> 文档中心 > 一个小项目带你了解vue框架——TodoList(简单实用易上手)
一个小项目带你了解vue框架——TodoList(简单实用易上手)
网友:zz 文档中心 2022-05-04 08:18:38
写在前面
你是否还在为繁杂的事情感到头昏脑涨?你是否还在将便利贴贴满整个桌面?本文就为你解决这个烦恼,使用vue框架做一个TodoList,将事情整理的井井有条不再是一个遥不可及梦!让我们行动起来吧!
基于vue的小项目——todoList
写在前面
设置头部基础布局和内容主体区域
设置左边待完成模块:
设置右边已完成模块:
交互的逻辑(数据的添加和循环展示)代码展示:
利用过滤器进行日期显示:
watch监听List的变换,目的是保存数据状态:
设置删除效果
写在最后
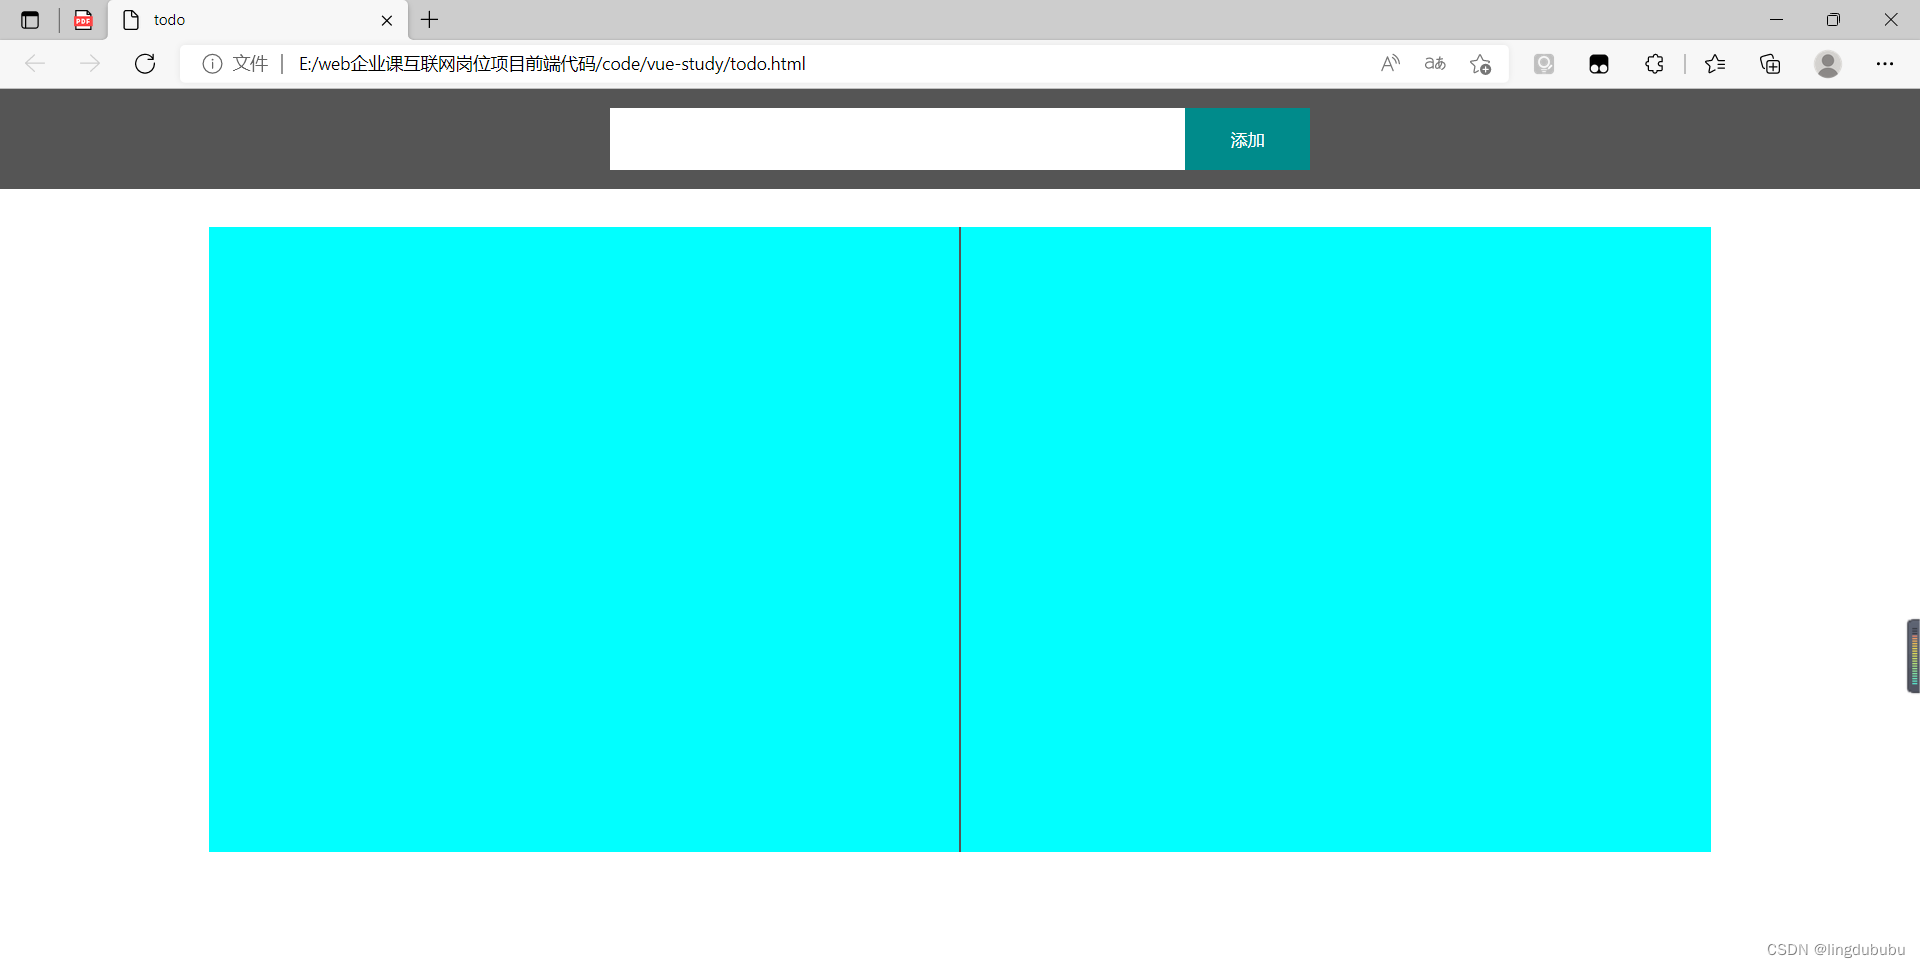
设置头部基础布局和内容主体区域
todo body { margin : 0; } .top { width : 100%; height : 80px; background-color : #555; display : flex; align-items : center; justify-content : center; } input[type="text"] { width : 400px; height : 50px; border : none; padding : 0 30px; } input:focus { outline : none; } button { width : 100px; height : 50px; background-color : darkcyan; color : #fff; border : none; padding : 0; cursor : pointer; } .bottom { width : 1221px; height : auto; min-height : 500px; background-color : aqua; margin : 30px auto; overflow : hidden; } .left { width : 600px; height : auto; float : left; min-height : 1px; } .divider { width : 1px; height : 500px; background-color : #555; float : left; margin : 0 10px; } .right { width : 600px; height : auto; float : left; min-height : 1px; } <div id="app" > <div class="top" > <input type="text" >//使用vue之后,将此行代码改为<input type="text" placeholder="请输入代待办事项" v-model="value" > 添加 //使用vue之后,将此行代码改为<button @click="handleClick" >添加 <div class=
"bottom" > <div class=
"left" >
<div class=
"divider" >
<div class=
"right" >
内容主体区域背景加了颜色,框架效果展示:
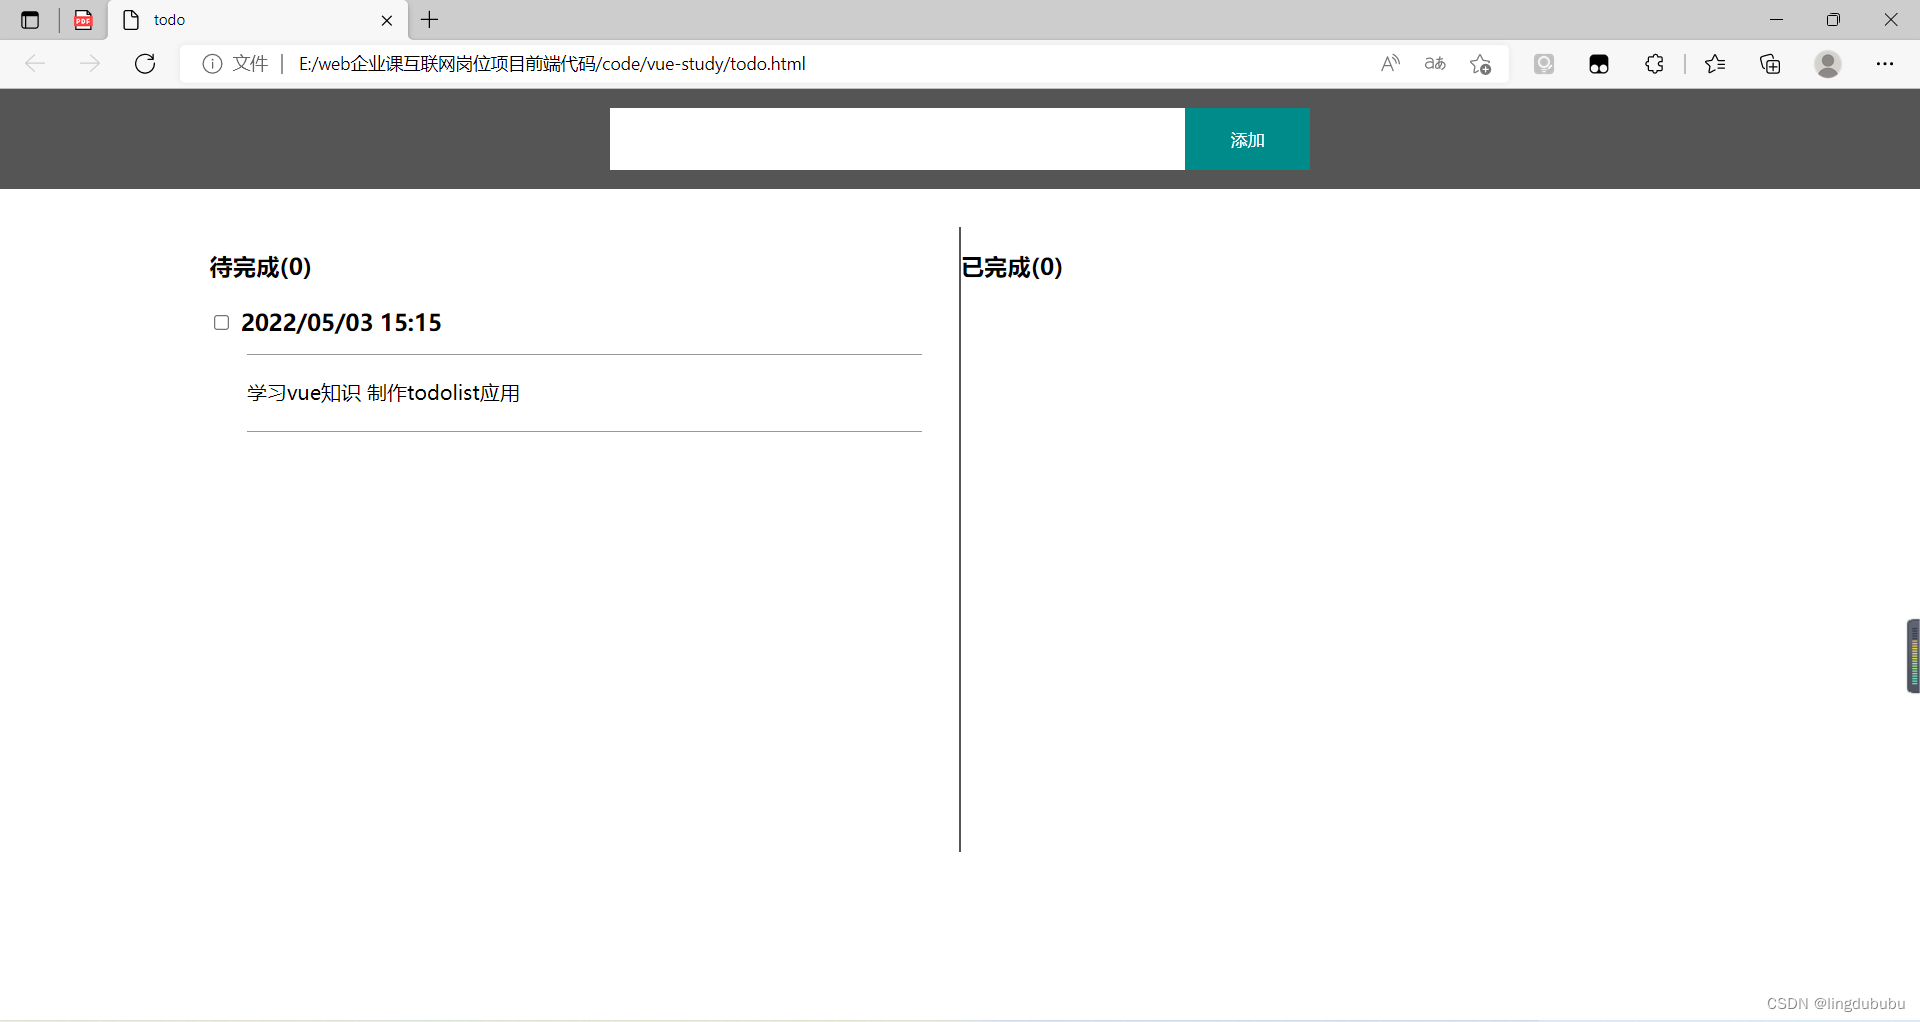
设置左边待完成模块:
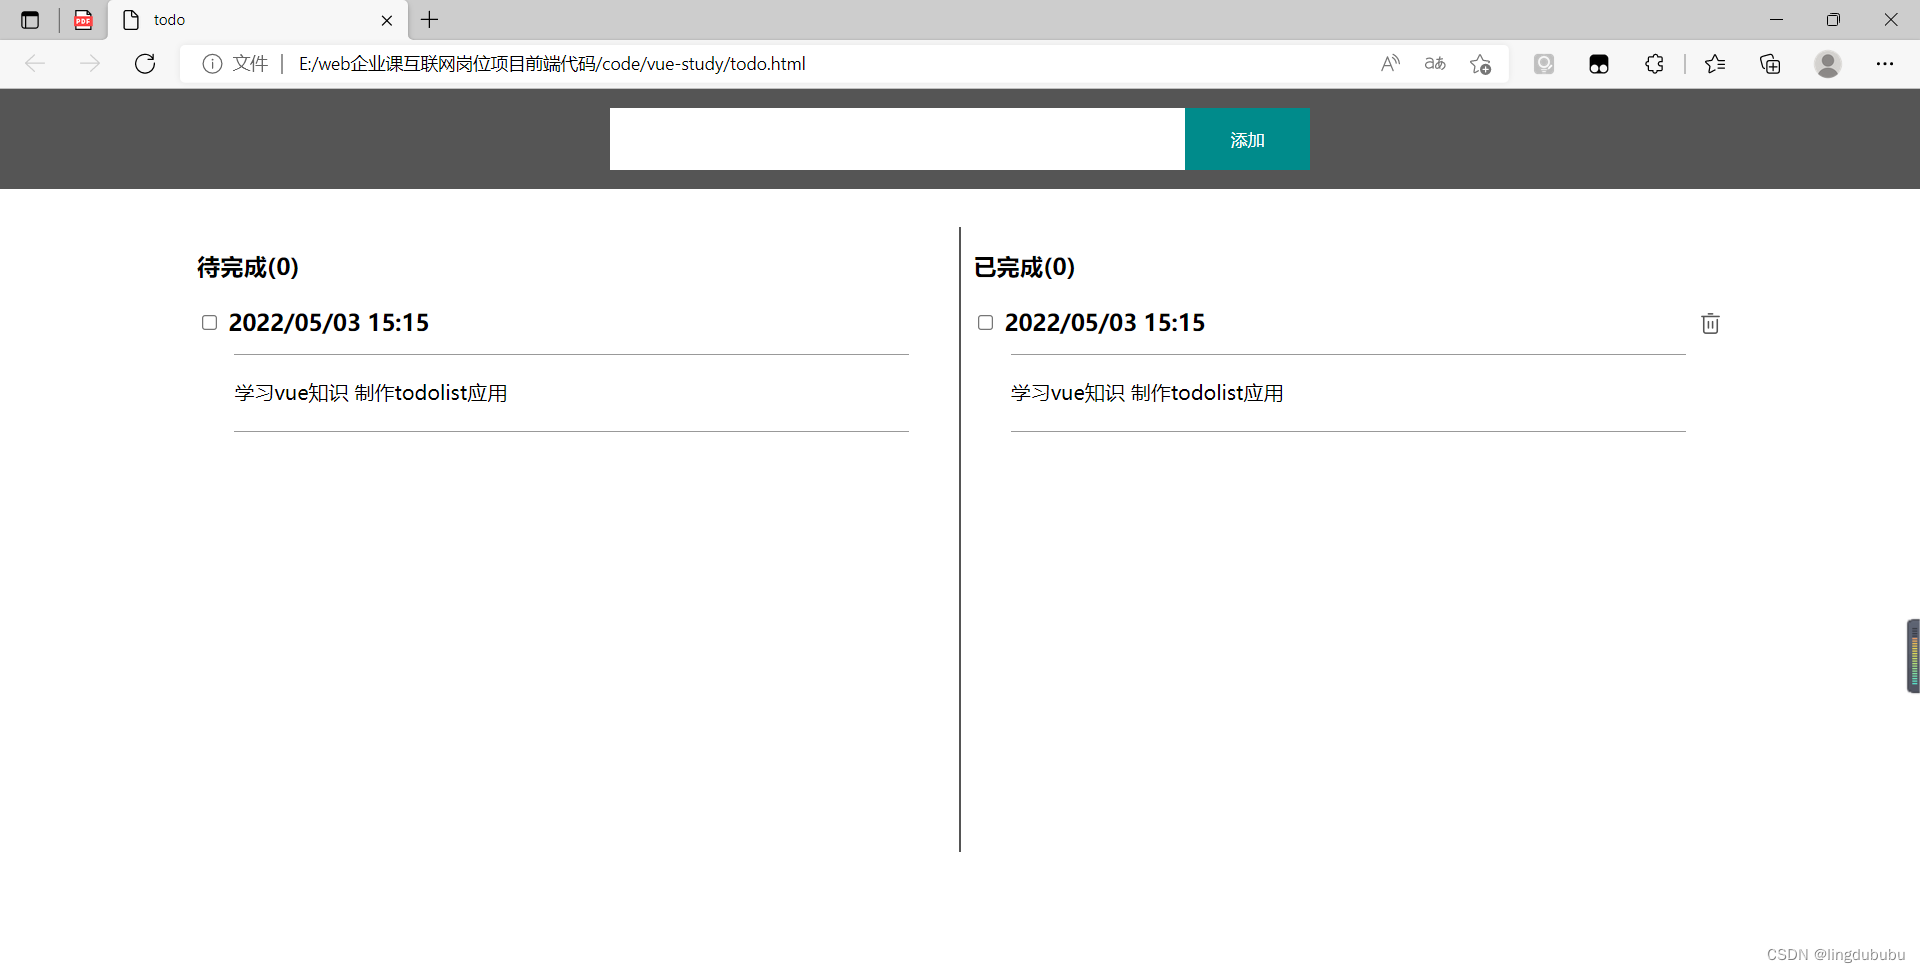
<div class="left" > 待完成( 0) <div class="item" > <div class="control" > <input type="checkbox" > 2022/05/03 15: 15 <div class="content" > 学习vue知识 制作todolist应用 .item { width : 100%; } .control { width : 100%; line-height : 30px; font-size : 18px; font-weight : bold; } .content { width : 90%; line-height : 30px; font-size : 16px; border-top : 1px solid #999; border-bottom : 1px solid #999; margin : 10px auto; padding : 15px 0; } 将背景颜色去掉,效果展示:
设置右边已完成模块:
<div class="right" > 已完成( 0) <div class="item" > <div class="control" > <input type="checkbox" > 2022/05/03 15: 15 <img src="delete.png" alt="" class="del" > <div class="content" > 学习vue知识 制作todolist应用 .del { width : 20px; height : 20px; float : right; cursor : pointer; margin-top : 5px; } delete.png
效果展示:
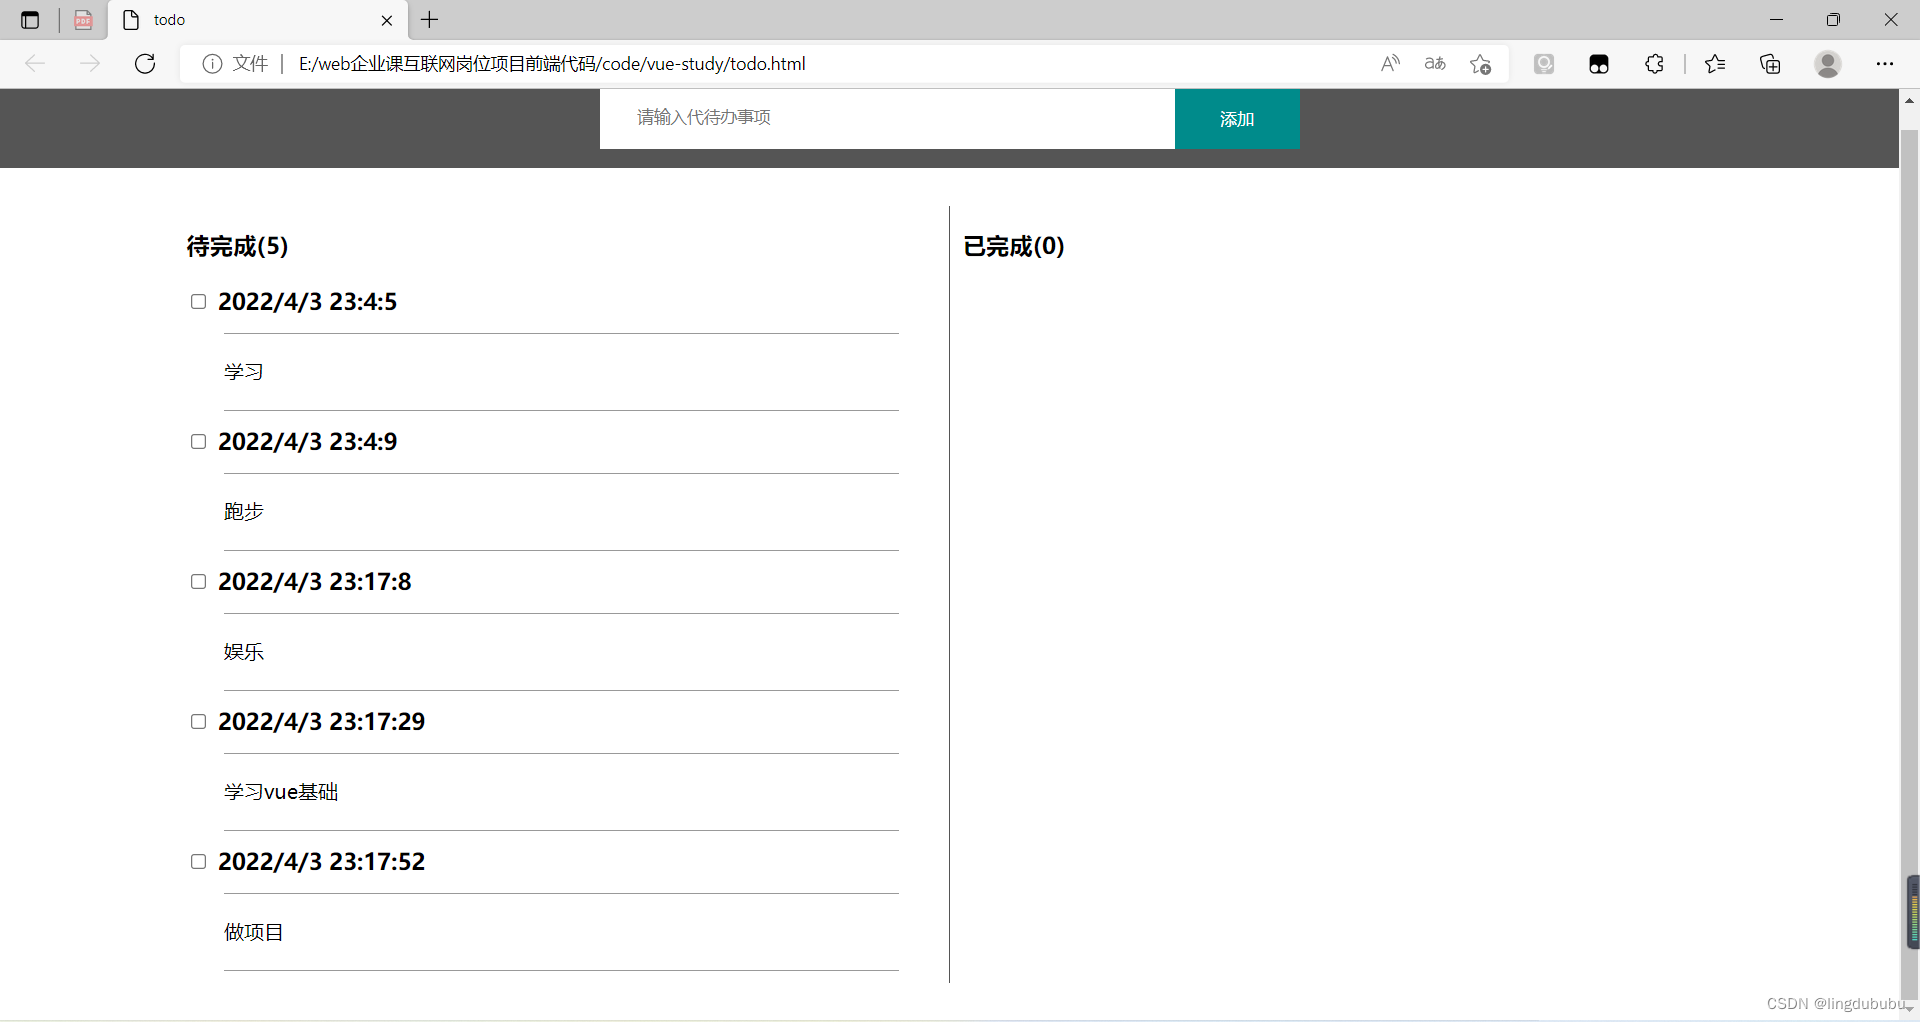
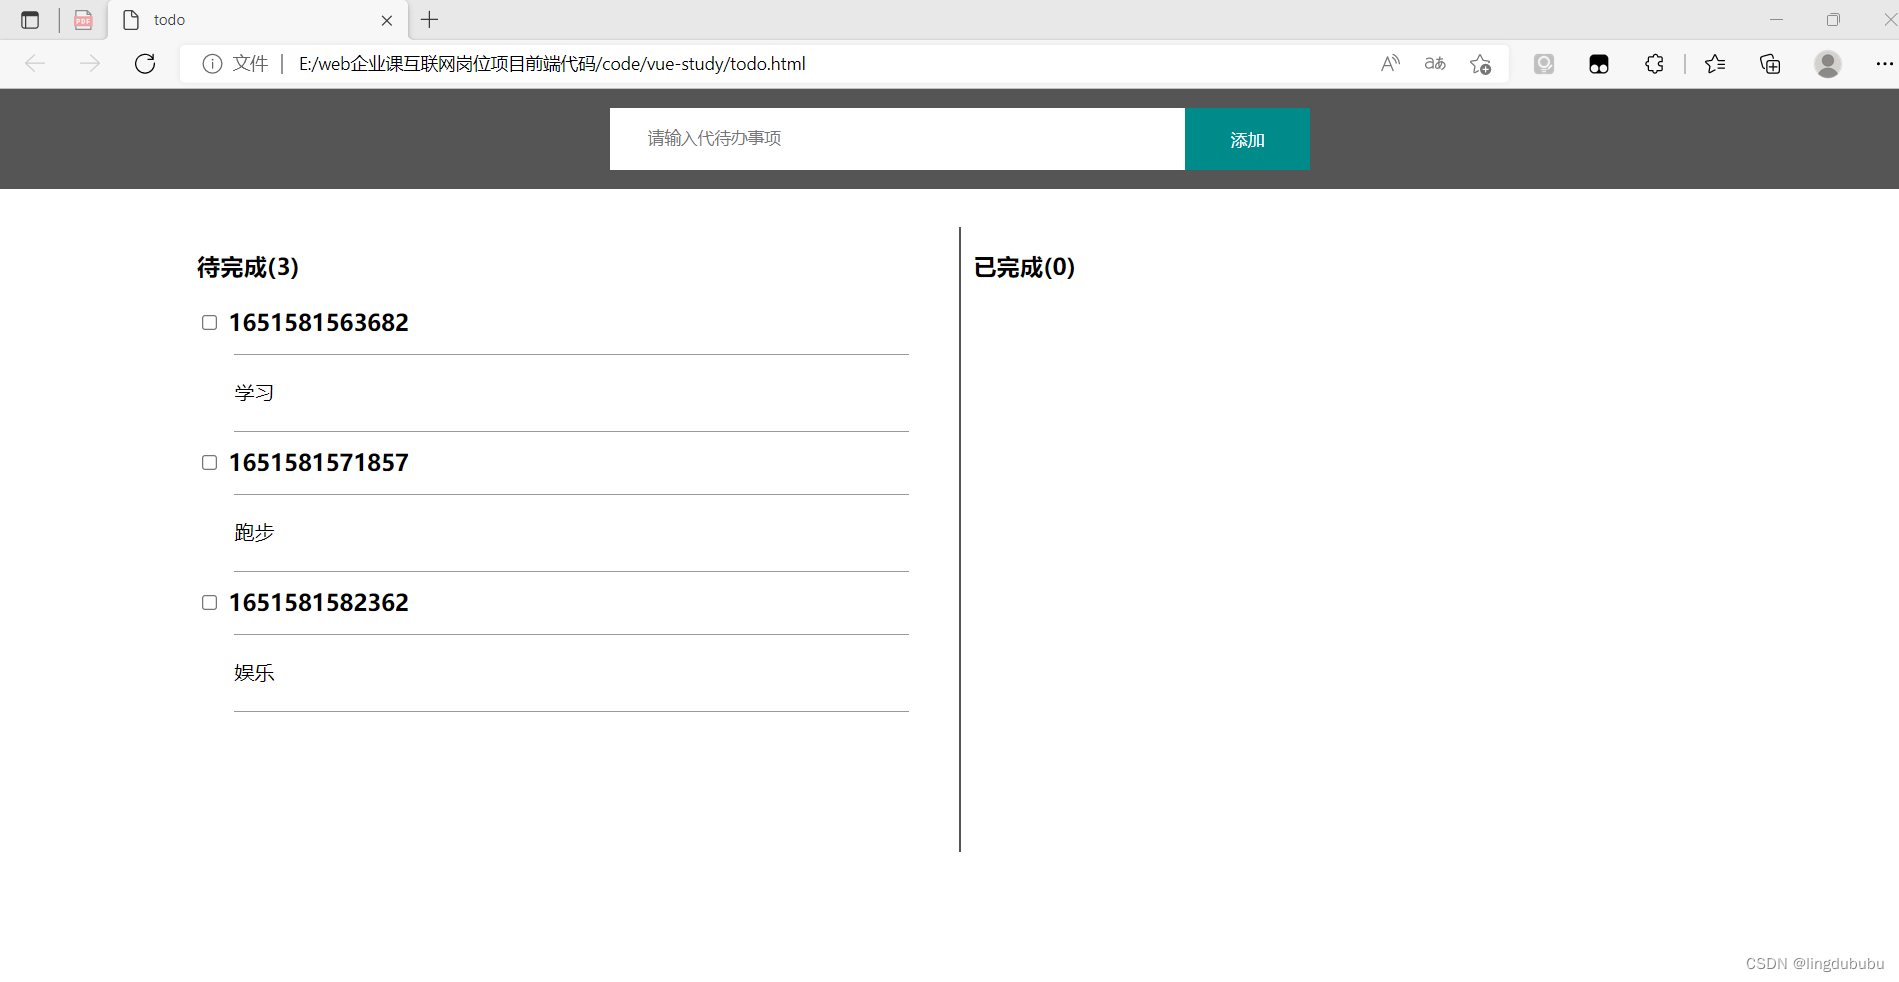
交互的逻辑(数据的添加和循环展示)代码展示:
<div id="app" > <div class="top" > <input type="text" placeholder="请输入代待办事项" v-model="value" > <button @click ="handleClick" >添加 <div class="bottom" > <div class="left" > 待完成( { { undoList.length} } ) { { item.datetime} }
{ { item.content} }
已完成({ { doneList.length} } ) { { item.datetime
} } { { item.content} }
new Vue( { el:"#app", data: { list : [], value : "" } , computed: { undoList() { return this.list.filter ( v=>!v.done) } , doneList() { return this.list.filter ( v=>v.done) ; } } , methods: { handleClick() { if(this.value==="") { alert ( "请填写事项的内容" ) ; return; } let obj= { } ; obj.content=this.value; obj.datetime=Date.now ( ) ; //时间戳1970/01/01 0h 0min 0s到现在的毫秒数 obj.done=false; //完成状态 this.list.push ( obj) ; //在数组末尾添加 this.value="" ; } } , } ) 效果展示:
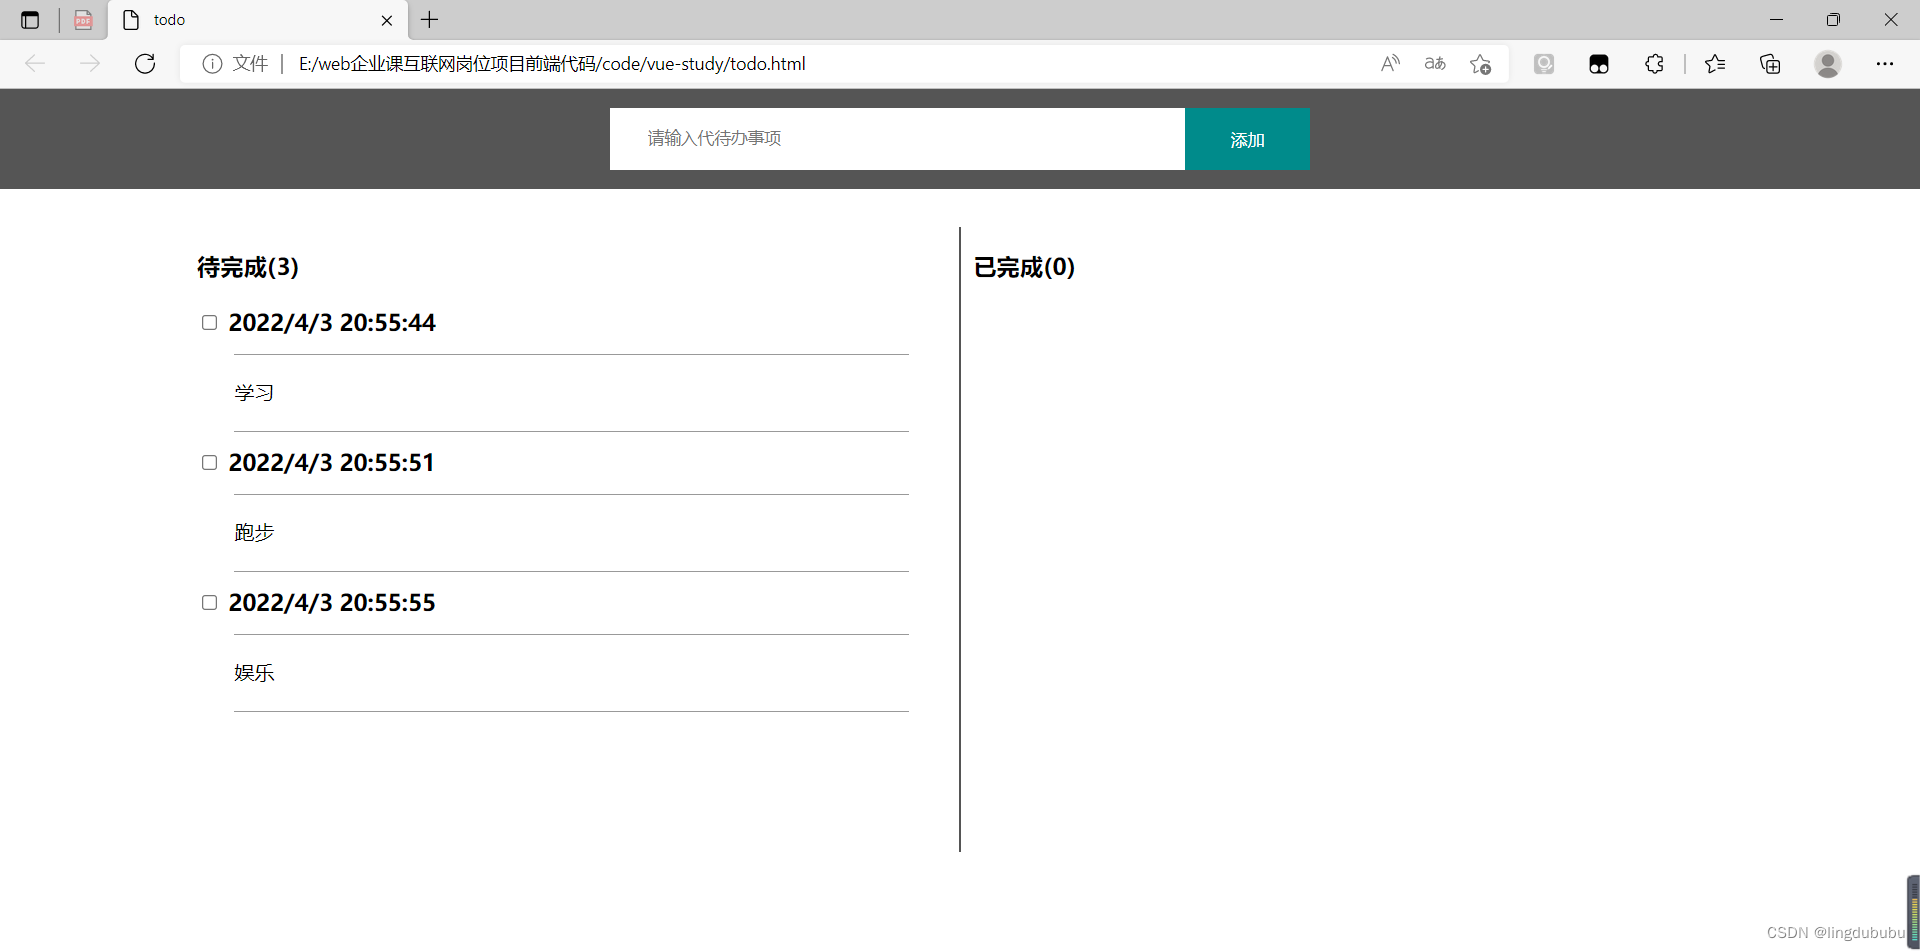
利用过滤器进行日期显示:
{ { item.datetime|formatDate} } { { item.datetime|formatDate} } filters: { formatDate(value) { let date=new Date ( value) ; let year=date.getFullYear ( ) ; let month=date.getMonth ( ) ; let day=date.getDate ( ) ; let hour=date.getHours ( ) ; let min=date.getMinutes ( ) ; let sec=date.getSeconds ( ) ; return `$ { year} /$ { month} /$ { day} $ { hour} :$ { min} :$ { sec} `; } } , 效果展示:
<input type="checkbox" @click="item.done=true" >想要将已完成状态的事件改成待完成状态,也是一样的道理。在已完成事件中添加点击事件
<input type="checkbox" @click="item.done=false" >效果展示:
data: { list : [], value : "" , height : 500//先设置分割线长度为500 } , divider分割线内联一个样式:
<div class="divider" : style="{height:height+" px"}" >因为在vue中数据的更新和页面内容的更新并不是同步的,要想在网页进行下一次更新渲染之后才进行新的高度的设置,加上这段代码才能实现内容的高度始终和线的高度保持一致:
this.$nextTick(()=> { this.height=this.$refs.bottom.offsetHeight } ) 效果展示:
批注:为了实现这一效果,我花了半小时时间,到最后才发现少写了一个字母,害得我找了半天,大家在写代码的时候,一方面要注意代码之间的逻辑,另一方面是不要马虎,要细心呀~
watch监听List的变换,目的是保存数据状态:
watch: { list: { handler() { localStorage.list = JSON.stringify ( this.list) ; //在localStorage里不能直接存储对象,要把this.list转换成字符串设置到本地存储当中 } , deep : true//深度监听 } } , mounted() { //生命周期函数,这是保存数据状态的方式 if (localStorage.list) { //当重新加载数据时,要把localStorage.list里的数据转换回来 this.list = JSON.parse ( localStorage.list) ; } } , 设置删除效果
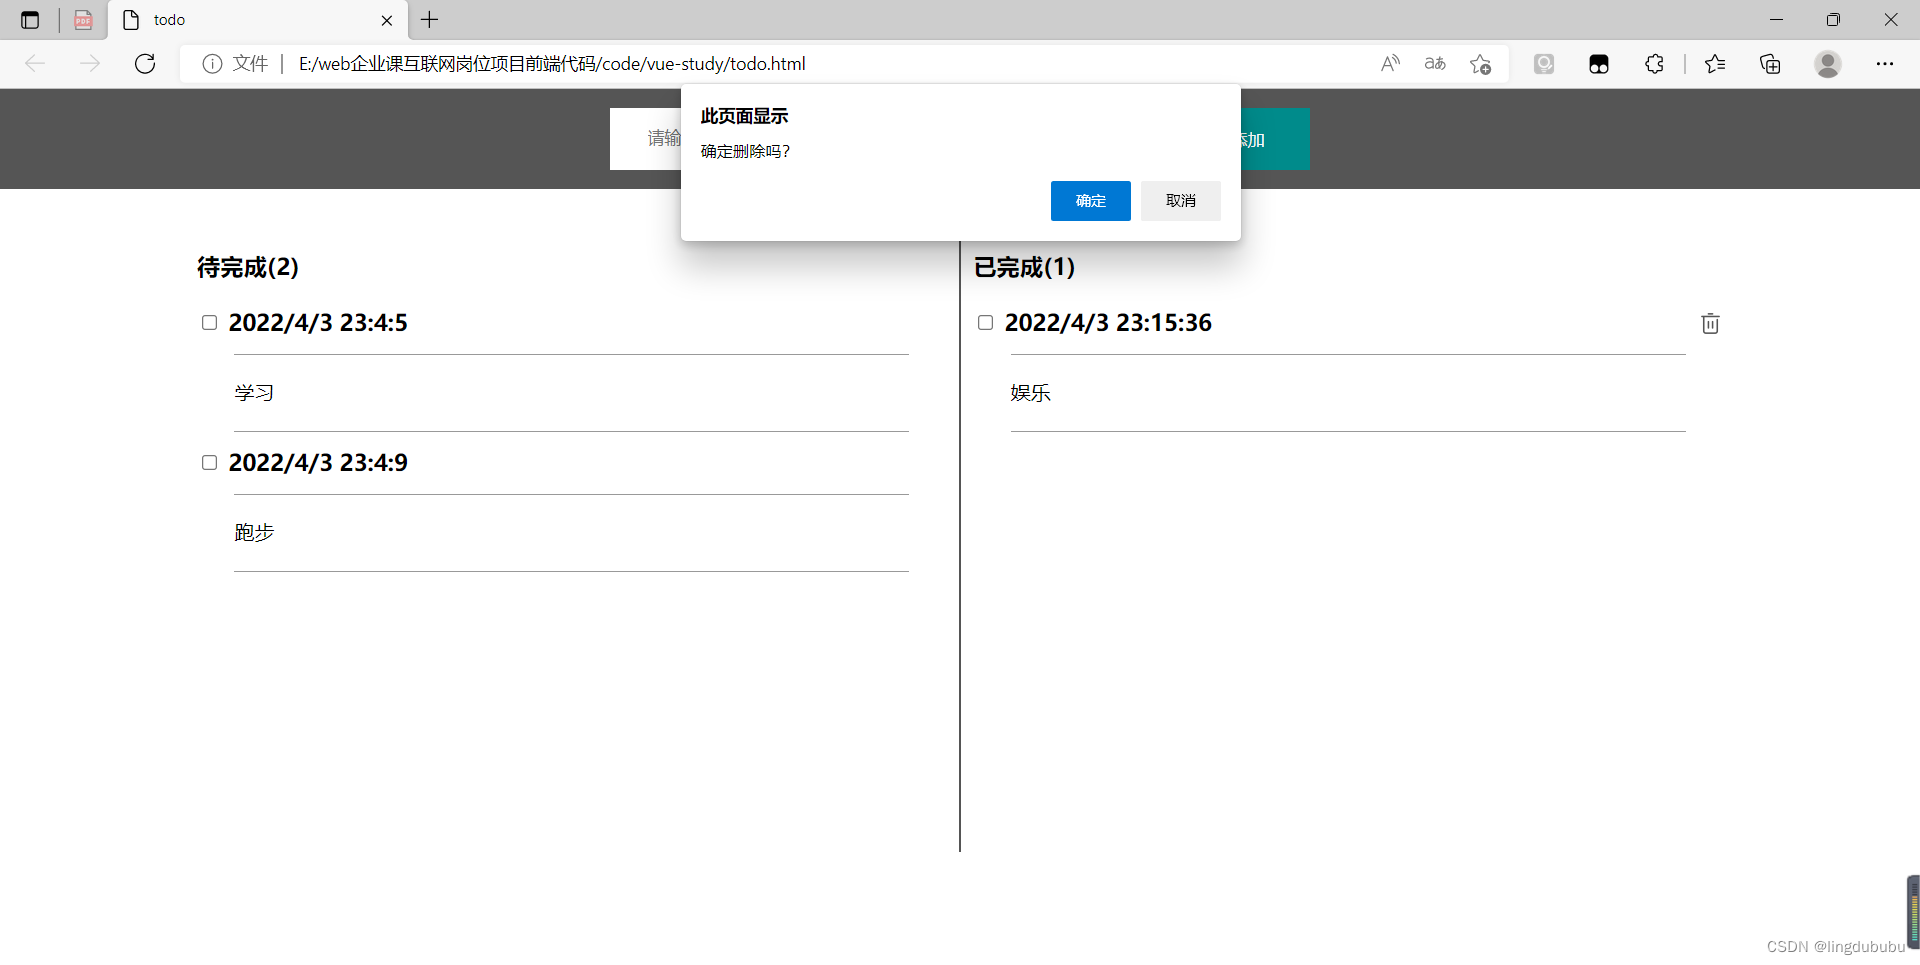
之前在已完成模块中设置的垃圾桶图片,现在给添加上点击事件:
<img src="delete.png" alt="" class="del" @click="handleDelete(item)" > handleDelete(item) { if(confirm("确定删除吗?")) { this.list=this.list.filter ( v=>v.datetime!=item.datetime) ; } 点击垃圾桶就能进行删除操作
写在最后
希望我的分享能够帮助到更多的人,如果觉得我的分享有帮助的话,请大家一键三连支持一下哦~ 原创不易,期待你的关注与支持~

 现在想要将待完成状态的事件标记成已完成状态,就要在待完成事件中添加点击事件,这也是利用了vue的一大优势,就是处理响应式数据。
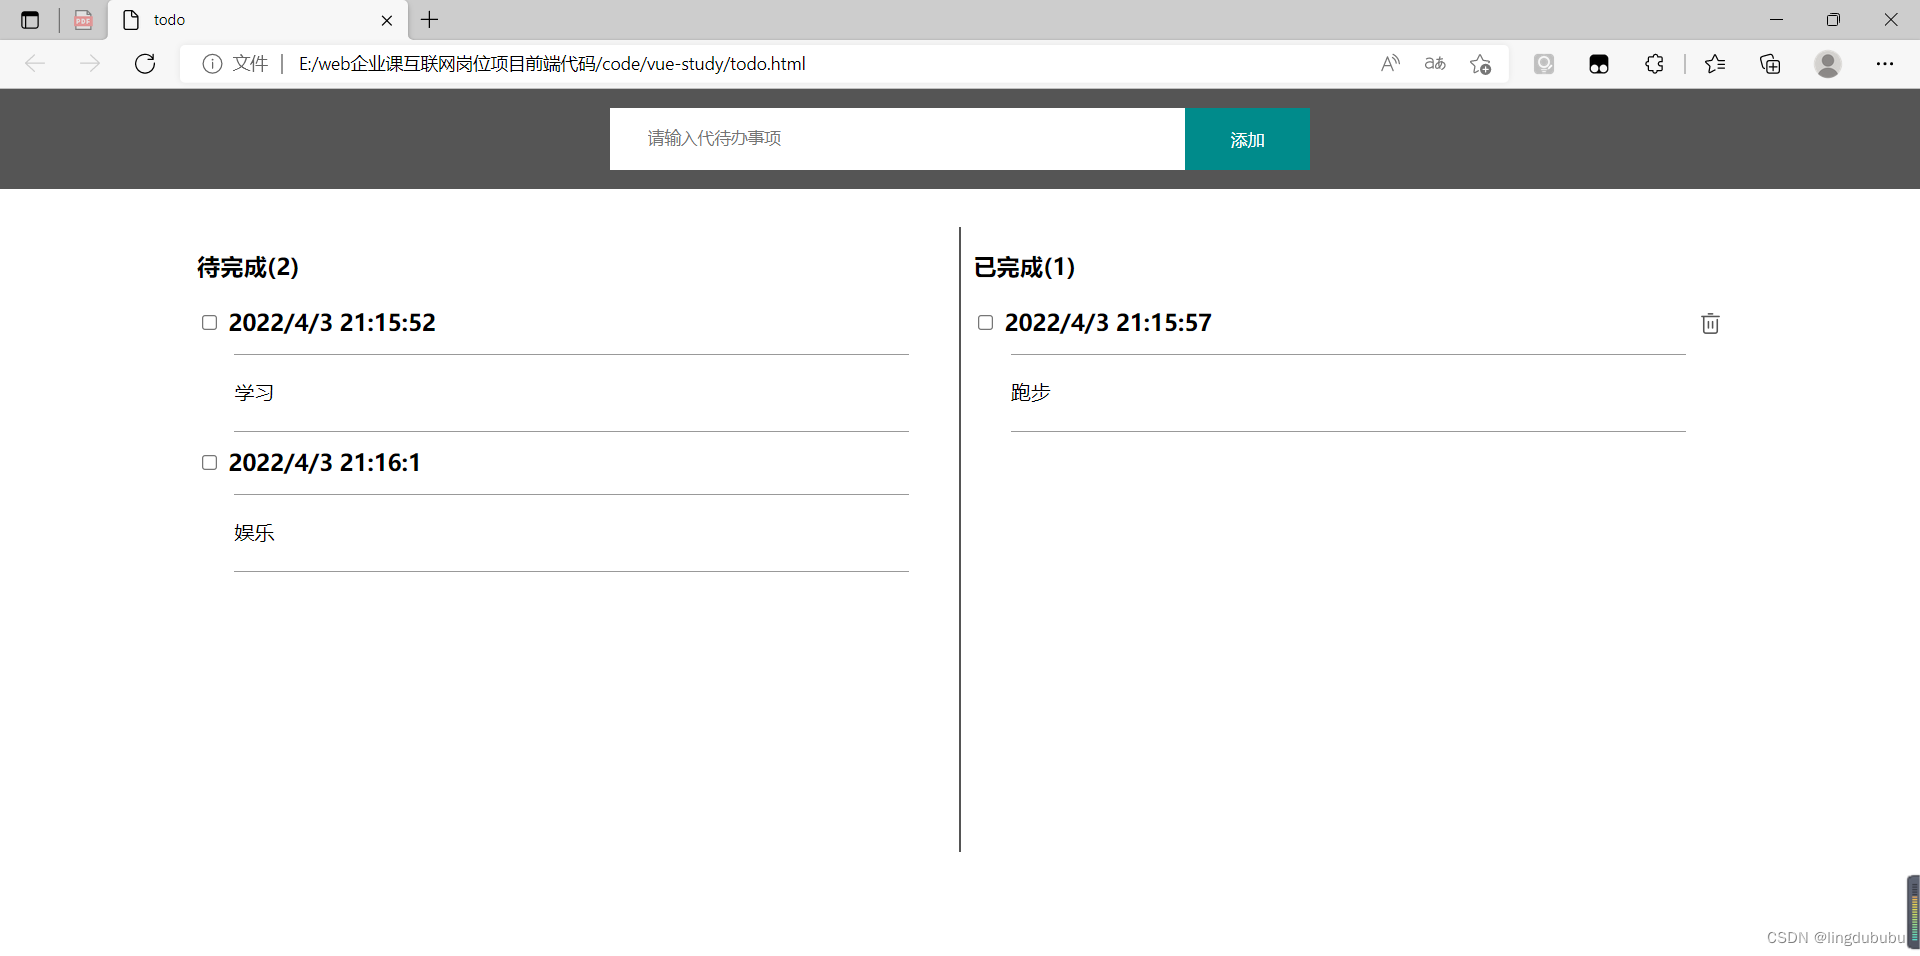 待办事件多了以后,会超出容器,此时要根据容器动态设置divider分割线的效果: