Java基础-线程(九)
文章目录
- 一、线程简介
-
- 1.多线程相关的三组概念
-
- 1.1程序和进程
- 1.2进程和线程
- 1.3并行和并发
- 1.4普通方法调用和多线程
- 二、线程实现(重点)
-
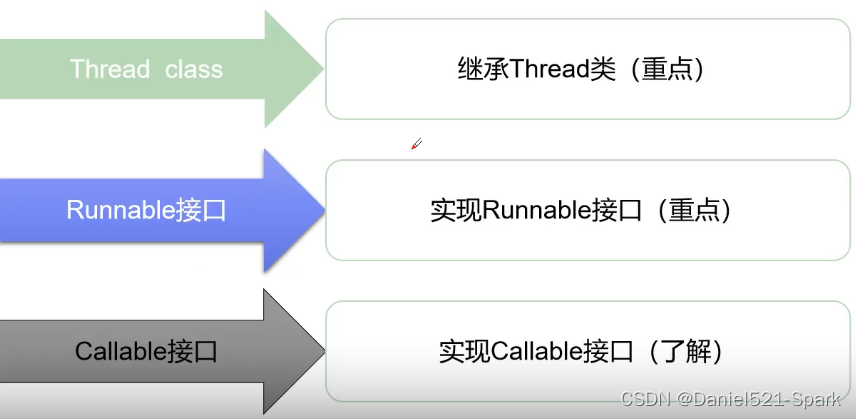
- 1. 三种创建方式
-
- 1.1继承Thread类
- 1.2 实现Runnable接口
-
- 1.2.1购火车票案例
- 1.3 实现Callable接口(了解即可)
- 2. 静态代理
- 3.Lambda表达式
- 三、线程状态(五大)
-
- 1.线程停止
- 2.线程休眠(sleep)
- 3.线程礼让(yield)
- 4.线程强制执行(Join)
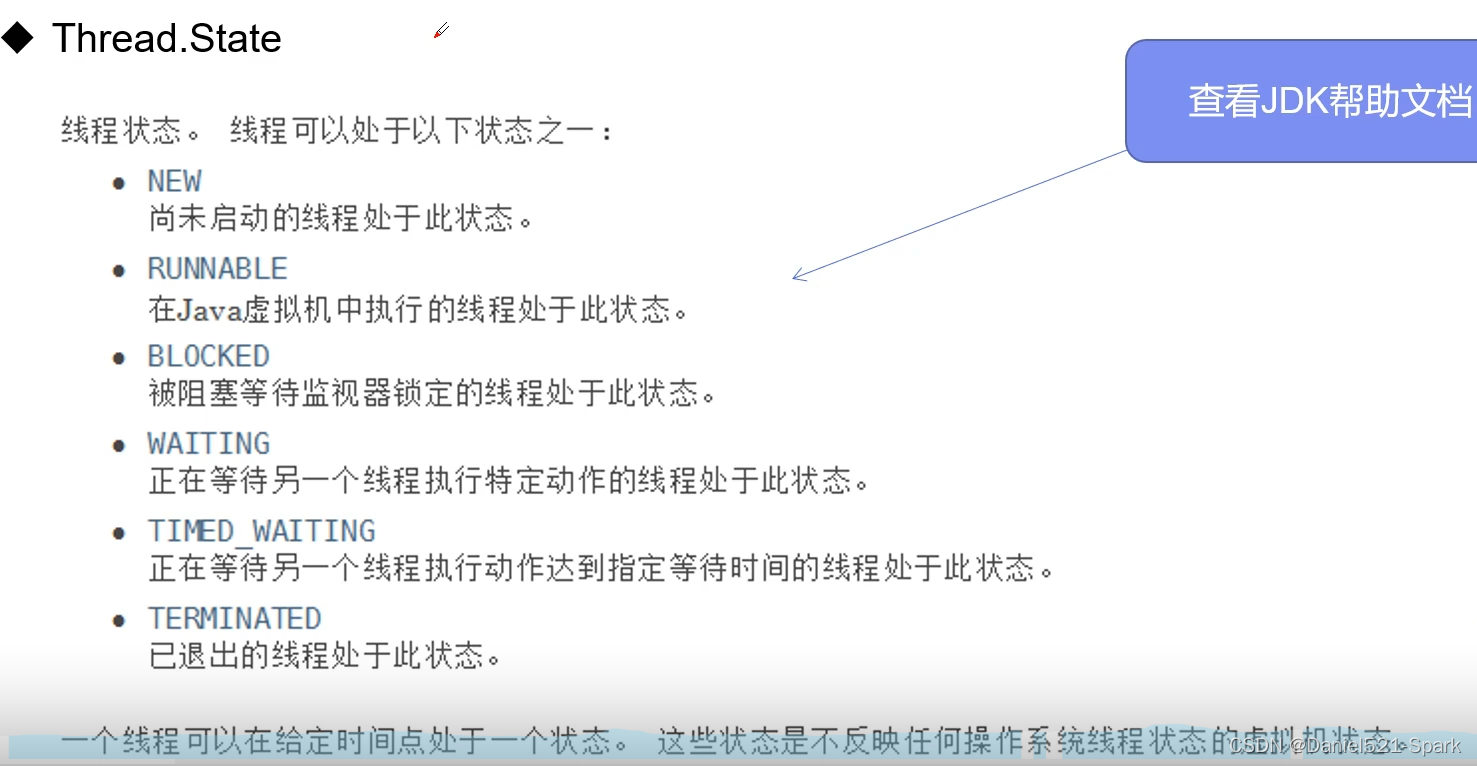
- 5.线程状态观测
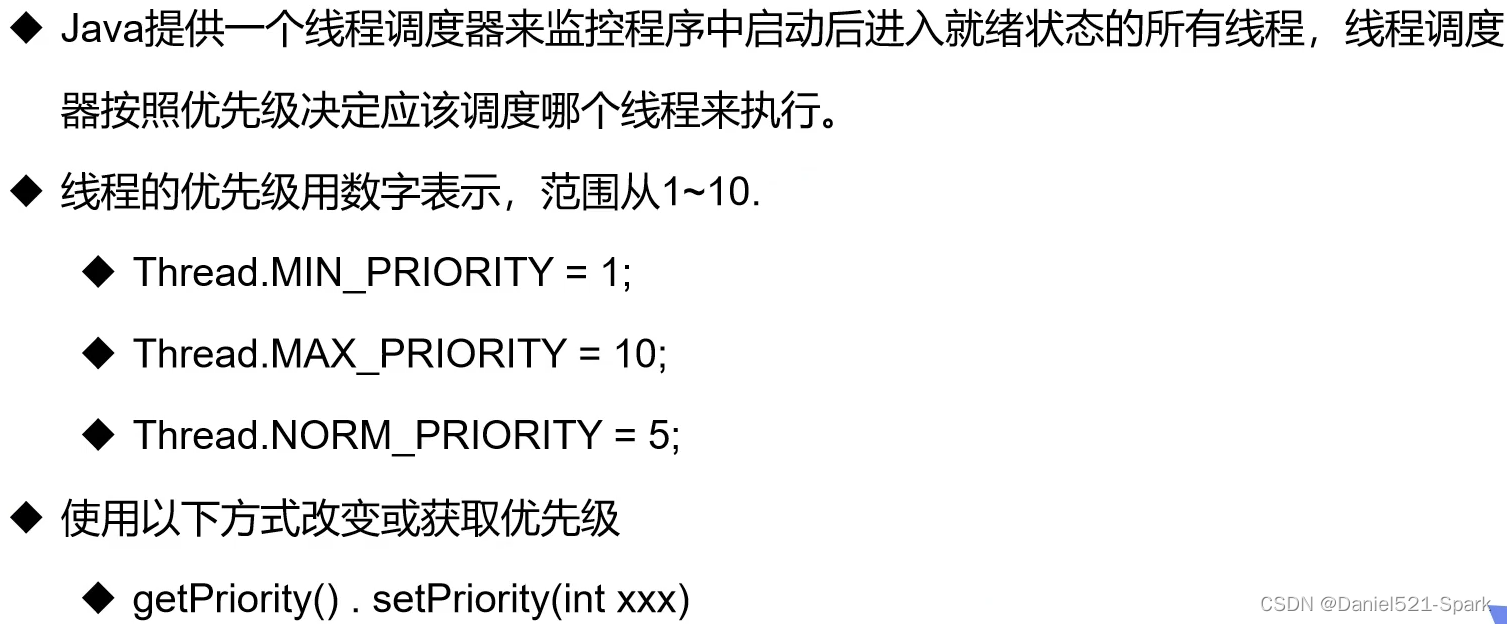
- 6.线程优先级(拓展)
- 7.守护(daemon)线程(拓展)
- 四、线程同步(重点)
-
- 1.并发
- 2.队列 & 锁
- 3.线程同步
- 4.同步方法
- 5.同步方法弊端
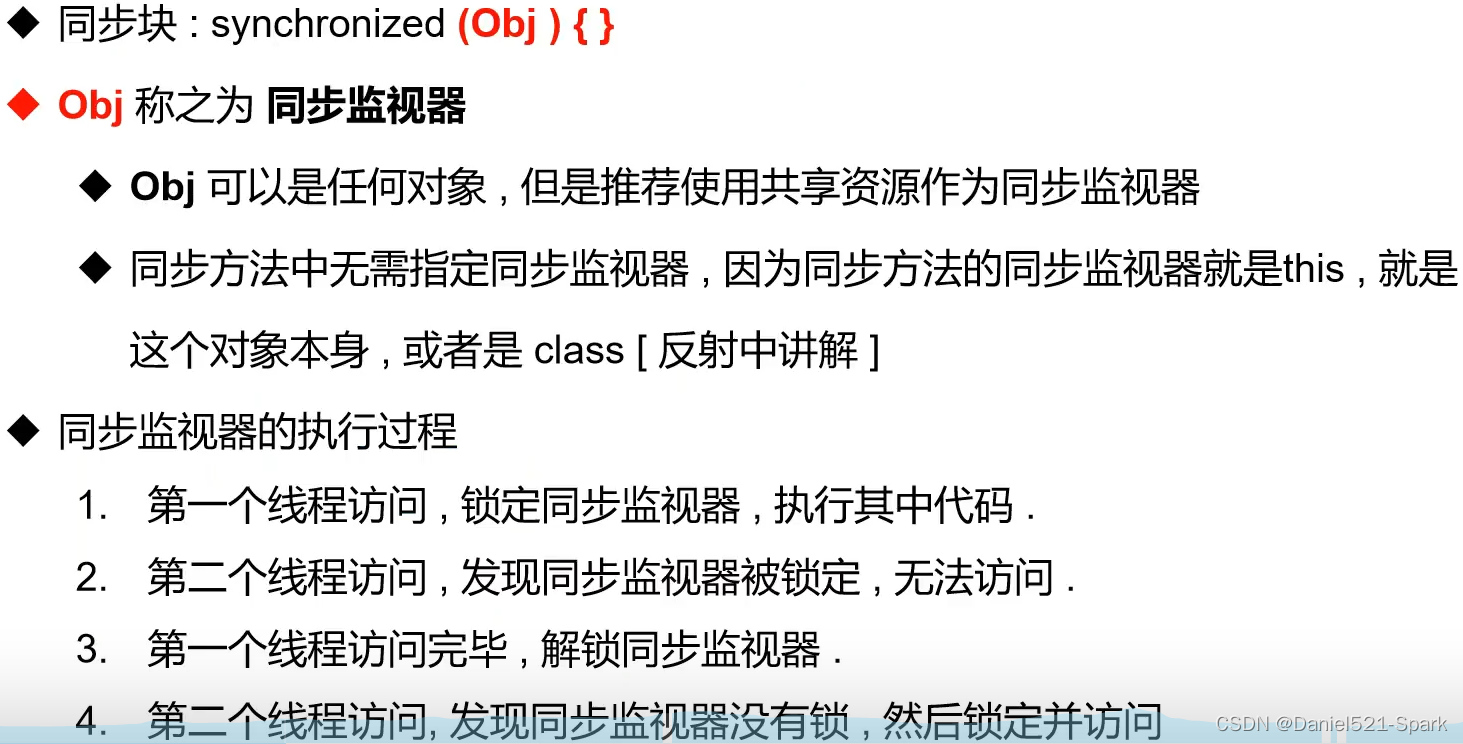
- 6.同步块
- 6.死锁
-
- 6.1.死锁避免的方法
- 6.2.Lock锁
- 6.3.synchronized 与 Lock的对比
- 五、线程通信问题(了解)
-
- 1.线程通信
- 2.线程通信-分析
- 3.线程池
- 六、高级主题
一、线程简介
1.多线程相关的三组概念


1.1程序和进程
1、程序(program):一个固定的运行逻辑和数据的集合,是一个静态的状态,一般存储在硬盘中
2、进程(process):一个正在运行的程序,是一个程序的一次运行,是一个动态的概念,一般存储在内存中。
1.2进程和线程
1、进程(process):一个正在执行的程序,有自己独立的资源分配,是一个独立的资源分配单位。
cpu,内存
2、线程(thread):一条独立的执行路径。多线程,在执行某个程序的时候,该程序可以有多个子任务,每个线程都可以独立的完成其中一个任务。在各个子任务之间,没有什么依赖关系,可以单独执行。
3、进程和线程的关系:
进程是用于分配资源的单位
一个进程中,可以有多条线程;但是一个进程中,至少有一条线程
线程不会独立的分配资源,一个进程中的所有线程,共享同一个进程中的资源
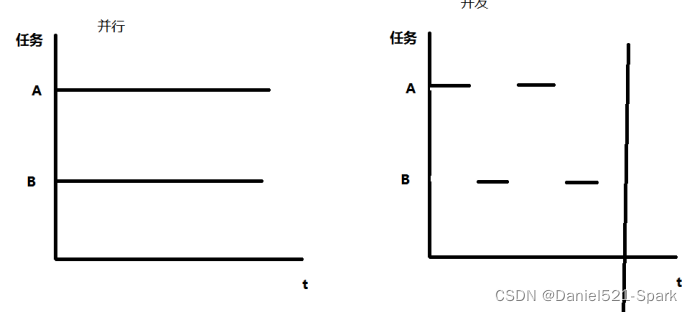
1.3并行和并发
1、并行(parallel):多个任务(进程、线程)同时运行。在某个确定的时刻,有多个任务在执行
条件:有多个cpu,多核编程
2、并发(concurrent):多个任务(进程、线程)同时发起。不能同时执行的(只有一个cpu),只能是同时要求执行。就只能在某个时间片内,将多个任务都有过执行。一个cpu在不同的任务之间,来回切换,只不过每个任务耗费的时间比较短,cpu的切换速度比较快,所以可以让用户感觉就像多个任务在同时执行。
本质:
1、并发的本质:不同任务来回切换
1.4普通方法调用和多线程

二、线程实现(重点)
三种创建方式
1. 三种创建方式
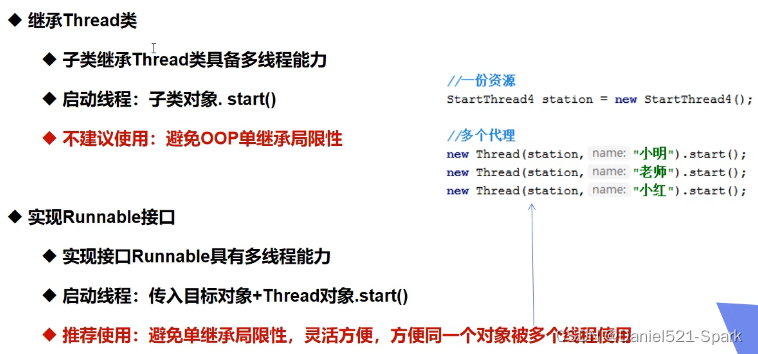
1.1继承Thread类
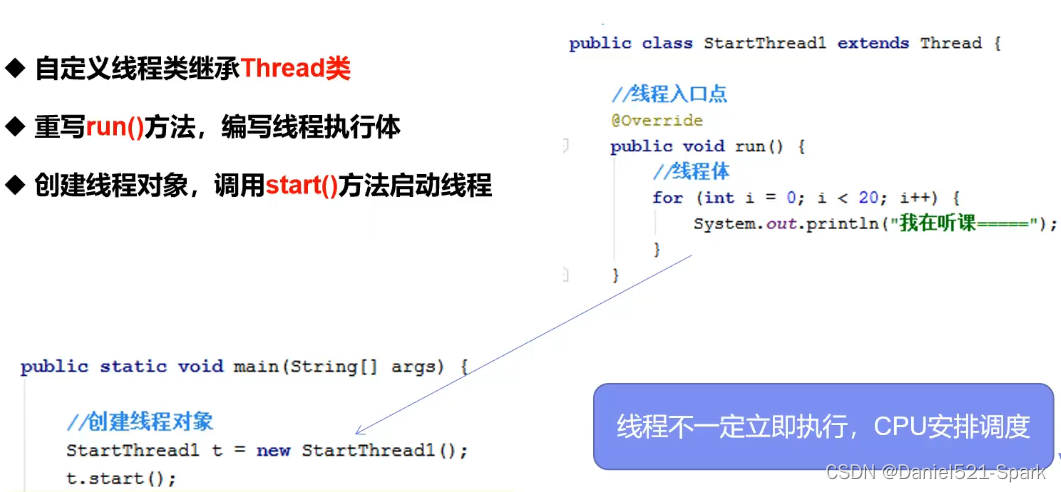
(1)继承Thread类
(2)重写run()方法
(3)调用start()方法启动线程
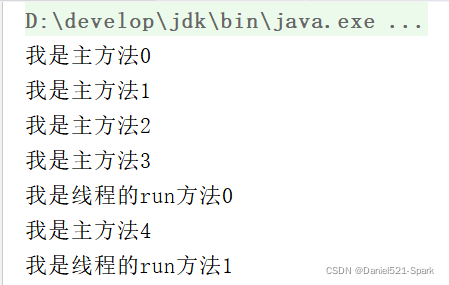
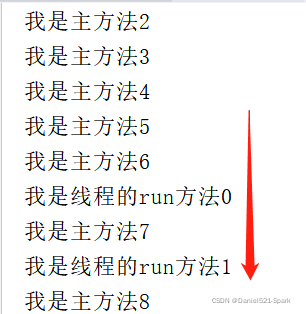
//创建线程方式一:继承Thread类,重写run()方法,调用start开启线程//总结:注意,线程开启不一定立即执行,由CPU调度执行public class Thread_Daniel extends Thread{ @Override public void run() { //run方法线程体 for (int i = 0; i < 50; i++) { System.out.println("我是线程的run方法"+i); } } public static void main(String[] args) { //main线程,主线程 //创建一个线程对象 Thread_Daniel threadDaniel = new Thread_Daniel(); //调用start()方法开启线程 threadDaniel.start(); for (int i = 0; i < 50; i++) { System.out.println("我是主方法"+i); } }}运行结果为(只截取部分):
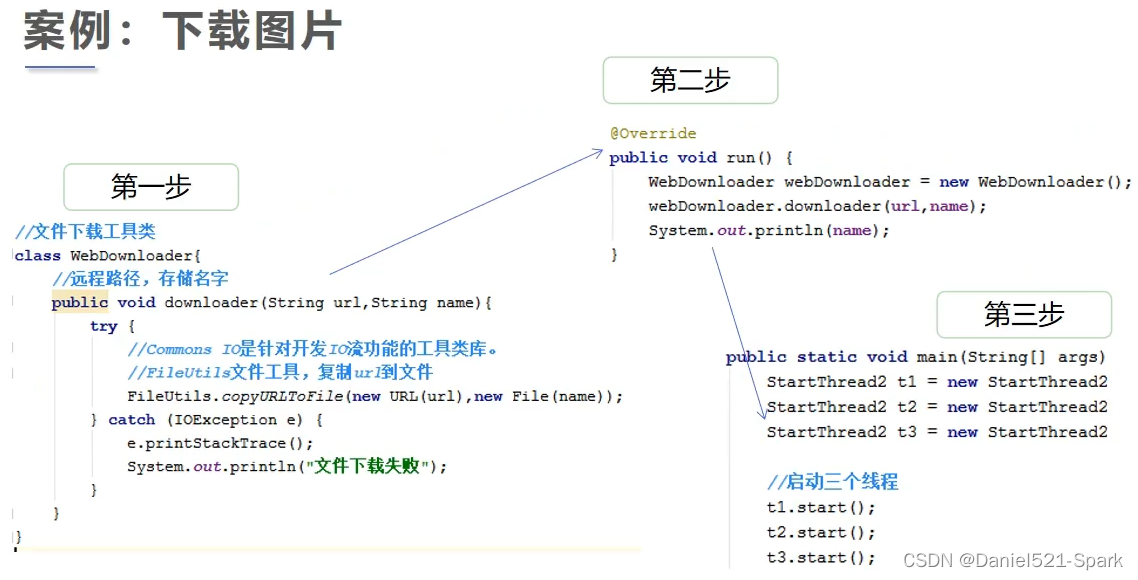
(1)下载: commons-io-2.6.jar
(2)编码如下:
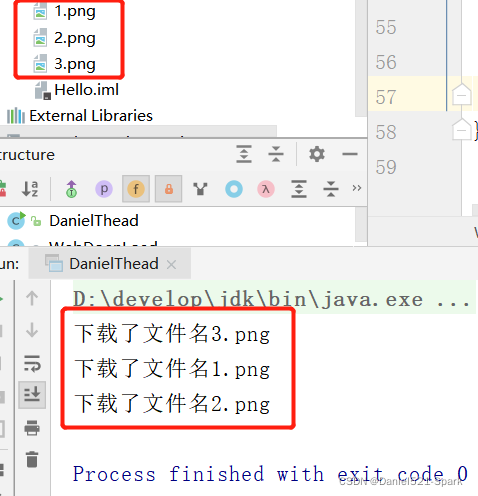
public class DanielThead extends Thread{ private String url; private String name; public DanielThead(String url, String name) { this.url = url; this.name = name; } public static void main(String[] args) { DanielThead thead1 = new DanielThead("https://img-blog.csdnimg.cn/3557edefd62a48f6b3e6c2feb9e18fc8.png", "1.png"); DanielThead thead2 = new DanielThead("https://img-blog.csdnimg.cn/3557edefd62a48f6b3e6c2feb9e18fc8.png", "2.png"); DanielThead thead3 = new DanielThead("https://img-blog.csdnimg.cn/3557edefd62a48f6b3e6c2feb9e18fc8.png", "3.png"); thead1.start(); thead2.start(); thead3.start(); } @Override public void run() { WebDoenLoad webDoenLoad = new WebDoenLoad(); webDoenLoad.downLoad(url,name); System.out.println("下载了文件名"+name); }}class WebDoenLoad{ public void downLoad(String url,String name){ try { FileUtils.copyURLToFile(new URL(url),new File(name)); } catch (IOException e) { e.printStackTrace(); System.out.println("文件下载失败"); } }}运行结果为:
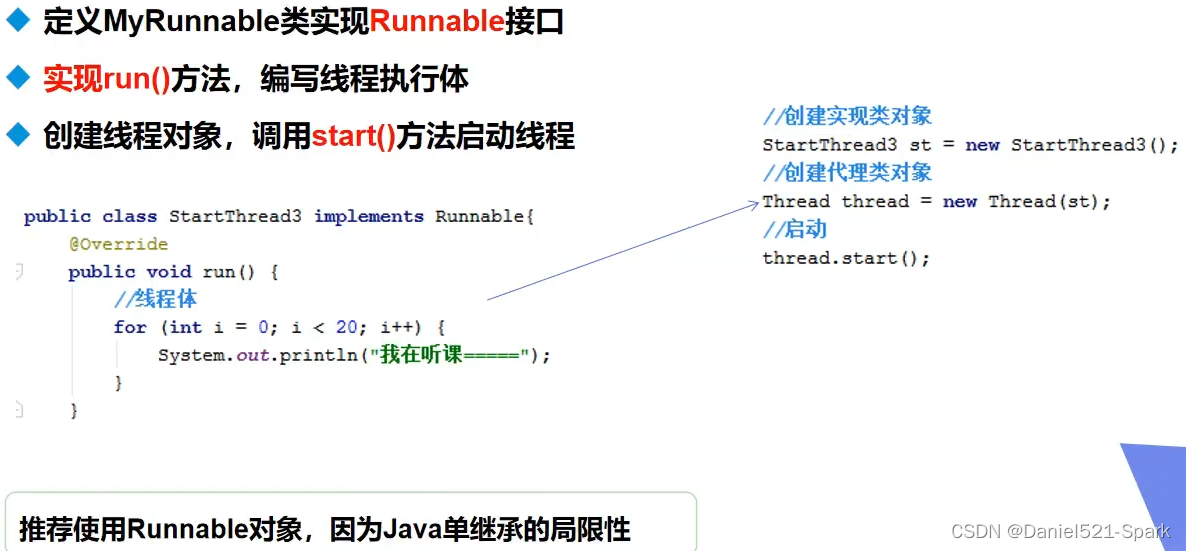
1.2 实现Runnable接口
1、实现Runnable接口:Runnable接口的实现类对象,表示一个具体的任务,将来创建一个线程对象之后,让线程执行这个任务
2、步骤:
1、定义一个任务类,实现Runnable接口
2、重写任务类中的run方法,用于定义任务的内容
3、创建任务类对象,表示任务
4、创建一个Thread类型的对象,用于执行任务类对象
5、调用线程对象的start方法,开启新线程
在继承Thread类中做了改变
//实现Runnable接口public class Runnable_Daniel implements Runnable { @Override public void run() { //run方法线程体 for (int i = 0; i < 50; i++) { System.out.println("我是线程的run方法"+i); } } public static void main(String[] args) { //main线程,主线程 //创建一个线程对象 Thread_Daniel threadDaniel = new Thread_Daniel(); //Thread thread = new Thread(threadDaniel); //调用start()方法开启线程 //thread.start(); new Thread(threadDaniel).start(); for (int i = 0; i < 50; i++) { System.out.println("我是主方法"+i); } }}运行结果为:
总结:
1.2.1购火车票案例
(1)火车票案例
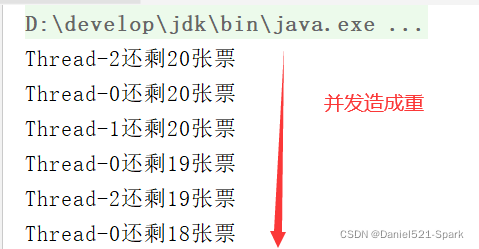
public class TrainTickets implements Runnable{ private int tickets = 20; @Override public void run() { while (true){ if(tickets <= 0){ break; } System.out.println(Thread.currentThread().getName()+"还剩"+tickets--+"张票"); } } public static void main(String[] args) { TrainTickets trainTickets1 = new TrainTickets(); TrainTickets trainTickets2 = new TrainTickets(); TrainTickets trainTickets3 = new TrainTickets(); new Thread(trainTickets1).start(); new Thread(trainTickets2).start(); new Thread(trainTickets3).start(); }}运行结果为:
(1)火车票案例(使用继承优化)
public class TrainTickets{ //线程安全火车票案例 public static void main(String[] args) { ThreadTrain tt1 = new ThreadTrain(); tt1.setName("窗口A"); ThreadTrain tt2 = new ThreadTrain(); tt2.setName("窗口B"); ThreadTrain tt3 = new ThreadTrain(); tt3.setName("窗口C"); tt1.start(); tt2.start(); tt3.start(); }}class ThreadTrain extends Thread{ private static int tickets = 10;//static保持每张票仅有一张 @Override public void run() { while(true) { synchronized (ThreadTrain.class) { if(tickets<=0) { break; } try { Thread.sleep(50); } catch (InterruptedException e) { e.printStackTrace(); } tickets--; System.out.println(Thread.currentThread().getName()+"卖出了一张票,还剩"+tickets+"张票"); } } }}运行结果为:
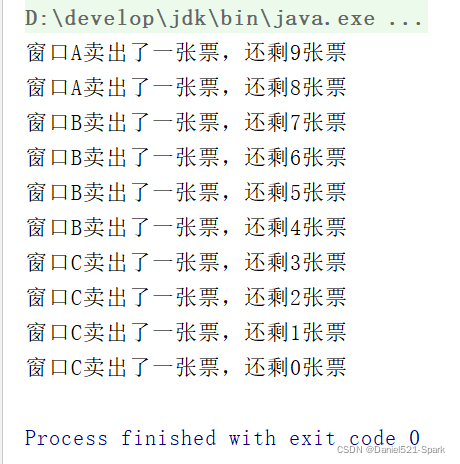
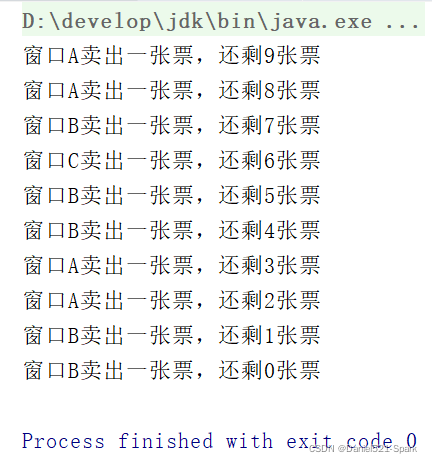
(2)火车票案例(使用实现优化)
public class TrainTickets implements Runnable{ private static int tickets = 10;//static静态 @Override public void run() { while (true){ synchronized (TrainTickets.class){ if(tickets <= 0){ break; } try { Thread.sleep(50); } catch (InterruptedException e) { e.printStackTrace(); } tickets--; System.out.println(Thread.currentThread().getName()+"卖出一张票,还剩"+tickets+"张票"); } } } public static void main(String[] args) {TrainTickets trainTickets1 = new TrainTickets(); TrainTickets trainTickets2 = new TrainTickets(); TrainTickets trainTickets3 = new TrainTickets(); new Thread(trainTickets1,"窗口A").start(); new Thread(trainTickets2,"窗口B").start(); new Thread(trainTickets3,"窗口C").start(); }}运行结果为:
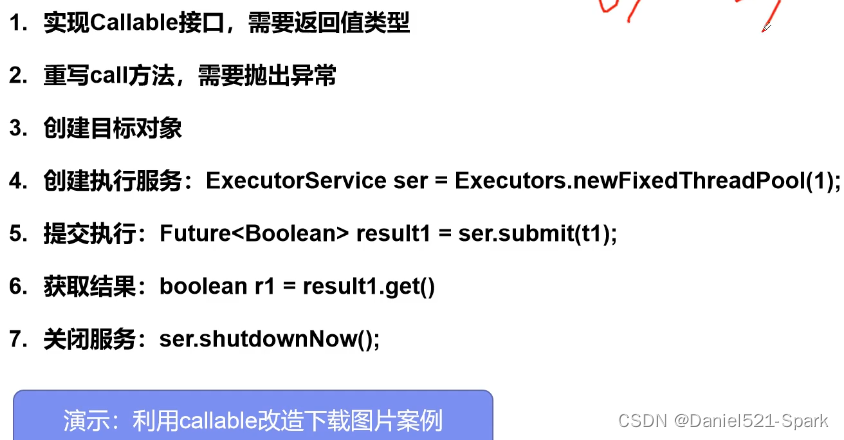
1.3 实现Callable接口(了解即可)
2. 静态代理

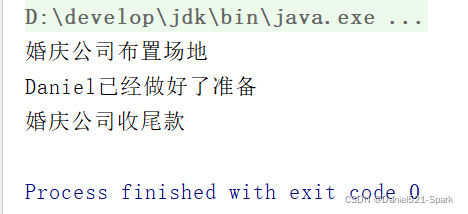
/** * 静态代理模式总结 * 真实对象和代理对象都要实现同一个接口 *代理对象要代理真实角色 * * 好处:代理对象剋做很懂真是对象做不了的事情 * 真实对象专注做自己的事情 */public class StaticProxy { public static void main(String[] args) {// new Thread(()->System.out.println("I love you")).start();//线程实现方式 new WeddingCompany(new You()).Happiness(); }}interface Marray{ /** * 人间四大喜事 * 1.久旱逢甘霖 * 2.他乡遇故知 * 3.洞房花烛夜 * 4.金榜题名时 */ void Happiness();}//真是角色:你去结婚class You implements Marray{ @Override public void Happiness() { System.out.println("Daniel已经做好了准备"); }}//代理角色,帮助你结婚class WeddingCompany implements Marray{ private Marray target;//target真实目标角色 public WeddingCompany(Marray target) { this.target = target; } @Override public void Happiness() { before(); this.target.Happiness();//这就是真是对象 after(); } public void before(){ System.out.println("婚庆公司布置场地"); } public void after(){ System.out.println("婚庆公司收尾款"); }}运行结果显示为:
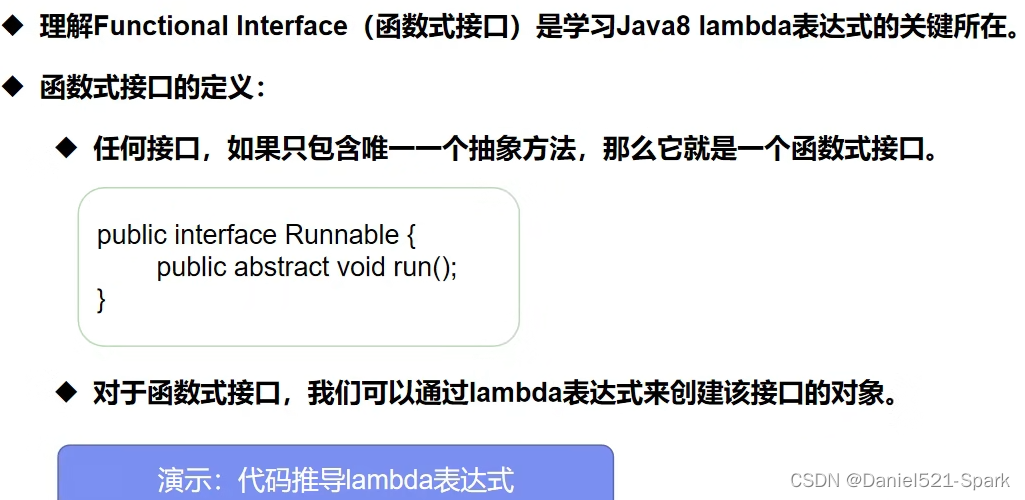
3.Lambda表达式

1、是对匿名内部类对象的一种格式的简化
2、Java8中引入了一个新的操作符“->”,称为箭头运算符,或者Lambda运算符
3、作用:就是用于分隔前后两部分的
4、左边:表示Lambda表达式的参数列表(接口中,定义的抽象方法的参数)
5、右边:表示的是方法的方法体,Lambda体
6、语法格式1:没有参数,也没有返回值
() -> System.out.println(“Hello Lambda”);
7、语法格式2:有一个参数,没有返回值
(x) -> System.out.println(x * x);
说明:如果只有一个参数,那么小括号可以省略
8、语法格式3:有多个参数,没有返回值,格式和语法格式2相同
(x, y) -> System.out.println(x + y);
9、语法格式4:接口中需要重写的方法,方法内容有多句,需要给多句话加上大括号
例如:(x, y) -> {int result = x + y; return result;}
注意事项:如果Lambda体中语句只有一句,那么大括号可以省略不写;如果大括号中只有一条语句,并且是return语句,那么return关键字也可以省略不写(如果要省略return关键字,就必须省略大括号)
例如:(x, y) -> x + y
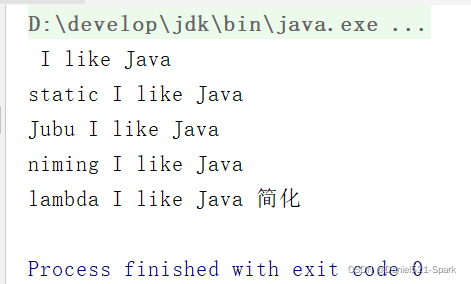
public class Ilike { //静态内部类 static class ii2 implements Ilikes{ @Override public void lambda() { System.out.println("static I like Java"); } } public static void main(String[] args) { Ilikes like = new ii(); like.lambda(); Ilikes like2 = new ii2(); like2.lambda(); //局部内部类 class ii3 implements Ilikes{ @Override public void lambda() { System.out.println("Jubu I like Java"); } } Ilikes like3 = new ii3(); like3.lambda(); //匿名内部类,没有类得名称,必须借助接口或者父类 like = new Ilikes() { @Override public void lambda() { System.out.println("niming I like Java"); } }; like.lambda(); //使用lambda简化 like = ()->{ System.out.println("lambda I like Java 简化"); }; like.lambda(); }}//创建函数式接口interface Ilikes{ void lambda();}//实现函数式接口class ii implements Ilikes{ @Override public void lambda() { System.out.println(" I like Java"); }}运行结果为:
lambda优化
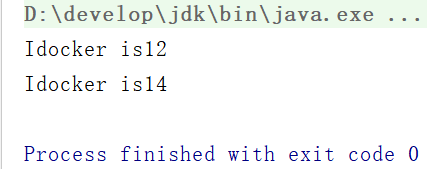
public class DanielLambda { public static void main(String[] args) { Idocker idocker = null; idocker = (int a,int b)->{ System.out.println("Idocker is"+a); System.out.println("Idocker is"+b); }; idocker.love(12,14); /** * 总结: * lambda表达式只能有一行代码的情况下才能简化成为一行,如果有多行,那么就用代码块包裹。 * 前提是接口为函数式接口 * 多个参数也可以去掉参数类型,要去掉就都去掉,必须加上括号。 */ }}interface Idocker{ void love(int a,int b);}运行结果为:
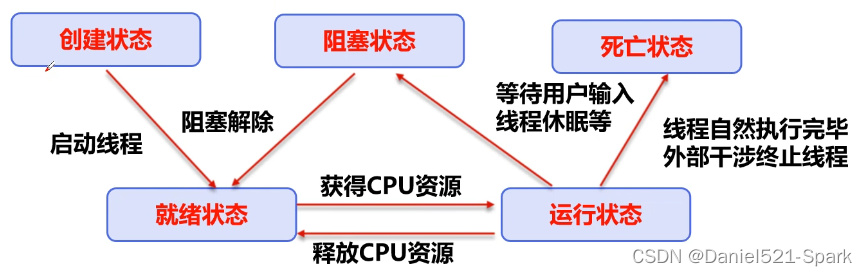
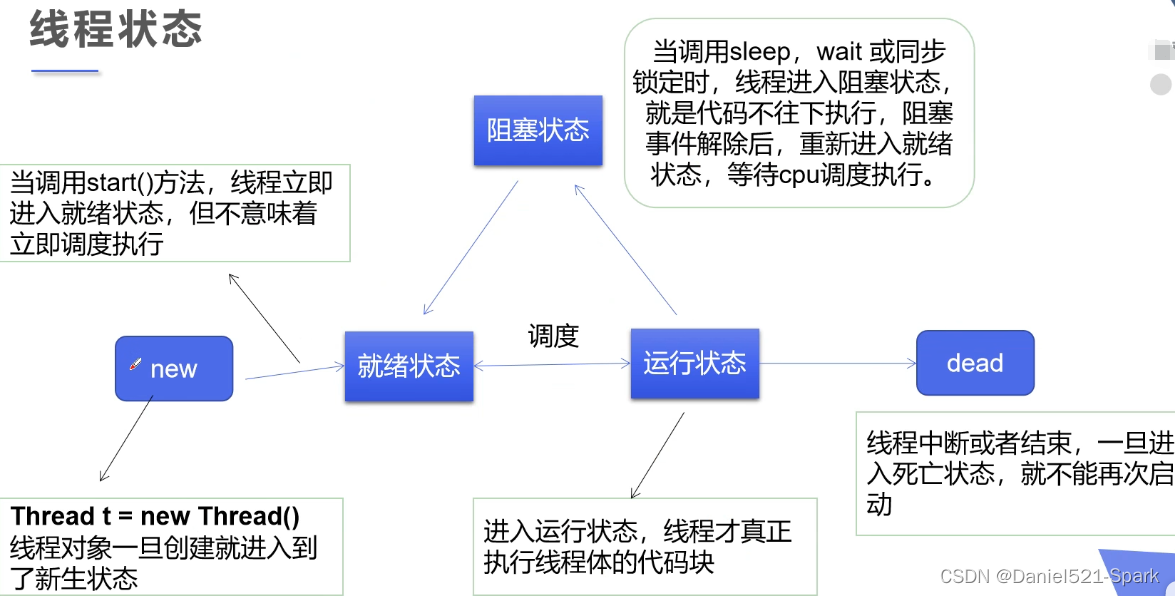
三、线程状态(五大)
1.线程停止
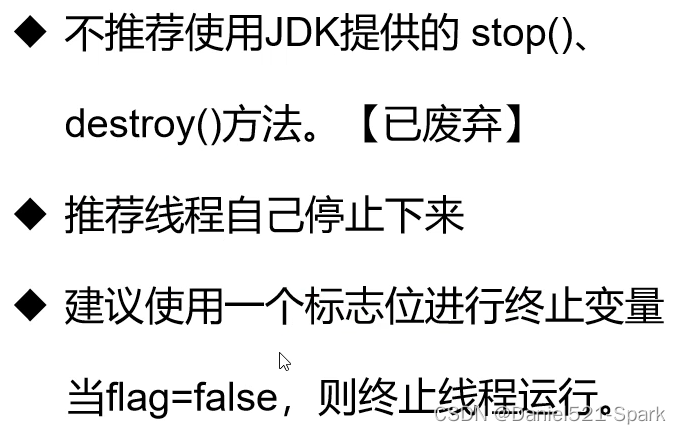
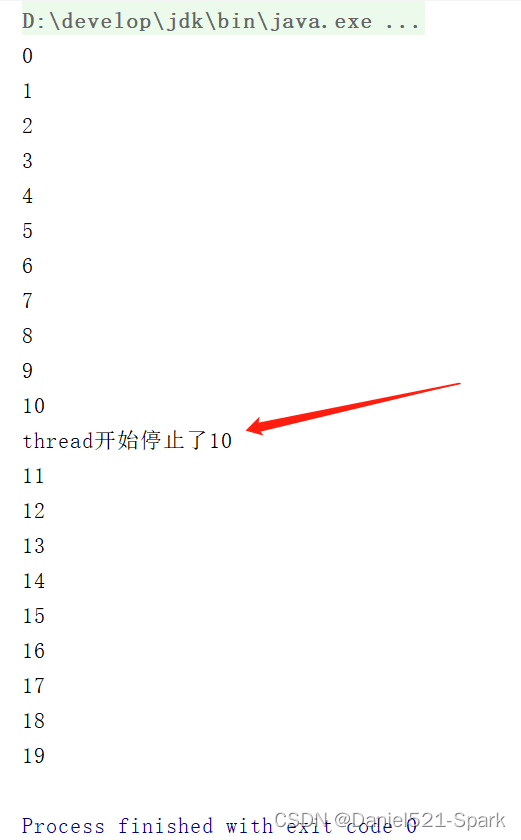
/** * @author Daniel * 测试stop * 1.建议线程正常停止——>利用次数,不建议死循环 * 2.建议使用标志位——>设置一个标志位 * 3.不要使用stop或者destroy等过时或者JDK不建议使用的方法 */public class DanielThread_Stop implements Runnable{ //1.设置一个标识位 private boolean flag; @Override public void run() { while (flag){ System.out.println("Thread____________run"); } } //2.设置一个公开的方法停止线程,转换标志位 public void stop(){ this.flag = false; } public static void main(String[] args) { DanielThread_Stop stope = new DanielThread_Stop(); new Thread(stope).start(); for (int i = 0; i < 20; i++) { System.out.println(i); if(i == 10){ //调用stop方法切换标志位,让线程停止 stope.stop(); System.out.println("thread开始停止了"+i); } } }}运行结果为:
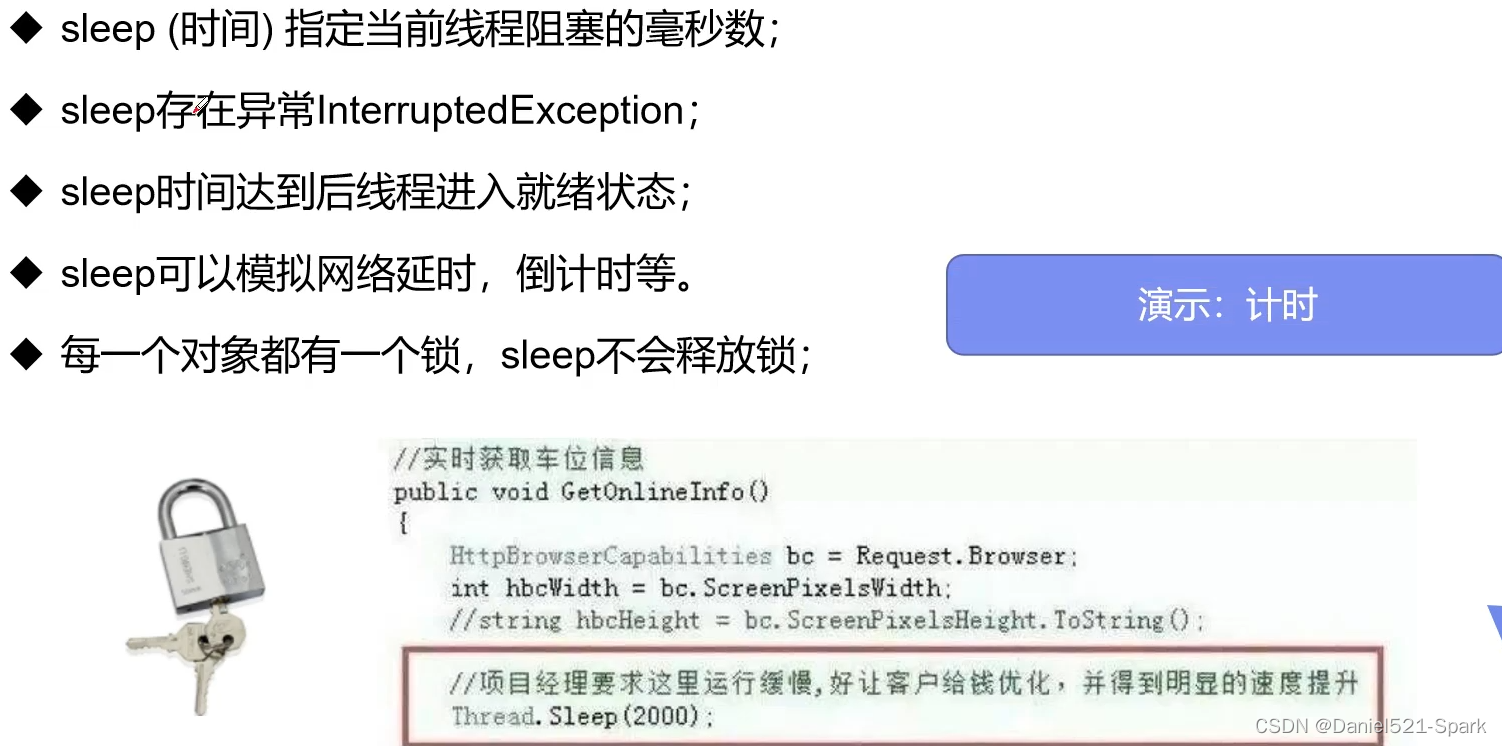
2.线程休眠(sleep)
案例1
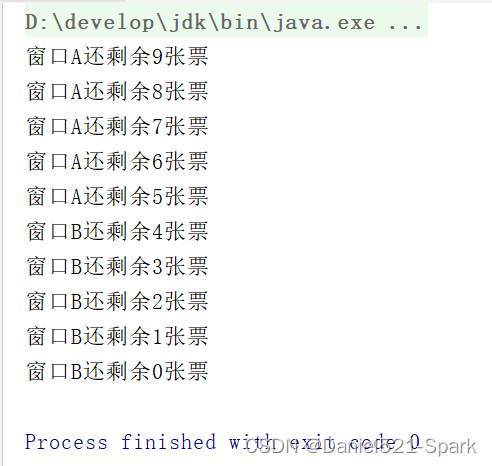
/** * @author Daniel * 模拟网络延时:放大问题的发生性 */public class TestSleep implements Runnable{ private int tickets = 10; @Override public void run() { while (true){ synchronized (TestSleep.class){ if(tickets <= 0){ break; } try { Thread.sleep ( 100 ); } catch (InterruptedException e) { e.printStackTrace (); } tickets--; System.out.println(Thread.currentThread().getName()+"还剩余"+tickets+"张票"); } } } public static void main(String[] args) { TestSleep testSleep = new TestSleep(); new Thread(testSleep,"窗口A").start(); new Thread(testSleep,"窗口B").start(); new Thread(testSleep,"窗口C").start(); }}运行结果为:
案例2
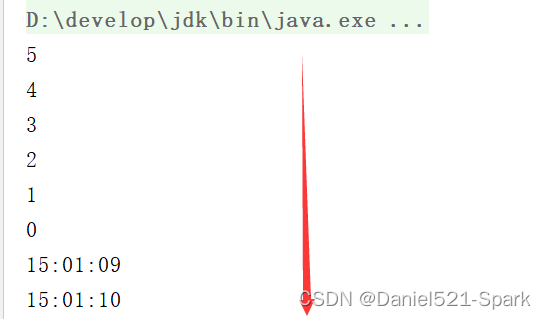
/** * @author Daniel * 模拟倒计时 * 系统当前时间 */public class DaoJiShi { public static void main(String[] args) { DaoDown ();//倒计时 //系统当前时间 Date startTime = new Date ( System.currentTimeMillis () ); while (true){ try { Thread.sleep (1000); System.out.println (new SimpleDateFormat ("HH:mm:ss").format ( startTime ) ); startTime = new Date ( System.currentTimeMillis () );//更新时间 } catch (InterruptedException e) { e.printStackTrace (); } } } public static void DaoDown(){ int time = 5; while (true){ System.out.println (time--); try { Thread.sleep ( 1000 ); } catch (InterruptedException e) { e.printStackTrace (); } if(time < 0){ break; } } }}运行结果为:
3.线程礼让(yield)
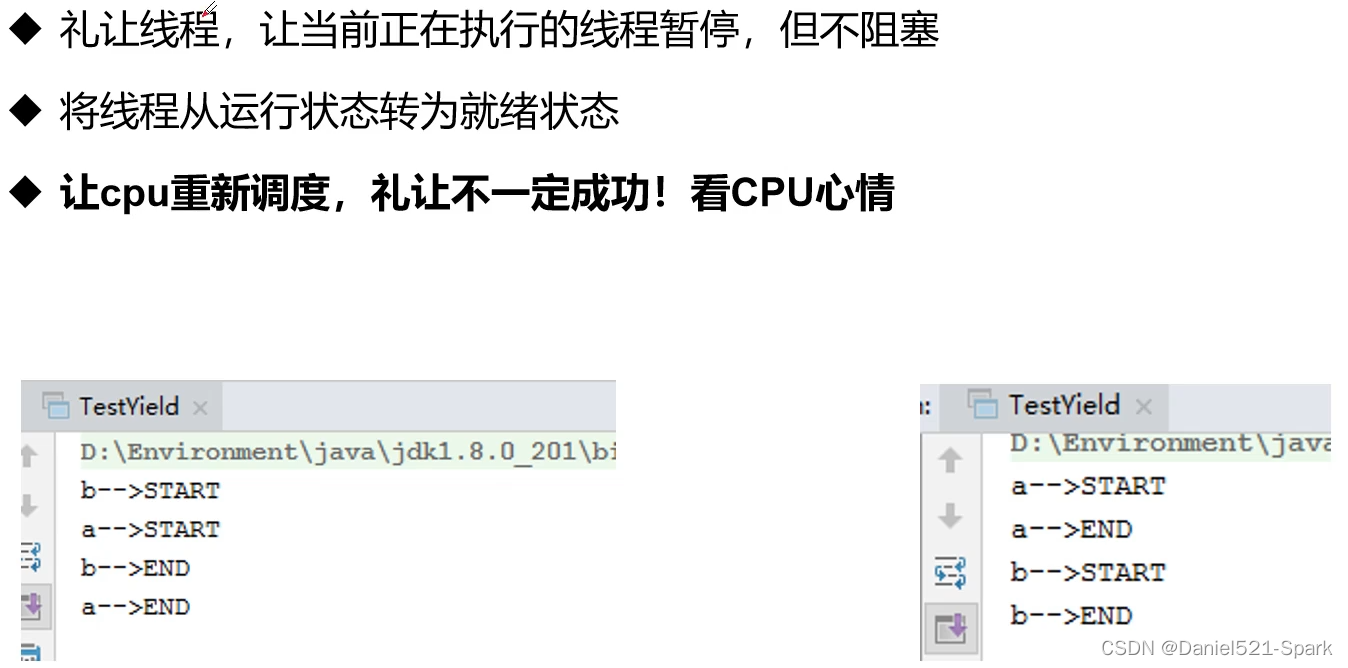
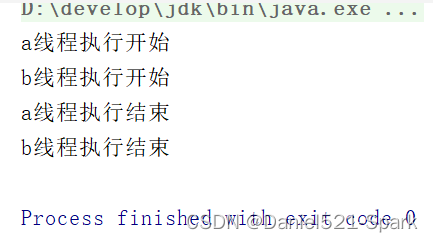
/** * @author Daniel * 线程礼让yield 礼让不一定成功 纯属看CPU心情 */public class MyYield implements Runnable{ public static void main(String[] args) { new Thread ( new MyYield (),"a" ).start (); new Thread ( new MyYield (),"b").start (); } @Override public void run() { System.out.println (Thread.currentThread ().getName ()+"线程执行开始"); Thread.yield (); System.out.println (Thread.currentThread ().getName ()+"线程执行结束"); }}运行结果为:
(1)没有礼让结果显示
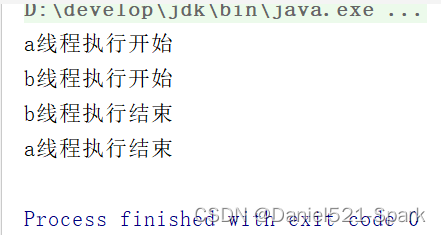
(2)礼让成功显示
4.线程强制执行(Join)
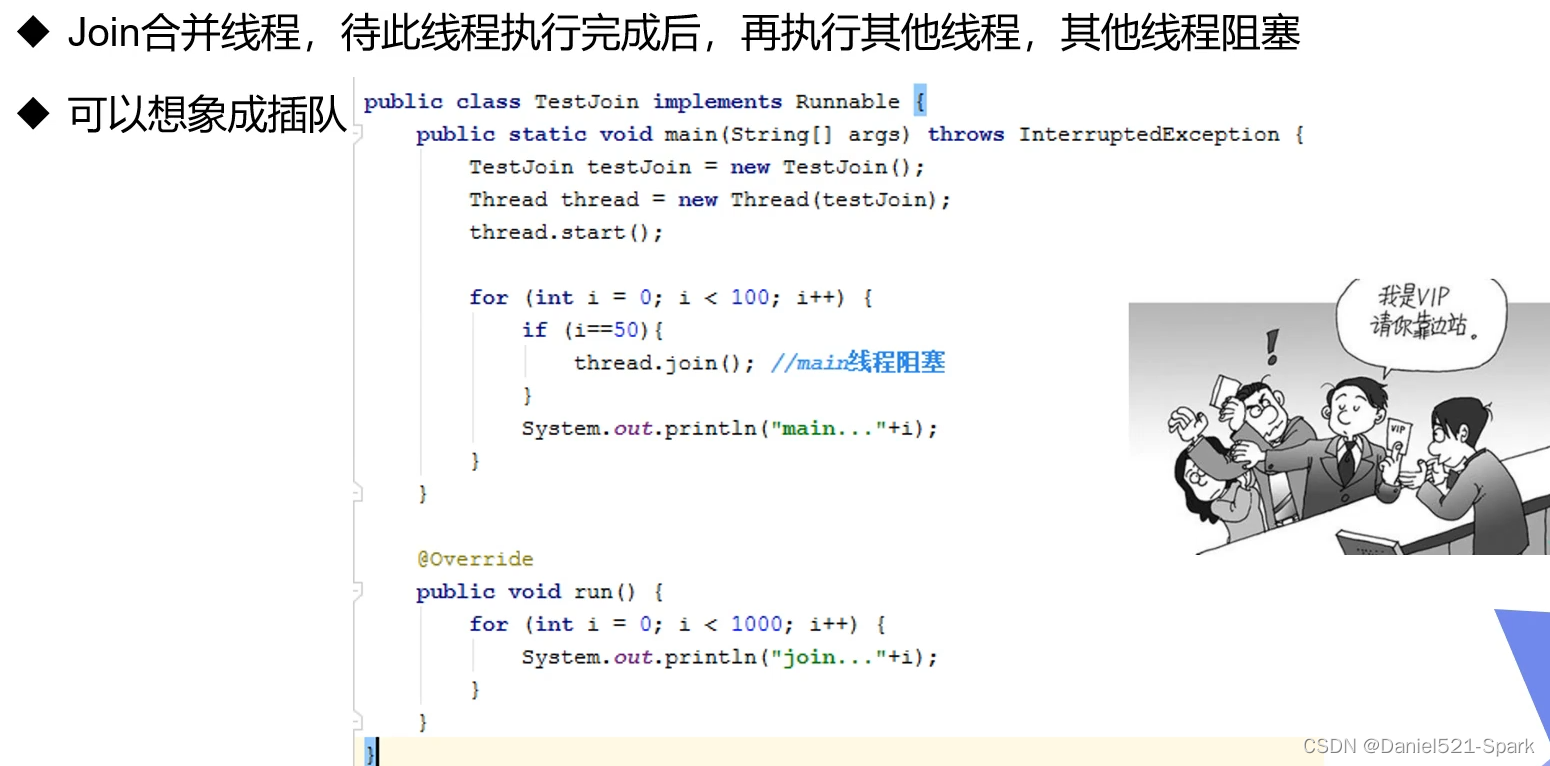
/** * @author Daniel * 插队 很霸道的 主线程执行结束才执行 */public class MyJoin implements Runnable { @Override public void run() { for (int i = 0; i < 5; i++) { System.out.println ("VIP来啦"); } } public static void main(String[] args) { MyJoin myJoin = new MyJoin (); Thread thread = new Thread (myJoin); thread.start (); for (int i = 0; i < 10; i++) { if(i == 5){ try { thread.join ();//插队 强行执行run() System.out.println ("执行完了"+i); } catch (InterruptedException e) { e.printStackTrace (); } } } }}
5.线程状态观测
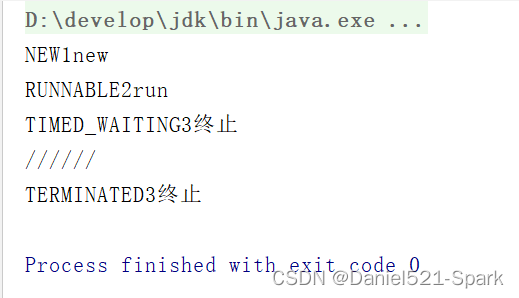
/** * @author Daniel * 线程的观测状态 */public class ThreadState { public static void main(String[] args) { Thread thread = new Thread (()->{ for (int i = 0; i < 10; i++) { try { Thread.sleep (100 ); } catch (InterruptedException e) { e.printStackTrace (); } } System.out.println ("//"); }); Thread.State state = thread.getState(); System.out.println (state+"1new");//new thread.start ();//启动线程 state = thread.getState ();//更新状态再次观察状态 System.out.println (state+"2run");//run while(state != Thread.State.TERMINATED){//只要线程不终止,线程一直处于运行状态 try { Thread.sleep ( 1000 ); state = thread.getState ();//更新状态再次观察状态 System.out.println (state+"3终止"); } catch (InterruptedException e) { e.printStackTrace (); } //thread.start (); //死亡后的线程不能再运行 } }}运行结果为:
6.线程优先级(拓展)

“性能倒置”——
/** * @author Daniel * 线程优先级 */public class ThreadProprity { public static void main(String[] args) { //默认 System.out.println (Thread.currentThread ().getName ()+ Thread.currentThread ().getPriority ());//默认值为5 MyProority myProority = new MyProority (); Thread thread1 = new Thread ( myProority ); Thread thread2 = new Thread ( myProority ); Thread thread3 = new Thread ( myProority );//先设置优先级,再启动 thread1.setPriority (2); thread1.start (); thread2.setPriority (Thread.MAX_PRIORITY); //MAX_PRIORITY=10 thread2.start (); thread3.setPriority (3); thread3.start (); }}class MyProority implements Runnable{ @Override public void run() {//默认线程 System.out.println (Thread.currentThread ().getName ()+ Thread.currentThread ().getPriority ());//默认值为5 }}运行结果为:
7.守护(daemon)线程(拓展)

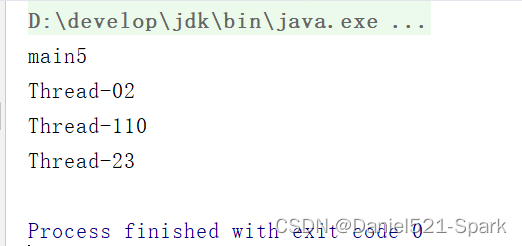
/** * @author Daniel * 守护线程 */public class ThreadShouHu { public static void main(String[] args) { God god = new God (); You you = new You (); Thread thread = new Thread (god); thread.setDaemon (true);//默认是false表示用户线程,正常的线程都是用户线程…… thread.start (); new Thread ( you ).start ();//你 用户线程启动…… }}// 上帝class God implements Runnable{ @Override public void run() { System.out.println ("上帝保佑着你"); }}//你class You implements Runnable{ @Override public void run() { for (int i = 0; i < 3; i++) { System.out.println ("开心过好每一天,因为人生不过三万天"); } System.out.println ("Good bye————world"); }}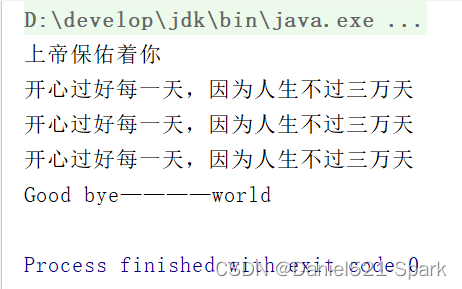
四、线程同步(重点)
多个线程操作同一个资源
1.并发
并发:同一个对象被多个线程同时操作


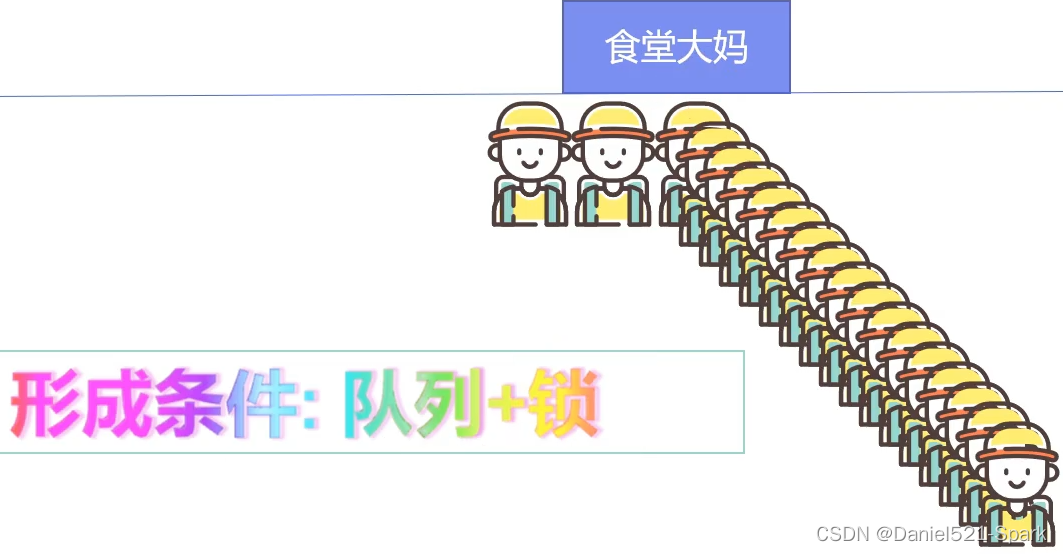
2.队列 & 锁
3.线程同步

4.同步方法
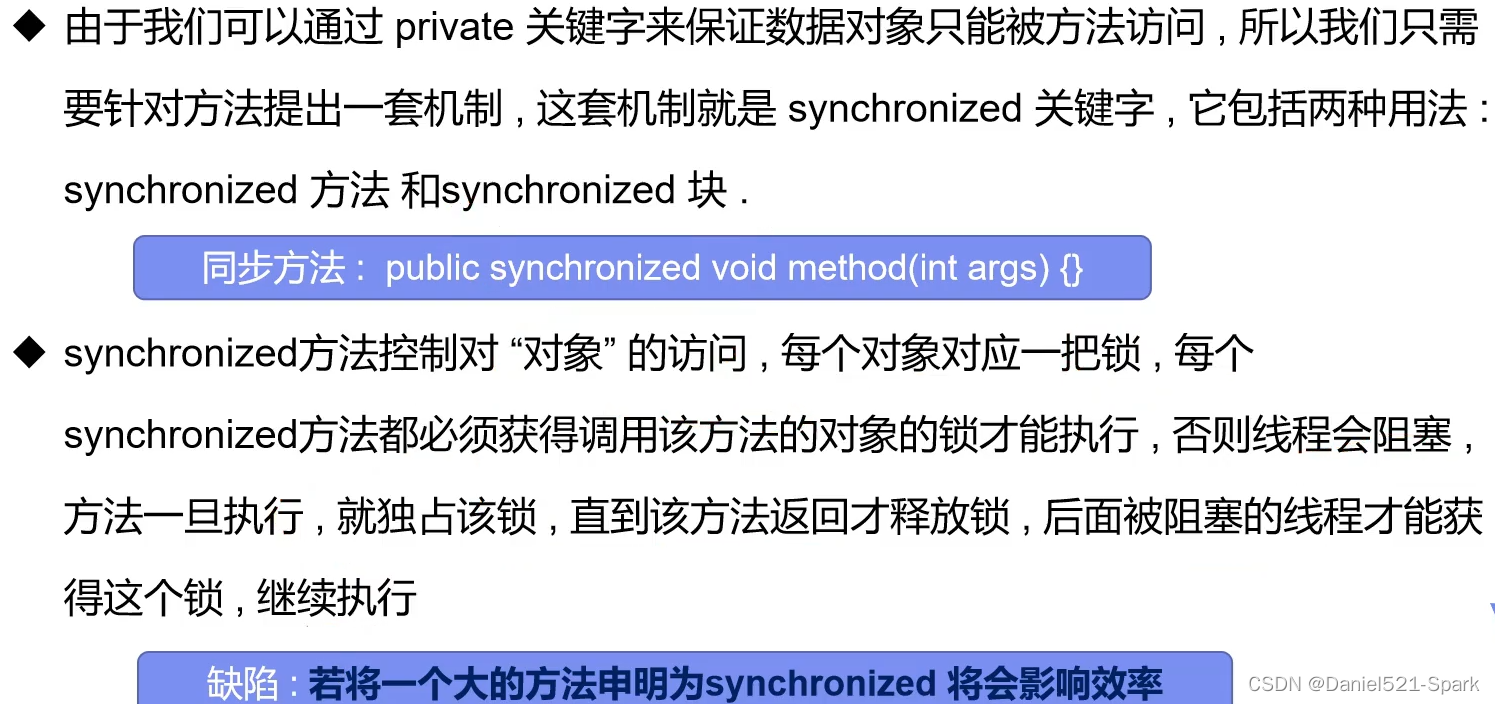
5.同步方法弊端
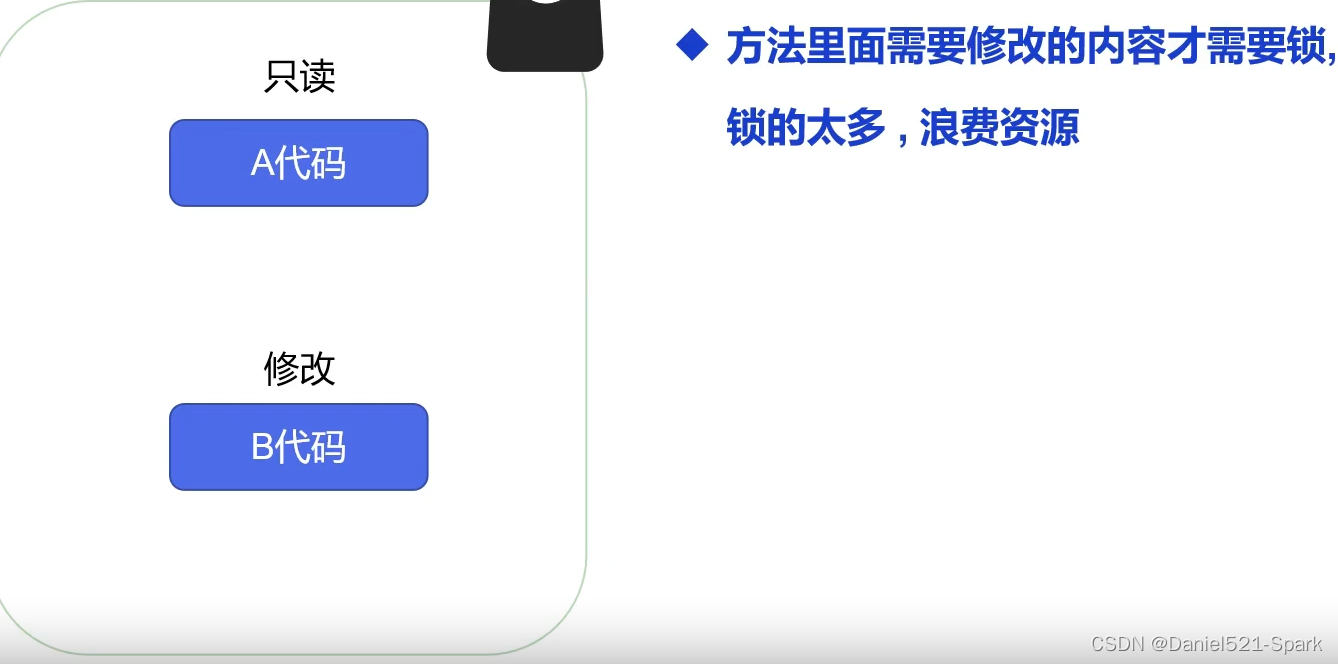
6.同步块
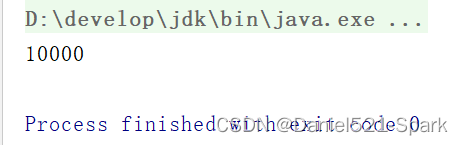
/** * @author Daniel * synchronized 加锁 */public class SychnoisedThred { public static void main(String[] args) { ArrayList list = new ArrayList (); for (int i = 0; i < 10000; i++) { new Thread (()->{ synchronized (list){ list.add (Thread.currentThread ().getName ()); } }).start (); } try { Thread.sleep ( 1000 ); } catch (InterruptedException e) { e.printStackTrace (); } System.out.println (list.size ()); }}运行结果为:
(1)未加锁运行结果:
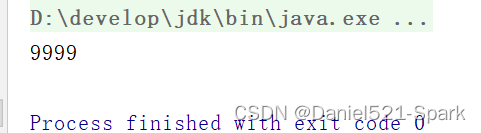
(2)加锁运行结果
安全类型集合无需加synchronized
/** * @author Daniel * 测试JUC安全类型的集合 */public class TestJuc { public static void main(String[] args) { CopyOnWriteArrayList<String> list = new CopyOnWriteArrayList<> (); for (int i = 0; i < 10000; i++) { new Thread ( ()->{ list.add ( Thread.currentThread ().getName () ); } ).start (); } try { Thread.sleep ( 1000 ); } catch (InterruptedException e) { e.printStackTrace (); } System.out.println (list.size ()); }}运行结果为:
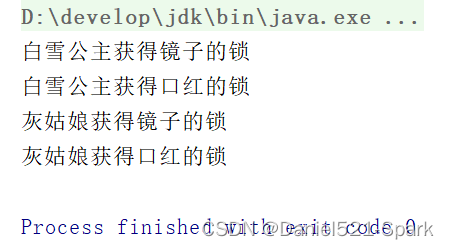
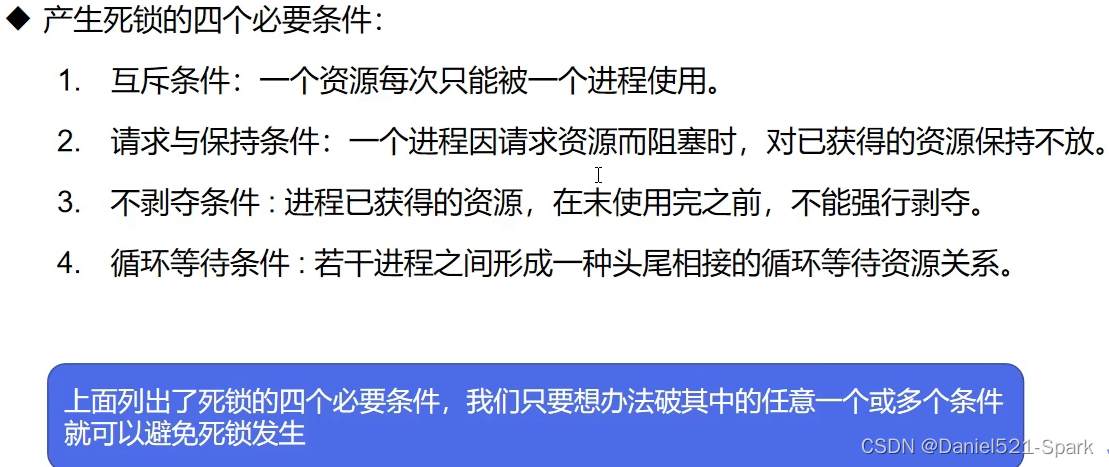
6.死锁

public class KnockTest { public static void main(String[] args) { Makeup g1 = new Makeup (1,"灰姑娘" ); Makeup g2 = new Makeup (1,"白雪公主" ); g1.start (); g2.start (); }}class Lipstick{//口红}class Mirror{//镜子}class Makeup extends Thread{ //需要的资源只有一份,使用static保证只有一份 static Lipstick lipstick = new Lipstick (); static Mirror mirror = new Mirror (); int chooice; String girlName; public Makeup(int chooice, String girlName) { this.chooice = chooice;//选择 this.girlName = girlName;//使用化妆品的人 } @Override public void run() { try { makeup (); }catch (InterruptedException i){ i.printStackTrace (); } } public void makeup () throws InterruptedException { if(chooice == 0){ synchronized (lipstick){//获得口红的锁 System.out.println (this.girlName+"获得口红的锁"); Thread.sleep ( 1000 ); /*synchronized (mirror){//一秒后想获得镜子 System.out.println (this.girlName+"获得镜子的锁"); }*/ } synchronized (mirror){//一秒后想获得镜子 System.out.println (this.girlName+"获得镜子的锁"); } }else{ synchronized (mirror) {//获得镜子的锁 System.out.println ( this.girlName + "获得镜子的锁" ); Thread.sleep ( 2000 ); /*synchronized (lipstick) {//一秒后想获得口红 System.out.println ( this.girlName + "获得口红的锁" ); }*/ } synchronized (lipstick) {//一秒后想获得口红 System.out.println ( this.girlName + "获得口红的锁" ); } } }}运行结果为:
6.1.死锁避免的方法
6.2.Lock锁
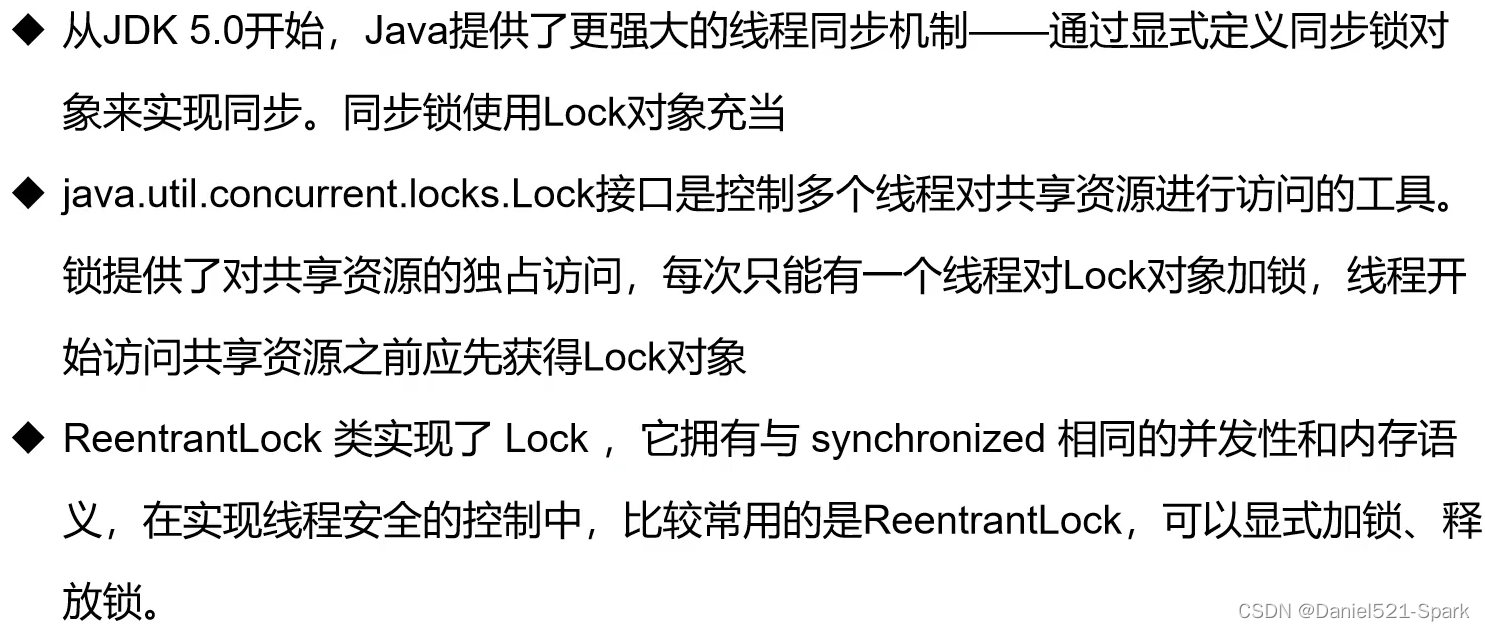
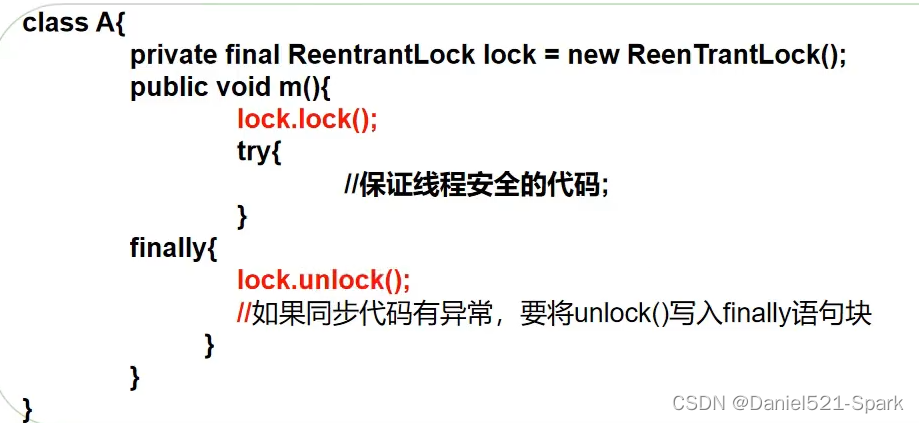
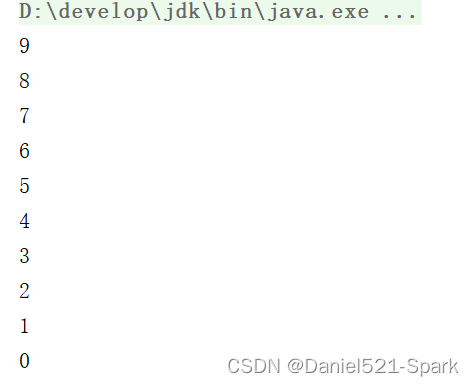
/** * @author Daniel * 锁机制 */public class LockTest { public static void main(String[] args) { BuyTick buyTick = new BuyTick (); new Thread ( buyTick,"锁子1" ).start (); new Thread ( buyTick,"锁子2" ).start (); }}class BuyTick implements Runnable{ private final ReentrantLock lock = new ReentrantLock(); int tickes = 10; @Override public void run() { while (true){ try { lock.lock (); if(tickes > 0){ tickes--; System.out.println (tickes); try { Thread.sleep ( 100 ); } catch (InterruptedException e) { e.printStackTrace (); } }else { break; } }finally { lock.unlock ();//释放锁 } } }}运行结果为:
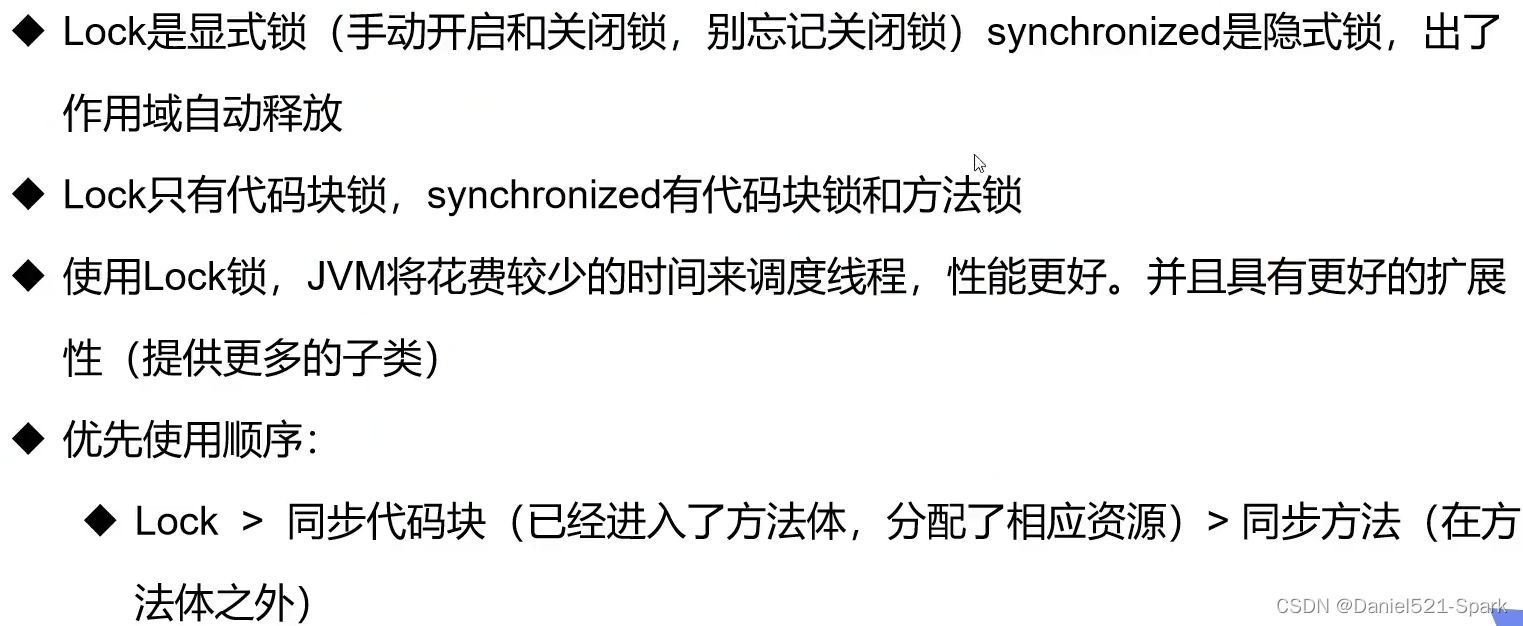
6.3.synchronized 与 Lock的对比
五、线程通信问题(了解)
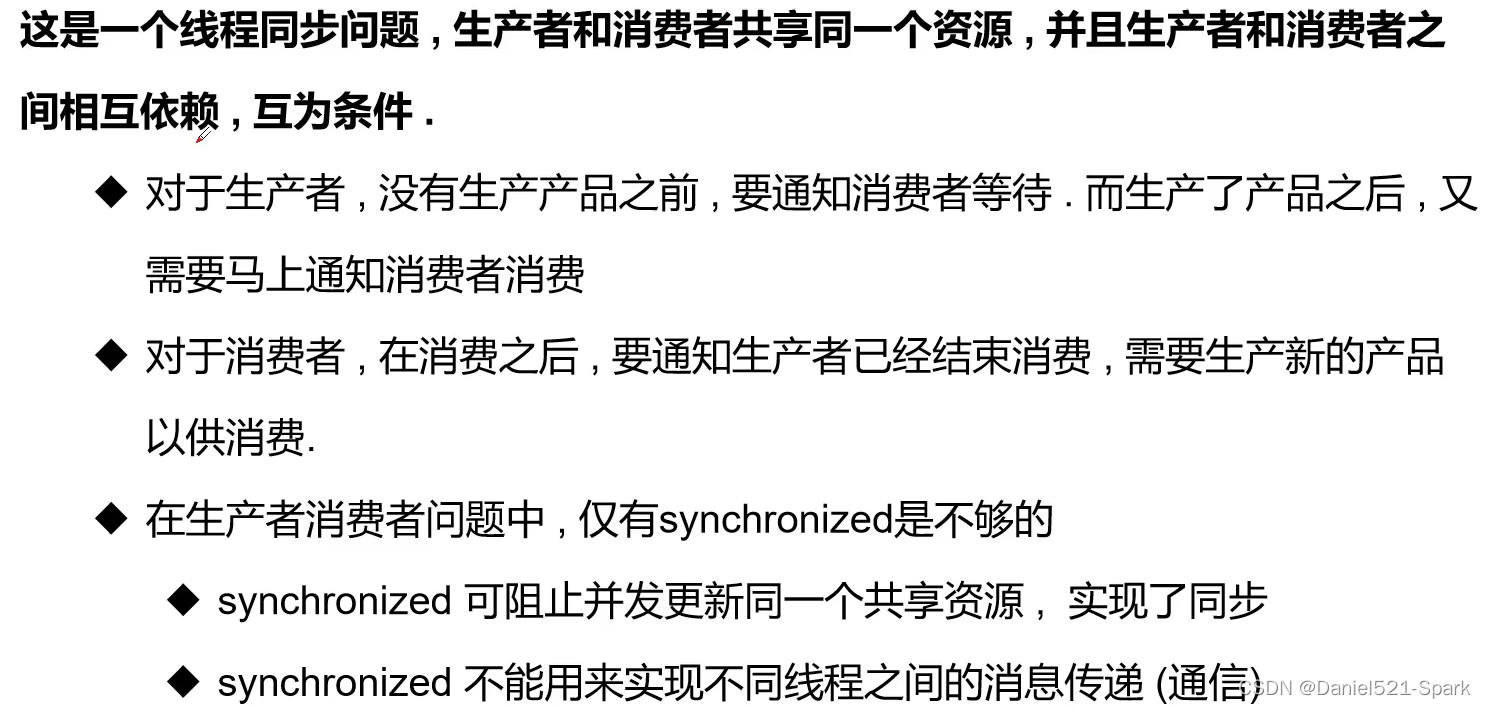
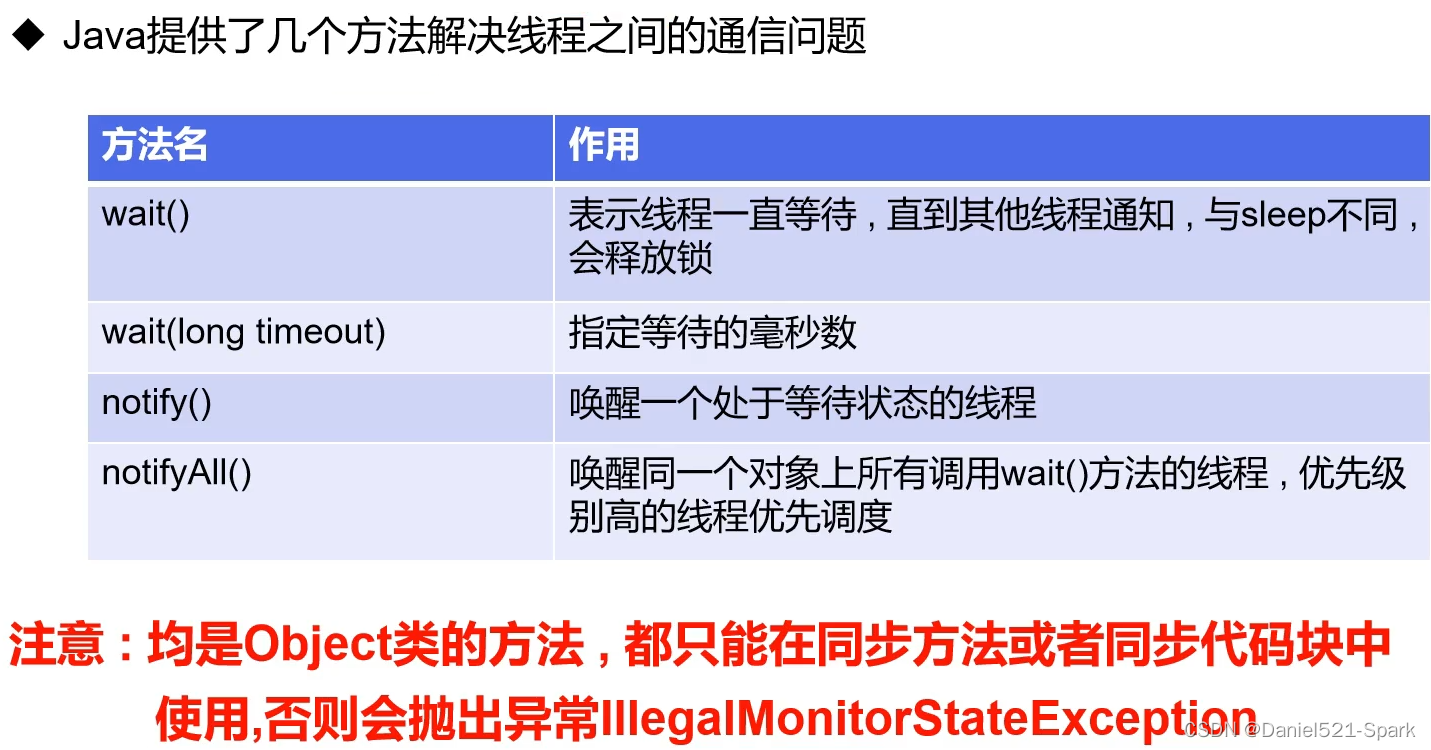
1.线程通信
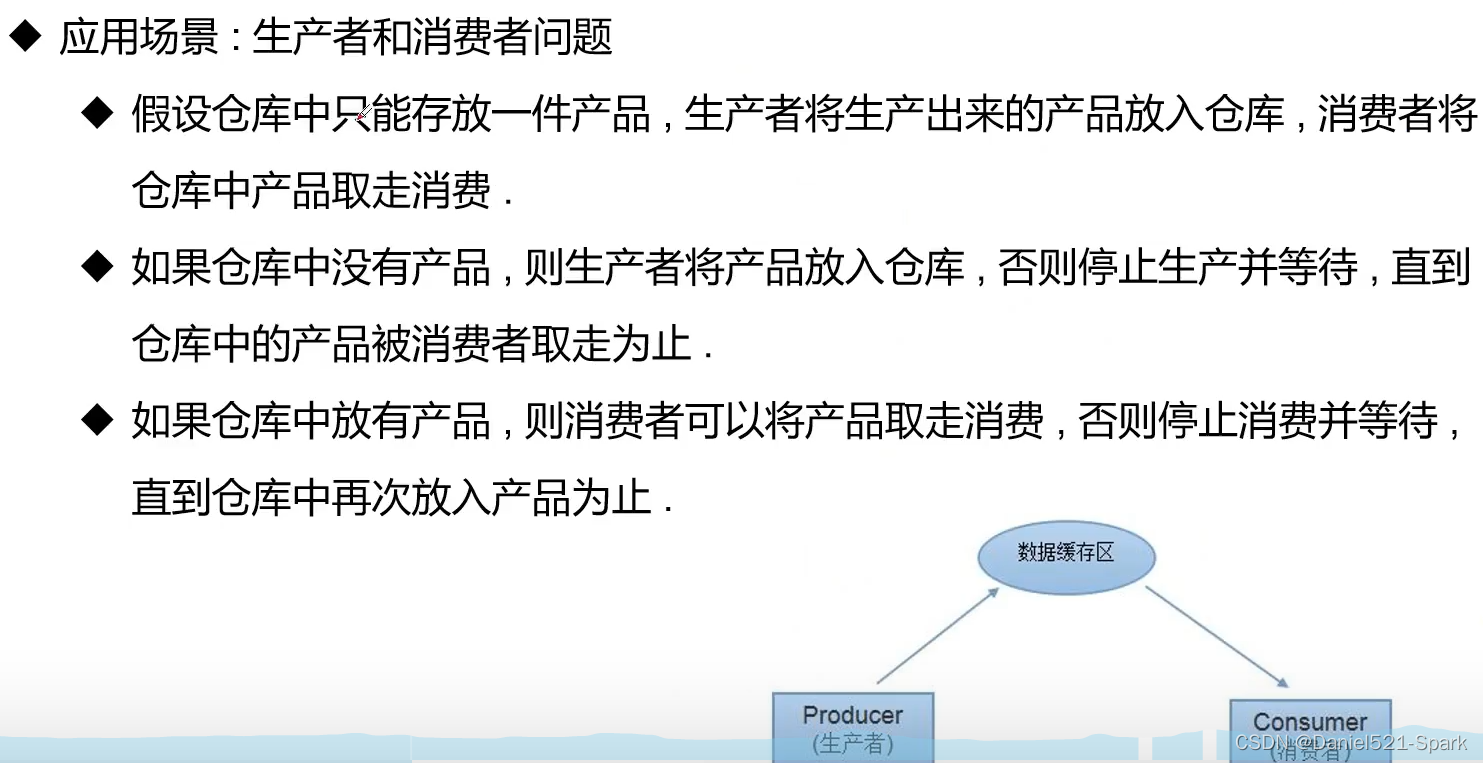
2.线程通信-分析
(1)解决方式1管程法

(2)解决方式2信号灯法

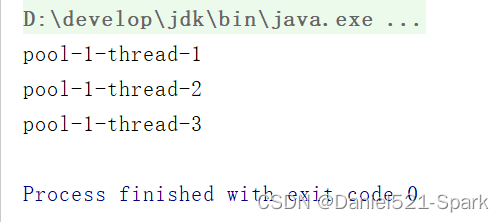
3.线程池

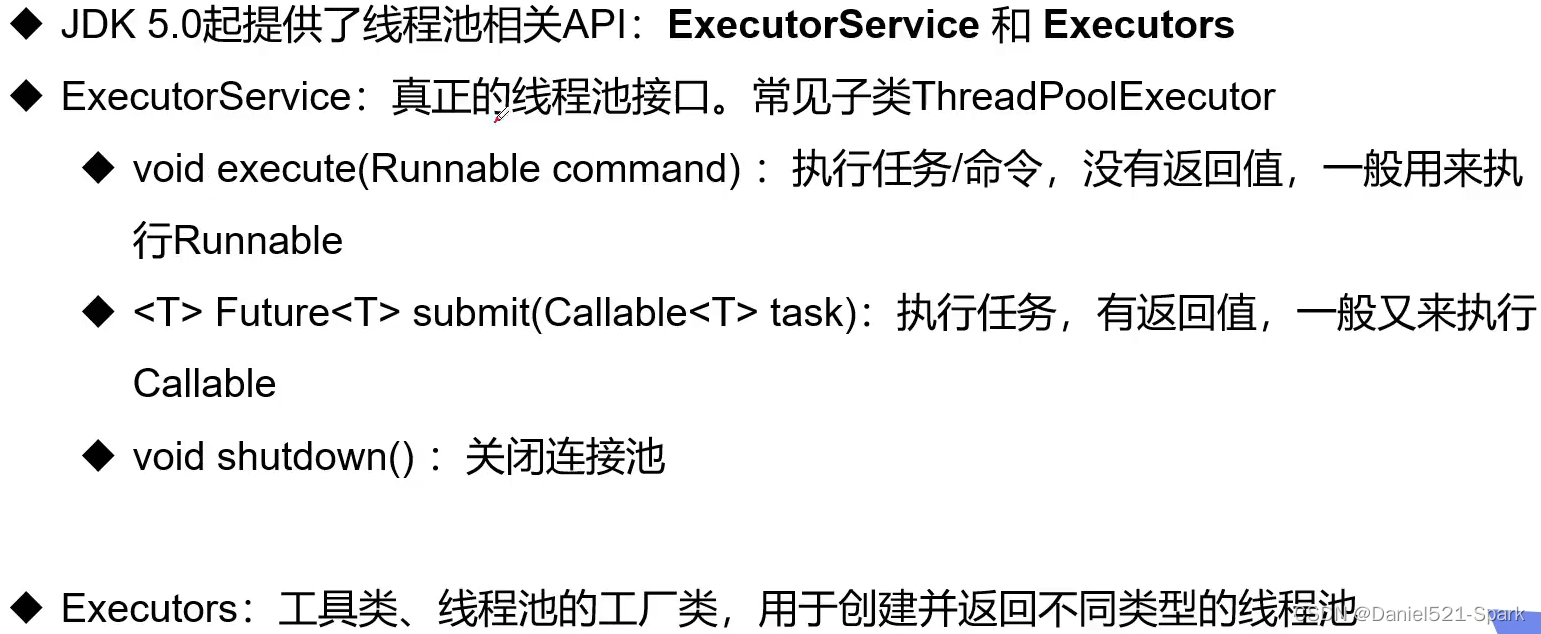
/** * @author Daniel * 线程池 */public class ThreadPool { public static void main(String[] args) { //1.创建服务,创建线程池 //newFixedThreadPool 参数为:线程池大小 ExecutorService service = Executors.newCachedThreadPool (); //2.执行 service.execute ( new ThreadPools () ); service.execute ( new ThreadPools () ); service.execute ( new ThreadPools () ); //关闭连接 service.shutdown ();// }}class ThreadPools implements Runnable{ @Override public void run() { System.out.println (Thread.currentThread ().getName ()); }}执行结果为:
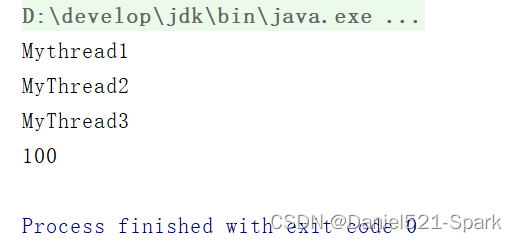
六、高级主题
/** * @author Daniel * 线程三种创建方式总结 */public class GaoJiZong { public static void main(String[] args) { new MyThread1 ().start (); new Thread ( new MyThread2 () ).start (); FutureTask<Integer> task = new FutureTask<> ( new MyThread3 () ); new Thread ( task ).start (); try { System.out.println ( task.get ()); } catch (InterruptedException e) { e.printStackTrace (); } catch (ExecutionException e) { e.printStackTrace (); } }}//1.继承Threadclass MyThread1 extends Thread{ @Override public void run() { System.out.println ("Mythread1"); }}//2.实现Runnable接口class MyThread2 implements Runnable{ @Override public void run() { System.out.println ("MyThread2"); }}//3.实现Callable接口class MyThread3 implements Callable<Integer>{ @Override public Integer call() throws Exception { System.out.println ("MyThread3"); return 100; }}运行结果为: