BoT-SORT实战:手把手教你实现BoT-SORT训练和测试
文章目录
- 摘要
- 数据准备
- 配置BoT-SORT环境
-
- 获取代码
- 创建虚拟环境
- 安装必要的包
-
- 1、安装pytorch
- 2、安装cython
- 3、安装Cython-bbox
- 3、安装faiss
- 4、安装其他的包
- 训练
-
- 生成REID数据集
- 预训练模型
-
- ByteTrack预训练模型
- REID预训练模型
- 开始训练
- 测试
-
- 测试视频
- 测试摄像头
摘要
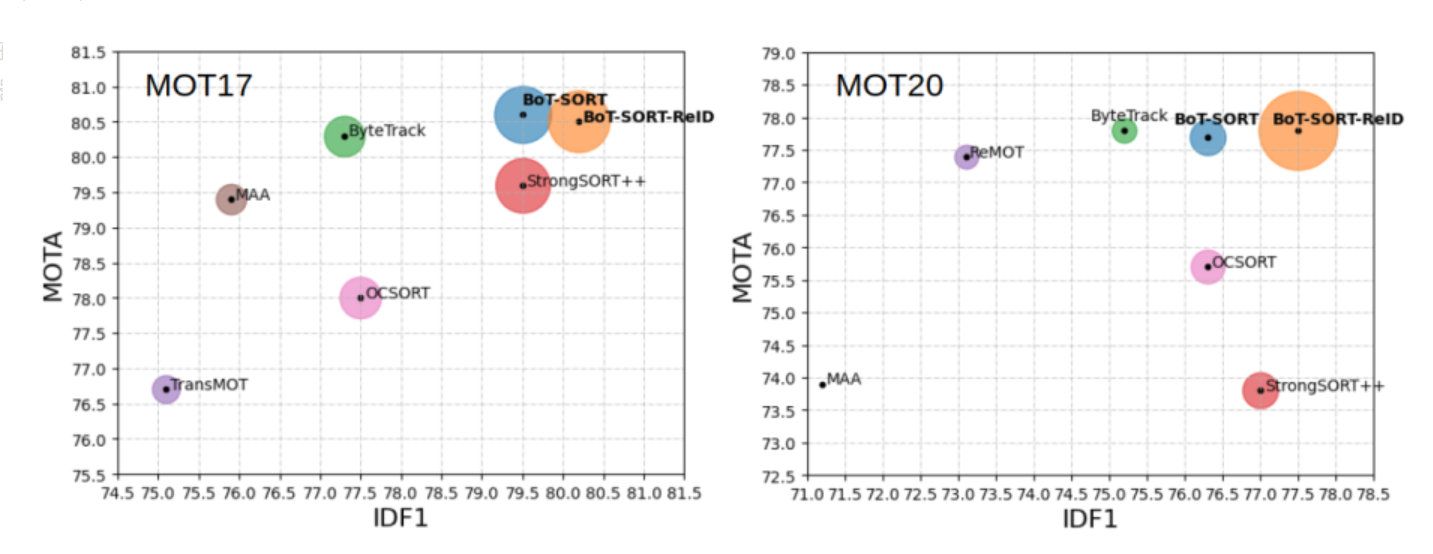
BoT-SORT是今年非常游戏的跟踪器模型。就所有主要 MOT 指标MOTA、IDF1 和 HOTA而言,BoT-SORT 和 BoT-SORT-ReID 在 MOT17 和 MOT20 测试集的 MOTChallenge数据集中排名第一。对于 MOT17:实现了 80.5 MOTA、80.2 IDF1 和 65.0 HOTA,在跟踪器的排行榜上暂居第一。
论文翻译:https://blog.csdn.net/hhhhhhhhhhwwwwwwwwww/article/details/126890651
论文链接:https://arxiv.org/pdf/2206.14651.pdf
代码:https://github.com/NirAharon/BOT-SORT
这篇文章主要讲述如何实现BoT-SORT训练和测试。
数据准备
数据,我们使用MOT17和MOT20这两款数据集。下载地址:
官方网站:https://motchallenge.net/
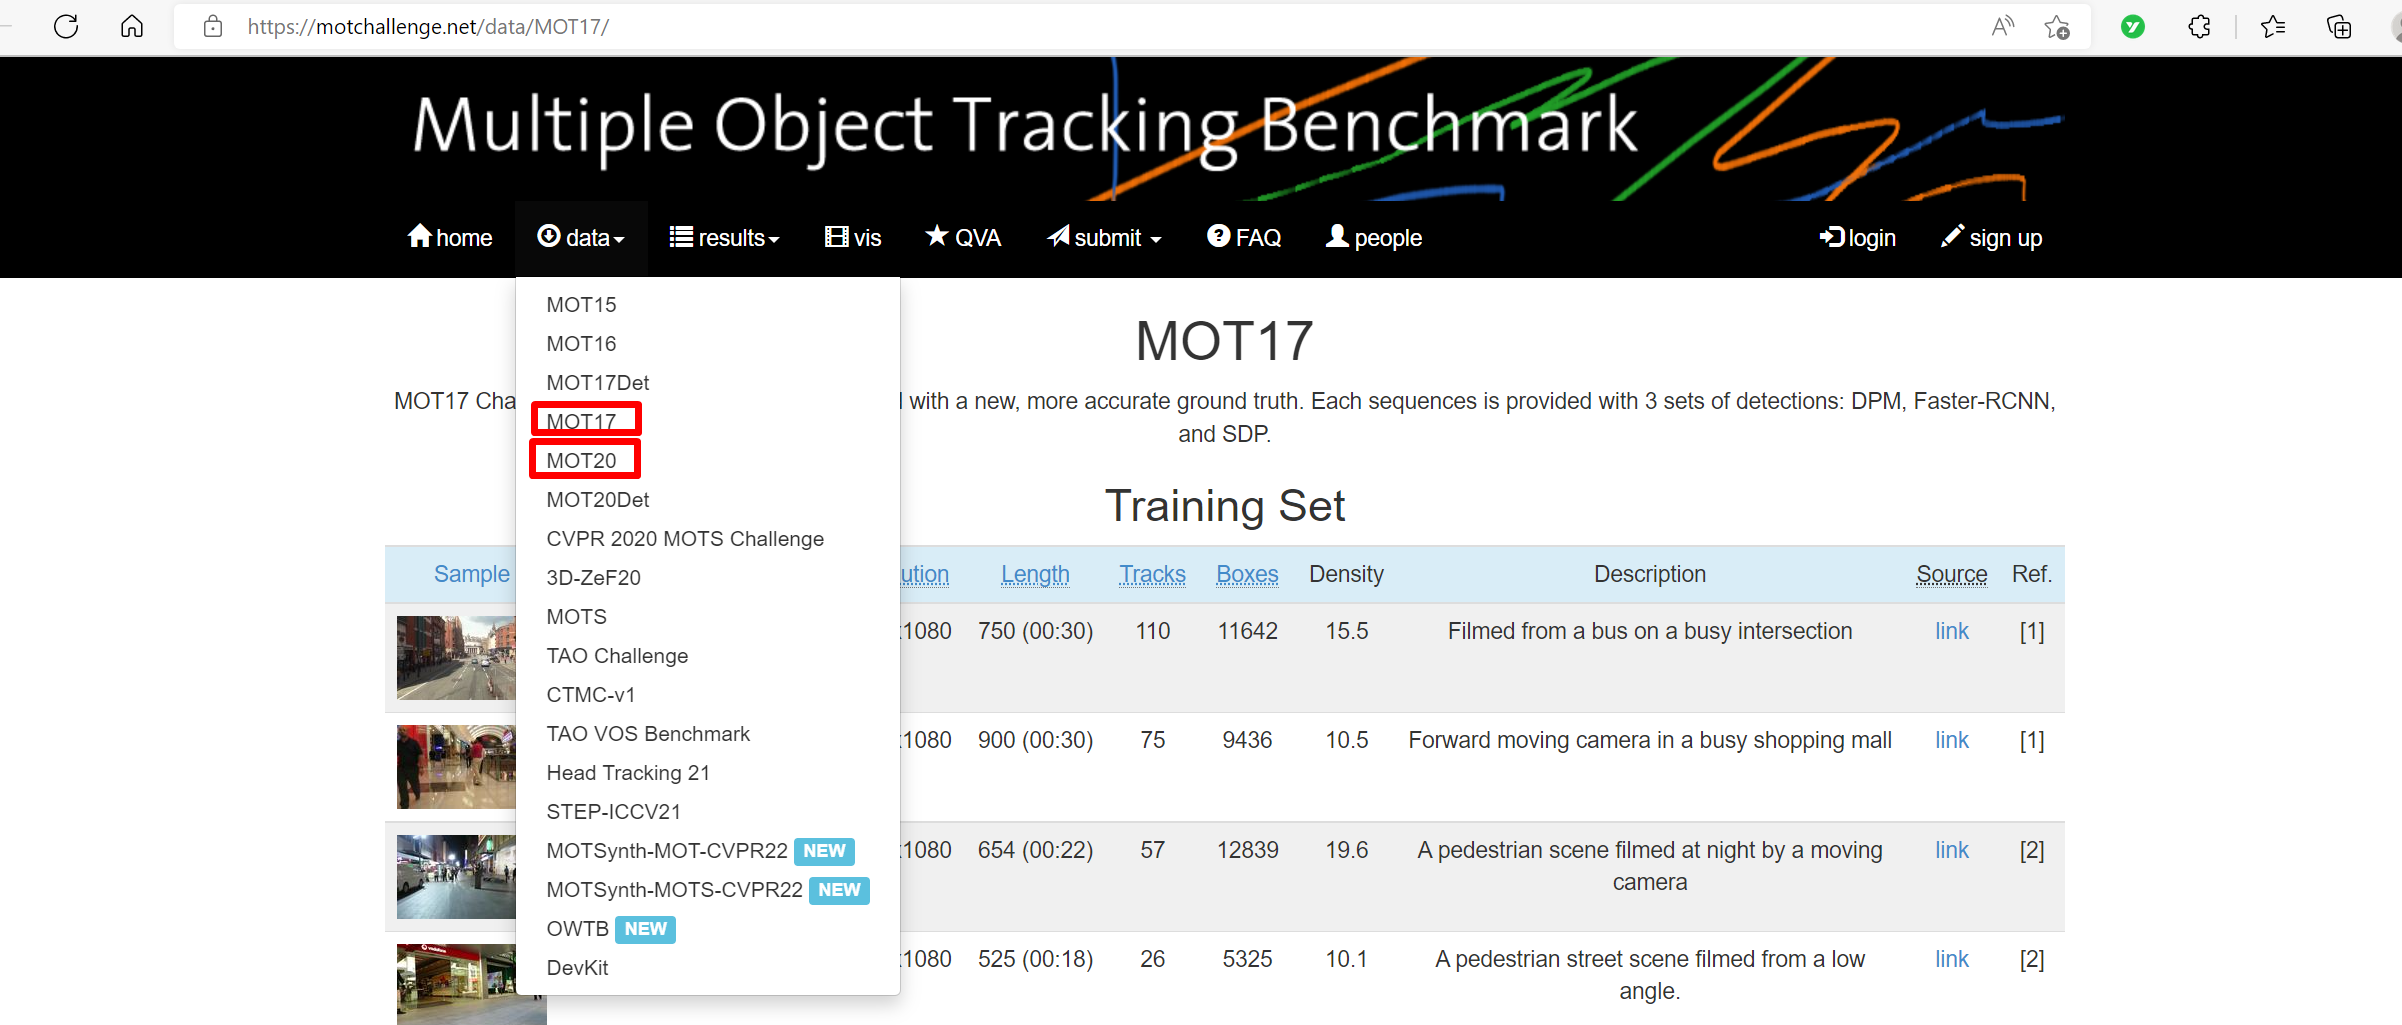
然后,点击“data”,就可以看到MOT17和MOT20。
选择MOT17,然后就可以看到MOT17的网页。
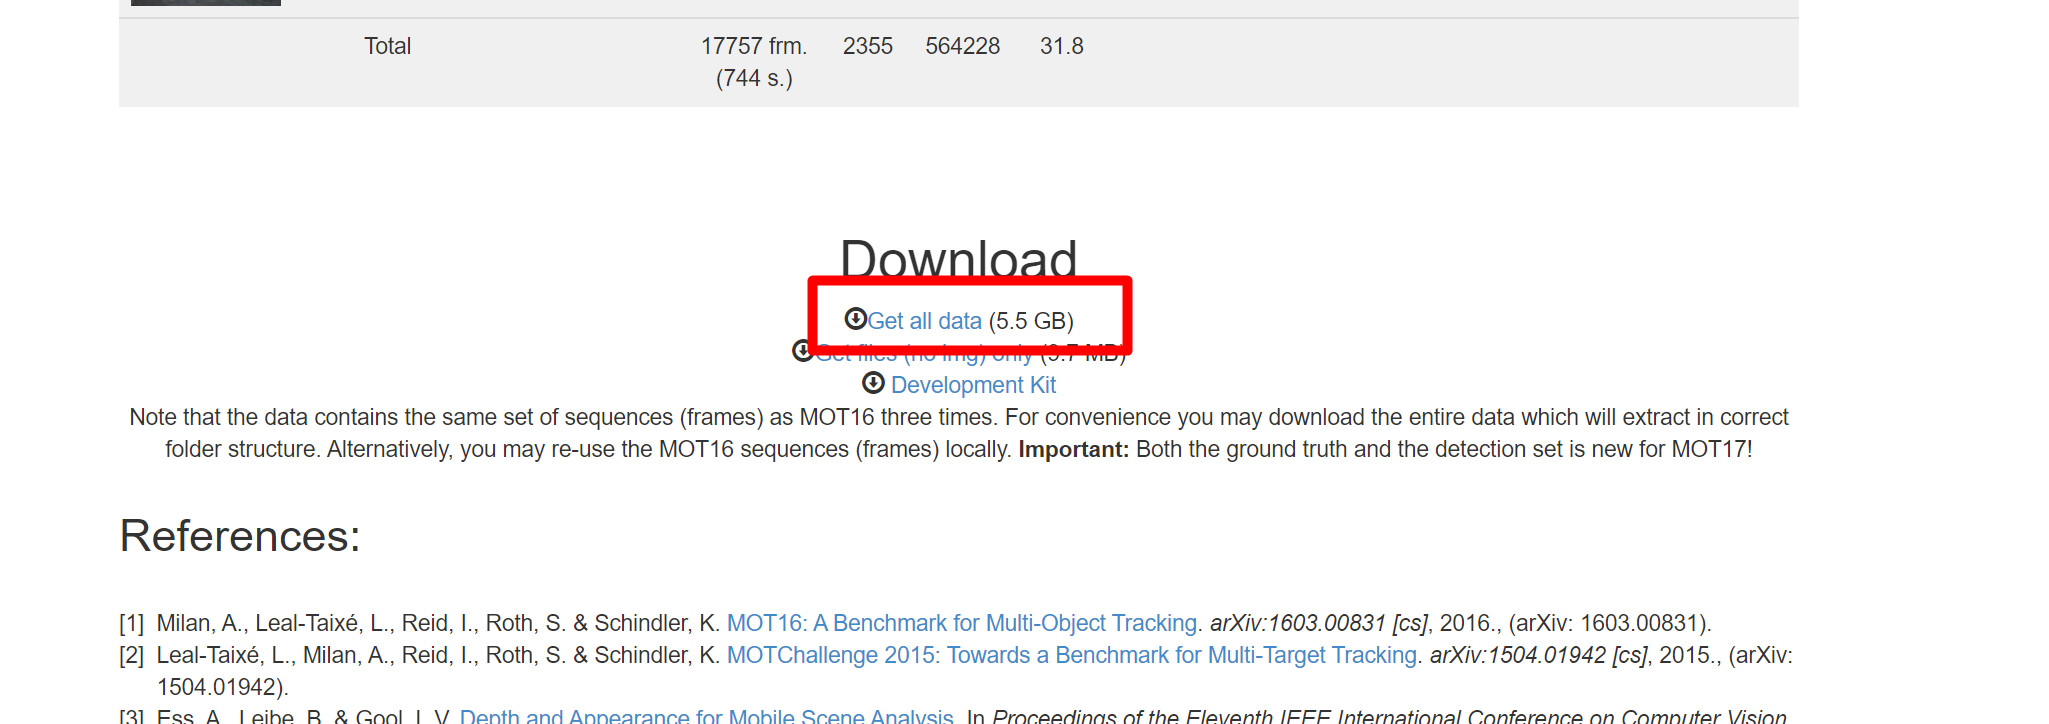
将网页下拉到最后就可以看到下载链接了。点击“Get all data”,下载MOT17。
同理,选择MOT20下载MOT20数据集。
配置BoT-SORT环境
获取代码
链接:
https://github.com/NirAharon/BOT-SORT
将其下载下来。然后放到本地磁盘,解压。
创建虚拟环境
执行如下命令:
conda create -n botsort_env python=3.7conda activate botsort_env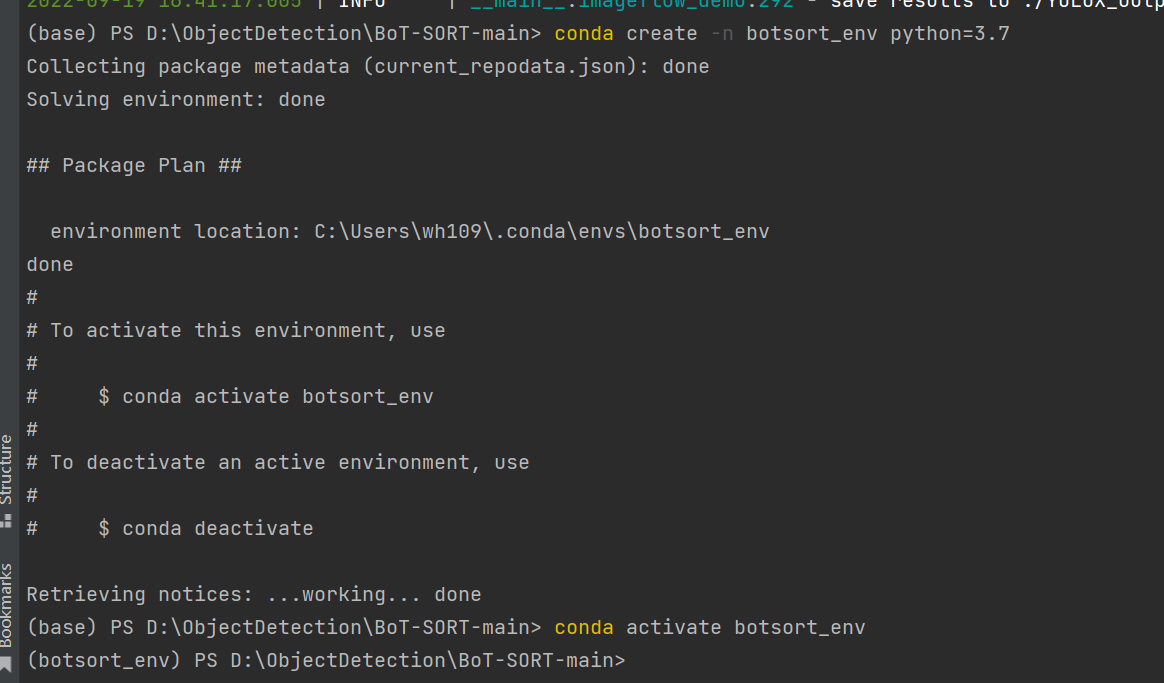
安装必要的包
第一种,进入BoT-SORT-main目录
执行
pip install -r requirements.txt安装requirements.txt所有的包,这样会安装多余的包。我通常采用另一种方式:单独安装每个包。
1、安装pytorch
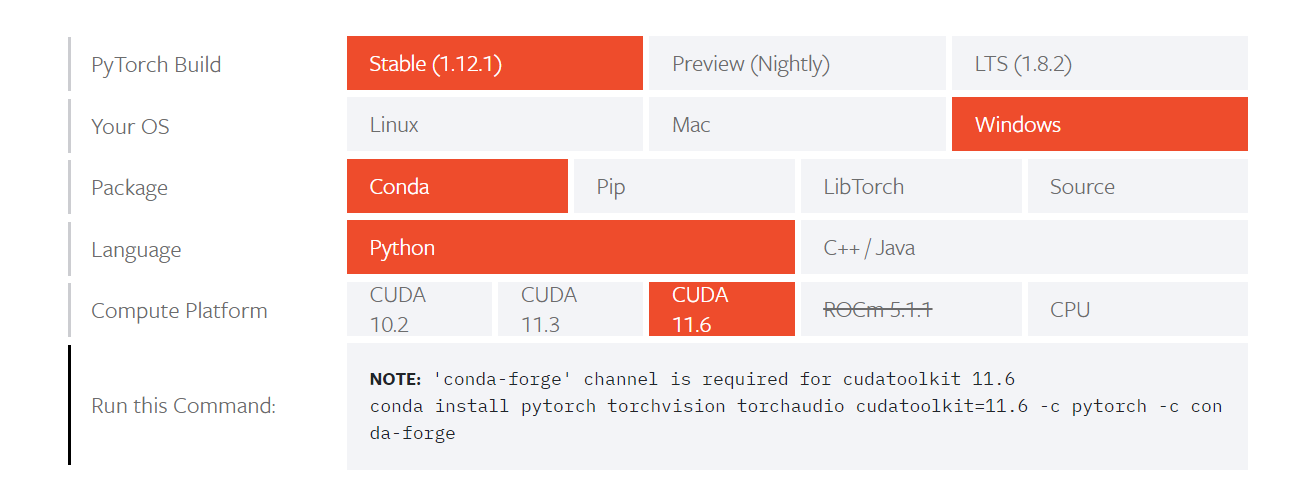
执行命令:
conda install pytorch torchvision torchaudio cudatoolkit=11.6 -c pytorch -c conda-forge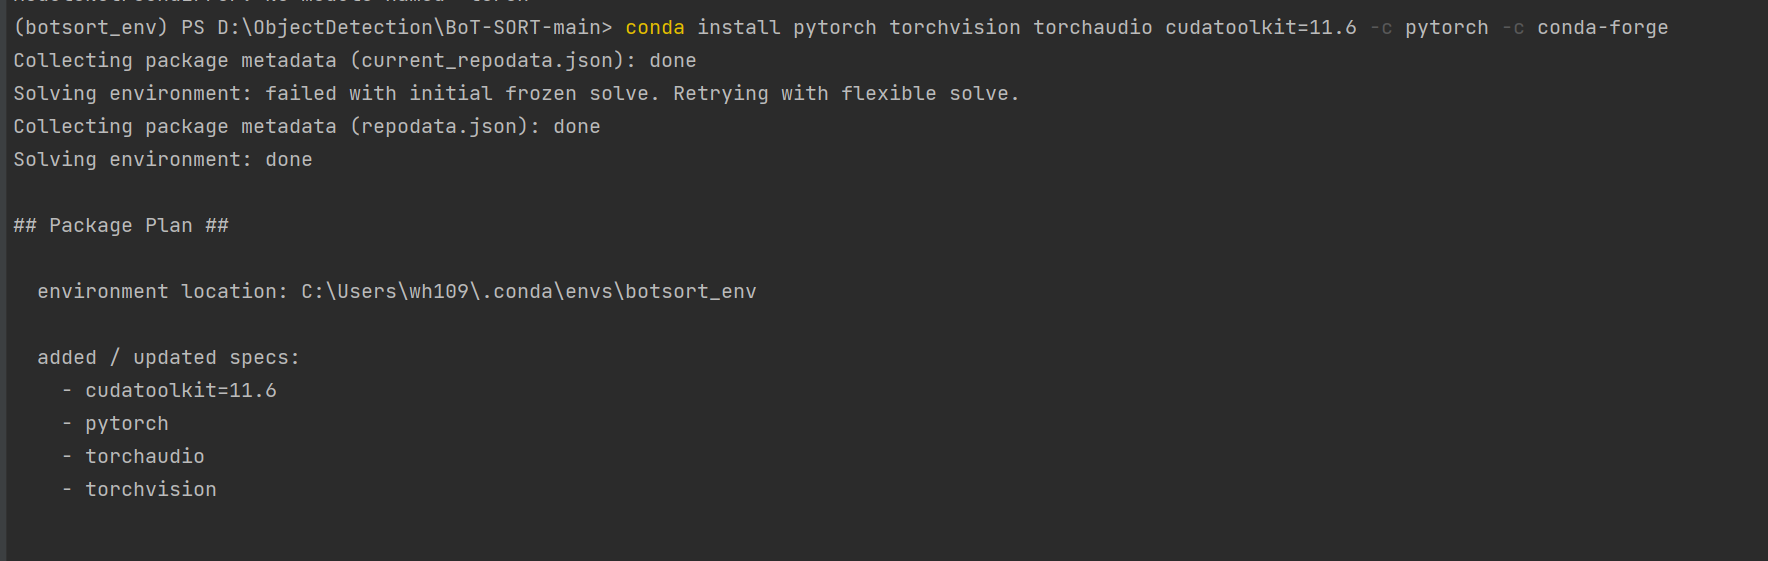
2、安装cython
pip install cython3、安装Cython-bbox
这里主要讲如何在Window下面安装:
第一步:从网址https://pypi.org/project/cython-bbox/中下载cython-bbox,然后解压,可以看到dist文件夹。

第二步:解压后,在文件夹里找到setup.py,并把extra_compile_args=[’-Wno-cpp’],修改为 extra_compile_args = {‘gcc’: [‘/Qstd=c99’]},如下图所示:
extra_compile_args = {'gcc':['/Qstd=c99']},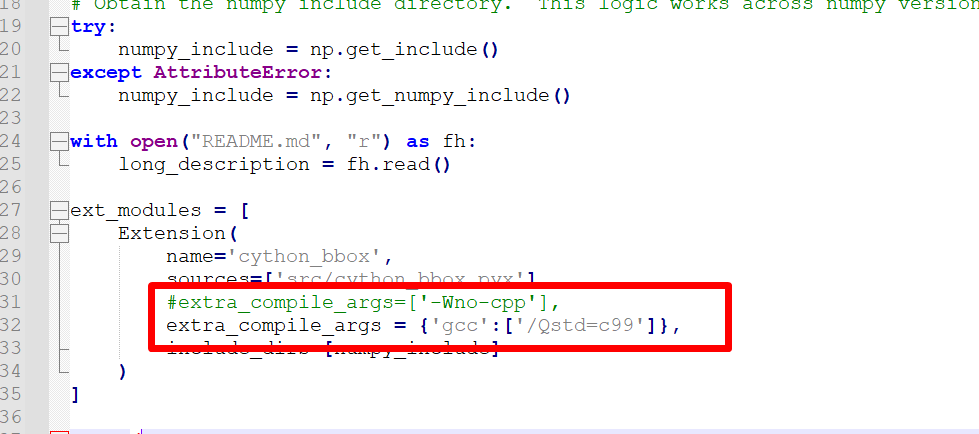
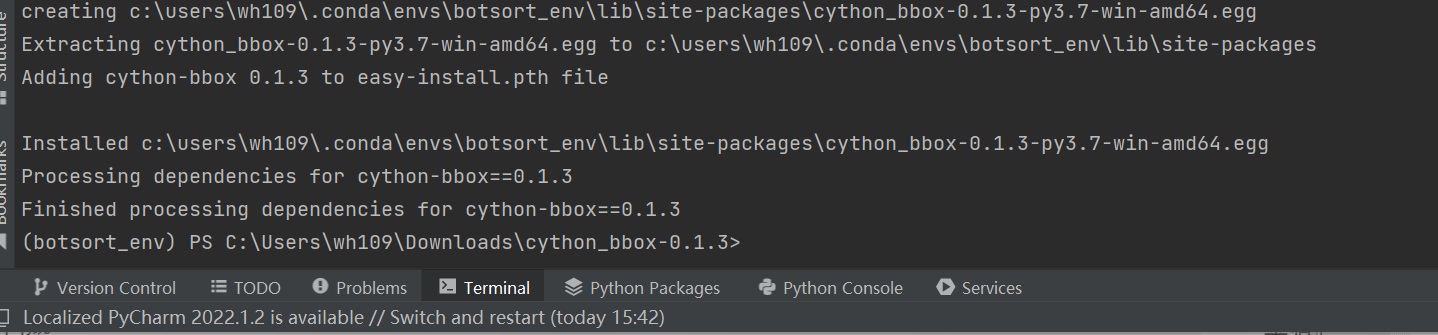
最后一步:在虚拟环境下,切换到cython_bbox-0.1.3缩在文件夹,输入命令:python setup.py build_ext install,当出现下图所示的结果,则代表cython-bbox安装成功。
3、安装faiss
参考:https://github.com/facebookresearch/faiss/blob/main/INSTALL.md
conda install -c conda-forge faiss-gpu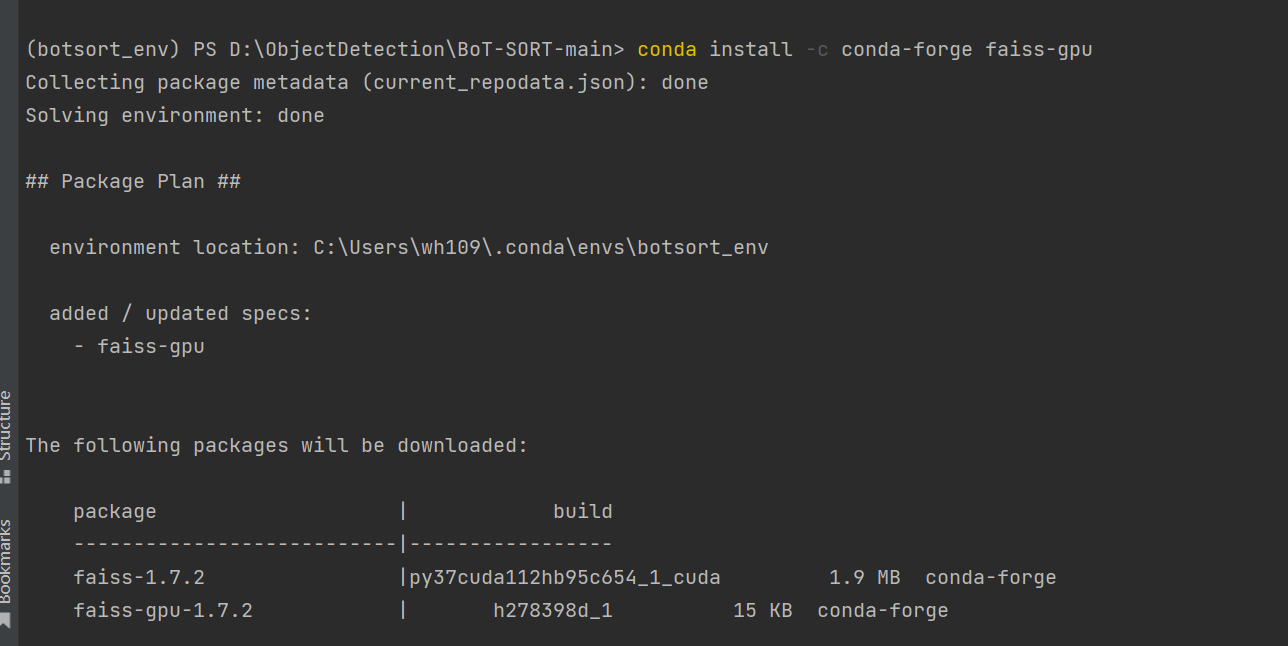
4、安装其他的包
pip install logurupip install thoppip install tabulatepip install sixpip install yacspip install termcolorpip install tensorboard把上面的安装包正确安装后就可以开始测试了。
训练
生成REID数据集
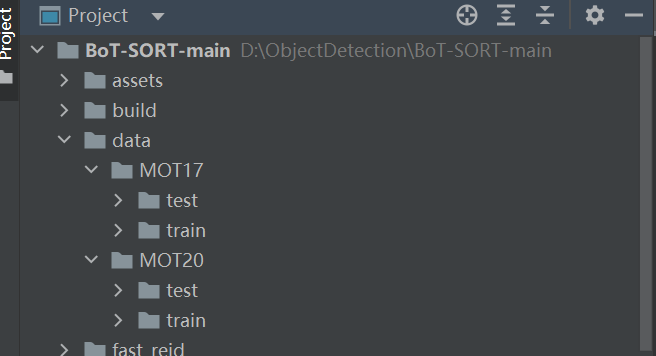
将下载好的数据集解压,放到data目录下,如下图:
执行命令:
# For MOT17 python fast_reid/datasets/generate_mot_patches.py --data_path <dataets_dir> --mot 17# For MOT20python fast_reid/datasets/generate_mot_patches.py --data_path <dataets_dir> --mot 20例如:
# For MOT20python fast_reid/datasets/generate_mot_patches.py --data_path data --mot 17等待完成后,就可以在“fast_reid/datasets”下面找到数据集,如下图:

预训练模型
ByteTrack预训练模型
- Standard models
| Model | MOTA | IDF1 | IDs | FPS |
|---|---|---|---|---|
| bytetrack_x_mot17 [google], [baidu(code:ic0i)] | 90.0 | 83.3 | 422 | 29.6 |
| bytetrack_l_mot17 [google], [baidu(code:1cml)] | 88.7 | 80.7 | 460 | 43.7 |
| bytetrack_m_mot17 [google], [baidu(code:u3m4)] | 87.0 | 80.1 | 477 | 54.1 |
| bytetrack_s_mot17 [google], [baidu(code:qflm)] | 79.2 | 74.3 | 533 | 64.5 |
- Light models
| Model | MOTA | IDF1 | IDs | Params(M) | FLOPs(G) |
|---|---|---|---|---|---|
| bytetrack_nano_mot17 [google], [baidu(code:1ub8)] | 69.0 | 66.3 | 531 | 0.90 | 3.99 |
| bytetrack_tiny_mot17 [google], [baidu(code:cr8i)] | 77.1 | 71.5 | 519 | 5.03 | 24.45 |
REID预训练模型
MOT17-SBS-S50网盘链接:
https://drive.google.com/file/d/1QZFWpoa80rqo7O-HXmlss8J8CnS7IUsN/view?usp=sharing
或者下载我上传到CSDN的模型:
https://download.csdn.net/download/hhhhhhhhhhwwwwwwwwww/86566078
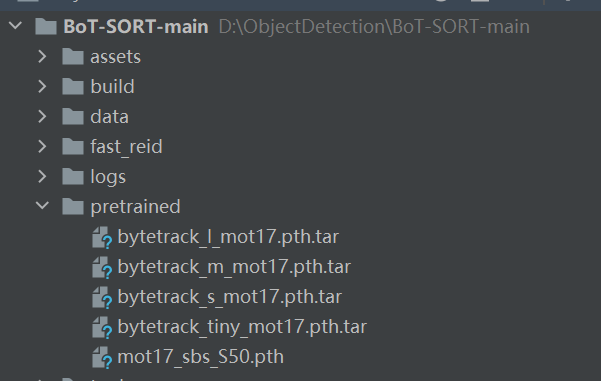
将预训练模型统一放到pretrained文件夹
开始训练
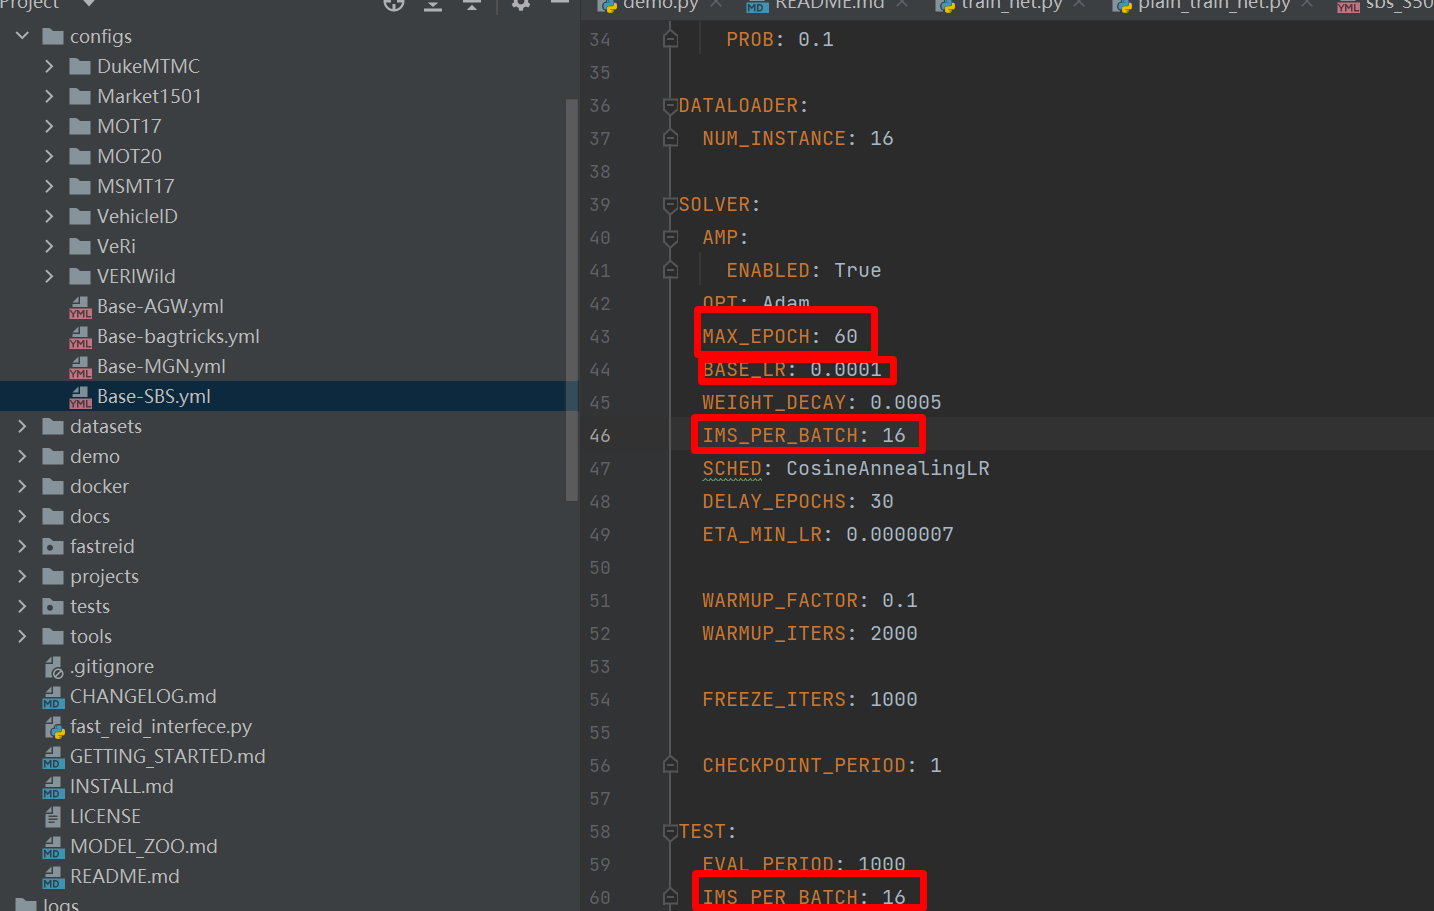
修改配置文件Base-SBS.yml里面的参数,根据自己的显卡大小调整BatchSize和学习率。
然后执行如下命令开始训练。
# For training MOT17 python fast_reid/tools/train_net.py --config-file ./fast_reid/configs/MOT17/sbs_S50.yml MODEL.DEVICE "cuda:0"# For training MOT20python fast_reid/tools/train_net.py --config-file ./fast_reid/configs/MOT20/sbs_S50.yml MODEL.DEVICE "cuda:0"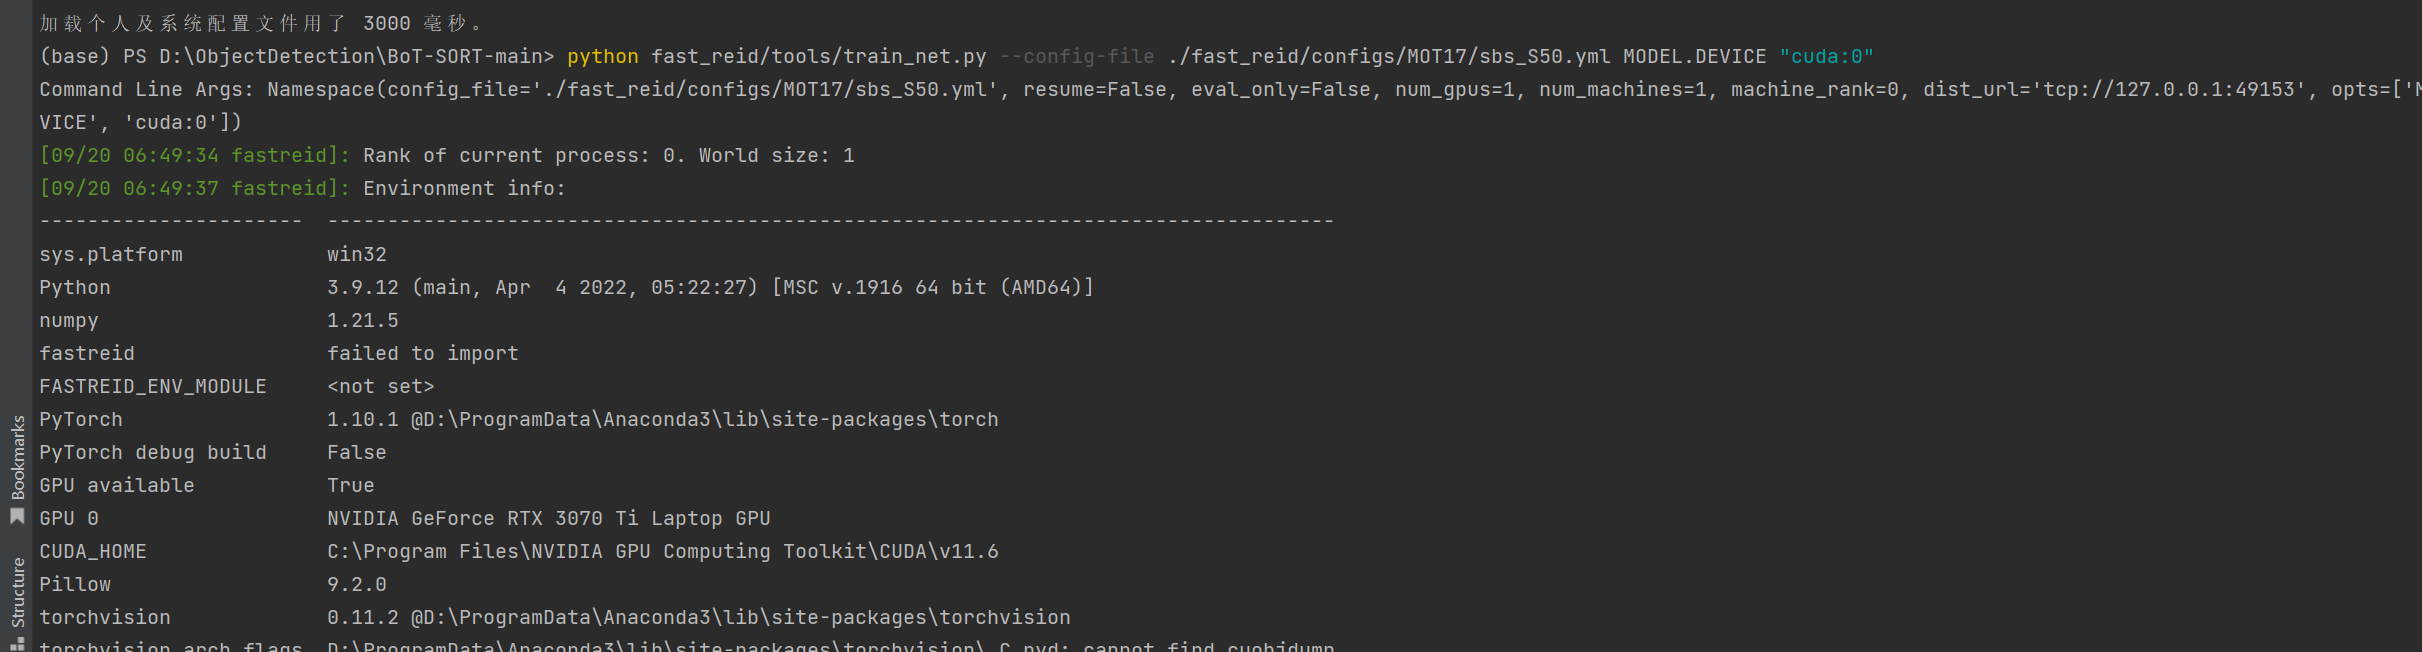
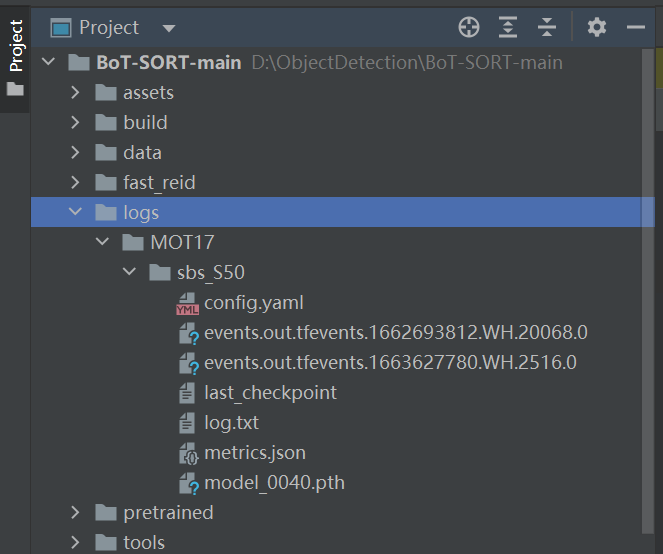
看到如下画面就表示开始训练了。在logs文件夹下面可以看到训练好的模型。
测试
打开tools/track.py文件,修改里面的参数,需要修改的参数。
parser.add_argument("--fast-reid-config", dest="fast_reid_config", default=r"fast_reid/configs/MOT17/sbs_S50.yml", type=str, help="reid config file path")parser.add_argument("--fast-reid-weights", dest="fast_reid_weights", default=r"pretrained/mot17_sbs_S50.pth", type=str, help="reid config file path")将这两个参数按照本地的实际参数修改。
跟踪模型默认是byteTrack的bytetrack_x_mot17.pth.tar文件,我们可以根据任务调整。
- Test on MOT17
cd <BoT-SORT_dir>python tools/track.py <dataets_dir/MOT17> --default-parameters --with-reid --benchmark "MOT17" --eval "test" --fp16 --fusepython tools/interpolation.py --txt_path <path_to_track_result>- Test on MOT20
cd <BoT-SORT_dir>python tools/track.py <dataets_dir/MOT20> --default-parameters --with-reid --benchmark "MOT20" --eval "test" --fp16 --fusepython tools/interpolation.py --txt_path <path_to_track_result>例如:
python tools/track.py data/MOT17 --default-parameters --with-reid --benchmark "MOT17" --eval "test" --fp16 --fuse等待测试完成。
测试视频
python tools/demo.py video --path <path_to_video> -f yolox/exps/example/mot/yolox_x_mix_det.py -c pretrained/bytetrack_x_mot17.pth.tar --with-reid --fuse-score --fp16 --fuse --save_result例如:
python tools/demo.py video --path 1.mp4 -f yolox/exps/example/mot/yolox_x_mix_det.py -c pretrained/bytetrack_x_mot17.pth.tar --with-reid --fuse-score --fp16 --fuse --save_result测试摄像头
python3 tools/demo.py webcam -f yolox/exps/example/mot/yolox_x_mix_det.py -c pretrained/bytetrack_x_mot17.pth.tar --with-reid --fuse-score --fp16 --fuse --save_result