MyBatis-Plus学习
本篇博客目录:
-
- 一.快速入门
-
-
- 1.学习链接
- 2.什么是MyBatis-Plus
- 3.可支持的数据库
- 4.快速开始
- 5.配置日志
-
- 二.核心功能
-
- (一) CRUD 接口
-
- 1. Mapper CRUD 接口
-
- (2) Insert
- (3) Delete
- (4) Update
- (5) Select
- (6) exists
- 2. Service CRUD 接口
-
- (1) Save
- (2) SaveOrUpdate
- (3) Remove
- (4) Update
- (5) Get
- (6) List
- (7) Page
- (8) Count
- (9) Chain
- 3.实例练习
-
- (1) 使用Mapper CRUD 接口方式实例
- (2) 使用Service CRUD 接口方式实例
- 3.相关实例查看
- (二) 条件构造器
- (三) 主键策略
- (四) 代码生成器
- 三.扩展
-
-
- 1.逻辑删除
- 2.自动填充
-
- 四.插件
-
-
- 1.乐观锁插件
- 2.性能分析插件
-
一.快速入门
1.学习链接
官方文档地址:https://baomidou.com/pages/24112f/#%E7%89%B9%E6%80%A7

视频学习地址:【狂神说Java】MyBatisPlus最新完整教程通俗易懂
人人编程网MyBatis-Plus学习教程地址:https://www.hxstrive.com/subject/mybatis_plus.htm?id=263
2.什么是MyBatis-Plus
MyBatis-Plus (opens new window)(简称 MP)是一个 MyBatis (opens new window) 的增强工具,在 MyBatis 的基础上只做增强不做改变,为简化开发、提高效率而生。

3.可支持的数据库
- 任何能使用 MyBatis 进行 CRUD, 并且支持标准 SQL 的数据库
- MySQL,Oracle,DB2,H2,HSQL,SQLite,PostgreSQL,SQLServer,Phoenix,Gauss ,ClickHouse,Sybase,OceanBase,Firebird,Cubrid,Goldilocks,csiidb
- 达梦数据库,虚谷数据库,人大金仓数据库,南大通用(华库)数据库,南大通用数据库,神通数据库,瀚高数据库
4.快速开始
官方学习链接:快速开始
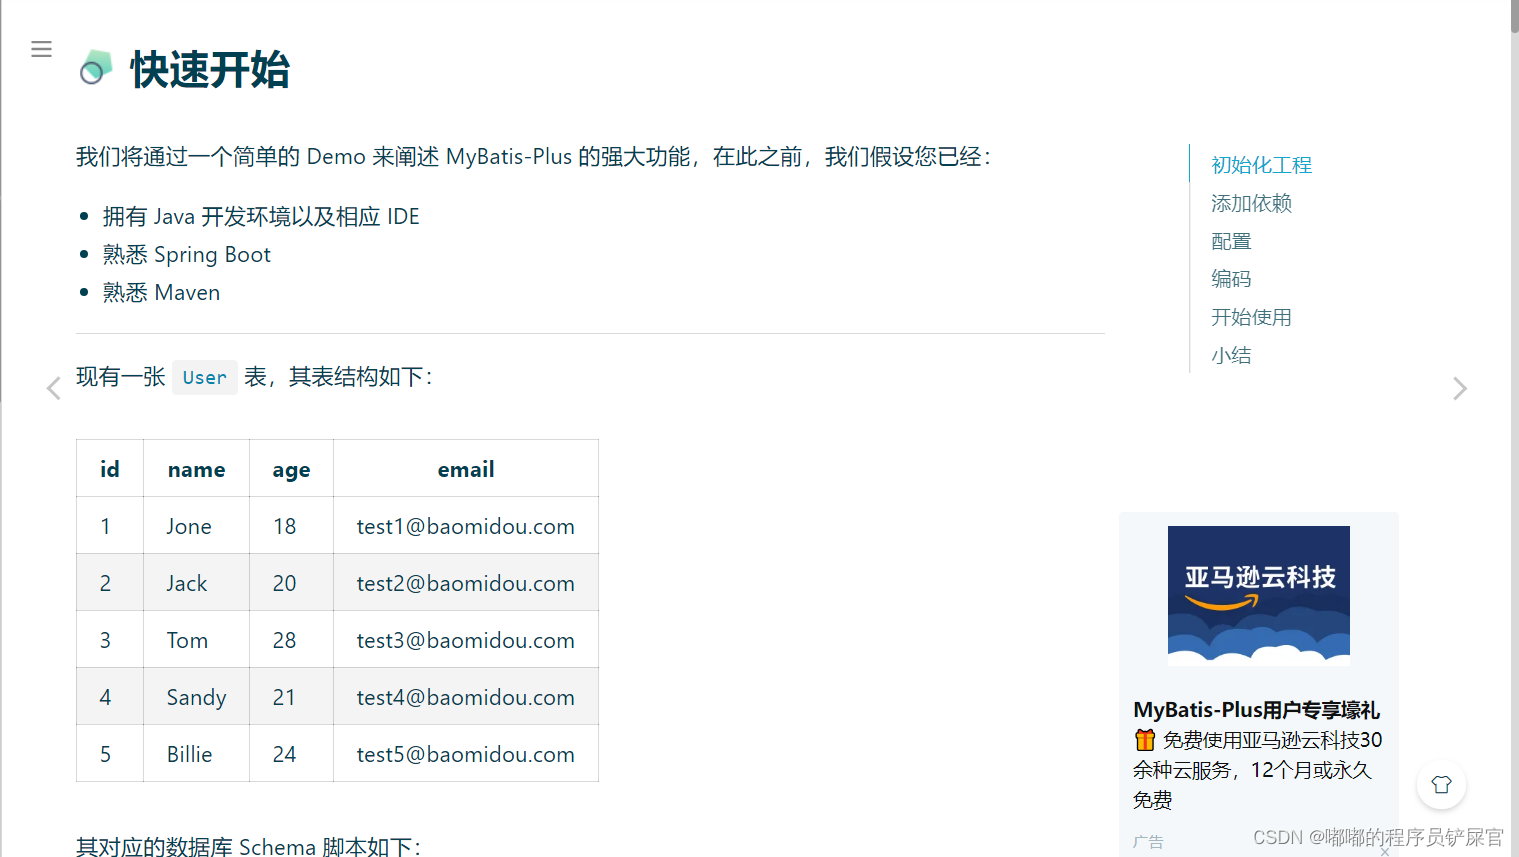
备注:官方采用的数据驱动为 H2
下面通过实例来感受一下MyBatis-Plus和MyBatis的区别:
(我使用的数据驱动为Mysql,导包方式为Maven,项目为SpringBoot项目)
项目结构:

导入依赖:
<dependencies> <dependency> <groupId>org.springframework.boot</groupId> <artifactId>spring-boot-starter-web</artifactId> </dependency> <dependency> <groupId>org.springframework.boot</groupId> <artifactId>spring-boot-starter-test</artifactId> <scope>test</scope> </dependency> <dependency> <groupId>com.baomidou</groupId> <artifactId>mybatis-plus-boot-starter</artifactId> <version>3.5.1</version> </dependency> <dependency> <groupId>mysql</groupId> <artifactId>mysql-connector-java</artifactId> </dependency> <dependency> <groupId>org.projectlombok</groupId> <artifactId>lombok</artifactId> </dependency> </dependencies>初始化数据源(application.yam中):
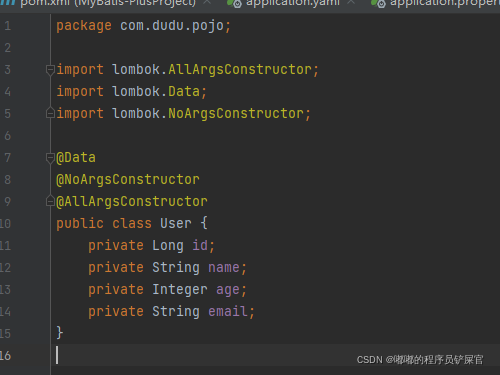
spring: datasource: username: root password: root url: jdbc:mysql://localhost:3306/mybatisplusdb?serverTimezone=UTC&useUnicode=true&characterEncoding=utf-8 driver-class-name: com.mysql.cj.jdbc.Driverpojo下的User类:
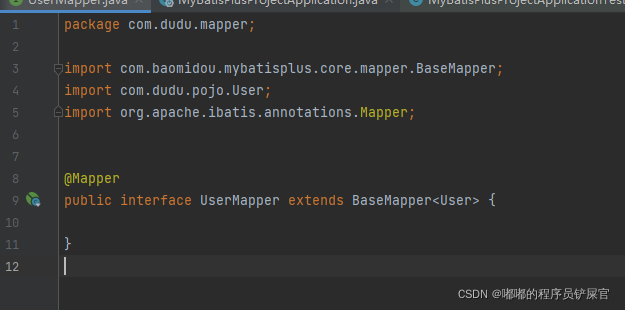
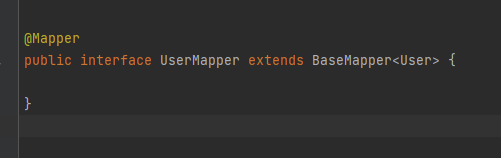
mapper下创建UserMapper接口,该接口继承BaseMapper接口(这里的T表示实体类名)
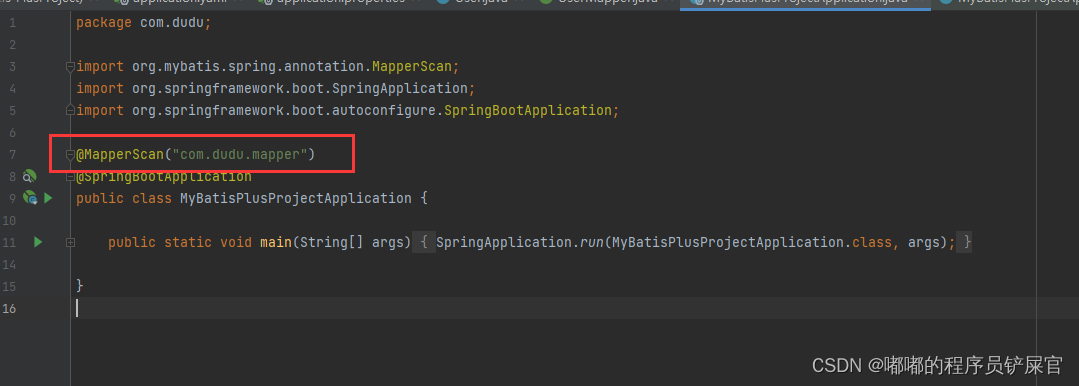
在启动类上加上@MapperScan扫描mapper文件:
测试类:
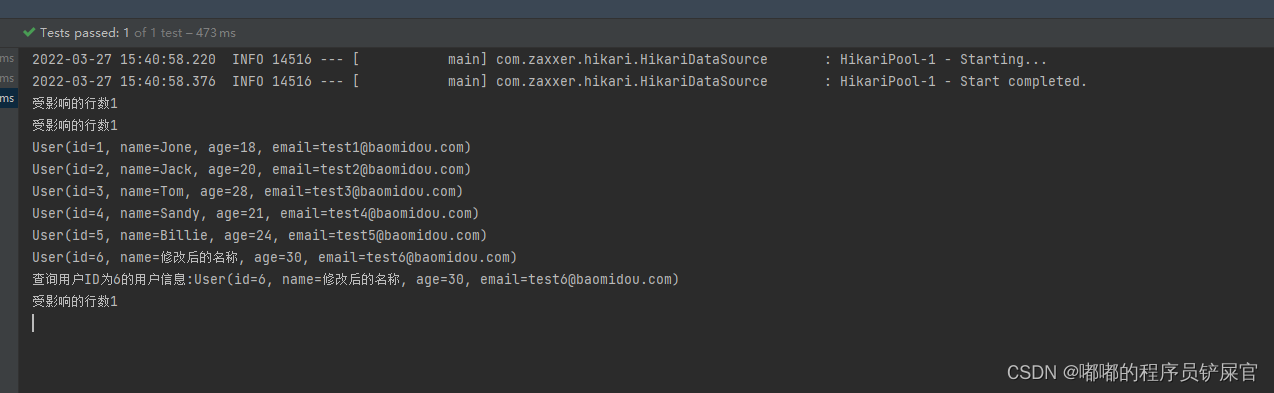
@SpringBootTestclass MyBatisPlusProjectApplicationTests { @Autowired private UserMapper userMapper; @Test void contextLoads() { // 【增】int adResult= userMapper.insert(new User( 6L,"test",30,"test6@baomidou.com"));System.out.println("受影响的行数"+adResult); // 【改】 User updateUser = new User(); updateUser.setId(6L); updateUser.setName("修改后的名称"); int updateResult = userMapper.updateById(updateUser); System.out.println("受影响的行数"+updateResult); // 【查】 // 查询所有用户信息 List<User> users = userMapper.selectList(null); users.forEach(System.out::println); // 通过Id获取用户信息 User currUser = userMapper.selectById(6L); System.out.println("查询用户ID为6的用户信息:"+currUser); // 【删】 int delResult= userMapper.deleteById(6L); System.out.println("受影响的行数"+delResult); }}运行效果:
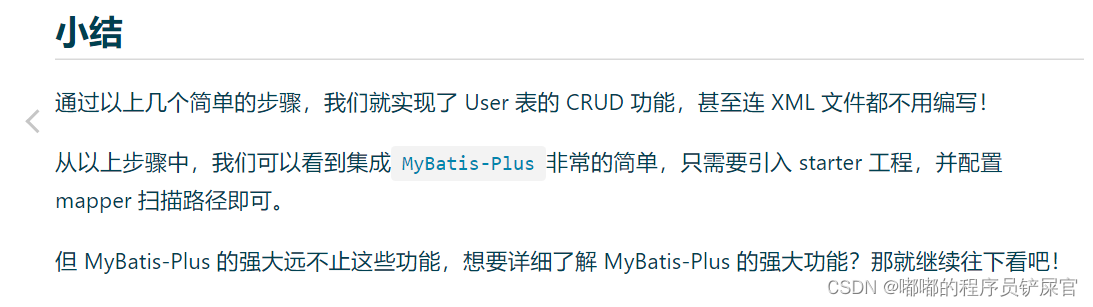
官方小结:
5.配置日志
我们所有的sql现在是不可见的,我们希望知道它是怎么执行的,所以我们必须要看日志!
- 配置日志(application.properties中)
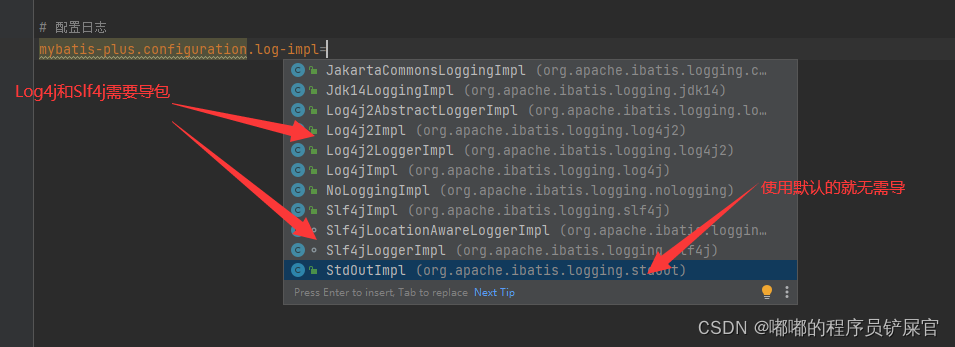
# 配置日志mybatis-plus.configuration.log-impl=org.apache.ibatis.logging.stdout.StdOutImpl再次运行测试类:

二.核心功能
(一) CRUD 接口
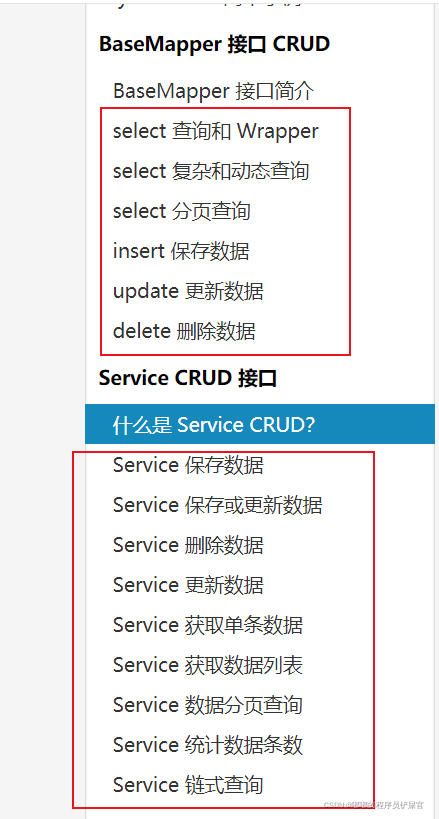
CRUD 接口分为以下二种:
- Mapper CRUD 接口
- Service CRUD 接口
1. Mapper CRUD 接口
Mapper CRUD 接口
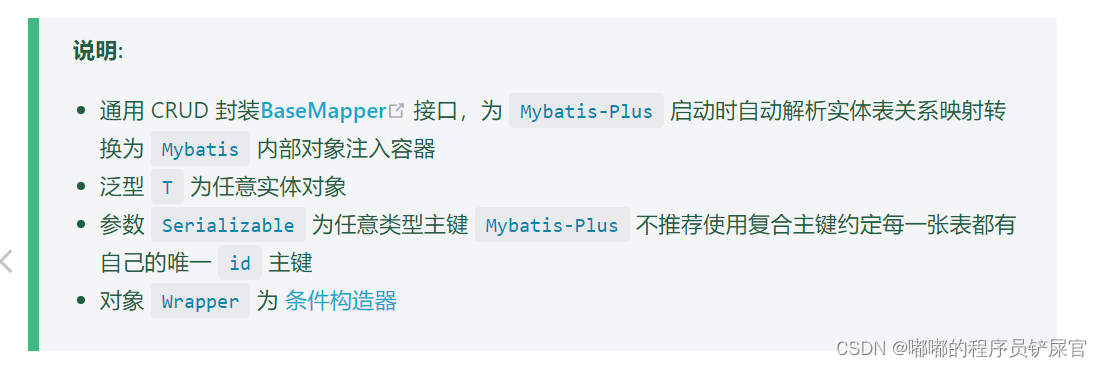
MyBatis Plus 提供了通用的 Mapper 接口(即 BaseMapper 接口),该接口对应我们的DAO层。在该接口中,定义了我们常见的方法签名,这样就可以方便我们对表进行操作。例如:查询(select)、插入(insert)、更新(update)存在(exists)和删除(delete)操作。
在前面的项目中,我们编写了一个UserMapper接口,该接口继承 BaseMapper 接口,我们就可以实现对数据库进行CRUD操作。
这是因为 BaseMapper 接口包含了许多CRUD的操作,并且该接口继承 Mapper 接口后,就不用再编写mapper.xml文件,获得CRUD功能。
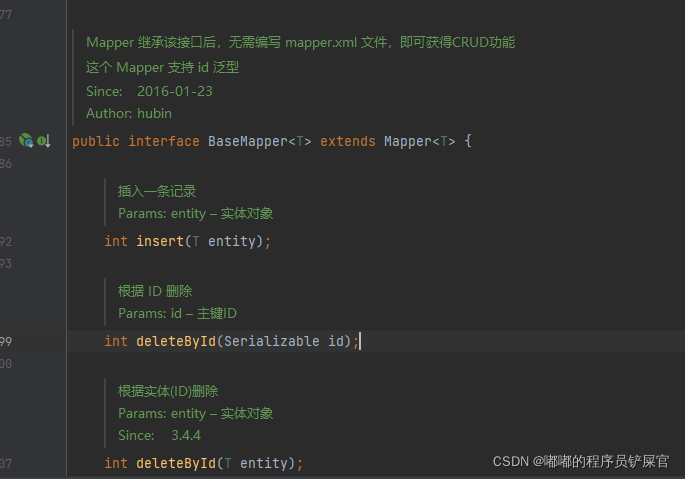
该接口提供了插入、修改、删除和查询方法。如下:
(2) Insert
// 插入一条记录int insert(T entity);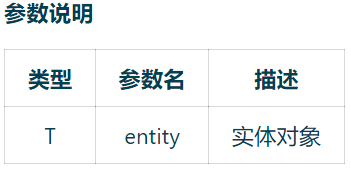
(3) Delete
// 根据 entity 条件,删除记录int delete(@Param(Constants.WRAPPER) Wrapper<T> wrapper);// 删除(根据ID 批量删除)int deleteBatchIds(@Param(Constants.COLLECTION) Collection<? extends Serializable> idList);// 根据 ID 删除int deleteById(Serializable id);// 根据 columnMap 条件,删除记录int deleteByMap(@Param(Constants.COLUMN_MAP) Map<String, Object> columnMap);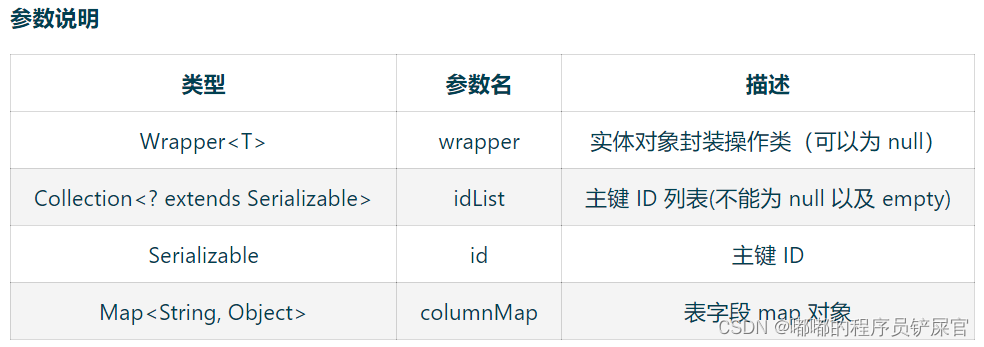
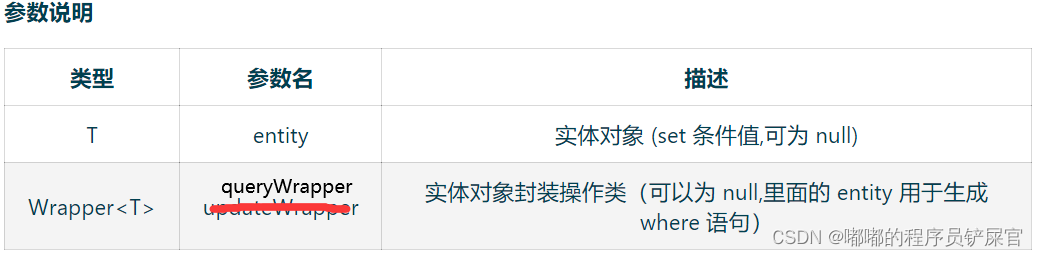
(4) Update
// 根据 whereWrapper 条件,更新记录int update(@Param(Constants.ENTITY) T updateEntity, @Param(Constants.WRAPPER) Wrapper<T> whereWrapper);// 根据 ID 修改int updateById(@Param(Constants.ENTITY) T entity);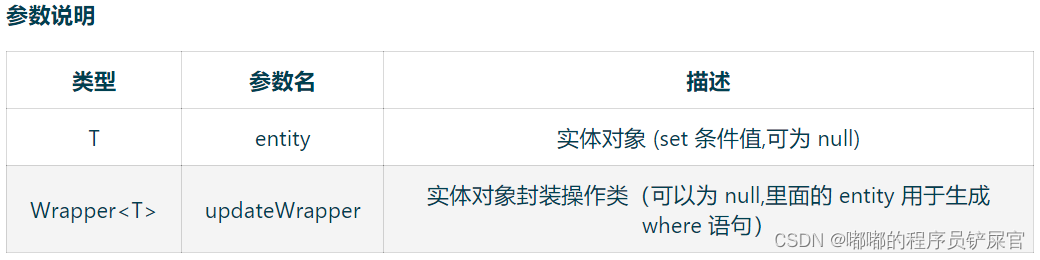
(5) Select
// 根据 ID 查询T selectById(Serializable id);// 根据 entity 条件,查询一条记录T selectOne(@Param(Constants.WRAPPER) Wrapper<T> queryWrapper);// 查询(根据ID 批量查询)List<T> selectBatchIds(@Param(Constants.COLLECTION) Collection<? extends Serializable> idList);// 根据 entity 条件,查询全部记录List<T> selectList(@Param(Constants.WRAPPER) Wrapper<T> queryWrapper);// 查询(根据 columnMap 条件)List<T> selectByMap(@Param(Constants.COLUMN_MAP) Map<String, Object> columnMap);// 根据 Wrapper 条件,查询全部记录List<Map<String, Object>> selectMaps(@Param(Constants.WRAPPER) Wrapper<T> queryWrapper);// 根据 Wrapper 条件,查询全部记录。注意: 只返回第一个字段的值List<Object> selectObjs(@Param(Constants.WRAPPER) Wrapper<T> queryWrapper);// 根据 entity 条件,查询全部记录(并翻页)IPage<T> selectPage(IPage<T> page, @Param(Constants.WRAPPER) Wrapper<T> queryWrapper);// 根据 Wrapper 条件,查询全部记录(并翻页)IPage<Map<String, Object>> selectMapsPage(IPage<T> page, @Param(Constants.WRAPPER) Wrapper<T> queryWrapper);// 根据 Wrapper 条件,查询总记录数Integer selectCount(@Param(Constants.WRAPPER) Wrapper<T> queryWrapper);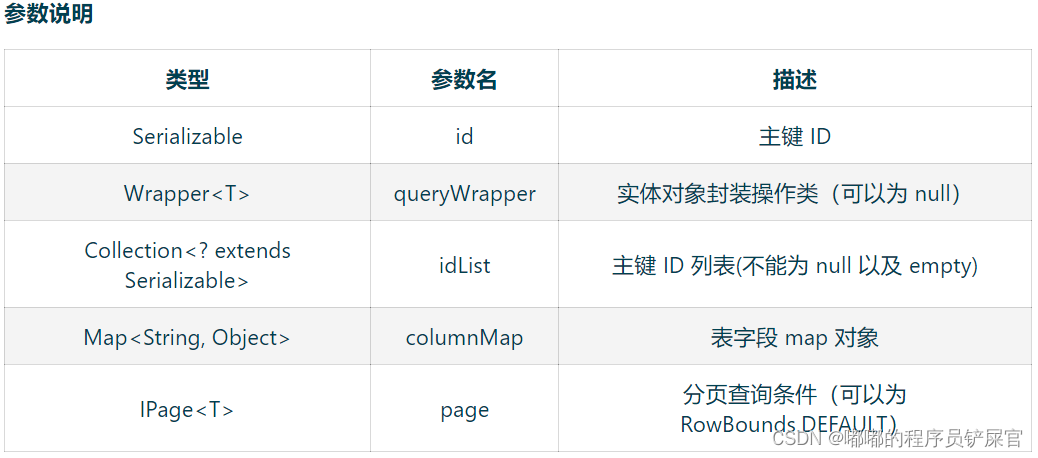
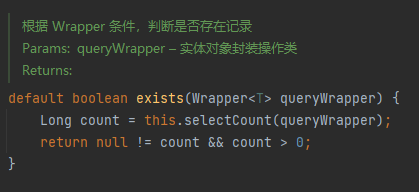
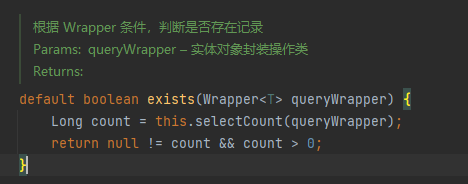
(6) exists
2. Service CRUD 接口
Service CRUD 接口
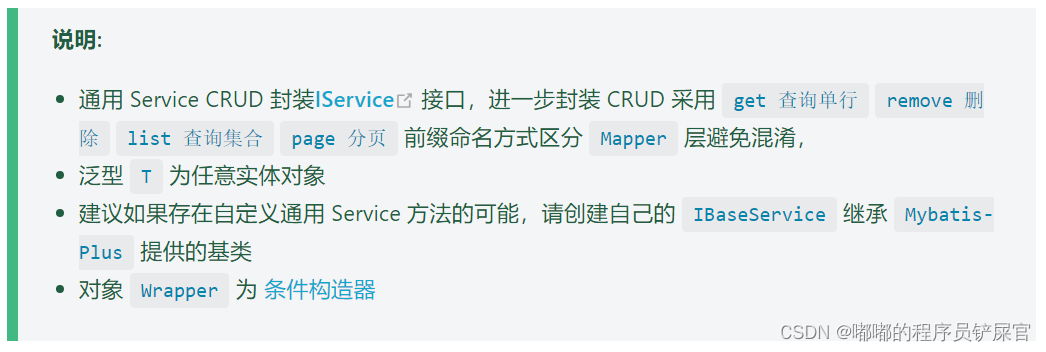
MyBatis Plus 还提供了 IService 接口,该接口对应 Service 层。MyBatis Plus 的通用 Service CRUD 实现了 IService 接口,进一步封装 CRUD。为了避免与 BaseMapper 中定义的方法混淆,该接口使用get(查询单行)、remove(删除)、list(查询集合)和 page(分页)前缀命名的方式进行区别。
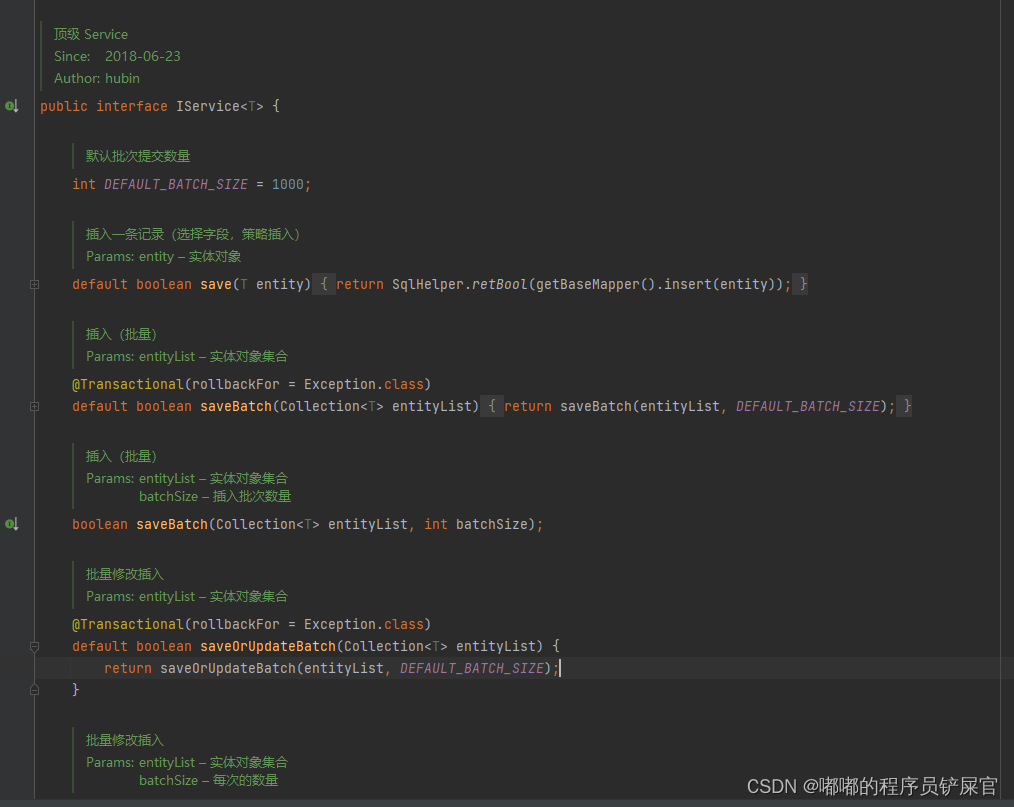
IService 接口:
IService 接口的实现类ServiceImpl (ServiceImpl 内部还是基于 BaseMapper 进行封装的):
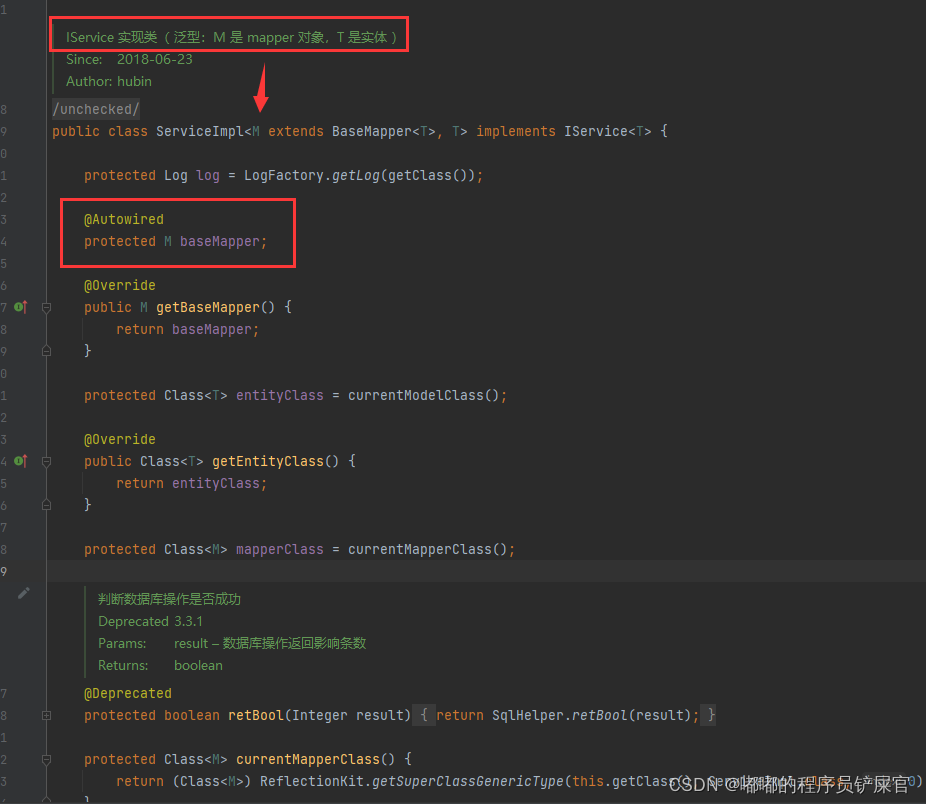
ServiceImpl 提供了如下方法:
(1) Save
// 插入一条记录(选择字段,策略插入)boolean save(T entity);// 插入(批量)boolean saveBatch(Collection<T> entityList);// 插入(批量)boolean saveBatch(Collection<T> entityList, int batchSize);
(2) SaveOrUpdate
// TableId 注解存在更新记录,否插入一条记录boolean saveOrUpdate(T entity);// 根据updateWrapper尝试更新,否继续执行saveOrUpdate(T)方法boolean saveOrUpdate(T entity, Wrapper<T> updateWrapper);// 批量修改插入boolean saveOrUpdateBatch(Collection<T> entityList);// 批量修改插入boolean saveOrUpdateBatch(Collection<T> entityList, int batchSize);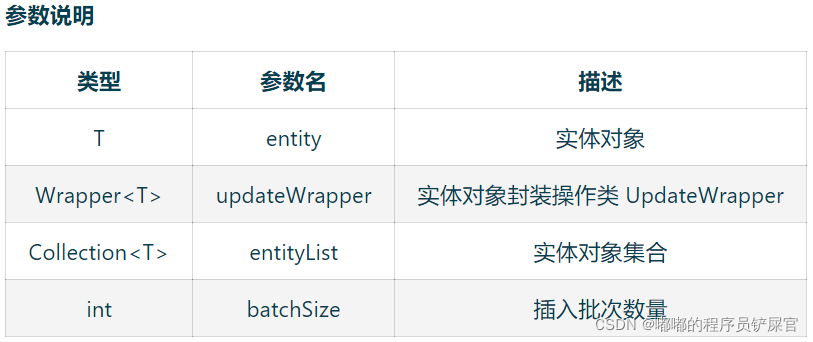
(3) Remove
// 根据 entity 条件,删除记录boolean remove(Wrapper<T> queryWrapper);// 根据 ID 删除boolean removeById(Serializable id);// 根据 columnMap 条件,删除记录boolean removeByMap(Map<String, Object> columnMap);// 删除(根据ID 批量删除)boolean removeByIds(Collection<? extends Serializable> idList);
(4) Update
// 根据 UpdateWrapper 条件,更新记录 需要设置sqlsetboolean update(Wrapper<T> updateWrapper);// 根据 whereWrapper 条件,更新记录boolean update(T updateEntity, Wrapper<T> whereWrapper);// 根据 ID 选择修改boolean updateById(T entity);// 根据ID 批量更新boolean updateBatchById(Collection<T> entityList);// 根据ID 批量更新boolean updateBatchById(Collection<T> entityList, int batchSize);
(5) Get
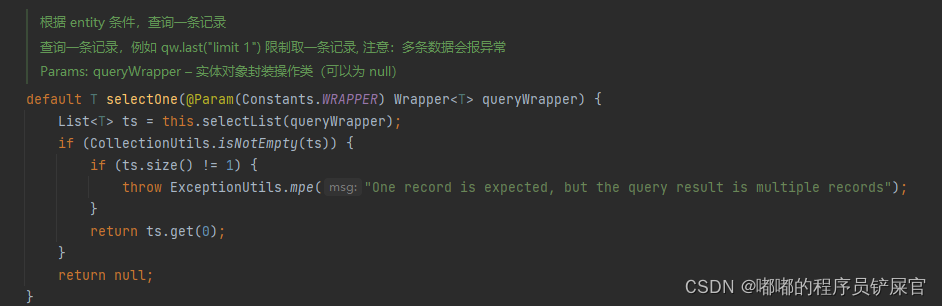
// 根据 ID 查询T getById(Serializable id);// 根据 Wrapper,查询一条记录。结果集,如果是多个会抛出异常,随机取一条加上限制条件 wrapper.last("LIMIT 1")T getOne(Wrapper<T> queryWrapper);// 根据 Wrapper,查询一条记录T getOne(Wrapper<T> queryWrapper, boolean throwEx);// 根据 Wrapper,查询一条记录Map<String, Object> getMap(Wrapper<T> queryWrapper);// 根据 Wrapper,查询一条记录<V> V getObj(Wrapper<T> queryWrapper, Function<? super Object, V> mapper);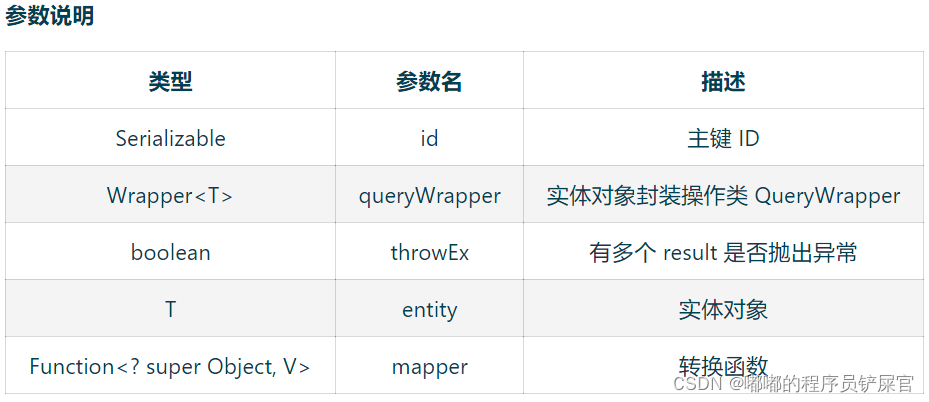
(6) List
// 查询所有List<T> list();// 查询列表List<T> list(Wrapper<T> queryWrapper);// 查询(根据ID 批量查询)Collection<T> listByIds(Collection<? extends Serializable> idList);// 查询(根据 columnMap 条件)Collection<T> listByMap(Map<String, Object> columnMap);// 查询所有列表List<Map<String, Object>> listMaps();// 查询列表List<Map<String, Object>> listMaps(Wrapper<T> queryWrapper);// 查询全部记录List<Object> listObjs();// 查询全部记录<V> List<V> listObjs(Function<? super Object, V> mapper);// 根据 Wrapper 条件,查询全部记录List<Object> listObjs(Wrapper<T> queryWrapper);// 根据 Wrapper 条件,查询全部记录<V> List<V> listObjs(Wrapper<T> queryWrapper, Function<? super Object, V> mapper);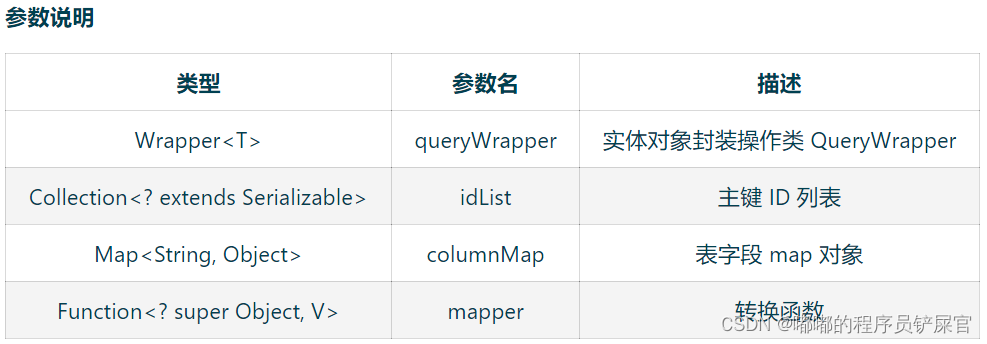
(7) Page
// 无条件分页查询IPage<T> page(IPage<T> page);// 条件分页查询IPage<T> page(IPage<T> page, Wrapper<T> queryWrapper);// 无条件分页查询IPage<Map<String, Object>> pageMaps(IPage<T> page);// 条件分页查询IPage<Map<String, Object>> pageMaps(IPage<T> page, Wrapper<T> queryWrapper);
(8) Count
// 查询总记录数int count();// 根据 Wrapper 条件,查询总记录数int count(Wrapper<T> queryWrapper);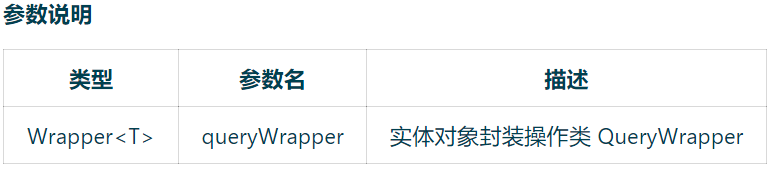
(9) Chain
query:
// 链式查询 普通QueryChainWrapper<T> query();// 链式查询 lambda 式。注意:不支持 KotlinLambdaQueryChainWrapper<T> lambdaQuery();// 示例:query().eq("column", value).one();lambdaQuery().eq(Entity::getId, value).list();update:
// 链式更改 普通UpdateChainWrapper<T> update();// 链式更改 lambda 式。注意:不支持 KotlinLambdaUpdateChainWrapper<T> lambdaUpdate();// 示例:update().eq("column", value).remove();lambdaUpdate().eq(Entity::getId, value).update(entity);3.实例练习
(1) 使用Mapper CRUD 接口方式实例
(本实例没有使用Wrapper参数进行操作)
实例1:基本CRUD操作
在测试类中添加如下代码
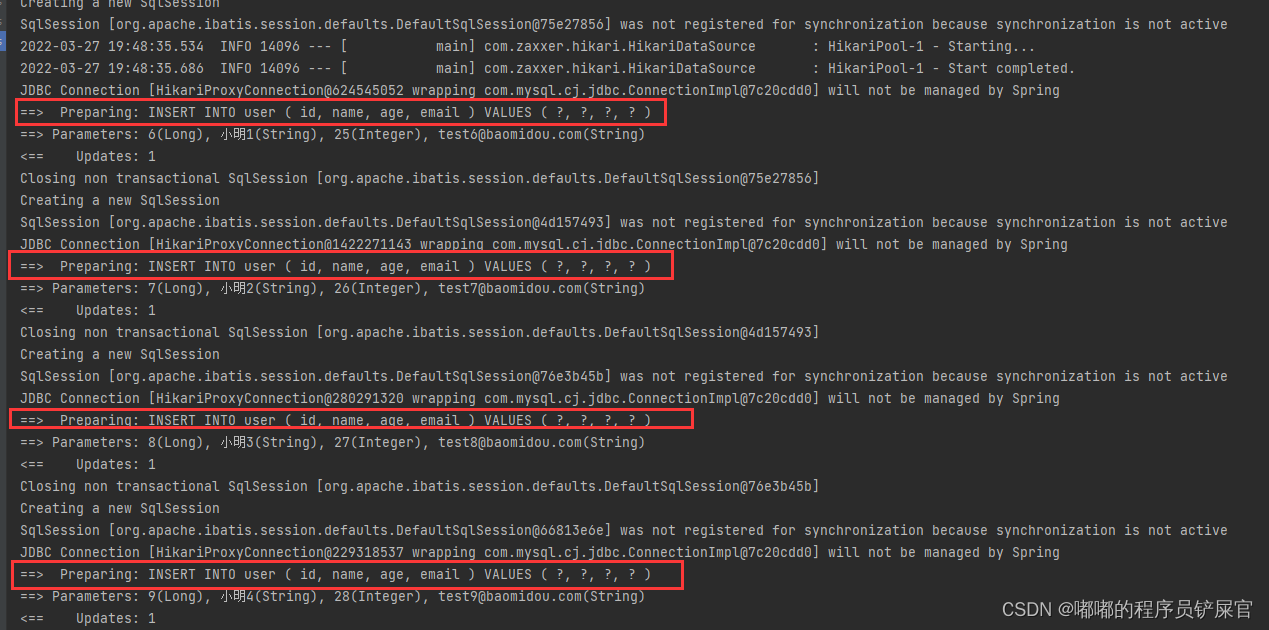
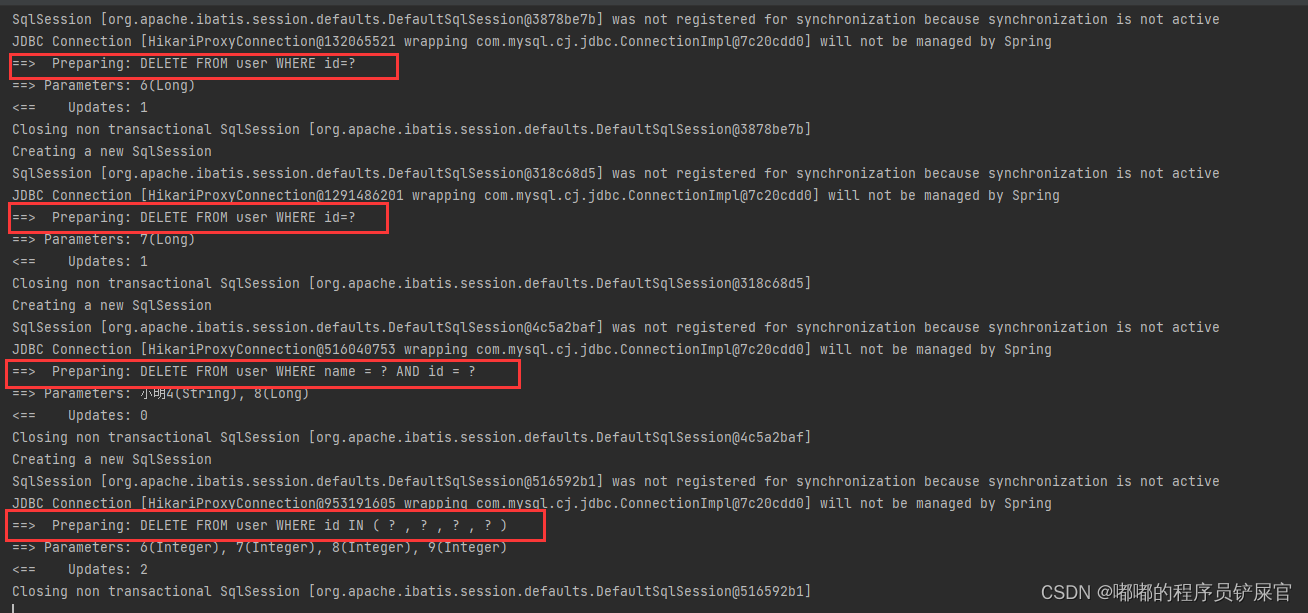
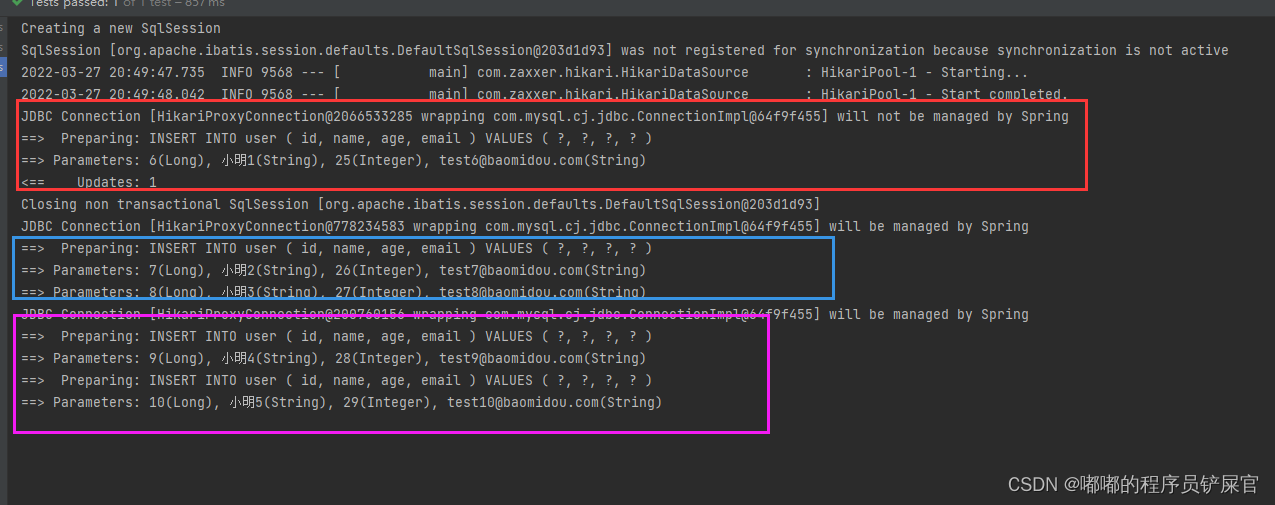
@Test public void method1_Mapper(){ // insert User objUser1 = new User(6L,"小明1",25,"test6@baomidou.com"); User objUser2 = new User(7L,"小明2",26,"test7@baomidou.com"); User objUser3 = new User(8L,"小明3",27,"test8@baomidou.com"); User objUser4 = new User(9L,"小明4",28,"test9@baomidou.com"); userMapper.insert(objUser1); userMapper.insert(objUser2); userMapper.insert(objUser3); userMapper.insert(objUser4); // Update // 根据ID进行修改 User objUser5 = new User(6L,"New_小明",25,"test6@baomidou.com"); userMapper.updateById(objUser5); // Select User user = userMapper.selectById(6L); List<User> users = userMapper.selectBatchIds(Arrays.asList(6,7,8,9)); Map<String,Object> map2 = new HashMap<>(); map2.put("id",6L); map2.put("age",26); map2.put("name","小明3"); map2.put("email","test9@baomidou.com"); userMapper.selectByMap(map2); // Delete userMapper.deleteById(6L); userMapper.deleteById(objUser2); Map<String,Object> map = new HashMap<>(); map.put("id",8L); map.put("name","小明4"); userMapper.deleteByMap(map); // 根据ID主键批量删除用户 Collection<Integer> idList = Arrays.asList(6,7,8,9); userMapper.deleteBatchIds(idList); }运行效果
- INSERT
使用的SQL:INSERT INTO user ( id, name, age, email ) VALUES ( ?, ?, ?, ? )
- Update
使用的SQL: UPDATE user SET name=?, age=?, email=? WHERE id=?

- Select
selectById(6L)方法使用的SQL:SELECT id,name,age,email FROM user WHERE id=?

selectBatchIds(Arrays.asList(6,7,8,9))方法使用的SQL:Preparing: SELECT id,name,age,email FROM user WHERE id IN ( ? , ? , ? , ? )
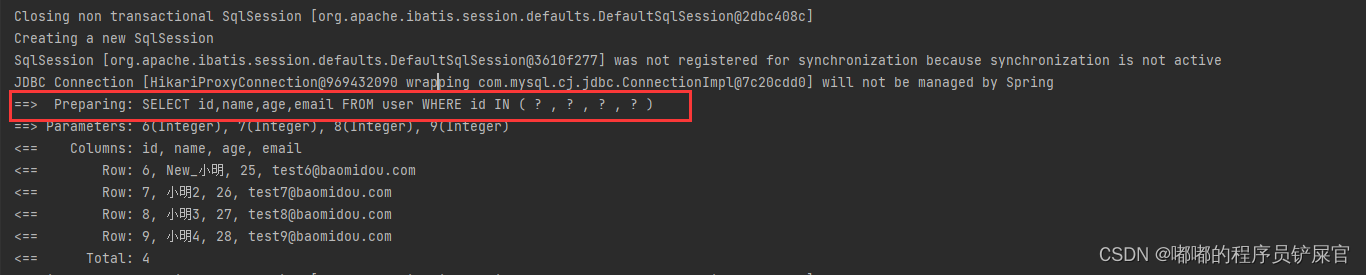
selectByMap(map2)方法使用的SQL语句:SELECT id,name,age,email FROM user WHERE name = ? AND id = ? AND age = ? AND email = ?

- Delete
实例2:分页查询
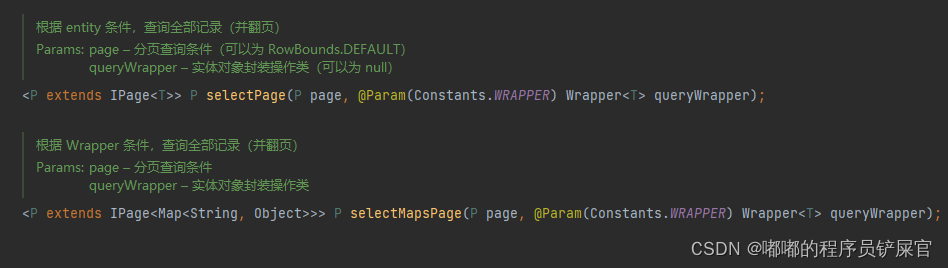
BaseMapper 接口提供了如下2个分页查询接口:
- selectPage:根据 entity 条件,查询全部记录
- selectMapsPage:根据 Wrapper 条件,查询全部记录
在使用上面两个方法进行分页查询时,我们需要配置分页插件。由于我们使用的 Spring Boot 项目,因此需要通过 @Configuration 和 @Bean 注解来添加配置。
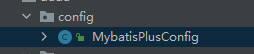
在config文件下创建MybatisPlusConfig配置类:
在MybatisPlusConfig配置类中添加分页配置:
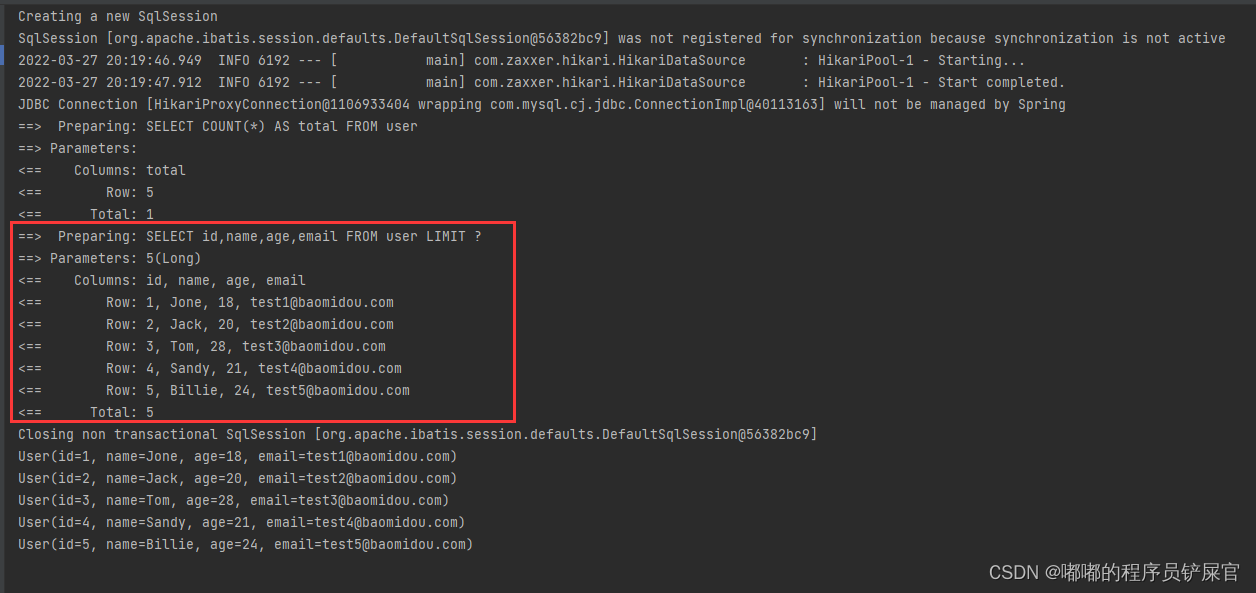
@Configurationpublic class MybatisPlusConfig { /** * 分页插件。如果你不配置,分页插件将不生效 */ @Bean public MybatisPlusInterceptor paginationInterceptor() { MybatisPlusInterceptor interceptor = new MybatisPlusInterceptor(); // 指定数据库方言为 MYSQL interceptor.addInnerInterceptor(new PaginationInnerInterceptor(DbType.MYSQL)); return interceptor; }}在测试类中添加如下代码:
@Test public void method1_Mapper2(){ // selectPage:根据 entity 条件,查询全部记录 Page<User> page = new Page<>(1,5); Page<User> result= userMapper.selectPage(page,null); for (User currUser:result.getRecords()){ System.out.println(currUser); } //selectMapsPage:根据 Wrapper 条件,查询全部记录 }运行效果:
(2) 使用Service CRUD 接口方式实例
(这种方式需要依托于前面的Mapper CRUD 接口,意思就是在前面建立的基础上进行使用,因为Service CRUD 接口需要使用Mapper对象)
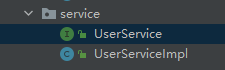
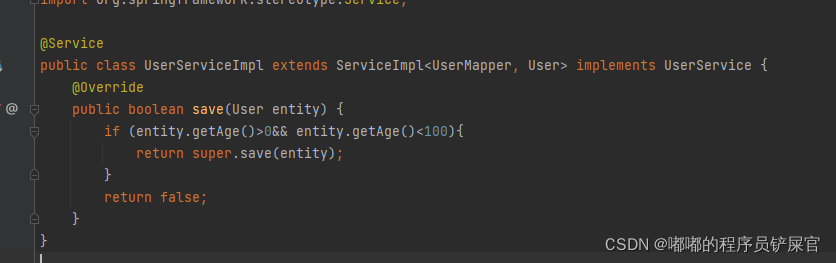
在service下创建UserService的接口,并创建该接口的实现类
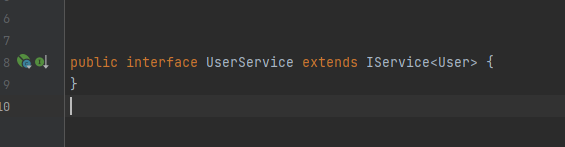
如果service有特别的需求,可以通过在UserServiceImpl类里重写所需的方法,如下重写save方法,判断用户年龄在0~100开区间内的用户进行存储。
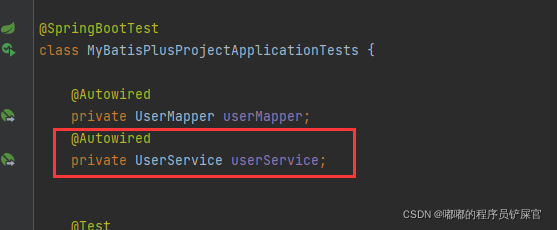
在测试上面声明一个UserService的全局变量
相关操作如下:
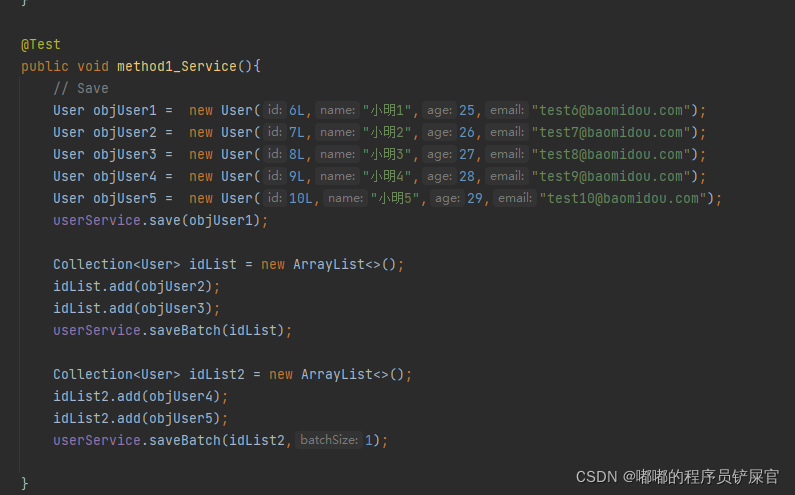
- Save
参数信息如下:
(entity:实体对象 ;entityList:实体对象集合;batchSize:插入批次数量,即每一个批次最大插入的数量)
运行效果:
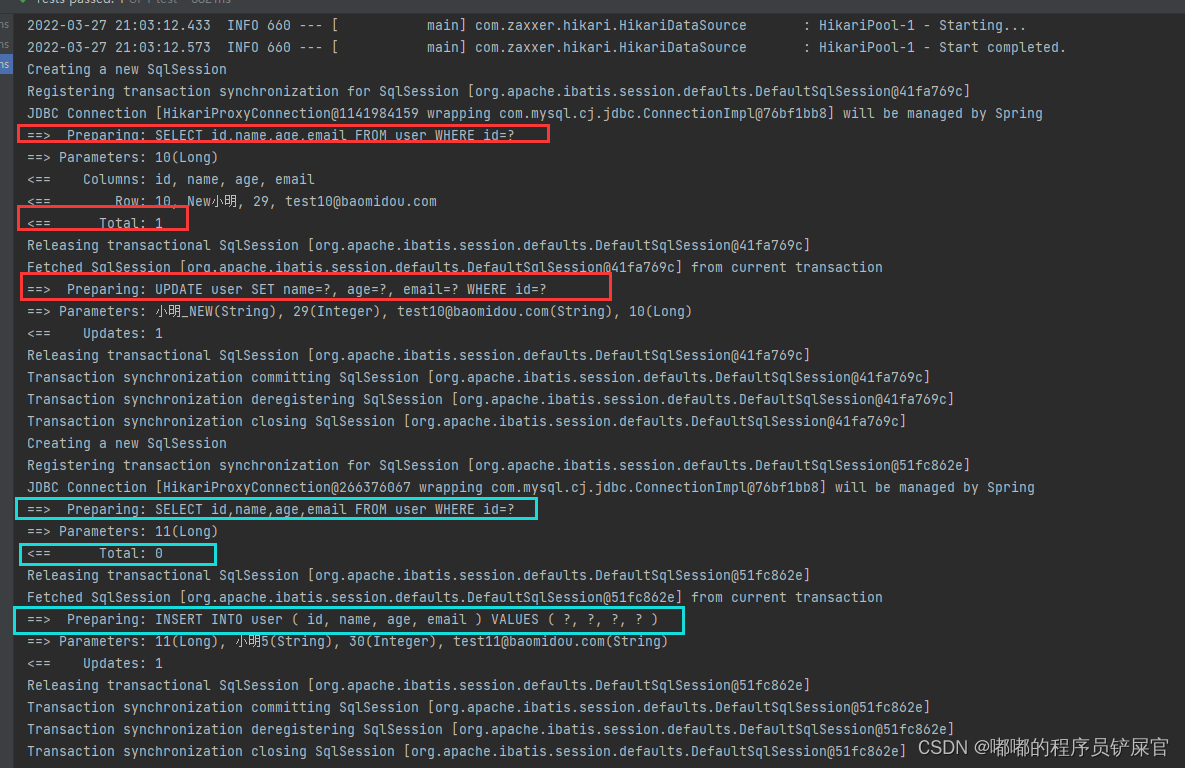
- SaveOrUpdate(如果存在就更新,否插入)
在测试类中添加如下代码:

运行效果(实质上先执行select然后再来判断是执行Update还是Insert):
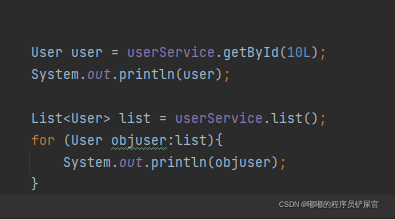
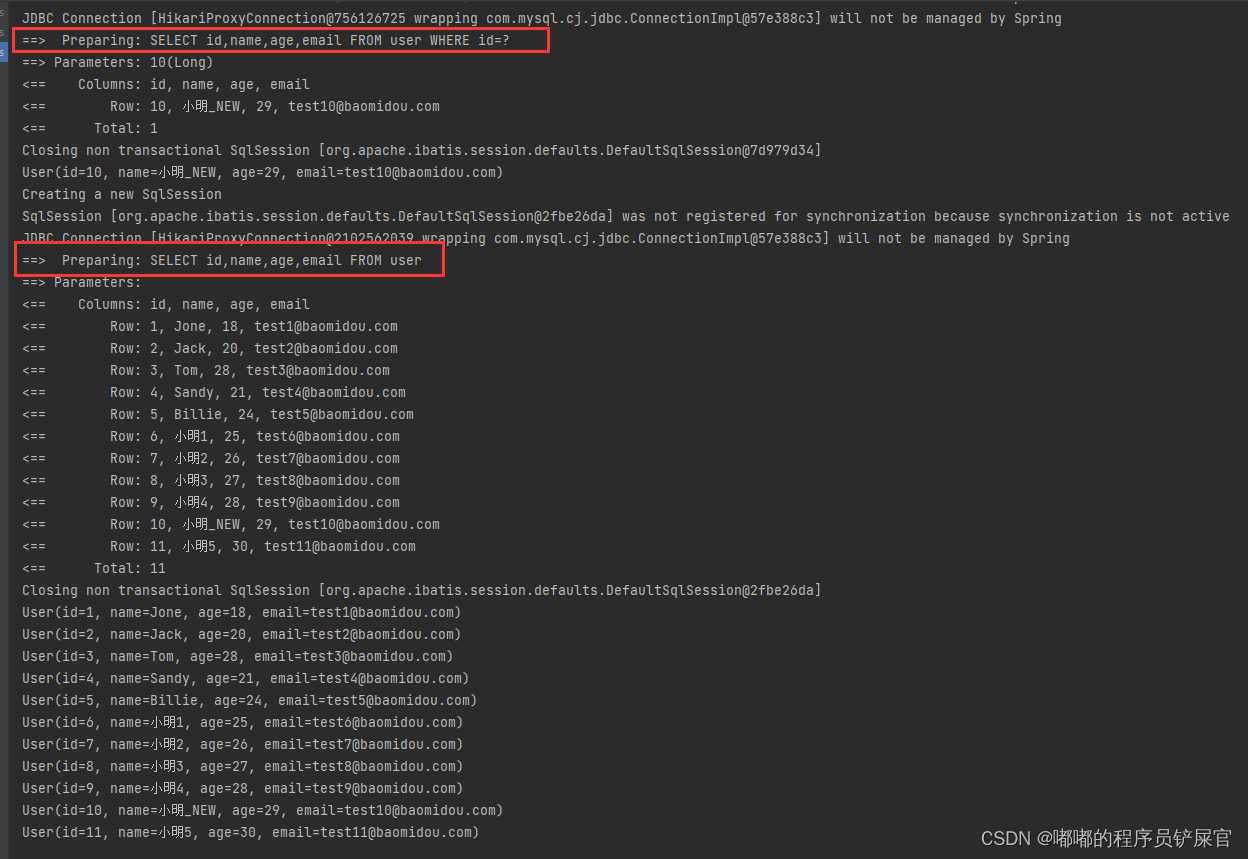
- get和list
在测试类中添加如下代码:
运行效果:
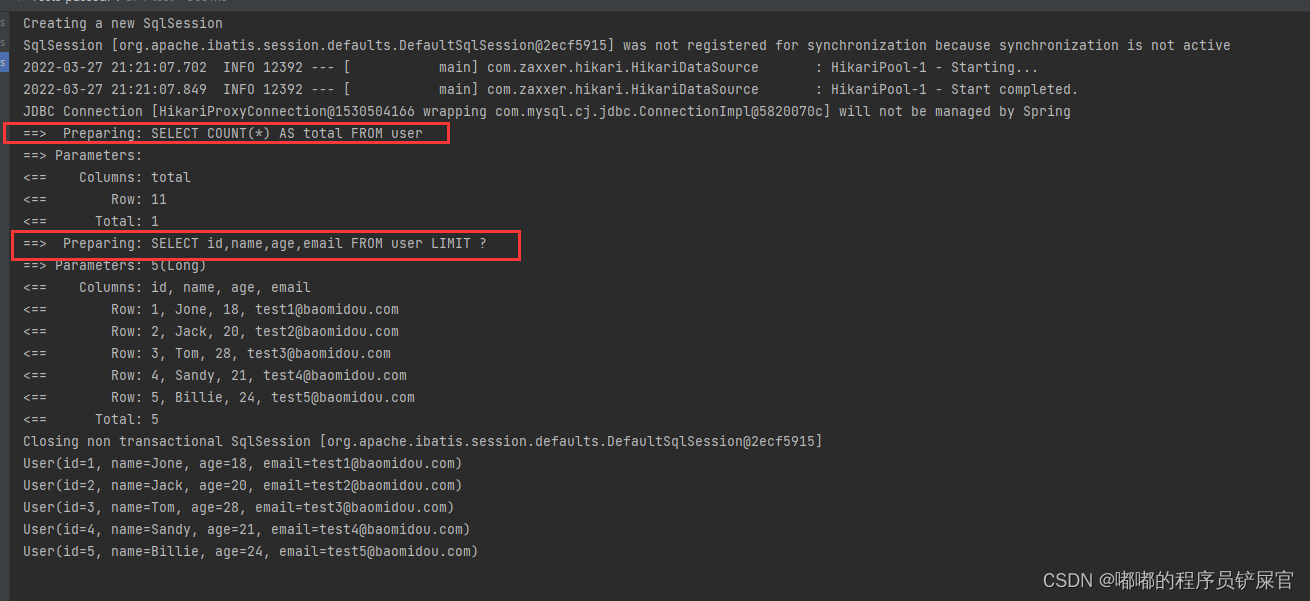
- 分页查询
在测试类中添加如下代码:
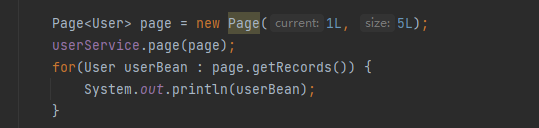
运行效果:
3.相关实例查看
人人编程网MyBatis-Plus教程有具体的实例练习!
(二) 条件构造器
在前面进行CRUD的使用很多方法里面都有一个Wrapper,手册解释为条件构造器!
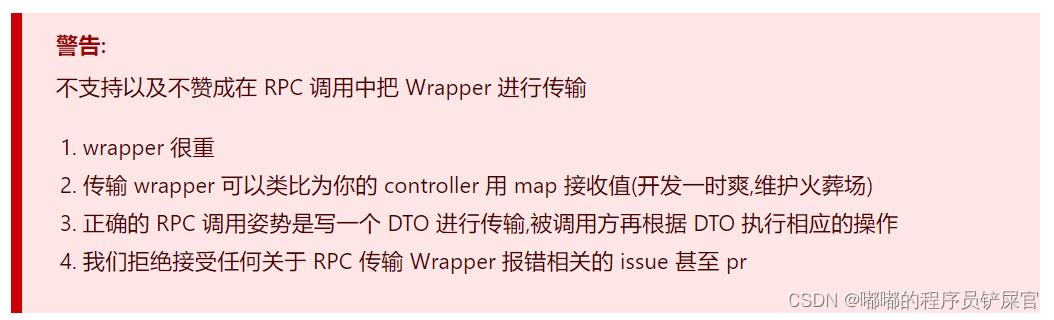
特别是在Service CRUD 接口对于Chain(链式)使用的时候
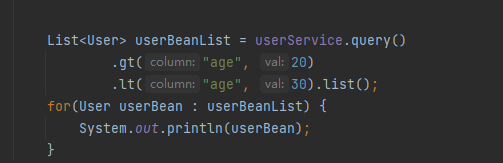
如:
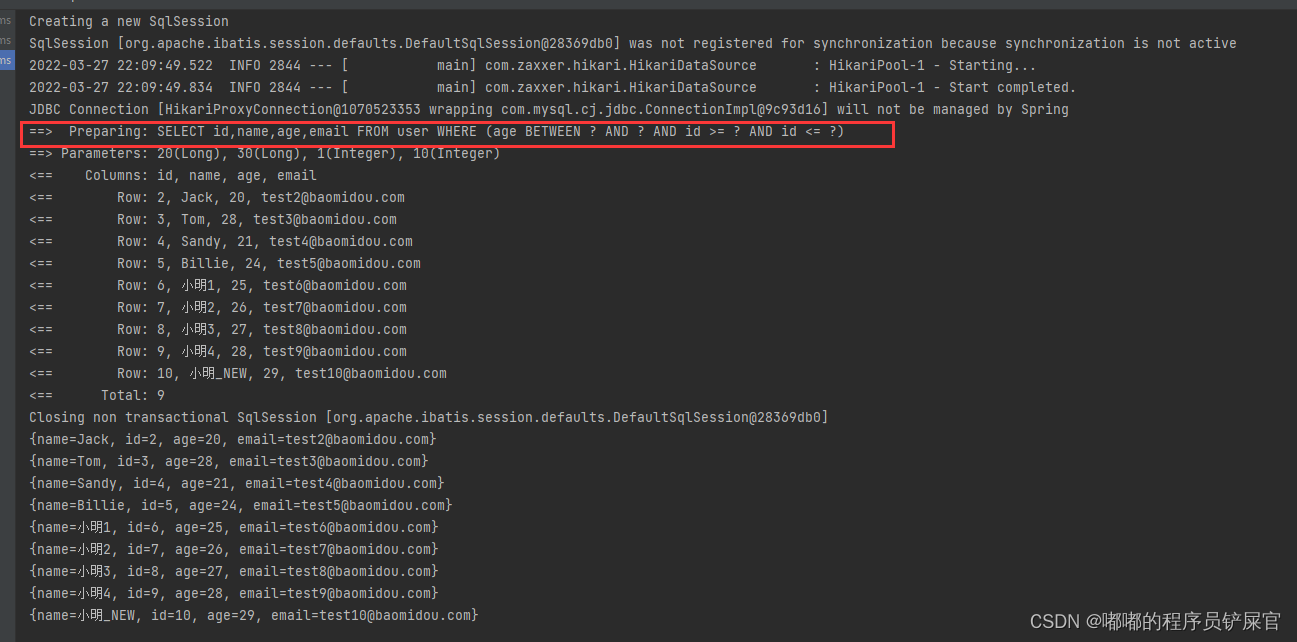
执行如下代码:
运行效果:
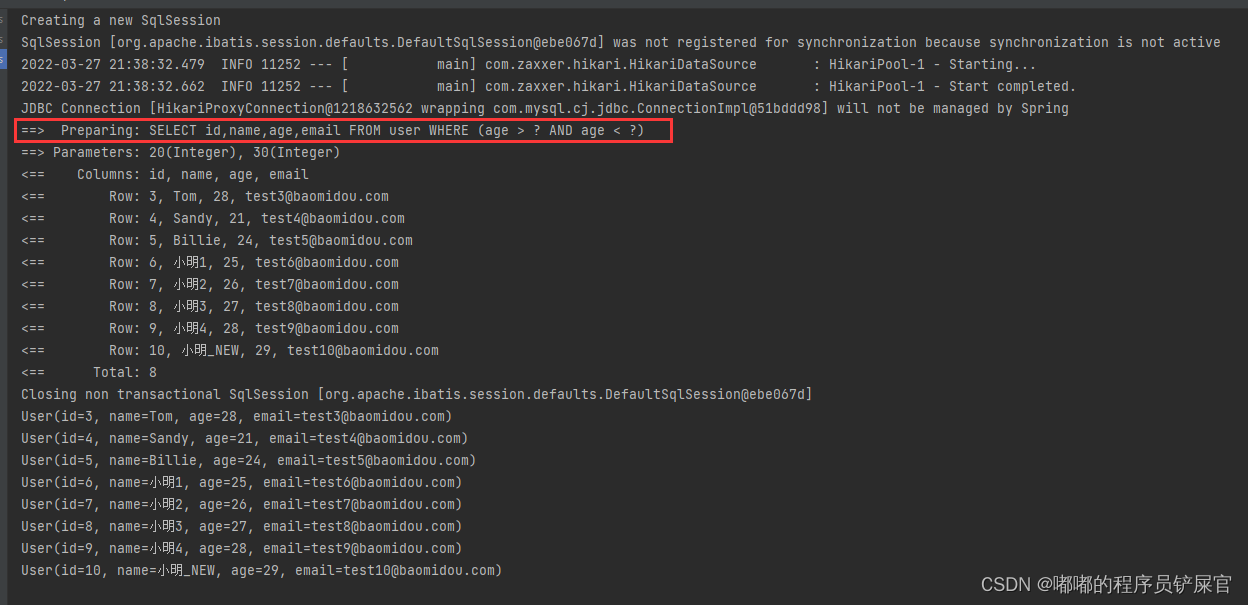
上面的gt表示age大于20,lt表示age小于30,gt和lt就是条件构造器的条件。
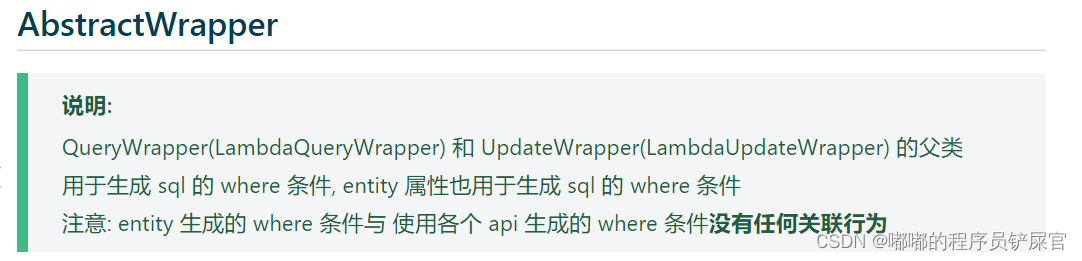
AbstractWrapper类的二个子类:
- QueryWrapper这个构造器用于查询,删除,存在(exists)语句中添加复杂的条件
- UpdateWrapper用于update语句中添加复杂的条件
- 条件构造器可以链式编程
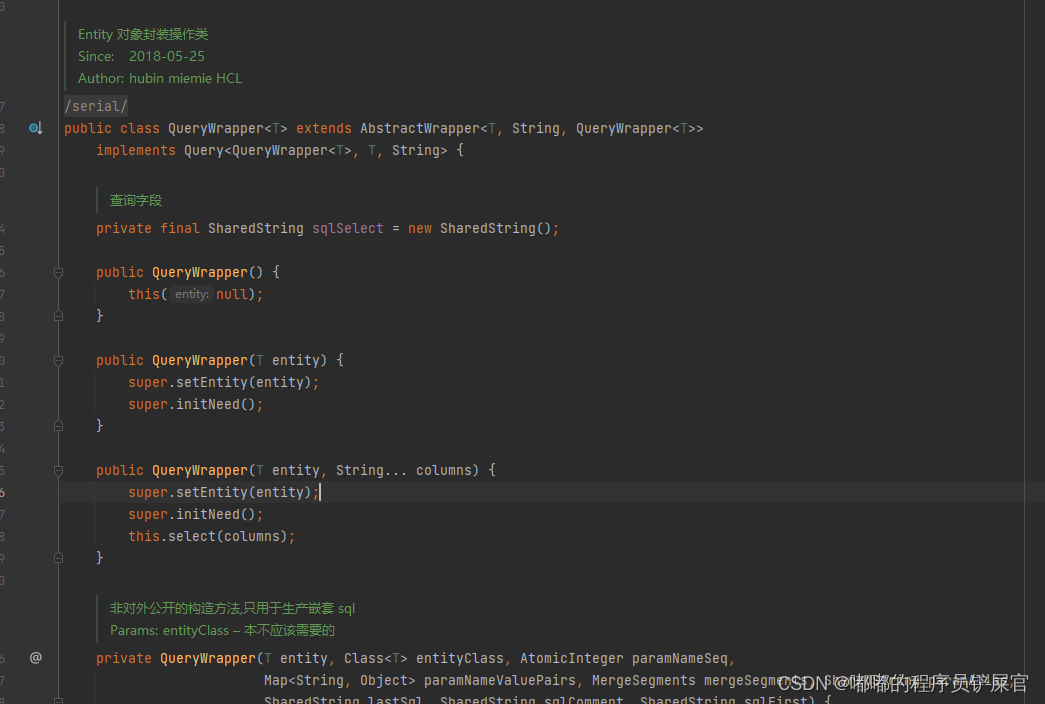
QueryWrapper(用于查询,删除,存在(exists)):

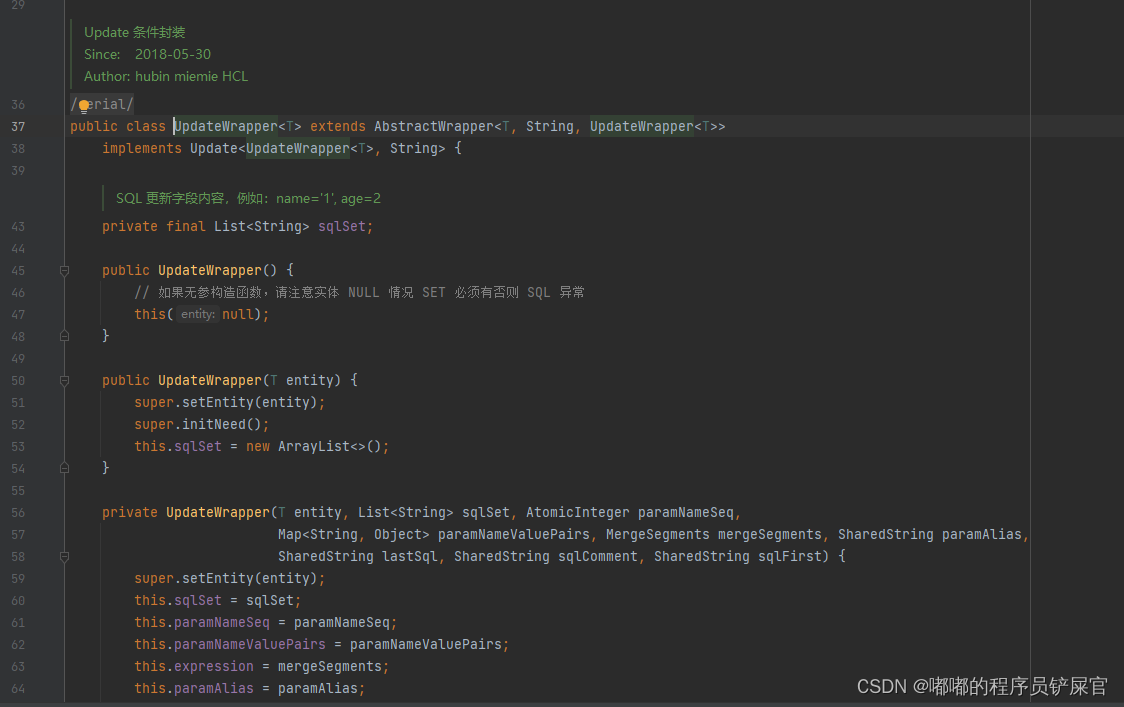
UpdateWrapper(用于更改):

QueryWrapper源码:
UpdateWrapper源码:
实例练习
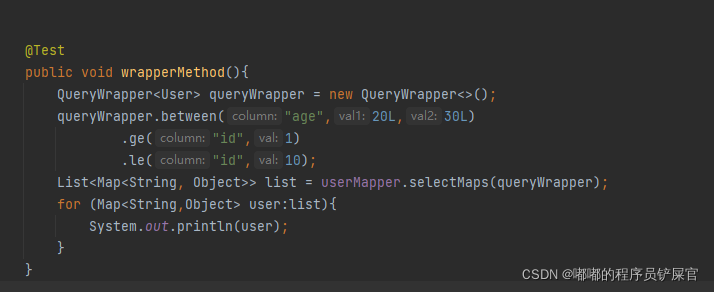
在测试类中添加如下代码:
运行效果:
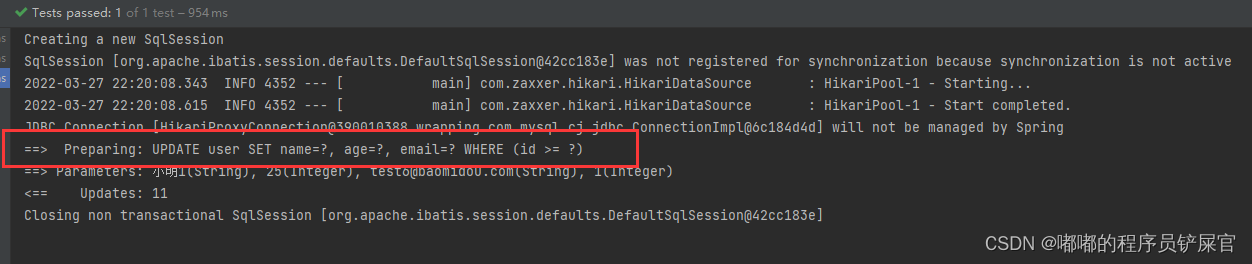
在测试类中添加如下方法:

运行效果:
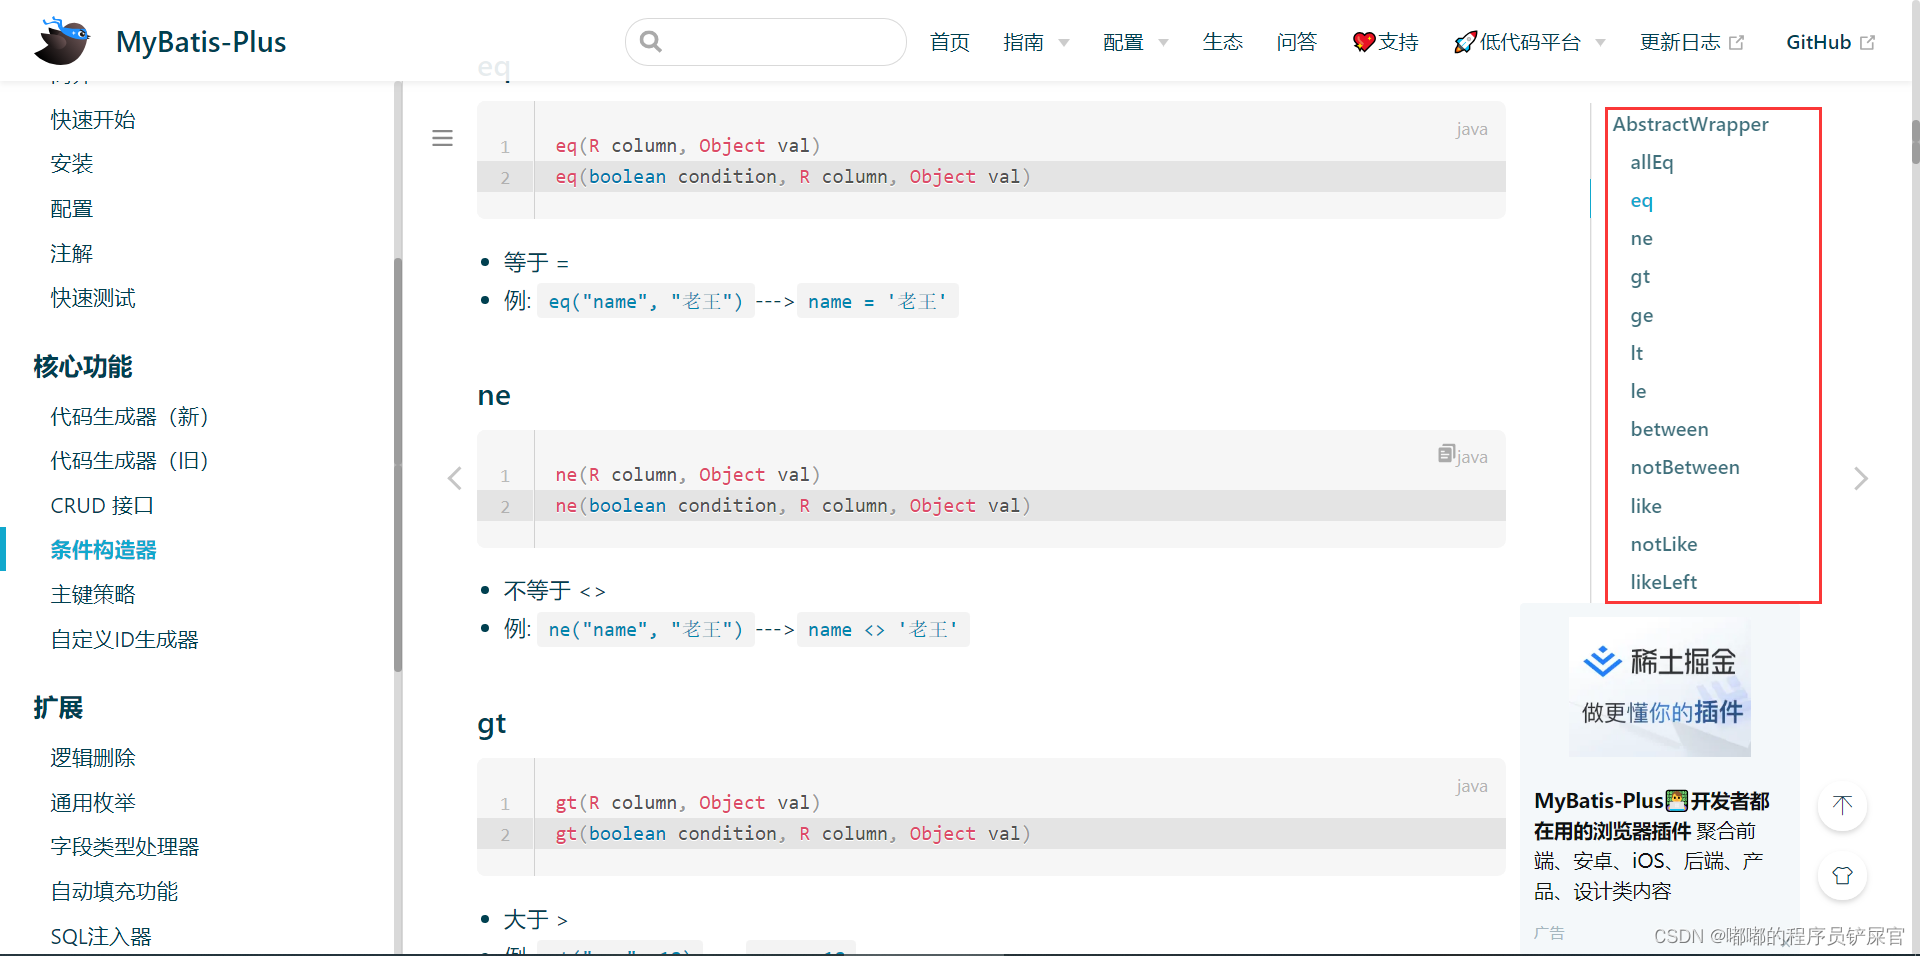
对于各种条件构造器参数的解释官方都给出了十分详细的解释:
链接:https://baomidou.com/pages/10c804/#eq
(三) 主键策略
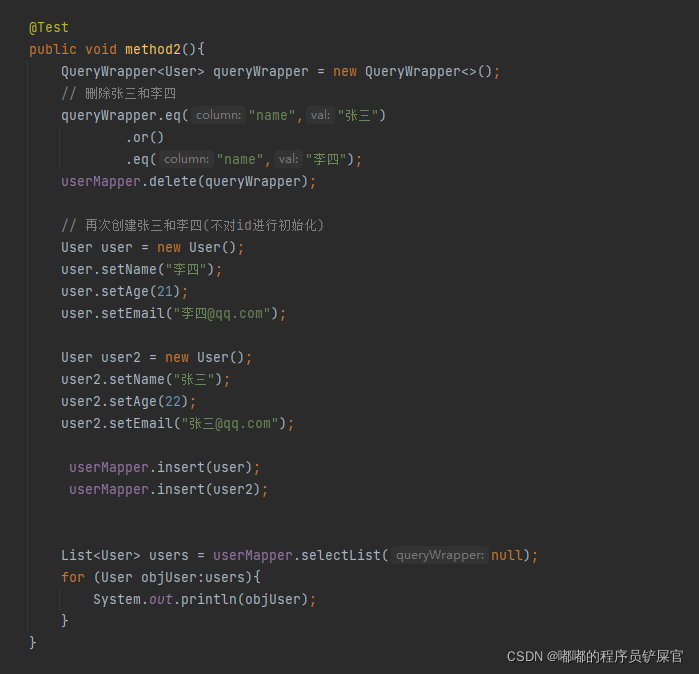
在测试类中编写如下代码:
(注意:这里不给Id设置任何参数,Id为数据库的主键)

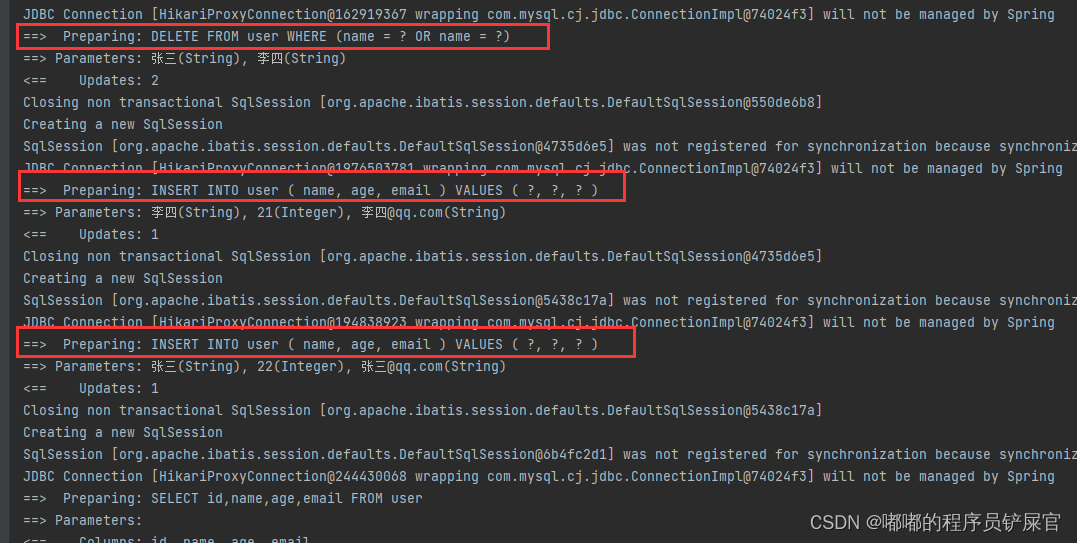
运行效果:
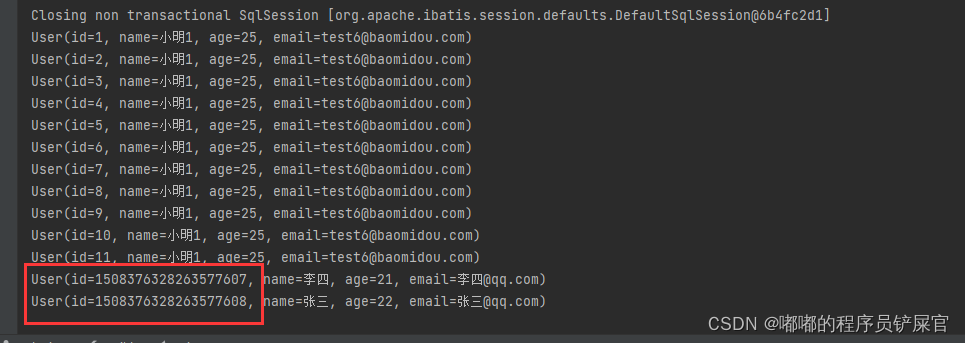
(此时我们会发现SQL语句依然执行,并且Id也进行了初始化。)


如果再添加一位用户,不对id进行任何初始化操作,我们会发现id和张三的id不存在任何关系,但是我们可以确定的是MP生成的Id必定是唯一的并且不为空(因为id为主键)。

能够生成唯一ID方式很多,对于这里使用的哪一种方式,官网也给出了解释,采用的是雪花算法+UUID(不含中划线)的方式(主键策略)。
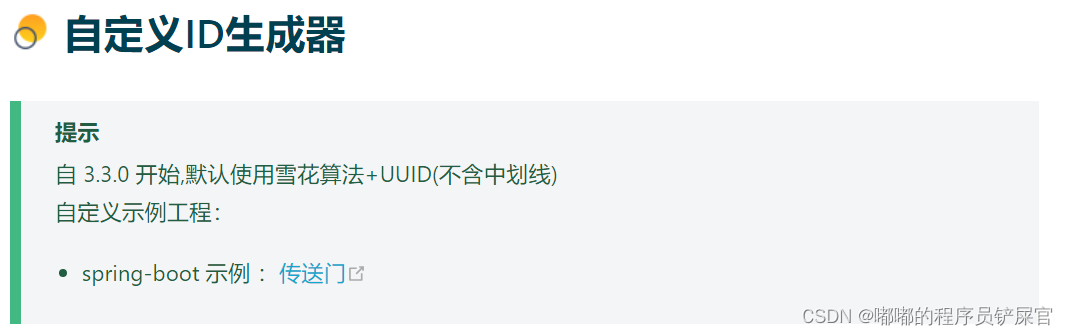
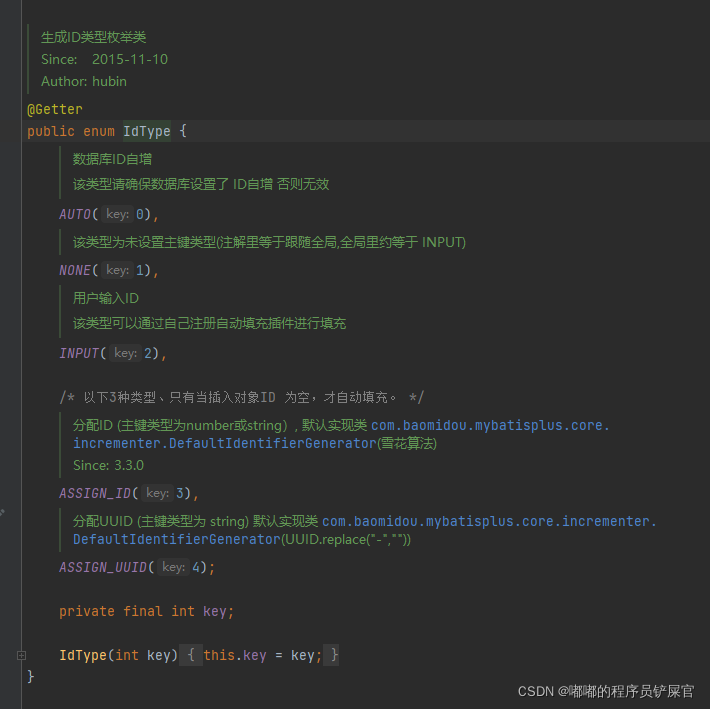
除了雪花算法+UUID(不含中划线)主键策略外,另外其他的策略可以在枚举类IdType中查询到。
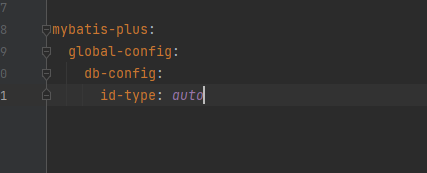
主键策略可以通过全局策略和局部策略进行初始化。
全局策略在配置文件中(application.yaml/application.properties)进行配置:
application.yaml
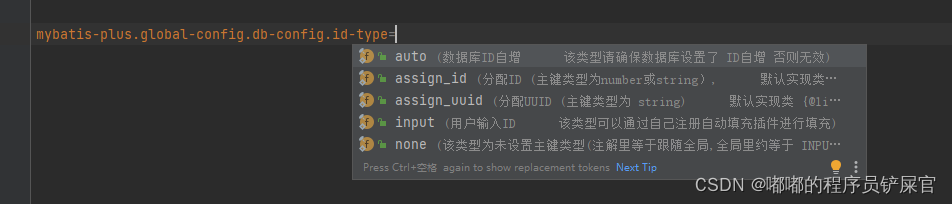
application.properties
局部策略需要在实体类中主键字段上添加@TableId(type = IdType.NONE)标签 ,通过type指定策略。

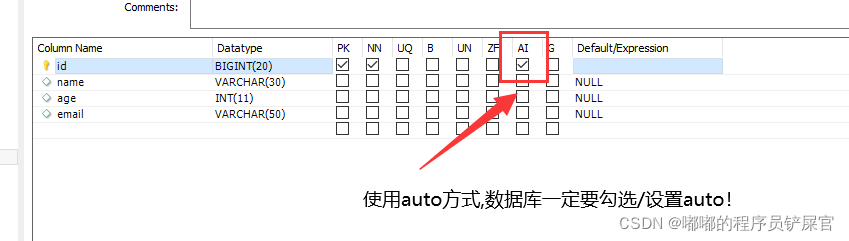
使用Auto在数据库中一定不要忘了设置主键字段属性auto
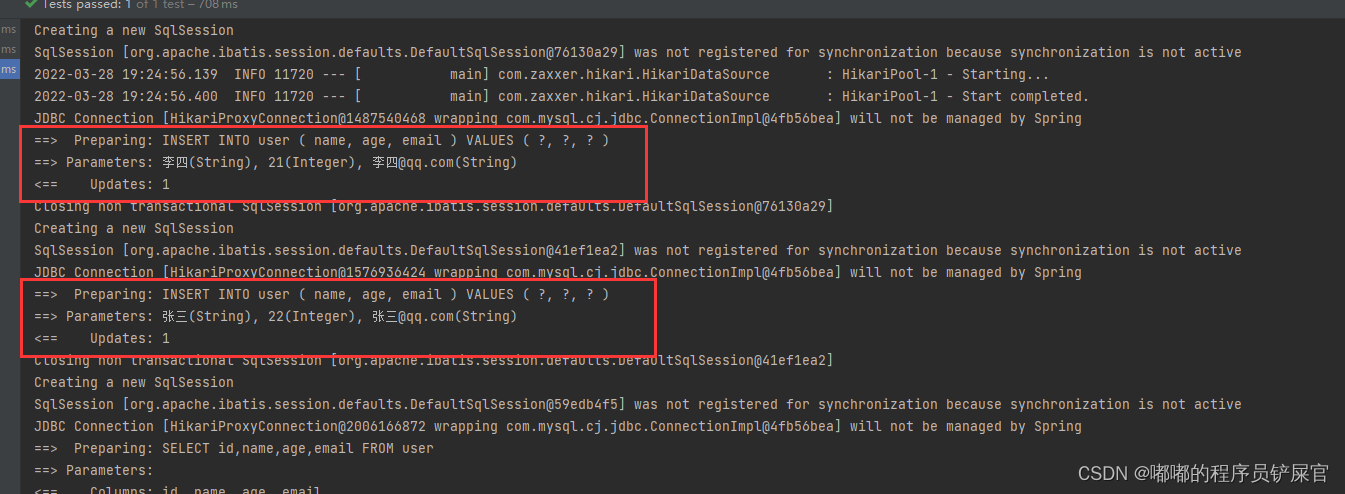
我们来测试一下,看看ID是否会自增,在测试类中编写如下代码:
运行效果:
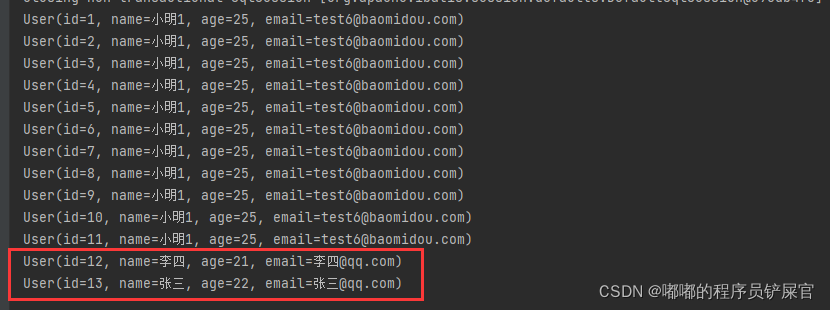
上面操作可能不是很好观察,因为Id还是很长一串(这是因为AUTO_INCREMENT的原因),为了更好的观察这里我们可以先删除李四和张三的记录,然后设置AUTO_INCREMENT为12(因为最后一个id为11)。
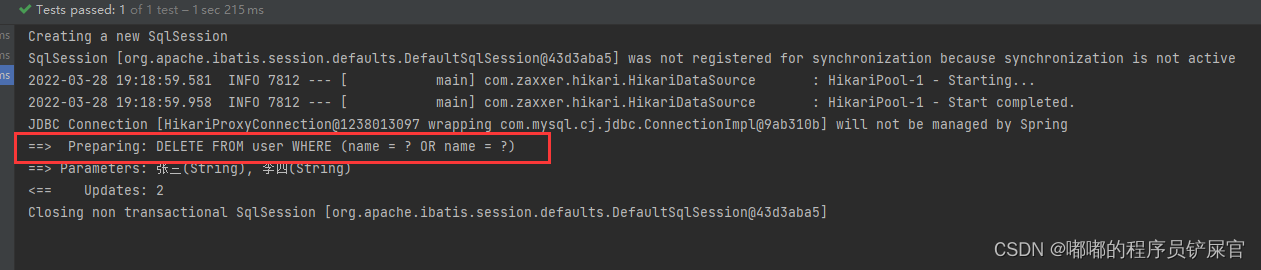
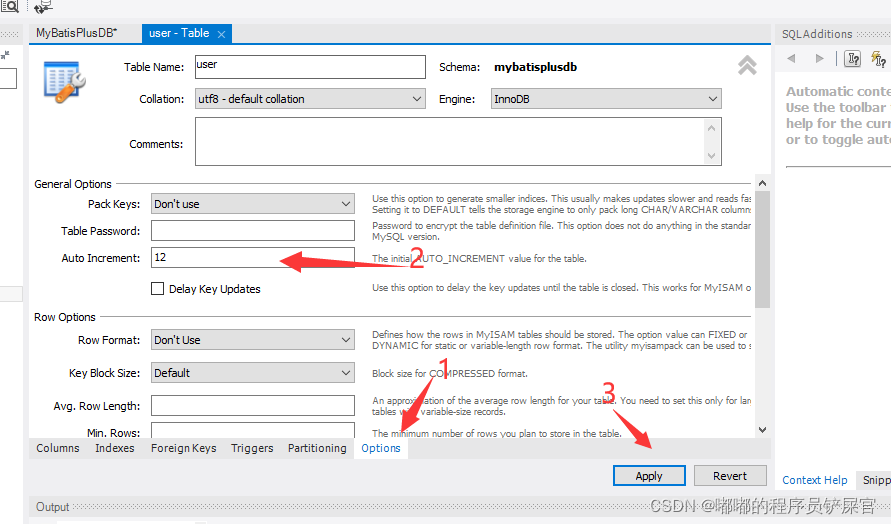
然后再次添加张三和李四的记录(运行后果然和Auto解释的那样进行自增):
注意:
- AUTO依赖于数据库的自增主键,插入时,实体对象无需设置主键,插入成功后,主键会被写回实体对象。
- INPUT完全依赖于用户输入。实体对象中主键ID是什么,插入到数据库时就设置什么。若有值便设置值,若为null则设置null
- 其余的几个策略,都是在实体对象中主键ID为空时,才会自动生成。
- NONE会跟随全局策略,ASSIGN_ID采用雪花算法,ASSIGN_UUID采用UUID
- 针对单个实体类的局部配置,使用@TableId即可。对于某个实体类,若它有局部主键策略,则采用局部策略,否则,跟随全局策略。
(四) 代码生成器
mp提供一个生成器,可快速生成Entity实体类,Mapper接口,Service,Controller等全套代码。
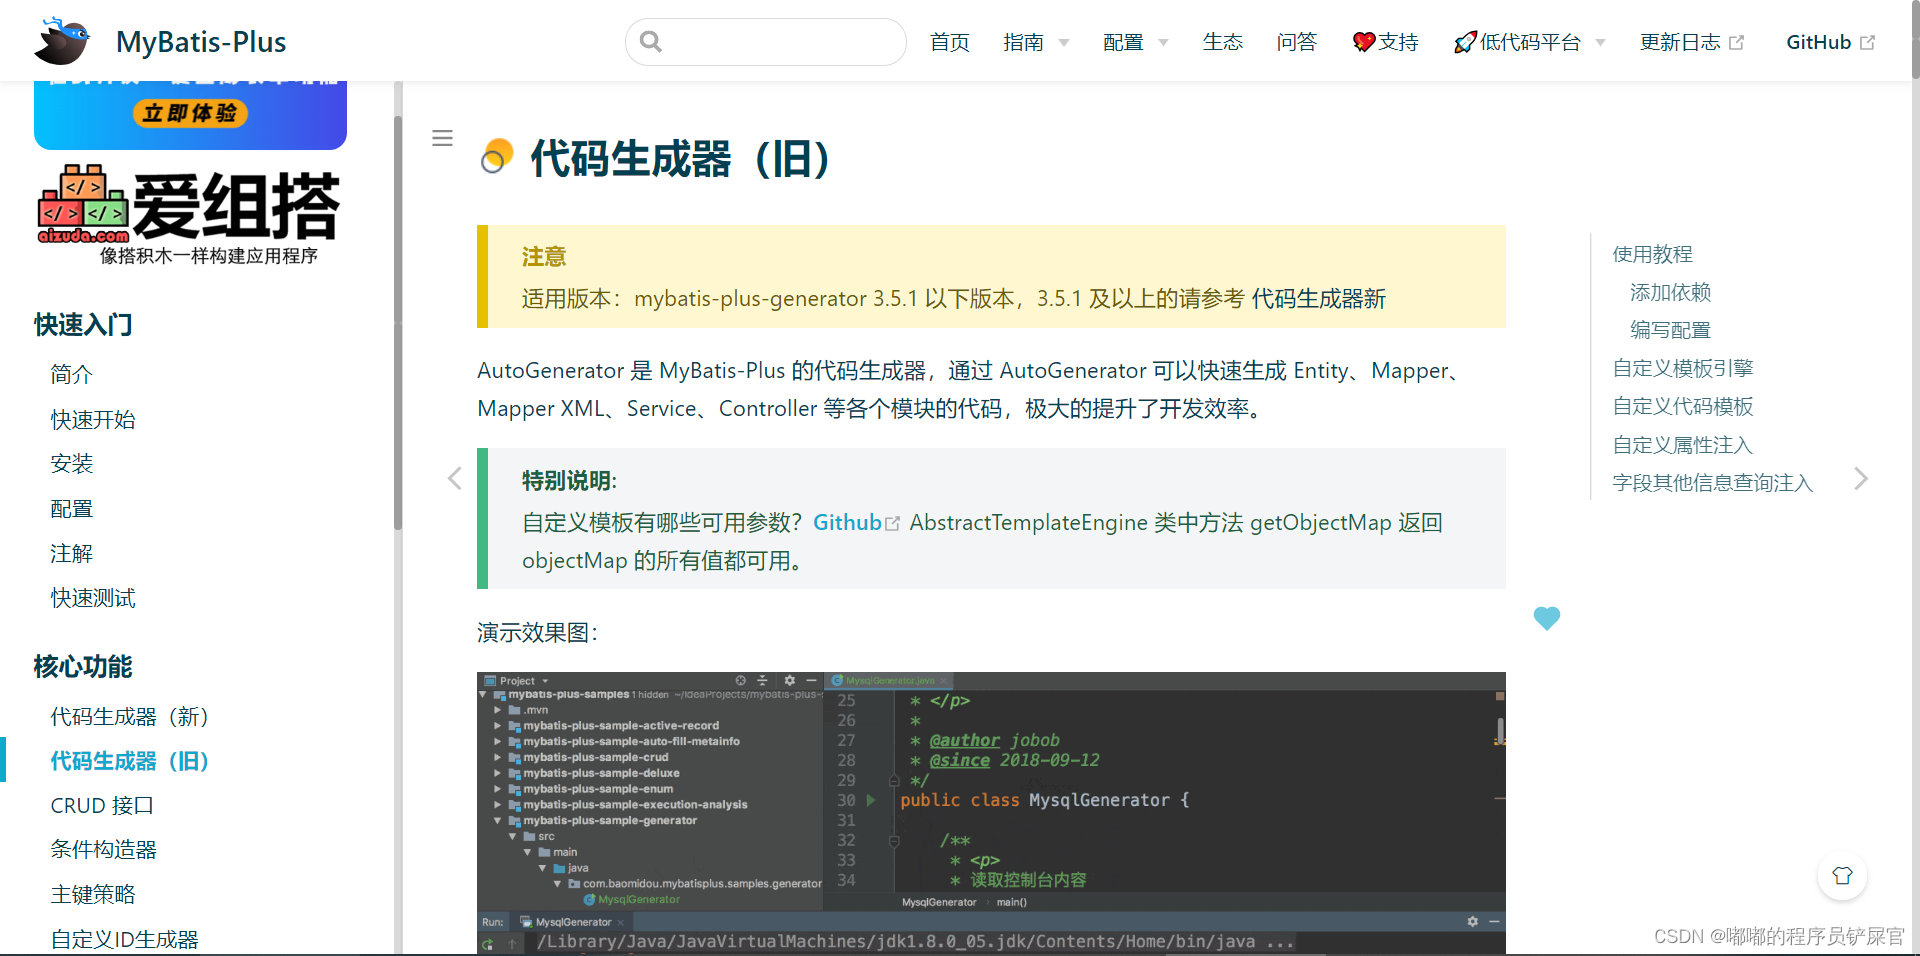
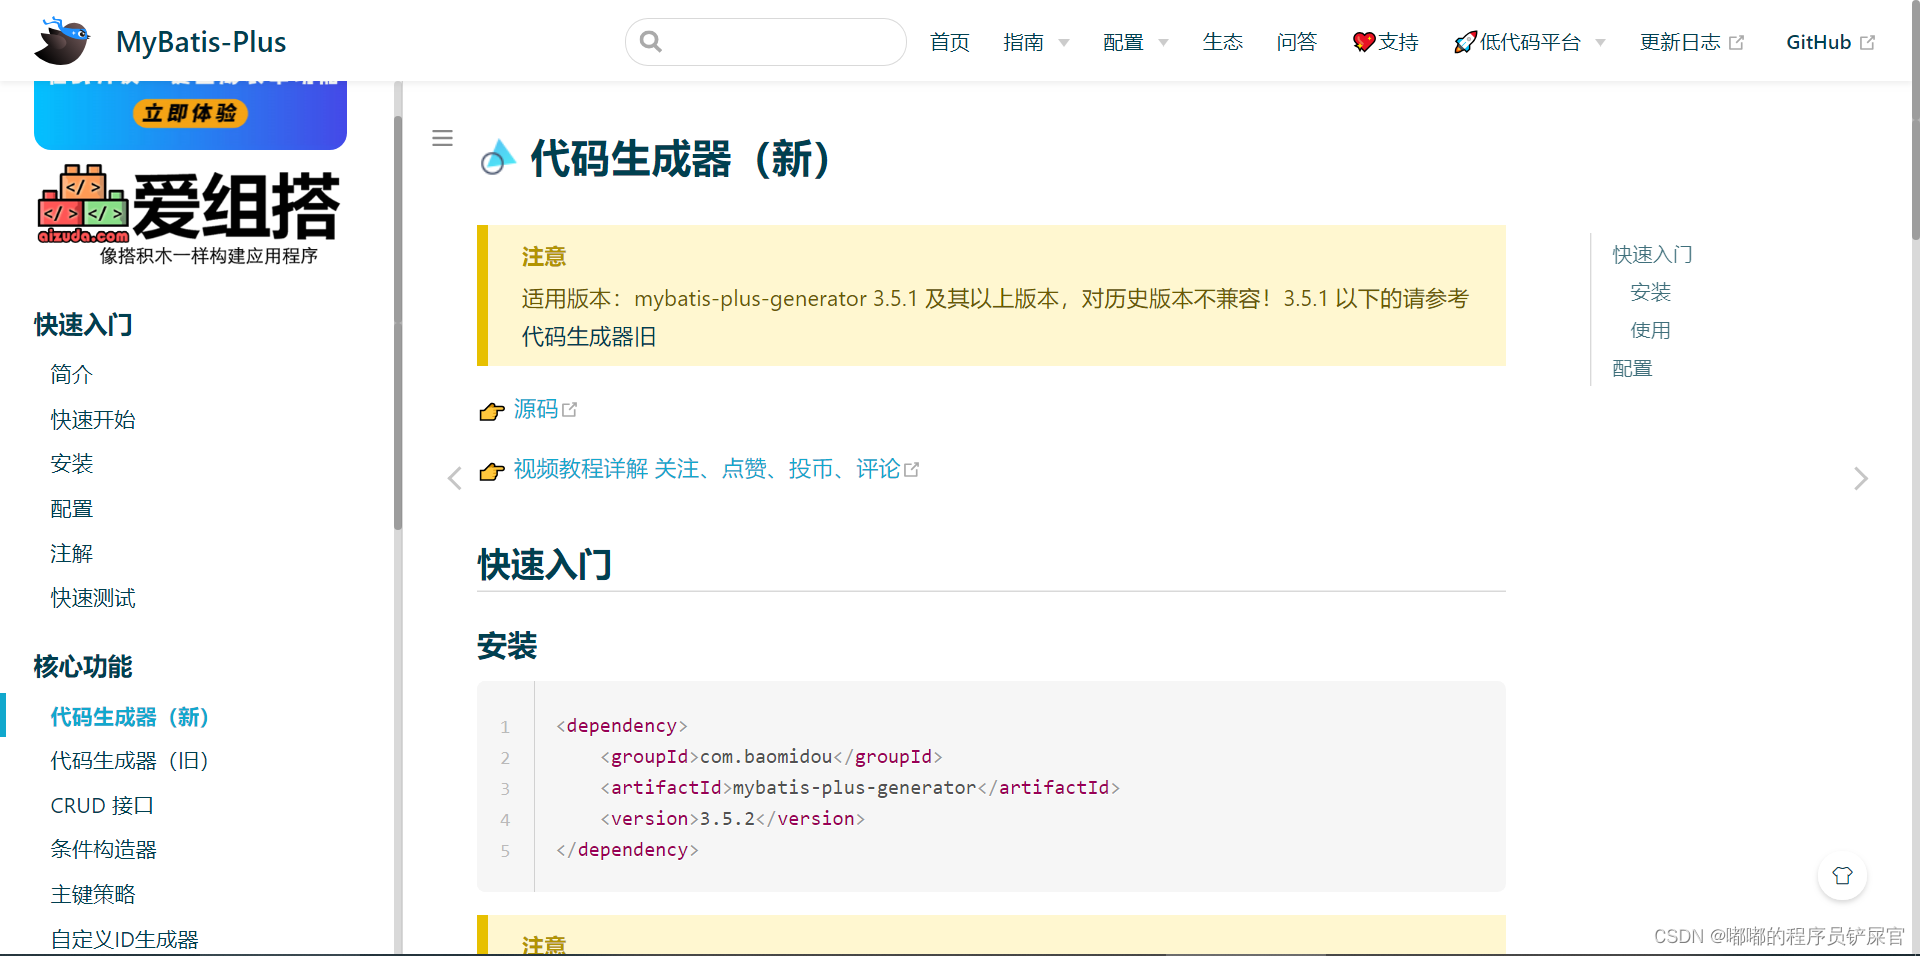
官方文档对于这部分写的非常详细,并且还搭配了视频,mybatis-plus-generator 3.5.1 以下版本选择代码生成器(旧),3.5.1 及以上的选择代码生成器(新)。
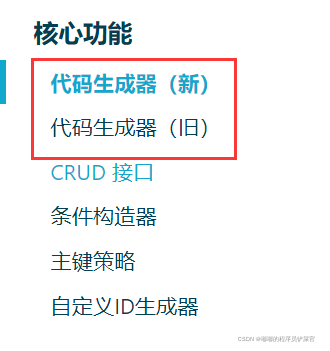
代码生成器(旧)官方学习链接:https://baomidou.com/pages
代码生成器(新)官方学习链接:https://baomidou.com/pages/779a6e/
视频学习链接:https://space.bilibili.com/483260422
由于这个项目我使用的是3.5.1所以这里我选择使用代码生成器(新):
(MyBatis-Plus 从 3.0.3 之后移除了代码生成器与模板引擎的默认依赖,需要手动添加相关依赖。)
导入生成器依赖:
<dependency> <groupId>com.baomidou</groupId> <artifactId>mybatis-plus-generator</artifactId> <version>3.5.2</version></dependency>导入生成器模板依赖(MyBatis-Plus 支持 Velocity(默认)、Freemarker、Beetl模板):
<!-- 模板引擎 --> <dependency> <groupId>org.apache.velocity</groupId> <artifactId>velocity-engine-core</artifactId> <version>2.0</version> </dependency>创建一个GeneratorTest的测试类,并创建测试方法generate:
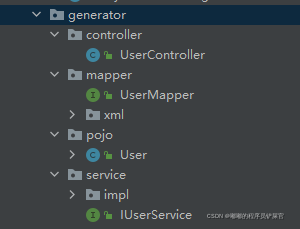
public class GeneratorTest { @Test public void generate() { String url = "jdbc:mysql://localhost:3306/mybatisplusdb?serverTimezone=UTC&useUnicode=true&characterEncoding=utf-8"; String userName = "root"; String passWord = "root"; FastAutoGenerator.create(url, userName, passWord) // 全局配置 .globalConfig(builder -> { builder.author("dudu") // 设置作者.disableOpenDir().fileOverride() // 覆盖已生成文件.outputDir(System.getProperty("user.dir")+ "/src/main/java"); // 指定输出目录 }) // 包配置 .packageConfig(builder -> { builder.parent("com.dudu") // 设置父包名 .moduleName("generator") .entity("pojo") .mapper("mapper") .service("service") .controller("controller") ; }) // 策略配置 .strategyConfig(builder -> { builder.addInclude("user") // 设置需要生成的表名.enableCapitalMode() ; })// .templateEngine(new FreemarkerTemplateEngine()) // 使用Freemarker引擎模板,默认的是Velocity引擎模板 .execute(); }}运行generate方法(就会生成如下文件):
三.扩展
1.逻辑删除
逻辑删除是为了方便数据恢复,和保护数据本身价值的一种方案,类似与我们在计算机中删除的文件会放入到回收站中去而并非直接删除。
使用步骤:
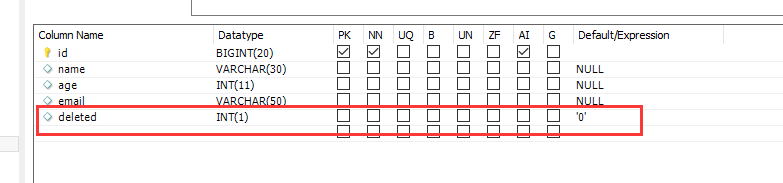
数据库表中新增一条逻辑删除字段deleted
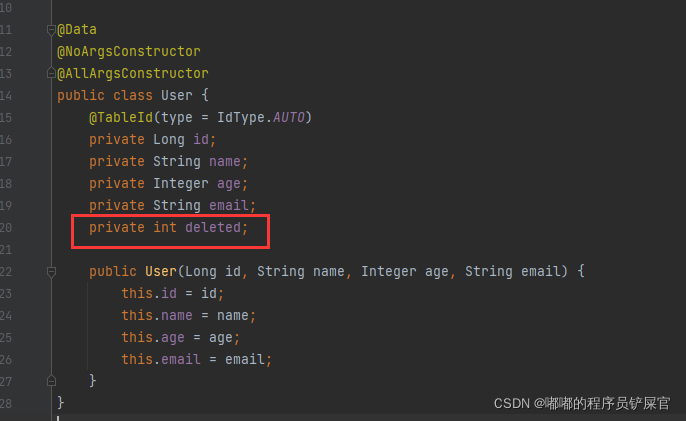
pojo中添加该字段,并新增一个有参构造(这样以前测试的方法依然可以执行)
如果不在配置文件中定义的话,可以使用@TableLogic标签

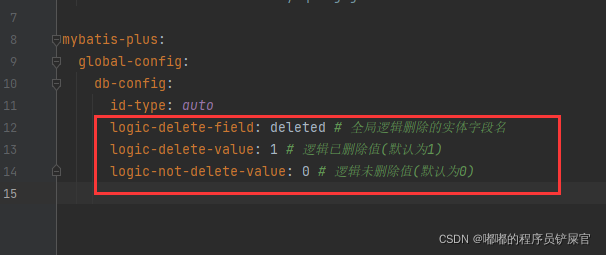
在配置文件中配置逻辑删除:
测试:
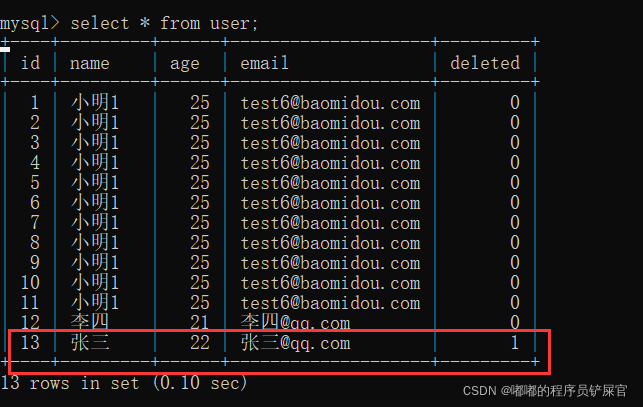
执行如下代码:
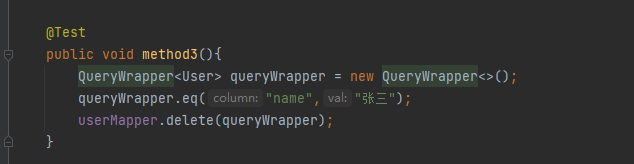
运行效果(会发现执行的SQL语句为Update):
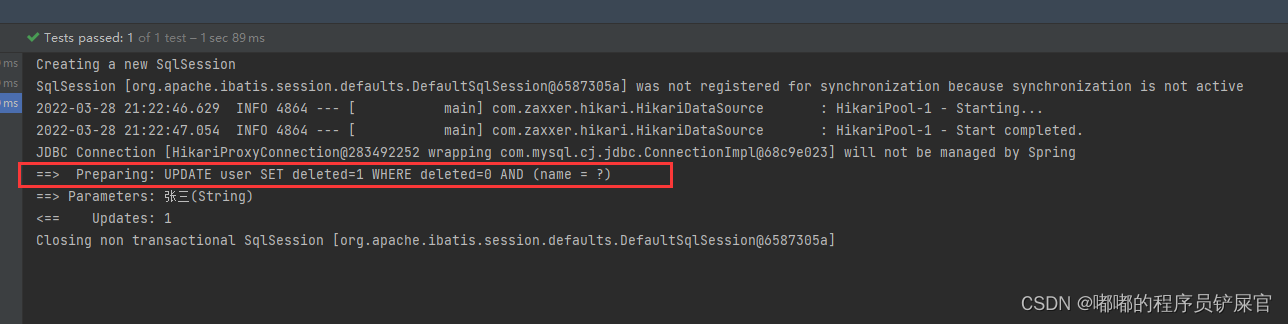
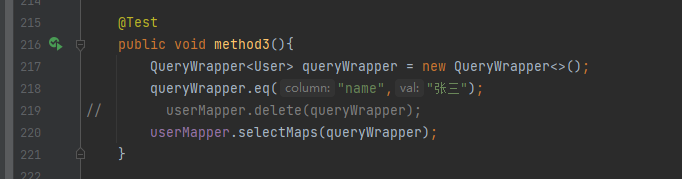
我们再来查找一下该用户(会发现在SQl中的where后会自动添加deleted=0):

2.自动填充
表中常常会有“新增时间”,“修改时间”,“操作人” 等字段。比较原始的方式,是每次插入或更新时,手动进行设置。mp可以通过配置,对某些字段进行自动填充。
在数据库中新增字段create_time,和update_time
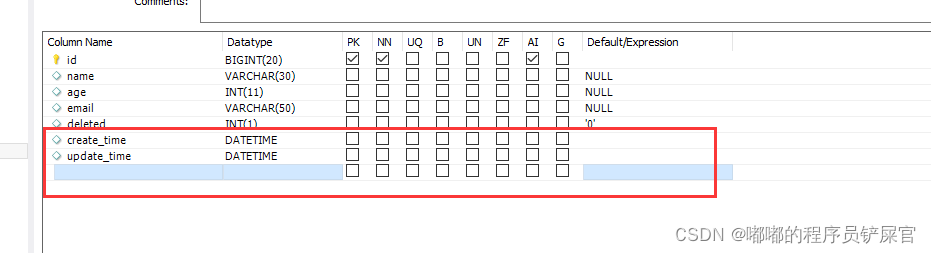
pojo中增加字段属性:
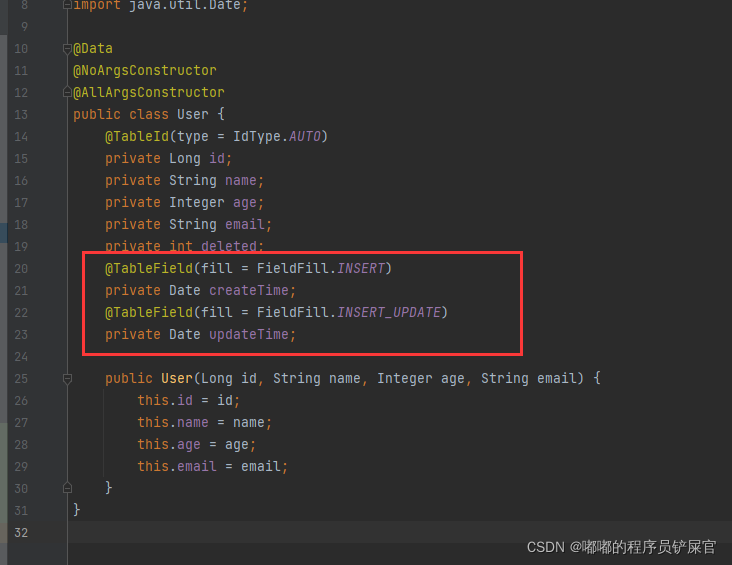
在handler文件下创建处理器类MyMetaObjectHandler
@Componentpublic class MyMetaObjectHandler implements MetaObjectHandler { @Override public void insertFill(MetaObject metaObject) { this.setFieldValByName("createTime", new Date(),metaObject); this.setFieldValByName("updateTime", new Date(),metaObject); } @Override public void updateFill(MetaObject metaObject) { this.setFieldValByName( "updateTime", new Date(),metaObject); }}测试
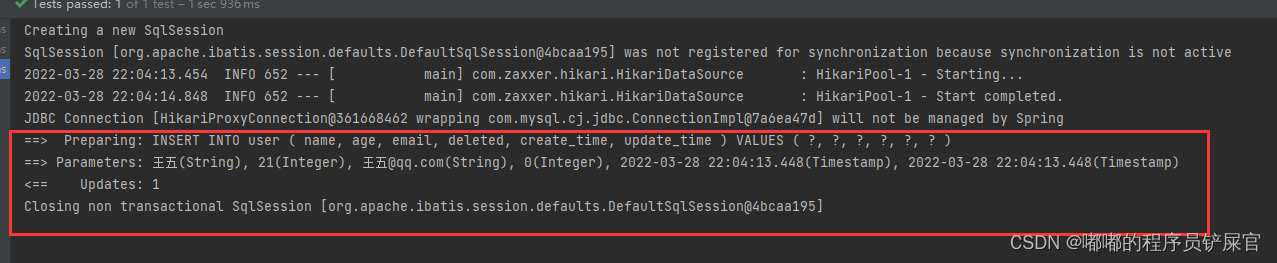
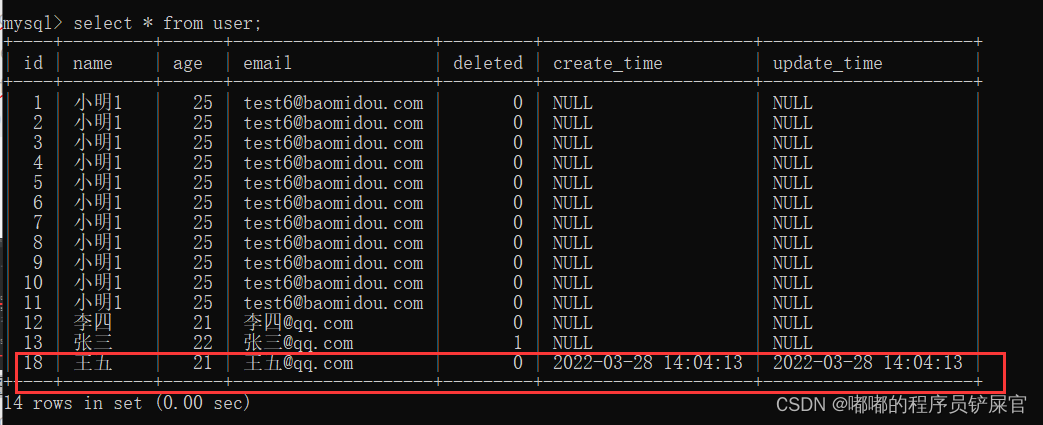
执行如下代码:
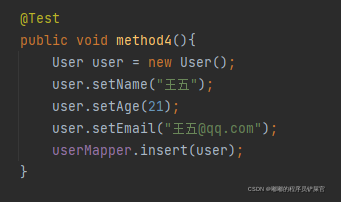
运行效果:
四.插件
1.乐观锁插件
当出现并发操作时,需要确保各个用户对数据的操作不产生冲突,此时需要一种并发控制手段。悲观锁的方法是,在对数据库的一条记录进行修改时,先直接加锁(数据库的锁机制),锁定这条数据,然后再进行操作;而乐观锁,正如其名,它先假设不存在冲突情况,而在实际进行数据操作时,再检查是否冲突。乐观锁的一种通常实现是版本号,在MySQL中也有名为MVCC的基于版本号的并发事务控制。
乐关锁和悲观锁
- 在读多写少的场景下,乐观锁比较适用,能够减少加锁操作导致的性能开销,提高系统吞吐量。
- 在写多读少的场景下,悲观锁比较使用,否则会因为乐观锁不断失败重试,反而导致性能下降。
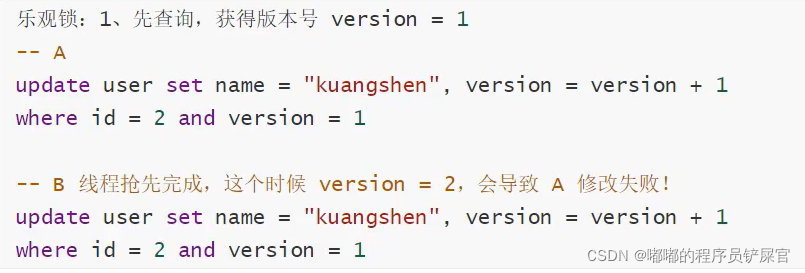
乐观锁的实现如下:
- 取出记录时,获取当前version
- 更新时,带上这个version
- 执行更新时, set version = newVersion where version = oldVersion
- 如果oldVersion与数据库中的version不一致,就更新失败
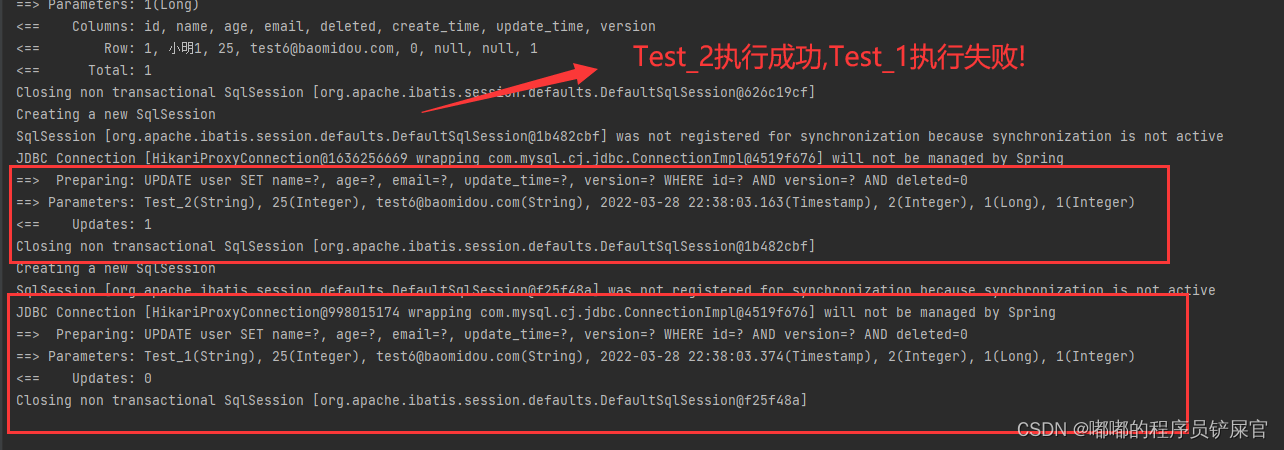
狂神的例子:线程A和线程B都执行相同任务,当线程B先执行的话,线程A就会执行失败,因为在执行B的时候version已经不为1了,导致执行线程A的任务失败。
在数据库中新增字段version
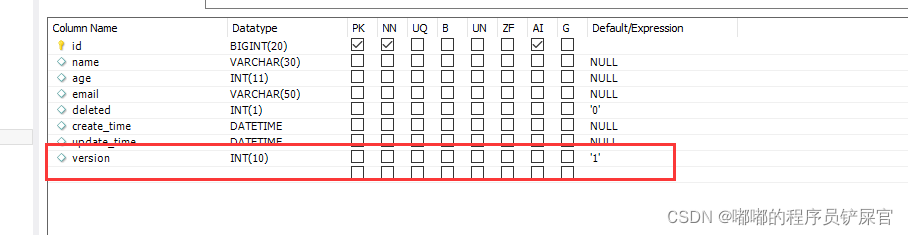
在pojo中同步:

在config中添加插件
@Bean public MybatisPlusInterceptor mybatisPlusInterceptor() { MybatisPlusInterceptor interceptor = new MybatisPlusInterceptor(); interceptor.addInnerInterceptor(new OptimisticLockerInnerInterceptor()); return interceptor; }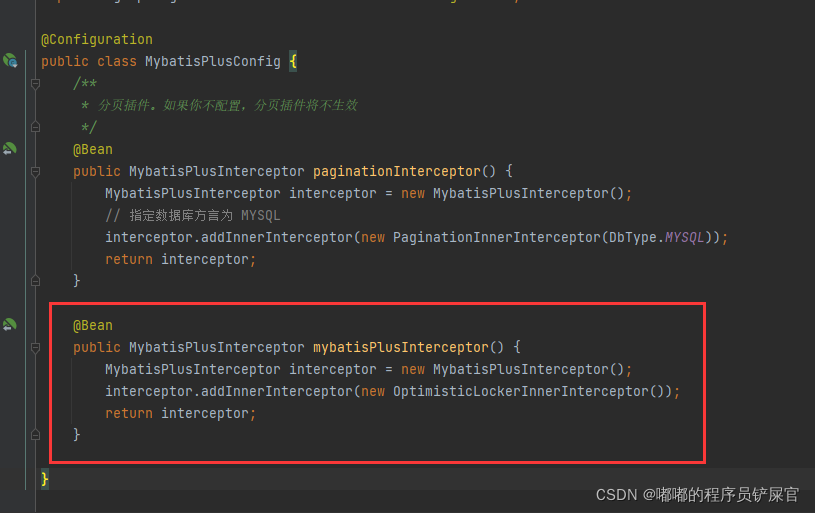
测试
在测试类中添加如下代码:
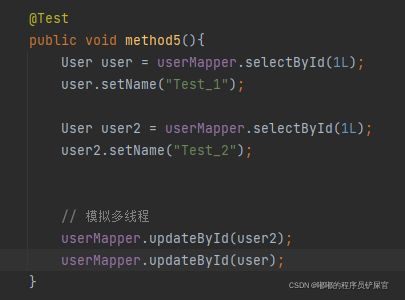
运行效果:
2.性能分析插件
该插件会输出SQL语句的执行时间,以便做SQL语句的性能分析和调优。(
只在测试和开发环境下有效)
(注:3.2.0版本之后,mp自带的性能分析插件被官方移除了,而推荐使用第三方性能分析插件)
MyBatis-Plus的性能分析插件狂神的视频有讲解,下面使用p6spy进行性能分析:
导入p6spy的依赖:
<dependency> <groupId>p6spy</groupId> <artifactId>p6spy</artifactId> <version>3.8.6</version> </dependency>修改数据datasource配置(application.yaml中):
url: jdbc:p6spy:mysql://localhost:3306/mybatisplusdb?serverTimezone=UTC&useUnicode=true&characterEncoding=utf-8# url: jdbc:mysql://localhost:3306/mybatisplusdb?serverTimezone=UTC&useUnicode=true&characterEncoding=utf-8 driver-class-name: com.p6spy.engine.spy.P6SpyDriver# driver-class-name: com.mysql.cj.jdbc.Driver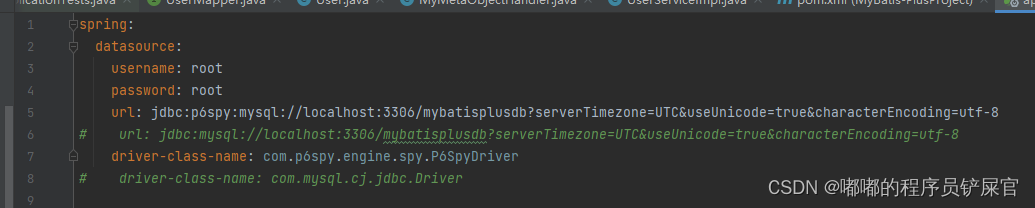
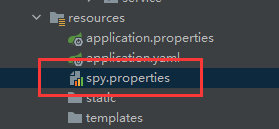
创建spy.properties并配置p6spy
module.log=com.p6spy.engine.logging.P6LogFactory,com.p6spy.engine.outage.P6OutageFactory# 自定义日志打印logMessageFormat=com.dudu.config.P6spySqlFormatConfig# 使用日志系统记录sqlappender=com.p6spy.engine.spy.appender.Slf4JLogger## 配置记录Log例外excludecategories=info,debug,result,batc,resultset# 设置使用p6spy driver来做代理deregisterdrivers=true# 日期格式dateformat=yyyy-MM-dd HH:mm:ss # 是否开启慢SQL记录outagedetection=true # 慢SQL记录标准 2 秒outagedetectioninterval=2 # 执行时间设置, 只有超过这个执行时间的才进行记录, 默认值0, 单位毫秒executionThreshold=1配置中使用的是自定义日志打印,在com.dudu.config中创建P6spySqlFormatConfig配置类
logMessageFormat=com.dudu.config.P6spySqlFormatConfig
详细代码如下:
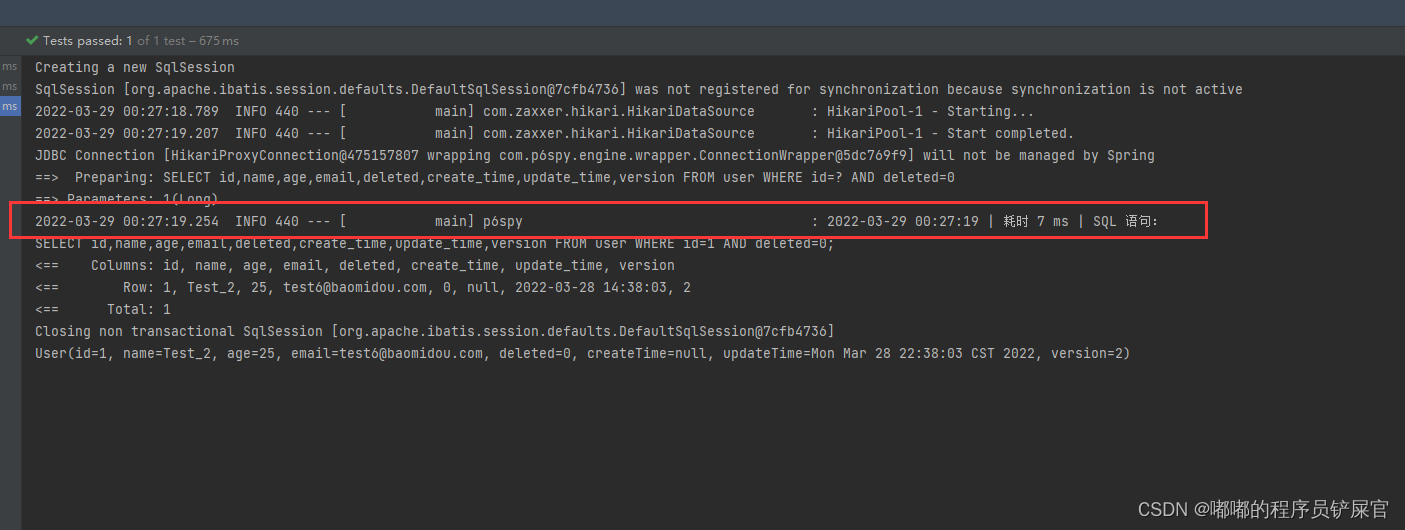
import com.p6spy.engine.spy.appender.MessageFormattingStrategy;import org.apache.commons.lang3.StringUtils;import org.springframework.context.annotation.Configuration;import java.text.SimpleDateFormat;import java.util.Date;/** * 自定义 p6spy sql输出格式 * */public class P6spySqlFormatConfig implements MessageFormattingStrategy { /** * 过滤掉定时任务的 SQL */ @Override public String formatMessage(int connectionId, String now, long elapsed, String category, String prepared, String sql, String url) { return StringUtils.isNotBlank(sql) ? new SimpleDateFormat("yyyy-MM-dd HH:mm:ss").format(new Date()).toString() + " | 耗时 " + elapsed + " ms | SQL 语句:" + StringUtils.LF + sql.replaceAll("[\\s]+", StringUtils.SPACE) + ";" : ""; }}在测试类中随便运行一个测试用例运行效果如下(执行SQL的时间会显示出来):
spy.properties中详细的配置如下:
# 指定应用的日志拦截模块,默认为com.p6spy.engine.spy.P6SpyFactory #modulelist=com.p6spy.engine.spy.P6SpyFactory,com.p6spy.engine.logging.P6LogFactory,com.p6spy.engine.outage.P6OutageFactory# 真实JDBC driver , 多个以 逗号 分割 默认为空#driverlist=# 是否自动刷新 默认 flase#autoflush=false# 配置SimpleDateFormat日期格式 默认为空#dateformat=# 打印堆栈跟踪信息 默认flase#stacktrace=false# 如果 stacktrace=true,则可以指定具体的类名来进行过滤。#stacktraceclass=# 监测属性配置文件是否进行重新加载#reloadproperties=false# 属性配置文件重新加载的时间间隔,单位:秒 默认60s#reloadpropertiesinterval=60# 指定 Log 的 appender,取值:#appender=com.p6spy.engine.spy.appender.Slf4JLogger#appender=com.p6spy.engine.spy.appender.StdoutLogger#appender=com.p6spy.engine.spy.appender.FileLogger# 指定 Log 的文件名 默认 spy.log#logfile=spy.log# 指定是否每次是增加 Log,设置为 false 则每次都会先进行清空 默认true#append=true# 指定日志输出样式 默认为com.p6spy.engine.spy.appender.SingleLineFormat , 单行输出 不格式化语句#logMessageFormat=com.p6spy.engine.spy.appender.SingleLineFormat# 也可以采用 com.p6spy.engine.spy.appender.CustomLineFormat 来自定义输出样式, 默认值是%(currentTime)|%(executionTime)|%(category)|connection%(connectionId)|%(sqlSingleLine)# 可用的变量为:# %(connectionId) connection id# %(currentTime) 当前时间# %(executionTime) 执行耗时# %(category) 执行分组# %(effectiveSql) 提交的SQL 换行# %(effectiveSqlSingleLine) 提交的SQL 不换行显示# %(sql)执行的真实SQL语句,已替换占位# %(sqlSingleLine) 执行的真实SQL语句,已替换占位 不换行显示#customLogMessageFormat=%(currentTime)|%(executionTime)|%(category)|connection%(connectionId)|%(sqlSingleLine)# date类型字段记录日志时使用的日期格式 默认dd-MMM-yy#databaseDialectDateFormat=dd-MMM-yy# boolean类型字段记录日志时使用的日期格式 默认boolean 可选值numeric#databaseDialectBooleanFormat=boolean# 是否通过jmx暴露属性 默认true#jmx=true# 如果jmx设置为true 指定通过jmx暴露属性时的前缀 默认为空# com.p6spy(.<jmxPrefix>)?:name=<optionsClassName>#jmxPrefix=# 是否显示纳秒 默认false#useNanoTime=false# 实际数据源 JNDI#realdatasource=/RealMySqlDS# 实际数据源 datasource class#realdatasourceclass=com.mysql.jdbc.jdbc2.optional.MysqlDataSource# 实际数据源所携带的配置参数 以 k=v 方式指定 以 分号 分割#realdatasourceproperties=port;3306,serverName;myhost,databaseName;jbossdb,foo;bar# jndi数据源配置 # 设置 JNDI 数据源的 NamingContextFactory。 #jndicontextfactory=org.jnp.interfaces.NamingContextFactory# 设置 JNDI 数据源的提供者的 URL。 #jndicontextproviderurl=localhost:1099# 设置 JNDI 数据源的一些定制信息,以分号分隔。 #jndicontextcustom=java.naming.factory.url.pkgs;org.jboss.naming:org.jnp.interfaces# 是否开启日志过滤 默认false, 这项配置是否生效前提是配置了 include/exclude/sqlexpression#filter=false# 过滤 Log 时所包含的表名列表,以逗号分隔 默认为空#include=# 过滤 Log 时所排除的表名列表,以逗号分隔 默认为空#exclude=# 过滤 Log 时的 SQL 正则表达式名称 默认为空#sqlexpression=#显示指定过滤 Log 时排队的分类列表,取值: error, info, batch, debug, statement,#commit, rollback, result and resultset are valid values# (默认 info,debug,result,resultset,batch)#excludecategories=info,debug,result,resultset,batch# 是否过滤二进制字段# (default is false)#excludebinary=false# P6Log 模块执行时间设置,整数值 (以毫秒为单位),只有当超过这个时间才进行记录 Log。 默认为0#executionThreshold=# P6Outage 模块是否记录较长时间运行的语句 默认false# outagedetection=true|false# P6Outage 模块执行时间设置,整数值 (以秒为单位)),只有当超过这个时间才进行记录 Log。 默认30s# outagedetectioninterval=integer time (seconds)