DBNet实战:详解DBNet训练与测试(pytorch)
论文连接:https://arxiv.org/pdf/1911.08947.pdf
github链接:github.com
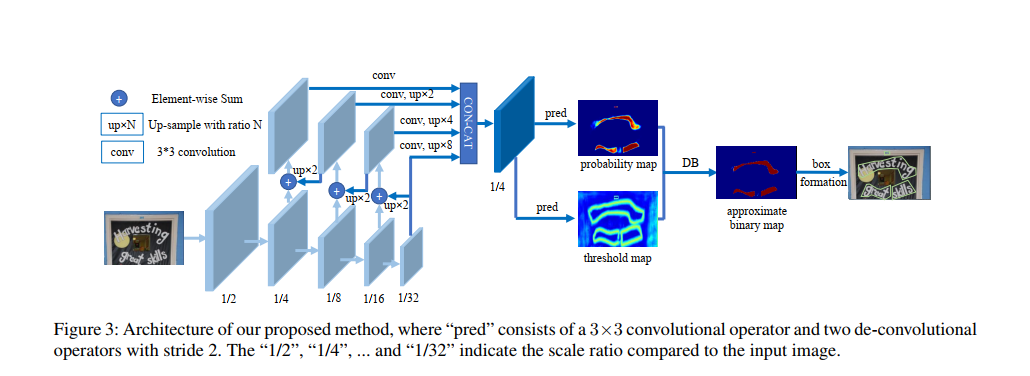
网络结构
- 首先,图像输入特征提取主干,提取特征;
- 其次,特征金字塔上采样到相同的尺寸,并进行特征级联得到特征F;
- 然后,特征F用于预测概率图(probability map P)和阈值图(threshold map T)
- 最后,通过P和F计算近似二值图(approximate binary map B)
在训练期间对P,T,B进行监督训练,P和B是用的相同的监督信号(label)。在推理时,只需要P或B就可以得到文本框。
网络输出:
1、probability map, wh1 , 代表像素点是文本的概率
2、threshhold map, wh1, 每个像素点的阈值
3、binary map, wh1, 由1,2计算得到,计算公式为DB公式
如下图:
下载代码
从WenmuZhou/DBNet.pytorch: A pytorch re-implementation of Real-time Scene Text Detection with Differentiable Binarization (github.com)获取代码,然后解压。然后安装缺少的安装包
pip install Polygon3 -i https://pypi.tuna.tsinghua.edu.cn/simple pip install addictpip install imgaug根据自己的环境,环境不同,安装的包也不相同。
在pycharm的Terminal下面执行:
python tools/train.py --config_file "config/icdar2015_resnet18_FPN_DBhead_polyLR.yaml"如果缺少包就会包错误,如果看不到错误,说明都安装了。

数据集
数据集使用icdar2015,网页链接:Downloads - Incidental Scene Text - Robust Reading Competition (uab.es),需要注册。
选择Task4.1:Text Localization
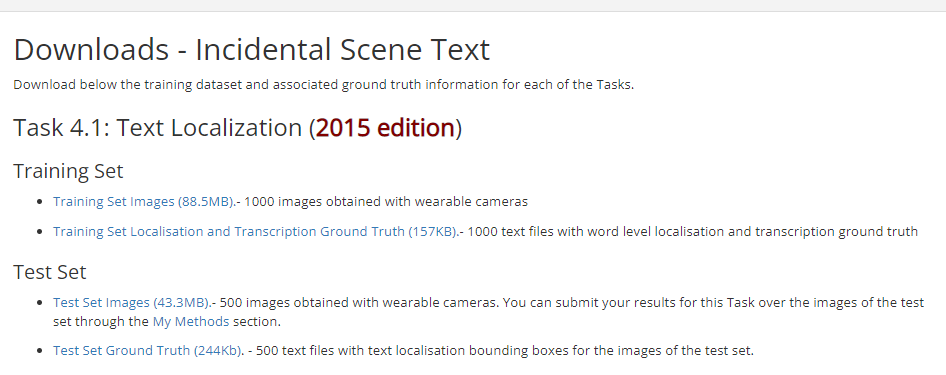
数据的详细介绍:Tasks - Incidental Scene Text - Robust Reading Competition (uab.es)
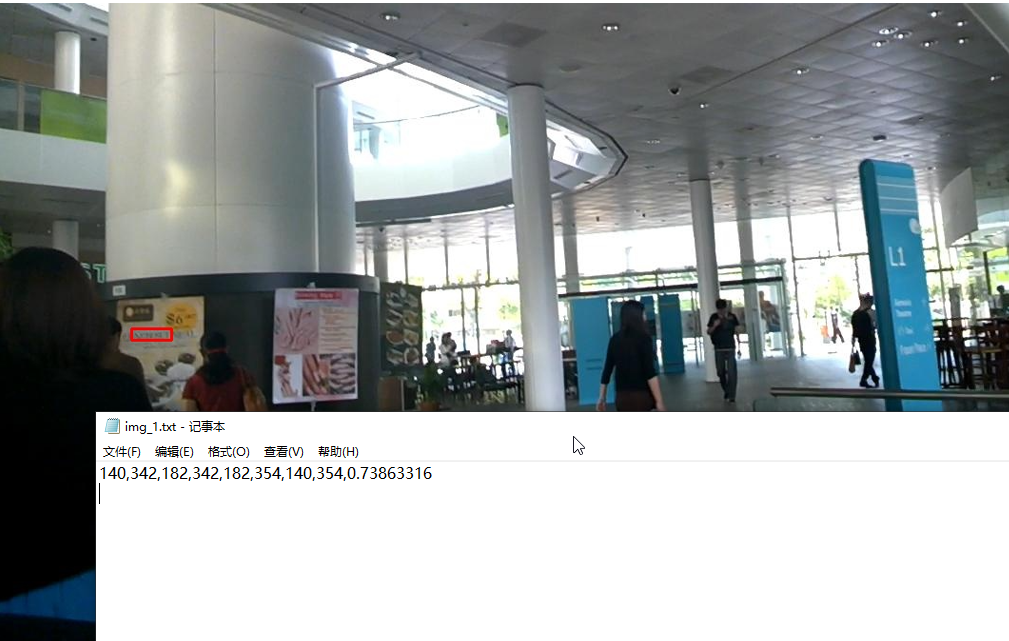
任务 4.1:文本本地化 对于文本本地化任务,我们将为每个图像提供单词边界框。 基本事实作为单独的文本文件(每个图像一个)给出,其中每一行指定一个单词边界框的坐标及其以逗号分隔格式的转录(参见图 1)。
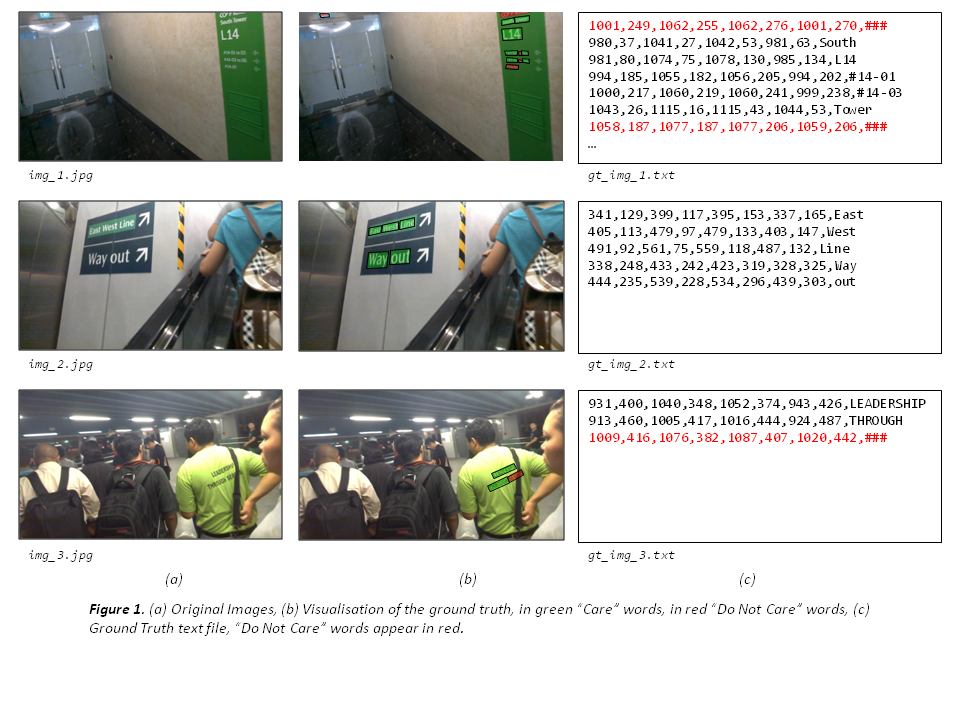
对于文本本地化任务,地面实况数据以单词边界框的形式提供。 与挑战 1 和 2 不同,边界框在挑战 4 中不是轴定向的,它们由四个角的坐标以顺时针方式指定。 对于训练集中的每个图像,将按照命名约定提供一个单独的 UTF-8 文本文件:
gt_[image name].txt
文本文件是逗号分隔的文件,其中每一行将对应于图像中的一个单词,并给出其边界框坐标(四个角,顺时针)及其格式的转录:
x1, y1, x2, y2, x3, y3, x4, y4, transcription
请注意,第八个逗号后面的任何内容都是转录的一部分,并且不使用转义字符。 “不关心”区域在基本事实中以“###”的转录表示。 作者将被要求自动定位图像中的文本并返回边界框。 结果必须在每个图像的单独文本文件中提交,每行对应于上述格式的边界框(逗号分隔值)。 应提交包含所有结果文件的单个压缩(zip 或 rar)文件。 如果您的方法无法为图像生成任何结果,您可以包含一个空的结果文件或根本不包含任何文件。 与挑战 1 和 2 不同,结果的评估将基于单一的 Intersection-over-Union 标准,阈值为 50%,类似于对象识别和 Pascal VOC 挑战 [1] 中的标准做法。
数据集下载完成后可以得到四个文件,如下图:

将ch4_training_images.zip解压到./datasets\train\img下面。
将ch4_training_localization_transcription_gt.zip解压到./datasets\train\gt下面。
将ch4_test_images.zip解压到./datasets\test\img下面。
将Challenge4_Test_Task1_GT.zip解压到./datasets\test\gt下面。
接下来对数据集做预处理,作者写Ubuntu系统下的处理脚本generate_lists.sh,所以如果用的系统是UBuntu,则执行脚本即可
bash generate_lists.sh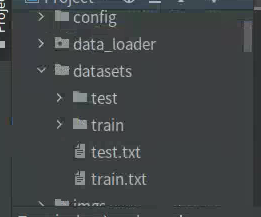
如果是Win10平台则需要写python脚本。新建getdata.py,插入代码:
import osdef get_images(img_path): ''' find image files in data path :return: list of files found ''' files = [] exts = ['jpg', 'png', 'jpeg', 'JPG', 'PNG'] for parent, dirnames, filenames in os.walk(img_path): for filename in filenames: for ext in exts: if filename.endswith(ext): files.append(os.path.join(parent, filename)) break print('Find {} images'.format(len(files))) return sorted(files)def get_txts(txt_path): ''' find gt files in data path :return: list of files found ''' files = [] exts = ['txt'] for parent, dirnames, filenames in os.walk(txt_path): for filename in filenames: for ext in exts: if filename.endswith(ext): files.append(os.path.join(parent, filename)) break print('Find {} txts'.format(len(files))) return sorted(files)if __name__ == '__main__': import json img_train_path = './datasets/train/img' img_test_path = './datasets/test/img' train_files = get_images(img_train_path) test_files = get_images(img_test_path) txt_train_path = './datasets/train/gt' txt_test_path = './datasets/test/gt' train_txts = get_txts(txt_train_path) test_txts = get_txts(txt_test_path) n_train = len(train_files) n_test = len(test_files) assert len(train_files) == len(train_txts) and len(test_files) == len(test_txts) # with open('train.txt', 'w') as f: with open('./datasets/train.txt', 'w') as f: for i in range(n_train): line = train_files[i] + '\t' + train_txts[i] + '\n' f.write(line) with open('./datasets/test.txt', 'w') as f: for i in range(n_test): line = test_files[i] + '\t' + test_txts[i] + '\n' f.write(line)逻辑不复杂,分别将train和test的img文件列表和gt文件列表对应起来保存到train.txt和test.txt中。
完成上面数据的处理就可以开始训练了
训练
到这里已经完成大部分的工作了,只需要对config文件参数做适当的修改就可以开始训练了。
本次训练使用的config文件是./config/icdar2015_resnet18_FPN_DBhead_polyLR.yaml,修改学习率、优化器、BatchSize等参数,如下图:
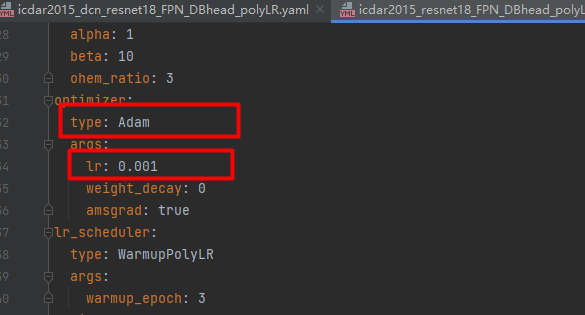
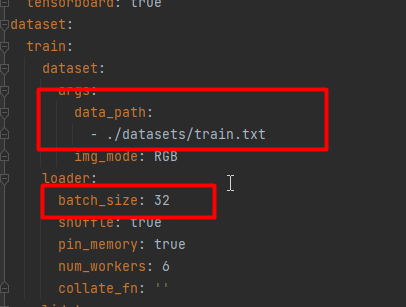
上面用红框标注的参数,大家根据实际的情况做修改,我的卡是3090,BatchSize设置32.
参数设置完成后,就开启训练,在pycharm的Terminal下面执行:
CUDA_VISIBLE_DEVICES=0 python tools/train.py --config_file "config/icdar2015_resnet18_FPN_DBhead_polyLR.yaml"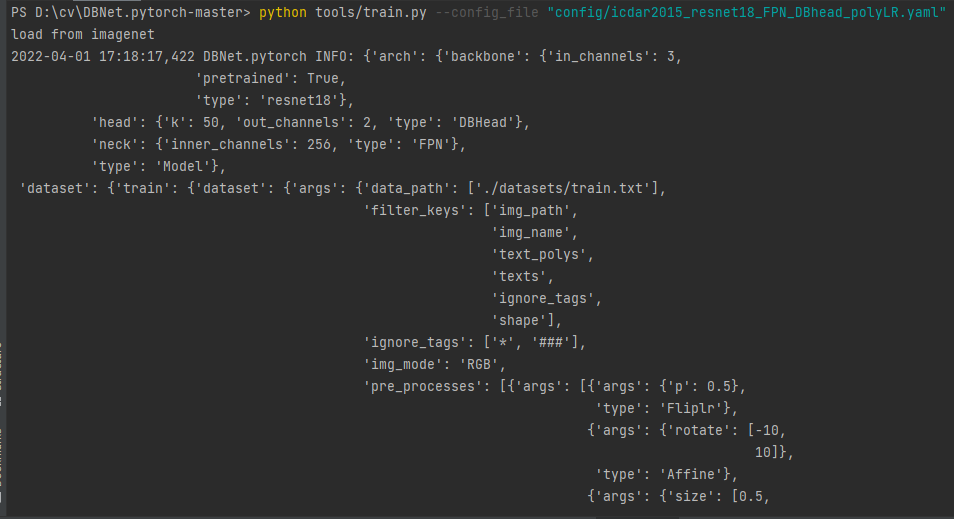
测试
打开./tools/predict.py,查看参数:
def init_args(): import argparse parser = argparse.ArgumentParser(description='DBNet.pytorch') parser.add_argument('--model_path', default=r'model_best.pth', type=str) parser.add_argument('--input_folder', default='./test/input', type=str, help='img path for predict') parser.add_argument('--output_folder', default='./test/output', type=str, help='img path for output') parser.add_argument('--thre', default=0.3,type=float, help='the thresh of post_processing') parser.add_argument('--polygon', action='store_true', help='output polygon or box') parser.add_argument('--show', default=True,action='store_true', help='show result') parser.add_argument('--save_resut', default=True, action='store_true', help='save box and score to txt file') args = parser.parse_args() return argsmodel_path:模型的路径。
input_folder:待测试图片的路径。
output_folder:输出结果的路径。
thre:最低置信度。
polygon:多边形还是框,True为多边形,False为box。建议设置为False。
show:是否展示。
save_resut:是否保存结果。
新建input文件夹,放入测试图片,在pycharm的Terminal执行如下命令:
python tools/predict.py --model_path output/DBNet_resnet18_FPN_DBHead/checkpoint/model_best.pth --input_folder ./input --output_folder ./output --thre 0.7执行完成后就可以在output文件夹中查看结果了:
总结
今天,我们演示了如果使用DBNet训练和测试。总体看起来不是很难。欢迎大家试用。
完整的代码:https://download.csdn.net/download/hhhhhhhhhhwwwwwwwwww/85065029