云原生技术-微服务SpringCloud(2)
❤️作者简介:2022新星计划第三季云原生与云计算赛道Top5🏅、华为云享专家🏅、云原生领域潜力新星🏅
💛博客首页:C站个人主页🌞
💗作者目的:如有错误请指正,将来会不断的完善笔记,帮助更多的Java爱好者入门,共同进步!
文章目录
-
- 云原生技术-微服务SpringCloud(2)
-
- 断路器springcloud Hystrix
-
- 服务降级
-
- 全局服务降级
- 服务熔断
- Hystrix-Dashboard
-
- Bug:Hystrix仪表盘连接不上
- Bug:Hystrix仪表盘一直是loading
- 服务网关springcloud gateway
-
- 配置gateway服务网关
- gateway服务网关负载均衡(lb)
- 分布式配置中心springcloud config
-
- 分布式配置中心服务器端(server)
- 分布式配置中心客户端(client)
-
- actuator手动刷新config-client
- 为什么要引入springcloud bus的原因
- 消息总线springcloud Bus
-
- 安装rabbitMQ环境
- 配置springcloud Bus
云原生技术-微服务SpringCloud(2)
断路器springcloud Hystrix
服务降级
在springcloud-02-comsumer-openFeign-dept80的Pom.xml
<dependency> <groupId>org.springframework.cloud</groupId> <artifactId>spring-cloud-starter-netflix-hystrix</artifactId> </dependency>修改它的deptController
@RestControllerpublic class deptController { @Autowired private deptService deptService; @HystrixCommand(fallbackMethod = "queryAllDept_Hystrix",commandProperties = { @HystrixProperty(name = "execution.isolation.thread.timeoutInMilliseconds",value = "1500") //添加超时服务降级 }) @RequestMapping("/feign/queryAllDept") public List<dept> queryAllDept(String id){ int i = Integer.parseInt(id); if(i<0){ throw new RuntimeException(); //此处为了触发服务降级fallback } return deptService.queryAllDept(); } //服务降级方法,这个方法直接从上面的正常方法复制过来,把名字修改一下即可,参数类型也和正常的方法要一致 public List<dept> queryAllDept_Hystrix(String id){ List<dept> depts = deptService.queryAllDept(); depts.add(new dept("1000","Hystrix_fallback")); return depts; }}主启动类
@SpringBootApplication@EnableFeignClients@EnableHystrix //开启Hystrix功能public class springApplicationFeign80 { public static void main(String[] args) { SpringApplication.run(springApplicationFeign80.class,args); }}commandProperties支持什么参数属性
我们全局搜索HystrixCommandProperties,往下翻可以看到如下
protected HystrixCommandProperties(HystrixCommandKey key, HystrixCommandProperties.Setter builder, String propertyPrefix) { this.key = key; this.circuitBreakerEnabled = getProperty(propertyPrefix, key, "circuitBreaker.enabled", builder.getCircuitBreakerEnabled(), default_circuitBreakerEnabled); this.circuitBreakerRequestVolumeThreshold = getProperty(propertyPrefix, key, "circuitBreaker.requestVolumeThreshold", builder.getCircuitBreakerRequestVolumeThreshold(), default_circuitBreakerRequestVolumeThreshold); this.circuitBreakerSleepWindowInMilliseconds = getProperty(propertyPrefix, key, "circuitBreaker.sleepWindowInMilliseconds", builder.getCircuitBreakerSleepWindowInMilliseconds(), default_circuitBreakerSleepWindowInMilliseconds); this.circuitBreakerErrorThresholdPercentage = getProperty(propertyPrefix, key, "circuitBreaker.errorThresholdPercentage", builder.getCircuitBreakerErrorThresholdPercentage(), default_circuitBreakerErrorThresholdPercentage); this.circuitBreakerForceOpen = getProperty(propertyPrefix, key, "circuitBreaker.forceOpen", builder.getCircuitBreakerForceOpen(), default_circuitBreakerForceOpen); this.circuitBreakerForceClosed = getProperty(propertyPrefix, key, "circuitBreaker.forceClosed", builder.getCircuitBreakerForceClosed(), default_circuitBreakerForceClosed); this.executionIsolationStrategy = getProperty(propertyPrefix, key, "execution.isolation.strategy", builder.getExecutionIsolationStrategy(), default_executionIsolationStrategy); this.executionTimeoutInMilliseconds = getProperty(propertyPrefix, key, "execution.isolation.thread.timeoutInMilliseconds", builder.getExecutionIsolationThreadTimeoutInMilliseconds(), default_executionTimeoutInMilliseconds); this.executionTimeoutEnabled = getProperty(propertyPrefix, key, "execution.timeout.enabled", builder.getExecutionTimeoutEnabled(), default_executionTimeoutEnabled); this.executionIsolationThreadInterruptOnTimeout = getProperty(propertyPrefix, key, "execution.isolation.thread.interruptOnTimeout", builder.getExecutionIsolationThreadInterruptOnTimeout(), default_executionIsolationThreadInterruptOnTimeout); this.executionIsolationThreadInterruptOnFutureCancel = getProperty(propertyPrefix, key, "execution.isolation.thread.interruptOnFutureCancel", builder.getExecutionIsolationThreadInterruptOnFutureCancel(), default_executionIsolationThreadInterruptOnFutureCancel); this.executionIsolationSemaphoreMaxConcurrentRequests = getProperty(propertyPrefix, key, "execution.isolation.semaphore.maxConcurrentRequests", builder.getExecutionIsolationSemaphoreMaxConcurrentRequests(), default_executionIsolationSemaphoreMaxConcurrentRequests); this.fallbackIsolationSemaphoreMaxConcurrentRequests = getProperty(propertyPrefix, key, "fallback.isolation.semaphore.maxConcurrentRequests", builder.getFallbackIsolationSemaphoreMaxConcurrentRequests(), default_fallbackIsolationSemaphoreMaxConcurrentRequests); this.fallbackEnabled = getProperty(propertyPrefix, key, "fallback.enabled", builder.getFallbackEnabled(), default_fallbackEnabled); this.metricsRollingStatisticalWindowInMilliseconds = getProperty(propertyPrefix, key, "metrics.rollingStats.timeInMilliseconds", builder.getMetricsRollingStatisticalWindowInMilliseconds(), default_metricsRollingStatisticalWindow); this.metricsRollingStatisticalWindowBuckets = getProperty(propertyPrefix, key, "metrics.rollingStats.numBuckets", builder.getMetricsRollingStatisticalWindowBuckets(), default_metricsRollingStatisticalWindowBuckets); this.metricsRollingPercentileEnabled = getProperty(propertyPrefix, key, "metrics.rollingPercentile.enabled", builder.getMetricsRollingPercentileEnabled(), default_metricsRollingPercentileEnabled); this.metricsRollingPercentileWindowInMilliseconds = getProperty(propertyPrefix, key, "metrics.rollingPercentile.timeInMilliseconds", builder.getMetricsRollingPercentileWindowInMilliseconds(), default_metricsRollingPercentileWindow); this.metricsRollingPercentileWindowBuckets = getProperty(propertyPrefix, key, "metrics.rollingPercentile.numBuckets", builder.getMetricsRollingPercentileWindowBuckets(), default_metricsRollingPercentileWindowBuckets); this.metricsRollingPercentileBucketSize = getProperty(propertyPrefix, key, "metrics.rollingPercentile.bucketSize", builder.getMetricsRollingPercentileBucketSize(), default_metricsRollingPercentileBucketSize); this.metricsHealthSnapshotIntervalInMilliseconds = getProperty(propertyPrefix, key, "metrics.healthSnapshot.intervalInMilliseconds", builder.getMetricsHealthSnapshotIntervalInMilliseconds(), default_metricsHealthSnapshotIntervalInMilliseconds); this.requestCacheEnabled = getProperty(propertyPrefix, key, "requestCache.enabled", builder.getRequestCacheEnabled(), default_requestCacheEnabled); this.requestLogEnabled = getProperty(propertyPrefix, key, "requestLog.enabled", builder.getRequestLogEnabled(), default_requestLogEnabled); this.executionIsolationThreadPoolKeyOverride = HystrixPropertiesChainedProperty.forString().add(propertyPrefix + ".command." + key.name() + ".threadPoolKeyOverride", (Object)null).build(); }例如:超时降级execution.isolation.thread.timeoutInMilliseconds和服务熔断的circuitBreaker.enabled和circuitBreaker.requestVolumeThreshold等等都在上面可以找到
全局服务降级
实现全局服务降级主要就是靠@DefaultProperties和@HystrixCommand
进入@DefaultProperties
@Target({ElementType.TYPE})@Retention(RetentionPolicy.RUNTIME)@Inherited@Documentedpublic @interface DefaultProperties { String groupKey() default ""; String threadPoolKey() default ""; HystrixProperty[] commandProperties() default {}; HystrixProperty[] threadPoolProperties() default {}; Class<? extends Throwable>[] ignoreExceptions() default {}; HystrixException[] raiseHystrixExceptions() default {}; String defaultFallback() default "";}使用方法:这个注解加到消费者的controller层上,必要配置(defaultFallback)也就是默认服务降级方法名称,然后在需要使用默认服务降级的方法上加上@HystrixCommand(不加任何参数)即可
小坑:注意=======>默认服务降级的方法也就是defaultFallback方法“”不能有任何参数“”,不然就会报错
比如如下配置
@RestController@DefaultProperties(defaultFallback = "queryAllDept_Hystrix") //默认全局服务降级,也就是配置上去后,需要服务降级的方法加上@HystrixCommand不加参数即可public class deptController { @Autowired private deptService deptService;// @HystrixCommand(fallbackMethod = "queryAllDept_Hystrix",commandProperties = {// @HystrixProperty(name = "execution.isolation.thread.timeoutInMilliseconds",value = "1500")// }) @HystrixCommand //触发全局服务降级 @RequestMapping("/feign/queryAllDept") public List<dept> queryAllDept(String id){ int i = Integer.parseInt(id); if(i<0){ throw new RuntimeException(); } return deptService.queryAllDept(id); }// //服务降级方法,全局服务降级方法不能有参数 public List<dept> queryAllDept_Hystrix(){ List<dept> depts = new ArrayList<>(); depts.add(new dept("1000","Hystrix_fallback")); return depts; }}服务熔断
Pom.xml
<dependency> <groupId>org.springframework.cloud</groupId> <artifactId>spring-cloud-starter-netflix-hystrix</artifactId> </dependency>在springcloud-02-provider-dept8001和8002的controller
@RestControllerpublic class deptController { private deptService deptService; @Value("${server.port}") private String port; @Autowired @Qualifier("deptServiceImpl") public void setDeptService(com.boot.service.deptService deptService) { this.deptService = deptService; } @GetMapping(path = "/queryAllDept") @HystrixCommand(fallbackMethod = "queryAllDept_Hystrix",commandProperties = { @HystrixProperty(name = "circuitBreaker.enabled",value = "true"), @HystrixProperty(name = "circuitBreaker.requestVolumeThreshold",value = "10"), @HystrixProperty(name = "circuitBreaker.sleepWindowInMilliseconds",value = "20000"),//注意这是毫秒。1秒=1000毫秒 @HystrixProperty(name = "circuitBreaker.errorThresholdPercentage",value = "50") }) public List<dept> queryAllDept(String id){ List<dept> depts = deptService.queryAllDept(); depts.add(new dept("999",port));// try {// Thread.sleep(1500);// } catch (InterruptedException e) {// e.printStackTrace();// } if(Integer.parseInt(id)<0){ throw new RuntimeException(); } return depts; } / * 服务熔断 */ public List<dept> queryAllDept_Hystrix(String id){ List<dept> depts = deptService.queryAllDept(); depts.add(new dept("1066","Break")); return depts; }}提供者主启动类:
@SpringBootApplication@EnableEurekaClient //eureka客户端@EnableCircuitBreaker //开启服务熔断功能public class SpringBootApplication8001 { public static void main(String[] args) { SpringApplication.run(SpringBootApplication8001.class,args); }}Hystrix-Dashboard
创建子模块springcloud-02-hystrix-Dashboard8110
仪表盘的访问页面:
假如端口号是8110:http://localhost:8110/hystrix
Pom.xml
<dependencies> <dependency> <groupId>org.springframework.boot</groupId> <artifactId>spring-boot-starter-web</artifactId> </dependency> <dependency> <groupId>org.springframework.boot</groupId> <artifactId>spring-boot-starter-actuator</artifactId> </dependency> <dependency> <groupId>org.springframework.cloud</groupId> <artifactId>spring-cloud-starter-netflix-hystrix-dashboard</artifactId> </dependency> </dependencies>配置文件没有要求,就修改端口号即可
server: port: 8110spring: application: name: hystrixDashboard8110主启动类:
@SpringBootApplication@EnableHystrixDashboard //开启了Hystrix仪表盘功能public class springBootApplication8110 { public static void main(String[] args) { SpringApplication.run(springBootApplication8110.class,args); }}Bug:Hystrix仪表盘连接不上
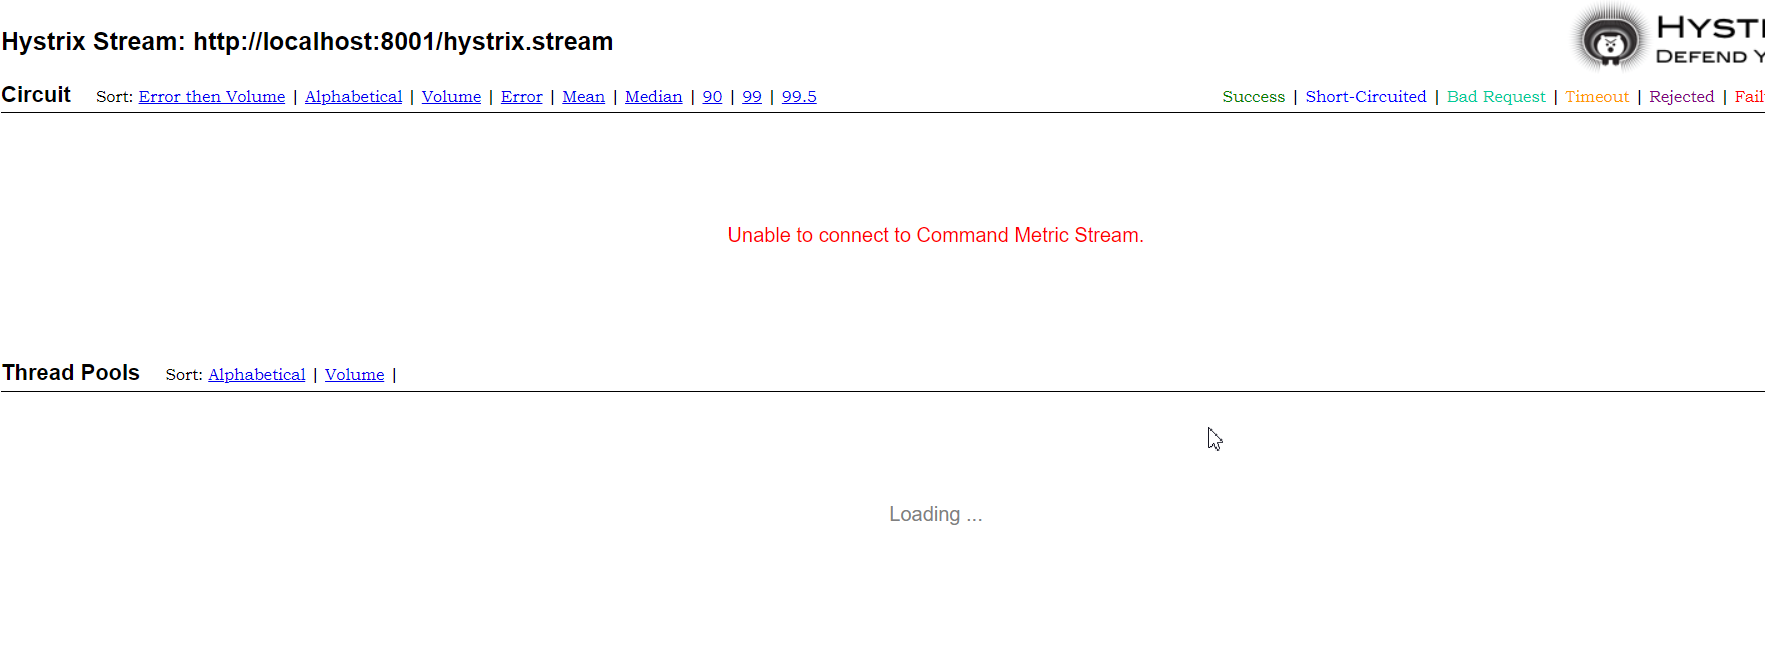
解决方法:在每一个需要监控的模块(比如微服务提供者8001和8002)加上如下配置
1.微服务提供者的Pom.xml
<dependency> <groupId>org.springframework.cloud</groupId> <artifactId>spring-cloud-starter-netflix-hystrix-dashboard</artifactId> </dependency>2.在微服务提供者8001和8002加上一个bean
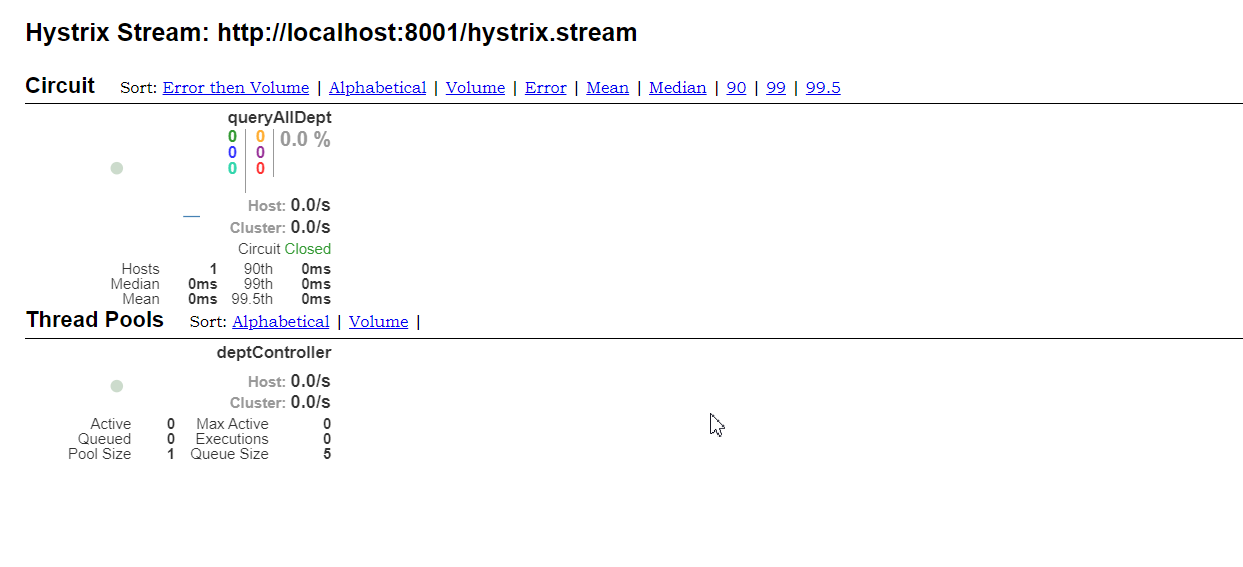
@SpringBootApplication@EnableEurekaClient //eureka客户端@EnableCircuitBreaker //开启服务熔断功能public class SpringBootApplication8001 { public static void main(String[] args) { SpringApplication.run(SpringBootApplication8001.class,args); } //解决Hystrix-dashboard连接不上 @Bean public ServletRegistrationBean getServlet() { HystrixMetricsStreamServlet streamServlet = new HystrixMetricsStreamServlet(); ServletRegistrationBean registrationBean = new ServletRegistrationBean(streamServlet); registrationBean.setLoadOnStartup(1); registrationBean.addUrlMappings("/hystrix.stream"); registrationBean.setName("HystrixMetricsStreamServlet"); return registrationBean; }}Bug:Hystrix仪表盘一直是loading
解决方法:用openFeign去调用一下即可
成功页面👇
服务网关springcloud gateway
小坑:1.注意===》gateWay不能有springBoot-Web的启动器,不然会报错。。。。。。。。
小坑(负载均衡):2.注意==》需要把gateway当作提供者注册到注册中心eureka中,不然不能进行服务网关的负载均衡
服务网关gateway作用:把所有请求都先进入网关gateway,再由gateway进行分发请求,这样的好处就是隐藏分发到的微服务的端口号,安全性更高
配置gateway服务网关
1.创建子模块springcloud-02-gateWay9527
2.打开pom.xml,添加依赖
<dependency> <groupId>org.springframework.cloud</groupId> <artifactId>spring-cloud-starter-gateway</artifactId> </dependency>3.application.yml
server: port: 9527spring: cloud: gateway: routes: #配置路由 - id: providerGateway8001 uri: http://localhost:8001 predicates: #配置断言 - Path=/queryAllDept4.然后再访问http://localhost:9527/queryAllDept?id=1
gateway服务网关负载均衡(lb)
注意:需要把gateway当作提供者“”注册“”到注册中心eureka中,不然不能进行服务网关的负载均衡
1.先导入这个
<dependency> <groupId>org.springframework.cloud</groupId> <artifactId>spring-cloud-starter-netflix-eureka-client</artifactId> </dependency>2.springBootApplication
@SpringBootApplication@EnableEurekaClientpublic class springBootApplication9527 { public static void main(String[] args) { SpringApplication.run(springBootApplication9527.class,args); }}3.application.yml
server: port: 9527spring: application: name: gateway9527 cloud: gateway: routes: - id: providerGateway8001 uri: lb://PROVIDER-DEPT predicates: - Path=/queryAllDepteureka: client: fetch-registry: true register-with-eureka: true service-url: defaultZone: http://eureka-server7001.com:7001/eureka/, http://eureka-server7002.com:7002/eureka/, http://eureka-server7003.com:7003/eureka/分布式配置中心springcloud config
1.创建gitee或者GitHub,并把配置文件上传到git
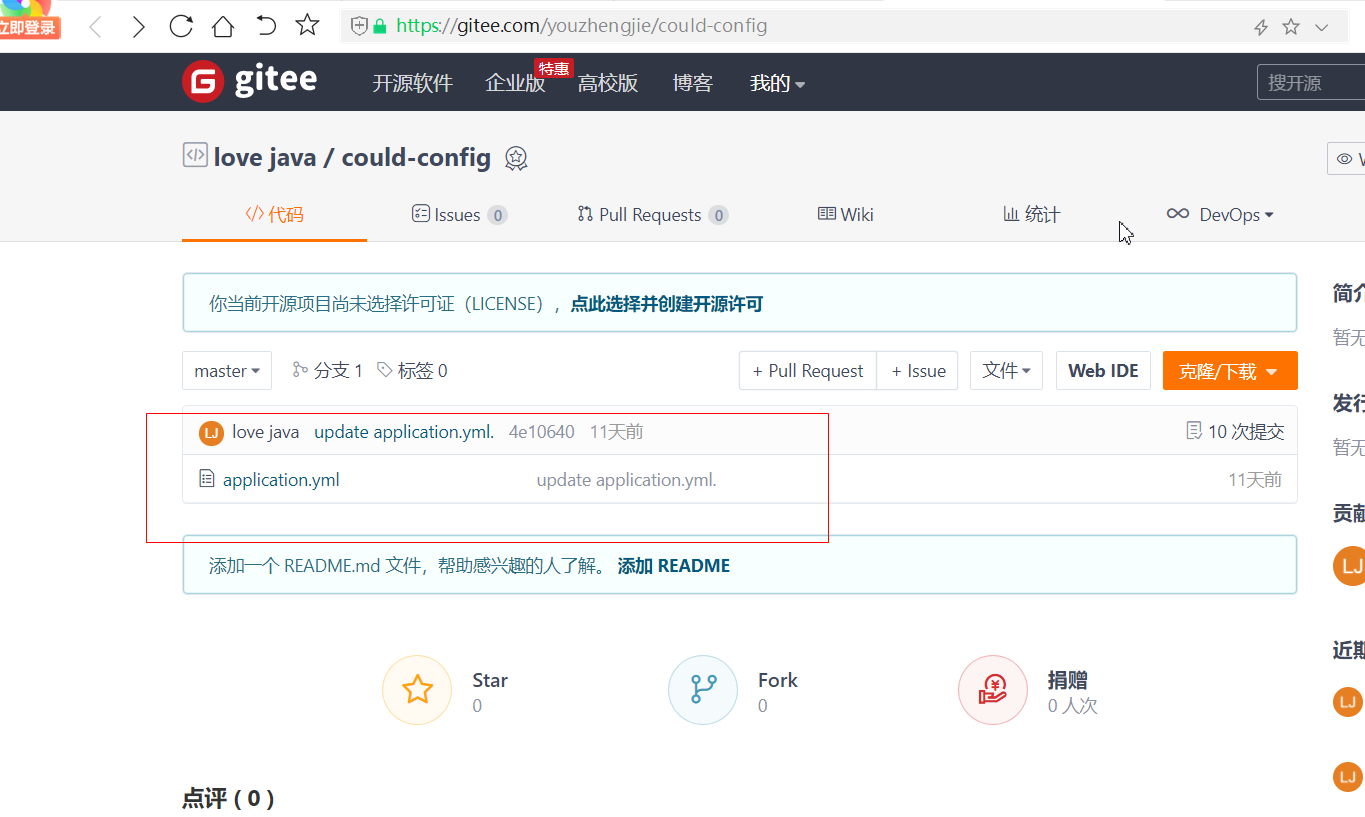
我们目的是拉取上面红框的配置文件
分布式配置中心服务器端(server)
2.创建子模块springcloud-02-config-server9001
3.导入依赖
<dependency> <groupId>org.springframework.cloud</groupId> <artifactId>spring-cloud-config-server</artifactId> </dependency>4.application.yml
server: port: 9001spring: cloud: config: server: git: default-label: master #文件所在git的分支,默认是master uri: https://gitee.com/youzhengjie/could-config #这个uri就是文件所在的网页地址。。。。5.启动类
@SpringBootApplication@EnableConfigServer //开启分布式配置中心服务器端public class springBootApplication9001 { public static void main(String[] args) { SpringApplication.run(springBootApplication9001.class,args); }}分布式配置中心客户端(client)
1.创建子模块springcloud-02-config-client8002
2.导入依赖(注意:web和config-client必须要导入,特别是web依赖,不导入不行)
<dependency> <groupId>org.springframework.boot</groupId> <artifactId>spring-boot-starter-web</artifactId> </dependency> <dependency> <groupId>org.springframework.boot</groupId> <artifactId>spring-boot-starter-actuator</artifactId> </dependency> <dependency> <groupId>org.springframework.cloud</groupId> <artifactId>spring-cloud-config-client</artifactId> </dependency>3.主启动类====不用加什么,就一个普通的springBoot启动类即可
4.bootstrap.yml
server: port: 8200spring: cloud: config: label: master name: application uri: http://localhost:90015.controller(去测试有没有sys.version,有的话就说明成功了)
@RestControllerpublic class testController { @Value("${sys.version}") private String version; @RequestMapping("/getVersion") public String getVersion(){ return version; }}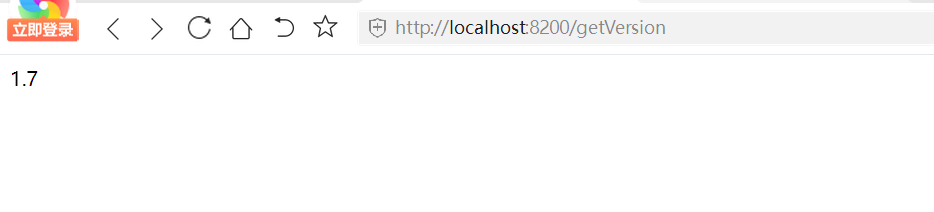
引入springcloud bus消息总线之前。。。。
我们用git去把sys.version更新成1.8
去访问一下config-server

发现config-server是可以立刻更新到的,因为config-server和gitee是直连的。
我们去访问一下config-client
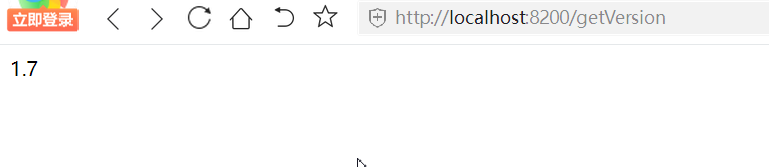
发现还是1.7,只有重新启动config-client项目才能更新成1.8,这是我们要用到actuator的refresh端点,手动刷新。
actuator手动刷新config-client
修改如下:1.在controller加上@RefreshScope
@RestController@RefreshScope //config client刷新注解public class testController { @Value("${sys.version}") private String version; @RequestMapping("/getVersion") public String getVersion(){ return version; }}2.暴露端点
server: port: 8200spring: cloud: config: label: master name: application uri: http://localhost:9001#开启所有端点management: endpoints: web: exposure: include: "*"3.用postman去发送post刷新请求
前提:1.发送POST请求到uri/actuator/refresh
2.前面几步工作做好,比如@RefreshScope。
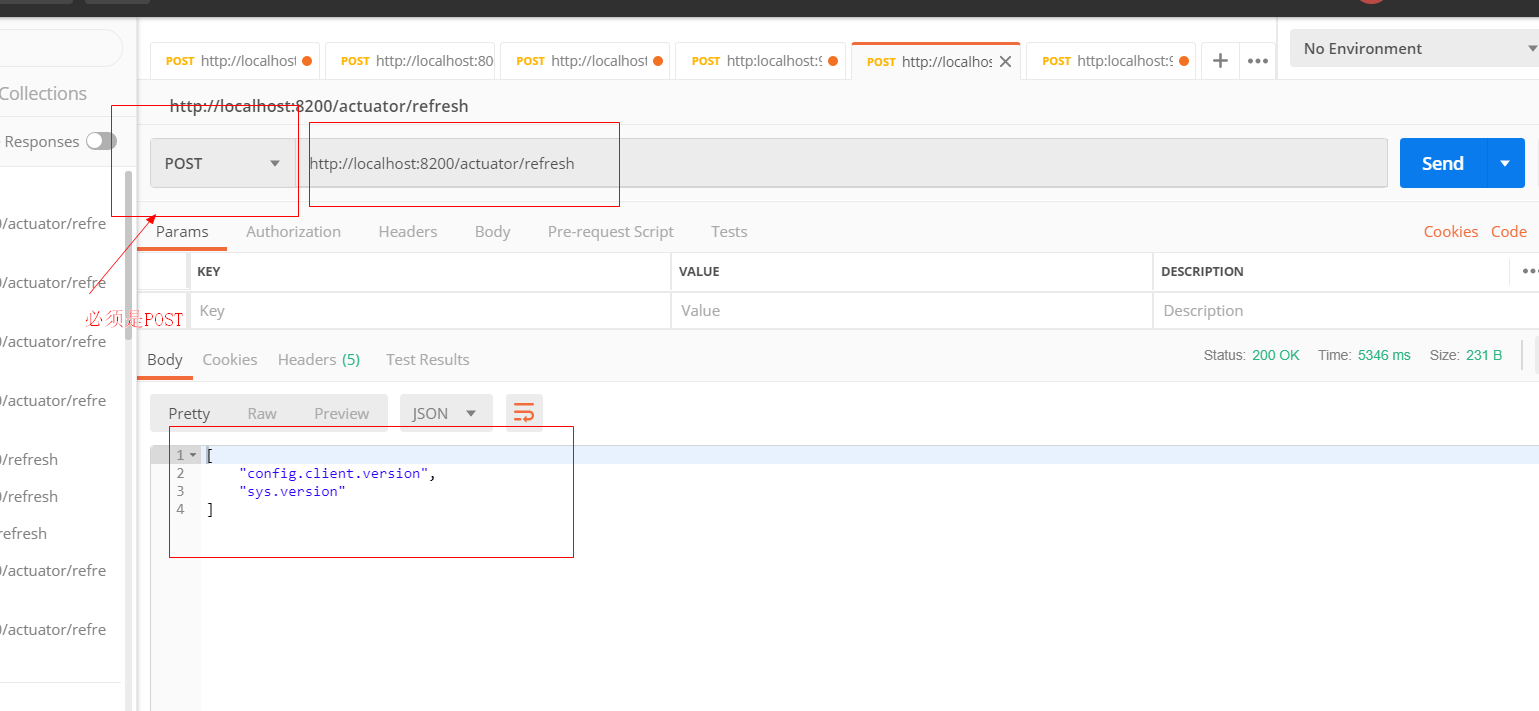
就ok了!!!
为什么要引入springcloud bus的原因
感想:假如有20个config-client,我们要去刷新他们,难道一个个去发送post请求/actuator/refresh???那肯定不行,这样可以是可以,但是效率太低了,所以我们就会引入消息总线springcloud bus,一次post刷新请求即可,不管有多少模块需要刷新。很方便
消息总线springcloud Bus
引入消息总线springcloud bus不需要创建新的模块。。。。只需要用config server和config client即可
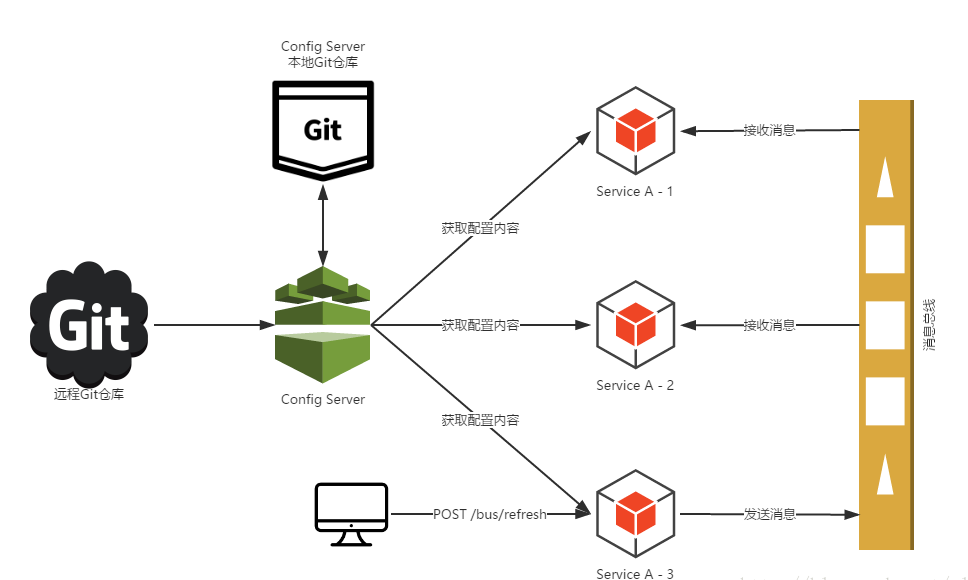
为什么不需要创建新的模块呢?因为在下面的架构中可以说明一切
安装rabbitMQ环境
总教程:https://www.cnblogs.com/saryli/p/9729591.html
1.安装erlang
(1.)下载erlang
官网地址:https://www.erlang.org/
下载教程:https://www.cnblogs.com/minily/p/7398445.html
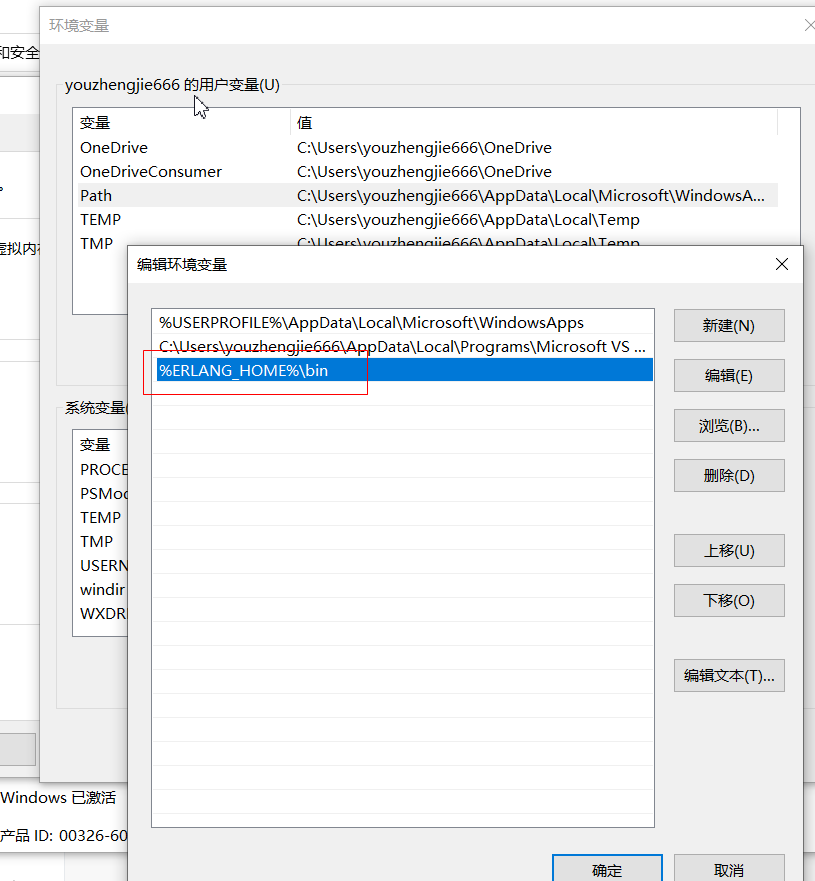
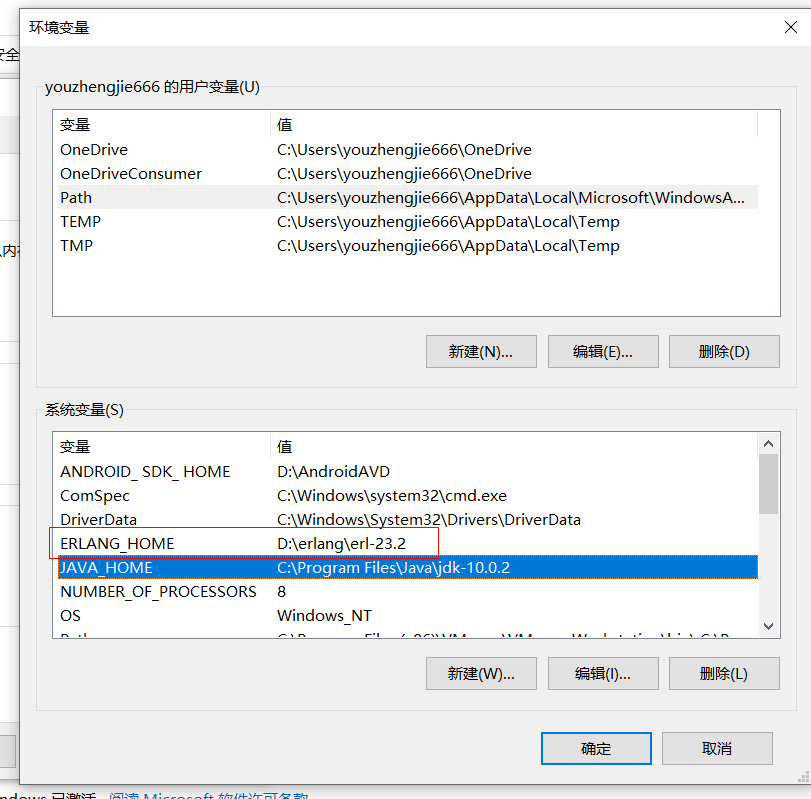
(2.)配置erlang环境
配置教程:https://blog.csdn.net/g6256613/article/details/80191402
需要配置环境变量
(3.)检查是否安装成功
打开cmd,输入erl,有输出说明成功
(4.)下载rabbitMQ
下载地址:https://www.cnblogs.com/saryli/p/9729591.html
。。。。。。。。。。。。省略,在总教程都有。
(5.)最后访问http://localhost:15672,如果访问成功,说明rabbitMQ安装成功
配置springcloud Bus
有了springcloud bus,我们只需要通知config server,config server就会去“”遍历“”config client,一个个发送刷新的通知,就比如一个个发送/actuator/refresh
1.在上面的基础上,config server9001的pom.xml添加依赖
<dependency> <groupId>org.springframework.cloud</groupId> <artifactId>spring-cloud-starter-bus-amqp</artifactId> </dependency>注意===========》2.config server 9001的application.yml
spring: cloud: config: server: git: default-label: master uri: https://gitee.com/youzhengjie/could-config rabbitmq: port: 5672 username: guest password: guest host: localhost注意::::一定要开放bus-refresh端点management: endpoints: web: exposure: include: "bus-refresh"3.在上面的基础上,config client 8200 的pom.xml
<dependency> <groupId>org.springframework.cloud</groupId> <artifactId>spring-cloud-starter-bus-amqp</artifactId> </dependency>4.config client 8200的application.yml
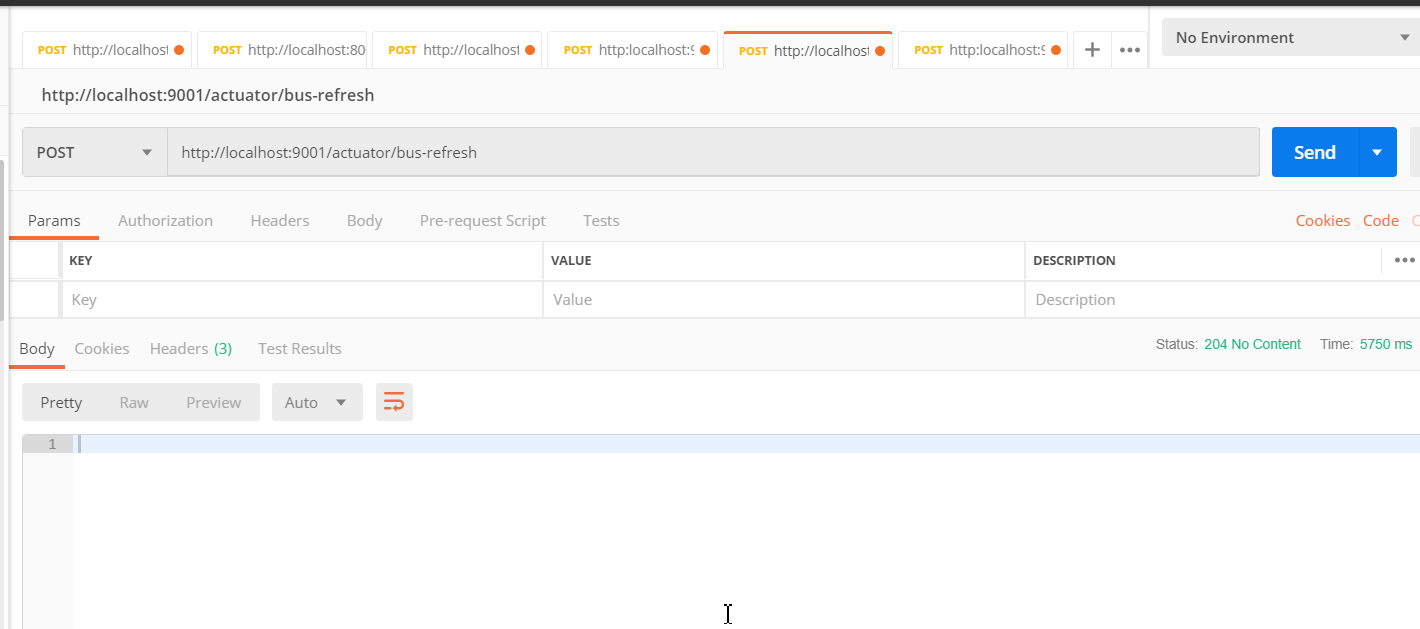
spring: cloud: config: label: master name: application uri: http://localhost:9001 rabbitmq: host: localhost username: guest password: guest port: 56725.在postman发送刷新命令即可。http://localhost:9001/actuator/bus-refresh
❤️💛🧡本章结束,我们下一章见❤️💛🧡

