springboot+vue框架
文章目录
1.Vue的安装
- 新建文件夹"springboot+vue框架"
- 打开dos界面,进入"springboot+vue框架"文件夹
- 安装node软件
- 安装vue脚本
npm install vue- 创建vue项目
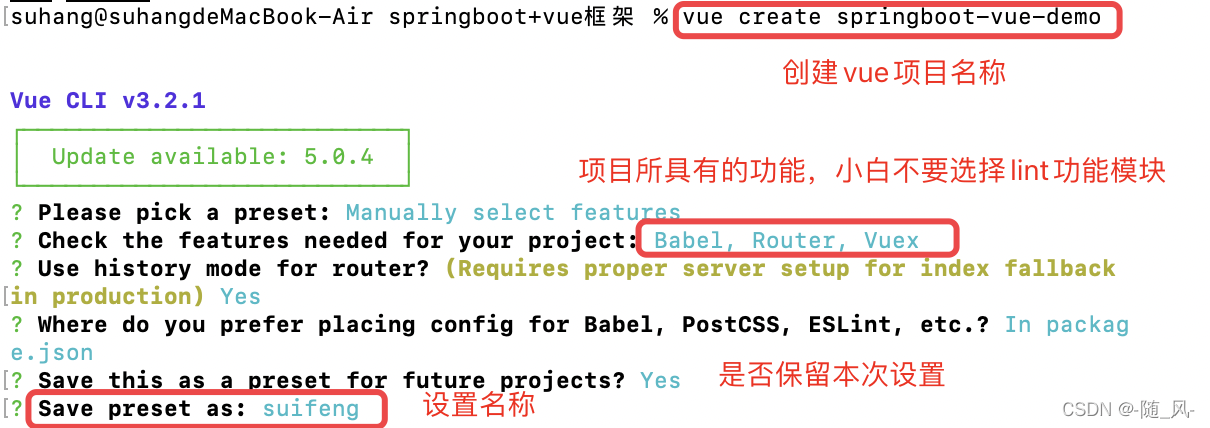
- 安装成功后,打开项目
cd springboot-vue-demo npm run serve- 直接把springboot-vue-demo拖入到IDEA
- 设置自动运行按钮
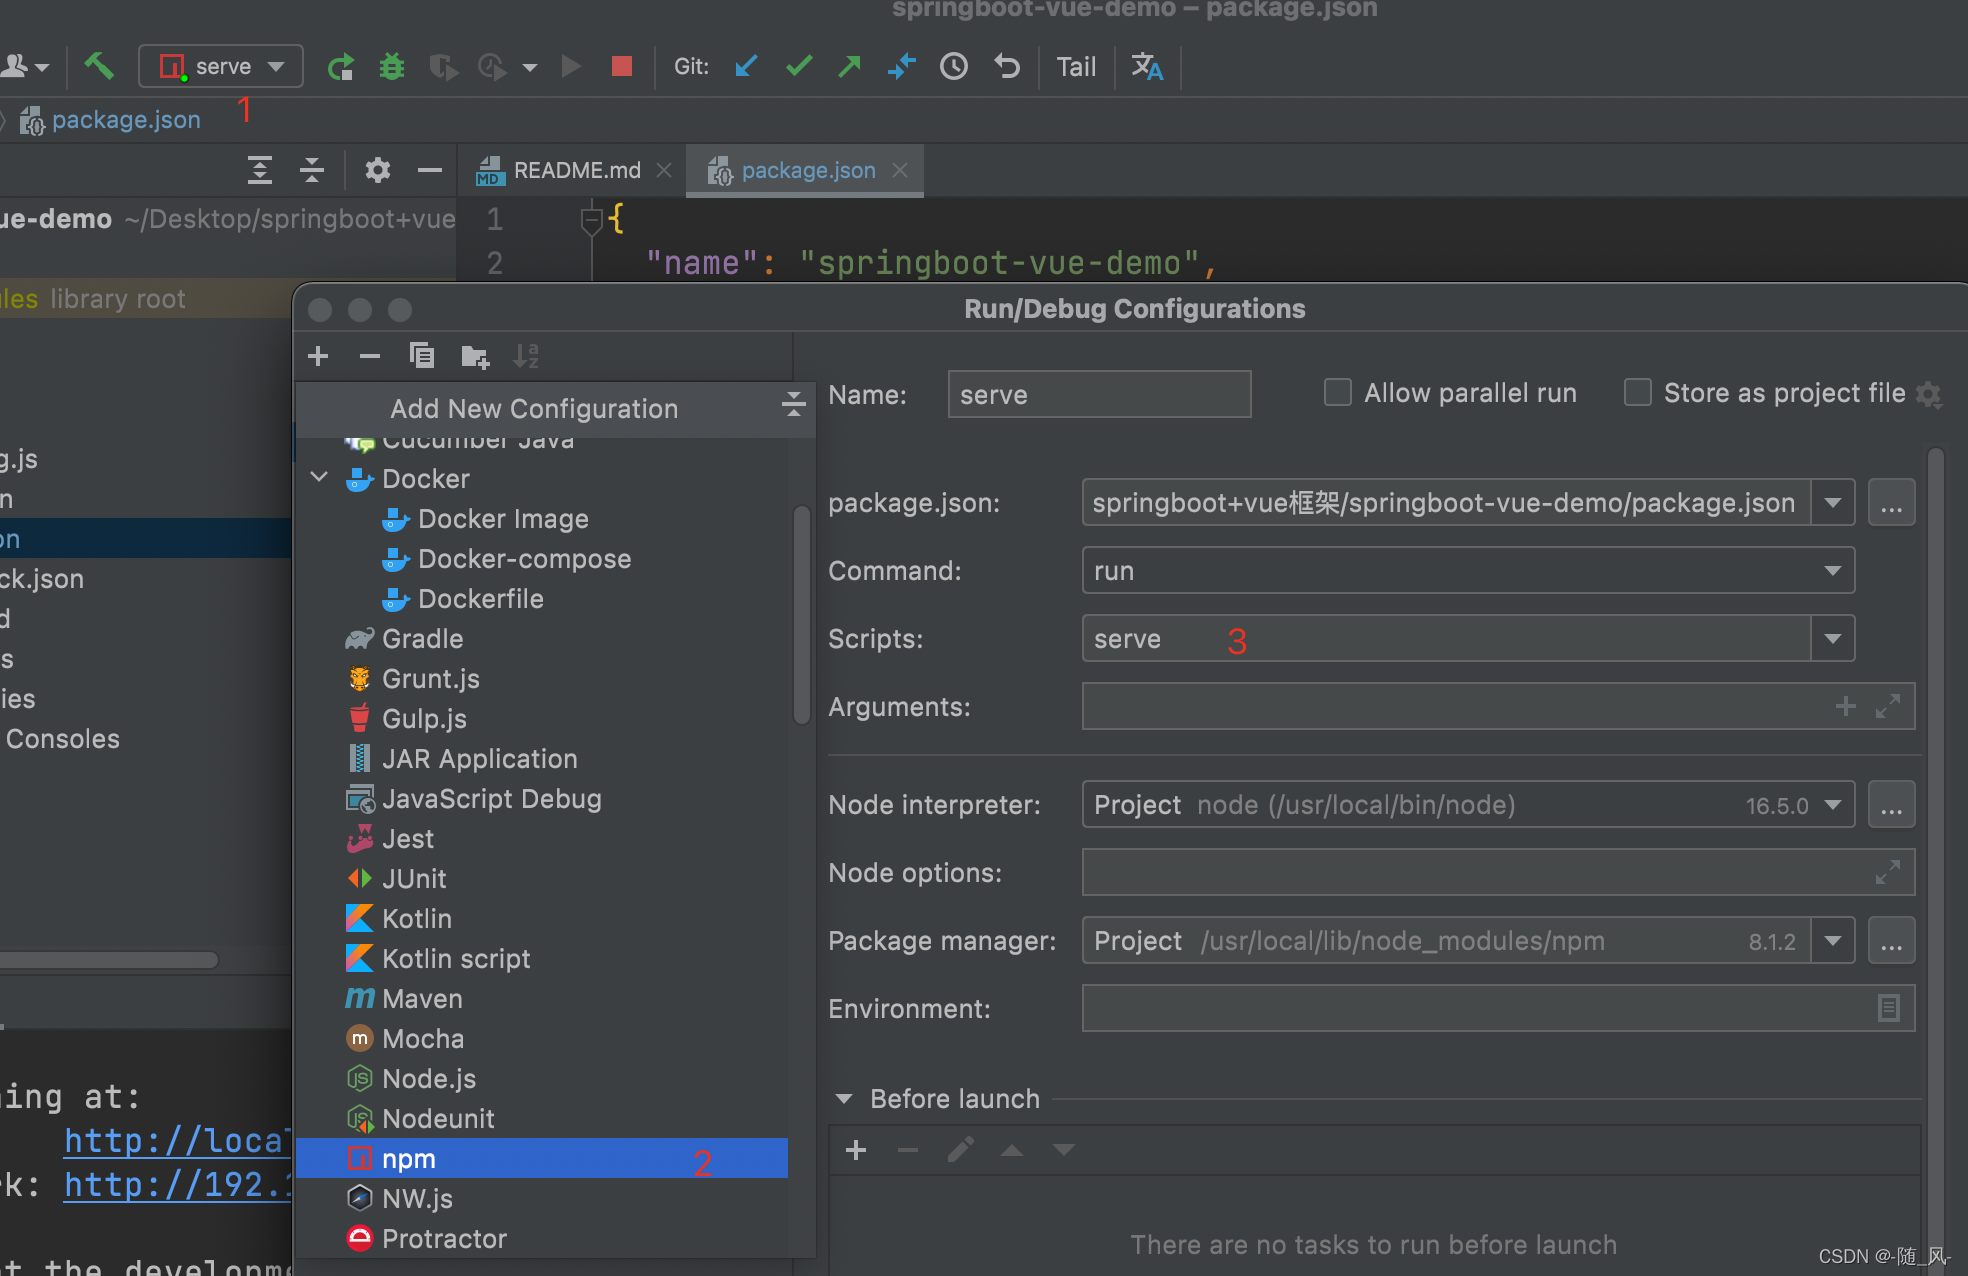
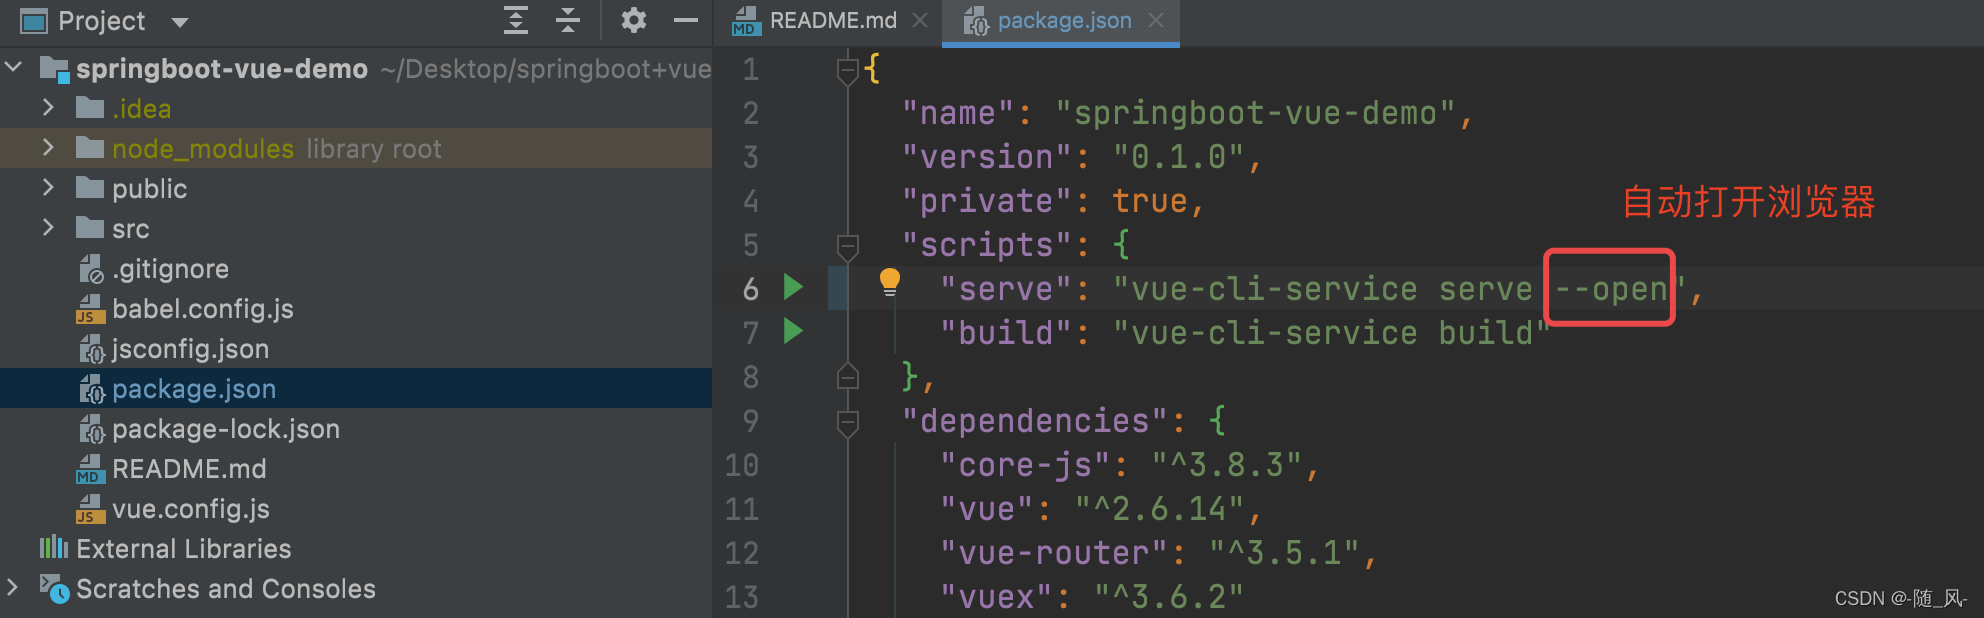
- 设置自动打开浏览器界面
2. 使用element-plus组件
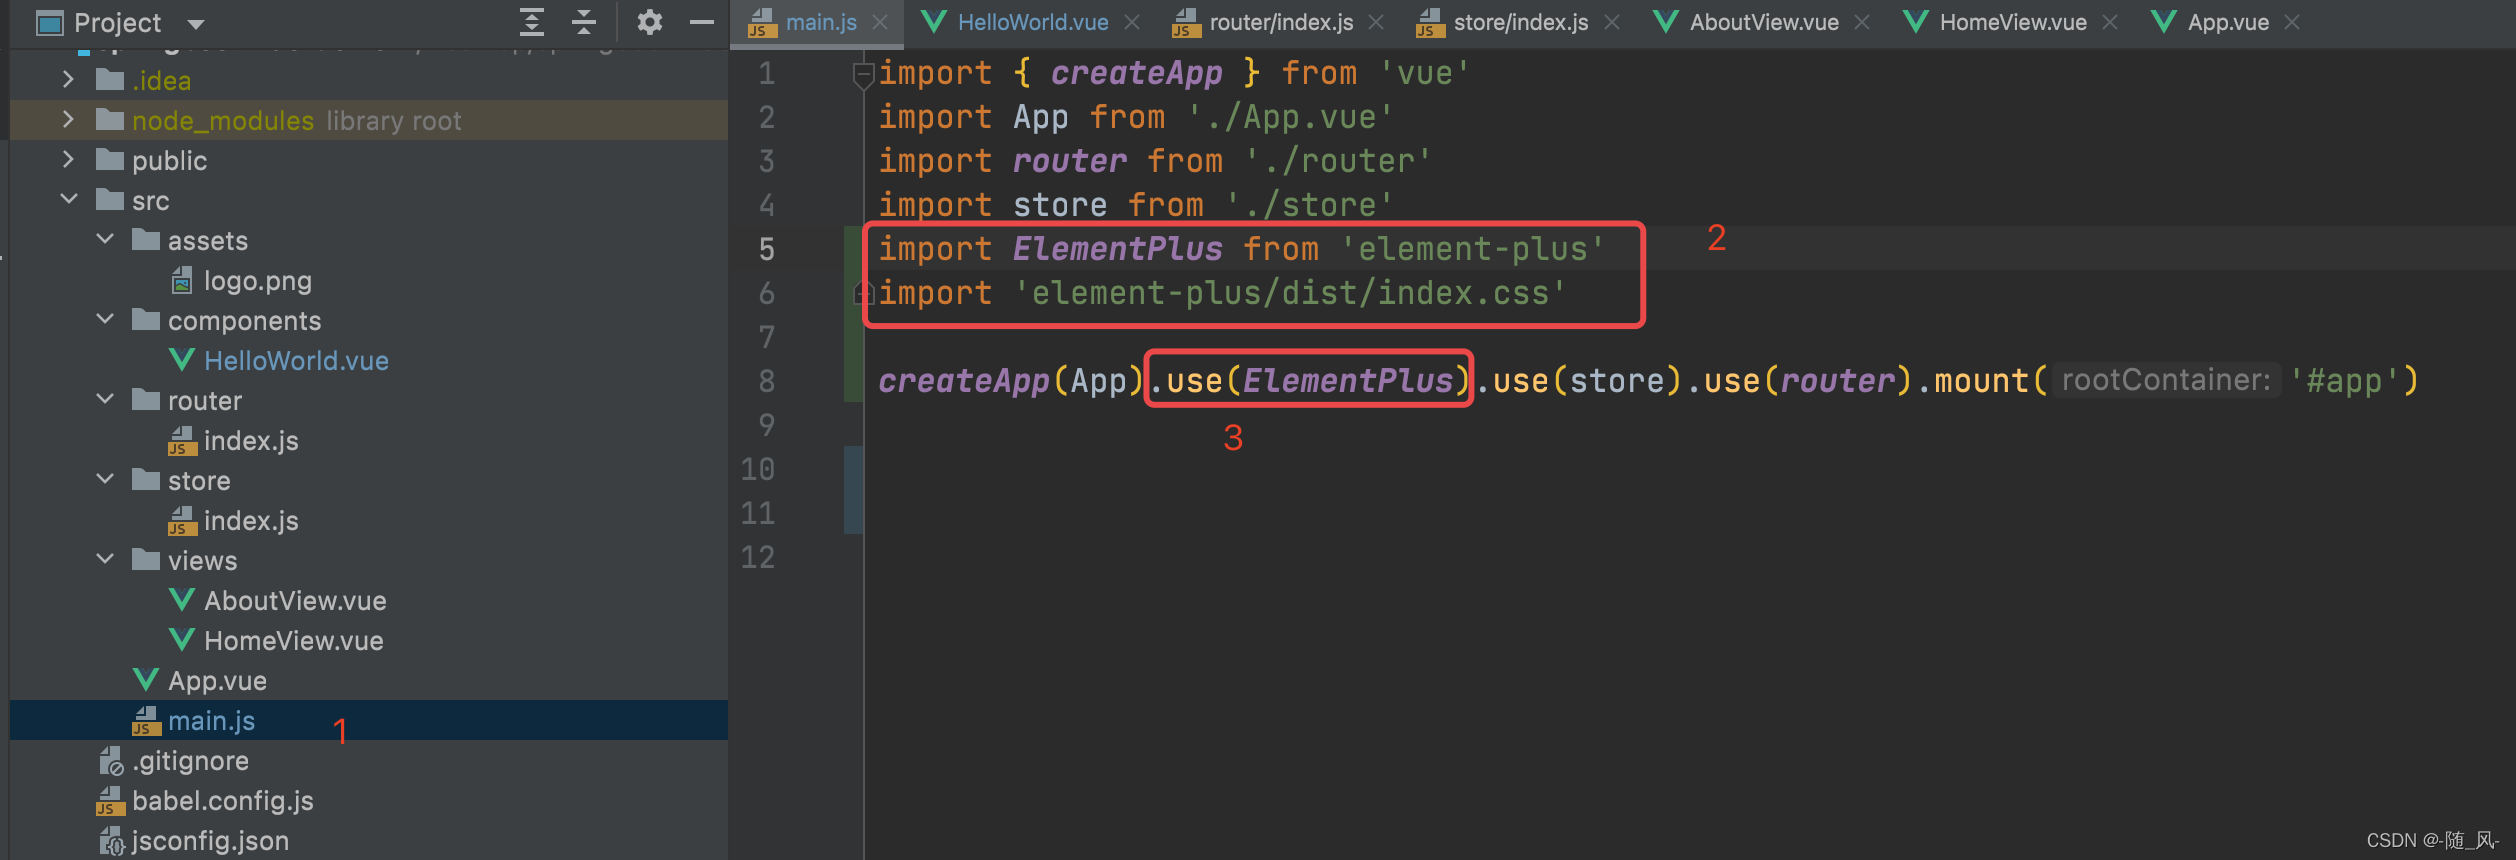
- 在IDEA上安装element-plus组件
npm install element-plus --save --legacy-peer-deps- 添加配置信息
3.使用axios进行前后端交互
3.1. 安装axios
npm i axios -S3.2. Vue项目搭建常用的配置文件,request.js和vue.config.js
3.2.1. 前端跨域解决方案
request.js用来请求数据,封装的代码如下:
import axios from 'axios'const request = axios.create({baseURL: '/api', // 注意!! 这里是全局统一加上了 '/api' 前缀,也就是说所有接口都会加上'/api'前缀在,页面里面写接口的时候就不要加 '/api'了,否则会出现2个'/api',类似 '/api/api/user'这样的报错,切记!!! timeout: 5000})// request 拦截器// 可以自请求发送前对请求做一些处理// 比如统一加token,对请求参数统一加密request.interceptors.request.use(config => { config.headers['Content-Type'] = 'application/json;charset=utf-8'; // config.headers['token'] = user.token; // 设置请求头 return config}, error => { return Promise.reject(error)});// response 拦截器// 可以在接口响应后统一处理结果request.interceptors.response.use( response => { let res = response.data; // 如果是返回的文件 if (response.config.responseType === 'blob') { return res } // 兼容服务端返回的字符串数据 if (typeof res === 'string') { res = res ? JSON.parse(res) : res } return res; }, error => { console.log('err' + error) // for debug return Promise.reject(error) })export default requestvue.config.js:
// 跨域配置module.exports = { devServer: { //记住,别写错了devServer//设置本地默认端口 选填 port: 9876, proxy: { //设置代理,必须填 '/api': {//设置拦截器 拦截器格式 斜杠+拦截器名字,名字可以自己定 target: 'http://localhost:9999', //代理的目标地址 changeOrigin: true,//是否设置同源,输入是的 pathRewrite: { //路径重写 '^/api': ''//选择忽略拦截器里面的内容 } } } }}3.2.2. 后端跨域解决方案
如果后端设置了跨域配置,则使用下面的request.js 代码:
import axios from 'axios'const request = axios.create({baseURL: 'http://localhost:9090', // 注意!! 这里是全局统一加上了 后端接口前缀 前缀,后端必须进行跨域配置! timeout: 5000})// request 拦截器// 可以自请求发送前对请求做一些处理// 比如统一加token,对请求参数统一加密request.interceptors.request.use(config => { config.headers['Content-Type'] = 'application/json;charset=utf-8'; // config.headers['token'] = user.token; // 设置请求头 return config}, error => { return Promise.reject(error)});// response 拦截器// 可以在接口响应后统一处理结果request.interceptors.response.use( response => { let res = response.data; // 如果是返回的文件 if (response.config.responseType === 'blob') { return res } // 兼容服务端返回的字符串数据 if (typeof res === 'string') { res = res ? JSON.parse(res) : res } return res; }, error => { console.log('err' + error) // for debug return Promise.reject(error) })export default request4. 数据库设计
5. 创建springboot项目
采用分层思想实现功能
Java web各层
返回结果格式
public class Result<T> { private String code; private String msg; private T data; public String getCode() { return code; } public void setCode(String code) { this.code = code; } public String getMsg() { return msg; } public void setMsg(String msg) { this.msg = msg; } public T getData() { return data; } public void setData(T data) { this.data = data; } public Result() { } public Result(T data) { this.data = data; } public static Result success(){ Result reslut = new Result<>(); reslut.setCode("0"); reslut.setMsg("成功"); return reslut; } public static <T> Result<T> success(T data){ Result<T> reslut = new Result<>(data); reslut.setCode("0"); reslut.setMsg("成功"); return reslut; } public static Result error(String code, String msg){ Result reslut = new Result(); reslut.setCode(code); reslut.setMsg(msg); return reslut; }}6. 前端功能实现与后端功能连通
6.1. 前端功能实现
以新增功能为例

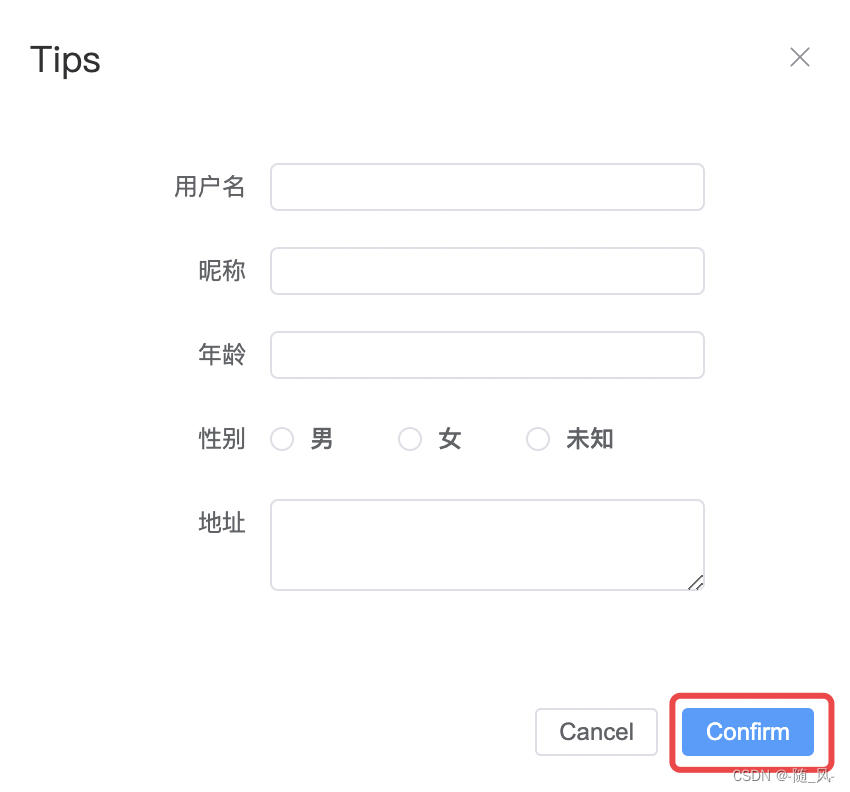
<!--功能区域--> <div style="margin: 10px 0"> <el-button type="primary" @click="handleEdit">新增</el-button> <el-button type="primary">导入</el-button> <el-button type="primary">导出</el-button> </div>注意save
<template #footer> <span class="dialog-footer"> <el-button @click="dialogVisible = false">Cancel</el-button> <el-button type="primary" @click="save">Confirm</el-button> </span></template>注意save函数
使用上文3.2.1中request.js来请求数据
save(){ request.post("/user",this.form).then(res =>{ console.log(res) if(res.code==='0'){ this.$message({type: "success",message: "新增成功" }) }else{ this.$message({type: "error",message: res.msg, }) } this.load() //刷新表格数据 this.dialogVisible=false //关闭弹窗 }) }6.2. 后端功能实现
@RestController@RequestMapping("/user")public class UserController { //@RequestBody:把前台传过来的json,转换为对象 @Resource UserMapper userMapper; @PostMapping public Result<?> save(@RequestBody User user){ if (user.getPassword()==null){ user.setPassword("123456"); } userMapper.insert(user); return Result.success(); }}
