【GD32F310开发板试用】rt-thread nano移植并创建线程
首发极术社区。如对兆易创新GD32F310 MCU感兴趣,欢迎添加微信 aijishu2020 加入GD32技术讨论群。
在上篇项目的基础上移植rt-thread nano系统。移植过程如下:
一、系统移植
移植步骤是按照官网的文档教程进行,地址:https://www.rt-thread.org/doc…
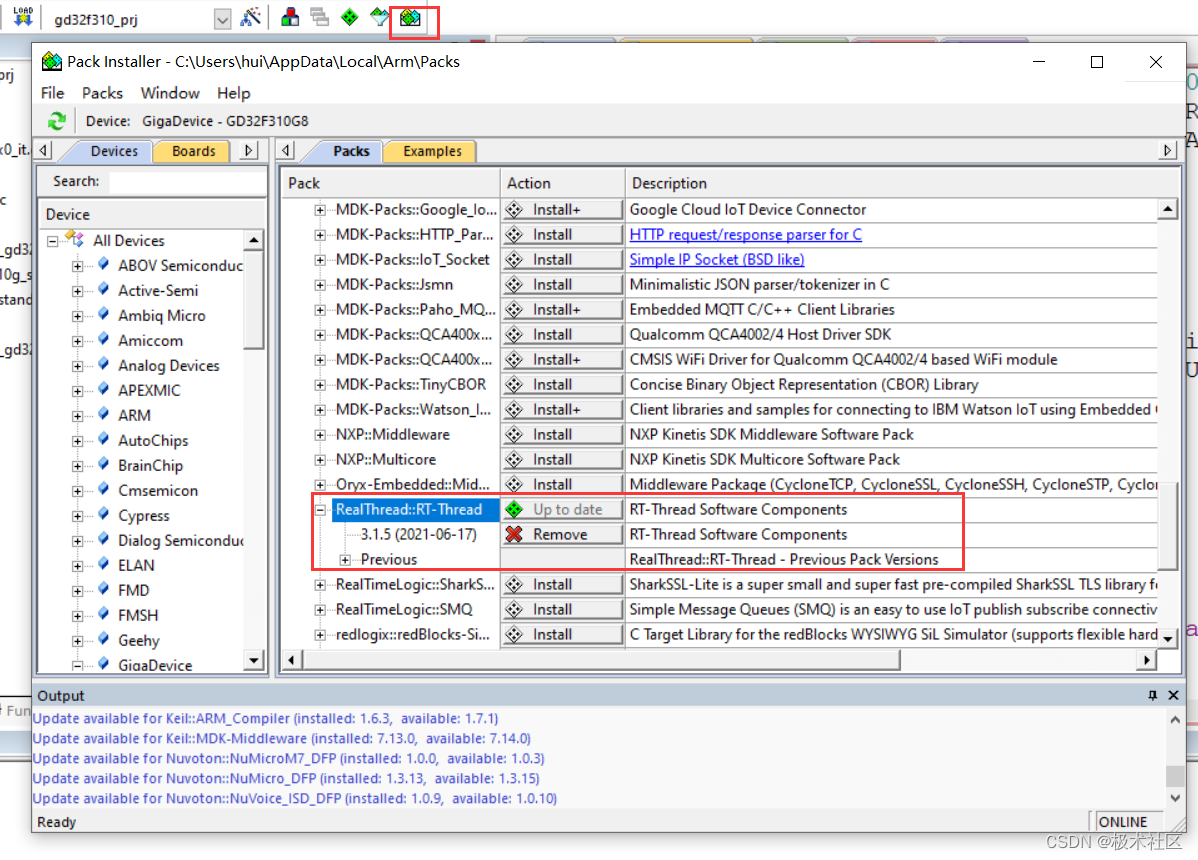
1.1、在keil下添加系统库文件
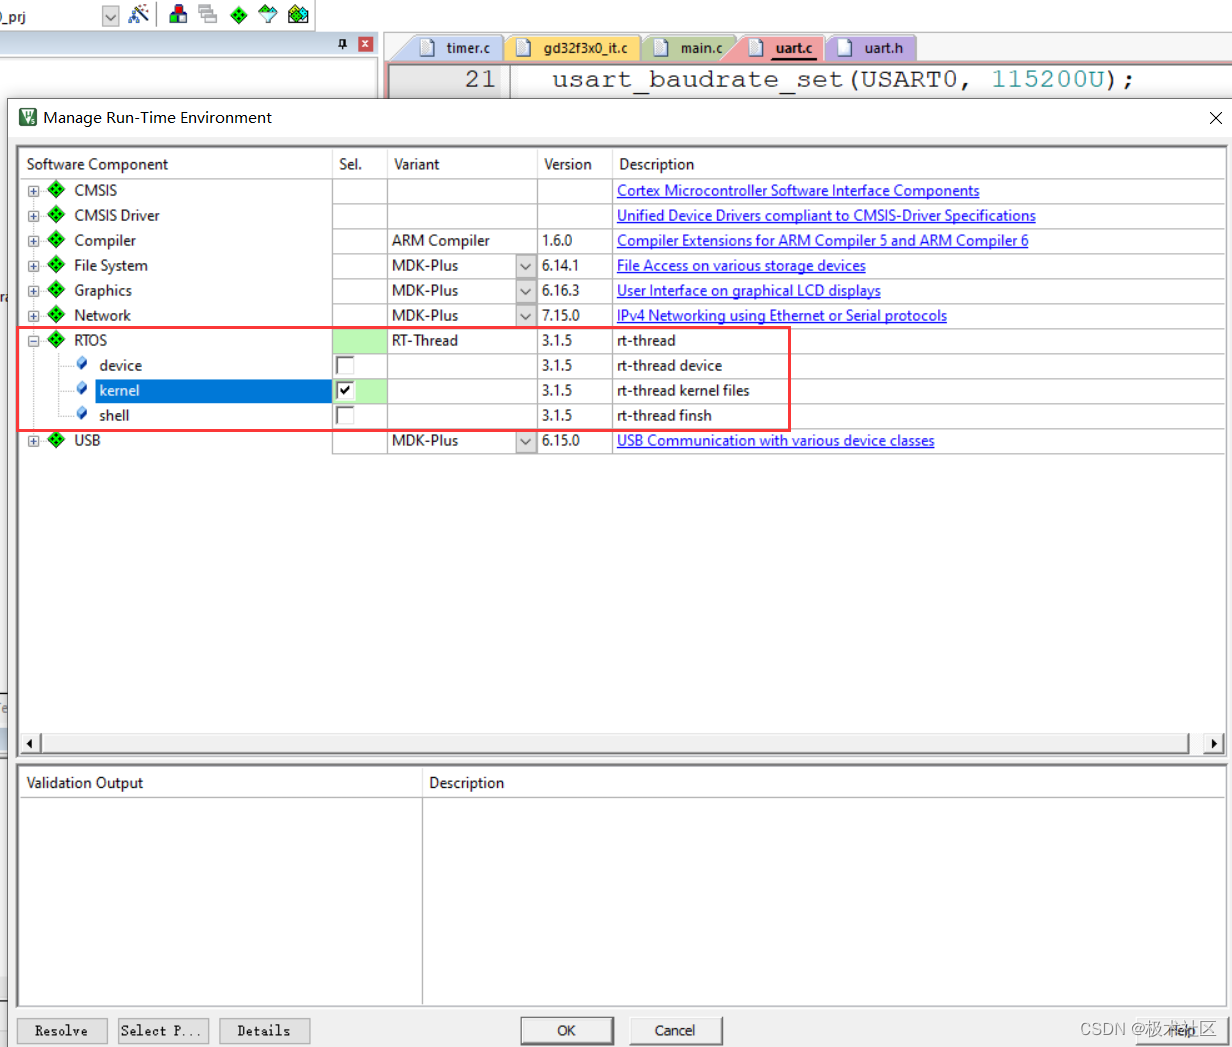
1.2、将系统添加进工程文件
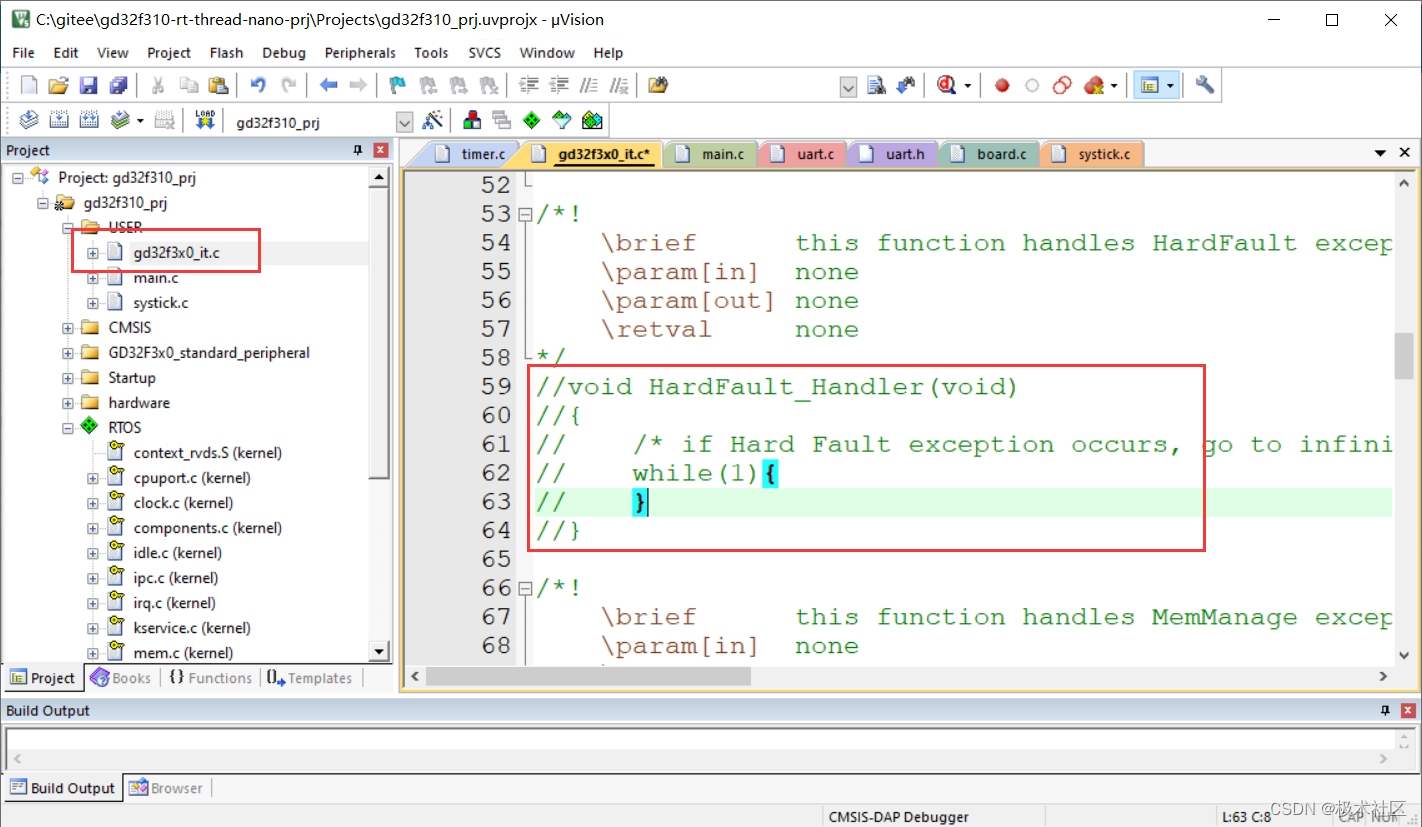
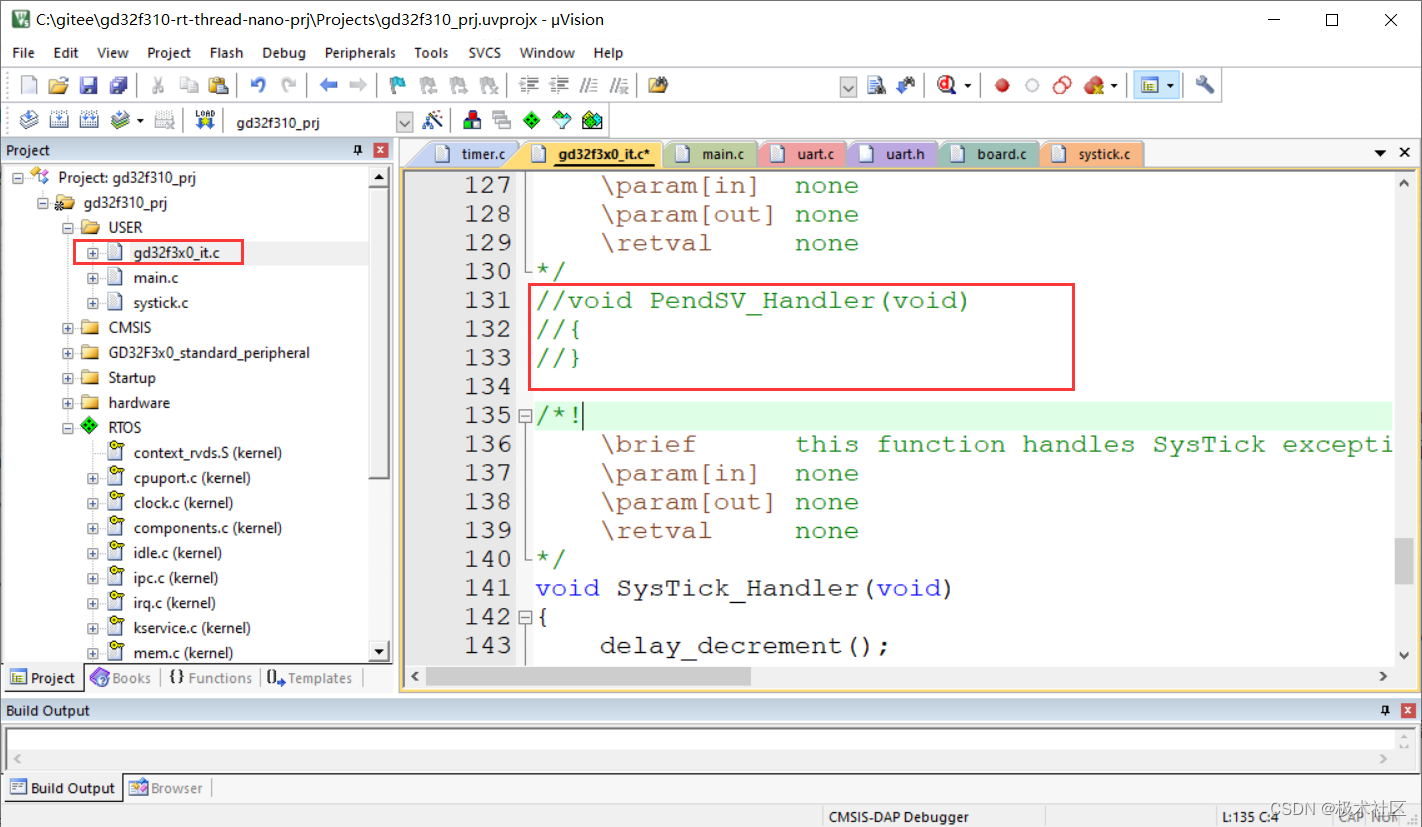
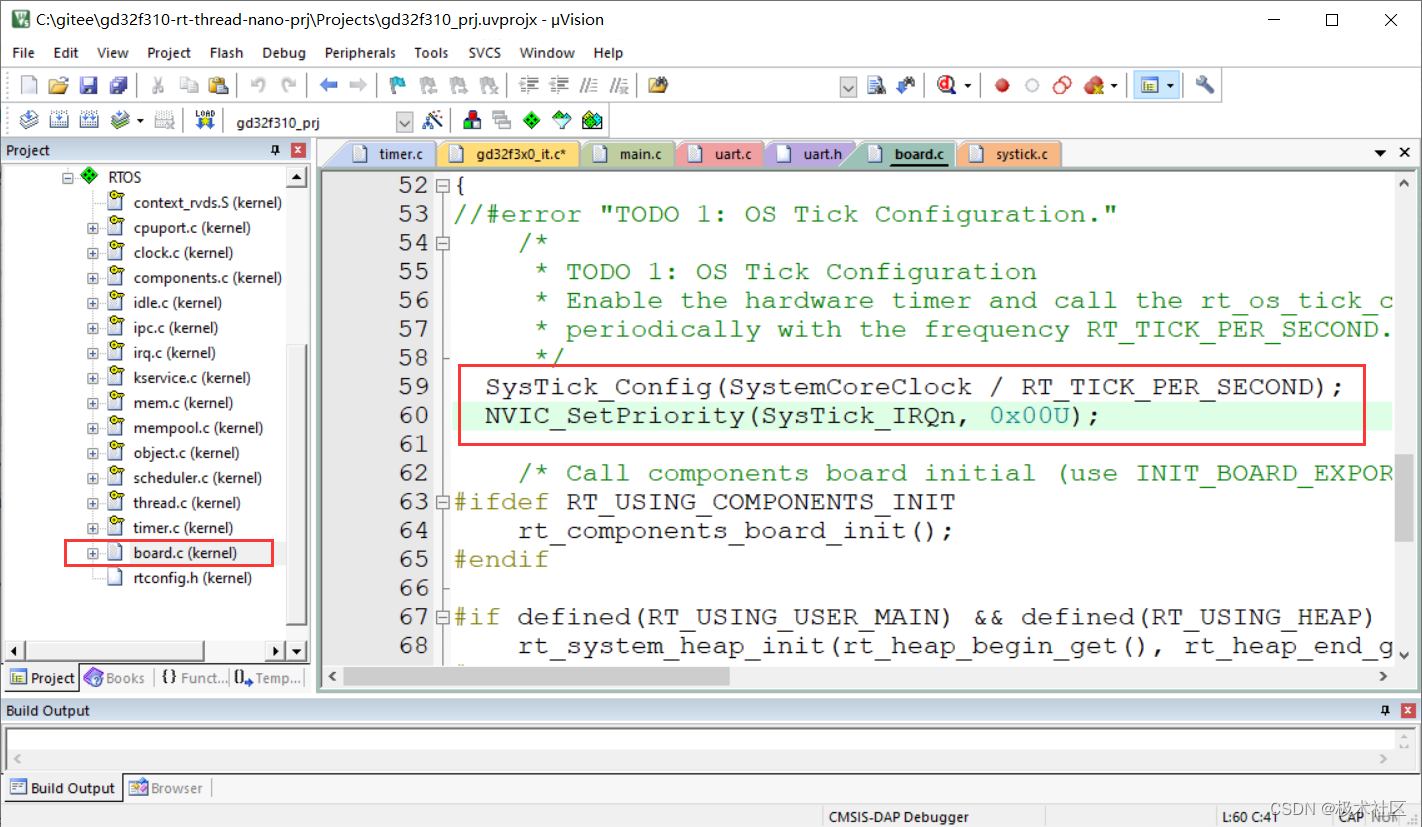
1.3、删除gd32f3x0_it.c中的HardFault_Handler、PendSV_Handler和SysTick_Handler函数

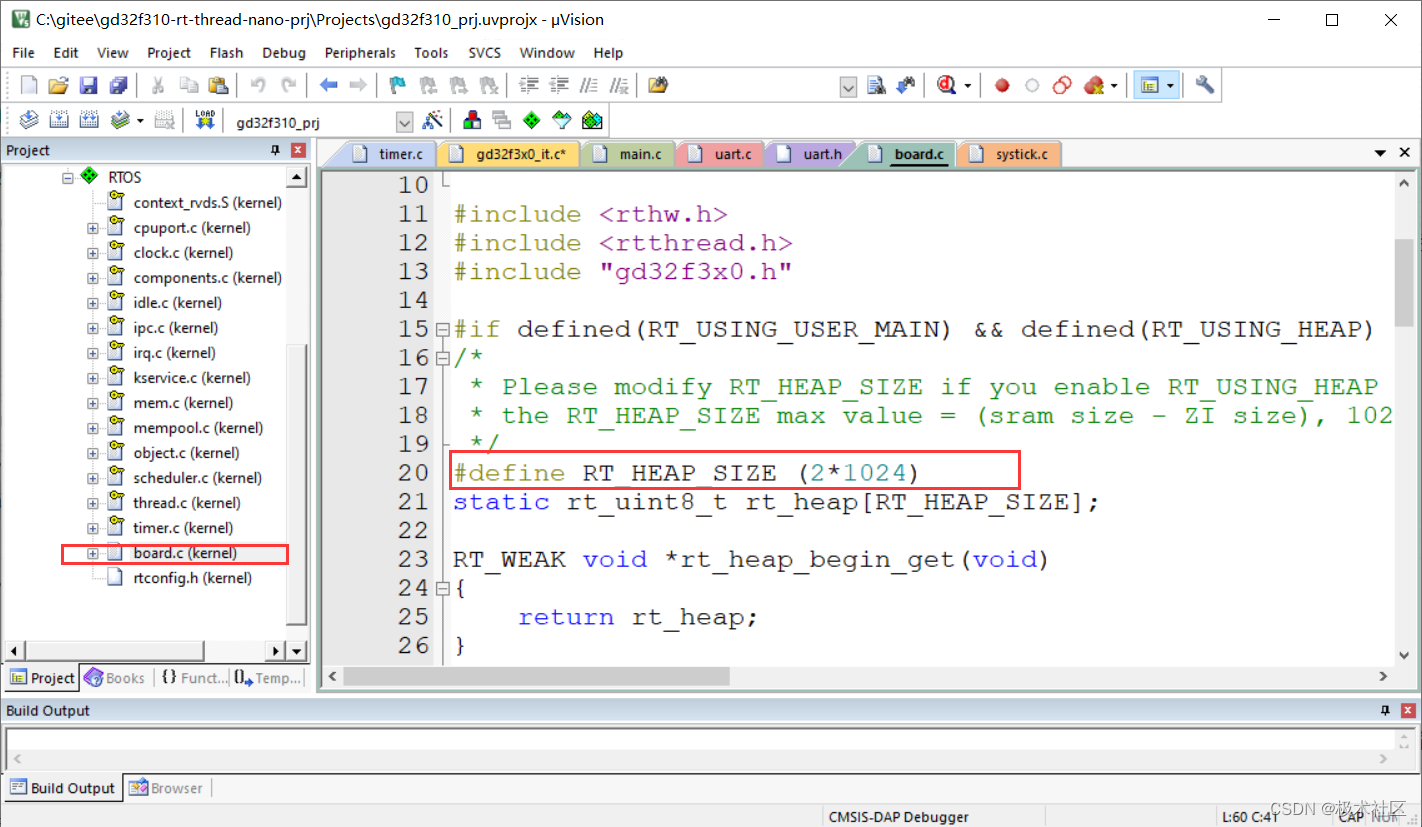
1.4、在board.c中增加和修改如下内容
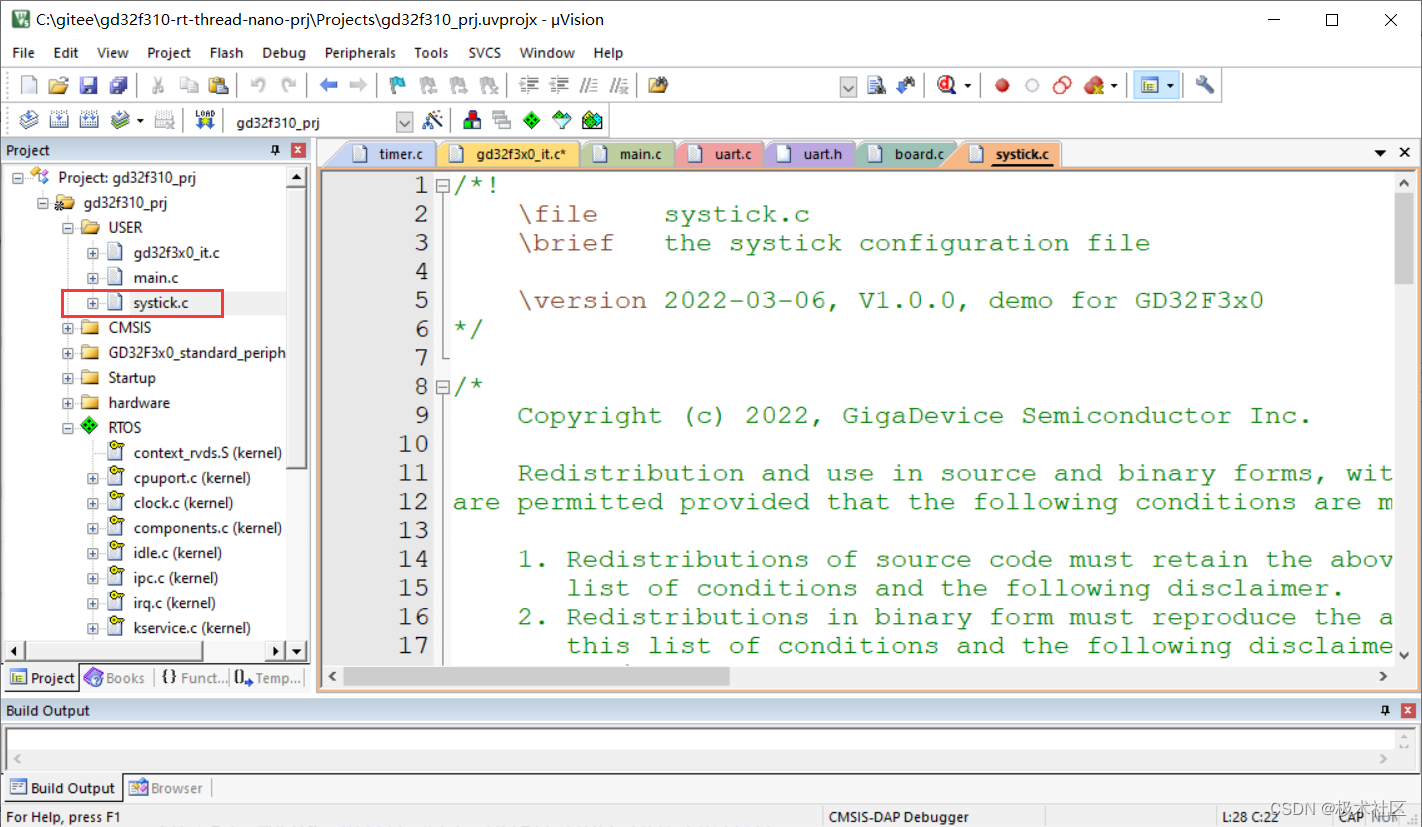
1.5、删除systicks.c
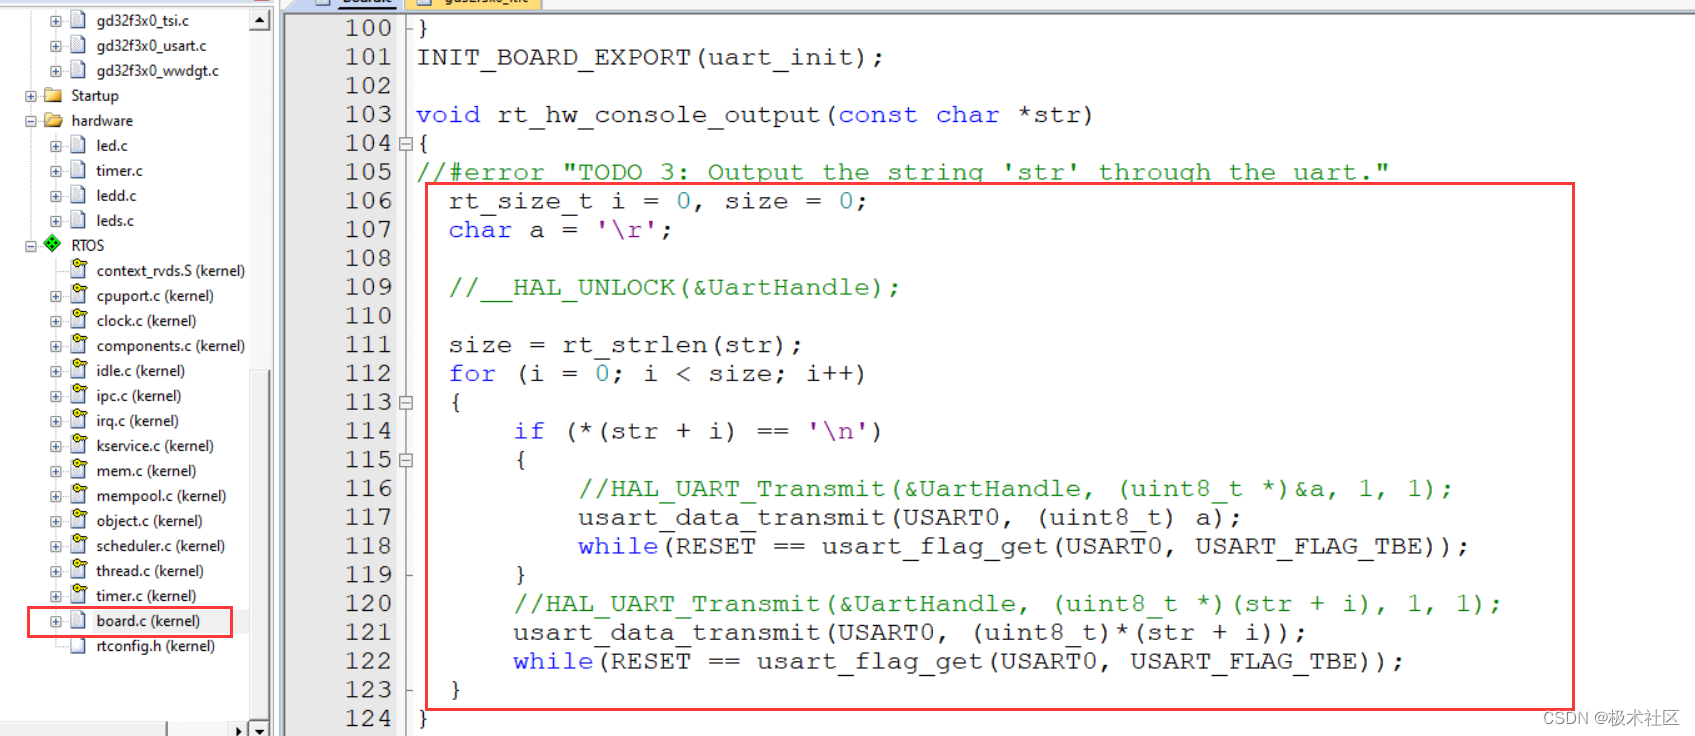
二、移植串口打印
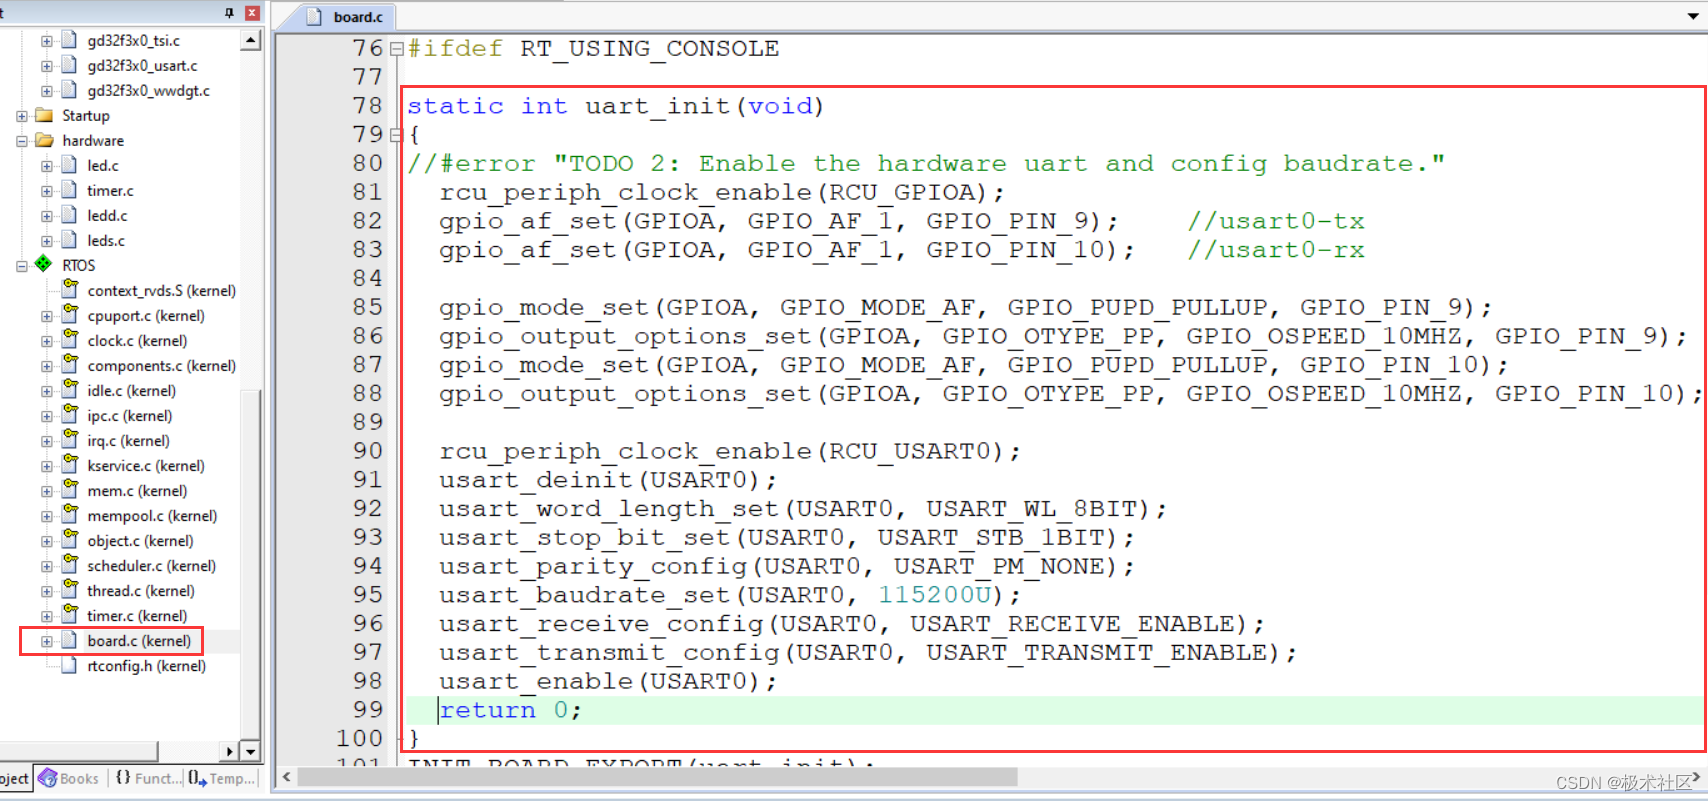
2.1、增加串口打印功能
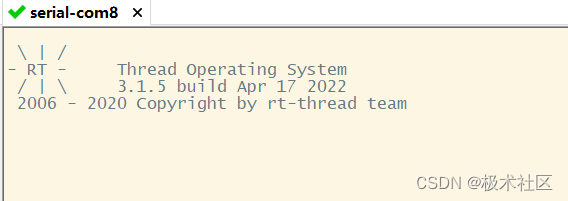
2.2、编译、下载后,运行显示
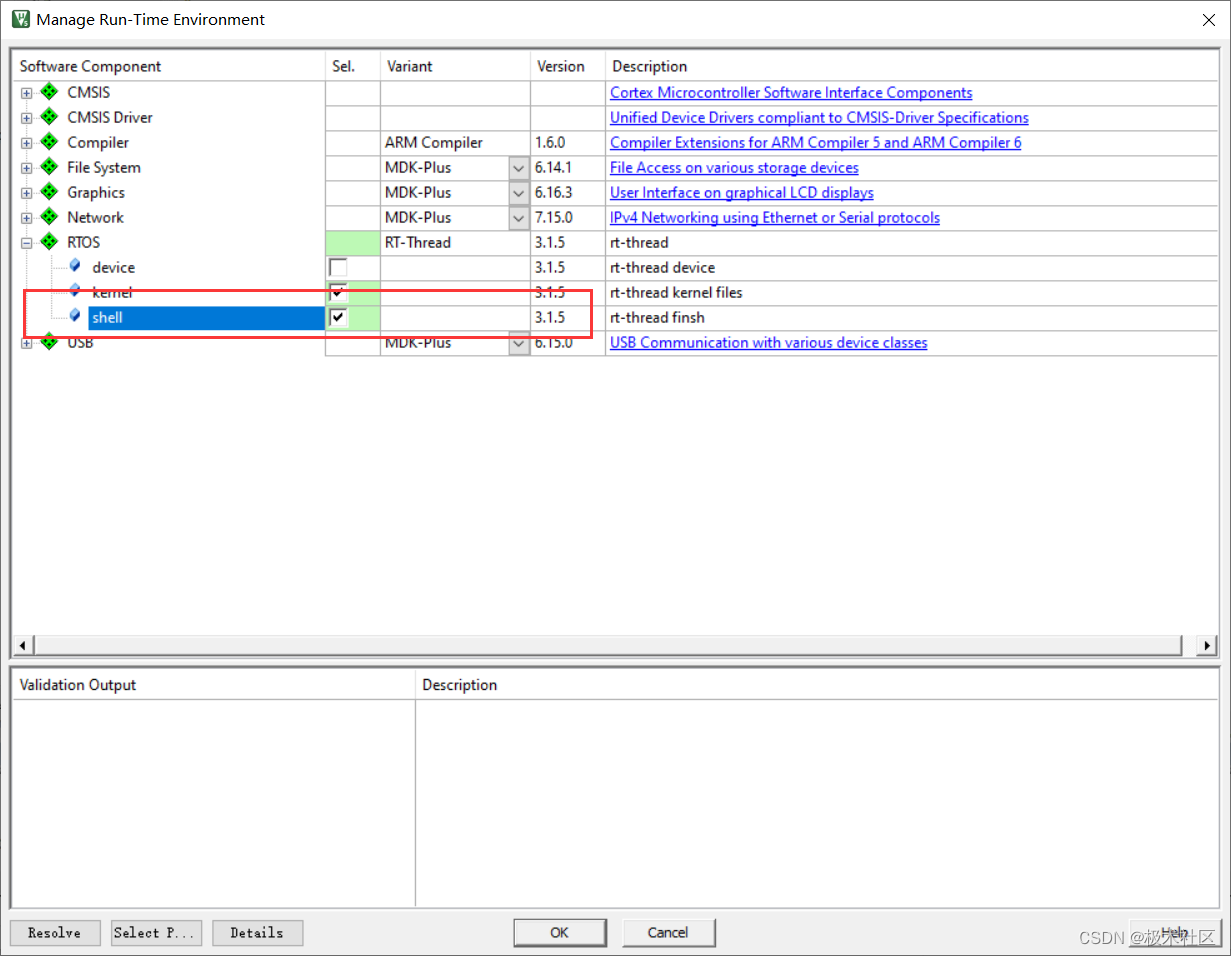
三、移植控制台
移植finSH参考文档 地址
3.1、keil下添加源码
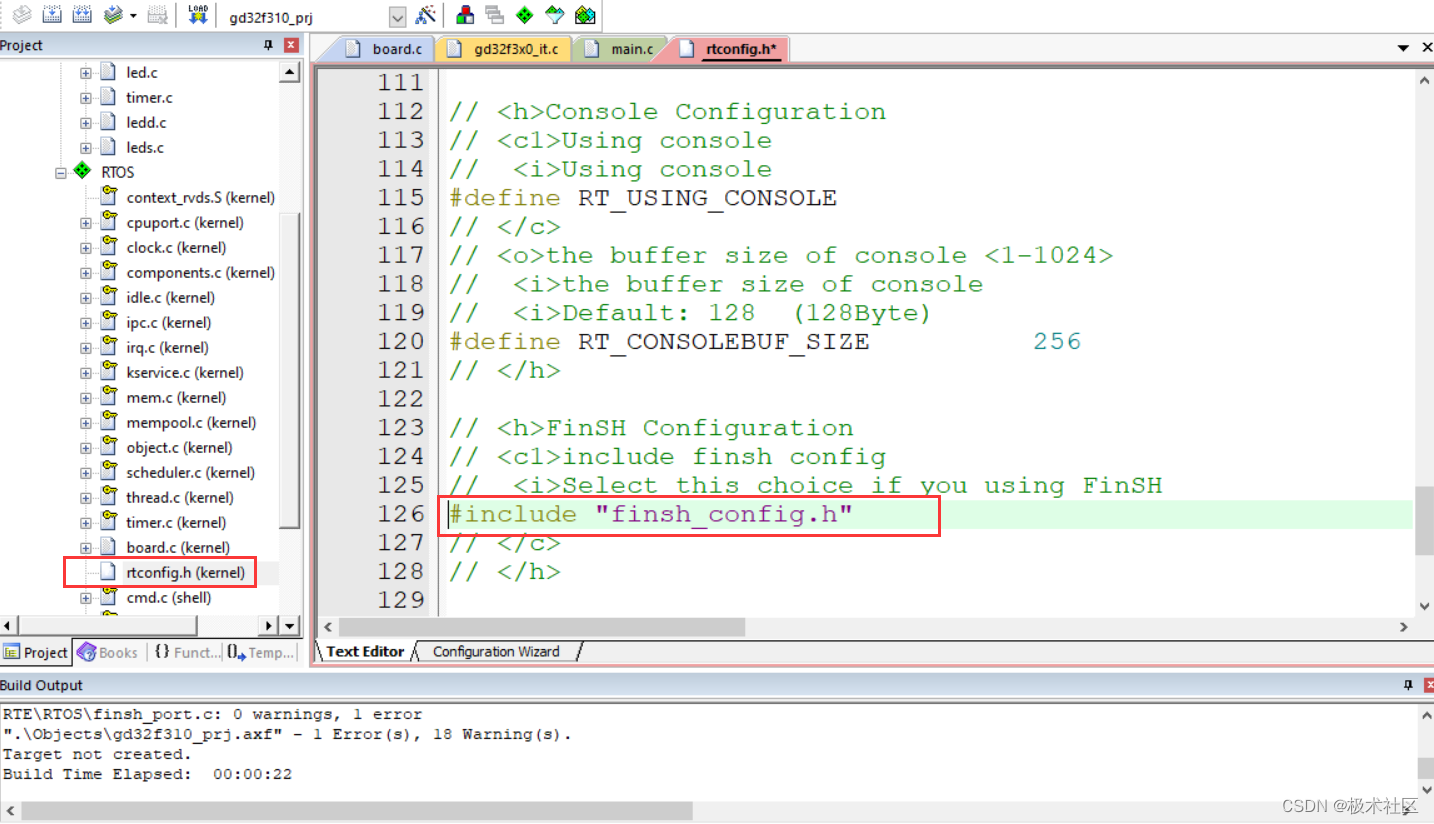
3.2、包含头文件
3.3、修改串口接收函数
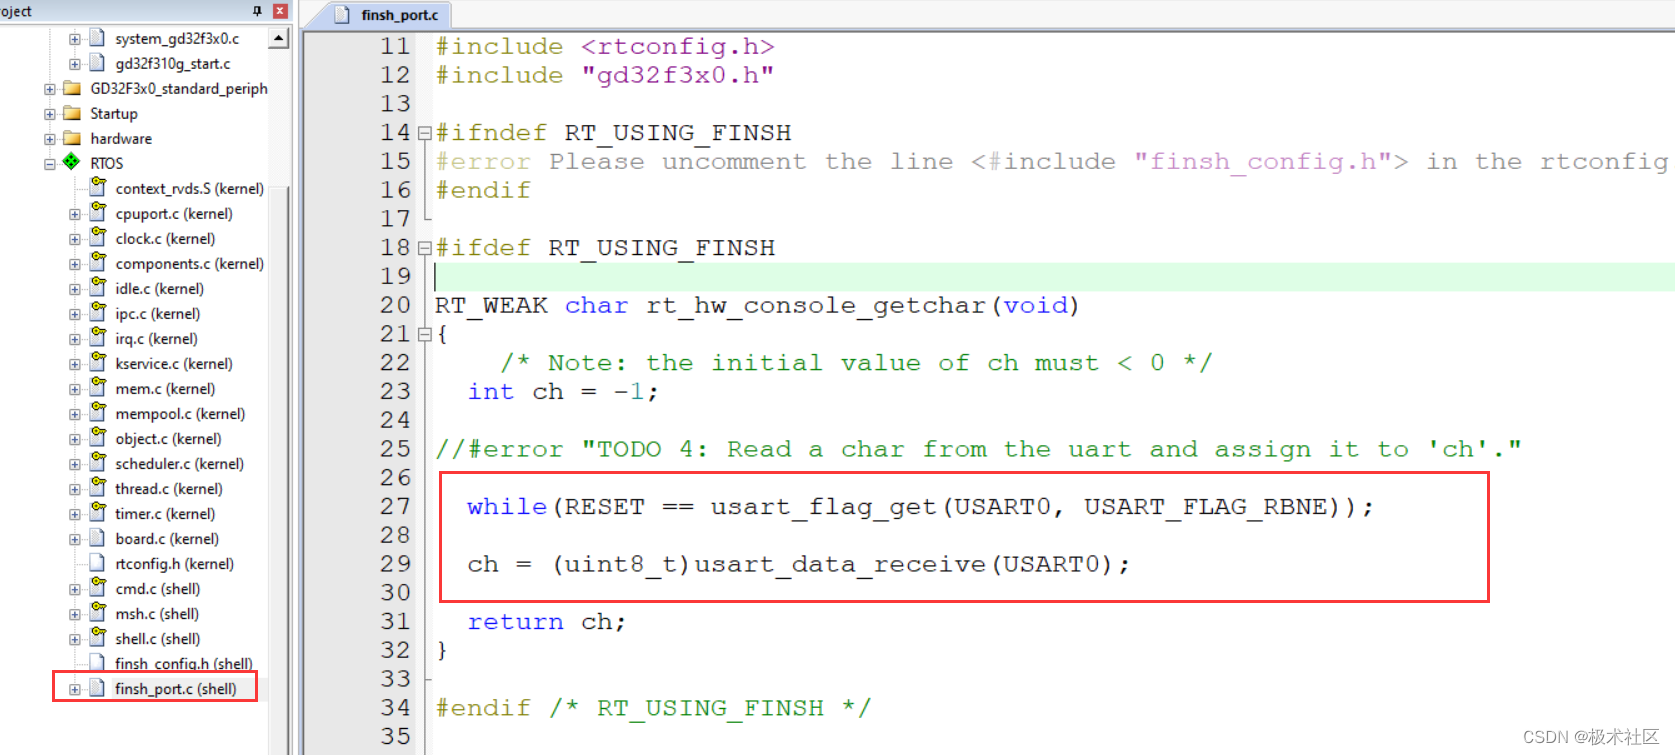
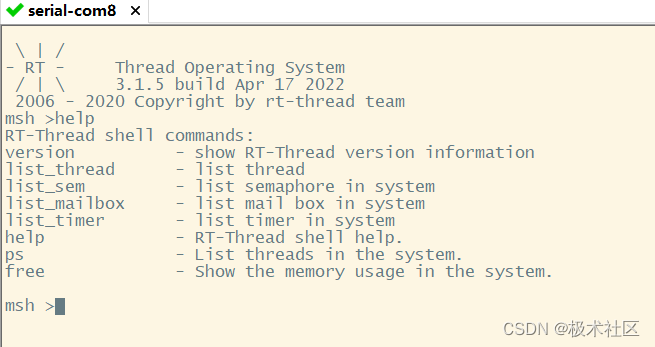
3.4、下载后打印信息
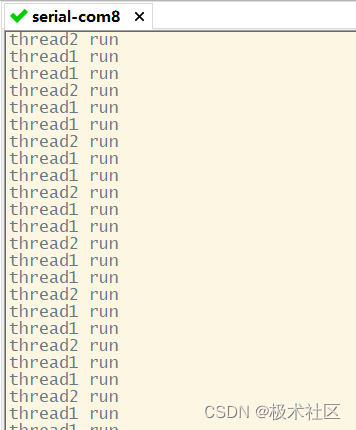
四、创建线程
创建两个线程,线程1运行上篇动态驱动LED数码管的例程,线程2打印信息。
4.1、创建线程程序
#include #include #include "gd32f3x0.h"#include "stdio.h"#include "string.h"#include "ledd.h"static rt_thread_t thread1;static rt_thread_t thread2;void thread1_entry(void *parameter){ init_ledd(); while(1) { leddisp(); rt_kprintf("thread1 run \n"); rt_thread_mdelay(2); }}void thread2_entry(void *parameter){ while(1) { rt_kprintf("thread2 run \n"); rt_thread_mdelay(5); }} void TaskInit(void){ thread1 = rt_thread_create("thread1", thread1_entry, RT_NULL, 256, 2, 10); if(thread1 != RT_NULL) { rt_thread_startup(thread1); } else { rt_kprintf("create thread1 fail\n\n"); } thread2 = rt_thread_create("thread2", thread2_entry, RT_NULL, 256, 2, 10); if(thread2 != RT_NULL) { rt_thread_startup(thread2); } else { rt_kprintf("create thread2 fail\n\n"); }4.2、串口输出
上面就是我在GD32F310开发板上创建和运行rt-thread nano项目例程的整个过程。

