【Spring】一、Spring注解真的你会用吗
本文章已代码的形势重温spring的注解,矫正使用注解的姿势
【Spring】一、Spring注解真的你会用吗
-
- 一、@Value
-
-
- 1、@Value使用${} 获取配置文件的值
- 2、@Value使用#{} 获取表达式的值
- 3、@Value做扩展
- 4、普通字符串
-
- 二、@Bean
-
-
- 1、autowire
- 2、autowireCandidate
- 3、@Bean的写在方法上
- 4、@Bean写在主注解上面
-
- 三、@ComponentScan
-
-
- 1、includeFilters
- 2、excludeFilters
- 3、扫描索引
-
- 四、@Conditional
-
-
- 1、TYPE
- 2、METHOD
- 3、Condition接口
-
- 五、@Autowired
-
-
- 1、FIELD
- 2、METHOD
- 3、CONSTRUCTOR
- 4、ANNOTATION_TYPE
- 5、PARAMETER
- 6、required 属性
- 7、statice
-
- 六、@Lazy
-
-
- 1、TYPE
- 2、METHOD
- 3、CONSTRUCTOR
- 4、PARAMETER
- 5、FIELD
-
- 七、@Resource
-
-
- 1、没有指定名字
- 2、指定name
-
- 八、@Configuration
-
-
- 1、什么是配置bean
- 2、 配置bean有什么作用
-
- 九、Import
-
-
- 1、普通类型,直接把该类作为bean
- 2、ImportSelector
- 3、DeferredImportSelector
- 4、ImportBeanDefinitionRegistrar
-
- 十、@Lockup
- 十一、@Primary
- 十二、注册一个bean有哪些方式
- 十三、依赖注入有哪些方式
- 十四、获取ApplicationContext由哪些方式
-
-
- 1、实现ApplicationContextAware
- 2、通过@Autowired
-
- 十五、Bean的作用域有哪些
- 十六、Spring类型转换有哪些方式
- 十七、SpringAop有哪些使用方式
-
-
- 1、ProxyFatory
- 2、ProxyFactoryBean
- 3、BeanNameAutoProxyCreator
- 5、@EnableAspectJAutoProxy
-
- 十八、spring中有哪些父子
- 十九、Spring中有哪些有用的工具类
-
-
- 1、国际化
- 2、资源加载
- 3、事件发布
- 4、@Order
- 5、获取运行时环境
- 6、类的元数据
-
一、@Value
1、@Value使用${} 获取配置文件的值
#配置文件中的zhangsan=test-value //java代码中的获取方式 @Componentpublic class UserService { @Value("${zhangsan}") private String test; public void test(){ System.out.println(test);//输出test-value }} 2、@Value使用#{} 获取表达式的值
@Component("OrderService")public class OrderService {}@Componentpublic class UserService { @Value("#{OrderService}") private OrderService test; public void test(){ System.out.println(test); }}3、@Value做扩展
@Target({ElementType.FIELD, ElementType.METHOD, ElementType.PARAMETER, ElementType.ANNOTATION_TYPE})@Retention(RetentionPolicy.RUNTIME)@Documented@Value("${local.server.port}") //先解析此处的@value注解,然后赋值给自定义注解public @interface LocalServerPort {}@Componentpublic class UserService { @LocalServerPort private String localServerPort; public void test(){ System.out.println(localServerPort); //打印结果 8080 }}4、普通字符串
@Componentpublic class UserService { @Value("zhangsan") private String test; public void test(){ System.out.println(test);//输出zhangsan }} 二、@Bean
1、autowire
NO ---------不会自动注入
BY_NAME ---------根据set方法找到对应的属性名字查找Bean对象进行注入
BY_TYPE ---------根据set方法找到对应的属性名字查找Bean对象进行注入
注意跟@AUtowired提供的功能是完全独立的
@Componentpublic class OrderService {}@ComponentScan("com.xiaojialin")@PropertySource("classpath:spring.properties")public class Appconfig { @Bean(autowire = Autowire.BY_TYPE) //@Bean(autowire = Autowire.BY_NAME) public UserService userService(){ return new UserService(); }}public class UserService { //不使用@Autowired 情况下依旧可以自动注入 private OrderService orderService ; public void test(){ System.out.println(orderService); } public OrderService getOrderService() { return orderService; } public void setOrderService(OrderService orderService) { this.orderService = orderService; }}public class Test { public static void main(String[] args) { AnnotationConfigApplicationContext applicationContext = new AnnotationConfigApplicationContext(Appconfig.class); UserService userService = applicationContext.getBean("userService", UserService.class); userService.test();// @Bean(autowire = Autowire.NO)可以打印出来 null// @Bean(autowire = Autowire.BY_TYPE)可以打印出来 orderService // @Bean(autowire = Autowire.BY_NAME)可以打印出来 orderService }}2、autowireCandidate
默认为true,可以表示作为依赖注入的候选者,改为false后表示不能作为依赖注入的候选者
@ComponentScan("com.xiaojialin")public class Appconfig { //此注解表示bean不能用于依赖注入 @Bean(autowireCandidate = false) public OrderService orderService(){ return new OrderService(); }}public class UserService { @Autowired() private OrderService orderService; public void test(){ System.out.println(orderService); //会报错 // @Autowired(required = false) 时打印的为null }}3、@Bean的写在方法上
不仅能写在@Configuration中还能写在@Compoment中的方法上
注意写在@Configuration中可以吧bean中的属性可以注入成bean,而Compoment不可以
4、@Bean写在主注解上面
@Target({ElementType.METHOD, ElementType.ANNOTATION_TYPE})@Retention(RetentionPolicy.RUNTIME)@Documented@Bean@Scope("prototype")//多列的public @interface PrototypeBean {}@ComponentScan("com.xiaojialin")@PropertySource("classpath:spring.properties")public class Appconfig { @Bean @Scope("prototype") public UserService userService(){ return new UserService(); }}public class Test { public static void main(String[] args) { AnnotationConfigApplicationContext applicationContext = new AnnotationConfigApplicationContext(Appconfig.class); //打印出来多个bean UserService userService = applicationContext.getBean("userService", UserService.class); UserService userService2 = applicationContext.getBean("userService", UserService.class); System.out.println(userService);//com.xiaojialin.service.UserService@103f852 System.out.println(userService2);//com.xiaojialin.service.UserService@587c290d }}三、@ComponentScan
顾名思义,@ComponentScan 就是来扫描@Componen 注解的,默认情况下会把所有天添加了@Componen 注解的类扫描出来,并生成对应的Bena对象
1、includeFilters
可以自定义过滤,条件符合条件的才是bean
- ANNOTATION, ---- 可以指定某个注解符合条件的才是bean
@Target({ElementType.TYPE})@Retention(RetentionPolicy.RUNTIME)public @interface BeanFilter {} @ComponentScan(value = "com.xiaojialin", includeFilters = @ComponentScan.Filter(type= FilterType.ANNOTATION,value = BeanFilter.class))@PropertySource("classpath:spring.properties")public class Appconfig {}public class Test { public static void main(String[] args) { AnnotationConfigApplicationContext applicationContext = new AnnotationConfigApplicationContext(Appconfig.class); UserService userService = applicationContext.getBean("userService", UserService.class); System.out.println(userService); }}- ASSIGNABLE_TYPE, ---- 可以指定某个,符合条件的才是bean
- ASPECTJ, ---- 可以自定义一个 ASPECTJ,符合条件的才是bean
- REGEX, -----可以自定义个一个正则表达式,表示符合条件的才是bean
- CUSTOM; -----可以执行一个Typefilter类,自定义实现逻辑
2、excludeFilters
可以自定义过滤,条件符合条件就排除
- ANNOTATION, ---- 可以指定某个注解符合条件的才排除
- ASSIGNABLE_TYPE, ---- 可以指定某个,符合条件的才排除
- ASPECTJ, ---- 可以自定义一个 ASPECTJ,符合条件的才排除
- REGEX, -----可以自定义个一个正则表达式,表示符合条件的才排除
- CUSTOM; -----可以执行一个Typefilter类,自定义实现逻辑
3、扫描索引
跟@ComponentScan没有关系,跟扫描有关系
默认情况下spring可能会扫描很多的类,如果扫描的路径多,就比较耗时
在spring中提供了一种加快扫描的方式,不过这个索引需要程序员自己去创建一个META-INF/spring,components文件spring会吧这个文件中指定的类都会当做ben,从而就不用扫描了,速度就比较快。
四、@Conditional
@Conditional 条件注解
1、TYPE
spring在扫描时,如果发现@Conditional 注解,那么就会获取该注解所匹配的@Conditional 接口实现类,判断是否哦匹配,匹配则把改类作为bean
2、METHOD
@Conditional 添加在@Bean方法上市,则会先判@Conditional 实现类是否匹配,再进行bean的创建
3、Condition接口
ConditionContext参数
可以拿到spring容器相关的东西
BeanFactory
Environment
ClassLoader
BeanDefinitionRegistry
AnnotatedTypeMetadata参数
@Condition注解所在类的元信息
比如可以用它来判断当前类是否有某些注解等
public class MyCondition implements Condition { @Override public boolean matches(ConditionContext conditionContext, AnnotatedTypeMetadata annotatedTypeMetadata) { ConfigurableListableBeanFactory beanFactory = conditionContext.getBeanFactory(); Environment environment = conditionContext.getEnvironment(); try { //某个类有就返回true conditionContext.getClassLoader().loadClass("com.xiaojialin.User"); return true; } catch(ClassNotFoundException e) { return false; } }}@Component@Conditional(value = MyCondition.class) //MyCondition 返回true就创建bean,false就不创建public class UserService {}五、@Autowired
1、FIELD
表示字段注入 在某个字段属性上使用@Autowired上使用时,,spring在创建改bean的过程中,spring会根据字段的类型和名字从spring容器中找到匹配的bean对象,并赋值给这个属性
2、METHOD
表示set方法注入
在某个set放发上使用@Autowired时,spring在创建给bean的过程中,会来调用该set方法,并且如果set方法有入参参数,那么spring会根据入参信息,在容器中找到匹配的bean传给改参数,我通过在set方法中给属性赋值,从而就达到了set方法注入的目的。
注意:也可以添加到普通方法上,不一定是set方法
@Componentpublic class UserService { private OrderService orderService; @Autowired//set方法注入 public void setOrderService(OrderService orderService) { this.orderService = orderService; } public void test(){ System.out.println(orderService); }}3、CONSTRUCTOR
表示构造方法注入
当在某个构造方法上使用@Autowired注解时,表示改bean在创建时,会使用这个构造方法来实例化得到某个bean。spring会根据构造方法的入参类型和名字,匹配到bean对象改入参。通过在构造方法中给参数赋值,从而达到了构造方法注入的目的。
@Componentpublic class UserService { private OrderService orderService; @Autowired public UserService(OrderService orderService) { this.orderService = orderService; } public void test(){ System.out.println(orderService); }}4、ANNOTATION_TYPE
表示可以写在其他注解上,使其它注解可以具有次注解的功能
@Target({ElementType.CONSTRUCTOR, ElementType.METHOD, ElementType.PARAMETER, ElementType.FIELD, ElementType.ANNOTATION_TYPE})@Retention(RetentionPolicy.RUNTIME)@Autowiredpublic @interface MyAutowired {}5、PARAMETER
在srging-tes模块中对于JUnit的支持中,参数也可以使用@Autowired
6、required 属性
默认为true,一定要给某bean找到属性并赋值,找不到就会报错
注意构造方法上这个属性会失效,相当于一直是true
7、statice
statice方法是不会进行依赖注入的
六、@Lazy
1、TYPE
写在某个类上,表示该类是懒加载的,只会在用到该bean时才会创建,而不是启动后创建。
写在@Configuration时,表示该配置类中的所有bean都是懒加载的
public static void main(String[] args) { AnnotationConfigApplicationContext applicationContext = new AnnotationConfigApplicationContext(Appconfig.class); boolean userService1 = applicationContext.getBeanFactory().containsSingleton("userService"); System.out.println("判断userService在不在容器里面"+userService1);//打印false UserService userService = applicationContext.getBean("userService", UserService.class); userService.test(); }@Component@Lazypublic class UserService { @Autowired private OrderService orderService; public void test(){ System.out.println(orderService); }}2、METHOD
当把@Lazy写在@Autowired 注解所在地方法时spring会给所有入参赋值一个代理对象
3、CONSTRUCTOR
当把@Lazy写在@Autowired 注解所在地构造方法时spring会给所有入参赋值一个代理对象
注意:可以解决循环依赖
4、PARAMETER
当把@Lazy写在@Autowired 注解所在参数时spring会给该入参赋值一个代理对象
5、FIELD
当把@Lazy写在某个字段时,spring会给改属性添加cglb生成的代理对象,当该代理对象执行某个方式时,才去spring容器查找某个bean,并执行对应的方法。
七、@Resource
1、没有指定名字
先判断字段名字所对应的的bean是否存在,如果存在则把这个bean赋值给属性,不存在这根据字段类型找
2、指定name
根据指定的名字找,找不到就报错
@Resource是jdk提供的spring是负责实现,负责提供支持
八、@Configuration
被 @Configuration注解修饰的类,首先是一个bean,再是一个配置bean
1、什么是配置bean
有@Configuration注解
proxyBeanMethods =true 表示是full配置bean,表示代理对象
proxyBeanMethods =flase 表示是lite配置bean,表示普通对象
无@Configuration注解
存在@Component 表示是lite配置bean
存在@ComponentScan 表示是lite配置bean
存在@Import 表示是lite配置bean
存在@ImportResource 表示是lite配置bean
存在@Bean的方法 表示是lite配置bean
2、 配置bean有什么作用
对于配置bean不仅仅会放在spring容器中,spring还会去解析bean
proxyBeanMethods
true 配置bean对应的配置类是代理对象
false true 配置bean对应的配置类是普通对象
普通对象不能使用类中的其他bean,代理对象起亚使用类中其他的bean
九、Import
1、普通类型,直接把该类作为bean
@ComponentScan(value = "com.xiaojialin")@PropertySource("classpath:spring.properties")@Import(UserService.class)public class Appconfig {}public class UserService { @Autowired private OrderService orderService; public void test(){ System.out.println(orderService); }}public class Test { public static void main(String[] args) { AnnotationConfigApplicationContext applicationContext = new AnnotationConfigApplicationContext(Appconfig.class); UserService userService = applicationContext.getBean(UserService.class); userService.test(); } }2、ImportSelector
将selectImports()方法返回的类当做bean
public class UserService implements ImportSelector { @Override public String[] selectImports(AnnotationMetadata importingClassMetadata) { //自己实现一些逻辑来导入bean return new String[0]; }}3、DeferredImportSelector
//和ImportSelector的区别是执行时机不同public class UserService implements DeferredImportSelector { @Override public String[] selectImports(AnnotationMetadata importingClassMetadata) { //自己实现一些逻辑来导入bean return new String[0]; }}4、ImportBeanDefinitionRegistrar
//自己调用注册bean的接口public class ImportUserService implements ImportBeanDefinitionRegistrar { public void registerBeanDefinitions(AnnotationMetadata importingClassMetadata, BeanDefinitionRegistry registry, BeanNameGenerator importBeanNameGenerator) { //根据自己的规则套用一下代码进行bean的注册 BeanDefinitionBuilder beanDefinitionBuilder = BeanDefinitionBuilder.genericBeanDefinition(); AbstractBeanDefinition beanDefinition = beanDefinitionBuilder.getBeanDefinition(); beanDefinition.setBeanClass(OrderService.class); registry.registerBeanDefinition("orderService123",beanDefinition); }}十、@Lockup
@LocKup注解中的作用在官网上叫做方法注入
@Autowired、@Reoure、@Value是属性注入,是分某个属性赋值
@Lookup注解的作用是给某个方法赋值一个bean,所以叫方法注入,在调用这个方法返回所指定的bean对象。
正常情况下抽象类是不能成为bean的,但是给抽象方法上加上@Lookup注解,name最终也能产生一个bean对象,比鞥企鹅改bean对象可以调用该抽象方法,并返回所执行的bean独享
Methodreplacer 方法替换器
public class Test { public static void main(String[] args) { AnnotationConfigApplicationContext applicationContext = new AnnotationConfigApplicationContext(Appconfig.class); AbstractUserService userService = applicationContext.getBean(AbstractUserService.class); System.out.println(userService.test());//com.xiaojialin.service.OrderService@6279cee3 }}@Componentpublic abstract class AbstractUserService { @Lookup("orderService") public OrderService test() { System.out.println("test"); return null; }}十一、@Primary
在spring 中使用注解,常使用@Autowired, 默认是根据类型Type来自动注入的。但有些特殊情况,对同一个接口,可能会有几种不同的实现类,而默认只会采取其中一种的情况下使用 @Primary 指定主bean
public class Test { public static void main(String[] args) { AnnotationConfigApplicationContext applicationContext = new AnnotationConfigApplicationContext(Appconfig.class); UserService userService = applicationContext.getBean(UserService.class); userService.test();//com.xiaojialin.service.OrderService@25b485ba }}@ComponentScan(value = "com.xiaojialin")@PropertySource("classpath:spring.properties")public class Appconfig { @Bean @Primary//主bean private OrderService orderService(){ return new OrderService(); } @Bean private OrderService orderService1(){ return new OrderService(); }}@Componentpublic class UserService { @Autowired private OrderService orderService123; public void test(){ System.out.println(orderService123); }}十二、注册一个bean有哪些方式
- @Comporent
@Confguration
@Service
@Controller @Repository
-
@Bean
通过解析某个方法作为bean
-
@Import
导入类成BeanDefinition来注册bean
-
@ImportResource
导入一个xml文件来解析来注册bean
-
BeanDefinitionRegistryPostProcessor
通过注入BeanDefinition来注册bean
@Commpublic class MyBeanDefinitionRegistrarPostProcessor implements BeanDefinitionRegistryPostProcessor { @Override public void postProcessBeanDefinitionRegistry(BeanDefinitionRegistry beanDefinitionRegistry) throws BeansException { BeanDefinitionBuilder beanDefinitionBuilder = BeanDefinitionBuilder.genericBeanDefinition(); AbstractBeanDefinition beanDefinition = beanDefinitionBuilder.getBeanDefinition(); beanDefinition.setBeanClass(UserService.class);//自己注册一个bean beanDefinitionRegistry.registerBeanDefinition("userService",beanDefinition); } @Override public void postProcessBeanFactory(ConfigurableListableBeanFactory configurableListableBeanFactory) throws BeansException { }} -
FactoryBean
SmartFactoryBean 将自己new的对象注册成bean
public class Test { public static void main(String[] args) { AnnotationConfigApplicationContext applicationContext = new AnnotationConfigApplicationContext(Appconfig.class); UserService userService2 = (UserService) applicationContext.getBean("myFactoryBean"); System.out.println(userService2);//打印 com.xiaojialin.service.UserService@29f69090 userService2.test();//打印 null }}@Component//public class MyFactoryBean implements FactoryBean {或者public class MyFactoryBean implements SmartFactoryBean { @Override public Object getObject() throws Exception { return new UserService(); } @Override public Class<?> getObjectType() { return UserService.class; }}public class UserService { @Autowired private OrderService orderService123; public void test(){ System.out.println(orderService123); }} -
applicationContext.registerBean()
通过Supplier接口题功一个对象作为bean
-
applicationContext.register()
直接将某个类作为bean
-
applicationContext.registerBeanDefinition()
通过注入BeanDefinition来注册bean
public class Test { public static void main(String[] args) { AnnotationConfigApplicationContext applicationContext = new AnnotationConfigApplicationContext(Appconfig.class); //方式一 applicationContext.register(UserService.class); //方式二 applicationContext.registerBean(UserService.class); //方式三 BeanDefinitionBuilder beanDefinitionBuilder = BeanDefinitionBuilder.genericBeanDefinition(); AbstractBeanDefinition beanDefinition = beanDefinitionBuilder.getBeanDefinition(); beanDefinition.setBeanClass(UserService.class); applicationContext.registerBeanDefinition("userService",beanDefinition); UserService userService2 = (UserService) applicationContext.getBean(UserService.class); System.out.println(userService2); userService2.test(); }}
十三、依赖注入有哪些方式
-
autowire mode
可以理解为spring的自动注入和@Autowired注解没有关系,主要利用类的set方法 byType和byName
-
@Autowired
可以用@Autowired直接表示给哪个属性进行自动注入
可以加载字段和方法上
使用(byName)来注入,可以结合@Qualifier注解一起使用,先byType、再byName
-
@Resource
可以用@Resource直接表示给哪个属性进行自动注入
可以加载字段和方法上 先byName、再byType
-
@Value
用@Value给属性赋值可以加在方法,也可以加在字段上
-
自定义BeanPostProcessor
处理自定义注解
@Target({ElementType.CONSTRUCTOR, ElementType.METHOD, ElementType.PARAMETER, ElementType.FIELD, ElementType.ANNOTATION_TYPE})@Retention(RetentionPolicy.RUNTIME)@Documentedpublic @interface XiaoAutowired {}@Componentpublic class MyBeanPostProcessor implements BeanPostProcessor, ApplicationContextAware { //ApplicationContextAware 实现获取applicationContext //@Autowired private ApplicationContext applicationContext; //bean的前置初始化处理器 @Nullable public Object postProcessBeforeInitialization(Object bean, String beanName) throws BeansException { //也可以处理某个名字叫beanName的做一些事情 Class aClass = bean.getClass(); Field[] declaredFields = aClass.getDeclaredFields(); for(Field declaredField : declaredFields) { if(declaredField.isAnnotationPresent(XiaoAutowired.class)){ declaredField.setAccessible(true); Object byNameBean = applicationContext.getBean(declaredField.getName()); try { //实现给加了XiaoAutowired字段的属性通过名字赋值 declaredField.set(bean,byNameBean); } catch(IllegalAccessException e) { e.printStackTrace(); } } } return bean; } @Override public void setApplicationContext(ApplicationContext applicationContext) throws BeansException { this.applicationContext=applicationContext; }}@Componentpublic class UserService { @XiaoAutowired//使用自己的注解 private OrderService orderService; public void test(){ System.out.println(orderService); }}十四、获取ApplicationContext由哪些方式
1、实现ApplicationContextAware
2、通过@Autowired
具体代码看第上边代码
十五、Bean的作用域有哪些
-
单例
单例池 通过map实现
-
多例
无额外支持,每次创建一个bean返回
-
Requerst
requerst.getAttribute()、 requerst.setAttribute()
-
Session
session.getAttribute()、 session.setAttribute()
-
Application
servletContext.getAttribute()、 servletContext.setAttribute()
十六、Spring类型转换有哪些方式
就是把字符串bean名称转换成一个bean
-
ProxyFactory
利用jdk中自带的
-
ConversionService
spring中实现的
-
TypeConversion
合二为一工具类,类型转换器
十七、SpringAop有哪些使用方式
1、ProxyFatory
代理对象工厂封装了jdk动态代理合CGLB
public class ProxyFactoryAopTest { public static void main(String[] args) { //AnnotationConfigApplicationContext applicationContext = new AnnotationConfigApplicationContext(Appconfig.class); //UserService target = (UserService) applicationContext.getBean(UserService.class); UserService target = new UserService(); ProxyFactory proxyFactory = new ProxyFactory(); proxyFactory.setTarget(target); proxyFactory.addAdvice(new MethodInterceptor() { @Override public Object invoke(MethodInvocation methodInvocation) throws Throwable { System.out.println("执行前置通知------"); Object proceed = methodInvocation.proceed(); System.out.println("执行后置通知------"); return proceed; } }); UserService proxy = (UserService) proxyFactory.getProxy(); proxy.test(); }}2、ProxyFactoryBean
利用FatoryBean机制将代理对象作为bean
public class ProxyFactoryBeanTest { public static void main(String[] args) { AnnotationConfigApplicationContext applicationContext = new AnnotationConfigApplicationContext(ProxyFactoryBeanconfig.class); UserService userService2 = (UserService) applicationContext.getBean("userviceProxy"); userService2.test(); // befory--userviceProxy---- // 被代理了 // after---userviceProxy--- }}public class UserService { public void test(){ System.out.println("被代理了"); }}@ComponentScan(value = "com.xiaojialin")@PropertySource("classpath:spring.properties")public class ProxyFactoryBeanconfig { @Bean public ProxyFactoryBean userviceProxy(){ UserService userService = new UserService(); ProxyFactoryBean proxyFactory = new ProxyFactoryBean(); proxyFactory.setTarget(userService); proxyFactory.addAdvice(new MethodInterceptor() { @Override public Object invoke(MethodInvocation methodInvocation) throws Throwable { System.out.println("befory--userviceProxy----"); Object proceed = methodInvocation.proceed(); System.out.println("after---userviceProxy---"); return proceed; } }); return proxyFactory; }}3、BeanNameAutoProxyCreator
指定某个beanName让spring进行aop
public class BeanNameAutoProxyCreatorTest { public static void main(String[] args) { AnnotationConfigApplicationContext applicationContext = new AnnotationConfigApplicationContext(BeanNameAutoProxyCreatorConfg.class); UserService userService2 = (UserService) applicationContext.getBean(UserService.class); userService2.test(); // befory------ // com.xiaojialin.service.OrderService@1f3f4916 // after------ }}@ComponentScan(value = "com.xiaojialin")@PropertySource("classpath:spring.properties")public class BeanNameAutoProxyCreatorConfg { @Bean private MethodInterceptor xiaoAroundAdvice(){ return new MethodInterceptor() { @Override public Object invoke(MethodInvocation methodInvocation) throws Throwable { System.out.println("befory------"); Object proceed = methodInvocation.proceed(); System.out.println("after------"); return proceed; } }; } @Bean private BeanNameAutoProxyCreator beanNameAutoProxyCreator(){ BeanNameAutoProxyCreator beanNameAutoProxyCreator = new BeanNameAutoProxyCreator(); beanNameAutoProxyCreator.setBeanNames("userSe*"); beanNameAutoProxyCreator.setInterceptorNames("xiaoAroundAdvice"); beanNameAutoProxyCreator.setProxyTargetClass(true); return beanNameAutoProxyCreator; }}4、DefaultAdvisorAutoProxyCreator
指定某个Advisor让sprIng对其匹配的bean进行aop,可以制定到某个方法
@ComponentScan(value = "com.xiaojialin")@PropertySource("classpath:spring.properties")public class DefaultAdvisorAutoProxyCreatorConfig { private MethodInterceptor xiaoAroundAdvice(){ return new MethodInterceptor() { @Override public Object invoke(MethodInvocation methodInvocation) throws Throwable { System.out.println("befory------"); Object proceed = methodInvocation.proceed(); System.out.println("after------"); return proceed; } }; } @Bean private DefaultPointcutAdvisor defaultPointcutAdvisor(){ NameMatchMethodPointcut nameMatchMethodPointcut = new NameMatchMethodPointcut(); nameMatchMethodPointcut.addMethodName("test");//指定代理的方法 DefaultPointcutAdvisor defaultPointcutAdvisor = new DefaultPointcutAdvisor(); defaultPointcutAdvisor.setPointcut(nameMatchMethodPointcut); defaultPointcutAdvisor.setAdvice(this.xiaoAroundAdvice()); return defaultPointcutAdvisor; } @Bean private DefaultAdvisorAutoProxyCreator beanNameAutoProxyCreator(){ DefaultAdvisorAutoProxyCreator beanNameAutoProxyCreator = new DefaultAdvisorAutoProxyCreator(); return beanNameAutoProxyCreator; }}public class DefaultAdvisorAutoProxyCreatorTest { public static void main(String[] args) { AnnotationConfigApplicationContext applicationContext = new AnnotationConfigApplicationContext(DefaultAdvisorAutoProxyCreatorConfig.class); UserService userService2 = (UserService) applicationContext.getBean(UserService.class); userService2.test(); // befory------ // com.xiaojialin.service.OrderService@1f3f4916 // after------ }}5、@EnableAspectJAutoProxy
开启支持Aspect
十八、spring中有哪些父子
- 父子类
- 父子BeanDefinition
- 父子BeanFactory
- 父子ApplicationContext
十九、Spring中有哪些有用的工具类
1、国际化
MessageSource
更方便的进行国际化操作
@ComponentScan(value = "com.xiaojialin")@PropertySource("classpath:spring.properties")public class Appconfig { @Bean public MessageSource messageSource(){ ResourceBundleMessageSource messageSource= new ResourceBundleMessageSource(); messageSource.setBasename("messages"); return messageSource; }}public class Test { public static void main(String[] args) { AnnotationConfigApplicationContext applicationContext = new AnnotationConfigApplicationContext(Appconfig.class); String test = applicationContext.getMessage("test",null,new Locale("en")); System.out.println(test); //打印出来了 _en配置文件中的配置信息 }}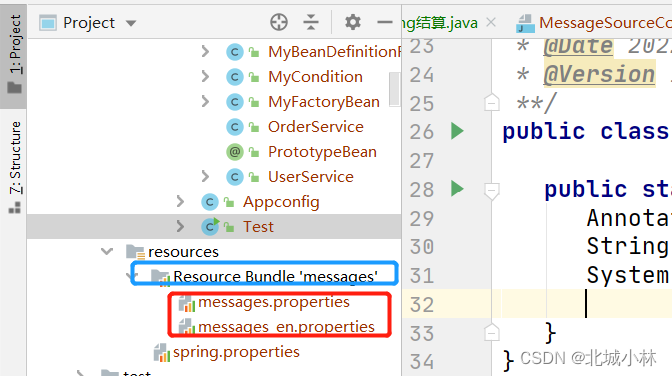
创建好红色的配置文件后,idea会自动创建出文件夹
2、资源加载
applicationContext.getResource()
更方便的读取某个资源
文件资源
网络资源
public class Test { public static void main(String[] args) { AnnotationConfigApplicationContext applicationContext = new AnnotationConfigApplicationContext(Appconfig.class); Resource resource = applicationContext.getResource("file:D:\\05_Course\\IJavaProject\\ITestProject\\25-spring-annotation\\src\\main\\java\\com\\xiaojialin\\Appconfig.java"); System.out.println(resource.getFilename());//打印Appconfig.java Resource resource2 = applicationContext.getResource("classpath:spring.properties"); System.out.println(resource2.getFilename()); //打印spring.properties" Resource resource3 = applicationContext.getResource("https://www.baidu.com"); System.out.println(resource3.getURI()); //打印https://www.baidu.com }}3、事件发布
ApplicationLIstener
某个类作为资源监听器
@EventLIstener
某个方法作为资源监听器
@Componentpublic class MyListener implements ApplicationListener { @Override public void onApplicationEvent(ApplicationEvent event) { System.out.println("监听spring启动事件"+event); }}//打印监听spring启动事件org.springframework.context.event.ContextRefreshedEvent[source=org.springframework.context.annotation.AnnotationConfigApplicationContext@2e0fa5d3, started on Tue May 17 22:17:34 CST 2022]c自动后自己发布一个事件
public class Test { public static void main(String[] args) throws IOException { AnnotationConfigApplicationContext applicationContext = new AnnotationConfigApplicationContext(Appconfig.class); applicationContext.publishEvent("发送了一个消息"); }}@Componentpublic class MyListener implements ApplicationListener { @Override public void onApplicationEvent(ApplicationEvent event) { if(event instanceof PayloadApplicationEvent){ System.out.println("监听到消息:"+((PayloadApplicationEvent) event).getPayload()); } if(event instanceof ContextRefreshedEvent){ System.out.println("监听到消息:"+event); } }}//打印监听到消息:org.springframework.context.event.ContextRefreshedEvent[source=org.springframework.context.annotation.AnnotationConfigApplicationContext@2e0fa5d3, started on Tue May 17 22:23:37 CST 2022]监听到消息:发送了一个消息通过广播器发送事件,并使用 @EventListener接收
@Component@Orderpublic class UserService { @Autowired private ApplicationEventMulticaster multicaster; public void test(){multicaster.multicastEvent(new PayloadApplicationEvent<String>(this,"通过广播器发送的消息")); } @EventListener public void Listener(ApplicationEvent event){ if(event instanceof PayloadApplicationEvent){ System.out.println("监听到消息:"+((PayloadApplicationEvent) event).getPayload()); } //打印 监听到消息:通过广播器发送的消息 }}自定义事件发布和处理器
@Getter //自定义音乐发布内容public class MusicEvent extends ApplicationEvent { //音乐名称 private String musicName; //发布日期 private LocalDate infoDate; //是否收费 private Boolean reality; public MusicEvent(Object source,String musicName,LocalDate infoDate,Boolean reality) { super(source); this.musicName = musicName; this.infoDate = infoDate; this.reality = reality; }} //自定义音乐监听器@Componentpublic class MusicListener implements ApplicationListener<MusicEvent> { @Override public void onApplicationEvent(MusicEvent event) { System.out.println("我收到新发布分歌曲了"); System.out.println(event.getMusicName()); System.out.println(event.getInfoDate()); System.out.println(event.getReality());//打印我收到新发布分歌曲了新歌曲2022-05-17false } } //发布方式 @Componentpublic class UserService { @Autowired private ApplicationEventMulticaster multicaster; public void test(){ multicaster.multicastEvent(new MusicEvent( this, "新歌曲", LocalDate.now(),false)); }} 4、@Order
OrderComparator
利用order接口来指定顺序
public class Test { public static void main(String[] args) throws IOException { AnnotationConfigApplicationContext applicationContext = new AnnotationConfigApplicationContext(Appconfig.class); UserService userService1 = new UserService(); userService1.setOrder(1); UserService userService2 = new UserService(); userService2.setOrder(4); UserService userService3 = new UserService(); userService3.setOrder(3); UserService userService4 = new UserService(); userService4.setOrder(2); List<UserService> list = new ArrayList<>(); list.add(userService1); list.add(userService2); list.add(userService3); list.add(userService4); System.out.println(list);//打印[UserService{order=1}, UserService{order=4}, UserService{order=3}, UserService{order=2}]list.sort(new OrderComparator()); System.out.println(list);//打印[UserService{order=1}, UserService{order=2}, UserService{order=3}, UserService{order=4}] }}//当某个类没有实现OrderComparator接口时,直接可以通过@Order注解进行指定顺序
AnnotationAwareOrderComparator
利用@Order注解来指定顺序
5、获取运行时环境
applicationContext.getEnvironment()
操作系统环境变量
Jvm环境变量
properties文件
public class Test { public static void main(String[] args) throws IOException { AnnotationConfigApplicationContext applicationContext = new AnnotationConfigApplicationContext(Appconfig.class); ConfigurableEnvironment environment = applicationContext.getEnvironment(); System.out.println("====操作系统环境变量"); System.out.println( environment.getSystemProperties()); System.out.println("====jvm环境变量"); System.out.println(environment.getSystemEnvironment()); System.out.println("====获取配置文件"); System.out.println(environment.getPropertySources()); System.out.println(environment.getProperty("zhangsan")); }}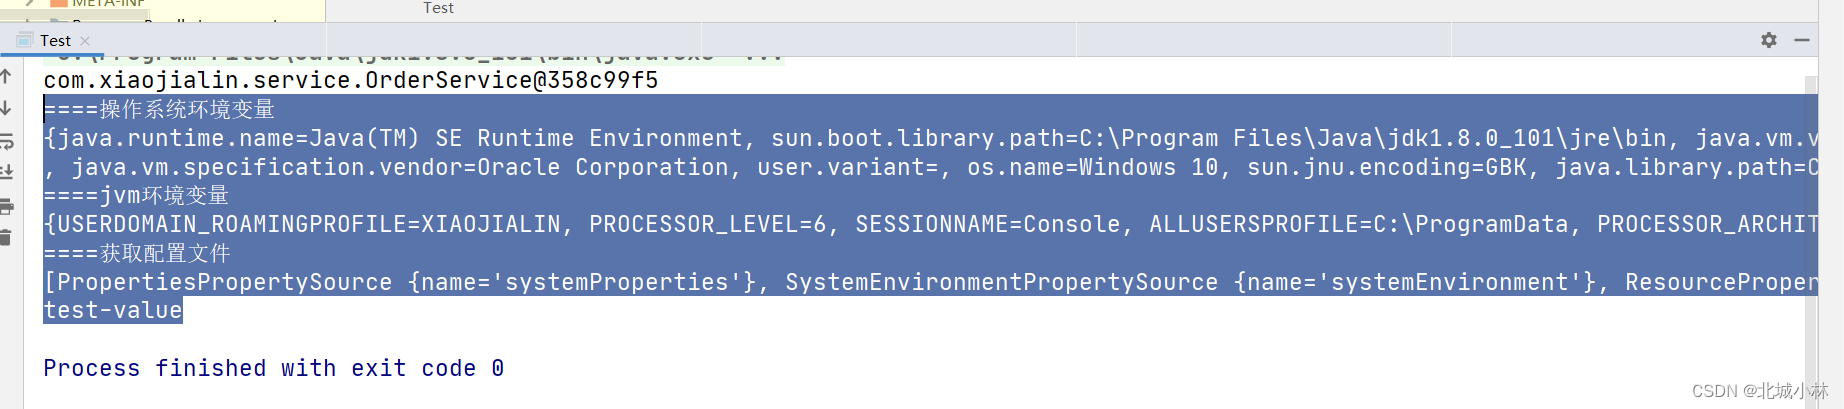
6、类的元数据
SimpleMetadataReaderFactory
获取类名
获取类上分方法
获取类上的注解
等等—
public class Test { public static void main(String[] args) throws IOException { SimpleMetadataReaderFactory factory = new SimpleMetadataReaderFactory(); MetadataReader metadataReader = factory.getMetadataReader("com.xiaojialin.service.UserService"); ClassMetadata classMetadata = metadataReader.getClassMetadata(); String className = classMetadata.getClassName(); System.out.println("得到类名字"); //获取注解信息 AnnotationMetadata annotationMetadata = metadataReader.getAnnotationMetadata(); Set<String> annotationTypes = annotationMetadata.getAnnotationTypes(); for(String annotationType : annotationTypes) { System.out.println("得到所有的注解类型"+annotationType); } }}
