【SSM直击大厂】最终章:SSM 整合
🙊🙊作者主页:🔗求不脱发的博客
📔📔 精选专栏:🔗SSM直击大厂
📋📋 精彩摘要:学完了整个Spring+SpringMVC+Mybatis基础知识,最后将三者整合到一起共同发挥作用才是最重要的。其中SSM整合的实质,仅仅就是将Mybatis整合入Spring。因为SpringMVC原本就是Spring的一部分,不用专门整合。
💞💞觉得文章还不错的话欢迎大家点赞👍➕收藏⭐️➕评论💬支持博主🤞
📚目录
📖SSM 整合
📝1️⃣原始整合方式
✨1.创建数据库表
✨2.创建Maven工程
✨3.配置pom.xml坐标
✨4.实体类
✨5.Mapper接口
✨6.Service接口
✨7.Service实现
✨8.Controller
✨9.相关配置文件
📝2️⃣Spring整合MyBatis
✨1.整合思路
✨2.将SqlSessionFactory配置到Spring容器中
✨3.扫描Mapper,让Spring容器产生Mapper实现类
✨4.配置声明式事务控制
✨5.更新Service实现类代码
📝【SSM直击大厂】完结散花
📖SSM 整合
📝1️⃣原始整合方式
✨1.创建数据库表
create database ssm;create table account( id int primary key auto_increment, name varchar(100), money double(7,2));表数据:
| id | namo | money |
| 1 | tom | 5000 |
| 2 | lucy | 5000 |
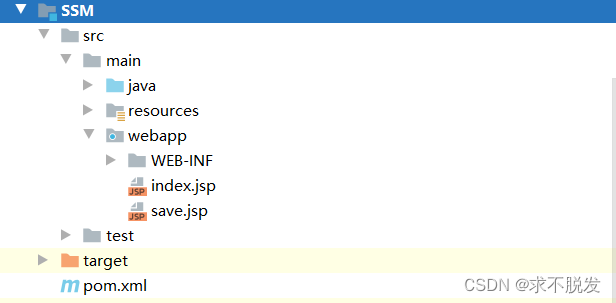
✨2.创建Maven工程
基本项目结构:
✨3.配置pom.xml坐标
相关依赖:
这里不再详细列出具体代码,其中主要包括以下相关依赖(简单列出artifactId)。
spring-context aspectjweaver spring-jdbc spring-tx spring-test spring-webmvc servlet-api jsp-api mybatis mybatis-spring mybatis-plus lombok mysql-connector-java c3p0
✨4.实体类
数据库表 account 对应实体类:
public class Account { private Integer id;//id private String name;//姓名 private Double money;//余额}✨5.Mapper接口
public interface AccountMapper { public void save(Account account); public List findAll();}✨6.Service接口
public interface AccountService { void save(Account account); //保存账户数据 List findAll(); //查询账户数据}✨7.Service实现
@Service("accountService")public class AccountServiceImpl implements AccountService {public void save(Account account) {SqlSession sqlSession = MyBatisUtils.openSession();AccountMapper accountMapper = sqlSession.getMapper(AccountMapper.class);accountMapper.save(account);sqlSession.commit();sqlSession.close();}public List findAll() {SqlSession sqlSession = MyBatisUtils.openSession();AccountMapper accountMapper = sqlSession.getMapper(AccountMapper.class);return accountMapper.findAll();}}✨8.Controller
@Controllerpublic class AccountController {@Autowiredprivate AccountService accountService;@RequestMapping("/save")@ResponseBodypublic String save(Account account) {accountService.save(account);return "save success";}@RequestMapping("/findAll")public ModelAndView findAll() {ModelAndView modelAndView = new ModelAndView();modelAndView.setViewName("accountList");modelAndView.addObject("accountList", accountService.findAll());return modelAndView;}}✨9.相关配置文件
- Spring配置文件:applicationContext.xml
- SprngMVC配置文件:spring-mvc.xml
- MyBatis映射文件:AccountMapper.xml
- MyBatis核心文件:sqlMapConfig.xml
- 数据库连接信息文件:jdbc.properties
- Web.xml文件:web.xml
- 日志文件:log4j.xml
📝2️⃣Spring整合MyBatis
✨1.整合思路
对于下面部分代码:
SqlSession sqlSession = MyBatisUtils.openSession();
AccountMapper accountMapper = sqlSession.getMapper(AccountMapper.class);
accountMapper.save(account);
sqlSession.commit();
sqlSession.close();
可将Session工厂交给Spring容器管理,从容器中获得执行操作的Mapper实例。
将事务的控制交给Spring容器使用声明式事务控制。
✨2.将SqlSessionFactory配置到Spring容器中
在applicationContext.xml中配置Bean
✨3.扫描Mapper,让Spring容器产生Mapper实现类
在applicationContext.xml中配置
✨4.配置声明式事务控制
在applicationContext.xml中配置
✨5.更新Service实现类代码
@Service("accountService")public class AccountServiceImpl implements AccountService {@Autowiredprivate AccountMapper accountMapper;public void save(Account account) {accountMapper.save(account);}public List findAll() {return accountMapper.findAll();}}📝【SSM直击大厂】完结散花

