【云原生&微服务一】SpringCloud之Ribbon实现负载均衡详细案例(集成Eureka、Ribbon)
一、负载均衡概述
在分布式 或 微服务架构中,服务的提供者往往有多个实例 会注册到服务注册中心中,服务消费者需要使用服务时,需要决定使用哪个服务提供者,这正是负载均衡的体现。
负载均衡也可以理解为:将用户的请求平摊分配到每个服务器上,尽可能的压榨每台服务器的带宽、性能。
负载均衡的方式有两种:
- 服务端负载均衡
像以前的老架构,通过nginx对请求做负载均衡,然后下发到指定的tomcat。
- 客户端负载均衡
client获取到所有的service实例,然后做负载均衡规则。例如:Ribbon、Feign
本文我们针对SpringCloud如何集成Ribbon实现负载均衡做一个讨论。
注:(版本信息)–
二、Ribbon实现负载均衡
整体项目目录包括三个Module,分别为:eureka-server、ribbon-feign-sample、ribbon-feign-sample-consumer。
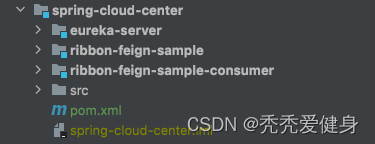
其中eureka-server作为服务注册中心、ribbon-feign-sample作为服务提供者、ribbon-feign-sample-consumer作为服务消费者。
Ribbon 与 RestTemplate 配合使用,实现了微服务之间的调用。
0、最上层父项目spring-cloud-center的pom.xml文件
<project xmlns="http://maven.apache.org/POM/4.0.0" xmlns:xsi="http://www.w3.org/2001/XMLSchema-instance" xsi:schemaLocation="http://maven.apache.org/POM/4.0.0 http://maven.apache.org/xsd/maven-4.0.0.xsd"> <parent> <groupId>org.springframework.boot</groupId> <artifactId>spring-boot-starter-parent</artifactId> <version>2.3.7.RELEASE</version> <relativePath/> </parent> <modelVersion>4.0.0</modelVersion> <packaging>pom</packaging> <modules> <module>ribbon-feign-sample</module> <module>ribbon-feign-sample-consumer</module> <module>eureka-server</module> </modules> <artifactId>spring-cloud-center</artifactId> <groupId>com.saint</groupId> <version>0.0.1-SNAPSHOT</version> <name>spring-cloud-center</name> <properties> <java.version>1.8</java.version> </properties> <dependencyManagement> <dependencies> <dependency> <groupId>org.springframework.boot</groupId> <artifactId>spring-boot-dependencies</artifactId> <version>2.3.7.RELEASE</version> <type>pom</type> <scope>import</scope> </dependency> <dependency> <groupId>org.springframework.cloud</groupId> <artifactId>spring-cloud-dependencies</artifactId> <version>Hoxton.SR8</version> <type>pom</type> <scope>import</scope> </dependency> <dependency> <groupId>com.alibaba.cloud</groupId> <artifactId>spring-cloud-alibaba-dependencies</artifactId> <version>2.2.5.RELEASE</version> <type>pom</type> <scope>import</scope> </dependency> </dependencies> </dependencyManagement> <build> <plugins> <plugin> <groupId>org.apache.maven.plugins</groupId> <artifactId>maven-compiler-plugin</artifactId> <configuration> <source>1.8</source> <target>1.8</target> <encoding>UTF-8</encoding> </configuration> </plugin> <plugin> <groupId>org.springframework.boot</groupId> <artifactId>spring-boot-maven-plugin</artifactId> </plugin> </plugins> </build></project>关于Spring-cloud和SpringBoot的版本对应关系,参考博文:SpringBoot、SpringCloud、SpringCloudAlibaba的版本对应关系。
1、搭建服务注册中心eureka-server
eureka-server整体代码结构目录如下:
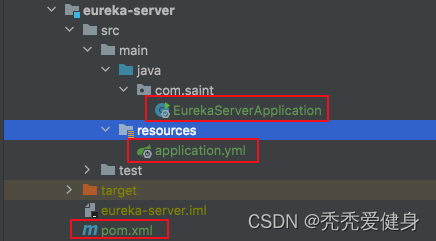
其整体很简单、仅仅包含一个pom.xml文件、一个配置文件、一个启动类。
1、pom.xml
<project xmlns="http://maven.apache.org/POM/4.0.0" xmlns:xsi="http://www.w3.org/2001/XMLSchema-instance" xsi:schemaLocation="http://maven.apache.org/POM/4.0.0 http://maven.apache.org/xsd/maven-4.0.0.xsd"> <parent> <artifactId>spring-cloud-center</artifactId> <groupId>com.saint</groupId> <version>0.0.1-SNAPSHOT</version> </parent> <modelVersion>4.0.0</modelVersion> <artifactId>eureka-server</artifactId> <version>0.0.1-SNAPSHOT</version> <description>eureka-server</description> <dependencies> <dependency> <groupId>org.springframework.cloud</groupId> <artifactId>spring-cloud-starter-netflix-eureka-server</artifactId> </dependency> <dependency> <groupId>org.springframework.boot</groupId> <artifactId>spring-boot-starter-web</artifactId> </dependency> <dependency> <groupId>org.springframework.boot</groupId> <artifactId>spring-boot-starter</artifactId> <optional>true</optional> </dependency> <dependency> <groupId>org.springframework.boot</groupId> <artifactId>spring-boot-autoconfigure</artifactId> </dependency> </dependencies></project>2、修改配置文件application.yml
server: port: 10010spring: application: name: eureka-servereureka: client: # 把自身注册到Eureka-server中 register-with-eureka: true # 服务注册中心不需要去检索其他服务 fetch-registry: false # 指定服务注册中心的位置 service-url: defaultZone: http://localhost:10010/eureka instance: hostname: localhost3、修改启动类
package com.saint;import org.springframework.boot.SpringApplication;import org.springframework.boot.autoconfigure.SpringBootApplication;import org.springframework.cloud.netflix.eureka.server.EnableEurekaServer;/ * @author Saint */@EnableEurekaServer@SpringBootApplicationpublic class EurekaServerApplication { public static void main(String[] args) { SpringApplication.run(EurekaServerApplication.class, args); }}这里和普通的启动有一个区别:需要加上 @EnableEurekaServer 注解开启Eureka-Server。
4、启动eureka-server
启动成功后,控制台输出如下:

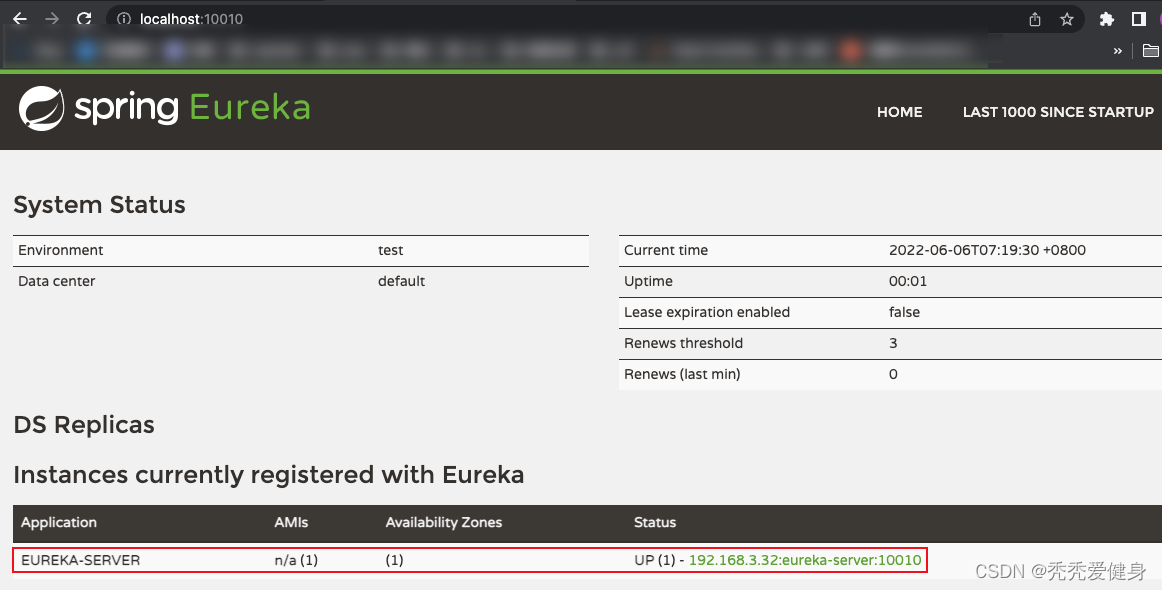
进入到eureka-server 的dashboard,可以看到eureka-server已经上线:
2、搭建服务提供者ribbon-feign-sample
ribbon-feign-sample整体代码结构目录如下:
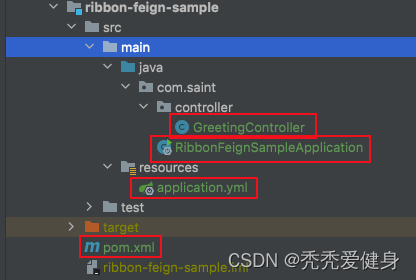
其中包含一个pom.xml文件、一个配置文件、一个启动类、一个Controller。
1、pom.xml
<project xmlns="http://maven.apache.org/POM/4.0.0" xmlns:xsi="http://www.w3.org/2001/XMLSchema-instance" xsi:schemaLocation="http://maven.apache.org/POM/4.0.0 http://maven.apache.org/xsd/maven-4.0.0.xsd"> <parent> <artifactId>spring-cloud-center</artifactId> <groupId>com.saint</groupId> <version>0.0.1-SNAPSHOT</version> </parent> <modelVersion>4.0.0</modelVersion> <artifactId>ribbon-feign-sample</artifactId> <groupId>com.saint</groupId> <version>0.0.1-SNAPSHOT</version> <description>ribbon test service provider</description> <dependencies> <dependency> <groupId>org.springframework.cloud</groupId> <artifactId>spring-cloud-starter-netflix-eureka-client</artifactId> </dependency> <dependency> <groupId>org.springframework.boot</groupId> <artifactId>spring-boot-starter-web</artifactId> </dependency> <dependency> <groupId>org.springframework.boot</groupId> <artifactId>spring-boot-starter</artifactId> <optional>true</optional> </dependency> <dependency> <groupId>org.springframework.boot</groupId> <artifactId>spring-boot-autoconfigure</artifactId> </dependency> </dependencies></project>2、修改配置文件application.yml
server: port: 8081spring: application: name: greeting-serviceeureka: client: # 将当前服务注册到服务注册中心 service-url: defaultZone: http://localhost:10010/eureka3、修改启动类
package com.saint;import org.springframework.boot.SpringApplication;import org.springframework.boot.autoconfigure.SpringBootApplication;import org.springframework.cloud.netflix.eureka.EnableEurekaClient;/ * Saint */@SpringBootApplication@EnableEurekaClientpublic class RibbonFeignSampleApplication { public static void main(String[] args) { SpringApplication.run(RibbonFeignSampleApplication.class, args); }}这里和普通的启动有一个区别:需要加上 @EnableEurekaClient 注解开启eureka-client。
4、编写GreetingController
package com.saint.controller;import org.springframework.web.bind.annotation.GetMapping;import org.springframework.web.bind.annotation.PathVariable;import org.springframework.web.bind.annotation.RequestMapping;import org.springframework.web.bind.annotation.RestController;/ * @author Saint */@RestController@RequestMapping("/greeting")public class GreetingController { @GetMapping("/sayHello/{name}") public String sayHello(@PathVariable("name") String name) { System.out.println("接收到了请求调用 + " + name); return "Hello, " + name; }}5、启动GREETING-SERVICE服务实例1(8081端口)
服务启动成功后,控制台输出如下:

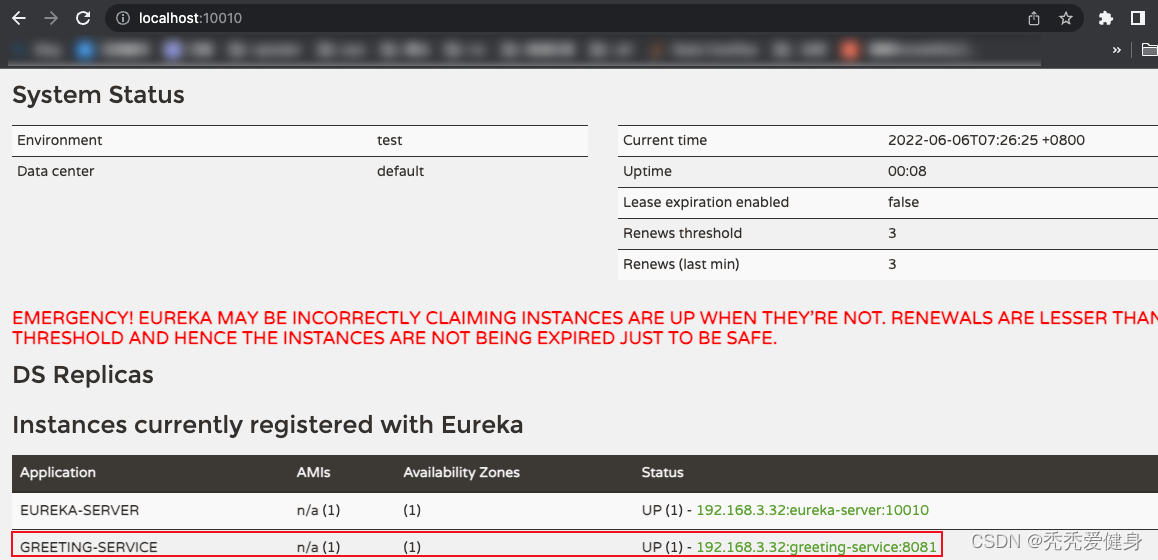
再看eureka-server dashboard中多了一个 GREETING-SERVICE 服务,并且其有一个实例 192.168.3.32:greeting-service:8081。
6、启动GREETING-SERVICE服务实例2(8082端口)
1> 修改RibbonFeignSampleApplication的配置:

2> 复制出一个RibbonFeignSampleApplication配置:
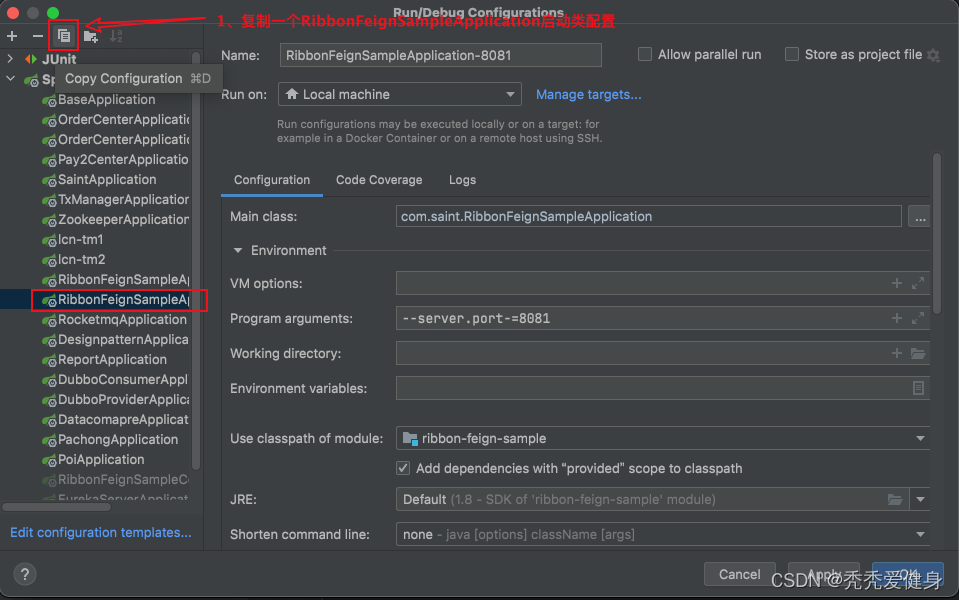
3> 修改第二启动类配置名为:RibbonFeignSampleApplication-8082,启动端口为8082:

4> 运行RibbonFeignSampleApplication-8082:

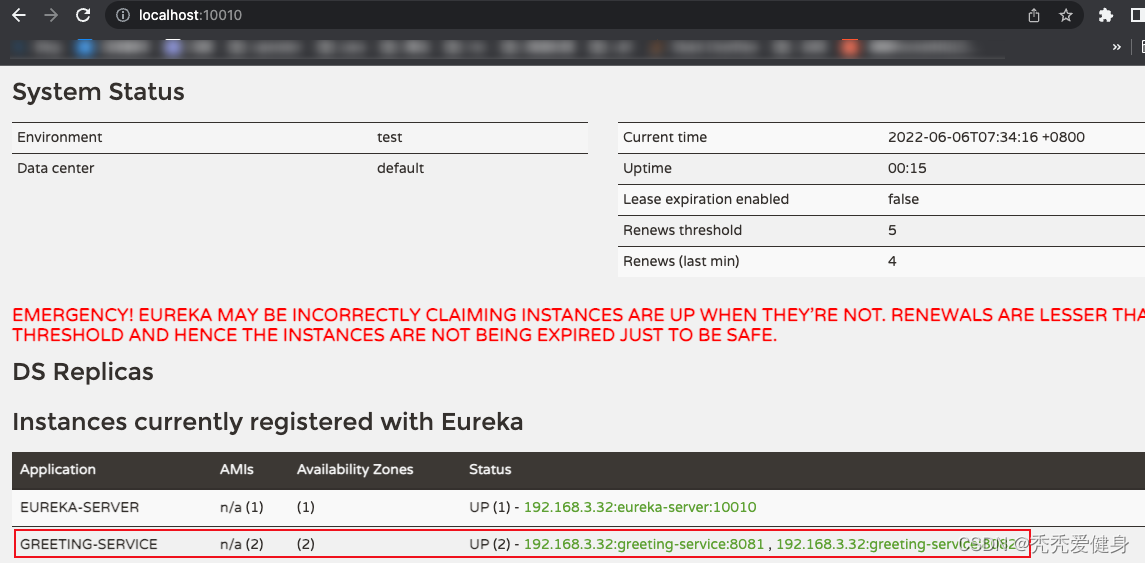
5> 启动之后,看eureka-server dashboard中GREETING-SERVICE 服务多了一个实例 192.168.3.32:greeting-service:8082:
3、搭建服务消费者ribbon-feign-sample-consumer
ribbon-feign-sample-consumer整体代码结构目录如下:
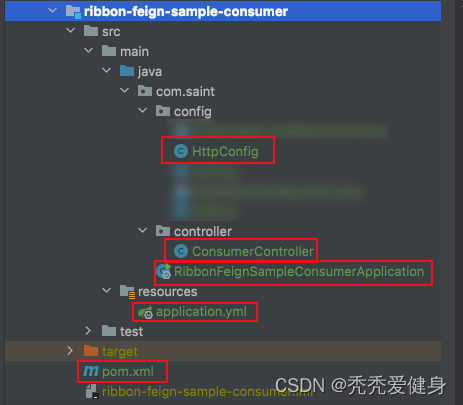
其包含一个pom.xml文件、一个application配置文件、一个启动类、一个Http负载均衡配置类、一个Controller。
1、pom.xml
<project xmlns="http://maven.apache.org/POM/4.0.0" xmlns:xsi="http://www.w3.org/2001/XMLSchema-instance" xsi:schemaLocation="http://maven.apache.org/POM/4.0.0 http://maven.apache.org/xsd/maven-4.0.0.xsd"> <parent> <artifactId>spring-cloud-center</artifactId> <groupId>com.saint</groupId> <version>0.0.1-SNAPSHOT</version> </parent> <modelVersion>4.0.0</modelVersion> <artifactId>ribbon-feign-sample-consumer</artifactId> <version>0.0.1-SNAPSHOT</version> <description>ribbon test service provider</description> <dependencies> <dependency> <groupId>org.springframework.cloud</groupId> <artifactId>spring-cloud-starter-netflix-ribbon</artifactId> </dependency> <dependency> <groupId>org.springframework.cloud</groupId> <artifactId>spring-cloud-starter-netflix-eureka-client</artifactId> </dependency> <dependency> <groupId>org.springframework.boot</groupId> <artifactId>spring-boot-starter-web</artifactId> </dependency> <dependency> <groupId>org.springframework.boot</groupId> <artifactId>spring-boot-starter</artifactId> <optional>true</optional> </dependency> <dependency> <groupId>org.springframework.boot</groupId> <artifactId>spring-boot-autoconfigure</artifactId> </dependency> <dependency> <groupId>org.springframework.boot</groupId> <artifactId>spring-boot-starter-test</artifactId> <scope>test</scope> </dependency> </dependencies></project>2、修改配置文件application.yml
server: port: 9090spring: application: name: consumer-serviceeureka: client: # 将当前服务注册到服务注册中心 service-url: defaultZone: http://localhost:10010/eureka注:服务端口为9090,后面我们进行接口调用的时候会用到。
3、修改启动类
package com.saint;import org.springframework.boot.SpringApplication;import org.springframework.boot.autoconfigure.SpringBootApplication;import org.springframework.cloud.netflix.eureka.EnableEurekaClient;/ * Saint */@SpringBootApplication@EnableEurekaClientpublic class RibbonFeignSampleConsumerApplication { public static void main(String[] args) { SpringApplication.run(RibbonFeignSampleConsumerApplication.class, args); }}4、修改HTTP负载均衡配置类–HttpConfig
package com.saint.config;import org.springframework.cloud.client.loadbalancer.LoadBalanced;import org.springframework.context.annotation.Bean;import org.springframework.context.annotation.Configuration;import org.springframework.web.client.RestTemplate;/ * Http配置类 * * @author Saint */@Configurationpublic class HttpConfig { @Bean @LoadBalanced public RestTemplate restTemplate(){ return new RestTemplate(); }}HttpConfig类的作用:对RestTemple的调用使用Ribbon做负载均衡,将RestTemplate注入到Spring IOC容器中。
5、编写ConsumerController
package com.saint.controller;import org.springframework.beans.factory.annotation.Autowired;import org.springframework.web.bind.annotation.PathVariable;import org.springframework.web.bind.annotation.RequestMapping;import org.springframework.web.bind.annotation.RestController;import org.springframework.web.client.RestTemplate;/ * @author Saint */@RestControllerpublic class ConsumerController { @Autowired private RestTemplate restTemplate; @RequestMapping("/say/{name}") public String getHello(@PathVariable("name") String name) { String res = restTemplate.getForObject("http://GREETING-SERVICE/greeting/sayHello/" + name, String.class); return res; }}ConsumerController中通过RestTemplate调用http://GREETING-SERVICE/greeting/sayHello/{name}。
6、启动ribbon-feign-sample-consumer
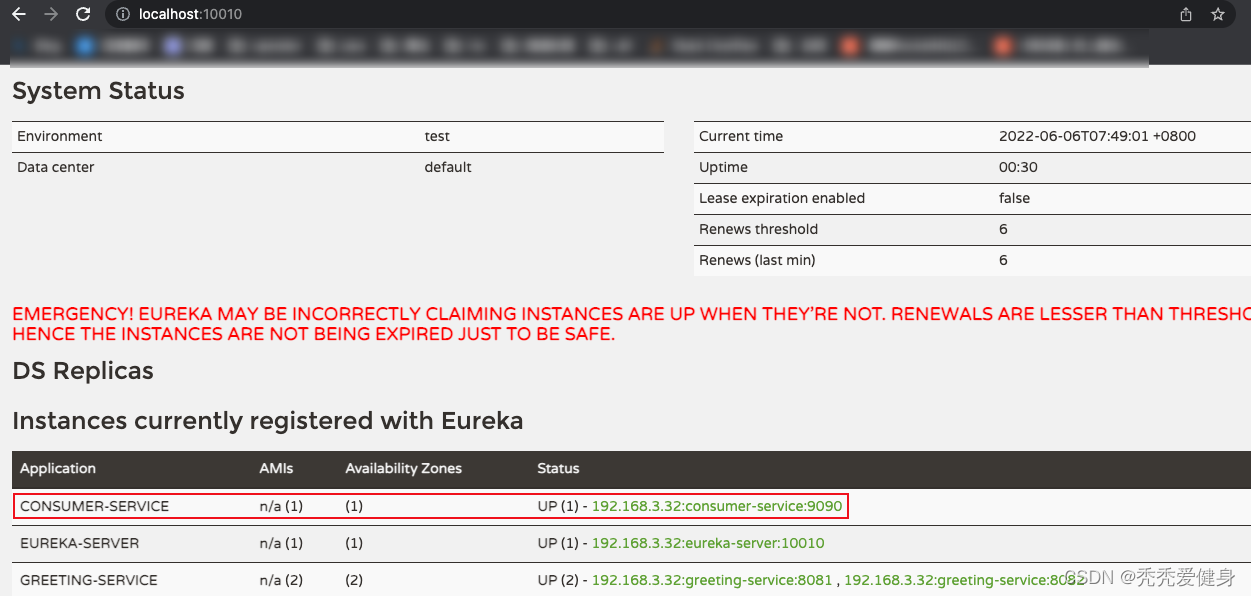
启动成功后,看eureka-server dashboard中多了一个 CONSUMER-SERVICE 服务,并且其有一个实例 192.168.3.32:consumer-service:9090。
4、使用浏览器进行调用服务消费者
上述步骤中,我们已经依次启动了eureka-server、ribbon-feign-sample-8081、ribbon-feign-sample-8082、ribbon-feign-sample-consumer;三个服务、四个实例。
此处我们针对服务消费者ribbon-feign-sample-consumer做四次接口调用,分别为:
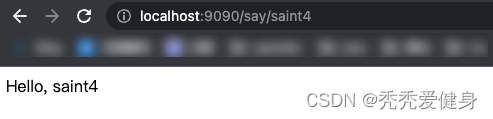
- http://localhost:9090/say/saint
- http://localhost:9090/say/saint2
- http://localhost:9090/say/saint3
- http://localhost:9090/say/saint4
然后我们去看ribbon-feign-sample-8081、ribbon-feign-sample-8082的控制台输出:
1> ribbon-feign-sample-8081控制台输出:

2> ribbon-feign-sample-8082控制台输出:

3> 结果说明:
我们可以发现,四个请求,ribbon-feign-sample-8081和ribbon-feign-sample-8082各分担了两个请求。其中ribbon-feign-sample-8081服务实例承担了请求:http://localhost:9090/say/saint2、http://localhost:9090/say/saint4,而ribbon-feign-sample-8082服务实例承担了请求:http://localhost:9090/say/saint、http://localhost:9090/say/saint3。
从现象上来看,已经Ribbon实现了负载均衡,并且默认是按照轮询的方式。
下文我们接着讨论 Ribbon是如何实现负载均衡(源码分析)?

