梅科尔工作室-李庆浩 HarmonyOS+Django登录案例实现
1.前端书写
1.1hml页代码
1.2css页代码
.container { flex-direction: column; justify-content: center; align-items: center; width: 100%; height: 100%;}.title { font-size: 50px; color: #000000; opacity: 0.9;}.images { margin: 15px 0 15px 15px; width: 100px; height: 100px; border: 1px solid rgba(0,0,0,0);}.round { border-radius: 100px;}.input{ background-color: white;}.capsule{ text-color: #11D6BB; font-size: 17px; font-weight: 600;}.text { text-color: #11D6BB; font-size: 17px; font-weight: 600;}.text1{ text-color: #969696;}.circleall{ width: 90%; flex-direction: row; justify-content: space-around; margin: 0 4% 0 4% ; border-bottom: 1px solid rgba(0,0,0,0.1);}.circleall2{ width: 90%; flex-direction: row; justify-content: flex-end;}.circleall3{ width: 90%; flex-direction: row; justify-content: space-around;}.buttons { margin-top: 15px; width: 70%; height: 50px; text-align: center; font-size: 24px; border-radius: 10px; background-color: #11D6BB;}.buttons2 { margin-top: 30px; width: 70%; height: 50px; text-align: center; font-size: 24px; border-radius: 10px; background-color: #11D6BB;}@media screen and (device-type: tablet) and (orientation: landscape) { .title { font-size: 100px; }}@media screen and (device-type: wearable) { .title { font-size: 28px; color: #FFFFFF; }}@media screen and (device-type: tv) { .container { background-image: url("/common/images/Wallpaper.png"); background-size: cover; background-repeat: no-repeat; background-position: center; } .title { font-size: 100px; color: #FFFFFF; }}@media screen and (device-type: phone) and (orientation: landscape) { .title { font-size: 60px; }}1.3js页代码
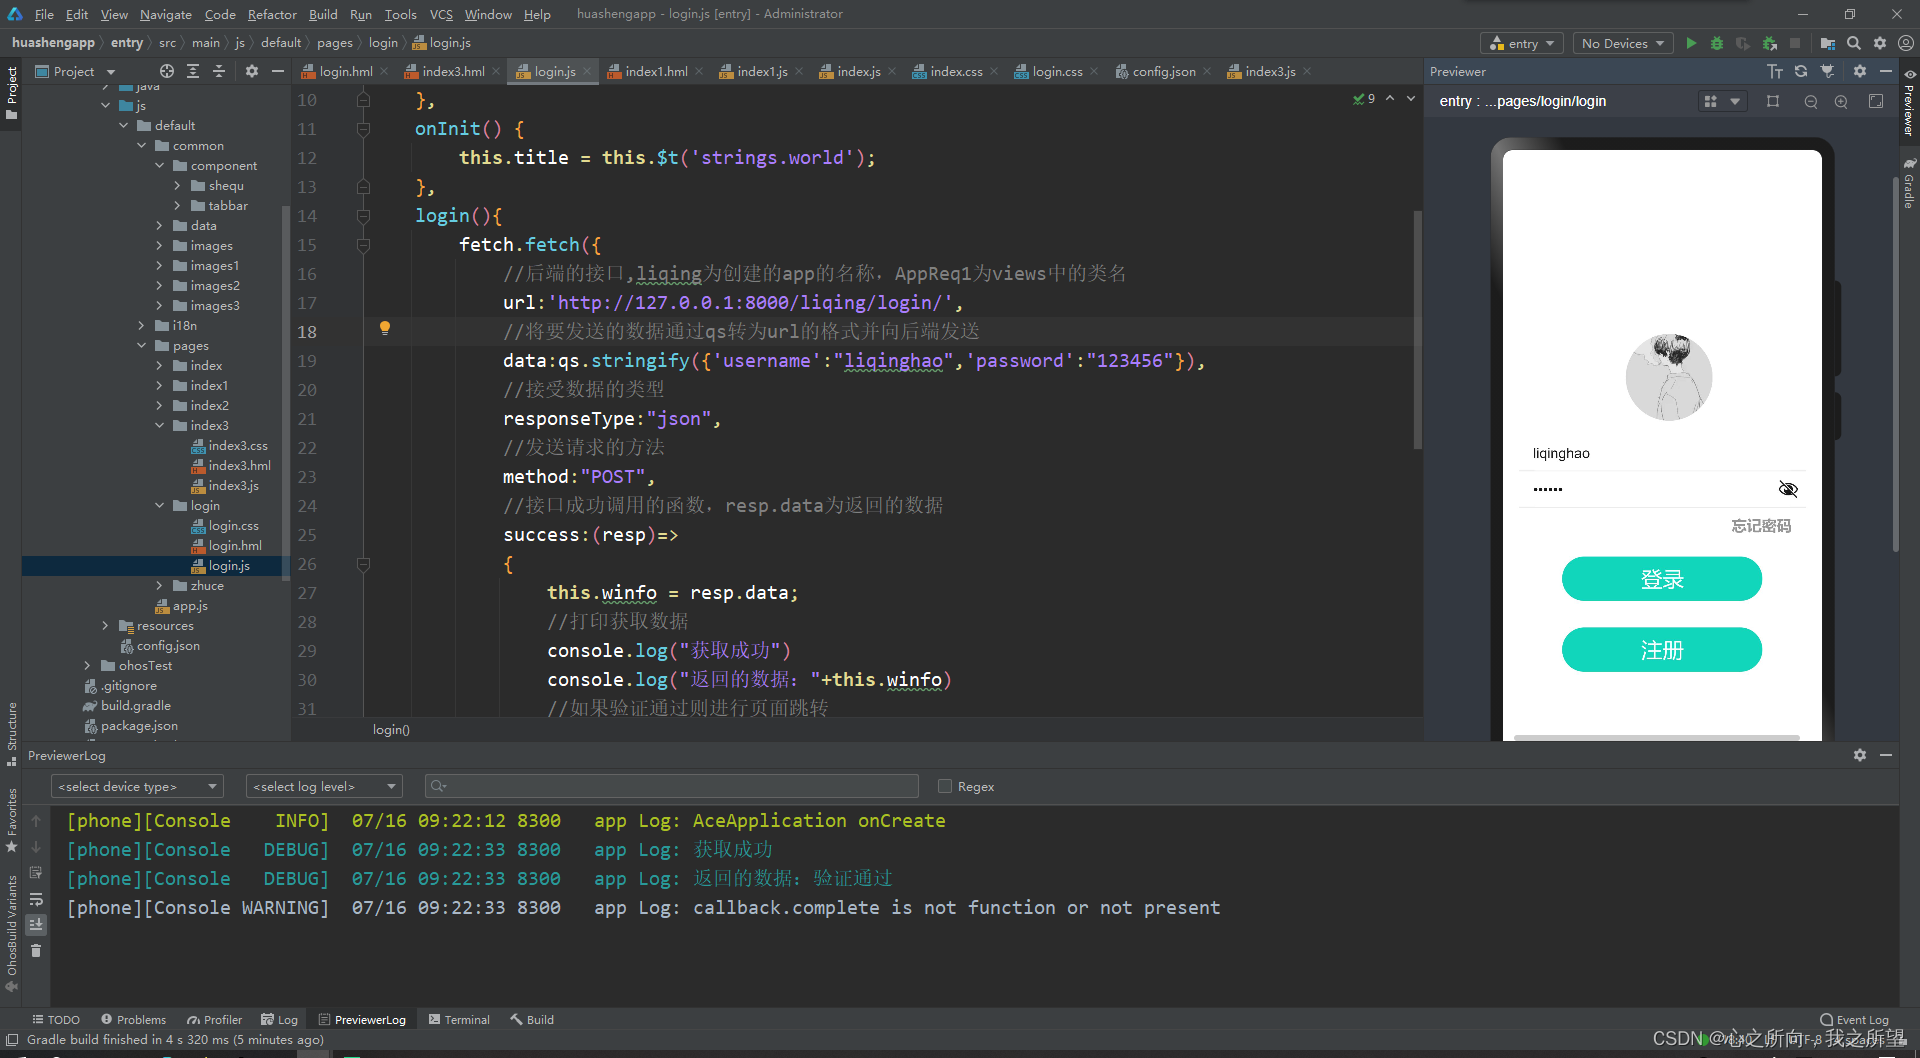
由于想要动态获取input标签的输入值,需要真机模拟才可以实现,但是真机模拟的时候需要远程服务器提供接口,所以这个案例直接给password和username设置一定的值。
import fetch from '@system.fetch';import qs from 'querystring';import router from '@system.router';export default { data: { title: "", username:"", password:"", winfo:"" }, onInit() { this.title = this.$t('strings.world'); }, dousername(e){ this.username = e.value; }, dopassword(e){ this.password = e.value; }, login(){ fetch.fetch({ //后端的接口,liqing为创建的app的名称,AppReq1为views中的类名 url:'http://127.0.0.1:8000/liqing/login/', //将要发送的数据通过qs转为url的格式并向后端发送 data:qs.stringify({'username':"liqinghao",'password':"******"}), //接受数据的类型 responseType:"json", //发送请求的方法 method:"POST", //接口成功调用的函数,resp.data为返回的数据 success:(resp)=> { this.winfo = resp.data; //打印获取数据 console.log("获取成功") console.log("返回的数据:"+this.winfo) //如果验证通过则进行页面跳转 if(this.winfo=="验证通过"){ //router方法进行页面的跳转 router.push({ uri: "pages/index/index" }) } }, //接口调用失败则获取失败原因 fail:(resp)=> { //打印失败原因 this.winfo = resp.data; console.log("获取失败") console.log("失败原因:"+this.winfo) } }) }}2.后端书写
这次不采用迁移数据库的方式,直接在views.py中进行操作。
2.1路由配置
一级路由配置
urlpatterns = [ path('admin/', admin.site.urls), path('liqing/',include(liqing_urls,namespace='liqing')),]二级路由配置
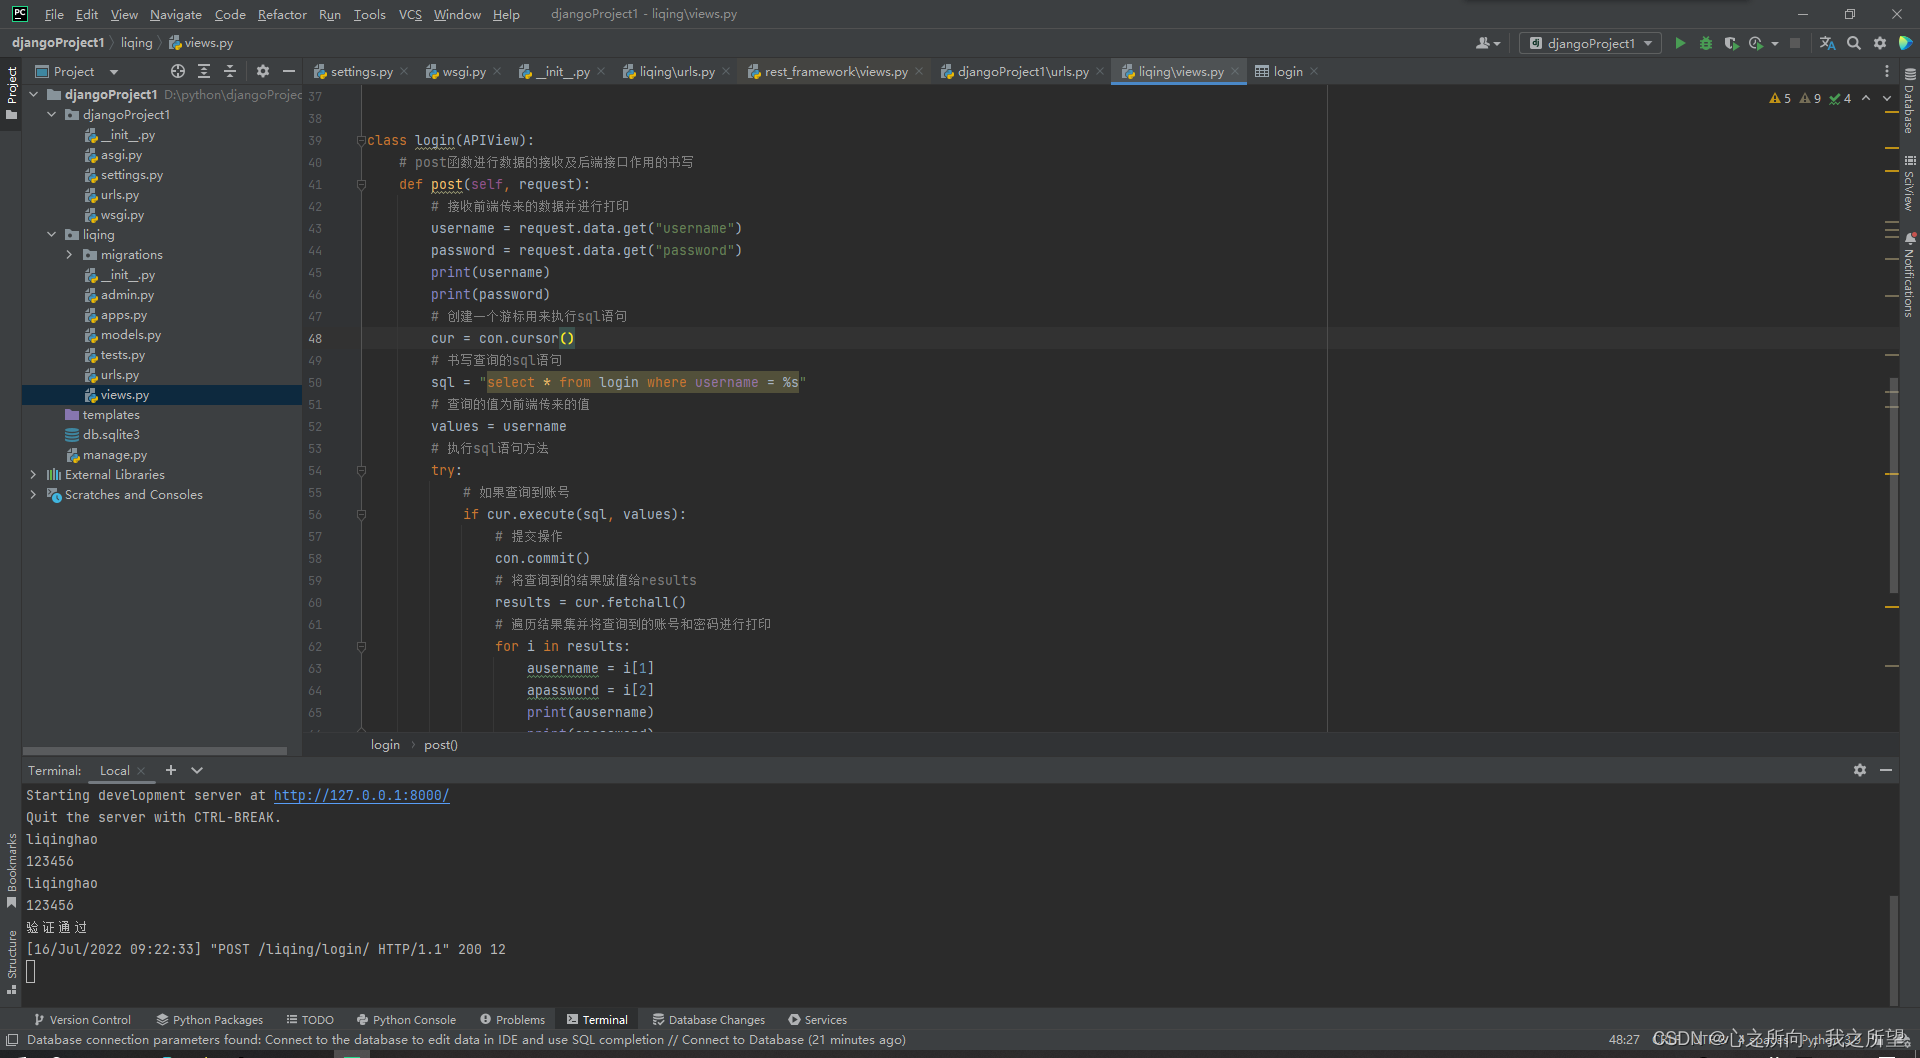
from django.urls import pathfrom liqing.views import AppReq1, loginapp_name = 'liqing'urlpatterns = [ path('login/', login.as_view()),]2.2views.py配置
# Create your views here.import pymysqlfrom django.http import HttpResponsefrom rest_framework.utils import jsonfrom rest_framework.views import APIViewfrom liqing import modelsfrom liqing.models import studenttry: con = pymysql.connect(host='127.0.0.1', port=3306, user='root', password='******',# 自己设置的mysql连接密码 db="testdb1",# 要连接的数据库名称 charset='utf8') print("数据库连接成功")except pymysql.Error as e: print('数据库连接失败' + str(e))class login(APIView): # post函数进行数据的接收及后端接口作用的书写 def post(self, request): # 接收前端传来的数据并进行打印 username = request.data.get("username") password = request.data.get("password") print(username) print(password) # 创建一个游标用来执行sql语句 cur = con.cursor() # 书写查询的sql语句 sql = "select * from login where username = %s" # 查询的值为前端传来的值 values = username # 执行sql语句方法 try: # 如果查询到账号 if cur.execute(sql, values): # 提交操作 con.commit() # 将查询到的结果赋值给results results = cur.fetchall() # 遍历结果集并将查询到的账号和密码进行打印 for i in results: ausername = i[1] apassword = i[2] print(ausername) print(apassword) # 如果密码正确,则向前端返回验证通过 if password == apassword: print("验证通过") return HttpResponse("验证通过") # 为查询到账号,则向前端返回账号输入错误 else: print("账号错误") return HttpResponse("账号输入错误") # 执行失败则返回原因 except pymysql.Error as e: print("错误原因:" + str(e)) return HttpResponse("请求失败")3.效果展示
3.1前端效果
3.2后端效果