ESP8266|RPi pico 通过ESP8266搭建web服务器(树莓派pico通过esp8266联网)
文章目录
- 前言
- 软件准备
- 硬件准备
- 接线
- C/C++实现代码
-
- 实验现象
- Micropython实现代码
-
- 实验现象
- 参考资料
前言
- Raspberry pi pico官网介绍:https://www.raspberrypi.org/documentation/rp2040/getting-started/#board-specifications
- ESP8266官网介绍:https://www.espressif.com/zh-hans/products/socs/esp8266
软件准备
根据树莓派官网的介绍,基于Raspberry pi pico我们可以搭建两种开发环境: Micropython和C/C++
关于开发环境的搭建,国内已经有很多优秀的课程了,我是参考韦东山百问网出的教程搭建的开发环境:
- Micropython:https://www.bilibili.com/video/BV1ZK411c7yf?p=4
- C/C++:https://www.bilibili.com/video/BV1ZK411c7yf?p=5
硬件准备
在开始实验之前,需要准备好一下的硬件:
Raspberry pi pico开发板
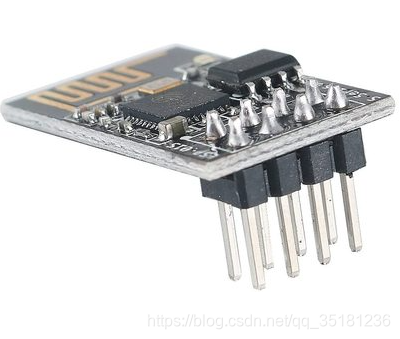
ESP8266串口wifi
接线
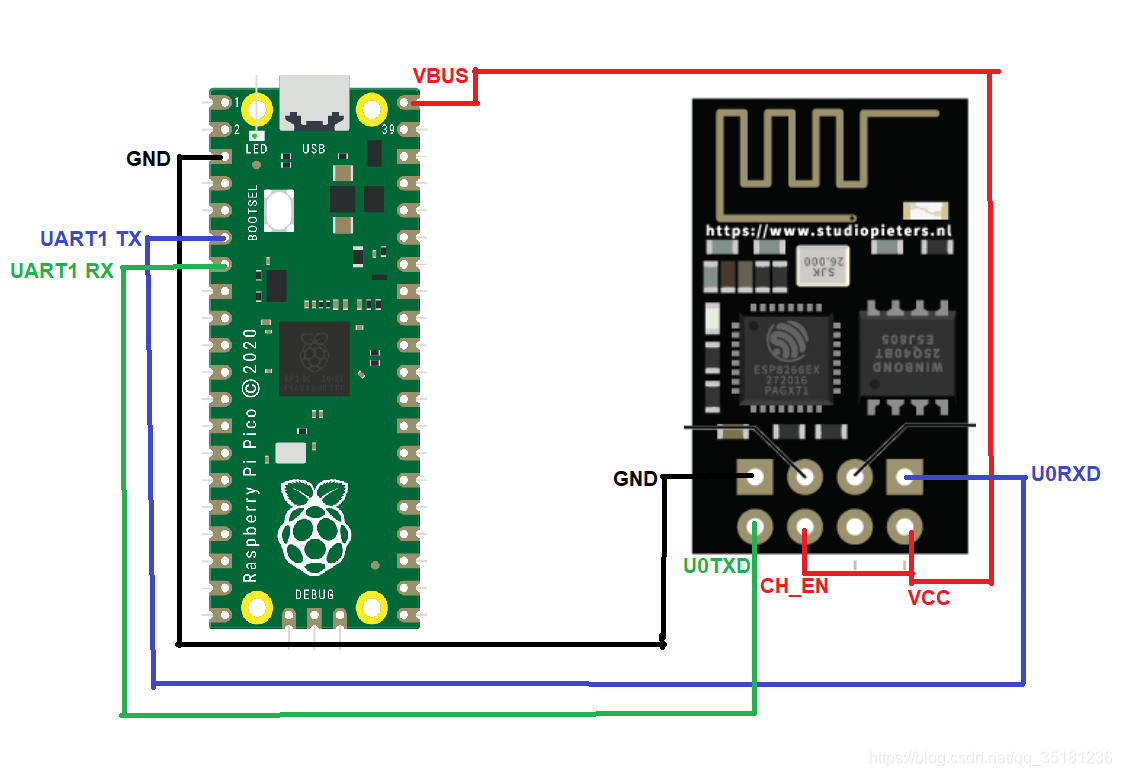
uart0我用于串口模块连接到PC显示串口信息,所以我从uart1开始使用,uart1分配给ESP8266使用。
| pico引脚 | ESP8266引脚 |
|---|---|
| VBUS | VCC、CH-EN |
| GND | GND |
| UART1TX Pin6 | U0RXD |
| UART1RX Pin7 | U0TXD |
C/C++实现代码
/ * Copyright (c) 2008-2021 深圳百问网科技有限公司 * * SPDX-License-Identifier: BSD-3-Clause */#include #include #include #include "pico/stdlib.h"#include "pico/multicore.h"#include "hardware/gpio.h"#include "hardware/uart.h"#define UART_ID uart1#define BAUD_RATE 115200#define UART_TX_PIN 4#define UART_RX_PIN 5#define RECV_BUFFER 256char recv_buf[RECV_BUFFER];int buff_count = 0;void core1_entry() { memset(recv_buf,'0',RECV_BUFFER); while (1) { //printf("%c", uart_getc(UART_ID)); recv_buf[buff_count++] = uart_getc(UART_ID); if(buff_count >= RECV_BUFFER ) buff_count = 0; }}int main() { stdio_init_all(); // Set up our UART with the required speed. uart_init(UART_ID, BAUD_RATE); // Set the TX and RX pins by using the function select on the GPIO // Set datasheet for more information on function select gpio_set_function(UART_TX_PIN, GPIO_FUNC_UART); gpio_set_function(UART_RX_PIN, GPIO_FUNC_UART); multicore_launch_core1(core1_entry); printf("Setting up network on ESP8266...\n"); printf(" - Setting CWMODE to 1 station mode...\n"); uart_puts(UART_ID, "AT+CWMODE=1\r\n"); sleep_ms(2000); printf(" - Joining Wifi ...'\n"); uart_puts(UART_ID, "AT+CWJAP=\"baiwenwang\",\"www.100ask.org\"\r\n"); sleep_ms(5000); printf("done!\n\n"); printf("Starting Webserver port on ESP8266...\n"); sleep_ms(1000); printf(" - Setting CIPMUX for multiple connections...\n"); uart_puts(UART_ID, "AT+CIPMUX=1\r\n"); sleep_ms(2000); printf(" - Starting CIPSERVER on port 80...\n"); uart_puts(UART_ID, "AT+CIPSERVER=1,80\r\n"); printf("done!\n\n"); sleep_ms(1000); // 查询本地 IP 地址 uart_puts(UART_ID, "AT+CIFSR\r\n"); sleep_ms(1000); printf("%s\n", recv_buf); printf("Waiting For connection...\n"); while (true) { if (strstr(recv_buf, "+IPD")) { printf("! Incoming connection - sending webpage"); uart_puts(UART_ID, "AT+CIPSEND=0,108\r\n"); // Send a HTTP response then a webpage as bytes the 108 is the amount of bytes you are sending, change this if you change the data sent below sleep_ms(1000); uart_puts(UART_ID, "HTTP/1.1 200 OK\r\n"); uart_puts(UART_ID, "Content-Type: text/html\r\n"); uart_puts(UART_ID, "Connection: close\r\n"); uart_puts(UART_ID, "\r\n"); uart_puts(UART_ID, "\r\n"); uart_puts(UART_ID, "\r\n"); uart_puts(UART_ID, "It Works!\r\n"); uart_puts(UART_ID, "\r\n"); sleep_ms(1000); uart_puts(UART_ID, "AT+CIPCLOSE=0\r\n"); // close the connection when done. sleep_ms(4000); printf("\n\nWaiting For connection...\n"); sleep_ms(250); memset(recv_buf,'0',RECV_BUFFER); buff_count = 0; } }}实验现象

Micropython实现代码
## Copyright © 2021 深圳百问网科技有限公司 All Rights Reserved.# https://www.100ask.net# https://shop502068889.taobao.com/## SPDX-License-Identifier: BSD-3-Clause#from machine import UARTimport machineimport _threadimport timerecv_buf="" # receive buffer global variableprint('-- ESP8266 Webserver --')print (' ')print ('setting up UART Connection...')uart = UART(1,115200) # create a UART serial connection using UART1 pins and a baud of 115200print ('done!')print (' ')#Function to read serial response from UART serial into buffer one byte at a timedef uartSerialRxMonitor(): recv="" while True: recv=str(uart.read(1).decode("utf-8")) print(recv, end='') global recv_buf recv_buf=recv_buf+recvprint ('Starting connection to ESP8266...')_thread.start_new_thread(uartSerialRxMonitor, ()) # start serial monitor as a threadprint ('done!')print (' ')print ('Setting up network on ESP8266...')print (' - Setting CWMODE to 1 station mode...')uart.write('AT+CWMODE=1'+'\r\n')time.sleep(2)print (' - Joining Wifi ...')uart.write('AT+CWJAP="baiwenwang","www.100ask.org"'+'\r\n') # set Wifi network SSID and password heretime.sleep(5)print ('done!')print (' ')print ('Starting Webserver port on ESP8266...')time.sleep(4)print (' - Setting CIPMUX for multiple connections...')uart.write('AT+CIPMUX=1'+'\r\n')time.sleep(2)print (' - Starting CIPSERVER on port 80...')uart.write('AT+CIPSERVER=1,80'+'\r\n')print ('done!')print (' ')time.sleep(1)print (' ')print ('Waiting For connection...')while True: if '+IPD' in recv_buf: #IPD in serial indicates an incoming connection time.sleep(2) print ('! Incoming connection - sending webpage') uart.write('AT+CIPSEND=0,108'+'\r\n') #Send a HTTP response then a webpage as bytes the 108 is the amount of bytes you are sending, change this if you change the data sent below time.sleep(1) uart.write('HTTP/1.1 200 OK'+'\r\n') uart.write('Content-Type: text/html'+'\r\n') uart.write('Connection: close'+'\r\n') uart.write(''+'\r\n') uart.write(''+'\r\n') uart.write(''+'\r\n') uart.write('It Works!'+'\r\n') uart.write(''+'\r\n') time.sleep(1) uart.write('AT+CIPCLOSE=0'+'\r\n') # close the connection when done. time.sleep(4) print (' ') print (' ') print ('Waiting For connection...') recv_buf=""实验现象
参考资料
ESP8266 AT指令集

