前后端分离框架Vue+Element UI(下集)
个人简介
作者是一个来自河源的大三在校生,以下笔记都是作者自学之路的一些浅薄经验,如有错误请指正,将来会不断的完善笔记,帮助更多的Java爱好者入门。
文章目录
Vue2框架-2.9.6
webpack打包工具
webpack是一款模块加载器兼打包工具, 它能把各种资源, 如JS、JSX、ES 6、SASS、LESS、图片等都作为模块来处理和使用。
安装webpack
npm install webpack -gnpm install webpack-cli -gwebpack -vwebpack-cli -v使用webpack
创建名称为webpack.config.js的配置文件。例如:

编写webpack打包的简单配置
const path = require('path');module.exports = { entry: './src/main.js', //打包入口 output: { path: path.resolve(__dirname, 'dist'), //输出路径 filename: 'bundle.js' //相当于./dist/bundle.js }}webpack配置项:
- entry:入口文件,指定WebPack用哪个文件作为项目的入口
- output:输出,指定WebPack把处理完成的文件放置到指定路径
- module:模块,用于处理各种类型的文件
- plugins:插件,如:热更新、代码重用等
- resolve:设置路径指向
- watch:监听,用于设置文件改动后直接打包
执行命令即可打包:
webpack动态打包,监听
webpack --watch展示Vue内容
vue文件其实就是组件,组件名为export default中的name,所以想要展示vue组件的内容,有如下两种方法:
方式一:
方式二:
不然vue的内容将不会展示,除非用vue-router
main.js
//程序主入口import Vue from "vue"; //导入vueimport Home from "./components/Home";//导入Home组件//使用vuenew Vue({ //这里main.js的el名称必须是#app el:'#app', //注册组件,必须要 components:{ Home }, template: ''});Home.vue
{{tx}}
export default { name: "Home", //vue组件名。import Home from xxx data(){ //相当于new Vue里面的data属性,给当前vue组件传值 return{ tx:'hello vue' } } }vue的注意点
- 程序主入口main.js的el名称必须是#app,否则会报错
Vue组件嵌套Vue组件
实战
main.js
//程序主入口import Vue from "vue"; //导入vueimport Home from "./components/Home";//导入Home组件//使用vuenew Vue({ //这里main.js的el名称必须是#app el:'#app', //注册组件,必须要 components:{ Home }, template: ''});Home.vue
{{tx}}
//需要什么组件就导入什么组件,并且注册 //方式一: // import MyContent from "@/components/MyContent"; //方式二: import MyContent from "./MyContent"; import MyFoot from "./MyFoot"; export default { name: "Home", //vue组件名。import Home from xxx data(){ //相当于new Vue里面的data属性,给当前vue组件传值 return{ tx:'hello vue' } }, //注册组件 components: { MyContent,MyFoot } }MyContent.vue
我是内容
export default { name: "MyContent" }MyFoot.vue
this is foot
export default { name: "MyFoot" }vue-router
vue-Router是Vue.js官方的路由管理器。它和Vue.js的核心深度集成, 让构建单页面应用变得易如反掌。包含的功能有:
- 嵌套的路由/视图表
- 模块化的、基于组件的路由配置
- 路由参数、查询、通配符
- 基于Vue js过渡系统的视图过渡效果
- 细粒度的导航控制
- 带有自动激活的CSS class的链接
- HTML5 历史模式或hash模式, 在IE 9中自动降级
- 自定义的滚动行为
使用vue-router3.0
安装
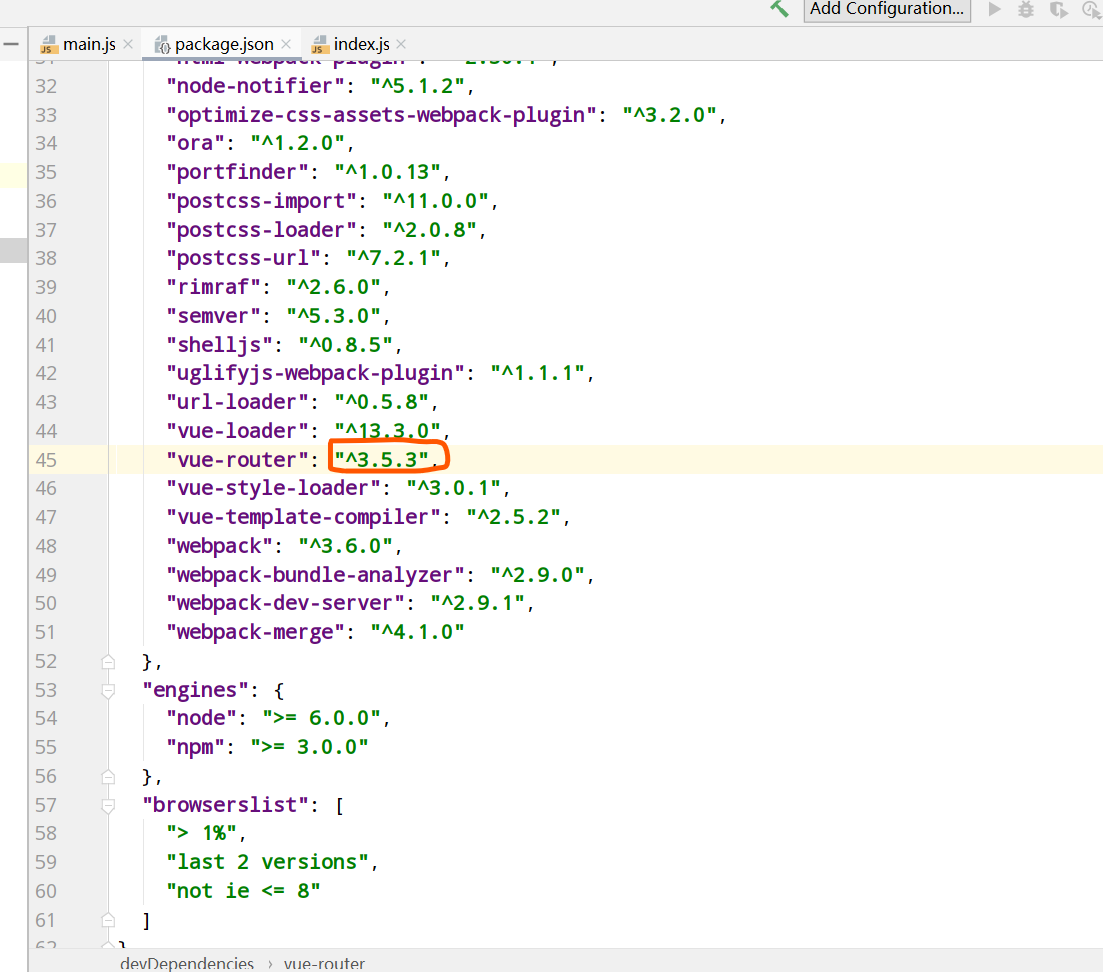
npm install vue-router --save-devvue-router报错
因为默认下载的vue-router是vue-router4,我们要修改到vue-router3才能使用。比如3.5.3版本就可以
路由实战
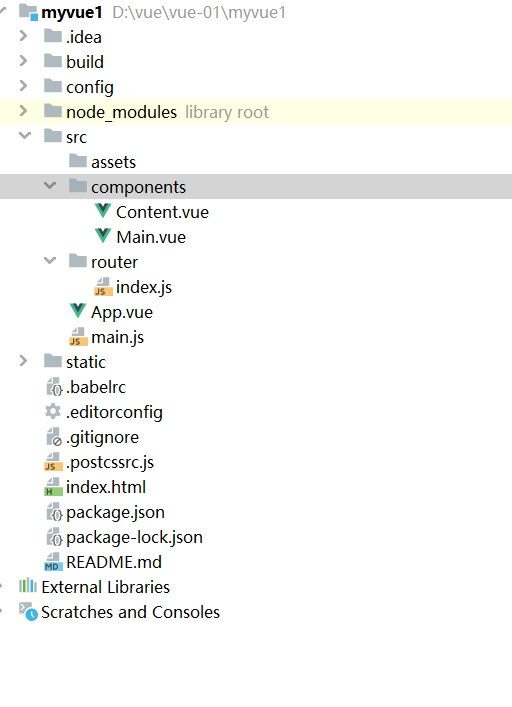
项目结构:
main.js:
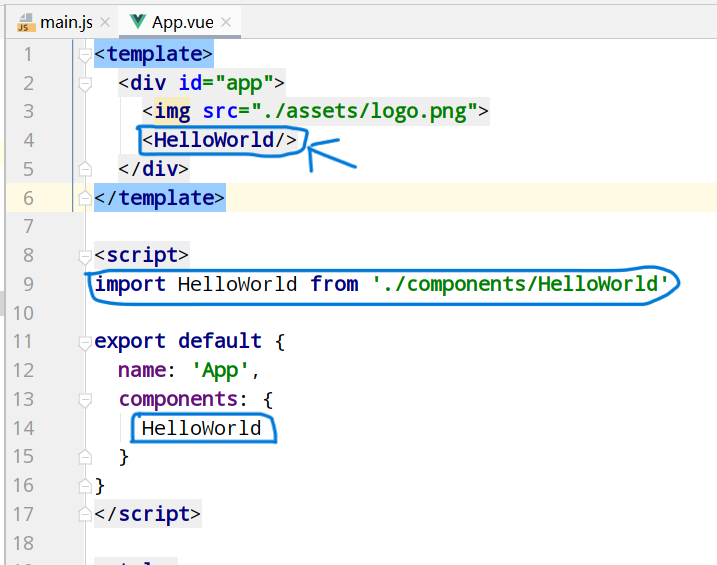
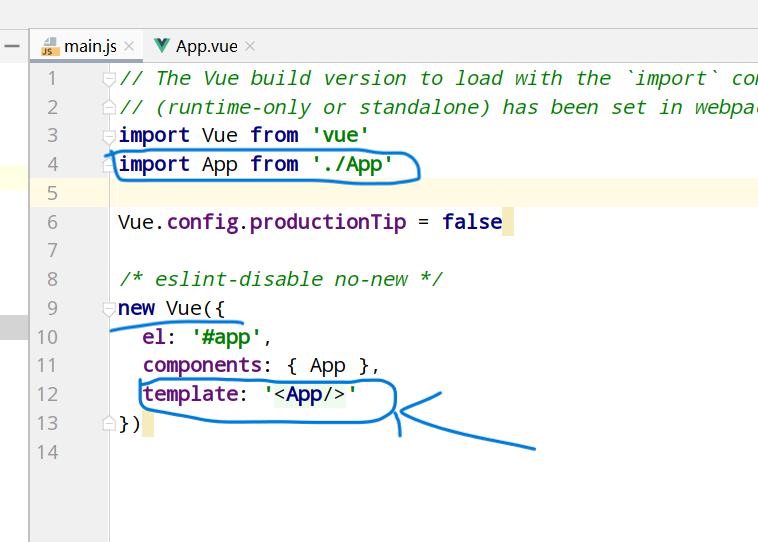
import Vue from "vue";import App from "./App";import router from "./router";new Vue({ el:'#app', router, render: h => h(App)})App.vue:
首页 内容 其他 -------------------
export default { name: "App" }路由核心配置文件,index.js:
import Vue from 'vue'//导入路由插件import VueRouter from 'vue-router'//导入上面定义的组件import Content from '../components/Content'import Main from '../components/Main'import Other from "../components/Other";//安装路由Vue.use(VueRouter);//配置路由export default new VueRouter({ routes: [ { //路由路径 path: '/content', //路由名称 name: 'content', //跳转到组件 component: Content }, { //路由路径 path: '/main', //路由名称 name: 'main', //跳转到组件 component: Main }, { path: '/other', components: { // default: Content, //默认如果当访问这个路径没有指定视图的name则会到这个组件 otherview: Other //命名视图格式==>视图的name:响应组件名 } } ]});Content.vue:
content
export default { name: "Content" }Main.vue:
main
export default { name: "Main" }Other.vue:
其他
export default { name: "Other" }vue+element-ui
安装element-ui
#安装element-uinpm i element-ui -S#安装依赖npm install# npm安装SASS加载器npm install sass-loader node-sass --save-dev# 如果不行就用cnpm安装SASS加载器cnpm install sass-loader node-sass --save-devpackage.json:
{ "name": "myvue2", "version": "1.0.0", "description": "A Vue.js project", "author": "ms666 ", "private": true, "scripts": { "dev": "webpack-dev-server --inline --progress --config build/webpack.dev.conf.js", "start": "npm run dev", "build": "node build/build.js" }, "dependencies": { "element-ui": "^2.15.6", "vue": "^2.5.2" }, "devDependencies": { "autoprefixer": "^7.1.2", "babel-core": "^6.22.1", "babel-helper-vue-jsx-merge-props": "^2.0.3", "babel-loader": "^7.1.1", "babel-plugin-syntax-jsx": "^6.18.0", "babel-plugin-transform-runtime": "^6.22.0", "babel-plugin-transform-vue-jsx": "^3.5.0", "babel-preset-env": "^1.3.2", "babel-preset-stage-2": "^6.22.0", "chalk": "^2.0.1", "copy-webpack-plugin": "^4.0.1", "css-loader": "^0.28.0", "extract-text-webpack-plugin": "^3.0.0", "file-loader": "^1.1.4", "friendly-errors-webpack-plugin": "^1.6.1", "html-webpack-plugin": "^2.30.1", "node-notifier": "^5.1.2", "node-sass": "^7.0.1", "optimize-css-assets-webpack-plugin": "^3.2.0", "ora": "^1.2.0", "portfinder": "^1.0.13", "postcss-import": "^11.0.0", "postcss-loader": "^2.0.8", "postcss-url": "^7.2.1", "rimraf": "^2.6.0", "sass-loader": "^12.6.0", "semver": "^5.3.0", "shelljs": "^0.8.5", "uglifyjs-webpack-plugin": "^1.1.1", "url-loader": "^0.5.8", "vue-loader": "^13.3.0", "vue-router": "^3.5.3", "vue-style-loader": "^3.0.1", "vue-template-compiler": "^2.5.2", "webpack": "^3.6.0", "webpack-bundle-analyzer": "^2.9.0", "webpack-dev-server": "^2.9.1", "webpack-merge": "^4.1.0" }, "engines": { "node": ">= 6.0.0", "npm": ">= 3.0.0" }, "browserslist": [ "> 1%", "last 2 versions", "not ie <= 8" ]}使用element-ui
引入element-ui
在项目的入口文件main.js引入以下即可。
import Vue from 'vue'import ElementUI from 'element-ui'import 'element-ui/lib/theme-chalk/index.css'Vue.use(ElementUI)实战
main.js
import Vue from 'vue'import ElementUI from 'element-ui'import 'element-ui/lib/theme-chalk/index.css'import App from "./App";//路由配置import router from "./router";Vue.use(router)//使用elementui插件Vue.use(ElementUI)new Vue({ el:'#app', router, render: h => h(App)})App.vue
新增活动 数据信息 export default { name: "App" } #app { font-family: 'Avenir', Helvetica, Arial, sans-serif; -webkit-font-smoothing: antialiased; -moz-osx-font-smoothing: grayscale; text-align: center; color: #2c3e50; margin-top: 60px; }路由index.js
import Vue from 'vue'//导入路由插件import VueRouter from 'vue-router'//导入上面定义的组件import Activity from "../views/Activity";import Info from "../views/Info";//安装路由Vue.use(VueRouter);//配置路由export default new VueRouter({ routes: [ { //路由路径 path: '/activity', //路由名称 name: 'activity', //跳转到组件 components: { act:Activity } }, { //路由路径 path: '/info', //路由名称 name: 'info', //跳转到组件 components: { in:Info } } ]});Activity.vue
- 立即创建 重置 export default { name:'Activity', data() { return { ruleForm: { name: '', region: '', date1: '', date2: '', delivery: false, type: [], resource: '', desc: '' }, rules: { name: [ { required: true, message: '请输入活动名称', trigger: 'blur' }, { min: 3, max: 5, message: '长度在 3 到 5 个字符', trigger: 'blur' } ], region: [ { required: true, message: '请选择活动区域', trigger: 'change' } ], date1: [ { type: 'date', required: true, message: '请选择日期', trigger: 'change' } ], date2: [ { type: 'date', required: true, message: '请选择时间', trigger: 'change' } ], type: [ { type: 'array', required: true, message: '请至少选择一个活动性质', trigger: 'change' } ], resource: [ { required: true, message: '请选择活动资源', trigger: 'change' } ], desc: [ { required: true, message: '请填写活动形式', trigger: 'blur' } ] } }; }, methods: { submitForm(formName) { this.$refs[formName].validate((valid) => { if (valid) { alert('submit!'); } else { console.log('error submit!!'); return false; } }); }, resetForm(formName) { this.$refs[formName].resetFields(); } } }Info.vue
.el-table .warning-row { background: oldlace; } .el-table .success-row { background: #f0f9eb; } export default { name: 'Info', methods: { tableRowClassName({row, rowIndex}) { if (rowIndex === 1) { return 'warning-row'; } else if (rowIndex === 3) { return 'success-row'; } return ''; } }, data() { return { tableData: [{ date: '2016-05-02', name: '王小虎', address: '上海市普陀区金沙江路 1518 弄', }, { date: '2016-05-04', name: '王小虎', address: '上海市普陀区金沙江路 1518 弄' }, { date: '2016-05-01', name: '王小虎', address: '上海市普陀区金沙江路 1518 弄', }, { date: '2016-05-03', name: '王小虎', address: '上海市普陀区金沙江路 1518 弄' }] } } }路由嵌套
嵌套路由注意的问题
嵌套路由必须只有一个root,否则会报错
- Component template should contain exactly one root element. If you are using v-if on multiple elements, use v-else-if to chain them instead. @ ./src/views/Info.vue 12:0-360 @ ./src/router/index.js @ ./src/main.js @ multi (webpack)-dev-server/client?http://localhost:8080 webpack/hot/dev-server ./src/main.js问题产生原因
展示嵌套路由内容 解决办法
解决办法就是用一个div包括他们全部
展示嵌套路由内容 实战
路由配置index.js
import Vue from 'vue'//导入路由插件import VueRouter from 'vue-router'//导入上面定义的组件import Activity from "../views/Activity";import Info from "../views/Info";//路由嵌套组件import ChirdContent from "../views/chirdrenViews/ChirdContent";//安装路由Vue.use(VueRouter);//配置路由export default new VueRouter({ routes: [ { //路由路径 path: '/activity', //路由名称 name: 'activity', //跳转到组件 components: { act:Activity } }, { //路由路径 path: '/info', //路由名称 name: 'info', //跳转到组件 components: { in:Info }, //配置路由嵌套 children: [ { path: '/chird/chirdContent', components: { cc:ChirdContent //ChirdContent组件嵌套在info这个vue组件中 } } ] } ]});被嵌套组件:
.el-table .warning-row { background: oldlace; } .el-table .success-row { background: #f0f9eb; } 展示嵌套路由内容 export default { name: 'Info', methods: { tableRowClassName({row, rowIndex}) { if (rowIndex === 1) { return 'warning-row'; } else if (rowIndex === 3) { return 'success-row'; } return ''; } }, data() { return { tableData: [{ date: '2016-05-02', name: '王小虎', address: '上海市普陀区金沙江路 1518 弄', }, { date: '2016-05-04', name: '王小虎', address: '上海市普陀区金沙江路 1518 弄' }, { date: '2016-05-01', name: '王小虎', address: '上海市普陀区金沙江路 1518 弄', }, { date: '2016-05-03', name: '王小虎', address: '上海市普陀区金沙江路 1518 弄' }] } } }嵌套组件
路由嵌套内容
export default { name: "ChirdContent" }其他基本和上面的实战一致。
参数传递
路由index.js
{ //路由路径 path: '/home/:id/:username', //绑定参数id //路由名称 name: 'myhome', //跳转到组件 components: { hm:Home } }App.vue
绑定参数方式1Home.vue
{{$route.params.id}}
{{$route.params.username}}
{{$route.path}}
{{$route.params}}
export default { name: "Home" }重定向
重定向到一个地址
路由index.js
//重定向 { //路由路径 path: '/activity', //路由名称 name: 'activity', //跳转到组件 components: { act:Activity } },//重定向 { path: '/toActivity', redirect: '/activity' }App.vue
重定向路由模式
路由模式有两种:
- hash:路径带 # 符号,如 http://localhost/#/login
- history:路径不带 # 符号,如 http://localhost/login
//配置路由export default new VueRouter({ mode:'history', // mode:'hash', //默认模式 routes: [ { //路由路径 path: '/activity', //路由名称 name: 'activity', //跳转到组件 components: { act:Activity } } ]});404
NotFound.vue
404未找到页面
export default { name: "NotFound" }路由index.js
import NotFound from "../views/NotFound";//配置404页面 { path:'*', component: NotFound }路由钩子
- beforeRouteEnter: 在进入路由前执行
- beforeRouteLeave: 在离开路由前执行
Home.vue:
export default { name: "Home", beforeRouteEnter:((to, from, next) => { console.log('进入路由之前'); next(); }), beforeRouteLeave:((to, from, next) => { console.log('离开路由之前') next(); }) }参数说明:
- to:路由将要跳转的路径信息
- from:路径跳转前的路径信息
- next:路由的控制参数
- next() 跳入下一个页面
- next(’/path’) 改变路由的跳转方向,使其跳到另一个路由
- next(false) 返回原来的页面
- next((vm)=>{}) 仅在 beforeRouteEnter 中可用,vm 是组件实例
axios异步请求
1:安装axios
npm install --save axios vue-axios2:main.js引入axios
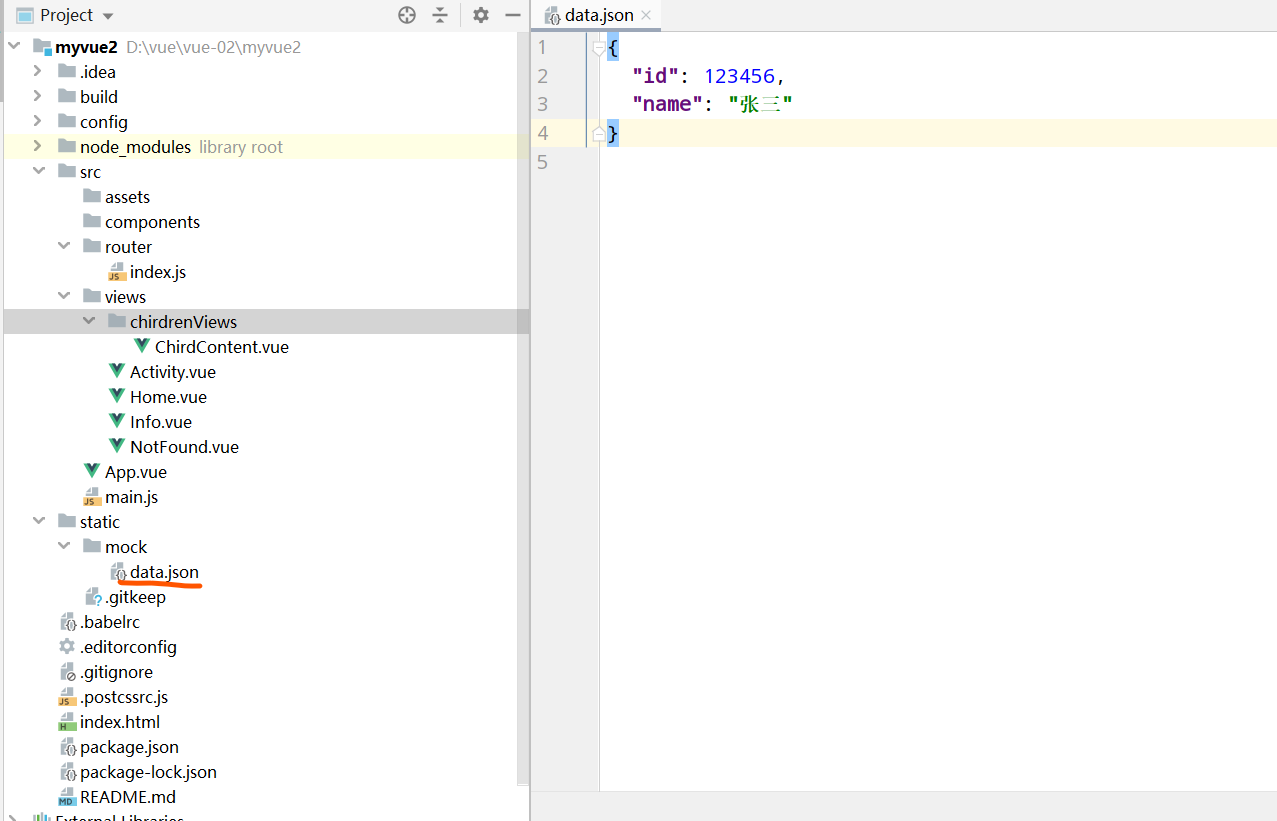
import axios from 'axios'import VueAxios from 'vue-axios'Vue.use(VueAxios, axios)3:准备测试数据
只有我们的 static 目录下的文件是可以被访问到的,所以我们就把静态文件放入该目录下。
数据和之前用的json数据一样 需要的去上述axios例子里
4:使用
Home.vue
export default { name: "Home", beforeRouteEnter:((to, from, next) => { console.log('进入路由之前'); next(vm => { //进入路由之前执行getData方法 vm.getData() }); }), beforeRouteLeave:((to, from, next) => { console.log('离开路由之前') next(); }), //axios methods: { getData: function () { this.axios .get('http://localhost:8080/static/mock/data.json') .then(function (response) {console.log(response) }) } } }
