Kubernetes 管理员认证(CKA)考试笔记(三)
写在前面
- 嗯,准备考
cka证书,报了个班,花了好些钱,一定要考过去。 - 这篇博客是报班听课后整理的笔记,适合温习。
- 博客内容涉及
secret,configmap的创建使用 deployment的创建手动自动扩缩容,镜像滚动更新回滚等。deamonset,ReplicationController,RepliSet的创建使用pod的健康检测,服务可用性检测Service的创建,服务发现,服务发布Ingress等
生活的意义就是学着真实的活下去,生命的意义就是寻找生活的意义 -----山河已无恙
密码配置管理
多个镜像的密码管理
环境准备
相关镜像拉去
┌──[root@vms81.liruilongs.github.io]-[~/ansible]└─$ansible node -m ping192.168.26.83 | SUCCESS => { "ansible_facts": { "discovered_interpreter_python": "/usr/bin/python" }, "changed": false, "ping": "pong"}192.168.26.82 | SUCCESS => { "ansible_facts": { "discovered_interpreter_python": "/usr/bin/python" }, "changed": false, "ping": "pong"}┌──[root@vms81.liruilongs.github.io]-[~/ansible]└─$ansible node -m shell -a "docker pull hub.c.163.com/library/mysql:latest"┌──[root@vms81.liruilongs.github.io]-[~/ansible]└─$ansible node -m shell -a "docker pull hub.c.163.com/library/wordpress:latest"学习环境准备,新建一个命名空间
┌──[root@vms81.liruilongs.github.io]-[~/ansible]└─$dir=k8s-secret-create;mkdir $dir;cd $dir┌──[root@vms81.liruilongs.github.io]-[~/ansible/k8s-secret-create]└─$kubectl get nsNAME STATUS AGEdefault Active 66dkube-node-lease Active 66dkube-public Active 66dkube-system Active 66dliruilong Active 65dliruilong-pod-create Active 58dliruilong-volume-create Active 16d┌──[root@vms81.liruilongs.github.io]-[~/ansible/k8s-secret-create]└─$kubectl create ns liruilong-secret-createnamespace/liruilong-secret-create created┌──[root@vms81.liruilongs.github.io]-[~/ansible/k8s-secret-create]└─$kubectl config set-context $(kubectl config current-context) --namespace=liruilong-secret-createContext "context1" modified.┌──[root@vms81.liruilongs.github.io]-[~/ansible/k8s-secret-create]└─$kubectl config view | grep namespace namespace: default namespace: liruilong-secret-create namespace: kube-system┌──[root@vms81.liruilongs.github.io]-[~/ansible/k8s-secret-create]└─$kubectl config get-contextsCURRENT NAMECLUSTER AUTHINFO NAMESPACE cluster1 default* context1 cluster1 kubernetes-admin1 liruilong-secret-create context2 kube-system┌──[root@vms81.liruilongs.github.io]-[~/ansible/k8s-secret-create]└─$mysqlpod创建一个mysql镜像
┌──[root@vms81.liruilongs.github.io]-[~/ansible/k8s-secret-create]└─$kubectl run mysqlpod --image=hub.c.163.com/library/mysql:latest --image-pull-policy=IfNotPresent --dry-run=client -o yaml >mysqlpod.yaml┌──[root@vms81.liruilongs.github.io]-[~/ansible/k8s-secret-create]└─$vim mysqlpod.yaml┌──[root@vms81.liruilongs.github.io]-[~/ansible/k8s-secret-create]└─$cat mysqlpod.yamlapiVersion: v1kind: Podmetadata: creationTimestamp: null labels: run: mysqlpod name: mysqlpodspec: containers: - image: hub.c.163.com/library/mysql:latest imagePullPolicy: IfNotPresent name: mysqlpod resources: {} env: - name: MYSQL_ROOT_PASSWORD value: liruilong dnsPolicy: ClusterFirst restartPolicy: Alwaysstatus: {}┌──[root@vms81.liruilongs.github.io]-[~/ansible/k8s-secret-create]└─$kubectl apply -f mysqlpod.yamlpod/mysqlpod created┌──[root@vms81.liruilongs.github.io]-[~/ansible/k8s-secret-create]└─$kubectl get pods -o wideNAMEREADY STATUS RESTARTS AGE IP NODE NOMINATED NODE READINESS GATESmysqlpod 1/1 Running 0 19s 10.244.171.190 vms82.liruilongs.github.io <none> <none>┌──[root@vms81.liruilongs.github.io]-[~/ansible/k8s-secret-create]└─$客户端测试
┌──[root@vms81.liruilongs.github.io]-[~/ansible/k8s-secret-create]└─$yum -y install mariadb┌──[root@vms81.liruilongs.github.io]-[~/ansible/k8s-secret-create]└─$mysql -uroot -pliruilong -h10.244.171.190Welcome to the MariaDB monitor. Commands end with ; or \g.Your MySQL connection id is 3Server version: 5.7.18 MySQL Community Server (GPL)Copyright (c) 2000, 2018, Oracle, MariaDB Corporation Ab and others.Type 'help;' or '\h' for help. Type '\c' to clear the current input statement.MySQL [(none)]> quitBye┌──[root@vms81.liruilongs.github.io]-[~/ansible/k8s-secret-create]└─$secret
创建 secret
┌──[root@vms81.liruilongs.github.io]-[~/ansible/k8s-secret-create]└─$kubectl describe pod mysqlpod | grep -A 2 Env Environment: MYSQL_ROOT_PASSWORD: liruilong Mounts:┌──[root@vms81.liruilongs.github.io]-[~/ansible/k8s-secret-create]└─$上面的密码我们使用的是明文,但是在实际的生产环境使用明文是很危险的一件事,所以我们需要加密处理
secret主要用于密码的保存
通过键值对的方式创建。直接指定键值对,或者存放中secret中
命令行创建secret
查看secret
┌──[root@vms81.liruilongs.github.io]-[~/ansible/k8s-secret-create]└─$kubectl get saNAME SECRETS AGEdefault 1 46m┌──[root@vms81.liruilongs.github.io]-[~/ansible/k8s-secret-create]└─$kubectl get secretsNAME TYPE DATA AGEdefault-token-7q2qj kubernetes.io/service-account-token 3 46m┌──[root@vms81.liruilongs.github.io]-[~/ansible/k8s-secret-create]└─$创建secret
┌──[root@vms81.liruilongs.github.io]-[~/ansible/k8s-secret-create]└─$kubectl create secret generic mysecl --from-literal=mysqlpassword=liruilong --from-literal=rqpassword=rqsecret/mysecl created┌──[root@vms81.liruilongs.github.io]-[~/ansible/k8s-secret-create]└─$kubectl get secretsNAME TYPE DATA AGEdefault-token-7q2qj kubernetes.io/service-account-token 3 49mmysecl Opaque 2 9s┌──[root@vms81.liruilongs.github.io]-[~/ansible/k8s-secret-create]└─$Secret有三种类型:
| Secret有三种类型 |
|---|
| Opaque |
| kubernetes.io/dockerconfigjson |
| kubernetes.io/service-account-token |
查看详细信息
┌──[root@vms81.liruilongs.github.io]-[~/ansible/k8s-secret-create]└─$kubectl describe secrets myseclName: myseclNamespace: liruilong-secret-createLabels:<none>Annotations: <none>Type: OpaqueData====mysqlpassword: 9 bytesrqpassword: 2 bytes┌──[root@vms81.liruilongs.github.io]-[~/ansible/k8s-secret-create]└─$┌──[root@vms81.liruilongs.github.io]-[~/ansible/k8s-secret-create]└─$kubectl get secrets mysecl -o yamlapiVersion: v1data: mysqlpassword: bGlydWlsb25n rqpassword: cnE=kind: Secretmetadata: creationTimestamp: "2021-12-12T02:45:20Z" name: mysecl namespace: liruilong-secret-create resourceVersion: "1594980" selfLink: /api/v1/namespaces/liruilong-secret-create/secrets/mysecl uid: 05a99a7c-c7f0-48ac-9f67-32eb52ed1558type: Opaque也可以通过解密得到想要的密码
┌──[root@vms81.liruilongs.github.io]-[~]└─$echo bGlydWlsb25n | base64 -dliruilong┌──[root@vms81.liruilongs.github.io]-[~]┌──[root@vms81.liruilongs.github.io]-[~]└─$echo cnE= | base64 -drq┌──[root@vms81.liruilongs.github.io]-[~]直接解密
┌──[root@vms81.liruilongs.github.io]-[~]└─$kubectl get secrets mysecl -o jsonpath='{.data.mysqlpassword}' | base64 -dliruilong┌──[root@vms81.liruilongs.github.io]-[~]└─$文件方式创建secret
一般使用命令行的方式创建,很少使用文件的方式创建
帐密信息文件
liruilong┌──[root@vms81.liruilongs.github.io]-[~/ansible/k8s-secret-create]└─$tee cat env.txt <<-'EOF'> user=liruilong> password1=redhat> password2=redhat> EOFuser=liruilongpassword1=redhatpassword2=redhat┌──[root@vms81.liruilongs.github.io]-[~/ansible/k8s-secret-create]└─$lsenv.txt mysqlpod.yaml通过--from-env-file文件创建
文件中的键值对
┌──[root@vms81.liruilongs.github.io]-[~/ansible/k8s-secret-create]└─$kubectl create secret generic mysecret1 --from-env-file=env.txtsecret/mysecret1 created查看创建信息
┌──[root@vms81.liruilongs.github.io]-[~/ansible/k8s-secret-create]└─$kubectl get secretsNAME TYPE DATA AGEdefault-token-7q2qj kubernetes.io/service-account-token 3 6h34mmysecl Opaque 2 5h45mmysecret1 Opaque 3 32s┌──[root@vms81.liruilongs.github.io]-[~/ansible/k8s-secret-create]└─$kubectl describe secrets mysecret1Name: mysecret1Namespace: liruilong-secret-createLabels:Annotations: Type: OpaqueData====password1: 6 bytespassword2: 6 bytesuser:9 bytes┌──[root@vms81.liruilongs.github.io]-[~/ansible/k8s-secret-create]└─$也可以通过--from-file来创建,文件名是键,文件内容为值
┌──[root@vms81.liruilongs.github.io]-[~/ansible/k8s-secret-create]└─$kubectl create secret generic mysecret2 --from-file=/etc/hostssecret/mysecret2 created┌──[root@vms81.liruilongs.github.io]-[~/ansible/k8s-secret-create]└─$kubectl get secrets mysecret2 -o jsonpath='{.data.hosts}'| base64 -d127.0.0.1 localhost localhost.localdomain localhost4 localhost4.localdomain4::1 localhost localhost.localdomain localhost6 localhost6.localdomain6192.168.26.81 vms81.liruilongs.github.io vms81192.168.26.82 vms82.liruilongs.github.io vms82192.168.26.83 vms83.liruilongs.github.io vms83┌──[root@vms81.liruilongs.github.io]-[~/ansible/k8s-secret-create]└─$使用 secret
secret可以通过卷的方式使用,也可以通过变量的方式使用
┌──[root@vms81.liruilongs.github.io]-[~/ansible/k8s-secret-create]└─$kubectl create secret generic mysecl --from-literal=mysqlpassword=liruilong --from-literal=rqpassword=rqsecret/mysecl created这里我们使用前面的创建的这个secret
变量的方式使用secret
yaml文件中变量设置密码通过secret的方式:mysqlpodargs.yaml
apiVersion: v1kind: Podmetadata: creationTimestamp: null labels: run: mysqlpod name: mysqlpodspec: containers: - image: hub.c.163.com/library/mysql:latest imagePullPolicy: IfNotPresent name: mysqlpod resources: {} env: - name: MYSQL_ROOT_PASSWORD valueFrom: secretKeyRef: name: mysecl key: mysqlpassword dnsPolicy: ClusterFirst restartPolicy: Alwaysstatus: {}创建pod
┌──[root@vms81.liruilongs.github.io]-[~/ansible/k8s-secret-create]└─$kubectl apply -f mysqlpodargs.yamlpod/mysqlpod created┌──[root@vms81.liruilongs.github.io]-[~/ansible/k8s-secret-create]└─$kubectl get pods -o wideNAMEREADY STATUSRESTARTS AGE IPNODE NOMINATED NODE READINESS GATESmysqlpod 0/1 ContainerCreating 0 15s <none> vms83.liruilongs.github.io <none> <none>┌──[root@vms81.liruilongs.github.io]-[~/ansible/k8s-secret-create]└─$kubectl get pods -o wideNAMEREADY STATUS RESTARTS AGE IP NODE NOMINATED NODE READINESS GATESmysqlpod 1/1 Running 0 21s 10.244.70.19 vms83.liruilongs.github.io <none> <none>测试登录
┌──[root@vms81.liruilongs.github.io]-[~/ansible/k8s-secret-create]└─$mysql -uroot -h10.244.70.19 -pliruilongWelcome to the MariaDB monitor. Commands end with ; or \g.Your MySQL connection id is 3Server version: 5.7.18 MySQL Community Server (GPL)Copyright (c) 2000, 2018, Oracle, MariaDB Corporation Ab and others.Type 'help;' or '\h' for help. Type '\c' to clear the current input statement.MySQL [(none)]>以卷的方式使用secret
pod文件nginxsecret.yaml,一般不这样使用
apiVersion: v1kind: Podmetadata: creationTimestamp: null labels: run: nginxsecret name: nginxsecretspec: volumes: - name: v1 secret: secretName: mysecl containers: - image: nginx imagePullPolicy: IfNotPresent name: nginxsecret resources: {} volumeMounts: - name: v1 mountPath: /data dnsPolicy: ClusterFirst restartPolicy: Alwaysstatus: {}创建pod会把加密的文件信息写在pod里的/data目录下
┌──[root@vms81.liruilongs.github.io]-[~/ansible/k8s-secret-create]└─$kubectl apply -f nginxsecret.yamlpod/nginxsecret created┌──[root@vms81.liruilongs.github.io]-[~/ansible/k8s-secret-create]└─$kubectl get podsNAME READY STATUS RESTARTS AGEnginxsecret 1/1 Running 0 41s┌──[root@vms81.liruilongs.github.io]-[~/ansible/k8s-secret-create]└─$kubectl exec -it nginxsecret -- bashroot@nginxsecret:/# lsbin data docker-entrypoint.d etc lib media opt root sbin sys usrboot dev docker-entrypoint.sh home lib64 mnt proc run srv tmp varroot@nginxsecret:/# cd data/;lsmysqlpassword rqpasswordroot@nginxsecret:/data# exitexit如过添加了subPath,会把指定的信息写入文件:nginxsecretsubPth.yaml
apiVersion: v1kind: Podmetadata: creationTimestamp: null labels: run: nginxsecret name: nginxsecretspec: volumes: - name: v1 secret: secretName: mysecl containers: - image: nginx imagePullPolicy: IfNotPresent name: nginxsecret resources: {} volumeMounts: - name: v1 mountPath: /data/mysql subPath: mysqlpassword dnsPolicy: ClusterFirst restartPolicy: Alwaysstatus: {}创建pod测试
┌──[root@vms81.liruilongs.github.io]-[~/ansible/k8s-secret-create]└─$kubectl apply -f nginxsecretsubPth.yamlpod/nginxsecret created┌──[root@vms81.liruilongs.github.io]-[~/ansible/k8s-secret-create]└─$kubectl get podsNAME READY STATUS RESTARTS AGEnginxsecret 1/1 Running 0 16s┌──[root@vms81.liruilongs.github.io]-[~/ansible/k8s-secret-create]└─$kubectl exec -it nginxsecret -- bashroot@nginxsecret:/# cat data/mysqlliruilongroot@nginxsecret:/# exitexitconfigmap(cm)
也是以键值对的方式使用,一般通过命名行的方式创建,也可以通过卷和变量的方式使用
config和secret的区别主要是secret加密了,而config没有加密
configmap(cm)的创建
通过命令行的方式创建
┌──[root@vms81.liruilongs.github.io]-[~/ansible/k8s-secret-create]└─$kubectl create configmap myconfig1 --from-literal=user=liruilong --from-literal=password=liruilongconfigmap/myconfig1 created查看创建信息
┌──[root@vms81.liruilongs.github.io]-[~/ansible/k8s-secret-create]└─$kubectl get cmNAME DATA AGEkube-root-ca.crt 1 7h32mmyconfig1 2 81s┌──[root@vms81.liruilongs.github.io]-[~/ansible/k8s-secret-create]└─$kubectl describe configmaps myconfig1Name: myconfig1Namespace: liruilong-secret-createLabels:<none>Annotations: <none>Data====password:----liruilonguser:----liruilongBinaryData====Events: <none>┌──[root@vms81.liruilongs.github.io]-[~/ansible/k8s-secret-create]└─$kubectl get cm myconfig1 -o jsonpath='{.data.password}'liruilong┌──[root@vms81.liruilongs.github.io]-[~/ansible/k8s-secret-create]└─$kubectl get cm myconfig1 -o jsonpath='{.data.user}'liruilong┌──[root@vms81.liruilongs.github.io]-[~/ansible/k8s-secret-create]└─$通过文件的方式创建
微服务中常用的配置文件信息
┌──[root@vms81.liruilongs.github.io]-[~/ansible/k8s-secret-create]└─$cat application.properties##配置了Web容器的端口号。server.port=8081##配置了当项目出错时跳转去的页面。#server.error.path=/error##配置了session失效时间, 30m表示30分钟,如果不写单位,默认单位是秒。由于Tomcat中配置session过期时间以分 钟为单位,因此这里单位如果是秒的话,该时间会被转换为一个不超过所配置秒数的最大分钟数,例如这里配置了119, 默认单位为秒,则实际session过期时间为1分钟。server.servlet.session.timeout=30m##表示项目名称,不配置时默认为/,如果配置了,就要在访问路径中加上配置的路径。server.servlet.context-path=/##表示配置Tomcat请求编码。server.tomcat.uri-encoding=utf-8##表示Tomcat最大线程数。server.tomcat.threads.max=500##是一个存放Tomcat运行日志和临时文件的目录,若不配置,则默认使用系统的临时目录。server.tomcat.basedir=/home/sang/tmp#HttpServletRequest的属性是否可以覆盖controller中model的同名项spring.freemarker.allow-request-override=false#HttpSession的属性是否可以覆盖controller中model的同名项spring.freemarker.allow-session-override=true#是否开启缓存spring.freemarker.cache=false#模板文件编码spring.freemarker.charset=UTF-8#是否检查模板位置spring.freemarker.check-template-location=true#Content-Type的值spring.freemarker.content-type=text/html#是否将HttpServletRequest中的属性添加到Model中spring.freemarker.expose-request-attributes=false#是否将HttpSession中的属性添加到Model中spring.freemarker.expose-session-attributes=true#模板文件后缀spring.freemarker.suffix=.ftl#模板文件位置spring.freemarker.template-loader-path=classpath:/templates/#是否开启缓存,开发时可设置为false,默认为truespring.thymeleaf.cache=true#是否检查模板是否存在,默认为truespring.thymeleaf.check-template=true#是否检查模板位置是否存在,默认为truespring.thymeleaf.check-template-location=true#模板文件编码spring.thymeleaf.encoding=UTF-8#模板文件位置spring.thymeleaf.prefix=classpath:/templates/#Content-Type配置spring.thymeleaf.servlet.content-type=text/html#模板文件后缀spring.thymeleaf.suffix=.html#spring.mvc.view.prefix=/WEB-INF/jsp/##spring.mvc.view.suffix=.jspspring.redis.database=0spring.redis.host=192.168.66.130spring.redis.port=6379spring.redis.password=123@456spring.redis.lettuce.pool.max-active=spring.redis.lettuce.pool.max-idle=spring.redis.lettuce.pool.max-wait=spring.redis.lettuce.pool.min-idle=spring.redis.lettuce.shutdown-timeout=#连接池最大连接数spring.redis.jedis.pool.max-active=8#连接池中的最大空闲连接spring.redis.jedis.pool.max-idle=8#连接池最大阻塞等待时间(使用负值表示没有限制)spring.redis.jedis.pool.max-wait=-1ms#连接池中的最小空闲连接spring.redis.jedis.pool.min-idle=0┌──[root@vms81.liruilongs.github.io]-[~/ansible/k8s-secret-create]└─$kubectl create configmap myconfig2 --from-file=./application.propertiesconfigmap/myconfig2 created┌──[root@vms81.liruilongs.github.io]-[~/ansible/k8s-secret-create]└─$cat env.txtuser=liruilongpassword1=redhatpassword2=redhat┌──[root@vms81.liruilongs.github.io]-[~/ansible/k8s-secret-create]└─$kubectl create configmap myconfig3 --from-env-file=./env.txtconfigmap/myconfig3 created查看创建的全部configMap
┌──[root@vms81.liruilongs.github.io]-[~/ansible/k8s-secret-create]└─$kubectl get cmNAME DATA AGEkube-root-ca.crt 1 8hmyconfig1 2 37mmyconfig2 1 9m16smyconfig3 3 18s┌──[root@vms81.liruilongs.github.io]-[~/ansible/k8s-secret-create]└─$configmap(cm)的使用
用卷的方式使用configmap
configmap通常使用卷的方式使用,一般可以在微服务中抽离配置文件: ngingconfig.yaml
apiVersion: v1kind: Podmetadata: creationTimestamp: null labels: run: nginxsecret name: nginxsecretspec: volumes: - name: config configMap: name: myconfig2 containers: - image: nginx imagePullPolicy: IfNotPresent name: nginxsecret resources: {} volumeMounts: - name: config mountPath: /app/java readOnly: true dnsPolicy: ClusterFirst restartPolicy: Alwaysstatus: {}测试,查看配置文件
┌──[root@vms81.liruilongs.github.io]-[~/ansible/k8s-secret-create]└─$kubectl apply -f ngingconfig.yamlpod/nginxsecret created┌──[root@vms81.liruilongs.github.io]-[~/ansible/k8s-secret-create]└─$kubectl get podsNAME READY STATUS RESTARTS AGEnginxsecret 1/1 Running 0 40s┌──[root@vms81.liruilongs.github.io]-[~/ansible/k8s-secret-create]└─$kubectl exec -it nginxsecret -- bashroot@nginxsecret:/# cd /app/java/;lsapplication.propertiesroot@nginxsecret:/app/java# cat application.properties##配置了Web容器的端口号。server.port=8081##配置了当项目出错时跳转去的页面。#server.error.path=/error##配置了session失效时间, 30m表示30分钟,如果不写单位,默认单位是秒。由于Tomcat中配置session过期时间以分 钟为单位,因此这里单位如果是秒的话,该时间会被转换为一个不超过所配置秒数的最大分钟数,例如这里配置了119, 默认单位为秒,则实际session过期时间为1分钟。server.servlet.session.timeout=30m##表示项目名称,不配置时默认为/,如果配置了,就要在访问路径中加上配置的路径。server.servlet.context-path=/##表示配置Tomcat请求编码。server.tomcat.uri-encoding=utf-8.........修改kube-prosy的负载策略,修改其中的 mode: " iptables/ipvs",修改之后需要重启对应的pod
┌──[root@vms81.liruilongs.github.io]-[~/ansible/k8s-secret-create]└─$kubectl get cm -n kube-systemNAME DATA AGEcalico-config 4 66dcoredns 1 66dextension-apiserver-authentication 6 66dkube-proxy 2 66dkube-root-ca.crt1 66dkubeadm-config 2 66dkubelet-config-1.21 1 66dkubelet-config-1.22 1 54d┌──[root@vms81.liruilongs.github.io]-[~/ansible/k8s-secret-create]└─$kubectl edit cm kube-proxy -n kube-system变量的方式使用configMap
┌──[root@vms81.liruilongs.github.io]-[~/ansible/k8s-secret-create]└─$kubectl get configmaps myconfig3 -o yamlapiVersion: v1data: password1: redhat password2: redhat user: liruilongkind: ConfigMapmetadata: creationTimestamp: "2021-12-12T10:04:42Z" name: myconfig3 namespace: liruilong-secret-create resourceVersion: "1645816" selfLink: /api/v1/namespaces/liruilong-secret-create/configmaps/myconfig3 uid: b75bef31-05a8-4d67-8d5c-dea42aedea67编写pod资源文件
apiVersion: v1kind: Podmetadata: creationTimestamp: null labels: run: mysqlpod name: mysqlpodspec: containers: - image: hub.c.163.com/library/mysql:latest imagePullPolicy: IfNotPresent name: mysqlpod resources: {} env: - name: MYSQL_ROOT_PASSWORD valueFrom: configMapKeyRef: name: myconfig3 key: user dnsPolicy: ClusterFirst restartPolicy: Alwaysstatus: {}创建pod
┌──[root@vms81.liruilongs.github.io]-[~/ansible/k8s-secret-create]└─$kubectl apply -f mysqlpodconfig.yamlpod/mysqlpod created┌──[root@vms81.liruilongs.github.io]-[~/ansible/k8s-secret-create]└─$kubectl get pods -o wideNAMEREADY STATUS RESTARTS AGE IP NODE NOMINATED NODE READINESS GATESmysqlpod 1/1 Running 0 3m19s 10.244.171.130 vms82.liruilongs.github.io <none> <none>┌──[root@vms81.liruilongs.github.io]-[~/ansible/k8s-secret-create]└─$测试使用
┌──[root@vms81.liruilongs.github.io]-[~/ansible/k8s-secret-create]└─$mysql -uroot -h10.244.171.130 -pliruilongWelcome to the MariaDB monitor. Commands end with ; or \g.Your MySQL connection id is 3Server version: 5.7.18 MySQL Community Server (GPL)Copyright (c) 2000, 2018, Oracle, MariaDB Corporation Ab and others.Type 'help;' or '\h' for help. Type '\c' to clear the current input statement.MySQL [(none)]>deployment
Deployment是Kubernetes v1.2引入的新概念,引入的目的是为了更好地解决Pod的编排问题。为此, Deployment在内部使用了Replica Set来实现目的,无论从Deployment的作用与目的、它的YAML定义,还是从它的具体命令行操作来看,我们都可以把它看作RC的一次升级,两者的相似度超过90%。
Deployment相对于RC的一个最大升级是我们可以随时知道当前Pod“部署”的进度。实际上由于一个Pod的创建、调度、绑定节点及在目标Node上启动对应的容器这一完整过程需要一定的时间,所以我们期待系统启动N个Pod副本的目标状态,实际上是一个连续变化的“部署过程”导致的最终状态。
以下是 Deployments 的典型用例:
| Deployments 的典型用例 |
|---|
创建 Deployment 以将 ReplicaSet 上线。 ReplicaSet 在后台创建 Pods。 检查 ReplicaSet 的上线状态,查看其是否成功。 |
通过更新 Deployment 的 PodTemplateSpec,声明 Pod 的新状态 。 新的ReplicaSet会被创建,Deployment 以受控速率将 |
如果 Deployment 的当前状态不稳定,回滚到较早的 Deployment 版本。 每次回滚都会更新 Deployment 的修订版本。 |
扩大 Deployment 规模以承担更多负载。 |
暂停 Deployment 以应用对 PodTemplateSpec 所作的多项修改, 然后恢复其执行以启动新的上线版本。 |
使用 Deployment 状态 来判定上线过程是否出现停滞。 |
清理较旧的不再需要的 ReplicaSet 。 |
ReplicaSet
ReplicaSet 的目的是维护一组在任何时候都处于运行状态的 Pod 副本的稳定集合。 因此,它通常用来保证给定数量的、完全相同的 Pod 的可用性。
ReplicaSet 的工作原理
RepicaSet 是通过一组字段来定义的,包括:
- 一个用来识别可获得的 Pod 的集合的选择算符(选择器)、
- 一个用来标明应该维护的副本个数的数值、
- 一个用来指定应该创建新 Pod 以满足副本个数条件时要使用的 Pod 模板等等。
学习环境准备
┌──[root@vms81.liruilongs.github.io]-[~/ansible]└─$dir=k8s-deploy-create ;mkdir $dir;cd $dir┌──[root@vms81.liruilongs.github.io]-[~/ansible/k8s-deploy-create]└─$kubectl get nsNAMESTATUS AGEdefault Active 78mkube-node-lease Active 79mkube-publicActive 79mkube-systemActive 79m┌──[root@vms81.liruilongs.github.io]-[~/ansible/k8s-deploy-create]└─$kubectl create ns liruilong-deploy-createnamespace/liruilong-deploy-create created┌──[root@vms81.liruilongs.github.io]-[~/ansible/k8s-deploy-create]└─$kubectl config set-context $(kubectl config current-context) --namespace=liruilong-deploy-createContext "kubernetes-admin@kubernetes" modified.┌──[root@vms81.liruilongs.github.io]-[~/ansible/k8s-deploy-create]└─$kubectl config view | grep namespace namespace: liruilong-deploy-create┌──[root@vms81.liruilongs.github.io]-[~/ansible/k8s-deploy-create]└─$用yaml文件创建deployment
┌──[root@vms81.liruilongs.github.io]-[~/ansible/k8s-deploy-create]└─$kubectl create deployment web1 --image=nginx --dry-run=client -o yaml > ngixndeplog.yaml┌──[root@vms81.liruilongs.github.io]-[~/ansible/k8s-deploy-create]└─$vim ngixndeplog.yamlngixndeplog.yaml
apiVersion: apps/v1kind: Deploymentmetadata: creationTimestamp: null labels: app: web1 name: web1spec: replicas: 3 selector: matchLabels: app: web1 strategy: {} template: metadata: creationTimestamp: null labels: app: web1 spec: containers: - image: nginx name: nginx ports: - containerPort: 80 resources: {}status: {}┌──[root@vms81.liruilongs.github.io]-[~/ansible/k8s-deploy-create]└─$kubectl apply -f ngixndeplog.yamldeployment.apps/web1 created查看创建的deployment
┌──[root@vms81.liruilongs.github.io]-[~/ansible/k8s-deploy-create]└─$kubectl get deploy -o wideNAME READY UP-TO-DATE AVAILABLE AGE CONTAINERS IMAGES SELECTORweb1 2/3 3 2 37s nginx nginx app=web1查看创建的replicaSet
┌──[root@vms81.liruilongs.github.io]-[~/ansible/k8s-deploy-create]└─$kubectl get rs -o wideNAMEDESIRED CURRENT READY AGE CONTAINERS IMAGES SELECTORweb1-66b5fd9bc8 3 3 34m28s nginx nginx app=web1,pod-template-hash=66b5fd9bc8查看创建的pod
┌──[root@vms81.liruilongs.github.io]-[~/ansible/k8s-deploy-create]└─$kubectl get pod -o wideNAME READY STATUS RESTARTS AGE IP NODE NOMINATED NODE READINESS GATESweb1-66b5fd9bc8-2wpkr 1/1 Running 0 3m45s 10.244.171.131 vms82.liruilongs.github.io <none> <none>web1-66b5fd9bc8-9lxh2 1/1 Running 0 3m45s 10.244.171.130 vms82.liruilongs.github.io <none> <none>web1-66b5fd9bc8-s9w7g 1/1 Running 0 3m45s 10.244.70.3 vms83.liruilongs.github.io <none> <none>Pod的扩容和缩容
在实际生产系统中,我们经常会遇到某个服务需要扩容的场景,也可能会遇到由于资源紧张或者工作负载降低而需要减少服务实例数量的场景。此时我们可以利用DeploymentRC的Scale机制来完成这些工作。Kubermetes对Pod的扩容和缩容操作提供了手动和自动两种模式,
手动模式通过执行kubecl scale命令对一个Deploymen/RC进行Pod副本数量的设置,即可一键完成。
自动模式则需要用户根据某个性能指标或者自定义业务指标,并指定Pod副本数量的范围,系统将自动在这个范围内根据性能指标的变化进行调整。
手动模式
命令行修改kubectl scale deployment web1 --replicas=2
┌──[root@vms81.liruilongs.github.io]-[~/ansible/k8s-deploy-create]└─$kubectl scale deployment web1 --replicas=2deployment.apps/web1 scaled┌──[root@vms81.liruilongs.github.io]-[~/ansible/k8s-deploy-create]└─$kubectl get pod -o wideNAME READY STATUS RESTARTS AGE IP NODE NOMINATED NODE READINESS GATESweb1-66b5fd9bc8-2wpkr 1/1 Running 0 8m19s 10.244.171.131 vms82.liruilongs.github.io <none> <none>web1-66b5fd9bc8-s9w7g 1/1 Running 0 8m19s 10.244.70.3 vms83.liruilongs.github.io <none> <none>┌──[root@vms81.liruilongs.github.io]-[~/ansible/k8s-deploy-create]└─$edit的方式修改kubectl edit deployment web1
┌──[root@vms81.liruilongs.github.io]-[~/ansible/k8s-deploy-create]└─$kubectl edit deployment web1deployment.apps/web1 edited┌──[root@vms81.liruilongs.github.io]-[~/ansible/k8s-deploy-create]└─$kubectl get pod -o wideNAME READY STATUSRESTARTS AGE IP NODE NOMINATED NODE READINESS GATESweb1-66b5fd9bc8-2wpkr 1/1 Running 0 9m56s 10.244.171.131 vms82.liruilongs.github.io <none> <none>web1-66b5fd9bc8-9lnds 0/1 ContainerCreating 0 6s <none> vms82.liruilongs.github.io <none> <none>web1-66b5fd9bc8-s9w7g 1/1 Running 0 9m56s 10.244.70.3 vms83.liruilongs.github.io <none> <none>┌──[root@vms81.liruilongs.github.io]-[~/ansible/k8s-deploy-create]└─$修改yaml文件方式
┌──[root@vms81.liruilongs.github.io]-[~/ansible/k8s-deploy-create]└─$sed -i 's/replicas: 3/replicas: 2/' ngixndeplog.yaml┌──[root@vms81.liruilongs.github.io]-[~/ansible/k8s-deploy-create]└─$kubectl apply -f ngixndeplog.yamldeployment.apps/web1 configured┌──[root@vms81.liruilongs.github.io]-[~/ansible/k8s-deploy-create]└─$kubectl get pod -o wideNAME READY STATUS RESTARTS AGE IP NODE NOMINATED NODE READINESS GATESweb1-66b5fd9bc8-2wpkr 1/1 Running 0 12m 10.244.171.131 vms82.liruilongs.github.io <none> <none>web1-66b5fd9bc8-s9w7g 1/1 Running 0 12m 10.244.70.3 vms83.liruilongs.github.io <none> <none>┌──[root@vms81.liruilongs.github.io]-[~/ansible/k8s-deploy-create]└─$HPA自动模式伸缩
从Kubernetes v1.1版本开始,新增了名为Horizontal Pod Autoscaler (HPA)的控制器,用于实现基于CPU使用率进行自动Pod扩容和缩容的功能。
HPA控制器基于Master的kube-controller-manager服务启动参数–horizontal-pod-autoscaler-sync-period定义的时长(默认值为30s),周期性地监测目标Pod的CPU使用率,并在满足条件时对ReplicationController或Deployment中的Pod副本数量进行调整,以符合用户定义的平均Pod CPU使用率。Pod CPU使用率来源于metric server 组件,所以需要预先安装好metric server .
HPA 可以基于内存,CPU,并发量来动态伸缩
创建HPA时可以使用kubectl autoscale 命令进行快速创建或者使用yaml配置文件进行创建。在创建HPA之前,需要已经存在一个DeploymentRC对象,并且该Deployment/RC中的Pod必须定义resources.requests.cpu的资源请求值,如果不设置该值,则metric server 将无法采集到该Pod的CPU使用情况,会导致HPA无法正常工作。
设置metric server 监控
┌──[root@vms81.liruilongs.github.io]-[~/ansible/metrics/deploy/1.8+]└─$kubectl top nodesNAME CPU(cores) CPU% MEMORY(bytes) MEMORY%vms81.liruilongs.github.io 401m 20% 1562Mi 40%vms82.liruilongs.github.io 228m 11% 743Mi 19%vms83.liruilongs.github.io 221m 11% 720Mi 18%配置HPA
设置副本数是最小2个,最大10个,CPU超过80
┌──[root@vms81.liruilongs.github.io]-[~/ansible/k8s-deploy-create]└─$kubectl autoscale deployment web1 --min=2 --max=10 --cpu-percent=80horizontalpodautoscaler.autoscaling/web1 autoscaled┌──[root@vms81.liruilongs.github.io]-[~/ansible/k8s-deploy-create]└─$kubectl get hpaNAME REFERENCE TARGETS MINPODS MAXPODS REPLICAS AGEweb1 Deployment/web1 <unknown>/80% 2 10 2 15s┌──[root@vms81.liruilongs.github.io]-[~/ansible/k8s-deploy-create]└─$kubectl delete hpa web1horizontalpodautoscaler.autoscaling "web1" deleted┌──[root@vms81.liruilongs.github.io]-[~/ansible/k8s-deploy-create]└─$解决当前cpu的使用量为unknown,这个占时没有解决办法
ngixndeplog.yaml
apiVersion: apps/v1kind: Deploymentmetadata: creationTimestamp: null labels: app: web1 name: web1spec: replicas: 2 selector: matchLabels: app: web1 strategy: {} template: metadata: creationTimestamp: null labels: app: web1 spec: containers: - image: nginx name: nginx ports: - containerPort: 80 resources: limits: cpu: 500m requests: cpu: 200m测试HPA
┌──[root@vms81.liruilongs.github.io]-[~/ansible/k8s-deploy-create]└─$cat ngixndeplog.yamlapiVersion: apps/v1kind: Deploymentmetadata: creationTimestamp: null labels: app: nginx name: nginxdepspec: replicas: 2 selector: matchLabels: app: nginx strategy: {} template: metadata: creationTimestamp: null labels: app: nginx spec: containers: - image: nginx name: web resources: requests: cpu: 100m restartPolicy: Always设置HPAkubectl autoscale deployment nginxdep --max=5 --cpu-percent=50
┌──[root@vms81.liruilongs.github.io]-[~/ansible/k8s-deploy-create]└─$kubectl get deployments.appsNAMEREADY UP-TO-DATE AVAILABLE AGEnginxdep 2/2 2 2 8m8s┌──[root@vms81.liruilongs.github.io]-[~/ansible/k8s-deploy-create]└─$kubectl autoscale deployment nginxdep --max=5 --cpu-percent=50horizontalpodautoscaler.autoscaling/nginxdep autoscaled┌──[root@vms81.liruilongs.github.io]-[~/ansible/k8s-deploy-create]└─$kubectl get pods -o wideNAME READY STATUS RESTARTS AGE IP NODE NOMINATED NODE READINESS GATESnginxdep-645bf755b9-27hzn 1/1 Running 0 97s 10.244.171.140 vms82.liruilongs.github.io <none> <none>nginxdep-645bf755b9-cb57p 1/1 Running 0 97s 10.244.70.10 vms83.liruilongs.github.io <none> <none>┌──[root@vms81.liruilongs.github.io]-[~/ansible/k8s-deploy-create]└─$kubectl get hpa -o wideNAMEREFERENCE TARGETS MINPODS MAXPODS REPLICAS AGEnginxdep Deployment/nginxdep <unknown>/50% 1 5 2 21s创建一个svc,然后模拟调用
┌──[root@vms81.liruilongs.github.io]-[~/ansible/k8s-deploy-create]└─$kubectl expose --name=nginxsvc deployment nginxdep --port=80service/nginxsvc exposed┌──[root@vms81.liruilongs.github.io]-[~/ansible/k8s-deploy-create]└─$kubectl get svc -o wideNAMETYPE CLUSTER-IP EXTERNAL-IP PORT(S) AGE SELECTORnginxsvc ClusterIP 10.104.147.65 <none> 80/TCP 9s app=nginx测试svc的调用
┌──[root@vms81.liruilongs.github.io]-[~/ansible]└─$ansible 192.168.26.83 -m shell -a "curl http://10.104.147.65 "192.168.26.83 | CHANGED | rc=0 >><!DOCTYPE html><html><head><title>Welcome to nginx!</title><style>html { color-scheme: light dark; }body { width: 35em; margin: 0 auto;font-family: Tahoma, Verdana, Arial, sans-serif; }</style></head><body><h1>Welcome to nginx!</h1><p>If you see this page, the nginx web server is successfully installed andworking. Further configuration is required.</p><p>For online documentation and support please refer to<a href="http://nginx.org/">nginx.org</a>.<br/>Commercial support is available at<a href="http://nginx.com/">nginx.com</a>.</p><p><em>Thank you for using nginx.</em></p></body></html> % Total % Received % Xferd Average Speed Time Time Time Current Dload Upload Total Spent Left Speed100 615 100 615 0 0 304k 0 --:--:-- --:--:-- --:--:-- 600k安装http-tools(IP压力测试工具包),模拟调用
┌──[root@vms81.liruilongs.github.io]-[~/ansible]└─$ansible 192.168.26.83 -m shell -a "yum install httpd-tools -y"┌──[root@vms81.liruilongs.github.io]-[~/ansible]└─$ansible 192.168.26.83 -m shell -a "ab -t 600 -n 1000000 -c 1000 http://10.104.147.65/ " &[1] 123433┌──[root@vms81.liruilongs.github.io]-[~/ansible]└─$观察pod的变化
deployment-健壮性测试
┌──[root@vms81.liruilongs.github.io]-[~/ansible]└─$kubectl scale deployment nginxdep --replicas=3deployment.apps/nginxdep scaled┌──[root@vms81.liruilongs.github.io]-[~/ansible]└─$kubectl get pods -o wideNAME READY STATUS RESTARTS AGE IP NODE NOMINATED NODE READINESS GATESnginxdep-645bf755b9-27hzn 1/1 Running 1 (3m19s ago) 47m 10.244.171.141 vms82.liruilongs.github.io <none> <none>nginxdep-645bf755b9-4dkpp 1/1 Running 0 30s 10.244.171.144 vms82.liruilongs.github.io <none> <none>nginxdep-645bf755b9-vz5qt 1/1 Running 0 30s 10.244.70.11 vms83.liruilongs.github.io <none> <none>┌──[root@vms81.liruilongs.github.io]-[~/ansible]└─$把vms83.liruilongs.github.io关机,等一段时间就会发现,pod都会在vms82.liruilongs.github.io上运行
┌──[root@vms81.liruilongs.github.io]-[~]└─$kubectl get nodesNAME STATUS ROLES AGE VERSIONvms81.liruilongs.github.io Ready control-plane,master 47h v1.22.2vms82.liruilongs.github.io Ready <none> 47h v1.22.2vms83.liruilongs.github.io NotReady <none> 47h v1.22.2┌──[root@vms81.liruilongs.github.io]-[~]└─$kubectl get pods -o wideNAME READY STATUS RESTARTS AGE IP NODE NOMINATED NODE READINESS GATESnginxdep-645bf755b9-27hzn 1/1 Running1 (20m ago) 64m 10.244.171.141 vms82.liruilongs.github.io <none> <none>nginxdep-645bf755b9-4dkpp 1/1 Running0 17m 10.244.171.144 vms82.liruilongs.github.io <none> <none>nginxdep-645bf755b9-9hzf2 1/1 Running0 9m48s 10.244.171.145 vms82.liruilongs.github.io <none> <none>nginxdep-645bf755b9-vz5qt 1/1 Terminating 0 17m 10.244.70.11 vms83.liruilongs.github.io <none> <none>┌──[root@vms81.liruilongs.github.io]-[~]└─$kubectl get pods -o wideNAME READY STATUS RESTARTS AGE IP NODE NOMINATED NODE READINESS GATESnginxdep-645bf755b9-27hzn 1/1 Running 1 (27m ago) 71m 10.244.171.141 vms82.liruilongs.github.io <none> <none>nginxdep-645bf755b9-4dkpp 1/1 Running 0 24m 10.244.171.144 vms82.liruilongs.github.io <none> <none>nginxdep-645bf755b9-9hzf2 1/1 Running 0 16m 10.244.171.145 vms82.liruilongs.github.io <none> <none>┌──[root@vms81.liruilongs.github.io]-[~]└─$kubectl top podsNAME CPU(cores) MEMORY(bytes)nginxdep-645bf755b9-27hzn 0m 4Minginxdep-645bf755b9-4dkpp 0m 1Minginxdep-645bf755b9-9hzf2 0m 1Mi┌──[root@vms81.liruilongs.github.io]-[~]└─$当vms83.liruilongs.github.io重新启动,pod并不会返回到vms83.liruilongs.github.io上运行
┌──[root@vms81.liruilongs.github.io]-[~]└─$kubectl get nodesNAME STATUS ROLES AGE VERSIONvms81.liruilongs.github.io Ready control-plane,master 2d v1.22.2vms82.liruilongs.github.io Ready <none> 2d v1.22.2vms83.liruilongs.github.io Ready <none> 2d v1.22.2┌──[root@vms81.liruilongs.github.io]-[~]└─$kubectl get pods -o wideNAME READY STATUS RESTARTS AGE IP NODE NOMINATED NODE READINESS GATESnginxdep-645bf755b9-27hzn 1/1 Running 1 (27m ago) 71m 10.244.171.141 vms82.liruilongs.github.io <none> <none>nginxdep-645bf755b9-4dkpp 1/1 Running 0 24m 10.244.171.144 vms82.liruilongs.github.io <none> <none>nginxdep-645bf755b9-9hzf2 1/1 Running 0 16m 10.244.171.145 vms82.liruilongs.github.io <none> <none>┌──[root@vms81.liruilongs.github.io]-[~]└─$deployment-更新回滚镜像
当集群中的某个服务需要升级时,我们需要停止目前与该服务相关的所有Pod,然后下载新版本镜像并创建新的Pod,如果集群规模比较大,则这个工作就变成了一个挑战,而且先全部停止然后逐步升级的方式会导致较长时间的服务不可用。
Kuberetes提供了滚动升级功能来解决上述问题。如果Pod是通过Deployment创建的,则用户可以在运行时修改Deployment的Pod定义(spec.template)或镜像名称,并应用到Deployment对象上,系统即可完成Deployment的自动更新操作。如果在更新过程中发生了错误,则还可以通过回滚(Rollback)操作恢复Pod的版本。
环境准备
┌──[root@vms81.liruilongs.github.io]-[~]└─$kubectl scale deployment nginxdep --replicas=5deployment.apps/nginxdep scaled┌──[root@vms81.liruilongs.github.io]-[~/ansible]└─$ansible node -m shell -a "docker pull nginx:1.9"┌──[root@vms81.liruilongs.github.io]-[~/ansible]└─$ansible node -m shell -a "docker pull nginx:1.7.9"通过deployment-更新镜像
现在pod镜像需要更新为 Nginx l.9,我们可以通 kubectl set image deployment/deploy名字 容器名字=nginx:1.9 --record为 Deployment设置新的镜像名称
┌──[root@vms81.liruilongs.github.io]-[~/ansible/k8s-deploy-create]└─$kubectl set image deployment/nginxdep web=nginx:1.9 --recordFlag --record has been deprecated, --record will be removed in the futuredeployment.apps/nginxdep image updated┌──[root@vms81.liruilongs.github.io]-[~/ansible/k8s-deploy-create]└─$kubectl get podsNAME READY STATUSRESTARTS AGEnginxdep-59d7c6b6f-6hdb8 0/1 ContainerCreating 0 26snginxdep-59d7c6b6f-bd5z2 0/1 ContainerCreating 0 26snginxdep-59d7c6b6f-jb2j7 1/1 Running 0 26snginxdep-59d7c6b6f-jd5df 0/1 ContainerCreating 0 4snginxdep-645bf755b9-27hzn 1/1 Running 1 (51m ago) 95mnginxdep-645bf755b9-4dkpp 1/1 Running 0 48mnginxdep-645bf755b9-hkcqx 1/1 Running 0 18m┌──[root@vms81.liruilongs.github.io]-[~/ansible/k8s-deploy-create]└─$kubectl get podsNAME READY STATUSRESTARTS AGEnginxdep-59d7c6b6f-6hdb8 0/1 ContainerCreating 0 51snginxdep-59d7c6b6f-bd5z2 1/1 Running 0 51snginxdep-59d7c6b6f-jb2j7 1/1 Running 0 51snginxdep-59d7c6b6f-jd5df 0/1 ContainerCreating 0 29snginxdep-59d7c6b6f-prfzd 0/1 ContainerCreating 0 14snginxdep-645bf755b9-27hzn 1/1 Running 1 (51m ago) 96mnginxdep-645bf755b9-4dkpp 1/1 Running 0 49m┌──[root@vms81.liruilongs.github.io]-[~/ansible/k8s-deploy-create]└─$kubectl get podsNAME READY STATUS RESTARTS AGEnginxdep-59d7c6b6f-6hdb8 1/1 Running 0 2m28snginxdep-59d7c6b6f-bd5z2 1/1 Running 0 2m28snginxdep-59d7c6b6f-jb2j7 1/1 Running 0 2m28snginxdep-59d7c6b6f-jd5df 1/1 Running 0 2m6snginxdep-59d7c6b6f-prfzd 1/1 Running 0 111s可以通过age的时间看到nginx的版本由latest滚动升级到 1.9的版本然后到1.7.9版本
┌──[root@vms81.liruilongs.github.io]-[~/ansible/k8s-deploy-create]└─$kubectl set image deployment/nginxdep web=nginx:1.7.9 --recordFlag --record has been deprecated, --record will be removed in the futuredeployment.apps/nginxdep image updated┌──[root@vms81.liruilongs.github.io]-[~/ansible/k8s-deploy-create]└─$kubectl get podsNAME READY STATUS RESTARTS AGEnginxdep-66587778f6-9jqfz 1/1 Running 0 4m37snginxdep-66587778f6-jbsww 1/1 Running 0 5m2snginxdep-66587778f6-lwkpg 1/1 Running 0 5m1snginxdep-66587778f6-tmd4l 1/1 Running 0 4m41snginxdep-66587778f6-v9f28 1/1 Running 0 5m2s┌──[root@vms81.liruilongs.github.io]-[~/ansible/k8s-deploy-create]└─$kubectl describe pods nginxdep-66587778f6-jbsww | grep Image: Image: nginx:1.7.9可以使用kubectl rollout pause deployment nginxdep来暂停更新操作,完成复杂更新
┌──[root@vms81.liruilongs.github.io]-[~/ansible/k8s-deploy-create]└─$kubectl rollout pause deployment nginxdepdeployment.apps/nginxdep paused┌──[root@vms81.liruilongs.github.io]-[~/ansible/k8s-deploy-create]└─$kubectl get deployments -o wideNAMEREADY UP-TO-DATE AVAILABLE AGE CONTAINERS IMAGES SELECTORnginxdep 5/5 5 5 147m web nginx:1.7.9 app=nginx┌──[root@vms81.liruilongs.github.io]-[~/ansible/k8s-deploy-create]└─$kubectl set image deployment/nginxdep web=nginxdeployment.apps/nginxdep image updated┌──[root@vms81.liruilongs.github.io]-[~/ansible/k8s-deploy-create]└─$kubectl rollout history deployment nginxdepdeployment.apps/nginxdepREVISION CHANGE-CAUSE4 kubectl set image deployment/nginxdep web=nginx:1.9 --record=true5 kubectl set image deployment/nginxdep web=nginx:1.9 --record=true6 kubectl set image deployment/nginxdep web=nginx:1.9 --record=true┌──[root@vms81.liruilongs.github.io]-[~/ansible/k8s-deploy-create]└─$kubectl rollout resume deployment nginxdepdeployment.apps/nginxdep resumeddeployment-回滚
这个和git基本类似。可以回滚到任意版本ID
查看版本历史记录
┌──[root@vms81.liruilongs.github.io]-[~/ansible/k8s-deploy-create]└─$kubectl rollout history deployment nginxdepdeployment.apps/nginxdepREVISION CHANGE-CAUSE1 kubectl set image deployment/nginxdep nginxdep=nginx:1.9 --record=true2 kubectl set image deployment/nginxdep web=nginx:1.9 --record=true3 kubectl set image deployment/nginxdep web=nginx:1.7.9 --record=true┌──[root@vms81.liruilongs.github.io]-[~/ansible/k8s-deploy-create]└─$kubectl get deployments nginxdep -o wideNAMEREADY UP-TO-DATE AVAILABLE AGE CONTAINERS IMAGES SELECTORnginxdep 5/5 5 5 128m web nginx:1.7.9 app=nginx回滚版本
┌──[root@vms81.liruilongs.github.io]-[~/ansible/k8s-deploy-create]└─$kubectl rollout undo deployment nginxdep --to-revision=2deployment.apps/nginxdep rolled back┌──[root@vms81.liruilongs.github.io]-[~/ansible/k8s-deploy-create]└─$kubectl get podsNAME READY STATUSRESTARTS AGEnginxdep-59d7c6b6f-ctdh2 0/1 ContainerCreating 0 6snginxdep-59d7c6b6f-dk67c 0/1 ContainerCreating 0 6snginxdep-59d7c6b6f-kr74k 0/1 ContainerCreating 0 6snginxdep-66587778f6-9jqfz 1/1 Running 0 23mnginxdep-66587778f6-jbsww 1/1 Running 0 23mnginxdep-66587778f6-lwkpg 1/1 Running 0 23mnginxdep-66587778f6-v9f28 1/1 Running 0 23m┌──[root@vms81.liruilongs.github.io]-[~/ansible/k8s-deploy-create]└─$kubectl get podsNAME READY STATUSRESTARTS AGEnginxdep-59d7c6b6f-7j9z7 0/1 ContainerCreating 0 37snginxdep-59d7c6b6f-ctdh2 1/1 Running 0 59snginxdep-59d7c6b6f-dk67c 1/1 Running 0 59snginxdep-59d7c6b6f-f2sb4 0/1 ContainerCreating 0 21snginxdep-59d7c6b6f-kr74k 1/1 Running 0 59snginxdep-66587778f6-jbsww 1/1 Running 0 24m┌──[root@vms81.liruilongs.github.io]-[~/ansible/k8s-deploy-create]└─$查看版本详细信息
┌──[root@vms81.liruilongs.github.io]-[~/ansible/k8s-deploy-create]└─$kubectl rollout history deployment nginxdep --revision=4deployment.apps/nginxdep with revision #4Pod Template: Labels:app=nginx pod-template-hash=59d7c6b6f Annotations: kubernetes.io/change-cause: kubectl set image deployment/nginxdep web=nginx:1.9 --record=true Containers: web: Image: nginx:1.9 Port:<none> Host Port: <none> Requests: cpu: 100m Environment: <none> Mounts: <none> Volumes: <none>滚动更新的相关参数
maxSurge :在升级过程中一次升级几个,即新旧的副本不超过 (1+ 设置的值)%
maxUnavailable :在升级过程中,pod不可用个数,一次性删除多少个pod
可以通过命令修改
┌──[root@vms81.liruilongs.github.io]-[~/ansible/k8s-deploy-create]└─$kubectl edit deployments nginxdep默认值
┌──[root@vms81.liruilongs.github.io]-[~/ansible/k8s-deploy-create]└─$kubectl get deployments nginxdep -o yaml | grep -A 5 strategy: strategy: rollingUpdate: maxSurge: 25% maxUnavailable: 25% type: RollingUpdate template:┌──[root@vms81.liruilongs.github.io]-[~/ansible/k8s-deploy-create]└─$- type
Recreate (重建): 设置spec.strategy.type:Recreate,表示 Deployment在更新Pod时,会先杀掉所有正在运行的Pod,然后创建新的Pod
RolligUpdate (滚动更新): 设置spec.strategy.type:RollingUupdate,表示Deployment会以滚动更新的方式来逐个更新Pod.同时,可以通过设置spec.strategy.rollingUuplate下的两个参数(maxUnavailable和maxSurge)来控制滚动更新的过程。
daemonset
DaemonSet 确保全部节点上运行一个 Pod 的副本。 当有节点加入集群时, 也会为他们新增一个 Pod 。 当有节点从集群移除时,这些Pod也会被回收。删除DaemonSet将会删除它创建的所有 Pod。即单实例,每个节点只跑一个pod
DaemonSet应用场景
DaemonSet 的一些典型用法:
- 在每个Node上运行一个
GlusterFS存储或者Ceph存储的Daemon进程 - 在每个Node上运行一个
日志采集程序,例如Fluentd或者Logstach. - 在每个Node上运行一个
性能监控程序,采集该Node的运行性能数据,例如PrometheusNode Exporter,collectd, New Relic agent或者Ganglia gmond等。
一种简单的用法是为每种类型的守护进程在所有的节点上都启动一个 DaemonSet。 一个稍微复杂的用法是为同一种守护进程部署多个 DaemonSet;每个具有不同的标志, 并且对不同硬件类型具有不同的内存、CPU 要求。这句话不太懂,以后再研究下
DaemonSet的Pod调度策略与RC类似,除了使用系统内置的算法在每台Node上进行调度,也可以在Pod的定义中使用NodeSelector或NodeAffinity来指定满足条件的Node范围进行调度。
学习环境准备
┌──[root@vms81.liruilongs.github.io]-[~/ansible]└─$dir=k8s-daemonset-create;mkdir $dir;cd $dir┌──[root@vms81.liruilongs.github.io]-[~/ansible/k8s-daemonset-create]└─$kubectl config current-contextkubernetes-admin@kubernetes┌──[root@vms81.liruilongs.github.io]-[~/ansible/k8s-daemonset-create]└─$kubectl create ns liruilong-dameonset-createnamespace/liruilong-dameonset-create created┌──[root@vms81.liruilongs.github.io]-[~/ansible/k8s-daemonset-create]└─$kubectl config set-context $(kubectl config current-context) --namespace=liruilong-daemonset-createContext "kubernetes-admin@kubernetes" modified.kubeadm中的deamonset
使用kubeadm安装的k8s环境中是使用的DaemonSet,calico是网路相关,所有节点都需要有,kube-proxy是代理相关,用于负载均衡等操作
┌──[root@vms81.liruilongs.github.io]-[~/ansible/k8s-ReplicationController]└─$kubectl get ds -ANAMESPACE NAME DESIRED CURRENT READY UP-TO-DATE AVAILABLE NODE SELECTOR AGEkube-system calico-node 3 3 33 3 kubernetes.io/os=linux 4d23hkube-system kube-proxy 3 3 33 3 kubernetes.io/os=linux 4d23h┌──[root@vms81.liruilongs.github.io]-[~/ansible/k8s-ReplicationController]└─$Demonset的创建
这里要说明的是deamonset和deployment只有在kind的位置不同,可以拷贝deployment的模板进行修改
apiVersion: apps/v1kind: DaemonSetmetadata: creationTimestamp: null labels: app: myds1 name: myds1spec: #replicas: 1 selector: matchLabels: app: myds1 #strategy: {} template: metadata: creationTimestamp: null labels: app: myds1 spec: containers: - image: nginx name: nginx resources: {}#status: {}┌──[root@vms81.liruilongs.github.io]-[~/ansible/k8s-daemonset-create]└─$kubectl create deployment myds1 --image=nginx --dry-run=client -o yaml > deamonset.yaml┌──[root@vms81.liruilongs.github.io]-[~/ansible/k8s-daemonset-create]└─$vim deamonset.yaml我们创建一个deamonset,当前只有master节点和一个node节点正常工作
因为master节点有污点,所以会发现这里只允许一个deamonset
┌──[root@vms81.liruilongs.github.io]-[~/ansible/k8s-daemonset-create]└─$kubectl apply -f deamonset.yamldaemonset.apps/myds1 created┌──[root@vms81.liruilongs.github.io]-[~/ansible/k8s-daemonset-create]└─$kubectl get nodesNAME STATUS ROLES AGE VERSIONvms81.liruilongs.github.io Ready control-plane,master 4d22h v1.22.2vms82.liruilongs.github.io Ready <none> 4d22h v1.22.2vms83.liruilongs.github.io NotReady <none> 4d22h v1.22.2┌──[root@vms81.liruilongs.github.io]-[~/ansible/k8s-daemonset-create]└─$kubectl get podsNAME READY STATUS RESTARTS AGEmyds1-fbmhp 1/1 Running 0 35s┌──[root@vms81.liruilongs.github.io]-[~/ansible/k8s-daemonset-create]└─$节点加入集群自动新增节点pod
我们在启动一台机器,会发现,新加入的vms83.liruilongs.github.io节点自动运行一个deamonset
┌──[root@vms81.liruilongs.github.io]-[~/ansible/k8s-daemonset-create]└─$kubectl get nodesNAME STATUS ROLES AGE VERSIONvms81.liruilongs.github.io Ready control-plane,master 4d22h v1.22.2vms82.liruilongs.github.io Ready <none> 4d22h v1.22.2vms83.liruilongs.github.io Ready <none> 4d22h v1.22.2┌──[root@vms81.liruilongs.github.io]-[~/ansible/k8s-daemonset-create]└─$kubectl get podsNAME READY STATUS RESTARTS AGEmyds1-prldj 1/1 Running 0 6m13smyds1-pvwm4 1/1 Running 0 10mDeamonset污点节点加入pod
下面我们从新修改deamonset资源文件,容忍有污点的节点
apiVersion: apps/v1kind: DaemonSetmetadata: creationTimestamp: null labels: app: myds1 name: myds1spec: #replicas: 1 selector: matchLabels: app: myds1 #strategy: {} template: metadata: creationTimestamp: null labels: app: myds1 spec: terminationGracePeriodSeconds: 0 tolerations: - operator: Exists containers: - image: nginx name: nginx resources: {}#status: {}┌──[root@vms81.liruilongs.github.io]-[~/ansible/k8s-daemonset-create]└─$kubectl apply -f deamonsettaint.yamldaemonset.apps/myds1 created┌──[root@vms81.liruilongs.github.io]-[~/ansible/k8s-daemonset-create]└─$kubectl get podsNAME READY STATUSRESTARTS AGEmyds1-8tsnz 0/1 ContainerCreating 0 3smyds1-9l6d9 0/1 ContainerCreating 0 3smyds1-wz44b 0/1 ContainerCreating 0 3s会发现每个节点都运行一个deamontset相关的pod
┌──[root@vms81.liruilongs.github.io]-[~/ansible/k8s-daemonset-create]└─$kubectl describe nodes vms81.liruilongs.github.io | grep TaintTaints: node-role.kubernetes.io/master:NoSchedule┌──[root@vms81.liruilongs.github.io]-[~/ansible/k8s-daemonset-create]└─$kubectl run pod1 --image=nginx --dry-run=server -o yaml | grep -A 6 terminationGracePeriodSeconds terminationGracePeriodSeconds: 30 tolerations: - effect: NoExecute key: node.kubernetes.io/not-ready operator: Exists tolerationSeconds: 300 - effect: NoExecute当然,如果我们不想所以有污点的节点都运行deamonset相关pod,那么我们可以使用另一种指定kye的方式
apiVersion: apps/v1kind: DaemonSetmetadata: creationTimestamp: null labels: app: myds1 name: myds1spec: selector: matchLabels: app: myds1 template: metadata: creationTimestamp: null labels: app: myds1 spec: terminationGracePeriodSeconds: 0 tolerations: - operator: Exists key: node-role.kubernetes.io/master effect: "NoSchedule" containers: - image: nginx name: nginx resources: {}会发现deamonset可以运行在master和node节点
┌──[root@vms81.liruilongs.github.io]-[~/ansible/k8s-daemonset-create]└─$kubectl apply -f deamonsetaint.yamldaemonset.apps/myds1 created┌──[root@vms81.liruilongs.github.io]-[~/ansible/k8s-daemonset-create]└─$kubectl get podsNAME READY STATUSRESTARTS AGEmyds1-f7hbb 0/1 ContainerCreating 0 4smyds1-hksp9 0/1 ContainerCreating 0 4smyds1-nnmzp 0/1 ContainerCreating 0 4sDaemon Pods 是如何被调度的
DaemonSet 确保所有符合条件的节点都运行该 Pod 的一个副本。 通常,运行 Pod 的节点由 Kubernetes 调度器选择。 不过,DaemonSet Pods 由 DaemonSet 控制器创建和调度。这就带来了以下问题:
Pod 行为的不一致性:正常 Pod 在被创建后等待调度时处于 Pending 状态, DaemonSet Pods 创建后不会处于 Pending 状态下。
Pod 抢占 由默认调度器处理。启用抢占后,DaemonSet 控制器将在不考虑 Pod 优先级和抢占 的情况下制定调度决策。这里的默认调度器即k8s中调度器。
ScheduleDaemonSetPods允许您使用默认调度器而不是DaemonSet控制器来调度DaemonSets,方法是将NodeAffinity条件而不是.spec.nodeName条件添加到DaemonSet Pods。 默认调度器接下来将Pod绑定到目标主机。
如果
DaemonSet Pod的节点亲和性配置已存在,则被替换 (原始的节点亲和性配置在选择目标主机之前被考虑)。DaemonSet控制器仅在创建或修改DaemonSet Pod时执行这些操作, 并且不会更改DaemonSet的spec.template。
nodeAffinity: requiredDuringSchedulingIgnoredDuringExecution: nodeSelectorTerms: - matchFields: - key: metadata.name operator: In values: - target-host-name与 Daemon Pods 通信
| DaemonSet 中的 Pod 进行通信的几种可能模式如下: |
|---|
推送(Push):配置 DaemonSet 中的 Pod,将更新发送到另一个服务,例如统计数据库。 这些服务没有客户端。 |
NodeIP 和已知端口:DaemonSet 中的 Pod 可以使用 hostPort,从而可以通过节点 IP 访问到 Pod。客户端能通过某种方法获取节点 IP 列表,并且基于此也可以获取到相应的端口。 |
DNS:创建具有相同 Pod 选择算符的 无头服务, 通过使用 endpoints 资源或从 DNS 中检索到多个 A 记录来发现 DaemonSet。 |
Service:创建具有相同 Pod 选择算符的服务,并使用该服务随机访问到某个节点上的 守护进程(没有办法访问到特定节点)。 |
更新 DaemonSet
如果节点的标签被修改,DaemonSet 将立刻向新匹配上的节点添加 Pod, 同时删除不匹配的节点上的 Pod。你可以修改 DaemonSet 创建的 Pod。不过并非 Pod 的所有字段都可更新。 下次当某节点(即使具有相同的名称)被创建时,DaemonSet 控制器还会使用最初的模板。
你可以修改 DaemonSet 创建的 Pod。不过并非 Pod 的所有字段都可更新。 下次当某节点(即使具有相同的名称)被创建时,DaemonSet 控制器还会使用最初的模板。
您可以删除一个 DaemonSet。如果使用 kubectl 并指定 --cascade=orphan 选项, 则 Pod 将被保留在节点上。接下来如果创建使用相同选择算符的新 DaemonSet, 新的 DaemonSet 会收养已有的 Pod。 如果有 Pod 需要被替换,DaemonSet 会根据其 updateStrategy 来替换。
DaemonSet 的替代方案
init 脚本
直接在节点上启动守护进程(例如使用 init、upstartd 或 systemd)的做法当然是可行的。 不过,基于 DaemonSet 来运行这些进程有如下一些好处:
- 像所运行的其他应用一样,
DaemonSet具备为守护进程提供监控和日志管理的能力。 - 为守护进程和应用所使用的配置语言和工具(如 Pod 模板、kubectl)是相同的。
- 在资源受限的容器中运行守护进程能够增加守护进程和应用容器的隔离性。 然而,这一点也可以通过在容器中运行守护进程但却不在 Pod 中运行之来实现。 例如,直接基于 Docker 启动。
裸 Pod
直接创建 Pod并指定其运行在特定的节点上也是可以的。 然而,DaemonSet 能够替换由于任何原因(例如节点失败、例行节点维护、内核升级) 而被删除或终止的 Pod。 由于这个原因,你应该使用 DaemonSet 而不是单独创建 Pod。
静态 Pod
通过在一个指定的、受 kubelet 监视的目录下编写文件来创建 Pod 也是可行的。 这类 Pod 被称为静态 Pod。 不像 DaemonSet,静态 Pod 不受 kubectl 和其它 Kubernetes API 客户端管理。 静态 Pod 不依赖于 API 服务器,这使得它们在启动引导新集群的情况下非常有用。 此外,静态 Pod 在将来可能会被废弃。
Deployments
DaemonSet 与 Deployments 非常类似, 它们都能创建 Pod,并且 Pod 中的进程都不希望被终止(例如,Web 服务器、存储服务器)。建议为无状态的服务使用 Deployments,比如前端服务。 对这些服务而言,对副本的数量进行扩缩容、平滑升级,比精确控制 Pod 运行在某个主机上要重要得多。 当需要 Pod 副本总是运行在全部或特定主机上,并且当该 DaemonSet 提供了节点级别的功能(允许其他 Pod 在该特定节点上正确运行)时, 应该使用 DaemonSet。
例如,网络插件通常包含一个以 DaemonSet 运行的组件。 这个 DaemonSet 组件确保它所在的节点的集群网络正常工作
┌──[root@vms81.liruilongs.github.io]-[~/ansible/k8s-ReplicationController]└─$kubectl get ds -ANAMESPACE NAME DESIRED CURRENT READY UP-TO-DATE AVAILABLE NODE SELECTOR AGEkube-system calico-node 3 3 33 3 kubernetes.io/os=linux 4d23hkube-system kube-proxy 3 3 33 3 kubernetes.io/os=linux 4d23h┌──[root@vms81.liruilongs.github.io]-[~/ansible/k8s-ReplicationController]└─$ReplicationController (RC)
ReplicationController 确保在任何时候都有特定数量的 Pod 副本处于运行状态。 换句话说,ReplicationController 确保一个 Pod 或一组同类的 Pod 总是可用的。
推荐使用配置 ReplicaSet 的 Deployment 来建立副本管理机制。RC是一个很古老的资源控制器,现在一般不怎么使用,作为了解,和deploy很的相似。
ReplicationController 如何工作
当 Pod 数量过多时,ReplicationController 会终止多余的 Pod。当 Pod 数量太少时,ReplicationController 将会启动新的 Pod。 与手动创建的 Pod 不同,由 ReplicationController 创建的 Pod 在失败、被删除或被终止时会被自动替换。 例如,在中断性维护(如内核升级)之后,你的 Pod 会在节点上重新创建。 因此,即使你的应用程序只需要一个 Pod,你也应该使用 ReplicationController 创建 Pod。 ReplicationController 类似于进程管理器,但是 ReplicationController 不是监控单个节点上的单个进程,而是监控跨多个节点的多个 Pod。
ReplicationController 的替代方案 ReplicaSet
ReplicaSet 是下一代 ReplicationController, 支持新的基于集合的标签选择算符。 它主要被 Deployment 用来作为一种编排 Pod 创建、删除及更新的机制。 请注意,我们推荐使用 Deployment 而不是直接使用 ReplicaSet,除非 你需要自定义更新编排或根本不需要更新。
Deployment 是一种更高级别的 API 对象, 它以类似于 kubectl rolling-update 的方式更新其底层 ReplicaSet 及其 Pod。 如果你想要这种滚动更新功能,那么推荐使用 Deployment,因为与 kubectl rolling-update 不同, 它们是声明式的、服务端的,并且具有其它特性。
创建一个RC
apiVersion: v1kind: ReplicationControllermetadata: name: nginxrcspec: replicas: 2 selector: app: nginx template: metadata: name: nginx labels: app: nginx spec: containers: - image: nginx name: web resources: requests: cpu: 100m restartPolicy: Always┌──[root@vms81.liruilongs.github.io]-[~/ansible/k8s-ReplicationController]└─$kubectl apply -f rc.yamlreplicationcontroller/nginxrc created┌──[root@vms81.liruilongs.github.io]-[~/ansible/k8s-ReplicationController]└─$kubectl get podsNAME READY STATUSRESTARTS AGEnginxrc-5szqd 0/1 ContainerCreating 0 15snginxrc-tstxl 1/1 Running 0 15s修改RC副本数
┌──[root@vms81.liruilongs.github.io]-[~/ansible/k8s-ReplicationController]└─$kubectl scale rc nginxrc --replicas=5replicationcontroller/nginxrc scaled┌──[root@vms81.liruilongs.github.io]-[~/ansible/k8s-ReplicationController]└─$kubectl get podsNAME READY STATUSRESTARTS AGEnginxrc-5szqd 1/1 Running 0 84snginxrc-6ptpt 0/1 ContainerCreating 0 3snginxrc-pd6qw 0/1 ContainerCreating 0 3snginxrc-tntbd 0/1 ContainerCreating 0 3snginxrc-tstxl 1/1 Running 0 84s删除RC
┌──[root@vms81.liruilongs.github.io]-[~/ansible/k8s-ReplicationController]└─$kubectl delete -f rc.yamlreplicationcontroller "nginxrc" deleted┌──[root@vms81.liruilongs.github.io]-[~/ansible/k8s-ReplicationController]└─$kubectl get podsNAME READY STATUS RESTARTS AGEnginxrc-5szqd 1/1 Terminating 0 110snginxrc-6ptpt 1/1 Terminating 0 29snginxrc-pd6qw 1/1 Terminating 0 29snginxrc-tntbd 1/1 Terminating 0 29snginxrc-tstxl 1/1 Terminating 0 110sReplicaSet(RS)
ReplicaSet 的目的是维护一组在任何时候都处于运行状态的 Pod 副本的稳定集合。 因此,它通常用来保证给定数量的、完全相同的 Pod 的可用性。
ReplicaSet 的工作原理
RepicaSet 是通过一组字段来定义的,包括:
- 一个用来识别可获得的 Pod 的集合的选择算符(选择器)、
- 一个用来标明应该维护的副本个数的数值、
- 一个用来指定应该创建新 Pod 以满足副本个数条件时要使用的 Pod 模板等等。
每个 ReplicaSet 都通过根据需要创建和 删除 Pod 以使得副本个数达到期望值, 进而实现其存在价值。当 ReplicaSet 需要创建新的 Pod 时,会使用所提供的 Pod 模板。
ReplicaSet 通过 Pod 上的 metadata.ownerReferences 字段连接到附属 Pod,该字段给出当前对象的属主资源。 ReplicaSet 所获得的 Pod 都在其 ownerReferences 字段中包含了属主 ReplicaSet 的标识信息。正是通过这一连接,ReplicaSet 知道它所维护的 Pod 集合的状态, 并据此计划其操作行为。
ReplicaSet 使用其选择算符来辨识要获得的 Pod 集合。如果某个 Pod 没有 OwnerReference 或者其 OwnerReference 不是一个 控制器,且其匹配到 某 ReplicaSet 的选择算符,则该 Pod 立即被此 ReplicaSet 获得。
何时使用 ReplicaSet
ReplicaSet 确保任何时间都有指定数量的 Pod 副本在运行。 然而,Deployment 是一个更高级的概念,它管理 ReplicaSet,并向 Pod 提供声明式的更新以及许多其他有用的功能。 因此,我们建议使用 Deployment 而不是直接使用 ReplicaSet,除非 你需要自定义更新业务流程或根本不需要更新。
创建一个RS
apiVersion: apps/v1kind: ReplicaSetmetadata: name: frontend labels: app: guestbook tier: frontendspec: replicas: 3 selector: matchLabels: tier: frontend template: metadata: labels: tier: frontend spec: containers: - name: nginx image: nginx┌──[root@vms81.liruilongs.github.io]-[~/ansible/k8s-ReplicationController]└─$kubectl apply -f rs.yamlreplicaset.apps/frontend created┌──[root@vms81.liruilongs.github.io]-[~/ansible/k8s-ReplicationController]└─$kubectl get podsNAME READY STATUSRESTARTS AGEfrontend-8r27p 1/1 Running 0 33sfrontend-lk46p 0/1 ContainerCreating 0 33sfrontend-njjt2 0/1 ContainerCreating 0 33s修改RS副本数
┌──[root@vms81.liruilongs.github.io]-[~/ansible/k8s-ReplicationController]└─$kubectl scale rs frontend --replicas=1replicaset.apps/frontend scaled┌──[root@vms81.liruilongs.github.io]-[~/ansible/k8s-ReplicationController]└─$kubectl get podsNAME READY STATUS RESTARTS AGEfrontend-8r27p 1/1 Running0 60sfrontend-lk46p 1/1 Terminating 0 60sfrontend-njjt2 1/1 Terminating 0 60s┌──[root@vms81.liruilongs.github.io]-[~/ansible/k8s-ReplicationController]└─$| 三者在胚子文件的区别 |
|---|
 |
副本数的修改
kubectl scale deployment nginx --replicas=20kubectl scale rs rs1 --replicas=4kubectl scale dc nginx --replicas=20Pod健康检查和服务可用性检查
健康检查的目的
探测的目的: 用来维持 pod的健壮性,当pod挂掉之后,deployment会生成新的pod,但如果pod是正常运行的,但pod里面出了问题,此时deployment是监测不到的。故此需要探测(probe)-pod是不是正常提供服务的
探针类似
Kubernetes 对 Pod 的健康状态可以通过两类探针来检查:LivenessProbe 和ReadinessProbe, kubelet定期执行这两类探针来诊断容器的健康状况。都是通过deployment实现的
| 探针类型 | 描述 |
|---|---|
| LivenessProbe探针 | 用于判断容器是否存活(Running状态) ,如果LivenessProbe探针探测到容器不健康,则kubelet将杀掉该容器,并根据容器的重启策略做相应的处理。如果一个容器不包含LivenesspProbe探针,那么kubelet认为该容器的LivenessProbe探针返回的值永远是Success。 |
| ReadinessProbe探针 | 用于判断容器服务是否可用(Ready状态) ,达到Ready状态的Pod才可以接收请求。对于被Service管理的Pod, Service与Pod Endpoint的关联关系也将基于Pod是否Ready进行设置。如果在运行过程中Ready状态变为False,则系统自动将其从Service的后端Endpoint列表中隔离出去,后续再把恢复到Ready状态的Pod加回后端Endpoint列表。这样就能保证客户端在访问Service时不会被转发到服务不可用的Pod实例上。 |
检测方式及参数配置
LivenessProbe和ReadinessProbe均可配置以下三种实现方式。
| 方式 | 描述 |
|---|---|
| ExecAction | 在容器内部执行一个命令,如果该命令的返回码为0,则表明容器健康。 |
| TCPSocketAction | 通过容器的IP地址和端口号执行TC检查,如果能够建立TCP连接,则表明容器健康。 |
| HTTPGetAction | 通过容器的IP地址、端口号及路径调用HTTP Get方法,如果响应的状态码大于等于200且小于400,则认为容器健康。 |
对于每种探测方式,需要设置initialDelaySeconds和timeoutSeconds等参数,它们的含义分别如下。
| 参数 | 描述 |
|---|---|
| initialDelaySeconds: | 启动容器后进行首次健康检查的等待时间,单位为s。 |
| timeoutSeconds: | 健康检查发送请求后等待响应的超时时间,单位为s。当超时发生时, kubelet会认为容器已经无法提供服务,将会重启该容器。 |
| periodSeconds | 执行探测的频率,默认是10秒,最小1秒。 |
| successThreshold | 探测失败后,最少连续探测成功多少次才被认定为成功,默认是1,对于liveness必须是1,最小值是1。 |
| failureThreshold | 当 Pod 启动了并且探测到失败,Kubernetes 的重试次数。存活探测情况下的放弃就意味着重新启动容器。就绪探测情况下的放弃 Pod 会被打上未就绪的标签。默认值是 3。最小值是 1 |
Kubernetes的ReadinessProbe机制可能无法满足某些复杂应用对容器内服务可用状态的判断
所以Kubernetes从1.11版本开始,引入PodReady++特性对Readiness探测机制进行扩展,在1.14版本时达到GA稳定版,称其为Pod Readiness Gates。
通过Pod Readiness Gates机制,用户可以将自定义的ReadinessProbe探测方式设置在Pod上,辅助Kubernetes设置Pod何时达到服务可用状态(Ready) 。为了使自定义的ReadinessProbe生效,用户需要提供一个外部的控制器(Controller)来设置相应的Condition状态。
Pod的Readiness Gates在Pod定义中的ReadinessGate字段进行设置。下面的例子设置了一个类型为www.example.com/feature-1的新ReadinessGate:
| – |
|---|
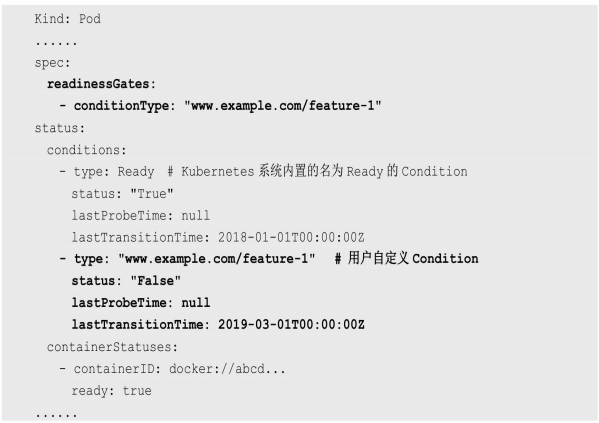 |
| 新增的自定义Condition的状态(status)将由用户自定义的外部控·制器设置,默认值为False. Kubernetes将在判断全部readinessGates条件都为True时,才设置Pod为服务可用状态(Ready为True) 。 |
| 这个不是太懂,需要以后再研究下 |
学习环境准备
┌──[root@vms81.liruilongs.github.io]-[~/ansible]└─$mkdir liveness-probe┌──[root@vms81.liruilongs.github.io]-[~/ansible]└─$cd liveness-probe/┌──[root@vms81.liruilongs.github.io]-[~/ansible/liveness-probe]└─$kubectl create ns liveness-probenamespace/liveness-probe created┌──[root@vms81.liruilongs.github.io]-[~/ansible/liveness-probe]└─$kubectl config current-contextkubernetes-admin@kubernetes┌──[root@vms81.liruilongs.github.io]-[~/ansible/liveness-probe]└─$kubectl config set-context $(kubectl config current-context) --namespace=liveness-probeContext "kubernetes-admin@kubernetes" modified.LivenessProbe探针
用于判断容器是否存活(Running状态) ,如果LivenessProbe探针探测到容器不健康,则kubelet将杀掉该容器,并根据容器的重启策略做相应的处理
ExecAction方式:command
在容器内部执行一个命令,如果该命令的返回码为0,则表明容器健康。
资源文件定义
┌──[root@vms81.liruilongs.github.io]-[~/ansible/liveness-probe]└─$cat liveness-probe.yamlapiVersion: v1kind: Podmetadata: creationTimestamp: null labels: run: pod-liveness name: pod-livenessspec: containers: - args: - /bin/sh - -c - touch /tmp/healthy; sleep 30; rm -rf /tmp/healthy; slee 10 livenessProbe: exec: command: - cat - /tmp/healthy initialDelaySeconds: 5 #容器启动的5s内不监测 periodSeconds: 5 #每5s钟检测一次 image: busybox imagePullPolicy: IfNotPresent name: pod-liveness resources: {} dnsPolicy: ClusterFirst restartPolicy: Always status: {}运行这个deploy。当pod创建成功后,新建文件,并睡眠30s,删掉文件在睡眠。使用liveness检测文件的存在
┌──[root@vms81.liruilongs.github.io]-[~/ansible/liveness-probe]└─$kubectl apply -f liveness-probe.yamlpod/pod-liveness created┌──[root@vms81.liruilongs.github.io]-[~/ansible/liveness-probe]└─$kubectl get podsNAME READY STATUS RESTARTS AGEpod-liveness 1/1 Running 1 (8s ago) 41s # 30文件没有重启运行超过30s后。文件被删除,所以被健康检测命中,pod根据重启策略重启
┌──[root@vms81.liruilongs.github.io]-[~/ansible/liveness-probe]└─$kubectl get podsNAME READY STATUS RESTARTS AGEpod-liveness 1/1 Running 2 (34s ago) 99s99s后已经从起了第二次
┌──[root@vms81.liruilongs.github.io]-[~/ansible]└─$ansible 192.168.26.83 -m shell -a "docker ps | grep pod-liveness"192.168.26.83 | CHANGED | rc=0 >>00f4182c014e 7138284460ff "/bin/sh -c 'touch /…" 6 seconds ago Up 5 seconds k8s_pod-liveness_pod-liveness_liveness-probe_81b4b086-fb28-4657-93d0-bd23e67f980a_001c5cfa02d8c registry.aliyuncs.com/google_containers/pause:3.5 "/pause" 7 seconds ago Up 6 seconds k8s_POD_pod-liveness_liveness-probe_81b4b086-fb28-4657-93d0-bd23e67f980a_0┌──[root@vms81.liruilongs.github.io]-[~/ansible]└─$kubectl get podsNAME READY STATUS RESTARTS AGEpod-liveness 1/1 Running 0 25s┌──[root@vms81.liruilongs.github.io]-[~/ansible]└─$kubectl get podsNAME READY STATUS RESTARTS AGEpod-liveness 1/1 Running 1 (12s ago) 44s┌──[root@vms81.liruilongs.github.io]-[~/ansible]└─$ansible 192.168.26.83 -m shell -a "docker ps | grep pod-liveness"192.168.26.83 | CHANGED | rc=0 >>1eafd7e8a12a 7138284460ff "/bin/sh -c 'touch /…" 15 seconds ago Up 14 seconds k8s_pod-liveness_pod-liveness_liveness-probe_81b4b086-fb28-4657-93d0-bd23e67f980a_101c5cfa02d8c registry.aliyuncs.com/google_containers/pause:3.5 "/pause" 47 seconds ago Up 47 seconds k8s_POD_pod-liveness_liveness-probe_81b4b086-fb28-4657-93d0-bd23e67f980a_0┌──[root@vms81.liruilongs.github.io]-[~/ansible]└─$查看节点机docker中的容器ID,前后不一样,确定是POD被杀掉后重启。
HTTPGetAction的方式
通过容器的IP地址、端口号及路径调用HTTP Get方法,如果响应的状态码大于等于200且小于400,则认为容器健康。
创建资源文件,即相关参数使用
┌──[root@vms81.liruilongs.github.io]-[~/ansible/liveness-probe]└─$cat liveness-probe-http.yamlapiVersion: v1kind: Podmetadata: creationTimestamp: null labels: run: pod-livenss-probe name: pod-livenss-probespec: containers: - image: nginx imagePullPolicy: IfNotPresent name: pod-livenss-probe livenessProbe: failureThreshold: 3 #当 Pod 启动了并且探测到失败,Kubernetes 的重试次数 httpGet: path: /index.html port: 80 scheme: HTTP initialDelaySeconds: 10 #容器启动后第一次执行探测是需要等待多少秒 periodSeconds: 10 #执行探测的频率,默认是10秒,最小1秒 successThreshold: 1 #探测失败后,最少连续探测成功多少次才被认定为成功 timeoutSeconds: 10 #探测超时时间,默认1秒,最小1秒 resources: {} dnsPolicy: ClusterFirst restartPolicy: Alwaysstatus: {}运行deploy,这个的探测机制访问Ngixn的默认欢迎页
┌──[root@vms81.liruilongs.github.io]-[~/ansible/liveness-probe]└─$vim liveness-probe-http.yaml┌──[root@vms81.liruilongs.github.io]-[~/ansible/liveness-probe]└─$kubectl apply -f liveness-probe-http.yamlpod/pod-livenss-probe created┌──[root@vms81.liruilongs.github.io]-[~/ansible/liveness-probe]└─$kubectl get podsNAME READY STATUS RESTARTS AGEpod-livenss-probe 1/1 Running 0 15s┌──[root@vms81.liruilongs.github.io]-[~/ansible/liveness-probe]└─$kubectl exec -it pod-livenss-probe -- rm /usr/share/nginx/html/index.html┌──[root@vms81.liruilongs.github.io]-[~/ansible/liveness-probe]└─$kubectl get podsNAME READY STATUS RESTARTS AGEpod-livenss-probe 1/1 Running 1 (1s ago) 2m31s当欢迎页被删除时,访问报错,被检测命中,pod重启
TCPSocketAction方式
通过容器的IP地址和端口号执行TCP检查,如果能够建立TCP连接,则表明容器健康。
资源文件定义
┌──[root@vms81.liruilongs.github.io]-[~/ansible/liveness-probe]└─$cat liveness-probe-tcp.yamlapiVersion: v1kind: Podmetadata: creationTimestamp: null labels: run: pod-livenss-probe name: pod-livenss-probespec: containers: - image: nginx imagePullPolicy: IfNotPresent name: pod-livenss-probe livenessProbe: failureThreshold: 3 tcpSocket: port: 8080 initialDelaySeconds: 10 periodSeconds: 10 successThreshold: 1 timeoutSeconds: 10 resources: {} dnsPolicy: ClusterFirst restartPolicy: Alwaysstatus: {}访问8080端口,但是8080端口未开放,所以访问会超时,不能建立连接,命中检测,重启Pod
┌──[root@vms81.liruilongs.github.io]-[~/ansible/liveness-probe]└─$kubectl apply -f liveness-probe-tcp.yamlpod/pod-livenss-probe created┌──[root@vms81.liruilongs.github.io]-[~/ansible/liveness-probe]└─$kubectl get podsNAME READY STATUS RESTARTS AGEpod-livenss-probe 1/1 Running 0 8s┌──[root@vms81.liruilongs.github.io]-[~/ansible/liveness-probe]└─$kubectl get podsNAME READY STATUS RESTARTS AGEpod-livenss-probe 1/1 Running 1 (4s ago) 44s┌──[root@vms81.liruilongs.github.io]-[~/ansible/liveness-probe]└─$ReadinessProbe探针
用于判断容器服务是否可用(Ready状态) ,达到Ready状态的Pod才可以接收请求。负责不能进行访问
ExecAction方式:command
资源文件定义,使用钩子建好需要检查的文件
┌──[root@vms81.liruilongs.github.io]-[~/ansible/liveness-probe]└─$cat readiness-probe.yamlapiVersion: v1kind: Podmetadata: creationTimestamp: null labels: run: pod-liveness name: pod-livenessspec: containers: - readinessProbe: exec: command: - cat - /tmp/healthy initialDelaySeconds: 5 #容器启动的5s内不监测 periodSeconds: 5 #每5s钟检测一次 image: nginx imagePullPolicy: IfNotPresent name: pod-liveness resources: {} lifecycle: postStart: exec: command: ["/bin/sh", "-c","touch /tmp/healthy"] dnsPolicy: ClusterFirst restartPolicy: Alwaysstatus: {}创建3个有Ngixn的pod,通过POD创建一个SVC做测试用
┌──[root@vms81.liruilongs.github.io]-[~/ansible/liveness-probe]└─$sed 's/pod-liveness/pod-liveness-1/' readiness-probe.yaml | kubectl apply -f -pod/pod-liveness-1 created┌──[root@vms81.liruilongs.github.io]-[~/ansible/liveness-probe]└─$sed 's/pod-liveness/pod-liveness-2/' readiness-probe.yaml | kubectl apply -f -pod/pod-liveness-2 created┌──[root@vms81.liruilongs.github.io]-[~/ansible/liveness-probe]└─$kubectl get pods -o wideNAME READY STATUS RESTARTS AGE IP NODE NOMINATED NODE READINESS GATESpod-liveness 1/1 Running 0 3m1s 10.244.70.50 vms83.liruilongs.github.io <none> <none>pod-liveness-1 1/1 Running 0 2m 10.244.70.51 vms83.liruilongs.github.io <none> <none>pod-liveness-2 1/1 Running 0 111s 10.244.70.52 vms83.liruilongs.github.io <none> <none>修改主页文字
┌──[root@vms81.liruilongs.github.io]-[~/ansible/liveness-probe]└─$serve=pod-liveness┌──[root@vms81.liruilongs.github.io]-[~/ansible/liveness-probe]└─$kubectl exec -it $serve -- sh -c "echo $serve > /usr/share/nginx/html/index.html"┌──[root@vms81.liruilongs.github.io]-[~/ansible/liveness-probe]└─$kubectl exec -it $serve -- sh -c "cat /usr/share/nginx/html/index.html"pod-liveness┌──[root@vms81.liruilongs.github.io]-[~/ansible/liveness-probe]└─$serve=pod-liveness-1┌──[root@vms81.liruilongs.github.io]-[~/ansible/liveness-probe]└─$kubectl exec -it $serve -- sh -c "echo $serve > /usr/share/nginx/html/index.html"┌──[root@vms81.liruilongs.github.io]-[~/ansible/liveness-probe]└─$serve=pod-liveness-2┌──[root@vms81.liruilongs.github.io]-[~/ansible/liveness-probe]└─$kubectl exec -it $serve -- sh -c "echo $serve > /usr/share/nginx/html/index.html"┌──[root@vms81.liruilongs.github.io]-[~/ansible/liveness-probe]└─$修改标签
┌──[root@vms81.liruilongs.github.io]-[~/ansible/liveness-probe]└─$kubectl get pods --show-labelsNAME READY STATUS RESTARTS AGE LABELSpod-liveness 1/1 Running 0 15m run=pod-livenesspod-liveness-1 1/1 Running 0 14m run=pod-liveness-1pod-liveness-2 1/1 Running 0 14m run=pod-liveness-2┌──[root@vms81.liruilongs.github.io]-[~/ansible/liveness-probe]└─$kubectl edit pods pod-liveness-1pod/pod-liveness-1 edited┌──[root@vms81.liruilongs.github.io]-[~/ansible/liveness-probe]└─$kubectl edit pods pod-liveness-2pod/pod-liveness-2 edited┌──[root@vms81.liruilongs.github.io]-[~/ansible/liveness-probe]└─$kubectl get pods --show-labelsNAME READY STATUS RESTARTS AGE LABELSpod-liveness 1/1 Running 0 17m run=pod-livenesspod-liveness-1 1/1 Running 0 16m run=pod-livenesspod-liveness-2 1/1 Running 0 16m run=pod-liveness┌──[root@vms81.liruilongs.github.io]-[~/ansible/liveness-probe]└─$要删除文件检测
┌──[root@vms81.liruilongs.github.io]-[~/ansible/liveness-probe]└─$kubectl exec -it pod-liveness -- ls /tmp/healthy┌──[root@vms81.liruilongs.github.io]-[~/ansible/liveness-probe]└─$kubectl exec -it pod-liveness-1 -- ls /tmp/healthy使用POD创建SVC
┌──[root@vms81.liruilongs.github.io]-[~/ansible/liveness-probe]└─$kubectl expose --name=svc pod pod-liveness --port=80service/svc exposed┌──[root@vms81.liruilongs.github.io]-[~/ansible/liveness-probe]└─$kubectl get epNAME ENDPOINTS AGEsvc 10.244.70.50:80,10.244.70.51:80,10.244.70.52:80 16s┌──[root@vms81.liruilongs.github.io]-[~/ansible/liveness-probe]└─$kubectl get svcNAME TYPE CLUSTER-IPEXTERNAL-IP PORT(S) AGEsvc ClusterIP 10.104.246.121 <none> 80/TCP 36s┌──[root@vms81.liruilongs.github.io]-[~/ansible/liveness-probe]└─$kubectl get pods -o wideNAME READY STATUS RESTARTS AGE IP NODE NOMINATED NODE READINESS GATESpod-liveness 1/1 Running 0 24m 10.244.70.50 vms83.liruilongs.github.io <none> <none>pod-liveness-1 1/1 Running 0 23m 10.244.70.51 vms83.liruilongs.github.io <none> <none>pod-liveness-2 1/1 Running 0 23m 10.244.70.52 vms83.liruilongs.github.io <none> <none>测试SVC正常,三个POD会正常 负载
┌──[root@vms81.liruilongs.github.io]-[~/ansible]└─$while true; do curl 10.104.246.121 ; sleep 1> donepod-livenesspod-liveness-2pod-livenesspod-liveness-1pod-liveness-2^C删除文件测试
┌──[root@vms81.liruilongs.github.io]-[~/ansible]└─$kubectl exec -it pod-liveness -- rm -rf /tmp/┌──[root@vms81.liruilongs.github.io]-[~/ansible]└─$kubectl exec -it pod-liveness -- ls /tmp/ls: cannot access '/tmp/': No such file or directorycommand terminated with exit code 2┌──[root@vms81.liruilongs.github.io]-[~/ansible]└─$while true; do curl 10.104.246.121 ; sleep 1; donepod-liveness-2pod-liveness-2pod-liveness-2pod-liveness-1pod-liveness-2pod-liveness-2pod-liveness-1^C会发现pod-liveness的pod已经不提供服务了
kubeadm 中的一些健康检测
kube-apiserver.yaml中的使用,两种探针同时使用
┌──[root@vms81.liruilongs.github.io]-[~/ansible]└─$cat /etc/kubernetes/manifests/kube-apiserver.yaml | grep -A 8 readi readinessProbe: failureThreshold: 3 httpGet: host: 192.168.26.81 path: /readyz port: 6443 scheme: HTTPS periodSeconds: 1 timeoutSeconds: 15┌──[root@vms81.liruilongs.github.io]-[~/ansible]└─$cat /etc/kubernetes/manifests/kube-apiserver.yaml | grep -A 9 liveness livenessProbe: failureThreshold: 8 httpGet: host: 192.168.26.81 path: /livez port: 6443 scheme: HTTPS initialDelaySeconds: 10 periodSeconds: 10 timeoutSeconds: 15┌──[root@vms81.liruilongs.github.io]-[~/ansible]└─$job&cronjob
Job:批处理调度
Kubernetes从1.2版本开始支持批处理类型的应用,我们可以通过Kubernetes Job资源对象来定义并启动一个批处理任务。
批处理任务通常并行(或者串行)启动多个计算进程去处理一批工作项(work item)处理完成后,整个批处理任务结束。
K8s官网中这样描述:Job 会创建一个或者多个 Pods,并将继续重试 Pods 的执行,直到指定数量的 Pods 成功终止。 随着 Pods 成功结束,Job 跟踪记录成功完成的 Pods 个数。 当数量达到指定的成功个数阈值时,任务(即 Job)结束。 删除 Job 的操作会清除所创建的全部 Pods。 挂起 Job 的操作会删除 Job 的所有活跃 Pod,直到 Job 被再次恢复执行。
一种简单的使用场景下,你会创建一个 Job 对象以便以一种可靠的方式运行某 Pod 直到完成。 当第一个 Pod 失败或者被删除(比如因为节点硬件失效或者重启)时,Job 对象会启动一个新的 Pod。也可以使用 Job 以并行的方式运行多个 Pod。
考虑到批处理的并行问题, Kubernetes将Job分以下三种类型。
| 类型 | 描述 |
|---|---|
| Non-parallel Jobs | 通常一个Job只启动一个Pod,除非Pod异常,才会重启该Pod,一旦此Pod正常结束, Job将结束。 |
| Parallel Jobs with a fixed completion count | 并行Job会启动多个Pod,此时需要设定Job的.spec.completions参数为一个正数,当正常结束的Pod数量达至此参数设定的值后, Job结束。此外, Job的.spec.parallelism参数用来控制并行度,即同时启动几个Job来处理Work Item. |
| Parallel Jobs with a work queue | 任务队列方式的并行Job需要一个独立的Queue, Work item都在一个Queue中存放,不能设置Job的.spec.completions参数,此时Job有以下特性。每个Pod都能独立判断和决定是否还有任务项需要处理。 如果某个Pod正常结束,则Job不会再启动新的Pod. 如果一个Pod成功结束,则此时应该不存在其他Pod还在工作的情况,它们应该都处于即将结束、退出的状态。 如果所有Pod都结束了,且至少有一个Pod成功结束,则整个Job成功结束。 |
嗯,我们就第一个,第二搞一个Demo,第三中之后有时间搞,其实就是资源配置参数的问题
环境准备
┌──[root@vms81.liruilongs.github.io]-[~/ansible/k8s-jobs-create]└─$kubectl config set-context $(kubectl config current-context) --namespace=liruiling-job-createContext "kubernetes-admin@kubernetes" modified.┌──[root@vms81.liruilongs.github.io]-[~/ansible/k8s-jobs-create]└─$kubectl create ns liruiling-job-createnamespace/liruiling-job-create created┌──[root@vms81.liruilongs.github.io]-[~/ansible/k8s-jobs-create]└─$vim myjob.yaml创建一个job
创建一个Job,执行echo "hello jobs"
┌──[root@vms81.liruilongs.github.io]-[~/ansible/k8s-jobs-create]└─$cat myjob.yamlapiVersion: batch/v1kind: Jobmetadata: creationTimestamp: null name: my-jobspec: template: metadata: creationTimestamp: null spec: containers: - command: - sh - -c - echo "hello jobs" - sleep 15 image: busybox name: my-job resources: {} restartPolicy: Neverstatus: {}┌──[root@vms81.liruilongs.github.io]-[~/ansible/k8s-jobs-create]└─$kubectl apply -f myjob.yamljob.batch/my-job created┌──[root@vms81.liruilongs.github.io]-[~/ansible/k8s-jobs-create]└─$kubectl get podsNAMEREADY STATUSRESTARTS AGEmy-job--1-jdzqd 0/1 ContainerCreating 0 7s┌──[root@vms81.liruilongs.github.io]-[~/ansible/k8s-jobs-create]└─$kubectl get jobsNAME COMPLETIONS DURATION AGEmy-job 0/1 17s 17s┌──[root@vms81.liruilongs.github.io]-[~/ansible/k8s-jobs-create]└─$kubectl get podsNAMEREADY STATUS RESTARTS AGEmy-job--1-jdzqd 0/1 Completed 0 24sSTATUS 状态变成 Completed意味着执行成功,查看日志
┌──[root@vms81.liruilongs.github.io]-[~/ansible/k8s-jobs-create]└─$kubectl get jobsNAME COMPLETIONS DURATION AGEmy-job 1/1 19s 46s┌──[root@vms81.liruilongs.github.io]-[~/ansible/k8s-jobs-create]└─$kubectl logs my-job--1-jdzqdhello jobs┌──[root@vms81.liruilongs.github.io]-[~/ansible/k8s-jobs-create]└─$job的配置参数解析
job的restart策略
restartPolicy: Never- Nerver :
只要任务没有完成,则是新创建pod运行,直到job完成 会产生多个pod - OnFailure :
只要pod没有完成,则会重启pod,直到job完成
activeDeadlineSeconds:最大可以运行时间
┌──[root@vms81.liruilongs.github.io]-[~/ansible/k8s-jobs-create]└─$kubectl explain jobs.spec | grep act activeDeadlineSeconds <integer> may be continuously active before the system tries to terminate it; value given time. The actual number of pods running in steady state will be less false to true), the Job controller will delete all active Pods associated┌──[root@vms81.liruilongs.github.io]-[~/ansible/k8s-jobs-create]└─$vim myjobact.yaml使用activeDeadlineSeconds:最大可以运行时间创建一个job
┌──[root@vms81.liruilongs.github.io]-[~/ansible/k8s-jobs-create]└─$cat myjobact.yamlapiVersion: batch/v1kind: Jobmetadata: creationTimestamp: null name: my-jobspec: template: metadata: creationTimestamp: null spec: activeDeadlineSeconds: 5 #最大可以运行时间 containers: - command: - sh - -c - echo "hello jobs" - sleep 15 image: busybox name: my-job resources: {} restartPolicy: Neverstatus: {}超过5秒任务没有完成,所以从新创建一个pod运行
┌──[root@vms81.liruilongs.github.io]-[~/ansible/k8s-jobs-create]└─$kubectl delete -f myjob.yamljob.batch "my-job" deleted┌──[root@vms81.liruilongs.github.io]-[~/ansible/k8s-jobs-create]└─$kubectl apply -f myjobact.yamljob.batch/my-job created┌──[root@vms81.liruilongs.github.io]-[~/ansible/k8s-jobs-create]└─$kubectl get podsNAMEREADY STATUSRESTARTS AGEmy-job--1-ddhbj 0/1 ContainerCreating 0 7s┌──[root@vms81.liruilongs.github.io]-[~/ansible/k8s-jobs-create]└─$kubectl get jobsNAME COMPLETIONS DURATION AGEmy-job 0/1 16s 16s┌──[root@vms81.liruilongs.github.io]-[~/ansible/k8s-jobs-create]└─$kubectl get podsNAMEREADY STATUSRESTARTS AGEmy-job--1-ddhbj 0/1 Completed 0 23smy-job--1-mzw2p 0/1 ContainerCreating 0 3s┌──[root@vms81.liruilongs.github.io]-[~/ansible/k8s-jobs-create]└─$kubectl get podsNAMEREADY STATUS RESTARTS AGEmy-job--1-ddhbj 0/1 Completed 0 48smy-job--1-mzw2p 0/1 Completed 0 28s┌──[root@vms81.liruilongs.github.io]-[~/ansible/k8s-jobs-create]└─$kubectl get jobsNAME COMPLETIONS DURATION AGEmy-job 0/1 55s 55s其他的一些参数
parallelism: N 一次性运行N个pod
completions: M job结束需要成功运行的Pod个数,即状态为Completed的pod数
backoffLimit: N 如果job失败,则重试几次
parallelism:一次性运行几个pod,这个值不会超过completions的值。
创建一个并行多任务的Job
apiVersion: batch/v1kind: Jobmetadata: creationTimestamp: null name: my-jobspec: backoffLimit: 6 #重试次数 completions: 6 # 运行几次 parallelism: 2 # 一次运行几个 template: metadata: creationTimestamp: null spec: containers: - command: - sh - -c - echo "hello jobs" - sleep 15 image: busybox name: my-job resources: {} restartPolicy: Neverstatus: {}创建一个有参数的job
┌──[root@vms81.liruilongs.github.io]-[~/ansible/k8s-jobs-create]└─$kubectl apply -f myjob-parma.yamljob.batch/my-job created┌──[root@vms81.liruilongs.github.io]-[~/ansible/k8s-jobs-create]└─$kubectl get pods jobsError from server (NotFound): pods "jobs" not found┌──[root@vms81.liruilongs.github.io]-[~/ansible/k8s-jobs-create]└─$kubectl get pods jobError from server (NotFound): pods "job" not found┌──[root@vms81.liruilongs.github.io]-[~/ansible/k8s-jobs-create]└─$kubectl get jobsNAME COMPLETIONS DURATION AGEmy-job 0/6 19s 19s查看参数设置的变化,运行6个job
┌──[root@vms81.liruilongs.github.io]-[~/ansible/k8s-jobs-create]└─$kubectl get podsNAMEREADY STATUSRESTARTS AGEmy-job--1-9vvst 0/1 Completed 0 25smy-job--1-h24cw 0/1 ContainerCreating 0 5smy-job--1-jgq2j 0/1 Completed 0 24smy-job--1-mbmg6 0/1 ContainerCreating 0 1s┌──[root@vms81.liruilongs.github.io]-[~/ansible/k8s-jobs-create]└─$kubectl get jobsNAME COMPLETIONS DURATION AGEmy-job 2/6 35s 35s┌──[root@vms81.liruilongs.github.io]-[~/ansible/k8s-jobs-create]└─$kubectl get jobsNAME COMPLETIONS DURATION AGEmy-job 3/6 48s 48s┌──[root@vms81.liruilongs.github.io]-[~/ansible/k8s-jobs-create]└─$└─$kubectl get podsNAMEREADY STATUS RESTARTS AGEmy-job--1-9vvst 0/1 Completed 0 91smy-job--1-b95qv 0/1 Completed 0 35smy-job--1-h24cw 0/1 Completed 0 71smy-job--1-jgq2j 0/1 Completed 0 90smy-job--1-mbmg6 0/1 Completed 0 67smy-job--1-njbfj 0/1 Completed 0 49s┌──[root@vms81.liruilongs.github.io]-[~/ansible/k8s-jobs-create]└─$kubectl get jobsNAME COMPLETIONS DURATION AGEmy-job 6/6 76s 93s实战:计算圆周率2000位
命令行的方式创建一个job
┌──[root@vms81.liruilongs.github.io]-[~/ansible/k8s-jobs-create]└─$kubectl create job job3 --image=perl --dry-run=client -o yaml -- perl -Mbignum=bpi -wle 'print bpi(500)'apiVersion: batch/v1kind: Jobmetadata: creationTimestamp: null name: job3spec: template: metadata: creationTimestamp: null spec: containers: - command: - perl - -Mbignum=bpi - -wle - print bpi(500) image: perl name: job3 resources: {} restartPolicy: Neverstatus: {}拉取相关镜像,命令行创建job
┌──[root@vms81.liruilongs.github.io]-[~/ansible]└─$ansible node -m shell -a "docker pull perl"┌──[root@vms81.liruilongs.github.io]-[~/ansible]└─$kubectl create job job2 --image=perl -- perl -Mbignum=bpi -wle 'print bpi(500)'job.batch/job2 created┌──[root@vms81.liruilongs.github.io]-[~/ansible/k8s-jobs-create]└─$kubectl get podsNAME READY STATUS RESTARTS AGEjob2--1-5jlbl 0/1 Completed 0 2m4s查看运行的job输出
┌──[root@vms81.liruilongs.github.io]-[~/ansible/k8s-jobs-create]└─$kubectl logs job2--1-5jlbl3.1415926535897932384626433832795028841971693993751058209749445923078164062862089986280348253421170679821480865132823066470938446095505822317253594081284811174502841027019385211055596446229489549303819644288109756659334461284756482337867831652712019091456485669234603486104543266482133936072602491412737245870066063155881748815209209628292540917153643678925903600113305305488204665213841469519415116094330572703657595919530921861173819326117931051185480744623799627495673518857527248912279381830119491Cronjob:定时任务
在 cronjob 的 yaml 文件里的 .spec.jobTemplate.spec 字段里,可以写 activeDeadlineSeconds 参数,指定 cronjob 所生成的 pod 只能运行多久
Kubernetes从1.5版本开始增加了一种新类型的Job,即类似LinuxCron的定时任务Cron Job,下面看看如何定义和使用这种类型的Job首先,确保Kubernetes的版本为1.8及以上。
在Kubernetes 1.9版本后,kubectl命令增加了别名cj来表示cronjob,同时kubectl set image/env命令也可以作用在CronJob对象上了。
创建一个 Cronjob
每分钟创建一个pod执行一个date命令
┌──[root@vms81.liruilongs.github.io]-[~/ansible/k8s-jobs-create]└─$kubectl create cronjob test-job --image=busybox --schedule="*/1 * * * *" --dry-run=client -o yaml -- /bin/sh -c "date"apiVersion: batch/v1kind: CronJobmetadata: creationTimestamp: null name: test-jobspec: jobTemplate: metadata: creationTimestamp: null name: test-job spec: template: metadata: creationTimestamp: null spec: containers: - command: - /bin/sh - -c - date image: busybox name: test-job resources: {} restartPolicy: OnFailure schedule: '*/1 * * * *'status: {}可是使用yaml文件或者命令行的方式创建
┌──[root@vms81.liruilongs.github.io]-[~/ansible/k8s-jobs-create]└─$kubectl get podsNo resources found in liruiling-job-create namespace.┌──[root@vms81.liruilongs.github.io]-[~/ansible/k8s-jobs-create]└─$kubectl apply -f jobcron.yamlcronjob.batch/test-job configured┌──[root@vms81.liruilongs.github.io]-[~/ansible/k8s-jobs-create]└─$kubectl get jobNAME COMPLETIONS DURATION AGEtest-job-27330246 0/1 0s 0s┌──[root@vms81.liruilongs.github.io]-[~/ansible/k8s-jobs-create]└─$kubectl get podsNAME READY STATUS RESTARTS AGEtest-job-27330246--1-xn5r6 1/1 Running 0 4s┌──[root@vms81.liruilongs.github.io]-[~/ansible/k8s-jobs-create]└─$kubectl get podsNAME READY STATUS RESTARTS AGEtest-job-27330246--1-xn5r6 0/1 Completed 0 100stest-job-27330247--1-9blnp 0/1 Completed 0 40s运行--watch命令,可以更直观地了解Cron Job定期触发任务执行的历史和现状:
┌──[root@vms81.liruilongs.github.io]-[~/ansible/k8s-jobs-create]└─$kubectl apply -f jobcron.yamlcronjob.batch/test-job created┌──[root@vms81.liruilongs.github.io]-[~/ansible/k8s-jobs-create]└─$kubectl get cronjobsNAMESCHEDULE SUSPEND ACTIVE LAST SCHEDULE AGEtest-job */1 * * * * False 0 <none> 12s┌──[root@vms81.liruilongs.github.io]-[~/ansible/k8s-jobs-create]└─$kubectl get jobs --watchNAME COMPLETIONS DURATION AGEtest-job-27336917 0/1 0stest-job-27336917 0/1 0s 0stest-job-27336917 1/1 25s 25stest-job-27336918 0/1 0stest-job-27336918 0/1 0s 0stest-job-27336918 1/1 26s 26s^C┌──[root@vms81.liruilongs.github.io]-[~/ansible/k8s-jobs-create]└─$kubectl get jobs -o wideNAME COMPLETIONS DURATION AGE CONTAINERS IMAGES SELECTORtest-job-27336917 1/1 25s 105s test-job busybox controller-uid=35e43bbc-5869-4bda-97db-c027e9a36b97test-job-27336918 1/1 26s 45s test-job busybox controller-uid=82d2e4a5-716c-42bf-bc7d-3137dd0e50e8┌──[root@vms81.liruilongs.github.io]-[~/ansible/k8s-jobs-create]└─$Service
Service是Kubernetes的核心概念,可以为一组具有相同功能的容器应用提供一个统一的入口地址,并且通过多实例的方式将请求负载分发到后端的各个容器应用上。具体涉及service的负载均衡机制、如何访问Service、 Headless Service, DNS服务的机制和实践、Ingress 7层路由机制等。
我们这里以服务的
创建,发布,发现三个角度来学习,偏实战,关于Headless Service,DNS服务的机制和实践、Ingress 7层路由机制等一些原理理论会在之后的博文里分享
通过Service的定义, Kubernetes实现了一种分布式应用统一入口的定义和负载均衡机制。Service还可以进行其他类型的设置,例如设置多个端口号、直接设置为集群外部服务,或实现为Headless Service (无头服务)模式.
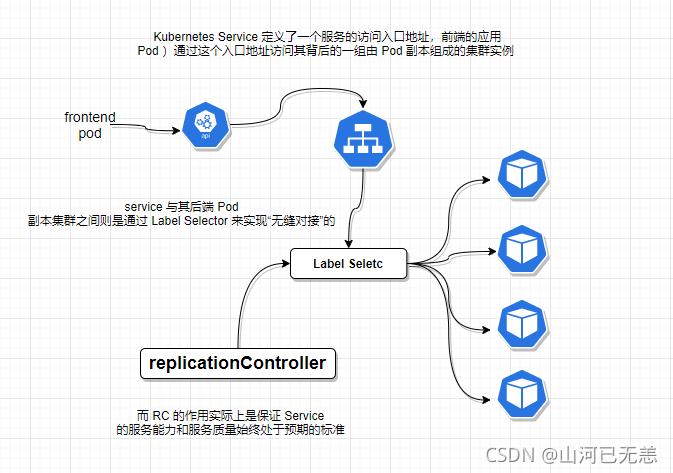
Kubernetes的Service定义了一个服务的访问入口地址,前端的应用(Pod)通过这个入口地址访问其背后的一组由Pod副本组成的集群实例, Service与其后端Pod副本集群之间则是通过Label Selector来实现“无缝对接”的。而RC或者deploy的作用实际上是保证Service的服务能力和服务质量始终处干预期的标准。
服务创建
为什么需要Service
学习环境准备,新建一个liruilong-svc-create命名空间
┌──[root@vms81.liruilongs.github.io]-[~/ansible]└─$d=k8s-svc-create┌──[root@vms81.liruilongs.github.io]-[~/ansible]└─$mkdir $d ;cd $d┌──[root@vms81.liruilongs.github.io]-[~/ansible/k8s-svc-create]└─$kubectl config set-context $(kubectl config current-context) --namespace=liruilong-svc-createContext "kubernetes-admin@kubernetes" modified.┌──[root@vms81.liruilongs.github.io]-[~/ansible/k8s-svc-create]└─$kubectl create ns liruilong-svc-createnamespace/liruilong-svc-create created┌──[root@vms81.liruilongs.github.io]-[~/ansible/k8s-svc-create]└─$kubectl get svcNo resources found in liruilong-svc-create namespace.┌──[root@vms81.liruilongs.github.io]-[~/ansible/k8s-svc-create]└─$使用pod资源创建服务
我们先来创建一个普通服务即不使用Service资源,只是通过pod创建
通过命令行的方式生成一个pod资源的yaml文件,然后我们修改一下
┌──[root@vms81.liruilongs.github.io]-[~/ansible/k8s-svc-create]└─$kubectl run pod-svc --image=nginx --image-pull-policy=IfNotPresent --dry-run=client -o yamlapiVersion: v1kind: Podmetadata: creationTimestamp: null labels: run: pod-svc name: pod-svcspec: containers: - image: nginx imagePullPolicy: IfNotPresent name: pod-svc resources: {} dnsPolicy: ClusterFirst restartPolicy: Alwaysstatus: {}这里我们修改下,使当前的pod可以对外提供能力,使用的方式,通过设置容器级别的hostPort,将容器应用的端口号映射到宿主机上
ports: - containerPort: 80 # 容器端口 hostPort: 800 # 提供能力的端口通过宿主机映射,当pod发生调度后,节点没法提供能力
通过设置Pod级别的hostNetwork=true,该Pod中所有容器的端口号都将被直接映射到物理机上。 在设置hostNetwork=true时需要注意,在容器的ports定义部分如果不指定hostPort,则默认hostPort等于containerPort,如果指定了hostPort,则hostPort必须等于containerPort的值:
spec nostNetwork: true containers: name: webapp image: tomcat imagePullPolicy: Never ports: - containerPort: 8080 通过下面的方式生成的pod可以通过800端口对外提供能力,这里的的IP为宿主机IP
┌──[root@vms81.liruilongs.github.io]-[~/ansible/k8s-svc-create]└─$cat pod-svc.yamlapiVersion: v1kind: Podmetadata: creationTimestamp: null labels: run: pod-svc name: pod-svcspec: containers: - image: nginx imagePullPolicy: IfNotPresent name: pod-svc ports: - containerPort: 80 hostPort: 800 resources: {} dnsPolicy: ClusterFirst restartPolicy: Alwaysstatus: {}┌──[root@vms81.liruilongs.github.io]-[~/ansible/k8s-svc-create]└─$这是一个单独的pod资源,生成的pod基于当前Node对外提供能力
┌──[root@vms81.liruilongs.github.io]-[~/ansible/k8s-svc-create]└─$kubectl apply -f pod-svc.yamlpod/pod-svc created┌──[root@vms81.liruilongs.github.io]-[~/ansible/k8s-svc-create]└─$kubectl get pods -owideNAME READY STATUS RESTARTS AGE IP NODE NOMINATED NODE READINESS GATESpod-svc 1/1 Running 0 3s 10.244.70.50 vms83.liruilongs.github.io <none> <none>对于pod-svc来讲,我们可以通过pod_ip+端口的方式访问,其实是类似于docker一样,把端口映射到宿主机的方式
然后我们以同样的方式生成几个新的pod,也是基于当前Node节点对外提供能力,这里我们只有两个节点,所以在生成第三个的时候,pod直接pending了,端口冲突,我们使用了宿主机映射的方式,所以每个node只能调度一个pop上去
┌──[root@vms81.liruilongs.github.io]-[~/ansible/k8s-svc-create]└─$sed 's/pod-svc/pod-svc-1/' pod-svc.yaml | kubectl apply -f -pod/pod-svc-1 created┌──[root@vms81.liruilongs.github.io]-[~/ansible/k8s-svc-create]└─$kubectl get pods -owideNAME READY STATUS RESTARTS AGE IP NODE NOMINATED NODE READINESS GATESpod-svc 1/1 Running 0 2m46s 10.244.70.50 vms83.liruilongs.github.io <none> <none>pod-svc-1 1/1 Running 0 13s 10.244.171.176 vms82.liruilongs.github.io <none> <none>┌──[root@vms81.liruilongs.github.io]-[~/ansible/k8s-svc-create]└─$sed 's/pod-svc/pod-svc-2/' pod-svc.yaml | kubectl apply -f -pod/pod-svc-2 created┌──[root@vms81.liruilongs.github.io]-[~/ansible/k8s-svc-create]└─$kubectl get pods -owideNAME READY STATUS RESTARTS AGE IP NODE NOMINATED NODE READINESS GATESpod-svc 1/1 Running 0 4m18s 10.244.70.50 vms83.liruilongs.github.io <none> <none>pod-svc-1 1/1 Running 0 105s 10.244.171.176 vms82.liruilongs.github.io <none> <none>pod-svc-2 0/1 Pending 0 2s <none> <none> <none> <none>┌──[root@vms81.liruilongs.github.io]-[~/ansible/k8s-svc-create]└─$这个时候,如果我们想多创建几个pod来提供能力,亦或者做负载。就要用到Service了
Service的创建
一般来说,对外提供服务的应用程序需要通过某种机制来实现,对于容器应用最简便的方式就是通过TCP/IP机制及监听IP和端口号来实现。即PodIP+容器端口的方式
直接通过Pod的IP地址和端口号可以访问到容器应用内的服务,但是Pod的IP地址是不可靠的,如果容器应用本身是分布式的部署方式,通过多个实例共同提供服务,就需要在这些实例的前端设置一个负载均衡器来实现请求的分发。
Kubernetes中的Service就是用于解决这些问题的核心组件。通过kubectl expose命令来创建Service
新创建的Service,系统为它分配了一个虚拟的IP地址(ClusterlP) , Service所需的端口号则从Pod中的containerPort复制而来:
下面我们就使用多个pod和deploy的方式为Service提供能力,创建Service
使用deployment创建SVC
创建一个有三个ng副本的deployment
┌──[root@vms81.liruilongs.github.io]-[~/ansible/k8s-svc-create]└─$kubectl create deployment web1 --image=nginx --replicas=3 --dry-run=client -o yamlapiVersion: apps/v1kind: Deploymentmetadata: creationTimestamp: null labels: app: web1 name: web1spec: replicas: 3 selector: matchLabels: app: web1 strategy: {} template: metadata: creationTimestamp: null labels: app: web1 spec: containers: - image: nginx name: nginx resources: {}status: {}┌──[root@vms81.liruilongs.github.io]-[~/ansible/k8s-svc-create]└─$kubectl create deployment web1 --image=nginx --replicas=3 --dry-run=client -o yaml > web1.yaml┌──[root@vms81.liruilongs.github.io]-[~/ansible/k8s-svc-create]└─$kubectl get pods -o wideNo resources found in liruilong-svc-create namespace.┌──[root@vms81.liruilongs.github.io]-[~/ansible/k8s-svc-create]└─$kubectl apply -f web1.yamldeployment.apps/web1 created┌──[root@vms81.liruilongs.github.io]-[~/ansible/k8s-svc-create]└─$kubectl get pods -o wideNAME READY STATUSRESTARTS AGE IPNODE NOMINATED NODE READINESS GATESweb1-6fbb48567f-2zfkm 0/1 ContainerCreating 0 2s <none> vms83.liruilongs.github.io <none> <none>web1-6fbb48567f-krj4j 0/1 ContainerCreating 0 2s <none> vms83.liruilongs.github.io <none> <none>web1-6fbb48567f-mzvtk 0/1 ContainerCreating 0 2s <none> vms82.liruilongs.github.io <none> <none>┌──[root@vms81.liruilongs.github.io]-[~/ansible/k8s-svc-create]└─$通过deploy: web1 为服务能力提供者,创建一个Servie服务
除了使用kubectl expose命令创建Service,我们也可以通过配置文件定义Service,再通过kubectl create命令进行创建
Service定义中的关键字段是ports和selector 。ports定义部分指定了Service所需的虚拟端口号为8081,如果与Pod容器端口号8080不一样,所以需要再通过targetPort来指定后端Pod的端口号。selector定义部分设置的是后端Pod所拥有的label:
┌──[root@vms81.liruilongs.github.io]-[~/ansible/k8s-svc-create]└─$kubectl expose --name=svc1 deployment web1 --port=80service/svc1 exposed┌──[root@vms81.liruilongs.github.io]-[~/ansible/k8s-svc-create]└─$kubectl get svc -o wideNAME TYPE CLUSTER-IP EXTERNAL-IP PORT(S) AGE SELECTORsvc1 ClusterIP 10.110.53.142 <none> 80/TCP 23s app=web1┌──[root@vms81.liruilongs.github.io]-[~/ansible/k8s-svc-create]└─$kubectl get podsNAME READY STATUS RESTARTS AGEweb1-6fbb48567f-2zfkm 1/1 Running 0 14mweb1-6fbb48567f-krj4j 1/1 Running 0 14mweb1-6fbb48567f-mzvtk 1/1 Running 0 14m┌──[root@vms81.liruilongs.github.io]-[~/ansible/k8s-svc-create]└─$kubectl get ep -owideNAME ENDPOINTS AGEsvc1 10.244.171.177:80,10.244.70.60:80,10.244.70.61:80 13m┌──[root@vms81.liruilongs.github.io]-[~/ansible/k8s-svc-create]└─$kubectl get pods --show-labelsNAME READY STATUS RESTARTS AGE LABELSweb1-6fbb48567f-2zfkm 1/1 Running 0 18m app=web1,pod-template-hash=6fbb48567fweb1-6fbb48567f-krj4j 1/1 Running 0 18m app=web1,pod-template-hash=6fbb48567fweb1-6fbb48567f-mzvtk 1/1 Running 0 18m app=web1,pod-template-hash=6fbb48567f┌──[root@vms81.liruilongs.github.io]-[~/ansible/k8s-svc-create]└─$使用pod创建Service
每个Pod都会被分配一个单独的IP地址,而且每个Pod都提供了一个独立的Endpoint(Pod IP+ContainerPort)以被客户端访问,现在多个Pod副本组成了一个集群来提供服务.客户端如何来访问它们呢?一般的做法是部署一个负载均衡器(软件或硬件),
Kubernetes中运行在每个Node上的kube-proxy进程其实就是一个智能的软件负载均衡器,它负责把对Service的请求转发到后端的某个Pod实例上,并在内部实现服务的负载均衡与会话保持机制。
资源文件定义
┌──[root@vms81.liruilongs.github.io]-[~/ansible/liveness-probe]└─$cat readiness-probe.yamlapiVersion: v1kind: Podmetadata: creationTimestamp: null labels: run: pod-liveness name: pod-livenessspec: containers: image: nginx imagePullPolicy: IfNotPresent name: pod-liveness resources: {} dnsPolicy: ClusterFirst restartPolicy: Alwaysstatus: {}创建3个有Ngixn的pod,通过POD创建一个SVC做测试用
┌──[root@vms81.liruilongs.github.io]-[~/ansible/liveness-probe]└─$sed 's/pod-liveness/pod-liveness-1/' readiness-probe.yaml | kubectl apply -f -pod/pod-liveness-1 created┌──[root@vms81.liruilongs.github.io]-[~/ansible/liveness-probe]└─$sed 's/pod-liveness/pod-liveness-2/' readiness-probe.yaml | kubectl apply -f -pod/pod-liveness-2 created┌──[root@vms81.liruilongs.github.io]-[~/ansible/liveness-probe]└─$kubectl get pods -o wideNAME READY STATUS RESTARTS AGE IP NODE NOMINATED NODE READINESS GATESpod-liveness 1/1 Running 0 3m1s 10.244.70.50 vms83.liruilongs.github.io <none> <none>pod-liveness-1 1/1 Running 0 2m 10.244.70.51 vms83.liruilongs.github.io <none> <none>pod-liveness-2 1/1 Running 0 111s 10.244.70.52 vms83.liruilongs.github.io <none> <none>修改主页文字
┌──[root@vms81.liruilongs.github.io]-[~/ansible/liveness-probe]└─$serve=pod-liveness┌──[root@vms81.liruilongs.github.io]-[~/ansible/liveness-probe]└─$kubectl exec -it $serve -- sh -c "echo $serve > /usr/share/nginx/html/index.html"┌──[root@vms81.liruilongs.github.io]-[~/ansible/liveness-probe]└─$kubectl exec -it $serve -- sh -c "cat /usr/share/nginx/html/index.html"pod-liveness┌──[root@vms81.liruilongs.github.io]-[~/ansible/liveness-probe]└─$serve=pod-liveness-1┌──[root@vms81.liruilongs.github.io]-[~/ansible/liveness-probe]└─$kubectl exec -it $serve -- sh -c "echo $serve > /usr/share/nginx/html/index.html"┌──[root@vms81.liruilongs.github.io]-[~/ansible/liveness-probe]└─$serve=pod-liveness-2┌──[root@vms81.liruilongs.github.io]-[~/ansible/liveness-probe]└─$kubectl exec -it $serve -- sh -c "echo $serve > /usr/share/nginx/html/index.html"┌──[root@vms81.liruilongs.github.io]-[~/ansible/liveness-probe]└─$修改标签
┌──[root@vms81.liruilongs.github.io]-[~/ansible/liveness-probe]└─$kubectl get pods --show-labelsNAME READY STATUS RESTARTS AGE LABELSpod-liveness 1/1 Running 0 15m run=pod-livenesspod-liveness-1 1/1 Running 0 14m run=pod-liveness-1pod-liveness-2 1/1 Running 0 14m run=pod-liveness-2┌──[root@vms81.liruilongs.github.io]-[~/ansible/liveness-probe]└─$kubectl edit pods pod-liveness-1pod/pod-liveness-1 edited┌──[root@vms81.liruilongs.github.io]-[~/ansible/liveness-probe]└─$kubectl edit pods pod-liveness-2pod/pod-liveness-2 edited┌──[root@vms81.liruilongs.github.io]-[~/ansible/liveness-probe]└─$kubectl get pods --show-labelsNAME READY STATUS RESTARTS AGE LABELSpod-liveness 1/1 Running 0 17m run=pod-livenesspod-liveness-1 1/1 Running 0 16m run=pod-livenesspod-liveness-2 1/1 Running 0 16m run=pod-liveness┌──[root@vms81.liruilongs.github.io]-[~/ansible/liveness-probe]└─$使用POD创建SVC
┌──[root@vms81.liruilongs.github.io]-[~/ansible/liveness-probe]└─$kubectl expose --name=svc pod pod-liveness --port=80service/svc exposed┌──[root@vms81.liruilongs.github.io]-[~/ansible/liveness-probe]└─$kubectl get epNAME ENDPOINTS AGEsvc 10.244.70.50:80,10.244.70.51:80,10.244.70.52:80 16s┌──[root@vms81.liruilongs.github.io]-[~/ansible/liveness-probe]└─$kubectl get svcNAME TYPE CLUSTER-IPEXTERNAL-IP PORT(S) AGEsvc ClusterIP 10.104.246.121 <none> 80/TCP 36s┌──[root@vms81.liruilongs.github.io]-[~/ansible/liveness-probe]└─$kubectl get pods -o wideNAME READY STATUS RESTARTS AGE IP NODE NOMINATED NODE READINESS GATESpod-liveness 1/1 Running 0 24m 10.244.70.50 vms83.liruilongs.github.io <none> <none>pod-liveness-1 1/1 Running 0 23m 10.244.70.51 vms83.liruilongs.github.io <none> <none>pod-liveness-2 1/1 Running 0 23m 10.244.70.52 vms83.liruilongs.github.io <none> <none>测试SVC正常,三个POD会正常 负载
┌──[root@vms81.liruilongs.github.io]-[~/ansible]└─$while true; do curl 10.104.246.121 ; sleep 1> donepod-livenesspod-liveness-2pod-livenesspod-liveness-1pod-liveness-2^C基于 ClusterlP 提供的两种负载分发策略
目前 Kubernetes 提供了两种负载分发策略:RoundRobin和SessionAffinity
| 负载分发策略 | 描述 |
|---|---|
| RoundRobin | 轮询模式,即轮询将请求转发到后端的各个Pod上。 |
| SessionAffinity | 基于客户端IP地址进行会话保持的模式, |
在默认情况下, Kubernetes采用RoundRobin模式对客户端请求进行,负载分发,但我们也可以通过设置service.spec.sessionAffinity=ClientIP来启用SessionAffinity策略。
查看svc包含的Pod
┌──[root@vms81.liruilongs.github.io]-[~/ansible/k8s-svc-create]└─$kubectl get svc -owide | grep -v NAME | awk '{print $NF}' | xargs kubectl get pods -lNAME READY STATUS RESTARTS AGEpod-svc 1/1 Running 0 18mpod-svc-1 1/1 Running 0 17mpod-svc-2 1/1 Running 0 16m┌──[root@vms81.liruilongs.github.io]-[~/ansible/k8s-svc-create]└─$端口的请求转发及多端口设置
一个容器应用也可能提供多个端口的服务,那么在Service的定义中也可以相应地设置为将多个端口转发到多个应用服务。
Kubernetes Service支持多个Endpoint(端口),在存在多个Endpoint的情况下,要求每个Endpoint定义一个名字来区分。下面是Tomcat多端口的Service定义样例:
- port: 8080 targetPort: 80 name: web1- port: 8008 targetPort: 90 name: web2多端口为什么需要给每个端口命名呢?这就涉及Kubernetes的服务发现机制了(通过DNS是方式实现的服务发布)
命令行的方式
┌──[root@vms81.liruilongs.github.io]-[~/ansible/k8s-svc-create]└─$kubectl expose --name=svc pod pod-svc --port=808 --target-port=80 --selector=run=pod-svcservice/svc exposed┌──[root@vms81.liruilongs.github.io]-[~/ansible/k8s-svc-create]└─$kubectl get svc -owideNAME TYPE CLUSTER-IPEXTERNAL-IP PORT(S) AGE SELECTORsvc ClusterIP 10.102.223.233 <none> 808/TCP 4s run=pod-svc┌──[root@vms81.liruilongs.github.io]-[~/ansible/k8s-svc-create]└─$kube-proxy的路由规则不同,ServiceIP的访问也不同
- iptable: Service(CLUSTER-IP )地址 ping 不通
- ipvs: Service(CLUSTER-IP )地址可以ping通
服务的发现
所谓服务发现,就是我们在pod内部,或者说容器内部,怎么获取到要访问的服务的IP和端口。类似于微服务中的注册中心概念
| Kubernetes 的服务发现机制 | 区别 |
|---|---|
最早时Kubernetes采用了Linux环境变量的方式解决这个问题,即每个Service生成一些对应的Linux环境变量(ENV),并在每个Pod的容器在启动时,自动注入这些环境变量 |
命名空间隔离 |
后来Kubernetes通过Add-On增值包的方式引入了DNS系统,把服务名作为DNS域名,这样一来,程序就可以直接使用服务名来建立通信连接了。目前Kubernetes上的大部分应用都已经采用了DNS这些新兴的服务发现机制 |
命名空间可见 |
环境准备,我们还是用之前的那个pod做的服务来处理
┌──[root@vms81.liruilongs.github.io]-[~]└─$kubectl get pods -owideNAME READY STATUS RESTARTS AGE IP NODE NOMINATED NODE READINESS GATESpod-svc 1/1 Running 0 69m 10.244.70.35 vms83.liruilongs.github.io <none> <none>pod-svc-1 1/1 Running 0 68m 10.244.70.39 vms83.liruilongs.github.io <none> <none>pod-svc-2 1/1 Running 0 68m 10.244.171.153 vms82.liruilongs.github.io <none> <none>┌──[root@vms81.liruilongs.github.io]-[~]└─$s=pod-svc┌──[root@vms81.liruilongs.github.io]-[~]└─$kubectl exec -it $s -- sh -c "echo $s > /usr/share/nginx/html/index.html"┌──[root@vms81.liruilongs.github.io]-[~]└─$s=pod-svc-1┌──[root@vms81.liruilongs.github.io]-[~]└─$kubectl exec -it $s -- sh -c "echo $s > /usr/share/nginx/html/index.html"┌──[root@vms81.liruilongs.github.io]-[~]└─$s=pod-svc-2┌──[root@vms81.liruilongs.github.io]-[~]└─$kubectl exec -it $s -- sh -c "echo $s > /usr/share/nginx/html/index.html"┌──[root@vms81.liruilongs.github.io]-[~]└─$kubectl get svc -owideNAME TYPE CLUSTER-IPEXTERNAL-IP PORT(S) AGE SELECTORsvc ClusterIP 10.102.223.233 <none> 808/TCP 46m run=pod-svc┌──[root@vms81.liruilongs.github.io]-[~]└─$while true ;do curl 10.102.223.233:808;sleep 2 ; donepod-svc-2pod-svc-1pod-svcpod-svcpod-svcpod-svc-2^C┌──[root@vms81.liruilongs.github.io]-[~]└─$测试镜像准备
┌──[root@vms81.liruilongs.github.io]-[~/ansible]└─$ansible node -m shell -a "docker pull yauritux/busybox-curl"通过Linux环境变量方式发现:命名空间隔离
在每个创建的pod里会存在已经存在的SVC的变量信息,这些变量信息基于命名空间隔离,
其他命名空间没有
┌──[root@vms81.liruilongs.github.io]-[~/ansible/k8s-svc-create]└─$kubectl run testpod -it --rm --image=yauritux/busybox-curl --image-pull-policy=IfNotPresent -n defaultIf you don't see a command prompt, try pressing enter./home # env | grep ^SVC/home # 只存在当前命名空间,只能获取相同namespace里的变量
换句话的意思,在相同的命名空间里,我们可以在容器里通过变量的方式获取已经存在的Service来提供能力
┌──[root@vms81.liruilongs.github.io]-[~]└─$kubectl run testpod -it --rm --image=yauritux/busybox-curl --image-pull-policy=IfNotPresentIf you don't see a command prompt, try pressing enter./home # env | grep ^SVCSVC_PORT_808_TCP_ADDR=10.102.223.233SVC_PORT_808_TCP_PORT=808SVC_PORT_808_TCP_PROTO=tcpSVC_SERVICE_HOST=10.102.223.233SVC_PORT_808_TCP=tcp://10.102.223.233:808SVC_SERVICE_PORT=808SVC_PORT=tcp://10.102.223.233:808/home #/home # while true ;do curl $SVC_SERVICE_HOST:$SVC_PORT_808_TCP_PORT ;sleep 2 ; donepod-svc-2pod-svc-2pod-svcpod-svc^C/home #通过DNS的方式发现:命名空间可见
Kubernetes发明了一种很巧妙又影响深远的设计:
Service不是共用一个负载均衡器的IP地址,而是每个Service分配了一个全局唯一的虚拟IP地址,这个虚拟IP被称为Cluster IP,这样一来,每个服务就变成了具备唯一IP地址的“通信节点”,服务调用就变成了最基础的TCP网络通信问题。
Service一旦被创建, Kubernetes就会自动为它分配一个可用的Cluster IP,而且在Service的整个生命周期内,它的Cluster IP不会发生改变。于是,服务发现这个棘手的问题在Kubernetes的架构里也得以轻松解决:只要用Service的Name与Service的Cluster IP地址做一个DNS域名映射即可完美解决问题。
┌──[root@vms81.liruilongs.github.io]-[~/ansible]└─$kubectl get svc -n kube-system -owideNAME TYPE CLUSTER-IPEXTERNAL-IP PORT(S) AGE SELECTORkube-dns ClusterIP 10.96.0.10<none> 53/UDP,53/TCP,9153/TCP 6d20h k8s-app=kube-dnsmetrics-server ClusterIP 10.111.104.173 <none> 443/TCP 6d18h k8s-app=metrics-server┌──[root@vms81.liruilongs.github.io]-[~/ansible]└─$kubectl get pods -n kube-system -l k8s-app=kube-dnsNAME READY STATUS RESTARTS AGEcoredns-7f6cbbb7b8-ncd2s 1/1 Running 2 (23h ago) 3d22hcoredns-7f6cbbb7b8-pjnct 1/1 Running 2 (23h ago) 3d22h有个这个DNS服务之后,创建的每个SVC就会自动的注册一个DNS
┌──[root@vms81.liruilongs.github.io]-[~]└─$kubectl run testpod -it --rm --image=yauritux/busybox-curl --image-pull-policy=IfNotPresentIf you don't see a command prompt, try pressing enter./home # cat /etc/resolv.confnameserver 10.96.0.10search liruilong-svc-create.svc.cluster.local svc.cluster.local cluster.local localdomain 168.26.131options ndots:5/home #在kube-system里有dns,可以自动发现所有命名空间里的服务的clusterIP,所以,在同一个命名空间里,一个服务访问另外一个服务的时候,可以直接通过服务名来访问,只要创建了一个服务(不管在哪个ns里创建的),都会自动向kube-system里的DNS注册如果是不同的命名空间,可以通过服务名.命名空间名 来访问`服务名.命名空间
┌──[root@vms81.liruilongs.github.io]-[~/ansible]└─$kubectl config view | grep namesp namespace: liruilong-svc-create┌──[root@vms81.liruilongs.github.io]-[~/ansible]└─$我们这其他的命名空间里创建的一pod来访问当前空间的提供的服务能力
┌──[root@vms81.liruilongs.github.io]-[~/ansible/k8s-svc-create]└─$kubectl run testpod -it --rm --image=yauritux/busybox-curl --image-pull-policy=IfNotPresent -n defaultIf you don't see a command prompt, try pressing enter.'/home # curl svc.liruilong-svc-create:808pod-svc-2/home #通过ClusterIP 实现
这是一种相对来说,简单的方法,即直接通过 ClusterIP 来访问服务能力,同时支持跨命名空间
不同命名空间的测试pod
┌──[root@vms81.liruilongs.github.io]-[~/ansible/k8s-svc-create]└─$kubectl run testpod -it --rm --image=yauritux/busybox-curl --image-pull-policy=IfNotPresent -n defaultIf you don't see a command prompt, try pressing enter./home # while true ;do curl 10.102.223.233:808;sleep 2 ; donepod-svcpod-svc-1pod-svcpod-svc-2pod-svc^C/home #实战WordPress博客搭建
| WordPress博客搭建 |
|---|
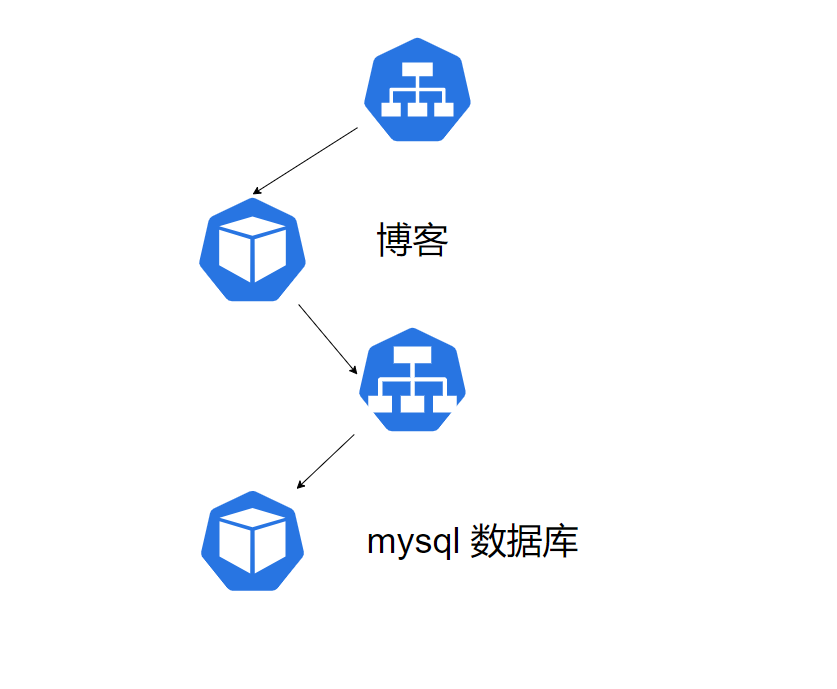 |
| 环境准备,没有的需要安装 |
┌──[root@vms81.liruilongs.github.io]-[~/ansible]└─$ansible node -m shell -a "docker images | grep mysql"192.168.26.82 | CHANGED | rc=0 >>mysql latest ecac195d15af 2 months ago 516MBmysql <none> 9da615fced53 2 months ago 514MBhub.c.163.com/library/mysql latest 9e64176cd8a2 4 years ago 407MB192.168.26.83 | CHANGED | rc=0 >>mysql latest ecac195d15af 2 months ago 516MBmysql <none> 9da615fced53 2 months ago 514MBhub.c.163.com/library/mysql latest 9e64176cd8a2 4 years ago 407MB┌──[root@vms81.liruilongs.github.io]-[~/ansible]└─$ansible node -m shell -a "docker images | grep wordpress"192.168.26.82 | CHANGED | rc=0 >>hub.c.163.com/library/wordpress latest dccaeccfba36 4 years ago 406MB192.168.26.83 | CHANGED | rc=0 >>hub.c.163.com/library/wordpress latest dccaeccfba36 4 years ago 406MB┌──[root@vms81.liruilongs.github.io]-[~/ansible]└─$创建一个mysql数据库pod
┌──[root@vms81.liruilongs.github.io]-[~/ansible/k8s-svc-create]└─$cat db-pod-mysql.yamlapiVersion: v1kind: Podmetadata: creationTimestamp: null labels: run: dbpod name: dbpodspec: containers: - image: hub.c.163.com/library/mysql imagePullPolicy: IfNotPresent name: dbpod resources: {} env: - name: MYSQL_ROOT_PASSWORD value: liruilong - name: MYSQL_USER value: root - name: MYSQL_DATABASE value: blog dnsPolicy: ClusterFirst restartPolicy: Alwaysstatus: {}┌──[root@vms81.liruilongs.github.io]-[~/ansible/k8s-svc-create]└─$kubectl apply -f db-pod-mysql.yamlpod/dbpod created┌──[root@vms81.liruilongs.github.io]-[~/ansible/k8s-svc-create]└─$kubectl get podsNAME READY STATUS RESTARTS AGEdbpod 1/1 Running 0 5s创建一个连接mysql-pod的Service,也可以理解为发布mysql服务,默认使用ClusterIP的方式
┌──[root@vms81.liruilongs.github.io]-[~/ansible/k8s-svc-create]└─$kubectl get pods --show-labelsNAME READY STATUS RESTARTS AGE LABELSdbpod 1/1 Running 0 80s run=dbpod┌──[root@vms81.liruilongs.github.io]-[~/ansible/k8s-svc-create]└─$kubectl expose --name=dbsvc pod dbpod --port=3306service/dbsvc exposed┌──[root@vms81.liruilongs.github.io]-[~/ansible/k8s-svc-create]└─$kubectl get svc dbsvc -o yamlapiVersion: v1kind: Servicemetadata: creationTimestamp: "2021-12-21T15:31:19Z" labels: run: dbpod name: dbsvc namespace: liruilong-svc-create resourceVersion: "310763" uid: 05ccb22d-19c4-443a-ba86-f17d63159144spec: clusterIP: 10.102.137.59 clusterIPs: - 10.102.137.59 internalTrafficPolicy: Cluster ipFamilies: - IPv4 ipFamilyPolicy: SingleStack ports: - port: 3306 protocol: TCP targetPort: 3306 selector: run: dbpod sessionAffinity: None type: ClusterIPstatus: loadBalancer: {}创建一个WordPress博客的pod
┌──[root@vms81.liruilongs.github.io]-[~/ansible/k8s-svc-create]└─$kubectl get svcNAME TYPE CLUSTER-IP EXTERNAL-IP PORT(S) AGEdbsvc ClusterIP 10.102.137.59 <none> 3306/TCP3m12s┌──[root@vms81.liruilongs.github.io]-[~/ansible/k8s-svc-create]└─$cat blog-pod.yamlapiVersion: v1kind: Podmetadata: creationTimestamp: null labels: run: blog name: blogspec: containers: - image: hub.c.163.com/library/wordpress imagePullPolicy: IfNotPresent name: blog resources: {} env: - name: WORDPRESS_DB_USER value: root - name: WORDPRESS_DB_PASSWORD value: liruilong - name: WORDPRESS_DB_NAME value: blog - name: WORDPRESS_DB_HOST #value: $(MYSQL_SERVICE_HOST) value: 10.102.137.59 dnsPolicy: ClusterFirst restartPolicy: Alwaysstatus: {}创建一个发布博客服务的SVC
┌──[root@vms81.liruilongs.github.io]-[~/ansible/k8s-svc-create]└─$kubectl expose --name=blogsvc pod blog --port=80 --type=NodePort┌──[root@vms81.liruilongs.github.io]-[~/ansible/k8s-svc-create]└─$kubectl get svc blogsvc -o yamlapiVersion: v1kind: Servicemetadata: creationTimestamp: "2021-12-20T17:11:03Z" labels: run: blog name: blogsvc namespace: liruilong-svc-create resourceVersion: "294057" uid: 4d350715-0210-441d-9c55-af0f31b7a090spec: clusterIP: 10.110.28.191 clusterIPs: - 10.110.28.191 externalTrafficPolicy: Cluster internalTrafficPolicy: Cluster ipFamilies: - IPv4 ipFamilyPolicy: SingleStack ports: - nodePort: 31158 port: 80 protocol: TCP targetPort: 80 selector: run: blog sessionAffinity: None type: NodePortstatus: loadBalancer: {}查看服务状态测试
┌──[root@vms81.liruilongs.github.io]-[~/ansible/k8s-svc-create]└─$kubectl get svc -o wideNAME TYPE CLUSTER-IP EXTERNAL-IP PORT(S) AGE SELECTORblogsvc NodePort 10.110.28.191 <none> 80:31158/TCP 22h run=blogdbsvc ClusterIP 10.102.137.59 <none> 3306/TCP15m run=dbpod┌──[root@vms81.liruilongs.github.io]-[~/ansible/k8s-svc-create]└─$kubectl get pods -o wideNAME READY STATUS RESTARTS AGE IP NODE NOMINATED NODE READINESS GATESblog 1/1 Running 0 14m 10.244.171.159 vms82.liruilongs.github.io <none> <none>dbpod 1/1 Running 0 21m 10.244.171.163 vms82.liruilongs.github.io <none> <none>┌──[root@vms81.liruilongs.github.io]-[~/ansible/k8s-svc-create]└─$| 访问 |
|---|
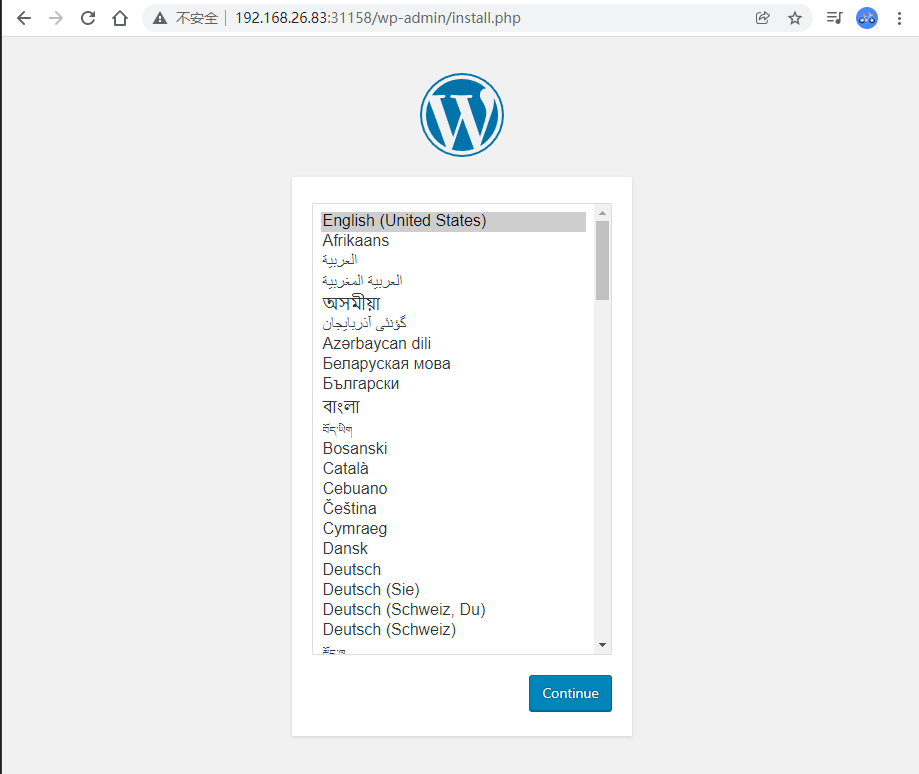 |
这里的话,在同一个命名空间里。所以可以使用变量来读取数据库所发布服务的ServiceIP
┌──[root@vms81.liruilongs.github.io]-[~/ansible/k8s-svc-create]└─$kubectl exec -it blog -- bashroot@blog:/var/www/html# env | grep DBSVCDBSVC_PORT_3306_TCP_ADDR=10.102.137.59DBSVC_SERVICE_PORT=3306DBSVC_PORT_3306_TCP_PORT=3306DBSVC_PORT_3306_TCP=tcp://10.102.137.59:3306DBSVC_SERVICE_HOST=10.102.137.59DBSVC_PORT=tcp://10.102.137.59:3306DBSVC_PORT_3306_TCP_PROTO=tcproot@blog:/var/www/html#即博客的pod中也可以这样配置
env: - name: WORDPRESS_DB_USER value: root - name: WORDPRESS_DB_PASSWORD value: liruilong - name: WORDPRESS_DB_NAME value: blog - name: WORDPRESS_DB_HOST value: $(DBSVC_SERVICE_HOST) #value: 10.102.137.59或者这样
env: - name: WORDPRESS_DB_USER value: root - name: WORDPRESS_DB_PASSWORD value: liruilong - name: WORDPRESS_DB_NAME value: blog - name: WORDPRESS_DB_HOST value: dbsvc.liruilong-svc-create ##value: 10.102.137.59服务的发布
所谓发布指的是,如何让集群之外的主机能访问服务
| Kubernetes里的“三种IP" | 描述 |
|---|---|
| Node IP | Node 节点的IP地址,Node IP是Kubernetes集群中每个节点的物理网卡的IP地址,这是一个真实存在的物理网络,所有属于这个网络的服务器之间都能通过这个网络直接通信,不管它们中是否有部分节点不属于这个Kubernetes集群。这也表明了Kubernetes集群之外的节点访问Kubernetes集群之内的某个节点或者TCP/IP服务时,必须要通过Node IP进行通信。 |
| Pod IP | Pod 的 IP 地址:Pod IP是每个Pod的IP地址,它是Docker Engine根据dockero网桥的IP地址段进行分配的,通常是一个虚拟的二层网络,前面我们说过, Kubernetes要求位于不同Node上的Pod能够彼此直接通信,所以Kubernetes里一个Pod里的容器访问另外一个Pod里的容器,就是通过Pod IP所在的虚拟二层网络进行通信的,而真实的TCP/IP流量则是通过Node IP所在的物理网卡流出的。 |
| Cluster IP | Service 的IP地址,Cluster IP仅仅作用于Kubernetes Service这个对象,并由Kubernetes管理和分配IP地址(来源于Cluster IP地址池)。Cluster IP无法被Ping,因为没有一个“实体网络对象”来响应。Cluster IP只能结合Service Port组成一个具体的通信端口,单独的Cluster IP不具备TCP/IP通信的基础,并且它们属于Kubernetes集群这样一个封闭的空间,集群之外的节点如果要访问这个通信端口,则需要做一些额外的工作。在Kubernetes集群之内, Node IP网、Pod IP网与Cluster IP网之间的通信,采用的是Kubermetes自己设计的一种编程方式的特殊的路由规则,与我们所熟知的IP路由有很大的不同。 |
外部系统访问 Service,采用
NodePort是解决上述问题的最直接、最有效、最常用的做法。具体做法在Service的定义里做如下扩展即可:
...spec: type: NodePort posts: - port: 8080 nodePort: 31002 selector: tier: frontend ...即这里我们可以通过nodePort:31002 来访问Service,NodePort的实现方式是在Kubernetes集群里的每个Node上为需要外部访问的Service开启个对应的TCP监听端口,外部系统只要用任意一个Node的IP地址+具体的NodePort端口即可访问此服务,在任意Node上运行netstat命令,我们就可以看到有NodePort端口被监听:
下面我们具体看下实际案例
NodePort方式
┌──[root@vms81.liruilongs.github.io]-[~/ansible/k8s-svc-create]└─$kubectl expose --name=blogsvc pod blog --port=80 --type=NodePortapiVersion: v1kind: Servicemetadata: creationTimestamp: "2021-12-20T17:11:03Z" labels: run: blog name: blogsvc namespace: liruilong-svc-create resourceVersion: "294057" uid: 4d350715-0210-441d-9c55-af0f31b7a090spec: clusterIP: 10.110.28.191 clusterIPs: - 10.110.28.191 externalTrafficPolicy: Cluster internalTrafficPolicy: Cluster ipFamilies: - IPv4 ipFamilyPolicy: SingleStack ports: - nodePort: 31158 port: 80 protocol: TCP targetPort: 80 selector: run: blog sessionAffinity: None type: NodePortstatus: loadBalancer: {}即我们前面的几个都是通过NodePort来服务映射,对所以工作节点映射,所以节点都可以访问,即外部通过节点IP+31158的形式访问,确定当服务太多时,端口不好维护
┌──[root@vms81.liruilongs.github.io]-[~/ansible/k8s-svc-create]└─$kubectl get svcNAME TYPE CLUSTER-IP EXTERNAL-IP PORT(S) AGEblogsvc NodePort 10.110.28.191 <none> 80:31158/TCP 23hdbsvc ClusterIP 10.102.137.59 <none> 3306/TCP49m┌──[root@vms81.liruilongs.github.io]-[~/ansible/k8s-svc-create]└─$hostPort方式
hostPort 容器映射,只能在pod所在节点映射到宿主机,这种一般不建议使用,当然静态节点觉得可以
┌──[root@vms81.liruilongs.github.io]-[~/ansible/k8s-svc-create]└─$cat pod-svc.yamlapiVersion: v1kind: Podmetadata: creationTimestamp: null labels: run: pod-svc name: pod-svcspec: containers: - image: nginx imagePullPolicy: IfNotPresent name: pod-svc ports: - containerPort: 80 hostPort: 800 resources: {} dnsPolicy: ClusterFirst restartPolicy: Alwaysstatus: {}┌──[root@vms81.liruilongs.github.io]-[~/ansible/k8s-svc-create]└─$kubectl get pods -o wideNAME READY STATUS RESTARTS AGE IP NODE NOMINATED NODE READINESS GATESpod-svc 1/1 Running 0 69s 10.244.171.172 vms82.liruilongs.github.io <none> <none>修改Service类型为ClusterIP ,从1.20开始可以直接修改,之前的版本需要删除nodepost
LoadBalancer方式
Service 负载均衡问题
NodePort还没有完全解决外部访问Service的所有问题,比如负载均衡问题,假如我们的集群中有10个Node,则此时最好有一个负载均衡器,外部的请求只需访问此负载均衡器的IP地址,由负载均衡器负责转发流量到后面某个Node的NodePort上。如图
| NodePort的负载均衡 |
|---|
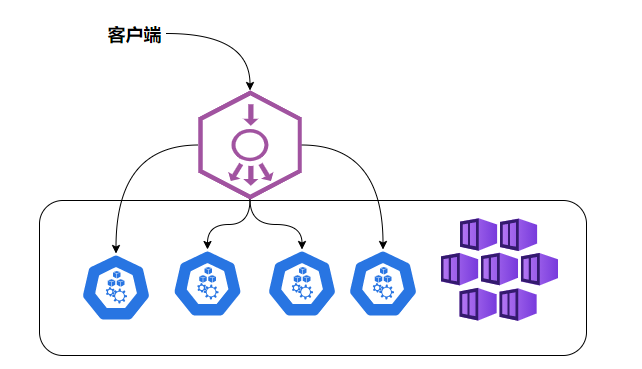 |
Load balancer组件独立于Kubernetes集群之外,通常是一个硬件的负载均衡器,或者是以软件方式实现的,例如HAProxy或者Nginx。对于每个Service,我们通常需要配置一个对应的Load balancer实例来转发流量到后端的Node上 |
Kubernetes提供了自动化的解决方案,如果我们的集群运行在谷歌的GCE公有云上,那么只要我们把Service的type-NodePort改为type-LoadBalancer,此时Kubernetes会自动创建一个对应的Load balancer实例并返回它的IP地址供外部客户端使用。当让我们也可以用一些插件来实现,如metallb等 |
LoadBalancer 需要建立服务之外的负载池。然后给Service分配一个IP。
我们直接创建一个LoadBalancer的Service的时候,会一直处于pending状态,是因为我们没有对应的云负载均衡器
┌──[root@vms81.liruilongs.github.io]-[~/ansible/k8s-svc-create]└─$kubectl expose --name=blogsvc pod blog --port=80 --type=LoadBalancerservice/blogsvc exposed┌──[root@vms81.liruilongs.github.io]-[~/ansible/k8s-svc-create]└─$kubectl get svc -o wide | grep blogsvcblogsvc LoadBalancer 10.106.28.175 <pending> 80:32745/TCP 26s run=blog┌──[root@vms81.liruilongs.github.io]-[~/ansible/k8s-svc-create]└─$Metallb可以通过k8s原生的方式提供LB类型的Service支持
| 使用: metallb https://metallb.universe.tf/ |
|---|
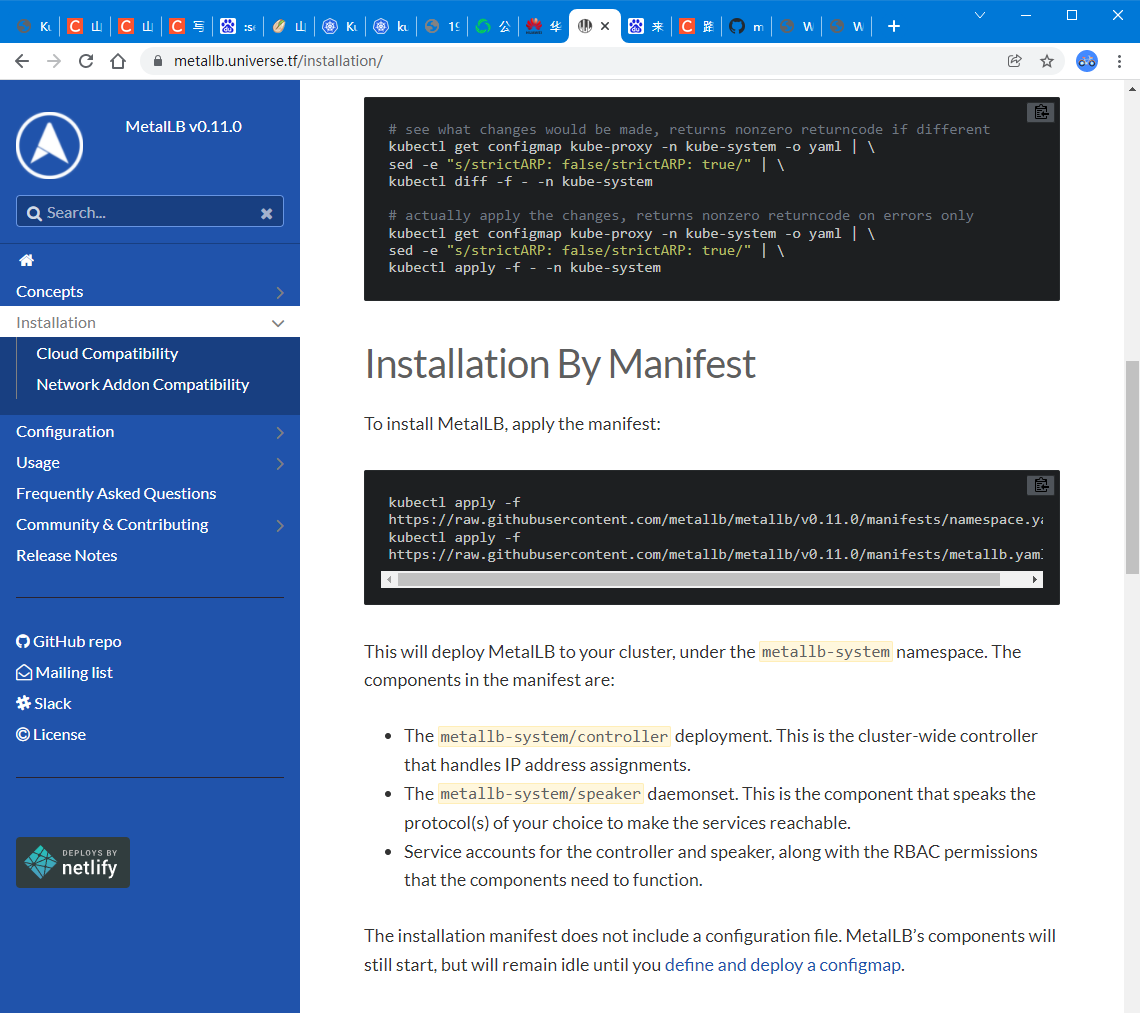 |
| 资源文件https://github.com/metallb/metallb/blob/main/manifests/metallb.yaml |
| 创建命名空间 |
┌──[root@vms81.liruilongs.github.io]-[~/ansible/k8s-svc-create]└─$kubectl create ns metallb-systemnamespace/metallb-system created┌──[root@vms81.liruilongs.github.io]-[~/ansible/k8s-svc-create]└─$kubectl config set-context $(kubectl config current-context) --namespace=metallb-systemContext "kubernetes-admin@kubernetes" modified.┌──[root@vms81.liruilongs.github.io]-[~/ansible/k8s-svc-create]└─$:set paste 解决粘贴混乱的问题
创建metallb
┌──[root@vms81.liruilongs.github.io]-[~/ansible/k8s-svc-create/metalld]└─$kubectl apply -f metallb.yaml┌──[root@vms81.liruilongs.github.io]-[~/ansible/k8s-svc-create/metalld]└─$kubectl get pods -o wideNAME READY STATUS RESTARTS AGE IP NODE NOMINATED NODE READINESS GATEScontroller-66d9554cc-8rxq8 1/1 Running 0 3m36s 10.244.171.170 vms82.liruilongs.github.io <none> <none>speaker-bbl94 1/1 Running 0 3m36s 192.168.26.83 vms83.liruilongs.github.io <none> <none>speaker-ckbzj 1/1 Running 0 3m36s 192.168.26.81 vms81.liruilongs.github.io <none> <none>speaker-djmpr 1/1 Running 0 3m36s 192.168.26.82 vms82.liruilongs.github.io <none> <none>┌──[root@vms81.liruilongs.github.io]-[~/ansible/k8s-svc-create/metalld]└─$创建地址池
┌──[root@vms81.liruilongs.github.io]-[~/ansible/k8s-svc-create/metalld]└─$vim pool.yaml┌──[root@vms81.liruilongs.github.io]-[~/ansible/k8s-svc-create/metalld]└─$kubectl apply -f pool.yamlconfigmap/config created┌──[root@vms81.liruilongs.github.io]-[~/ansible/k8s-svc-create/metalld]└─$cat pool.yamlapiVersion: v1kind: ConfigMapmetadata: namespace: metallb-system name: configdata: config: | address-pools: - name: default protocol: layer2 addresses: - 192.168.26.240-192.168.26.250┌──[root@vms81.liruilongs.github.io]-[~/ansible/k8s-svc-create/metalld]└─$使用type=LoadBalancer的配置通过metallb分配192.168.26.240这个地址给blogsvc
┌──[root@vms81.liruilongs.github.io]-[~/ansible/k8s-svc-create/metalld]└─$kubectl get svcNo resources found in metallb-system namespace.┌──[root@vms81.liruilongs.github.io]-[~/ansible/k8s-svc-create/metalld]└─$kubectl config set-context $(kubectl config current-context) --namespace=liruilong-svc-createContext "kubernetes-admin@kubernetes" modified.┌──[root@vms81.liruilongs.github.io]-[~/ansible/k8s-svc-create/metalld]└─$kubectl get svcNAME TYPE CLUSTER-IP EXTERNAL-IP PORT(S) AGEdbsvc ClusterIP 10.102.137.59 <none> 3306/TCP 101m┌──[root@vms81.liruilongs.github.io]-[~/ansible/k8s-svc-create/metalld]└─$kubectl expose --name=blogsvc pod blog --port=80 --type=LoadBalancerservice/blogsvc exposed┌──[root@vms81.liruilongs.github.io]-[~/ansible/k8s-svc-create/metalld]└─$kubectl get svc -o wideNAME TYPE CLUSTER-IPEXTERNAL-IP PORT(S) AGE SELECTORblogsvc LoadBalancer 10.108.117.197 192.168.26.240 80:30230/TCP 9s run=blogdbsvc ClusterIP 10.102.137.59 <none> 3306/TCP101m run=dbpod直接访问192.168.26.240就可以了 |
|---|
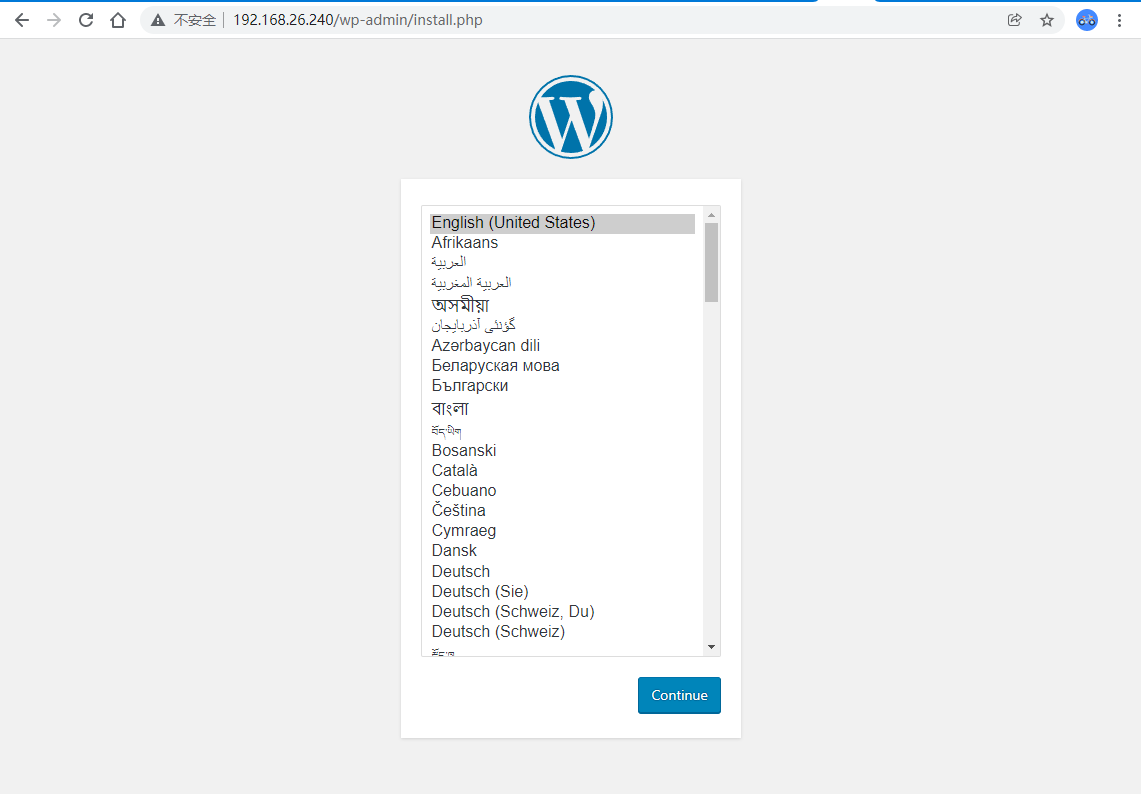 |
在创建一个也可以访问
┌──[root@vms81.liruilongs.github.io]-[~/ansible/k8s-svc-create/metalld]└─$kubectl expose --name=blogsvc-1 pod blog --port=80 --type=LoadBalancerservice/blogsvc-1 exposed┌──[root@vms81.liruilongs.github.io]-[~/ansible/k8s-svc-create/metalld]└─$kubectl get svc -o wideNAME TYPE CLUSTER-IPEXTERNAL-IP PORT(S) AGE SELECTORblogsvc LoadBalancer 10.108.117.197 192.168.26.240 80:30230/TCP 11m run=blogblogsvc-1 LoadBalancer 10.110.58.143 192.168.26.241 80:31827/TCP 3s run=blogdbsvcClusterIP 10.102.137.59 <none> 3306/TCP113m run=dbpod┌──[root@vms81.liruilongs.github.io]-[~/ansible/k8s-svc-create/metalld]└─$| 也可以访问 |
|---|
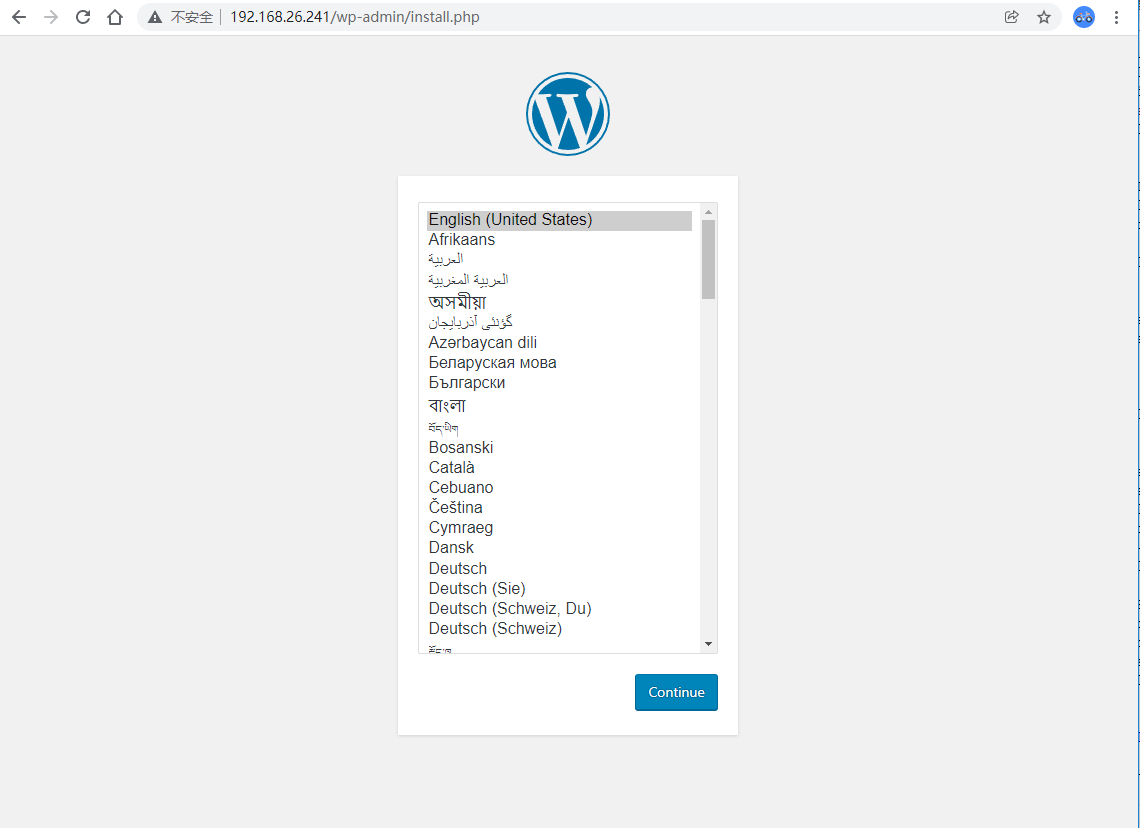 |
ingress方式(推荐)
| Ingress |
|---|
| Ingress 是对集群中服务的外部访问进行管理的 API 对象,典型的访问方式是 HTTP。 |
| Ingress 可以提供负载均衡、SSL 终结和基于名称的虚拟托管。 |
| Ingress 公开了从集群外部到集群内服务的 HTTP 和 HTTPS 路由。 流量路由由 Ingress 资源上定义的规则控制。 |
| 个人理解,就是实现了一个Ngixn功能,可以更具路由规则分配流量等 |
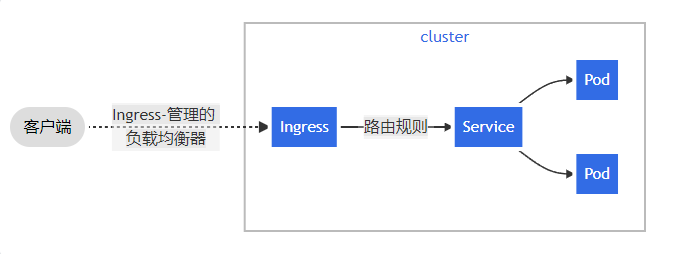 |
| 命名空间里配置ingress规则,嵌入到控制器nginx-反向代理的方式(ingress-nginx-controller) |
可以将 Ingress 配置为服务提供外部可访问的 URL、负载均衡流量、终止 SSL/TLS,以及提供基于名称的虚拟主机等能力。 Ingress 控制器 通常负责通过负载均衡器来实现 Ingress,尽管它也可以配置边缘路由器或其他前端来帮助处理流量。 |
Ingress 不会公开任意端口或协议。 将 HTTP 和 HTTPS 以外的服务公开到 Internet 时,通常使用 Service.Type=NodePort 或 Service.Type=LoadBalancer 类型的服务 |
ingress-nginx-controller 部署
需要的镜像
┌──[root@vms81.liruilongs.github.io]-[~/ansible/k8s-svc-create]└─$grep image nginx-controller.yaml image: docker.io/liangjw/ingress-nginx-controller:v1.0.1 imagePullPolicy: IfNotPresent image: docker.io/liangjw/kube-webhook-certgen:v1.1.1 imagePullPolicy: IfNotPresent image: docker.io/liangjw/kube-webhook-certgen:v1.1.1 imagePullPolicy: IfNotPresent┌──[root@vms81.liruilongs.github.io]-[~/ansible/k8s-svc-create]└─$准备工作,镜像上传,导入
┌──[root@vms81.liruilongs.github.io]-[~/ansible]└─$ansible node -m copy -a "dest=/root/ src=./../ingress-nginx-controller-img.tar"192.168.26.82 | CHANGED => { "ansible_facts": { "discovered_interpreter_python": "/usr/bin/python" }, "changed": true, "checksum": "a3c2f87fd640c0bfecebeab24369c7ca8d6f0fa0", "dest": "/root/ingress-nginx-controller-img.tar", "gid": 0, "group": "root", "md5sum": "d5bf7924cb3c61104f7a07189a2e6ebd", "mode": "0644", "owner": "root", "size": 334879744, "src": "/root/.ansible/tmp/ansible-tmp-1640207772.53-9140-99388332454846/source", "state": "file", "uid": 0}192.168.26.83 | CHANGED => { "ansible_facts": { "discovered_interpreter_python": "/usr/bin/python" }, "changed": true, "checksum": "a3c2f87fd640c0bfecebeab24369c7ca8d6f0fa0", "dest": "/root/ingress-nginx-controller-img.tar", "gid": 0, "group": "root", "md5sum": "d5bf7924cb3c61104f7a07189a2e6ebd", "mode": "0644", "owner": "root", "size": 334879744, "src": "/root/.ansible/tmp/ansible-tmp-1640207772.55-9142-78097462005167/source", "state": "file", "uid": 0}┌──[root@vms81.liruilongs.github.io]-[~/ansible]└─$ansible node -m shell -a "docker load -i /root/ingress-nginx-controller-img.tar"创建ingress控制器ingress-nginx-controller
┌──[root@vms81.liruilongs.github.io]-[~/ansible/k8s-svc-create]└─$kubectl apply -f nginx-controller.yaml┌──[root@vms81.liruilongs.github.io]-[~/ansible/k8s-svc-create]└─$kubectl get pods -n ingress-nginx -o wideNAME READY STATUS RESTARTS AGE IP NODE NOMINATED NODE READINESS GATESingress-nginx-admission-create--1-hvvxd 0/1 Completed 0 89s 10.244.171.171 vms82.liruilongs.github.io <none> <none>ingress-nginx-admission-patch--1-g4ffs 0/1 Completed 0 89s 10.244.70.7 vms83.liruilongs.github.io <none> <none>ingress-nginx-controller-744d4fc6b7-7fcfj 1/1 Running 0 90s 192.168.26.83 vms83.liruilongs.github.io <none> <none>┌──[root@vms81.liruilongs.github.io]-[~/ansible/k8s-svc-create]└─$配置DNS 创建域名到服务的映射
┌──[root@vms81.liruilongs.github.io]-[~/ansible]└─$ansible 192.168.26.83 -m shell -a "echo -e '192.168.26.83 liruilongs.nginx1\n192.168.26.83 liruilongs.nginx2\n192.168.26.83 liruilongs.nginx3' >> /etc/hosts"192.168.26.83 | CHANGED | rc=0 >>┌──[root@vms81.liruilongs.github.io]-[~/ansible]└─$ansible 192.168.26.83 -m shell -a "cat /etc/hosts"192.168.26.83 | CHANGED | rc=0 >>127.0.0.1 localhost localhost.localdomain localhost4 localhost4.localdomain4::1 localhost localhost.localdomain localhost6 localhost6.localdomain6192.168.26.81 vms81.liruilongs.github.io vms81192.168.26.82 vms82.liruilongs.github.io vms82192.168.26.83 vms83.liruilongs.github.io vms83192.168.26.83 liruilongs.nginx1192.168.26.83 liruilongs.nginx2192.168.26.83 liruilongs.nginx3┌──[root@vms81.liruilongs.github.io]-[~/ansible]└─$服务模拟,创建三个pod做服务
┌──[root@vms81.liruilongs.github.io]-[~/ansible/k8s-svc-create]└─$cat pod.yamlapiVersion: v1kind: Podmetadata: creationTimestamp: null labels: run: pod-svc name: pod-svcspec: containers: - image: nginx imagePullPolicy: IfNotPresent name: pod-svc resources: {} dnsPolicy: ClusterFirst restartPolicy: Alwaysstatus: {}┌──[root@vms81.liruilongs.github.io]-[~/ansible/k8s-svc-create]└─$kubectl apply -f pod.yamlpod/pod-svc created┌──[root@vms81.liruilongs.github.io]-[~/ansible/k8s-svc-create]└─$sed 's/pod-svc/pod-svc-1/' pod.yaml > pod-1.yaml┌──[root@vms81.liruilongs.github.io]-[~/ansible/k8s-svc-create]└─$sed 's/pod-svc/pod-svc-2/' pod.yaml > pod-2.yaml┌──[root@vms81.liruilongs.github.io]-[~/ansible/k8s-svc-create]└─$kubectl apply -f pod-1.yamlpod/pod-svc-1 created┌──[root@vms81.liruilongs.github.io]-[~/ansible/k8s-svc-create]└─$kubectl apply -f pod-2.yamlpod/pod-svc-2 created┌──[root@vms81.liruilongs.github.io]-[~/ansible/k8s-svc-create]└─$kubectl get pods -o wideNAME READY STATUS RESTARTS AGE IP NODE NOMINATED NODE READINESS GATESpod-svc 1/1 Running 0 2m42s 10.244.171.174 vms82.liruilongs.github.io <none> <none>pod-svc-1 1/1 Running 0 80s 10.244.171.175 vms82.liruilongs.github.io <none> <none>pod-svc-2 1/1 Running 0 70s 10.244.171.176 vms82.liruilongs.github.io <none> <none>┌──[root@vms81.liruilongs.github.io]-[~/ansible/k8s-svc-create]└─$修改Nginx的主页,根据pod创建三个服务SVC
┌──[root@vms81.liruilongs.github.io]-[~/ansible/k8s-svc-create]└─$kubectl get pods --show-labelsNAME READY STATUS RESTARTS AGE LABELSpod-svc 1/1 Running 0 3m7s run=pod-svcpod-svc-1 1/1 Running 0 105s run=pod-svc-1pod-svc-2 1/1 Running 0 95s run=pod-svc-2┌──[root@vms81.liruilongs.github.io]-[~/ansible/k8s-svc-create]└─$serve=pod-svc┌──[root@vms81.liruilongs.github.io]-[~/ansible/k8s-svc-create]└─$kubectl exec -it $serve -- sh -c "echo $serve > /usr/share/nginx/html/index.html"┌──[root@vms81.liruilongs.github.io]-[~/ansible/k8s-svc-create]└─$kubectl expose --name=$serve-svc pod $serve --port=80service/pod-svc-svc exposed┌──[root@vms81.liruilongs.github.io]-[~/ansible/k8s-svc-create]└─$serve=pod-svc-1┌──[root@vms81.liruilongs.github.io]-[~/ansible/k8s-svc-create]└─$kubectl exec -it $serve -- sh -c "echo $serve > /usr/share/nginx/html/index.html"┌──[root@vms81.liruilongs.github.io]-[~/ansible/k8s-svc-create]└─$kubectl expose --name=$serve-svc pod $serve --port=80service/pod-svc-1-svc exposed┌──[root@vms81.liruilongs.github.io]-[~/ansible/k8s-svc-create]└─$serve=pod-svc-2┌──[root@vms81.liruilongs.github.io]-[~/ansible/k8s-svc-create]└─$kubectl exec -it $serve -- sh -c "echo $serve > /usr/share/nginx/html/index.html"┌──[root@vms81.liruilongs.github.io]-[~/ansible/k8s-svc-create]└─$kubectl expose --name=$serve-svc pod $serve --port=80service/pod-svc-2-svc exposed创建了三个SVC做负载模拟
┌──[root@vms81.liruilongs.github.io]-[~/ansible/k8s-svc-create]└─$kubectl get svc -o wideNAME TYPE CLUSTER-IP EXTERNAL-IP PORT(S) AGE SELECTORpod-svc-1-svc ClusterIP 10.99.80.121 <none> 80/TCP 94s run=pod-svc-1pod-svc-2-svc ClusterIP 10.110.40.30 <none> 80/TCP 107s run=pod-svc-2pod-svc-svc ClusterIP 10.96.152.5 <none> 80/TCP 85s run=pod-svc┌──[root@vms81.liruilongs.github.io]-[~/ansible/k8s-svc-create]└─$┌──[root@vms81.liruilongs.github.io]-[~/ansible/k8s-svc-create]└─$kubectl get ingNo resources found in liruilong-svc-create namespace.┌──[root@vms81.liruilongs.github.io]-[~/ansible/k8s-svc-create]└─$vim ingress.yaml创建 Ingress,当然这里只是简单测试,可以更具具体业务情况配置复杂的路由策略
ingress.yaml
apiVersion: networking.k8s.io/v1kind: Ingressmetadata: name: my-ingress annotations: kubernetes.io/ingress.class: "nginx" #必须要加spec: rules: - host: liruilongs.nginx1 http: paths: - path: / pathType: Prefix backend: service: name: pod-svc-svc port:number: 80 - host: liruilongs.nginx2 http: paths: - path: / pathType: Prefix backend: service: name: pod-svc-1-svc port:number: 80 - host: liruilongs.nginx3 http: paths: - path: / pathType: Prefix backend: service: name: pod-svc-2-svc port:number: 80┌──[root@vms81.liruilongs.github.io]-[~/ansible/k8s-svc-create]└─$kubectl apply -f ingress.yamlingress.networking.k8s.io/my-ingress created┌──[root@vms81.liruilongs.github.io]-[~/ansible/k8s-svc-create]└─$kubectl get ingNAME CLASS HOSTS ADDRESS PORTS AGEmy-ingress <none> liruilongs.nginx1,liruilongs.nginx2,liruilongs.nginx3 80 17s负载测试
┌──[root@vms81.liruilongs.github.io]-[~/ansible]└─$ansible 192.168.26.83 -m shell -a "curl liruilongs.nginx1"192.168.26.83 | CHANGED | rc=0 >>pod-svc ┌──[root@vms81.liruilongs.github.io]-[~/ansible]└─$ansible 192.168.26.83 -m shell -a "curl liruilongs.nginx2"192.168.26.83 | CHANGED | rc=0 >>pod-svc-1 DNS解析的地址为控制器的地址,这里控制器使用的是docker内部网络的方式,即直接把端口映射宿主机了
┌──[root@vms81.liruilongs.github.io]-[~/ansible/k8s-svc-create]└─$grep -i hostN nginx-controller.yaml hostNetwork: true
