用鸿蒙开发AI应用(六)UI篇

前言
上一篇,我们在鸿蒙上写了一个HDF驱动并操作了一下LED硬件,这一篇我们来尝试一下构建一个有简单界面的App,体验一下鸿蒙的前端开发流程。


环境准备
1. 安装DevEco Studio
解压相应的压缩包(文末附下载链接),这里以win10为例,双击deveco-studio-2.0.12.201.exe
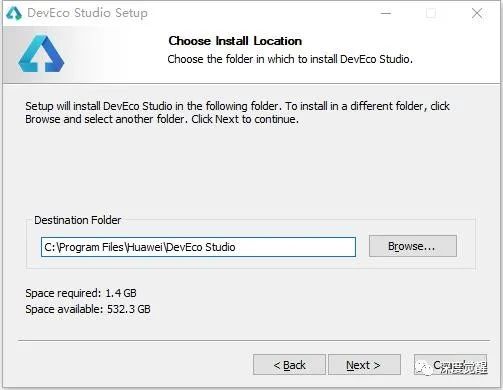
指定安装目录
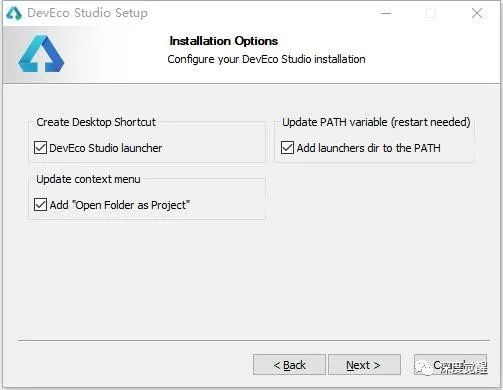
设置可选快捷方式和环境变量
一路下一步即可。
同意用户协议后,就能正常启动了。

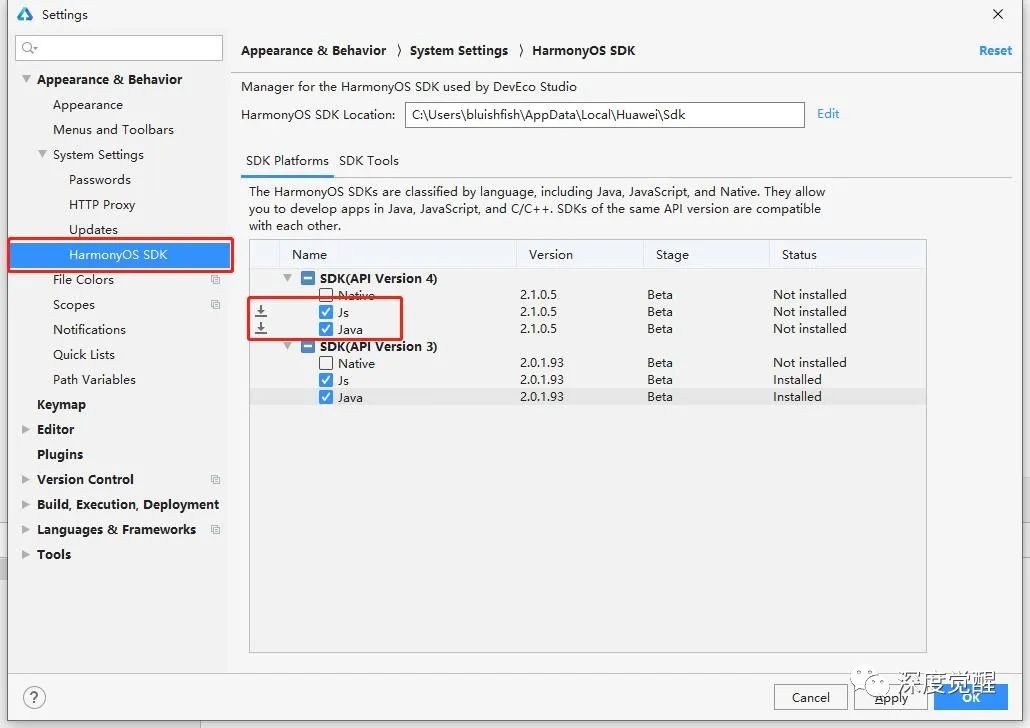
2. 更新sdk
在菜单 Setting->HarmonyOS SDK->SDK Platforms中,选择Js和Java,安装新版的SDK。
同样在SDK Tools中,选中新版的Previewer
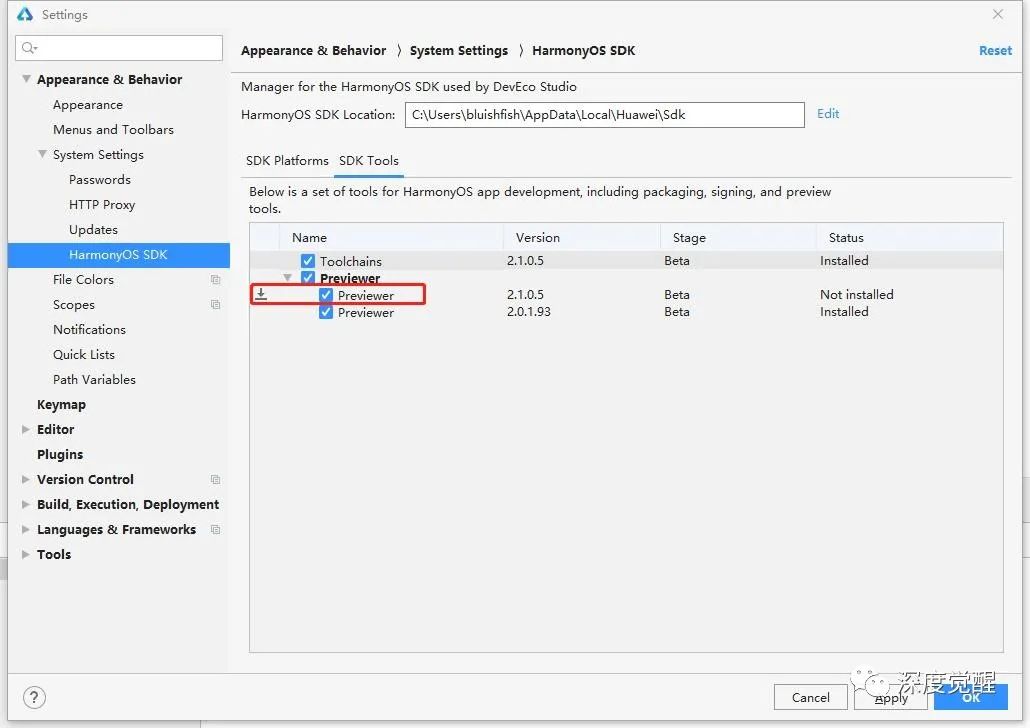
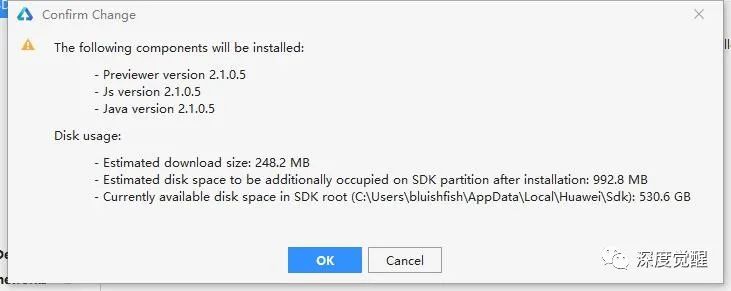
点击Apply更新
新建项目
点击菜单File->New Project...,选择智慧屏Smart Vision,创建一个空模板应用。
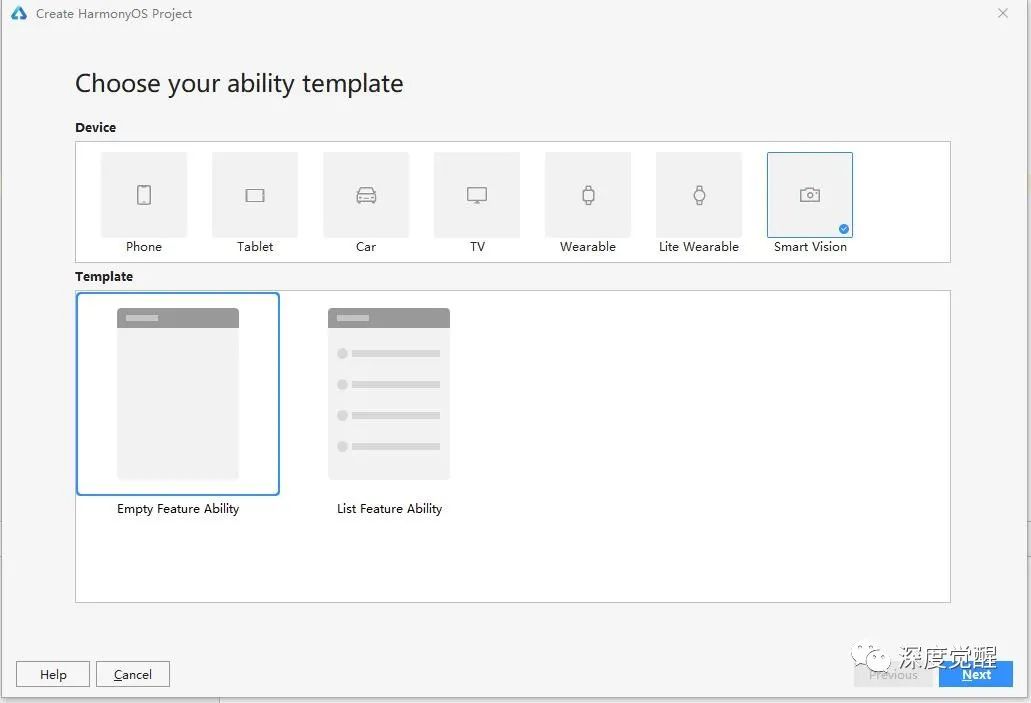
填入项目名称MyUiAPP,点击完成就能创建一个工程了。
遇到 gradle下载太慢或版本差异的,可以直接在以下网址用工具下载
https://services.gradle.org/distributions/目录结构
我们先分析一下目录结构,做Android开发的会倍感亲切。

1. APP
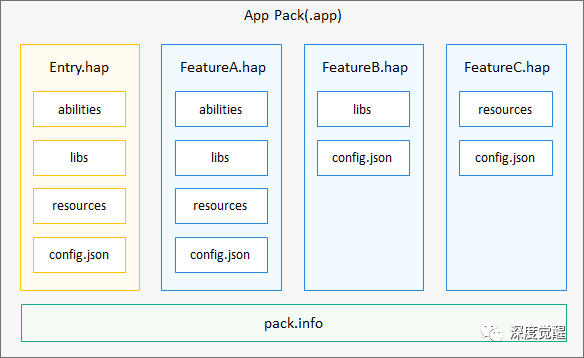
HarmonyOS的应用软件包以APP Pack(Application Package)形式发布,它是由一个或多个HAP(HarmonyOS Ability Package)以及描述每个HAP属性的pack.info组成。HAP是Ability的部署包,HarmonyOS应用代码围绕Ability组件展开。
一个HAP是由代码、资源、第三方库及应用配置文件组成的模块包,可分为entry和feature两种模块类型。
-
「entry」:应用的主模块。一个APP中,对于同一设备类型必须有且只有一个
entry类型的HAP,可独立安装运行。 -
「feature」:应用的动态特性模块。一个
APP可以包含一个或多个feature类型的HAP,也可以不含。只有包含Ability的HAP才能够独立运行。
2. Ability
Ability是应用所具备的能力的抽象,一个应用可以包含一个或多个Ability。Ability分为两种类型:FA(Feature Ability)和PA(Particle Ability)。FA/PA是应用的基本组成单元,能够实现特定的业务功能。FA有UI界面,而PA无UI界面。
3. 资源文件
应用的资源文件(字符串、图片、音频等)统一存放于resources目录下,便于开发者使用和维护。resources目录包括两大类目录,一类为base目录与限定词目录,另一类为rawfile目录。
4. 配置文件
配置文件(config.json)是应用的Ability信息,用于声明应用的Ability,以及应用所需权限等信息。
-
应用的全局配置信息,包含应用的包名、生产厂商、版本号等基本信息。
-
应用在具体设备上的配置信息,包含应用的备份恢复、网络安全等能力。
-
HAP包的配置信息,包含每个Ability必须定义的基本属性(如包名、类名、类型以及Ability提供的能力),以及应用访问系统或其他应用受保护部分所需的权限等。
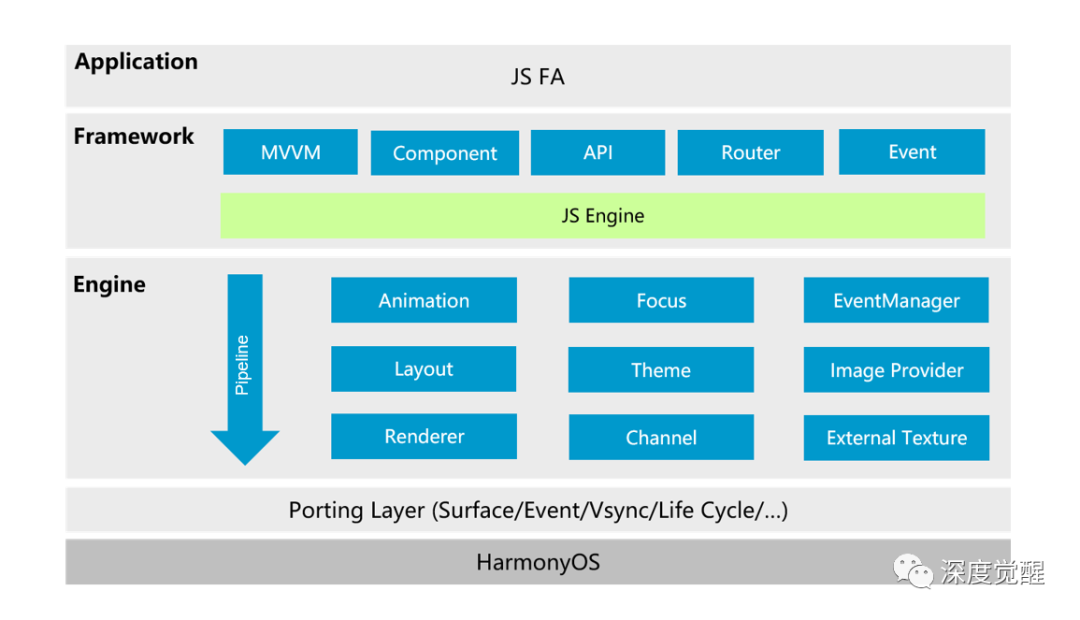
5. JS UI 框架
JS UI框架是一种跨设备的高性能UI开发框架,支持声明式编程和跨设备多态UI。
-
声明式编程
JS UI框架采用类HTML和CSS声明式编程语言作为页面布局和页面样式的开发语言,页面业务逻辑则支持ECMAScript规范的JavaScript语言。JS UI框架提供的声明式编程,可以让开发者避免编写UI状态切换的代码,视图配置信息更加直观。 -
跨设备
开发框架架构上支持
UI跨设备显示能力,运行时自动映射到不同设备类型,开发者无感知,降低开发者多设备适配成本。 -
高性能
开发框架包含了许多核心的控件,如列表、图片和各类容器组件等,针对声明式语法进行了渲染流程的优化。
JS UI框架包括应用层(Application)、前端框架层(Framework)、引擎层(Engine)和平台适配层(Porting Layer)。
空气质量监测 UI
1. 创建首页面
空气质量监测App包含两个界面(Page),工程创建完成后会生成一个名为index的Page,可以作为首页。
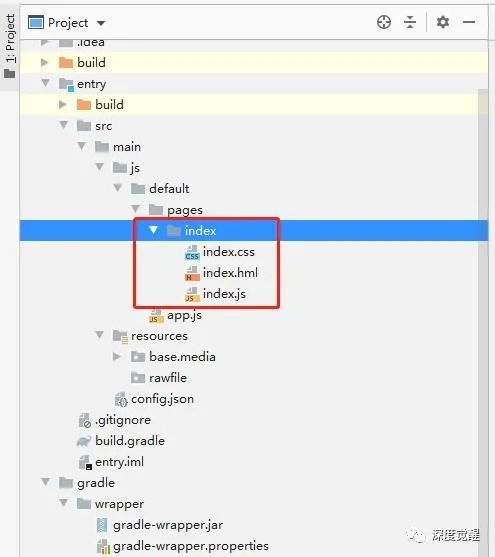
2. 创建详情页
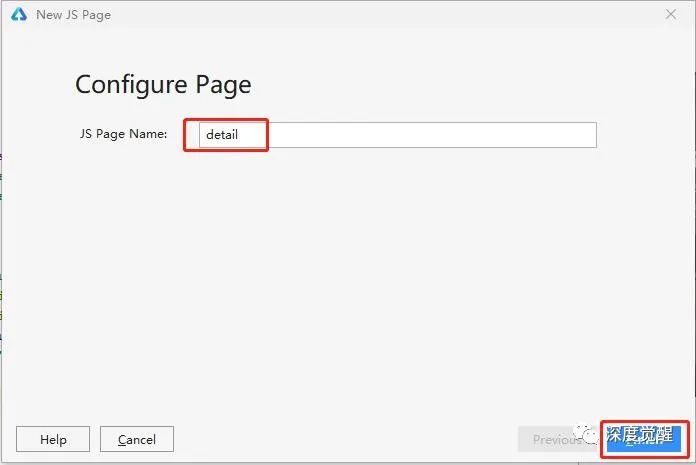
在pages目录按右键,弹出的菜单中选择New->JS Page。
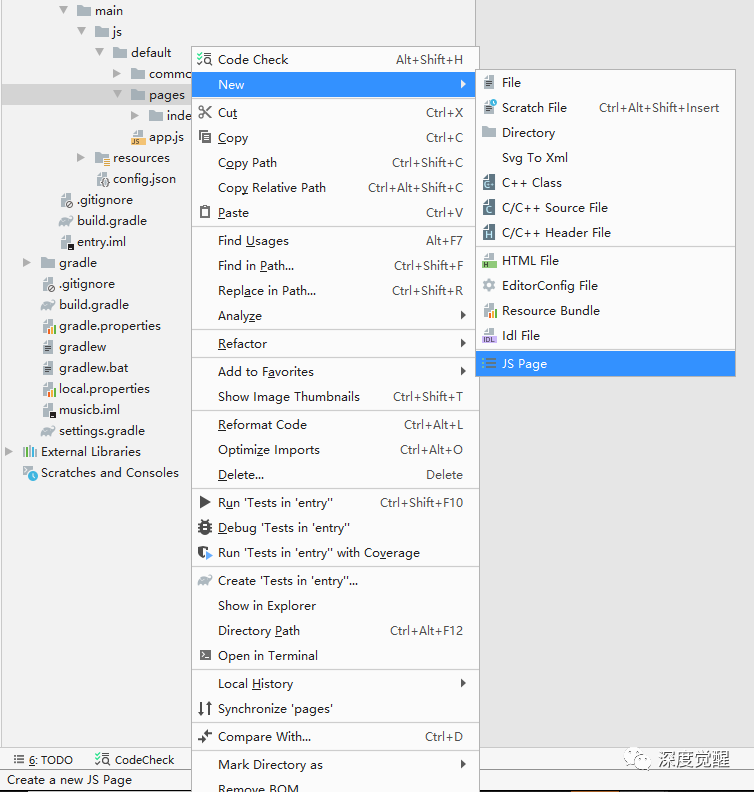
输入页面名称detail,
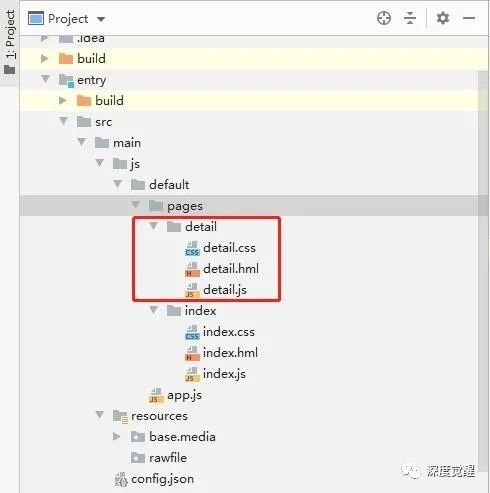
详情页创建完成后应用工程目录如下图所示,每个Page包括三个文件:布局文件hml、样式文件css、业务逻辑代码js。
3. 开发首页
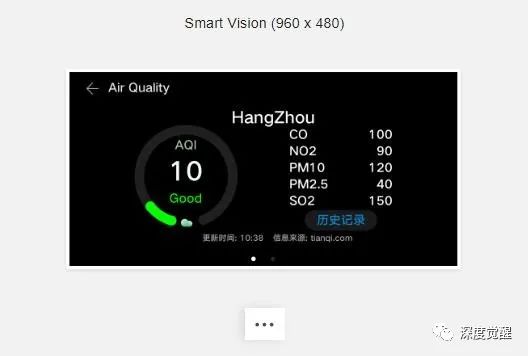
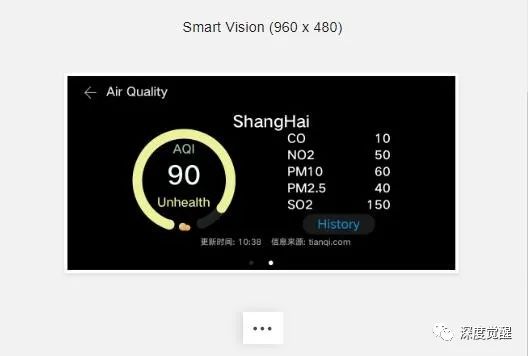
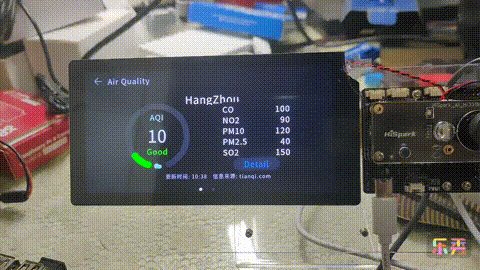
应用首页主要展示城市的空气质量概况。首页总共有两屏(可以根据需求设置多屏),每屏显示一个城市的空气质量信息:主要包括AQI指数、城市名称、污染物指数、更新时间和信息来源等数据。
3.1 创建根节点
修改entry/src/main/js/default/pages/index/index.hml,加入根节点div:
3.2 创建样式
修改entry/src/main/js/default/pages/index/index.css
.container { flex-direction: column; height: 480px; width: 960px;}3.3 添加标题栏
标题栏包括一个退出按钮和一个标题,两个控件是横向排列
空气质量 注意,这里要先导入common/ic_back.png图标资源。
3.4 添加标题栏样式
修改entry/src/main/js/default/pages/detail/detail.css,添加以下代码,设置组件的高度、边距、颜色等属性。
.header { width: 960px; height: 72px;}.back { width: 36px; height: 36px; margin-left: 39px; margin-top: 23px;}.title { width: 296px; height: 40px; margin-top: 20px; margin-left: 21px; color: #e6e6e6;}3.5 添加退出事件
onclick="exitApp" 设置了div组件的click事件,当在标题栏上触发点击事件时,就会执行函数exitApp,该函数位于index.js文件中,代码如下:
exitApp() { console.log('start exit'); app.terminate(); console.log('end exit');}app.terminate()函数实现了程序退出功能;在使用该函数前,需要引入app模块,在index.js文件的最上方写如下代码:
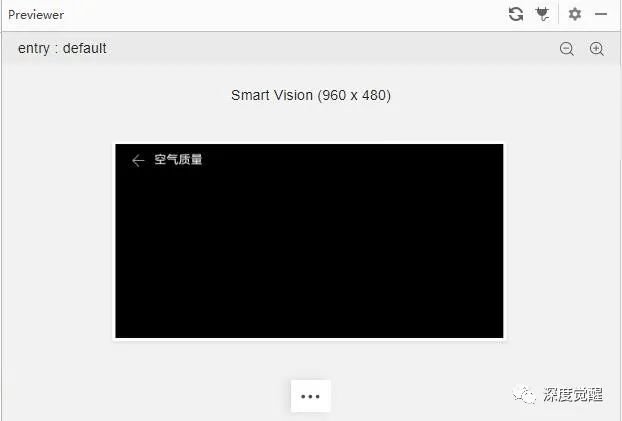
import app from '@system.app'在 Previewer 窗口中,可以预览界面效果
3.6 滑动组件
实现城市空气质量信息的多屏左右滑动,需要使用“swiper”组件。
在根节点中添加一个子节点swiper, 修改index.hml
添加样式,修改index.css
.swiper { height: 385px; width: 960px;}绑定swiperPage变量,swiperChange事件,修改index.js
//引入router模块,用户页面跳转import router from'@system.router'import app from '@system.app' export default { //定义参数 data: { //默认是第一页 swiperPage: 0 }, onInit () { }, exitApp(){ console.log('start exit'); app.terminate(); console.log('end exit'); }, //swiper滑动回调事件,保存当前swiper的index值,每次滑动都会将index值保存在swiperPage变量中 swiperChange (e) { this.swiperPage = e.index; }}在swiper中添加两个子组件stack(绝对布局),每个stack组件内分别添加text、image、progress等组件来显示对应的信息。
空气质量 {{airData[0].airQuality}} {{airData[0].location}} {{ airData[0].detailData }} AQI CO 100 NO2 90 PM10 120 PM2.5 40 SO2 150 {{airData[1].airQuality}} {{airData[1].location}} {{airData[1].detailData}} AQI CO 10 NO2 50 PM10 60 PM2.5 40 SO2 150 3.7 页面位置指示器
添加页面位置指示器:由于当前swiper不支持设置indicator,需要开发者自己来实现该效果。在根节点中添加一个子组件div,并设置相应样式;然后在该div中添加两个子组件div,设置两个div的border-radius,并在swiper滑动事件中动态改变对应div的背景色来实现该效果。
修改index.hml,在swiper组件后加入以下代码:
3.8 新增文字样式
修改 index.css
.aqi-value { text-align: center; font-size: 65px; color: #f0ffff; width: 156px; height: 92px; top: 134px; left: 210px;}.aqi { text-align: center; color: #a2c4a2; width: 156px; height: 45px; top: 90px; left: 210px;}.airquality { top: 222px; text-align: center; width: 156px; height: 45px; left: 210px;}.image { top: 285px; left: 274px; width: 32px; height: 32px;}.location-text { text-align: center; color: #ffffff; width: 250px; height: 52px; font-size: 40px; left: 380px; top: 16px;}.container { flex-direction: column; height: 480px; width: 960px;}.circle-progress { center-x: 128px; center-y: 128px; radius: 128px; startAngle: 198; totalAngle: 320; strokeWidth: 24px; width: 256px; height: 256px; left: 160px; top: 58px;}.detail { width: 256px; height: 265px; left: 544px; top: 58px; flex-direction: column;}.text-wrapper { width: 256px; height: 35px; margin-top: 6px;}.gas-name { width: 128px; height: 35px; text-align: left;}.gas-value { width: 128px; height: 35px; text-align: right;}.btn { width: 180px; height: 50px; margin-top: 6px; margin-left: 38px; background-color: #1a1a1a; color: #1085CE;}.footer { top: 326px; width: 960px; height: 28px;}.header { width: 960px; height: 72px;}.back { width: 36px; height: 36px; margin-left: 39px; margin-top: 23px;}.title { width: 296px; height: 40px; margin-top: 20px; margin-left: 21px; color: #e6e6e6;}.swiper { height: 385px; width: 960px;}.images { width: 60px; height: 15px; margin-left: 450px;}.update-time { width: 480px; height: 28px; font-size: 20px; color: #A9A9A9; text-align: right;}.info-source { width: 450px; height: 28px; font-size: 20px; color: #A9A9A9; text-align: left; margin-left: 24px;}.circle-div { width: 12px; height: 12px; border-radius: 6px;}3.9 实现页面逻辑
修改index.js,绑定页面数据data。初始化时,根据不同的数值显示不同的字体和图片onInit。实现页面跳转openDetail,将当前页面索引传递给detail页面。滑动触发后swiperChange改变指示位置。
//引入router模块,用户页面跳转import router from'@system.router'import app from '@system.app'export default {//定义参数 data: { //页面绑定数据 textColor1: "#00ff00", textColor2: "#00ff00", bgColor1: "#669966", bgColor2: "#669966", //默认是第一页 swiperPage: 0, percent1: 10, percent2: 90, iconUncheckedColor: '#262626', iconcheckedColor: '#ffffff', iconcheckedBR: '6px', src1: "common/cloud_green.png", src2: "common/cloud_green.png", airData: [ { location: "HangZhou", airQuality: "Good", detailData: 10 }, { location: "ShangHai", airQuality: "Unhealth", detailData: 90 } ] }, onInit () { //根据数值的不同,设置不同的字体、背景颜色和图片 if(this.airData[0].detailData > 100){ this.src1 = 'common/cloud_red.png'; this.textColor1 = '#ff0000'; this.bgColor1 = '#9d7462'; } else if(50 < this.airData[0].detailData && this.airData[0].detailData 100){ this.src2 = 'common/cloud_red.png'; this.textColor2 = '#ff0000'; this.bgColor2 = '#9d7462'; } else if(50 < this.airData[1].detailData && this.airData[1].detailData <= 100){ this.src2 = 'common/cloud_yellow.png'; this.textColor2 = '#ecf19a'; this.bgColor2 = '#9d9d62'; } if(this.selectedCityIndex){ this.swiperPage = this.selectedCityIndex; if(this.swiperPage == 0){ this.iconcheckedColor = '#ffffff'; this.iconUncheckedColor = '#262626'; }else{ this.iconcheckedColor = '#262626'; this.iconUncheckedColor = '#ffffff'; } } }, //跳转到详情页面 openDetail () { router.replace({ uri: 'pages/detail/detail', params: {selectedCityIndex:this.swiperPage} }); }, //退出应用 exitApp(){ console.log('start exit'); app.terminate(); console.log('end exit'); }, //swiper滑动回调事件,保存当前swiper的index值,每次滑动都会将index值保存在swiperPage变量中 swiperChange (e) { this.swiperPage = e.index; if(e.index == 0){ this.iconcheckedColor = '#ffffff'; this.iconUncheckedColor = '#262626'; }else{ this.iconcheckedColor = '#262626'; this.iconUncheckedColor = '#ffffff'; } }}预览效果如下:
4. 开发详情页
详情页以图表的形式展示一周内空气质量指标值。本页面由两部分组成:标题栏和图表栏;在图表栏,考虑显示效果,我们使用多个div替代chart组件来实现图表功能。
4.1 添加标题栏
修改 entry/src/main/js/default/pages/detail/detail.hml
历史记录 4.2 添加图表栏
添加城市位置到list-item-title,图表到list-item-chart
{{location}} 4.3 添加图表
CO4.4 添加样式
.location { text-align: center; color: #ffffff; width: 960px; height: 52px; font-size: 40px;}.container { height: 480px; width: 960px; flex-direction: column;}.header { width: 960px; height: 72px;}.back { width: 36px; height: 36px; margin-left: 39px; margin-top: 23px;}.title { width: 296px; height: 40px; margin-top: 20px; margin-left: 21px; color: #e6e6e6;}.chart-list { width: 960px; height: 408px;}.list-item-title { width: 960px; height: 52px;}.list-item-chart { width: 960px; height: 280px;}.chart-wrapper { width: 308px; height: 256px; flex-direction: column;}.gas-name { width: 308px; height: 35px; text-align: left;}.chart { width: 308px; height: 155px; margin-top: 10px; justify-content: flex-start; align-items: flex-end;}.chart-item { width: 24px; margin-left: 18px; border-radius: 3px;}.white-line { width: 308px; height: 2px; background-color: #ffffff; margin-top: 22px;}.week { width: 308px; height: 17px; margin-top: 6px; border-color: #ffffff; border-radius: 2px; margin-top: 6px;}.day { width: 26px; height: 17px; font-size: 10px; margin-left: 16px; text-align: center;}4.5 实现页面跳转
其中onclick="backMain"为返回主页事件,根据传递的页面索引,显示不同的位置数据,detail.js中的代码实现如下:
import router from '@system.router'export default { data: { location: '' }, onInit() { if (this.selectedCityIndex === 0) { this.location = '杭州'; } else { this.location = '上海'; } }, backMain() { router.replace({ uri: 'pages/index/index', params: { selectedCityIndex: this.selectedCityIndex } }); }} 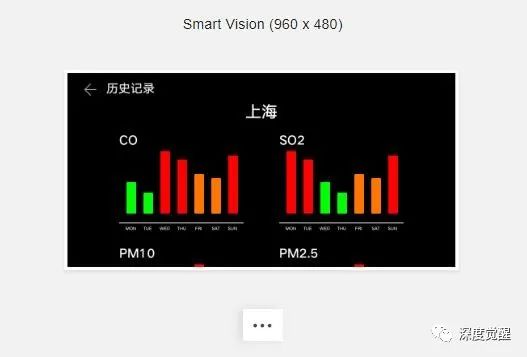
5. 模拟器调试
菜单Tools->HVD Manager,可以打开云端的模拟器

注册华为开发者账号,授权登录后

就能看到模拟器列表了,相比beta版只有Phone、TV和Wearable三种,增加了不少的设备。
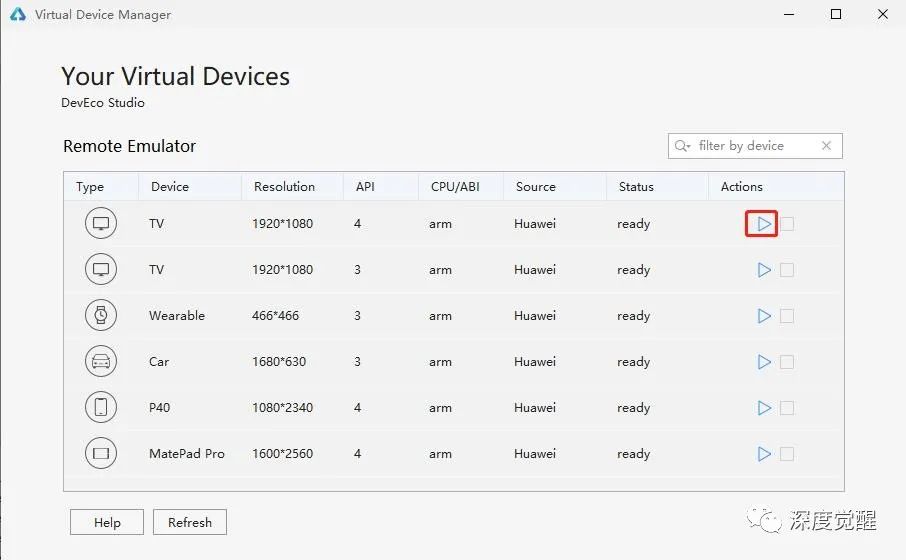
可惜还没有可用于smartVision设备的模拟器,现阶段我们还只能烧录到设备中调试,总体上"富鸿蒙"的进度比较快,期待一波更新。
6. 编译打包
若开发手机端的App,则需要申请证书,对应用程序进行签名。这样才能发布到应用市场,才被允许安装到真机上运行。
IPCamera应用「暂时不支持签名模式」,所以需要将应用发布为未签名的应用安装包。
菜单Build->Buildo APP(s)/Hap(s)->Build Release Hap(s),生成Hap文件。
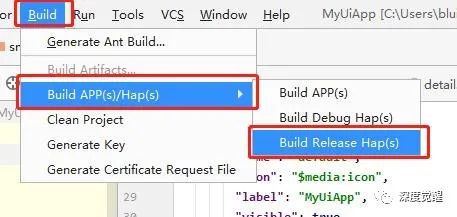
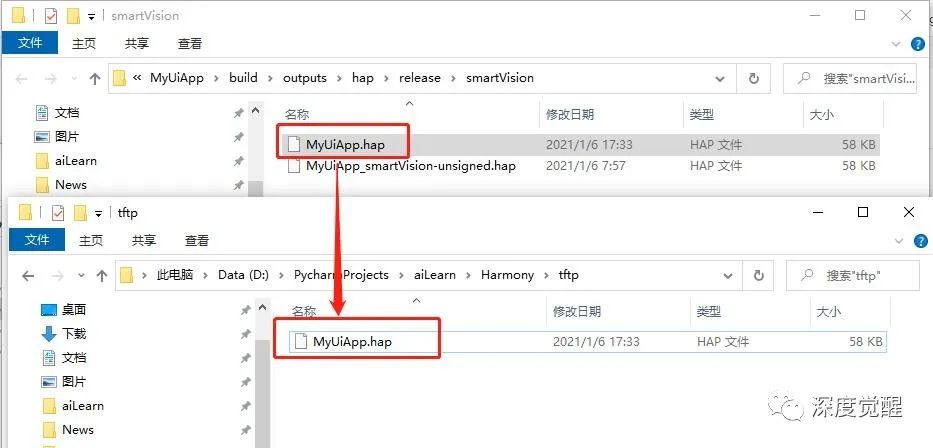
输出文件为 build/outputs/hap/release/smartVision/entry-release-smartVision-unsigned.hap,改名为MyUiApp.hap便于安装。
7. 通过sdcard安装
7.1 复制安装包和工具
将IDE编译的未签名应用安装包和安装工具(Z:\openharmony\out\my_hi3516dv300\dev_tools)放在sdcard中,将sdcard插入开发板卡槽。
7.2 禁用签名校验
应用安装默认要校验签名,需要执行以下命令,关闭签名校验。
./sdcard/dev_tools/bin/bm set -s disable 
7.3 安装应用
./sdcard/dev_tools/bin/bm install -p /sdcard/MyUiApp.hap 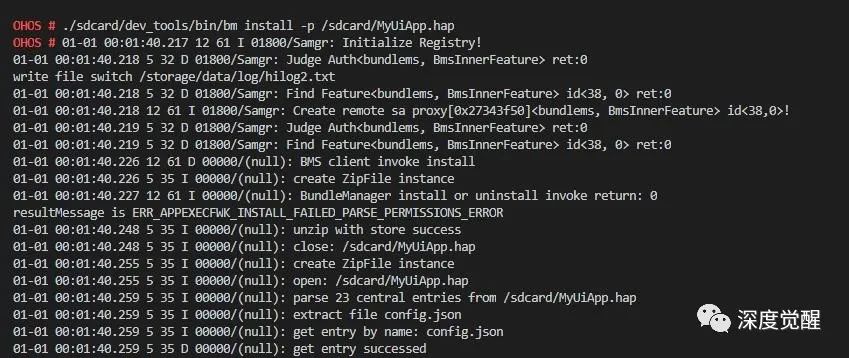
8. 通过NFS安装
每次插拔sdcard还是蛮不方便的,这里我们安装一个NFS服务器,让鸿蒙系统能直接访问Win10的目录,后续安装调试就会方便很多。
8.1 安装NFS服务器
我们先安装一个haneWIN NFS服务器, 双击文末网盘里的nfs1169.exe,一路下一步即可。
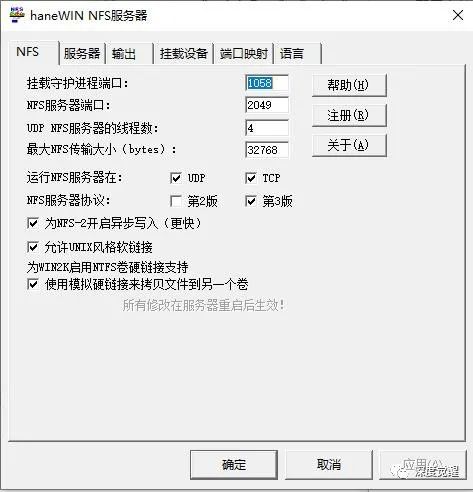
8.2 配置目录参数
编辑输出表文件,定义传输目录
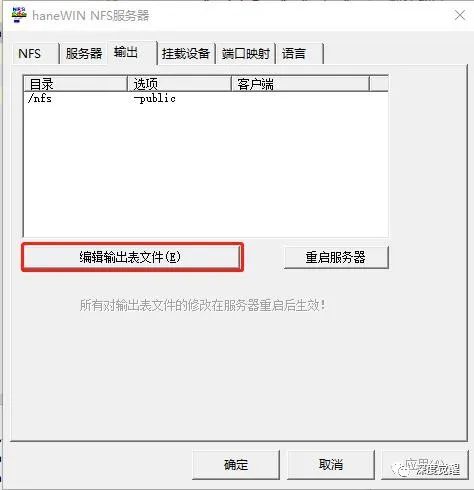
# exports example# C:\ftp -range 192.168.1.1 192.168.1.10# c:\public -public -readonly# c:\tools -readonly 192.168.1.4D:\PycharmProjects\aiLearn\Harmony\tftp -public -name:nfs8.3 重启服务
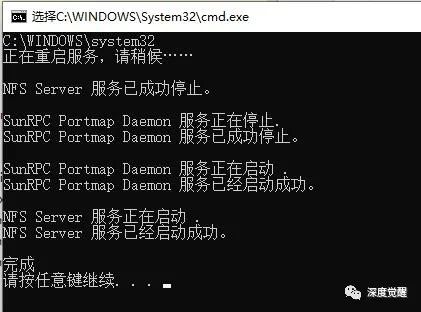
右键管理员权限,重启所有服务,让配置生效。
8.4 设置防火墙
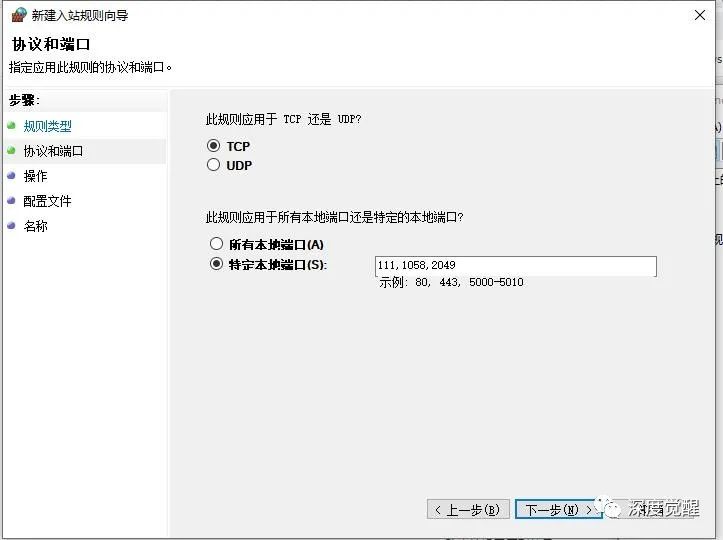
防火墙设置111、1058、2049这些端口的TCP和UDP,入站规则放行。
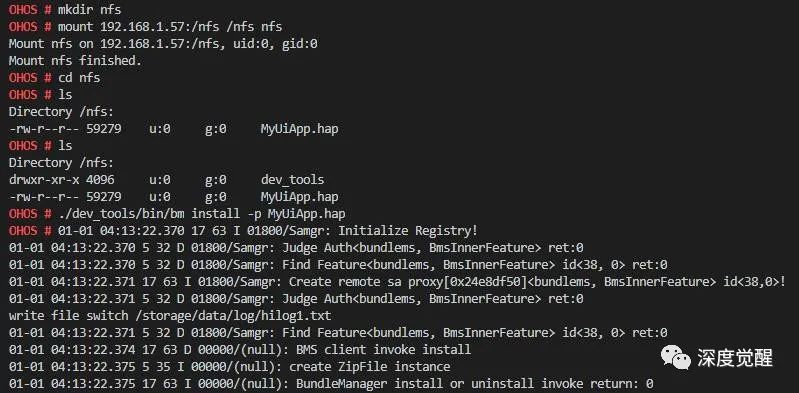
8.5 鸿蒙上挂载目录
主电脑的ip地址为192.168.1.57,NFS服务的别名为nfs,对应的目录为D:\PycharmProjects\aiLearn\Harmony\tftp
mkdir nfsmount 192.168.1.57:/nfs /nfs nfs挂载到鸿蒙的刚新建的 /nfs目录下,我们可以复制安装包和安装工具
8.6 安装应用
cd nfs./dev_tools/bin/bm install -p MyUiApp.hap前面做了这么多的铺垫,后续开发只要复制hap安装包,直接一条命令安装即可,非常方便。
运行程序
安装完成后,点击桌面上的MyUiApp就能看见界面效果了。
Js UI框架对开发者还是比较友好的,有小程序或快应用的开发经验,上手应该都比较顺滑。
不过HarmonyOS Device的支持库精简的非常严重,例如网络访问的@system.request和@system.fetch都不可用,这些功能在“富鸿蒙”的设备上开发就会比较方便。
资料下载
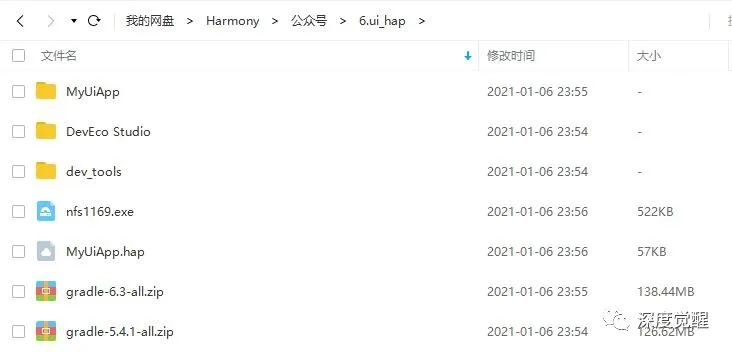
本期相关文件资料,可在公众号“深度觉醒”,后台回复:“ohos06”,获取下载链接。
下一篇
本期主要介绍了一下JS框架下的界面开发,
下一篇我们将尝试熟悉更多的设备能力,
并打通从框架用户态到驱动内核态之间的联系,
敬请期待...


往期推荐
-
用鸿蒙开发AI应用(HDF 驱动补光灯)
-
用鸿蒙开发AI应用(Helloworld)
-
用鸿蒙开发AI应用(软件篇)

