ASP.NET MVC 使用UEditor富文本
参考文章:https://www.cnblogs.com/chenbaba/p/6390661.html
第一步:先到https://github.com/fex-team/ueditor/releases去下载

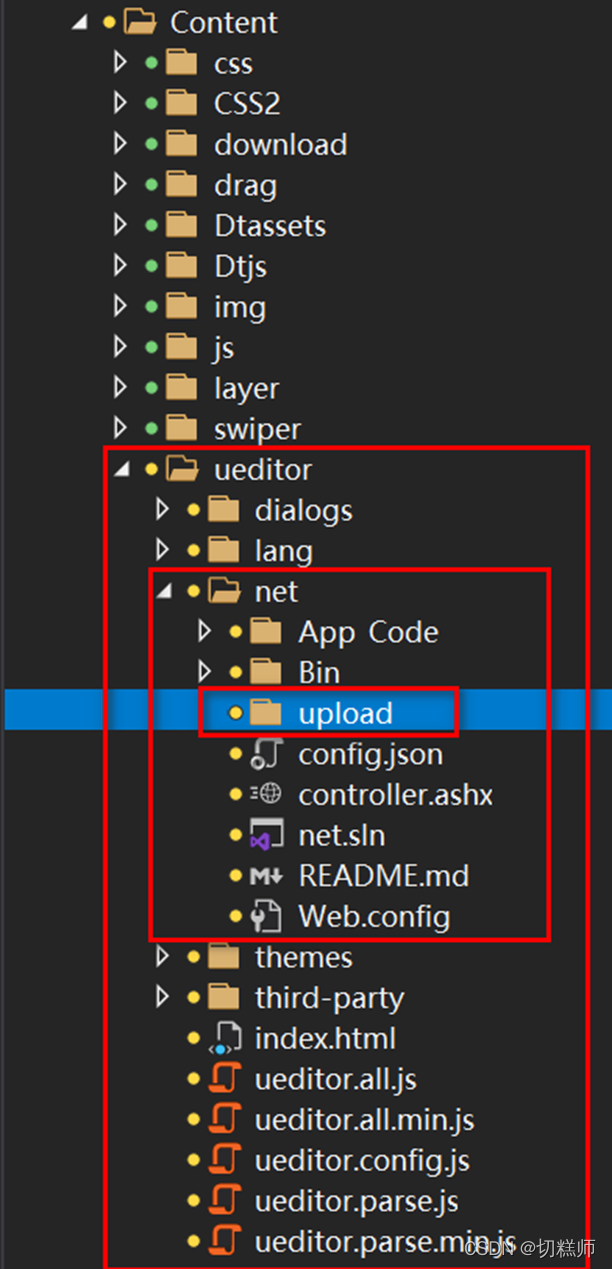
第二步:把下载的文件改成ueditor名称,添加到Content文件夹里面

第三步:在ueditor文件夹下面的net文件夹创建一个upload文件夹,用来存放上传的图片
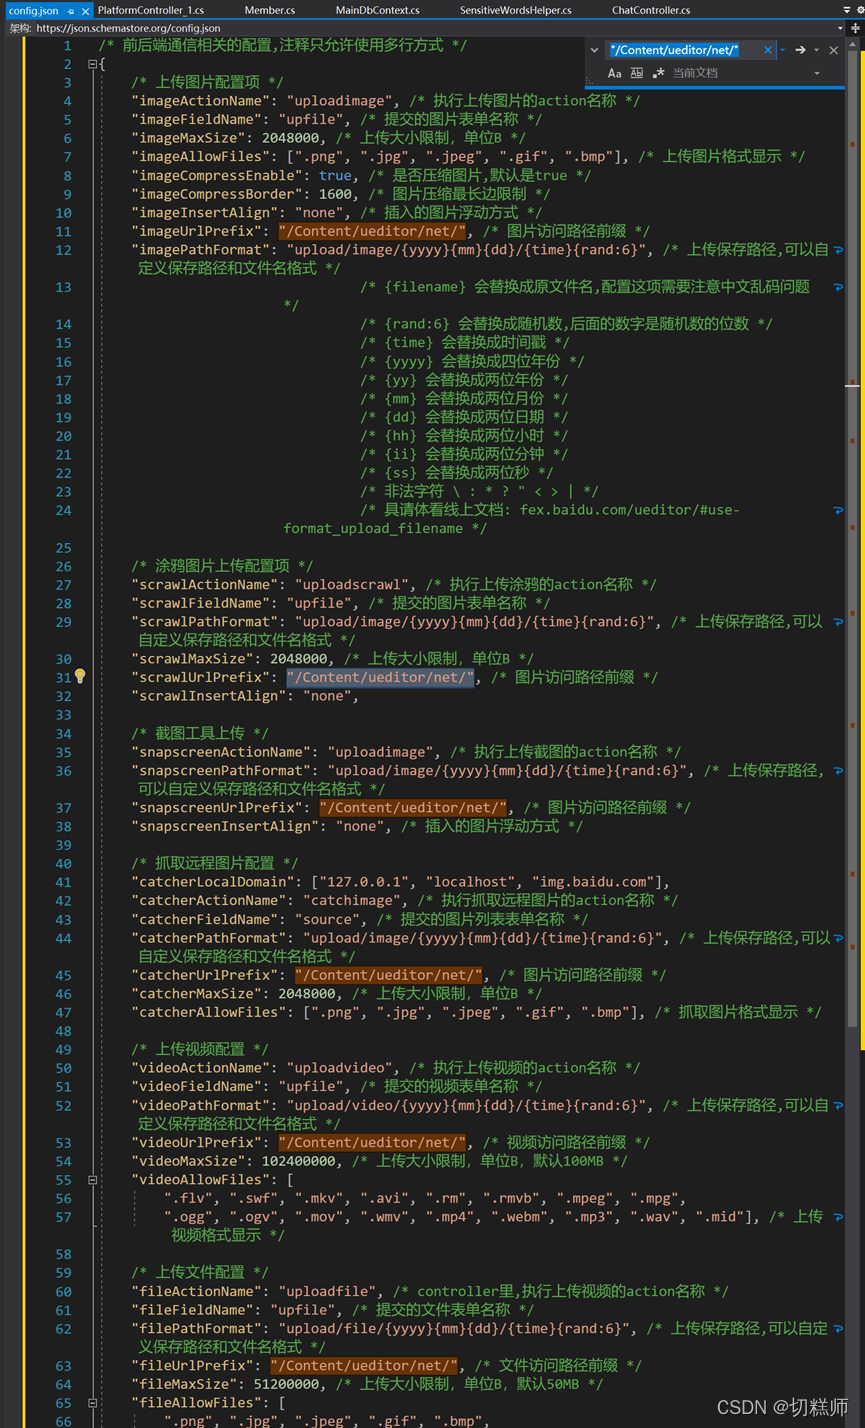
第四步:配置ueditor文件上传路径。
因为我们把ueditor文件夹放在了Content文件夹下面,所以找到net文件夹里面的config.json文件,将所有的 "/ueditor/net/"替换成"/Content/ueditor/net/" 。
第五步:创建一个Test控制器,点Index右键生成视图
在视图里面添加:
注意先后顺序,不要颠倒了!
然后添加ueditor的使用代码:
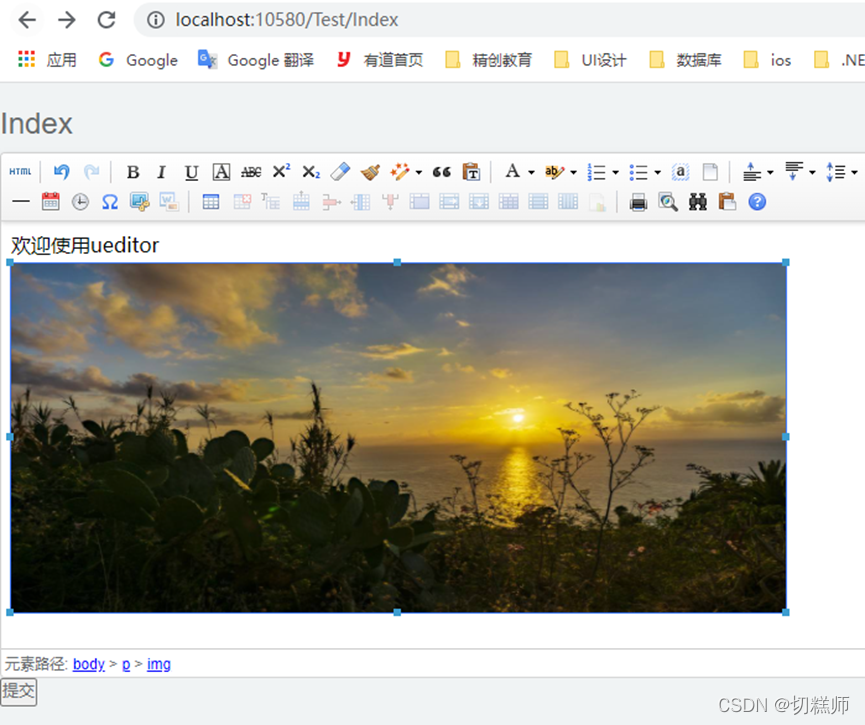
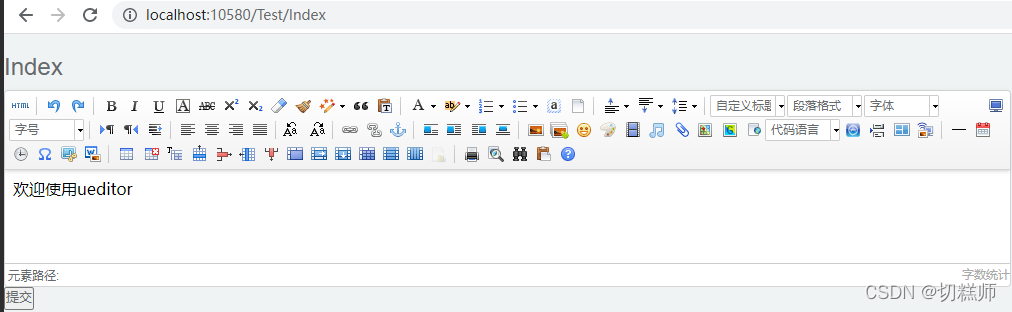
var editor = new baidu.editor.ui.Editor({ UEDITOR_HOME_URL: '/Content/ueditor/',//配置编辑器路径 iframeCssUrl: '/Content/ueditor/themes/iframe.css',//样式路径 initialContent: '欢迎使用ueditor',//初始化编辑器内容 autoHeightEnabled: true,//高度自动增长 minFrameHeight: 500//最小高度 }); editor.render('editor'); function submit() { var content = editor.getContent(); $.post('/Test/AddContent', { content: content }, function (response) { console.log(response); }); }
注意:我下载下来的Content/ueditor/lang/zh-cn/zh-cn.js 这个js文件的编码是jbk的。所以js文件引用需要标明字符集:charset="gbk"
第六步:在控制器里面在添加一个HttpPost的Index方法
[HttpPost][ValidateInput(false)]public ActionResult AddContent (string content){ var result = "ok"; return Json(result, JsonRequestBehavior.AllowGet);}注意: [ValidateInput(false)]取消危险字符的验证,如" % $#"等等。为了安全起见,正常的post提交是不允许提交诸如$/等敏感字符的(有点类似脚本注入),如果你有必要提交这些东西的话,就需要加上ValidateInput标签,比如富文本编辑的时候
以上步骤都作完成,就可以实现富文本并且可以上传图片了!