注解反射&动态代理的简单封装
文章目录
1、自定义注解&动态代理的简单实现
需求场景:
通过自定义注解方式,实现按钮的点击效果,和长按效果

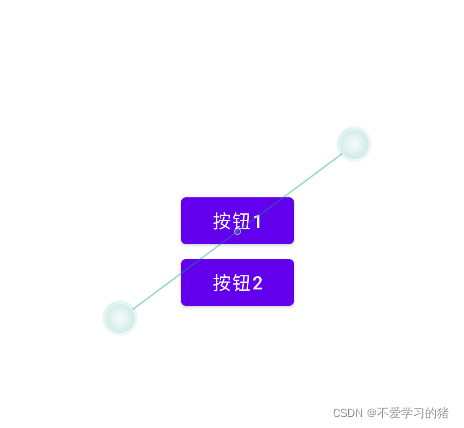
我们先写两个按钮
<?xml version="1.0" encoding="utf-8"?><LinearLayout xmlns:android="http://schemas.android.com/apk/res/android" xmlns:app="http://schemas.android.com/apk/res-auto" xmlns:tools="http://schemas.android.com/tools" android:layout_width="match_parent" android:layout_height="match_parent" android:gravity="center" android:orientation="vertical" tools:context=".MainActivity"> <Button android:id="@+id/btn_1" android:layout_width="wrap_content" android:layout_height="wrap_content" android:text="按钮1" tools:ignore="MissingConstraints,OnClick,UsingOnClickInXml" /> <Button android:id="@+id/btn_2" android:layout_width="wrap_content" android:layout_height="wrap_content" android:text="按钮2" tools:ignore="MissingConstraints" /></LinearLayout>再写两个自定义的注解接口
OnClick:
@Retention(RetentionPolicy.RUNTIME)@Target(ElementType.METHOD)public @interface OnClick { int[] value();}OnLongClick:
@Retention(RetentionPolicy.RUNTIME)@Target(ElementType.METHOD)public @interface OnLongClick { int[] value();}在上面的两个接口中,分别定义了两个int 数组,用来接收存储我们传入的组件ID
再写一个接口注入方法的使用实现类,用来实现上面的 OnClick 和 OnLongClick 两个接口。
InjectUtils:
这里我们使用最原始的方式,通过getClass 获取 activity 上的class 对象,再通过getDeclaredMethods() 方法获取到 当前activity 中的所有方法。再遍历出来当前activity 中的所有注解,并找到自定义注解,
最后加入动态代理的方式,将事件反射出来。代码实现如下:
public class InjectUtils { public static void injectEvent(Activity activity) {// 通过getClass 获得activity 上的对象 Class<? extends Activity> aClass = activity.getClass();// 获得activity 上的所有方法 Method[] declaredMethods = aClass.getDeclaredMethods(); for (Method method : declaredMethods) {// 获得方法上的所有注解 Annotation[] annotations = method.getAnnotations(); for (Annotation annotation : annotations) {// 循环遍历出自定义的注解 if (annotation.annotationType() == OnClick.class) { OnClick onClick = (OnClick) annotation; int[] ids = onClick.value(); for (int id : ids) { View viewById = activity.findViewById(id);// 创建一个动态代理 Object listener = Proxy.newProxyInstance(activity.getClassLoader(), new Class[]{View.OnClickListener.class}, new InvocationHandler() { @Override public Object invoke(Object o, Method m, Object[] objects) throws Throwable {// return method.invoke(activity, args); return method.invoke(activity, objects); } }); viewById.setOnClickListener((View.OnClickListener) listener); } } else if (annotation.annotationType() == OnLongClick.class) { OnLongClick onLongClick = (OnLongClick) annotation; int[] ids = onLongClick.value(); for (int id : ids) { View viewById = activity.findViewById(id); // 创建一个动态代理 Object listener = Proxy.newProxyInstance(activity.getClassLoader(), new Class[]{View.OnLongClickListener.class}, new InvocationHandler() { @Override public Object invoke(Object o, Method m, Object[] objects) throws Throwable { return method.invoke(activity, objects); } }); viewById.setOnLongClickListener((View.OnLongClickListener) listener); } } } } }}上面代码中,我们使用动态代理proxy的方式,实现了自定义注解反射需求。但是这样会造成代码非常的臃肿,不易维护等很多情况,特别是在我们需要拓展的时候,每次拓展,都需要再重新写一份如下代码。
OnLongClick onLongClick = (OnLongClick) annotation; int[] ids = onLongClick.value(); for (int id : ids) { View viewById = activity.findViewById(id); // 创建一个动态代理 Object listener = Proxy.newProxyInstance(activity.getClassLoader(), new Class[]{View.OnLongClickListener.class}, new InvocationHandler() { @Override public Object invoke(Object o, Method m, Object[] objects) throws Throwable { return method.invoke(activity, objects); } }); viewById.setOnLongClickListener((View.OnLongClickListener) listener); } 2、代理优化封装
基于上面的代码,我们加以改造优化,新建一个 EventType 注解接口,代码如下:
@Retention(RetentionPolicy.RUNTIME)@Target(ElementType.TYPE)public @interface EventType { Class listenerType(); String listenerSetter();}接下来,我们分别在 OnClick 和 OnLongClik 接口中,使用EventType注解
@EventType(listenerType = View.OnClickListener.class, listenerSetter = "setOnLongClickListener")最后我们去重新改造InjectUtils 类中的实现方法
具体的就不解释了,代码如下:
public class InjectUtils { public static void injectEvent(Activity activity) {// 通过getClass 获得activity 上的对象 Class<? extends Activity> aClass = activity.getClass();// 获得activity 上的所有方法 Method[] declaredMethods = aClass.getDeclaredMethods(); for (Method method : declaredMethods) {// 获得方法上的所有注解 Annotation[] annotations = method.getAnnotations(); for (Annotation annotation : annotations) {// 循环遍历出自定义的注解 Class<? extends Annotation> annotationType = annotation.annotationType();// 拿到注解上的 EventType 注解 if (annotationType.isAnnotationPresent(EventType.class)){ EventType eventType = annotationType.getAnnotation(EventType.class);// 获取定义的参数 Class listenerType = eventType.listenerType(); String listenerSetter = eventType.listenerSetter(); try { Method value = annotationType.getDeclaredMethod("value"); int[] viewIds = (int[]) value.invoke(annotation); Object proxy = Proxy.newProxyInstance(activity.getClassLoader(), new Class[]{listenerType}, new InvocationHandler() { @Override public Object invoke(Object o, Method m, Object[] objects) throws Throwable { return method.invoke(activity, objects); } }); for (int viewId: viewIds){ View view = activity.findViewById(viewId);// 找到setOnClickListener(new OnClickListener) Method setter = view.getClass().getMethod(listenerSetter, listenerType); setter.invoke(view, proxy); } } catch (NoSuchMethodException e) { e.printStackTrace(); } catch (InvocationTargetException e) { e.printStackTrace(); } catch (IllegalAccessException e) { e.printStackTrace(); } } } } }}经过上面的封装之后,我们以后不论想拓展什么的事件,只需要在类方法上面添加EventType 注解,并传入相关的事件就可以了
@EventType(listenerType = View.OnClickListener.class, listenerSetter = "setOnLongClickListener")

