首 页
技术文档
知识分类
网站导航
首 页
技术文档
知识分类
>
技术文档
>
Python柱状图
Python柱状图
网友:
Bloger
技术文档
2025-07-26 20:49:26
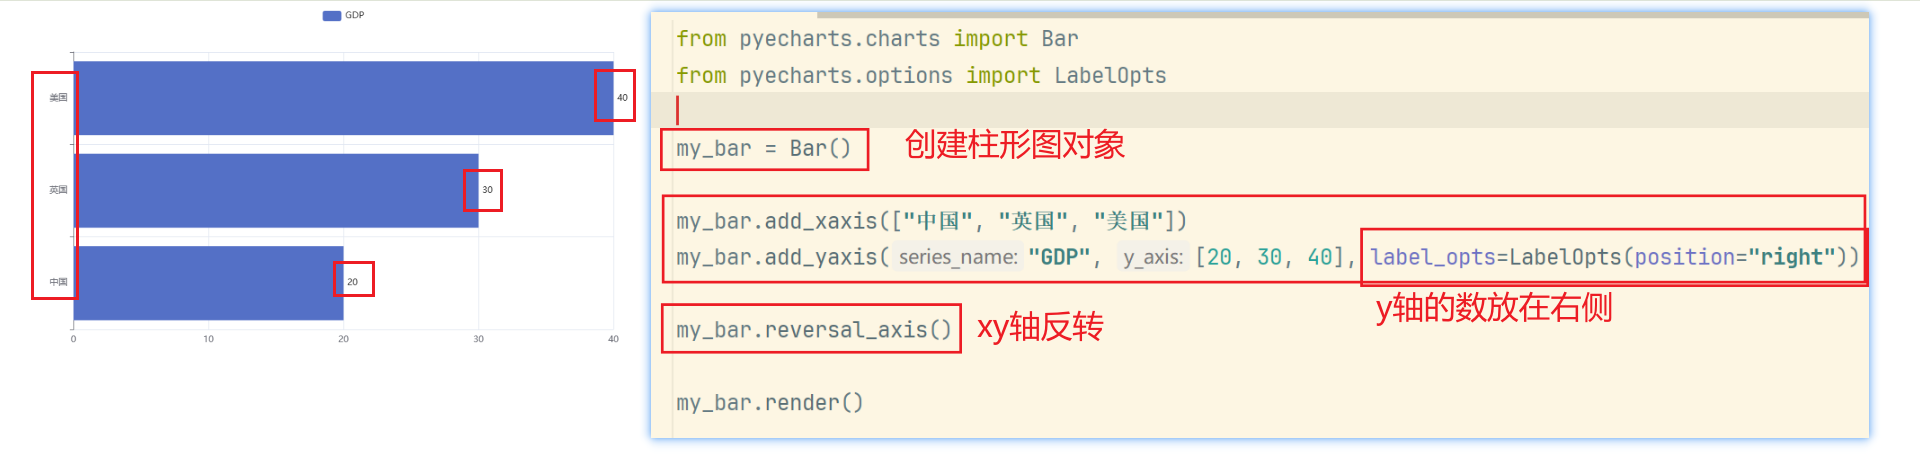
1.各国GDP
柱状图
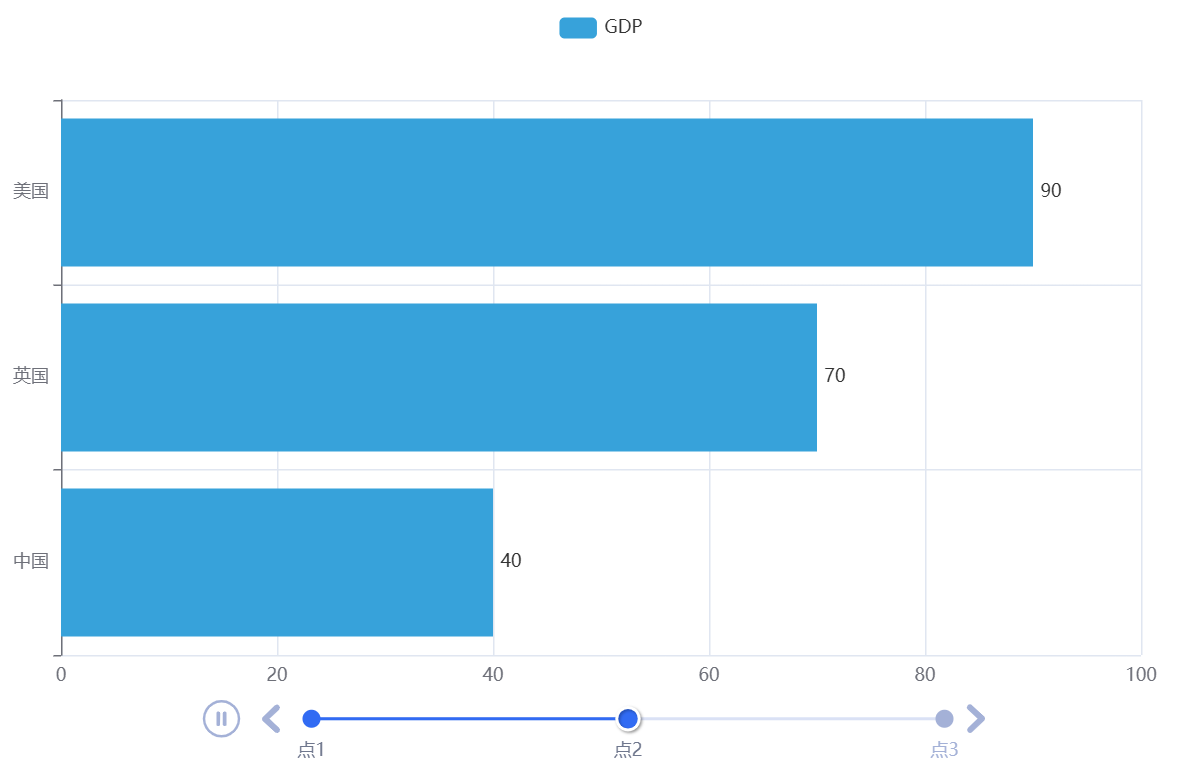
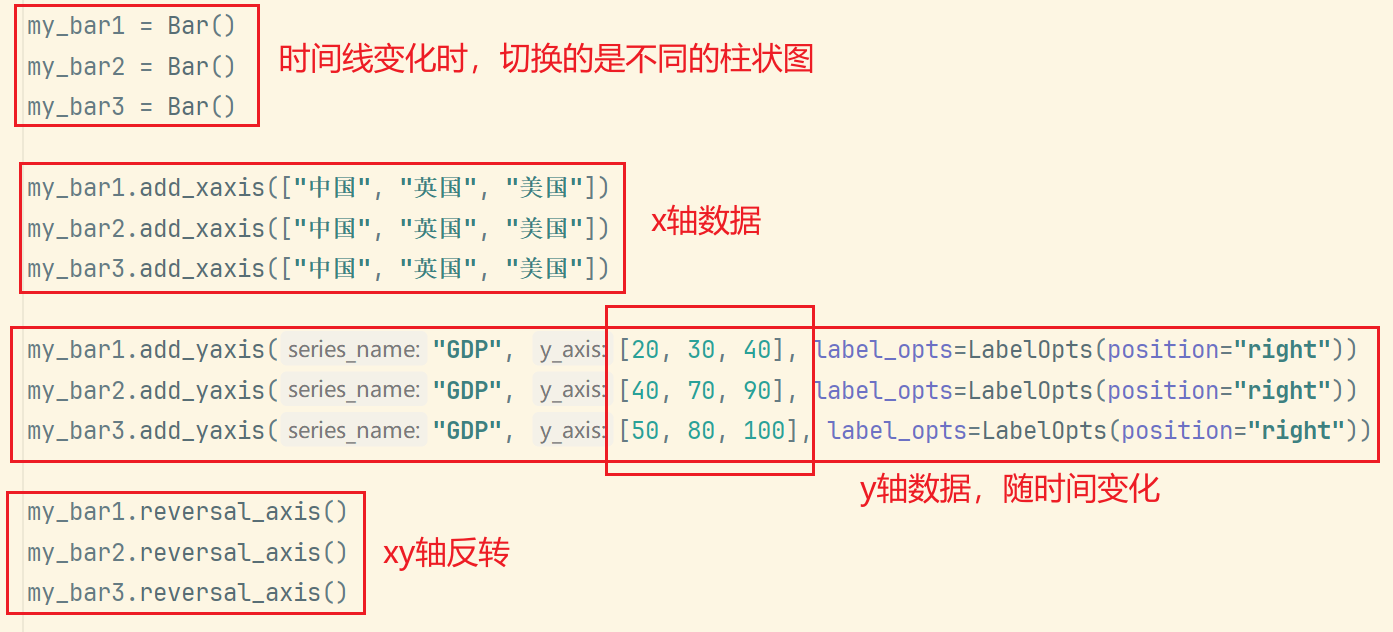
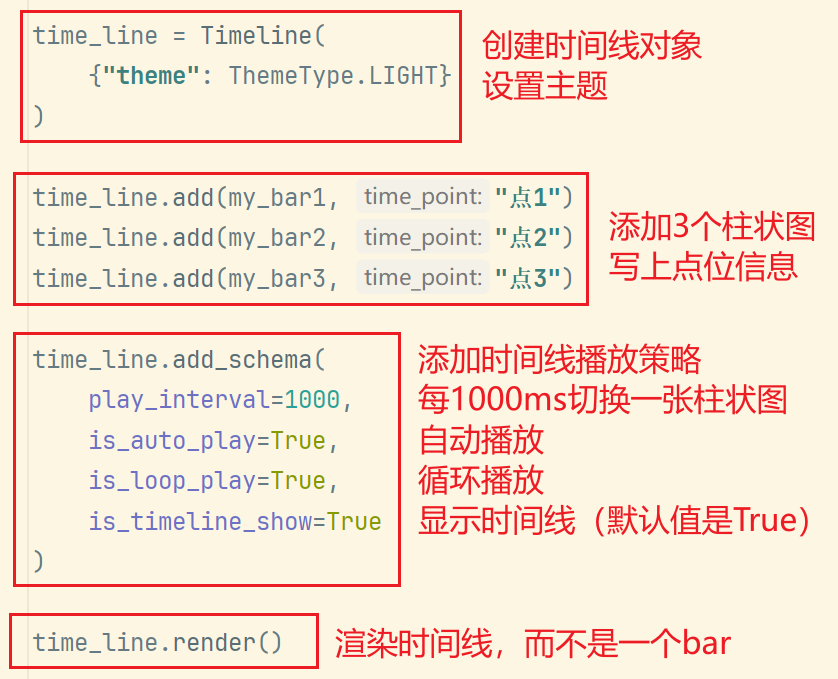
2.各国GDP
时间
线柱状图
网络标签:
https
时间
柱状图
上一篇
在Word和WPS文字中添加的拼音放到文字右边
下一篇
spring boot自动装配原理
相关问题
英雄联盟6300的英雄买哪个
艾尔登法环杀npc的任务
lol手游可以蜻蜓点水吗
洛克王国宠物遗传技能
英雄联盟手游大地图怎么看
怎么制作仙灵原神
剑网3 不要的装备
lol手游有几级
艾尔登环法火山怎么出去
英雄联盟手游安卓能和苹果一起玩吗
☚
公告
DeepSeek全套部署资料免费下载
免费可商用字体批量下载
标签
仓库
代码
元素
函数
功能
区块
参数
命令
图像
在这里
地址
客户端
容器
对象
工具
开发者
技术
接口
插件
插入图片
操作
数据
数据库
数组
文件
方法
服务器
模块
模型
测试
版本
环境
用户
示例
程序
算法
系统
线程
组件
节点
视频
设备
路径
镜像
项目
猜你想看的文章
英雄联盟如何对外打字
lol电信9区叫什么
英雄联盟小地图怎么移动位置
和平精英电脑版卡顿怎么处理(和平精英电脑版卡顿怎么处理掉)
lol拳头公司是哪国的
ios怎么装lol
英雄联盟怎么进入好友房间
lol怎么一键屏蔽所有人聊天
英雄联盟排位位置是随机的吗
原神雷神卡池2.5时间是什么时候