Java EE---Spring AOP
本文是我在学习Java EE过程中记录学习的点点滴滴,仅仅为了学完之后巩固一下,日后忘记了也可以方便快速的复习。
文章目录
- 前言
- 一、项目清单
- 二、全部代码
-
- 2.1、stuDao接口
- 2.2、StudentDaoImpl类
- 2.3、myAspect类
- 2.4、test类
- 2.5、applicationContext.xml代码
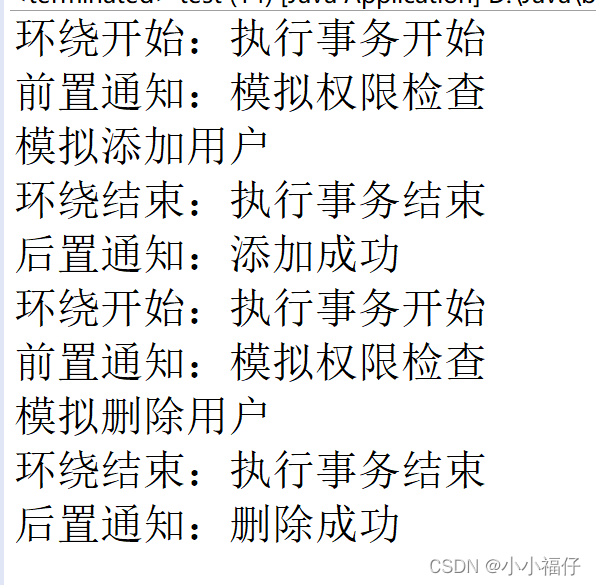
- 三、结果
- 四、笔记
前言
今天主要学习的是基于注解的AOP实现,由于基于XML的AOP实现需要在Spring文件中配置大量的代码信息,不利于代码的阅读和维护。为了解决这个问题,Spring AOP允许使用基于注解的方式实现AOP。
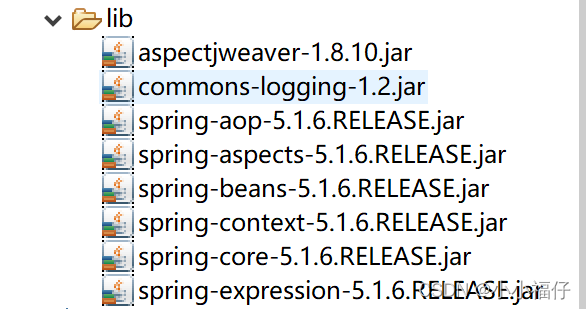
一、项目清单

使用的jar包:
二、全部代码
2.1、stuDao接口
package spring.aop.bean;public interface StudentDao {public void addStudent();public void deleteStudent();}2.2、StudentDaoImpl类
package spring.aop.bean;import org.springframework.stereotype.Repository;@Repository("studentdao")public class StudentDaoImpl implements StudentDao{public void addStudent() {System.out.println("模拟添加用户");};public void deleteStudent() {System.out.println("模拟删除用户");};}2.3、myAspect类
package spring.aop.aspect;import org.aspectj.lang.JoinPoint;import org.aspectj.lang.ProceedingJoinPoint;import org.aspectj.lang.annotation.After;import org.aspectj.lang.annotation.Around;import org.aspectj.lang.annotation.Aspect;import org.aspectj.lang.annotation.Before;import org.aspectj.lang.annotation.Pointcut;import org.springframework.stereotype.Component;@Component//配置切面@Aspectpublic class myAspect {//配置切点@Pointcut("execution(* spring.aop.bean.*.*(..))")public void myPointCut() {}@Pointcut("execution(* spring.aop.bean.*.add*(..))")public void myPointCut1() {}@Pointcut("execution(* spring.aop.bean.*.delete*(..))")public void myPointCut2() {}//配置各项通知@Before("myPointCut(),")public void myBefore(JoinPoint joinPoint) {System.out.println("前置通知:模拟权限检查");}@After("myPointCut1()")public void myAfter(){System.out.println("后置通知:添加成功");}@After("myPointCut2()")public void myAfter1(){System.out.println("后置通知:删除成功");}@Around("myPointCut()")public Object myAround(ProceedingJoinPoint proceedingJoinPoint) throws Throwable {System.out.println("环绕开始:执行事务开始");//执行目标方法Object obj = proceedingJoinPoint.proceed();System.out.println("环绕结束:执行事务结束");return obj;}}2.4、test类
package spring.aop.test;import org.springframework.context.ApplicationContext;import org.springframework.context.support.FileSystemXmlApplicationContext;import spring.aop.bean.StudentDao;public class test {public static void main(String [] args) {ApplicationContext context=new FileSystemXmlApplicationContext("src/applicationContext.xml");StudentDao dao=(StudentDao) context.getBean("studentdao");dao.addStudent();dao.deleteStudent();}}2.5、applicationContext.xml代码
<?xml version="1.0" encoding="UTF-8"?><beans xmlns="http://www.springframework.org/schema/beans" xmlns:xsi="http://www.w3.org/2001/XMLSchema-instance" xmlns:aop="http://www.springframework.org/schema/aop" xmlns:context="http://www.springframework.org/schema/context" xsi:schemaLocation="http://www.springframework.org/schema/beans http://www.springframework.org/schema/beans/spring-beans.xsd http://www.springframework.org/schema/aop http://www.springframework.org/schema/aop/spring-aop.xsd http://www.springframework.org/schema/context http://www.springframework.org/schema/context/spring-context.xsd"> <!--指定需要扫描的包,使注解生效 --> <context:component-scan base-package="spring.aop"></context:component-scan><!-- 启动基于注解声明式AspectJ --><aop:aspectj-autoproxy></aop:aspectj-autoproxy></beans>三、结果
四、笔记
- 以上代码主要是在两个方法add和del方法的前后添加前置通知、后置通知和环绕通知。
- 以上Aspect的配置基本上都在myAspect类中使用注释配置完成了,xml文件中则只需要扫描相应的包让其注释生效就好了。
- myAspect类中根据切面和切点的联系将切面中通知添加到切点的相应位置,有额外的更多要求可添加多个切点和多个切面,再根据需要去配置它们之间的联系将切面中的代码插入到切面中。

