Security自定义账号密码验证+thymeleaf登录案例(附带网页案例及源码下载)
Security系列教程
- Security入门体验
- Security自定义账号密码验证+thymeleaf登录案例(附带网页案例
- Security+验证码登录案例(附带网页案例)
- Security+jwt 实现无状态认证,前后端分离(附带网页案例))
- Security+jwt 短信认证登录,前后端分离(附带网页案例)
- Security+oauth2 授权服务器(附带网页案例)
文章目录
- Security系列教程
- 简介
-
- 1. 环境
- 2. 自定义认证过程
- 3. 认证处理器
- 4. Security核心配置
- 5. 编写测试案例
- 6. 效果演示
- 7. 源码分享
简介
本章主要实现Spring Security自定义用户认证功能,并使用thymeleaf编写一个简单网页供测试使用。
- Springboot版本2.5.3
- 整合网页模板引擎
thymeleaf
1. 环境
- 本教程项目Springboot版本
<parent> <groupId>org.springframework.boot</groupId> <artifactId>spring-boot-starter-parent</artifactId> <version>2.5.3</version> <relativePath/> </parent>- pom依赖
<dependency> <groupId>org.springframework.boot</groupId> <artifactId>spring-boot-starter-security</artifactId> </dependency> <dependency> <groupId>org.springframework.boot</groupId> <artifactId>spring-boot-starter-thymeleaf</artifactId> </dependency>- yml 配置
server: port: 9999spring: thymeleaf: # 关闭页面缓存,便于开发环境测试 cache: false # 静态资源路径 prefix: classpath:/templates/ # 网页资源默认.html结尾 mode: HTML2. 自定义认证过程
- 自定义认证的过程需要实现Spring Security提供的
UserDetailService接口。 - 由于Security默认的用户实体只存放了账号和密码信息,实战中我们往往需要更多的信息,如用户id等
- 创建
AuthUser重写Security用户实体User,添加我们的userId属性
@Accessors(chain = true)public class AuthUser extends User { / * 用户id */ private Long userId; public AuthUser(String username, String password, Collection<? extends GrantedAuthority> authorities) { super(username, password, authorities); } public AuthUser(String username, String password, boolean enabled, boolean accountNonExpired, boolean credentialsNonExpired, boolean accountNonLocked, Collection<? extends GrantedAuthority> authorities) { super(username, password, enabled, accountNonExpired, credentialsNonExpired, accountNonLocked, authorities); } public Long getUserId() { return userId; } public void setUserId(Long userId) { this.userId = userId; }}- 编写我们自己的用户实体
@Data@Accessors(chain = true)public class MyUser { / * id */ private Long userId; / * 账号 */ private String username; / * 密码 */ private String password;}- 我们这里为了便于测试用
HashMap模拟数据库,实战中换成数据库获取即可。
@Component@RequiredArgsConstructor@Slf4jpublic class UserDetailsServiceImpl implements UserDetailsService { / * 模拟一个数据库用户 * 账号 admin * 密码 123456 */ private final static HashMap<String, MyUser> USER_MAP = new LinkedHashMap<>() { { put("admin", new MyUser() .setUserId(1L) .setUsername("admin") .setPassword(new BCryptPasswordEncoder().encode("123456")) ); } }; @Override public UserDetails loadUserByUsername(String username) throws UsernameNotFoundException { log.info("登录者账号为:{}", username); // 通过userName获取用户信息,实战中把USER_MAP换成数据库获取即可 MyUser user = USER_MAP.get(username); if (user == null) { throw new UsernameNotFoundException("not found"); } // 角色和权限都在这里添加,角色以ROLE_前缀,不是ROLE_前缀的视为权限,这里添加了ROLE_ADMIN角色和read、write权限 List<GrantedAuthority> authorities = AuthorityUtils.commaSeparatedStringToAuthorityList("ROLE_ADMIN,read,write"); AuthUser authUser = new AuthUser(user.getUsername(), user.getPassword(), authorities); // 我们存放我们自定义的信息,如用户id,方便后续获取用户信息 authUser.setUserId(user.getUserId()); return authUser; }}AuthorityUtils是security核心包提供的一个工具类,专门用来处理权限和角色。- 本教程采用Str的形式写入角色和权限。
- 也可采用数组的方式添加:
String[] auths = {"ROLE_ADMIN", "read", "write"};List<GrantedAuthority> authorityList = AuthorityUtils.createAuthorityList(auths);3. 认证处理器
- 登录成功处理
@Component@Slf4jpublic class LoginSuccess extends SavedRequestAwareAuthenticationSuccessHandler { @Override public void onAuthenticationSuccess(HttpServletRequest request, HttpServletResponse response, Authentication authentication) throws IOException { log.info("登录认证成功"); // 这里写你登录成功后的逻辑,可以验证其他信息。 // 重定向 this.getRedirectStrategy().sendRedirect(request, response, "/toIndex"); }}- 登录失败处理
@Component@Slf4jpublic class LoginFailure extends SimpleUrlAuthenticationFailureHandler { @Override public void onAuthenticationFailure(HttpServletRequest request, HttpServletResponse response, AuthenticationException ex) throws IOException { logger.info("登录失败"); ex.printStackTrace(); request.setAttribute("errorMsg", "登录失败"); this.saveException(request, ex); this.getRedirectStrategy().sendRedirect(request, response, "/toLogin?error=true"); }}- 退出登录成功处理
@Slf4j@Componentpublic class LogoutSuccess extends SimpleUrlLogoutSuccessHandler { @Override public void onLogoutSuccess(HttpServletRequest request, HttpServletResponse response, Authentication authentication) throws IOException { log.info("注销成功!"); //这里写你登录成功后的逻辑 response.setStatus(HttpStatus.OK.value()); response.setContentType("application/json;charset=UTF-8"); response.getWriter().write("注销成功!"); // 重定向 this.getRedirectStrategy().sendRedirect(request, response, "/toLogin?logout=true"); }}4. Security核心配置
- 重写
WebSecurityConfigurerAdapter自定义我们的安全访问策略 WebSecurityConfig
/ * spring-security权限管理的核心配置 * * @author ding */@Configuration@EnableWebSecurity@EnableGlobalMethodSecurity(prePostEnabled = true)@RequiredArgsConstructorpublic class WebSecurityConfig extends WebSecurityConfigurerAdapter { private final AuthenticationSuccessHandler loginSuccess; private final AuthenticationFailureHandler loginFailure; private final SimpleUrlLogoutSuccessHandler LogoutSuccess; @Override protected void configure(HttpSecurity http) throws Exception { http.headers().frameOptions().disable();//开启运行iframe嵌套页面 // 1、配置权限认证 http.authorizeRequests() // 1. 配置不拦截路由 .antMatchers("/404", "/403", "/500", "/toLogin").permitAll() // 任何其它请求 .anyRequest() // 都需要身份认证 .authenticated() .and() // 2. 登录配置表单认证方式 .formLogin() // 自定义登录页面的url .loginPage("/toLogin") // 设置登录账号参数,与表单参数一致 .usernameParameter("username") // 设置登录密码参数,与表单参数一致 .passwordParameter("password") // 告诉Spring Security在发送指定路径时处理提交的凭证,默认情况下,将用户重定向回用户来自的页面。登录表单form中action的地址,也就是处理认证请求的路径, // 只要保持表单中action和HttpSecurity里配置的loginProcessingUrl一致就可以了,也不用自己去处理,它不会将请求传递给Spring MVC和您的控制器,所以我们就不需要自己再去写一个/user/login的控制器接口了 .loginProcessingUrl("/login") // 使用自定义的成功结果处理器 .successHandler(loginSuccess) // 使用自定义失败的结果处理器 .failureHandler(loginFailure) .and() // 3. 注销 .logout() .logoutUrl("/logout") .logoutSuccessHandler(LogoutSuccess) .permitAll() .and() // 4.session管理 .sessionManagement() // 失效后跳转到登陆页面 .invalidSessionUrl("/toLogin?logout=true") // 单用户登录,如果有一个登录了,同一个用户在其他地方登录将前一个剔除下线 //.maximumSessions(1).expiredSessionStrategy(expiredSessionStrategy()) // 单用户登录,如果有一个登录了,同一个用户在其他地方不能登录 //.maximumSessions(1).maxSessionsPreventsLogin(true) ; .and() // 5. 禁用跨站csrf攻击防御 .csrf() .disable(); } @Override public void configure(WebSecurity web) { // 配置静态文件不需要认证 web.ignoring().antMatchers("/static/"); } / * 指定加密方式 */ @Bean public PasswordEncoder passwordEncoder() { return new BCryptPasswordEncoder(); }}5. 编写测试案例
- 首先我们先封装一下
Security中我们常用的一些功能,如获取登录者信息,密码加密解密等 SecurityUtils
/ * 安全框架工具类封装 * * @author ding */public class SecurityUtils { private static final BCryptPasswordEncoder PASSWORD_ENCODER = new BCryptPasswordEncoder(); / * 获取登录者的信息 */ public static AuthUser getUser() { return (AuthUser) SecurityContextHolder.getContext().getAuthentication().getPrincipal(); } / * 获取登录者的id */ public static Long getUserId() { AuthUser principal = (AuthUser) SecurityContextHolder.getContext().getAuthentication().getPrincipal(); return principal.getUserId(); } / * 密码加密 * * @param password 明文密码 * @return 加密后的密码 */ public static String passwordEncoder(String password) { return PASSWORD_ENCODER.encode(password); } / * 密码比对 * * @param rawPassword 明文密码 * @param encodedPassword 加密后的密码 * @return 是否通过 */ public static boolean passwordMatches(CharSequence rawPassword, String encodedPassword) { return PASSWORD_ENCODER.matches(rawPassword, encodedPassword); }}- 接口编写
@Controller@Slf4jpublic class IndexController { @GetMapping("/") public String index() { return "index"; } @GetMapping("/toIndex") public String index(Model model) { AuthUser user = SecurityUtils.getUser(); log.info("当前用户为:{}", user); model.addAttribute("user", user); return "index"; } @GetMapping("/toLogin") public String login() { return "login"; }}- 网页编写,页面放在
src/main/resources/templates目录下 login.html
<!DOCTYPE html><html lang="en" xmlns:th="http://www.thymeleaf.org"><head> <meta charset="UTF-8"> <title>登陆页</title></head><body><div> <form action="/login" method="post"> <h2>登陆页</h2> <h6>账号:admin,密码:123456</h6> <input type="text" id="username" name="username" placeholder="admin"> <input type="password" id="password" name="password" placeholder="123456"> <button type="submit">登陆</button> <div th:if="${param.error}" style="color: red;"> 账号或密码错误. </div> <div th:if="${param.logout}" style="color: red;"> 登录失效. </div> </form></div></body></html>index.html
<!DOCTYPE html><html xmlns:th="http://www.thymeleaf.org"><head> <meta charset="UTF-8"> <title>首页</title></head><body><h1>首页</h1><p th:text="'用户:'+${user.username}"></p><br/><a th:href="@{/logout}">退出登录</a><br/></body></html>- 整体项目结构
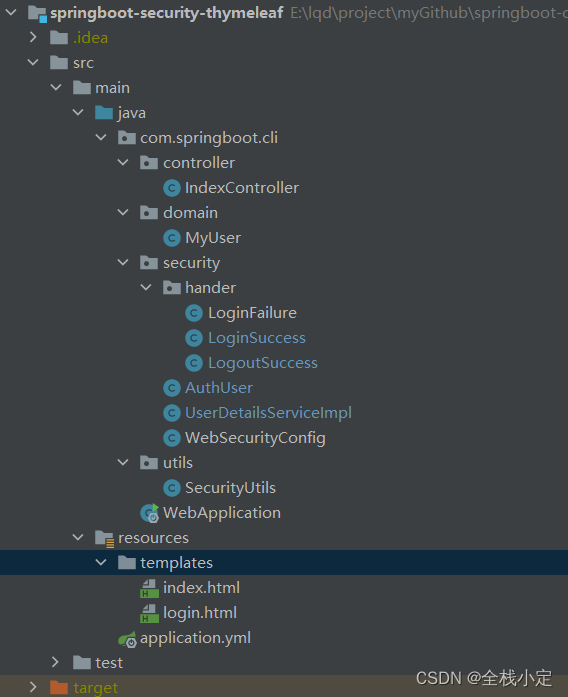
6. 效果演示
- 浏览器输入
http://localhost:9999/
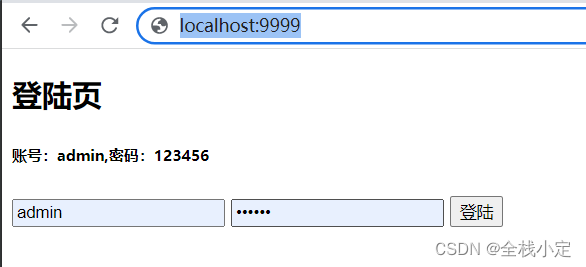
- 输入账号密码登录 admin/123456

7. 源码分享
本系列项目已收录
Springboot、SpringCloud全家桶教程+源码,各种常用框架使用案例都有哦,具备完善的文档,致力于让开发者快速搭建基础环境并让应用跑起来,并提供丰富的使用示例供使用者参考,快来看看吧。
- 项目源码github地址
- 项目源码国内gitee地址

