OpenHarmony编译系统
GN 简介
- 直接百度
GN 入门
- 可以参考下面的示例,作为入门参考学习
- https://blog.csdn.net/weixin_44701535/article/details/88355958
- https://gn.googlesource.com/gn/+/main/docs/reference.md
- https://chromium.googlesource.com/chromium/src/tools/gn/+/48062805e19b4697c5fbd926dc649c78b6aaa138/docs/language.md#Functions
借助openHarmony 代码来学习了解GN
从一个基本的目录来看
- Gn 管理同样是基于目录来常见的基本单元,存在BUILD.gn 来管理当前目录以及下层目录的内容,定义一些label, 后续访问的都是以target作为基本的单元。
- 同时存在一些.gni的文件将一些比较通用的模块(模板),以及一些编译的选项给提取出来,提高复用性,在实际需要的scope中,通过import导入所需要的文件,例如
import("//build/lite/config/component/lite_component.gni")。- 以
foundation/ai/engine/services/server为例来看。首先在该目录下面存在一个BUILD.gn的文件,其次在plugin_manager中同样存在一个BUILD.gn文件来管理当前的目录。 
- 查看
plugin_manager文件内容,可以发现一种常见的固定格式,首先import导入一些的文件, 然后定义一些labels,如gen_etc_ini和plungin_manager
- 查看
- 以
import("//foundation/ai/engine/services/ai_plugin_config.gni")action("gen_etc_ini") { outputs = [ "${root_out_dir}/etc/ai_engine_plugin.ini" ] script = "get_config_ini.py" args = [] args = [ rebase_path(get_path_info("//", "abspath")) ] args += [ rebase_path("$root_out_dir") ] args += [ "${board_name}" ] args += [ "$activate_plugin_list"]}source_set("plugin_manager") { sources = [ "source/aie_plugin_info.cpp", "source/plugin.cpp", "source/plugin_label.cpp", "source/plugin_manager.cpp", ] cflags = [ "-fPIC" ] cflags_cc = cflags include_dirs = [ "//base/hiviewdfx/hilog_lite/interfaces/native/kits/hilog", "//foundation/ai/engine/interfaces/", "//foundation/ai/engine/services/common/", "//foundation/ai/engine/services/server/", "//third_party/bounds_checking_function/include", "//third_party/iniparser", ] deps = [ "//third_party/iniparser:iniparser" ]}- 查看当前目录下的
BUILD.gn文件内容,可以发现其中调用了plugin_manager,使用的是相对路径。 当然使用一些不是当前目录下定义的labels使用的的是Source-tree absolute names。
import("//build/lite/config/component/lite_component.gni")lite_component("ai_server") {target_type = "executable"features = [ "communication_adapter:ai_communication_adapter", "plugin_manager", "server_executor",]cflags = [ "-fPIC" ]ldflags = [ "-Wl,-Map=server.map", "-lstdc++", "-Wl,--whole-archive", "libs/libai_communication_adapter.a", "-Wl,--no-whole-archive", "-ldl", "-pthread",]deps = [ "//base/hiviewdfx/hilog_lite/frameworks/featured:hilog_shared", "//foundation/ai/engine/services/common/platform/dl_operation:dlOperation", "//foundation/ai/engine/services/common/platform/event:event", "//foundation/ai/engine/services/common/platform/os_wrapper/ipc:aie_ipc", "//foundation/ai/engine/services/common/platform/lock:lock", "//foundation/ai/engine/services/common/platform/semaphore:semaphore", "//foundation/ai/engine/services/common/platform/threadpool:threadpool", "//foundation/distributedschedule/samgr_lite/samgr:samgr",]}lite_component("server") { features = [ ":ai_server", "plugin:plugin", "plugin_manager:gen_etc_ini", ]}- 细看这些内容,设计到的一些常用的Target 声明,以及一些自定义的模板。
lite_component便是一个模板,定义位于/mnt/d/workspace/code/code-v3.1-Beta/OpenHarmony/build/lite/config/component/lite_component.gni文件中。定义中使用了一些内置的函数,assert,defined,foreach, 以及一些流程控制和判断表达式的使用。其中的invoker做一个不严谨的类比,如果模板定义为一个类的话,那么通过该模板定义的一个Target可以类比为一个实例,那么invoker类比为 cpp 或者java中的this,python中的self,指代当前的实例 。关于其中的target, 主要是用于在运行时,推断编译时无法获取的 target内容,target(“source_set”, “doom_melon”) { 等于source_set(“doom_melon”) { 关于其中的forward_variables_from 则从给定的scope拷贝到本地的scope中。
template("lite_component") { assert(defined(invoker.features), "Component features is required.") if (!defined(invoker.target_type)) { target_type = "group" } else if (invoker.target_type == "static_library") { target_type = "group" } else { target_type = invoker.target_type } assert(target_type != "") target(target_type, target_name) { deps = [] forward_variables_from(invoker, "*") # add component deps if (defined(invoker.deps)) { deps += invoker.deps } # add component features foreach(feature_label, features) { deps += [ feature_label ] } }}- 关于这些Targets 内部可以定义的变量以及内置的变量。如target_type, features,cflags, ldflags, deps。
从整个项目来看
- 在根目录下存在
.gn完成gn相关的一些配置文件。
# The location of the build configuration file.buildconfig = "//build/config/BUILDCONFIG.gn"# The source root location.root = "//build/core/gn"# The executable used to execute scripts in action and exec_script.script_executable = "/usr/bin/env"- 从基本的配置文件
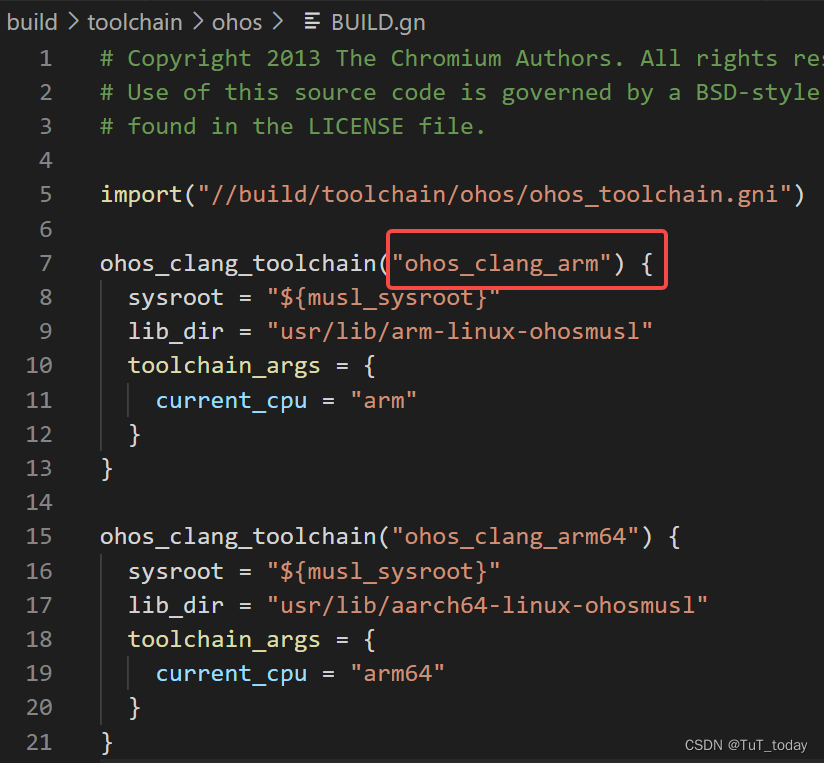
/mnt/d/workspace/code/code-v3.1-Beta/OpenHarmony/build/lite/config/BUILDCONFIG.gn来看,主要的是基础配置,设定工具链,以及一些基础的编译选项- set_default_toolchain
- set_defaults
- config
- declare_args
declare_args() {enable_teleporter = trueenable_doom_melon = false}If you want to override the (default disabled) Doom Melon:gn --args="enable_doom_melon=true enable_teleporter=true"This also sets the teleporter, but it's already defaulted to on so it willhave no effect.
命令行
- 关于Gn 本身提供的命令选项可以通过查看这些命令参数来查看,
编译AI子系统
- 参考该目录下的README.md 搭建编译环境,
https://gitee.com/openharmony/build_lite/blob/master/README_zh.md - 安装hb python 包,切换到opon harmony源码下,切换到python 虚拟环境
python3 -m pip install --user build/lite 看到 Successfully installed ohos-build-0.4.4, 如果没有看到,尝试多次执行该命令 The script hb is installed in '/home/wang/.local/bin' which is not on PATH. /home/wang/.local/bin 添加到环境变量中 ~/.bashrc source ~/.bashrc

- 设定一些基本配置
hb set -root ./# 当前源码目录,接下来弹出一个选择开发板, 上下选择, 回车选择# OHOS Which product do you need? ohos-arm64
使用build.sh编译
./build.sh --product-name rk3568 --ccache --jobs 16# 报错,缺少ruby 的环境/usr/bin/env: ‘ruby’: No such file or directory# 安装ruby 环境sudo apt updatesudo apt install ruby-full# 缺库# libtinfo.so.5: cannot open shared object file# install ls /lib/x86_64-linux-gnu/libtinfo.*sudo ln -s /lib/x86_64-linux-gnu/libtinfo.so.6.2 /lib/x86_64-linux-gnu/libtinfo.so.5# 版本不兼容/lib/x86_64-linux-gnu/libtinfo.so.5: version `NCURSES_TINFO_5.0.19991023' not found (required by ../../prebuilts/mingw-w64/ohos/linux-x86_64/clang-mingw/bin/clang)# installsudo apt-get install libncurses5 sudo apt install openjdk-11-jdk- 编译成功
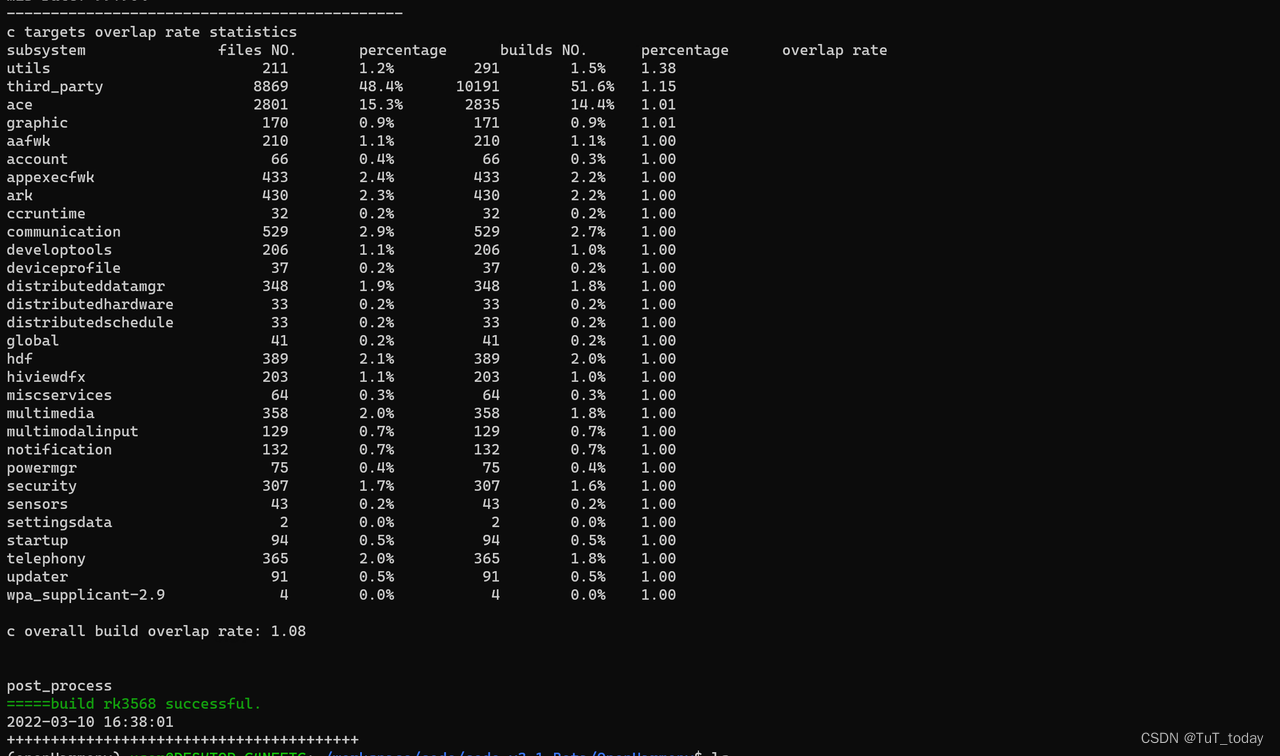
- 查看生成的文件

分析
- 该入口中主要做三部分内容,首先检查下安装的依赖是否完成, 然后配置下preloader , 之后build
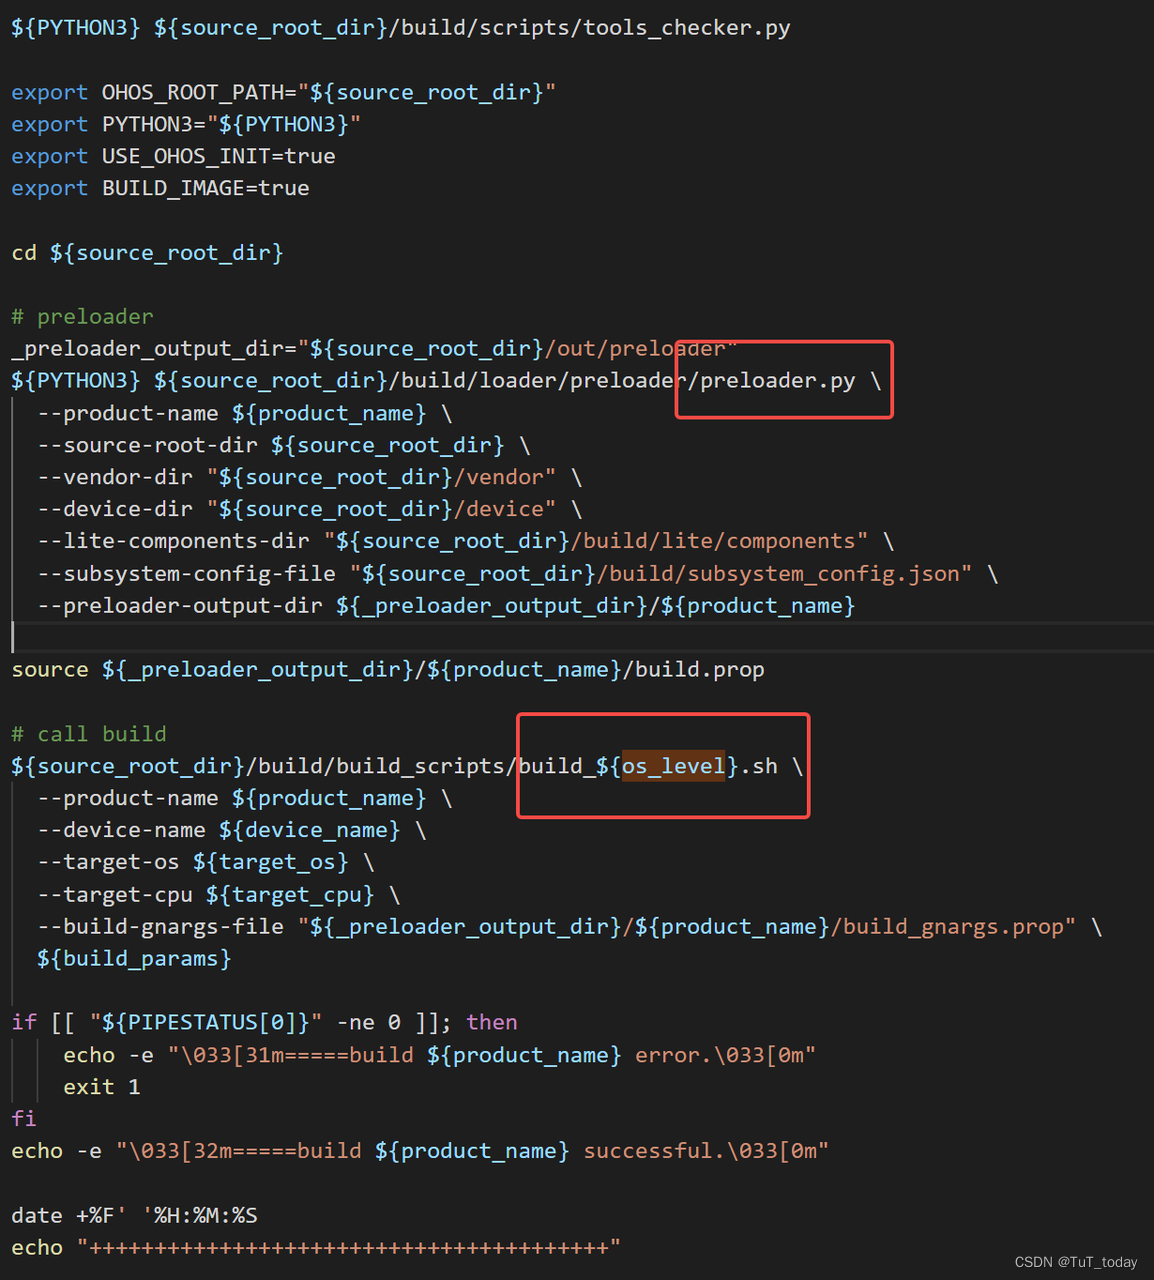
-
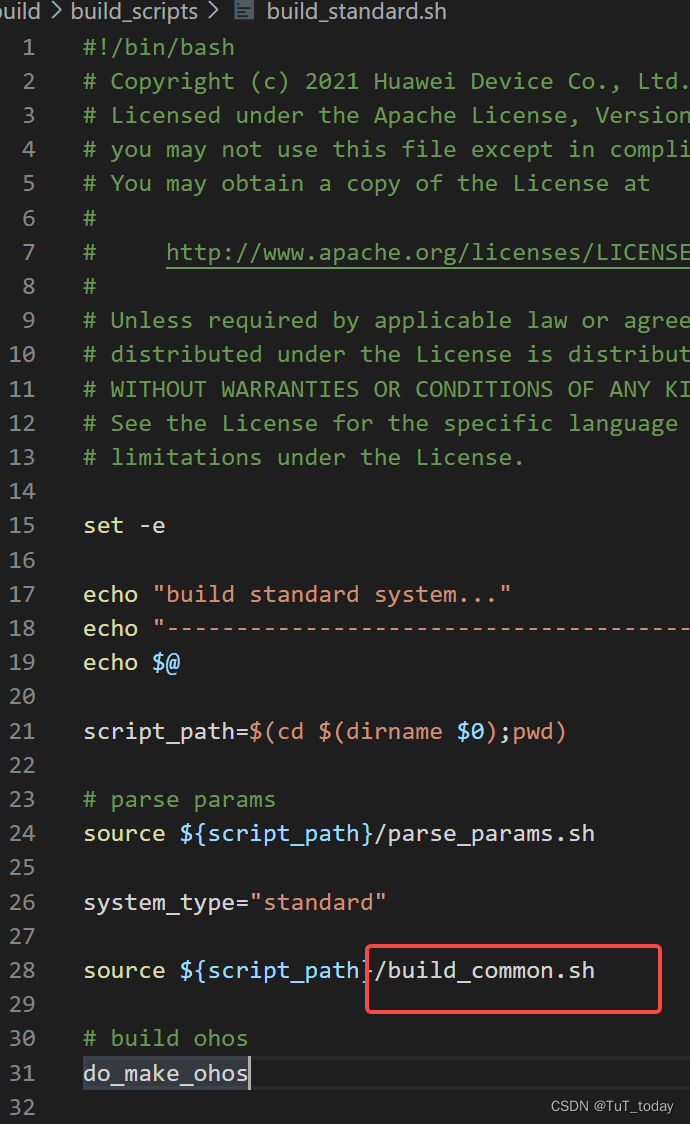
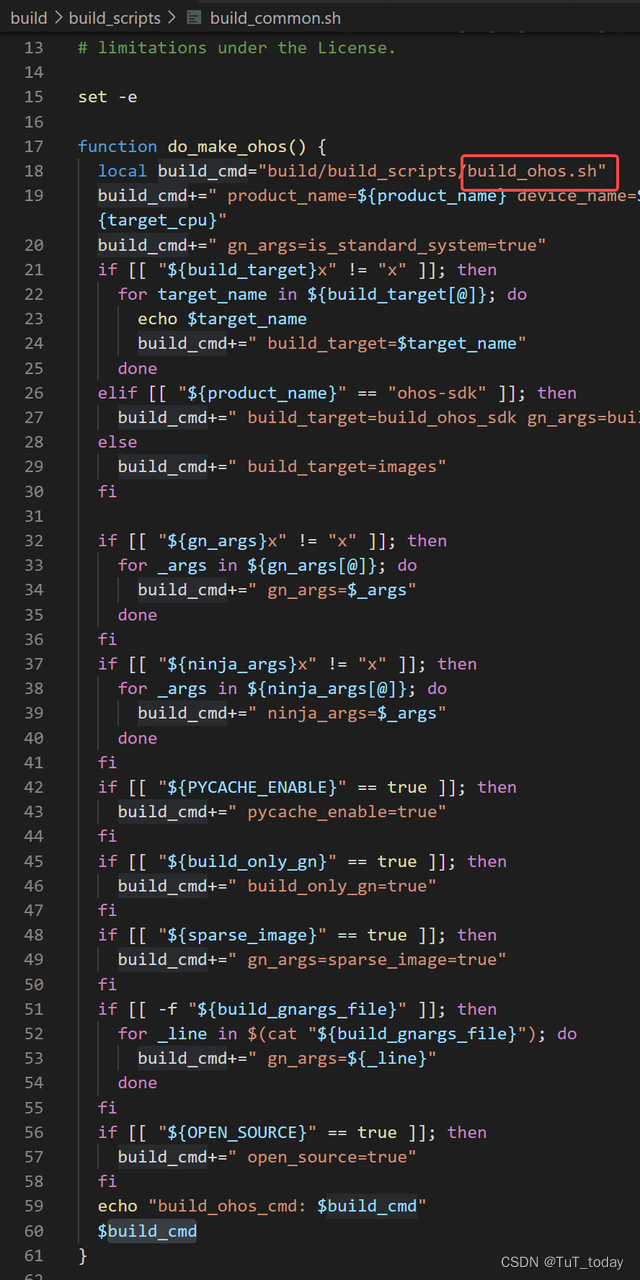
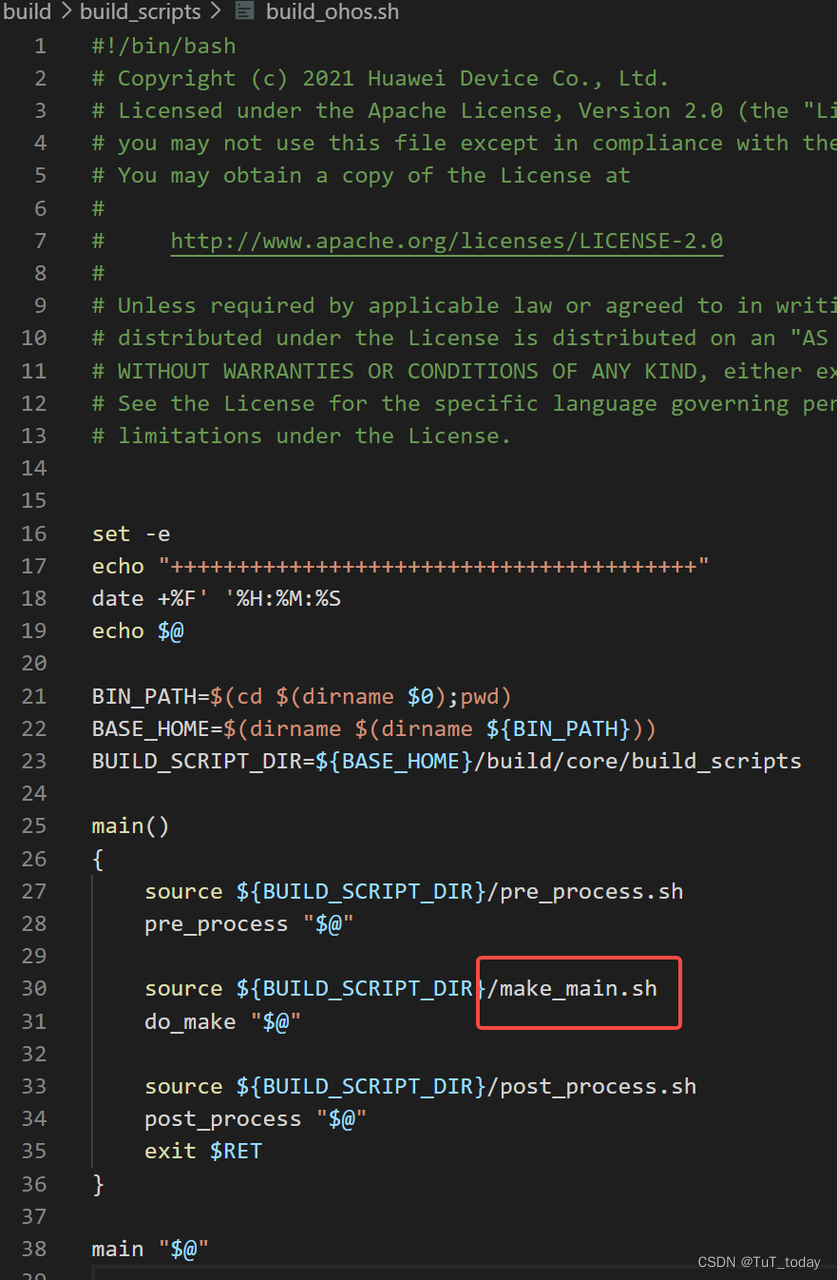
看下面的内容,会发现,最后还是走到了 调用gn, 然后最后调用Ninja
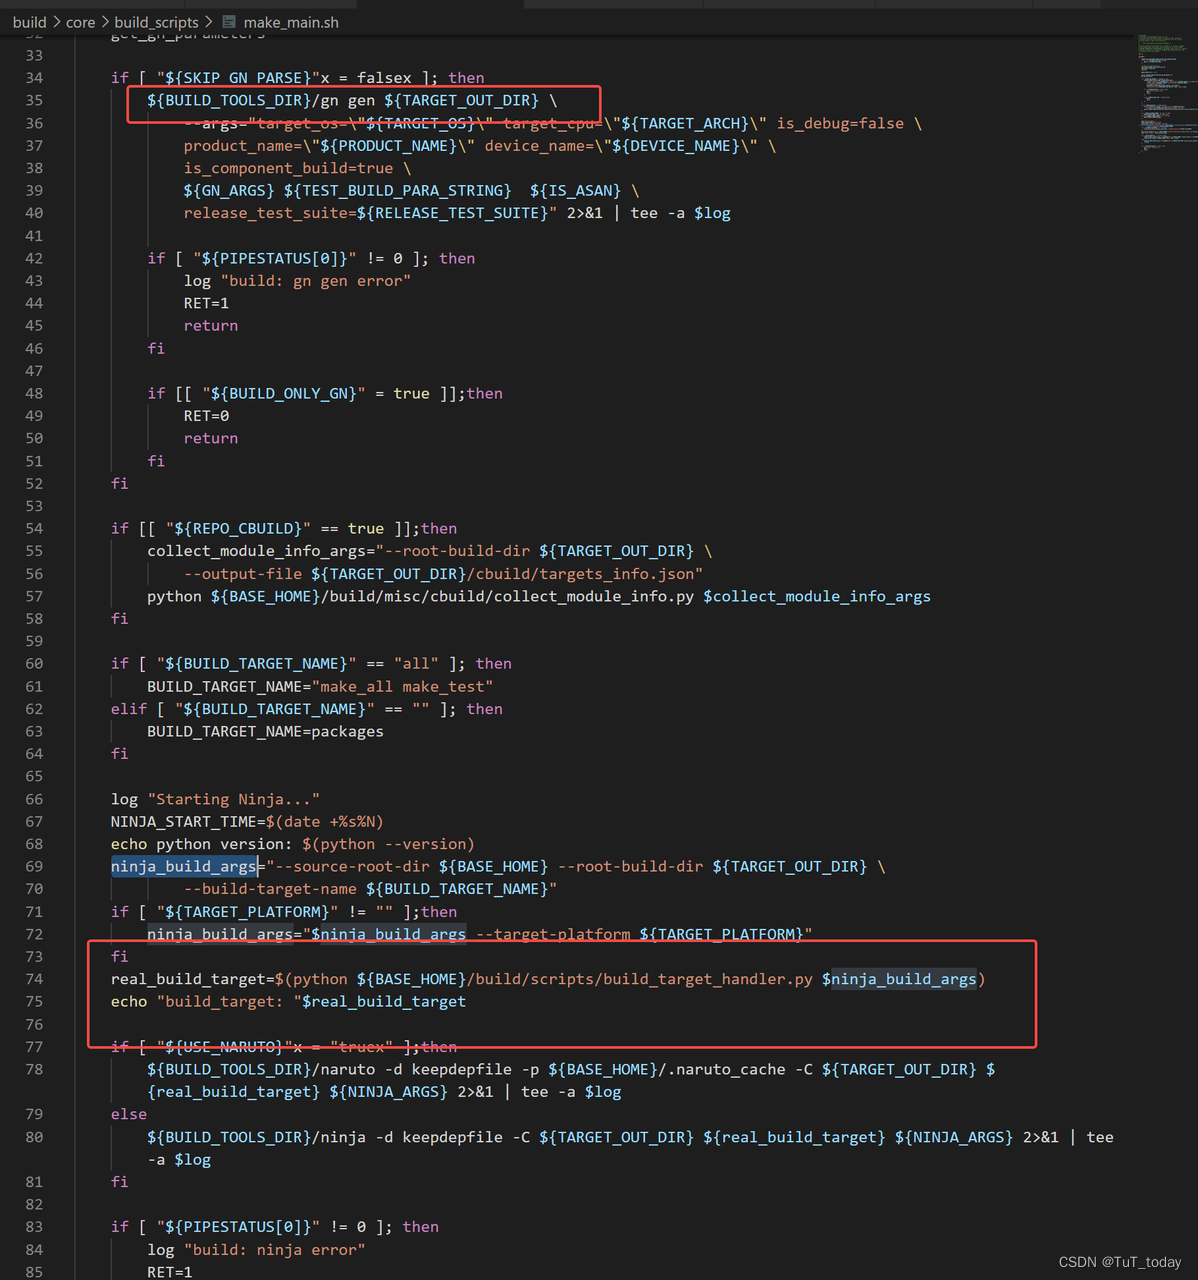
-
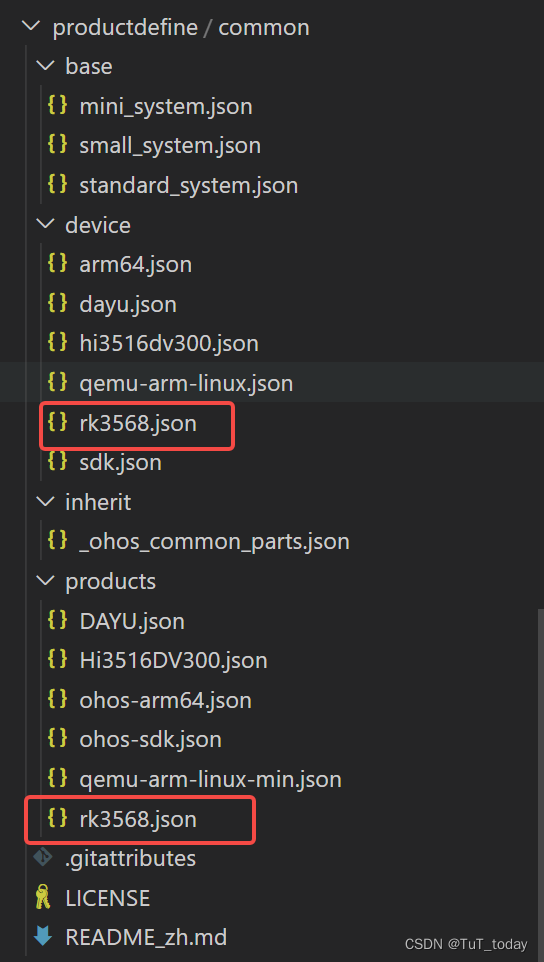
关于在preloader中工作,读取提前设置好配置文件,设置文件中主要是编译的配置,编译哪部分内容,以及选择对应的工具链的label。下图中为主要的配置json文件,关于这些文件的配置,可以参考该目录下的README_zh.md。

- 主要读取的json文件,以及选择好使用的工具链。