JavaWeb学习笔记(全)(狂神)
1.web的基本概念
1.1前言
web开发:
-
web,网页的意思
-
静态web
- html、css
- 提供给所有人看的数据始终不会发生变化!
-
动态web
- 淘宝,几乎是所有的网站。
- 提供给所有人看的数据始终会发生变化,每个人在不同的时间,不同的地点看到的信息各不相同。
- 技术栈:servlet/JSP,ASP,PHP
在java中,动态web资源开发的技术统称为JavaWeb
1.2web应用程序
web应用程序:可以提供浏览器访问的程序
- a.html 、b.html … 多个web资源,这些web资源可以被外界访问,对外界提供服务。
- 你能访问到的任何一个页面或者资源,都存在于这个世界的某一个角落的计算机上。
- URL
- 这个统一的web资源会被放在同一个文件夹下,web应用程序–》tomcat:服务器
- 一个web应用由多部分组成(静态web,动态web)
- html,css,js
- jsp,servlet
- java程序
- jar包
- 配置文件(Properties)
web应用编写完毕后,若想提供给外界访问,需要一个服务器来统一管理。
1.3静态web
*.htm,*.html这些都是网页的后缀,如果服务器上一直存在这些东西,我们就可以直接进行读取。- 静态web存在缺点
- web页面无法动态更新,所有用户看到都是同一个页面
- 轮播图,点击特效:伪动态
- JavaScript【实际开发中,它用的最多】
- VBScript
- 它无法和数据库交互(数据无法持久化,用户无法交互)
- web页面无法动态更新,所有用户看到都是同一个页面
1.4动态web
页面会动态展示:web的页面展示的效果因人而异
缺点:
- 假如服务器的动态资源出现了错误,我们需要重新编写我们的后台程序,重新发布。
- 停机维护
优点:
- web页面可以动态更新,所有用户都可以看到不同的页面
- 它可以与数据库交互(数据持久化)
2.web服务器讲解
2.1技术讲解
ASP:
- 微软:国内最早流行的就是ASP
- 在html中嵌入了VB的脚本,ASP+COM
- 在ASP开发中,基本一个页面都是几千行的业务代码,页面极其乱
- 维护成本高
- C#
- IIS
PHP:
- PHP开发速度很快,功能很强大,跨平台,代码很简单
- 无法承载大访问量的情况(局限性)
JSP/Servlet:
B/S:浏览器和服务器
C/S:客户端和服务器
- sun公司主推的B/S架构
- 基于java语言的(所有的发送四,或者一些开源的组件,都是用java写的)
- 可以承载三高问题带来的影响
- 语法像ASP
2.2web服务器
服务器是一种被动的操作,用来处理用户的一些请求和给用户一些响应信息
IIS
微软的 windows中自带的
Tomcat

Tomcat是Apache 软件基金会(Apache Software Foundation)的Jakarta 项目中的一个核心项目,最新的Servlet 和JSP 规范总是能在Tomcat 中得到体现。因为Tomcat 技术先进、性能稳定,而且免费,因而深受Java 爱好者的喜爱并得到了部分软件开发商的认可,成为目前比较流行的Web 应用服务器。
Tomcat 服务器是一个免费的开放源代码的Web 应用服务器,属于轻量级应用服务器,在中小型系统和并发访问用户不是很多的场合下被普遍使用,是开发和调试JSP 程序的首选。对于一个java初学web的人来说,它是最佳的选择。
诀窍是,当配置正确时,Apache 为HTML页面服务,而Tomcat 实际上运行JSP 页面和Servlet。
工作3-5年之后,可以尝试手写tomcat服务器。
下载tomcat:
- 安装 or 解压
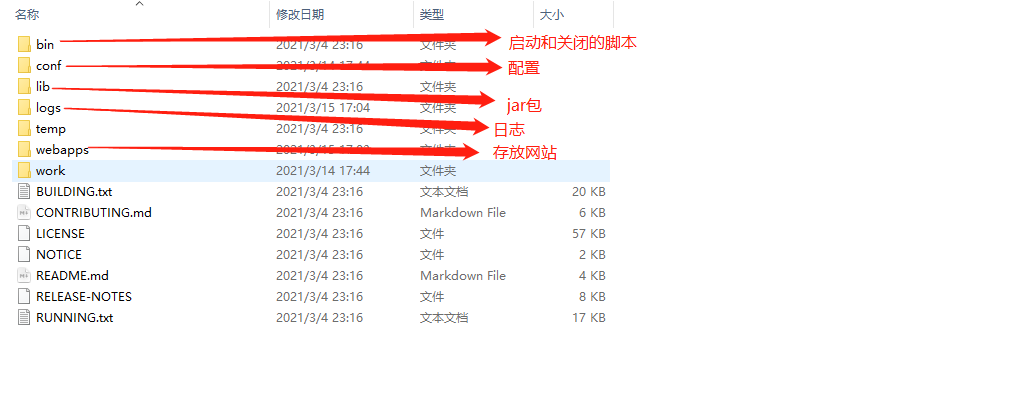
- 了解配置文件及目录结构
- 这个东西的作用
3.tomcat详解
3.1安装tomcat
官网:https://tomcat.apache.org/
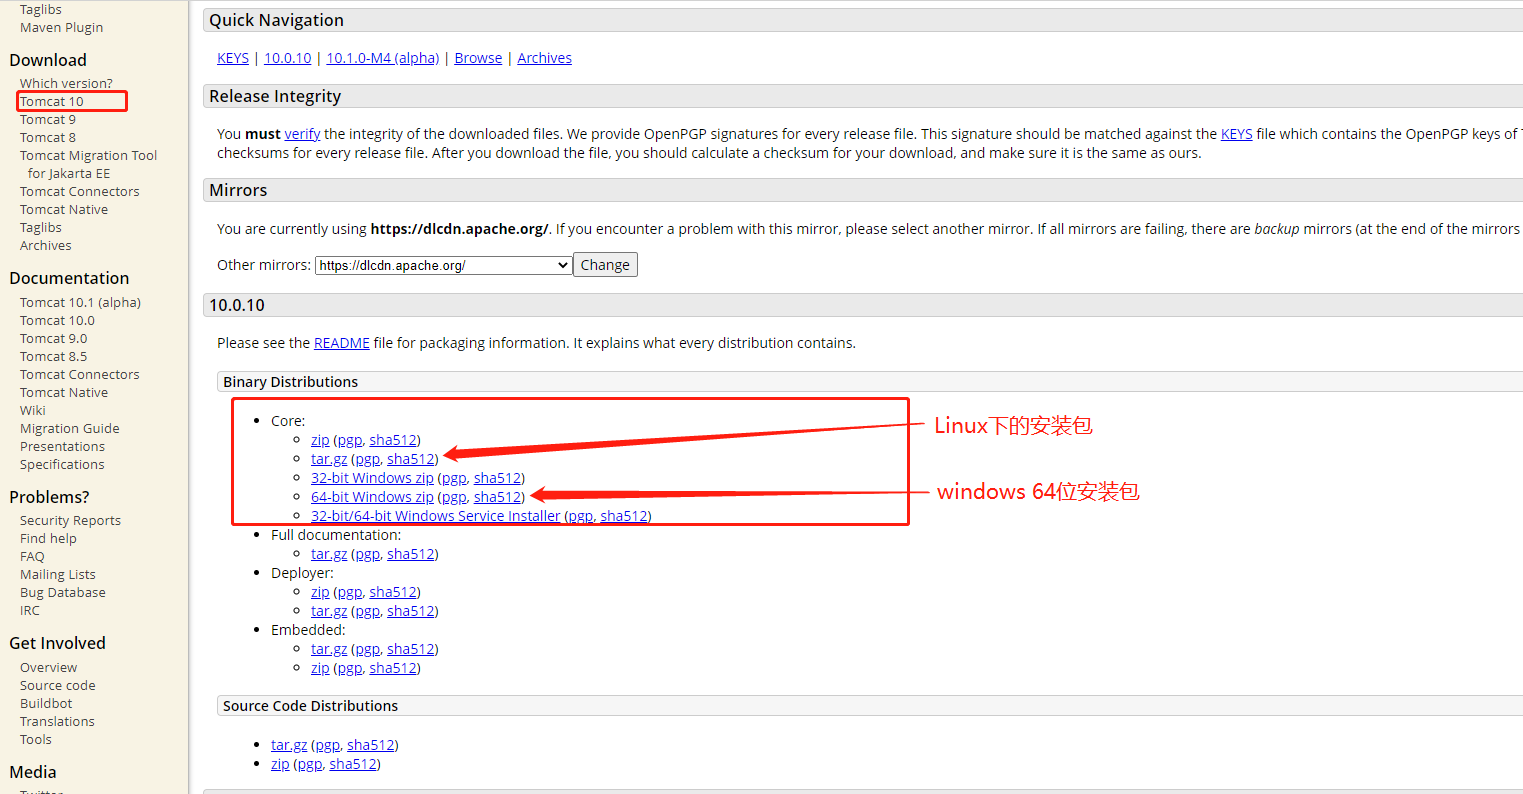
解压

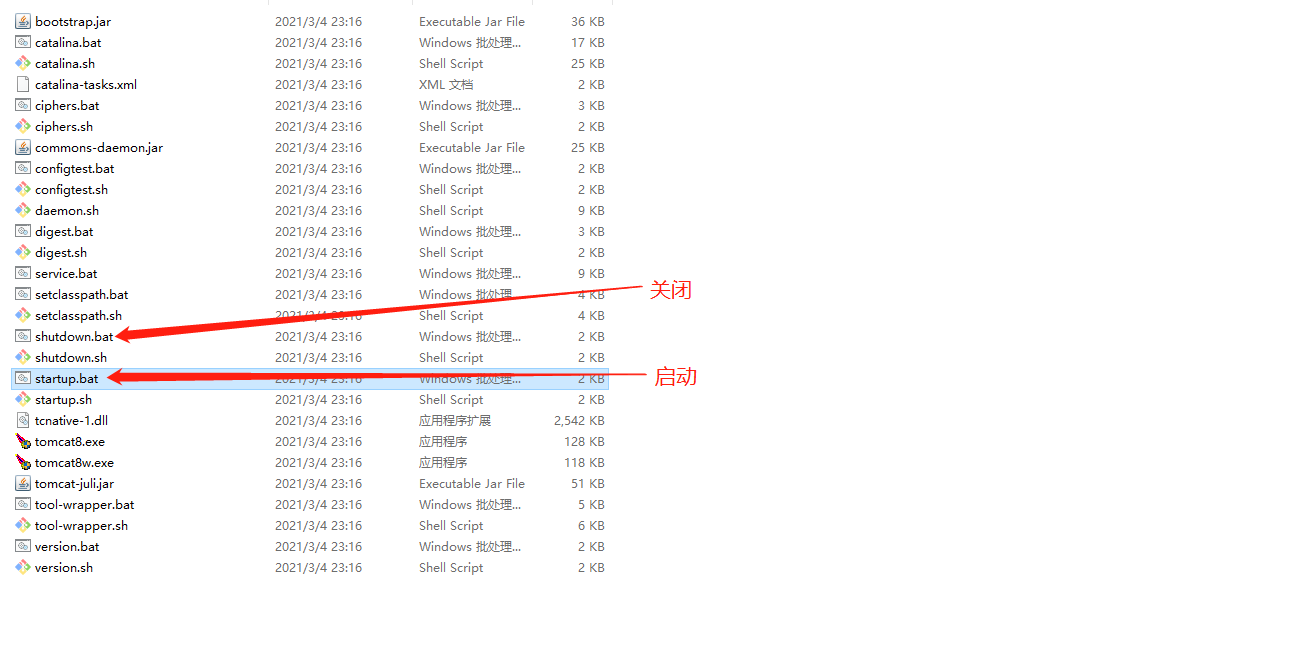
3.2tomcat启动和配置
启动,关闭tomcat
访问测试:http://localhost:8080/
可能遇到的问题:
- java环境变量没有配置
- 闪退问题:需要配置兼容性
- 乱码问题:配置文件中设置
3.3配置
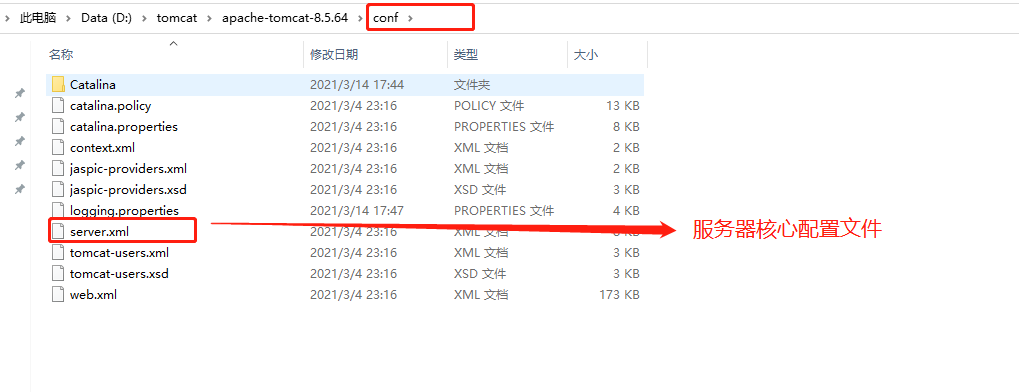
可以配置启动的端口号
-
tomcat的默认端口为:8080
-
mysql默认端口:3306
-
http默认端口:80
-
https默认端口:443
<Connector port="8080" protocol="HTTP/1.1" connectionTimeout="20000" redirectPort="8443" />
可以配置主机的名称
- 默认的主机名为:localhost — 127.0.0.1
- 默认网站应用存放的位置为webapps
<Host name="localhost" appBase="webapps" unpackWARs="true" autoDeploy="true">高难度面试题:
请你谈谈网站是如何进行访问的?
- 输入一个域名;回车
- 检查本机的配置文件C:\Windows\System32\drivers\etc\hosts下有没有这个域名的映射
- 有:直接返回对应的ip地址,这个地址中,有我们需要放的web程序,可以直接访问
- 没有:去DNS服务器找,找到的话就返回,找不到就返回找不到
4.可以配置一下环境变量(可选项)
3.4发布一个web网站
不会就先模仿
- 将自己写的网站,放到服务器(tomcat)中指定的web应用的文件夹(webapps)下,就可以访问了
网站应该有的结构
- webapps : tomcat服务器的web目录
- ROOT
- kuangstudy : 网站的目录名
- WEB-INF
- classes : java程序
- lib : web应用所依赖的jar包
- web.xml : 网站配置文件
- index.html : 默认的首页
- static
- css
- style.css
- js
- img
- css
- …
- WEB-INF
4.http详解
4.1什么是HTPP
超文本传输协议(Hyper Text Transfer Protocol,HTTP)是一个简单的请求-响应协议,它通常运行在TCP之上。
- 文本:html,字符串…
- 超文本:图片,音乐,视频,定位,地图…
- 80
HTTPS:安全的
- 443
4.2两个时代
- http1.0
- HTTP/1.0 : 客户端可以与web服务器连接后,只能获得一个web资源,断开连接
- http2.0
- HTTP/1.1:客户端可以与web服务器连接后,可以获得多个web资源。
4.3Http请求
- 客户端—发送请求(Request)–服务器
百度:
Request URL: https://www.baidu.com/ 请求地址Request Method: GET get方法/post方法Status Code: 200 OK 状态码:200Remote Address: 14.215.177.38:443Accept: text/html,application/xhtml+xml,application/xml;q=0.9,image/avif,image/webp,image/apng,*/*;q=0.8,application/signed-exchange;v=b3;q=0.9Accept-Encoding: gzip, deflate, brAccept-Language: zh-CN,zh;q=0.9Cache-Control: no-cacheConnection: keep-aliveCookie: BIDUPSID=E915D8DAC0FCA4159DF81414176EBD43; PSTM=1618281055; BAIDUID=E915D8DAC0FCA415F0B2ABB582D30135:FG=1; __yjs_duid=1_042d578ea86bfb698f35ffbf7e97f5ff1619488718760; BAIDUID_BFESS=E915D8DAC0FCA415F0B2ABB582D30135:FG=1; COOKIE_SESSION=16414_3_8_4_7_1_1_0_7_1_0_0_16416_0_3_0_1625410778_1625394325_1625410775%7C9%2379260_3_1625394323%7C2; BD_LAST_QID=9581266030928333830Host: www.baidu.com1.请求行
- 请求行中的请求方式:GET
- 请求方式:GET,POST,HEAD,DELETE,PUT,TRACT…
- get:请求能够携带的参数比较少,大小有限制,会在浏览器的URL地址拦显示数据内容,不安全,但是高效
- post:请求能都携带的参数没有限制,大小没有限制,不会再在浏览器的URL地址拦显示数据内容,安全,但是不高效。
2.消息头
Accept: 高速浏览器,它所支持的类型Accept-Encoding: 支持哪种编码格式 GBK UTF-8 GB2312 ISO8859-1Accept-Language: 告诉浏览器,它的语言环境Cache-Control: 缓存控制Connection: 告诉浏览器,请求完成是断开还是保持连接Host:主机4.4Http响应
- 服务器—响应—客户端
百度:
Cache-Control: private 缓存控制Connection: keep-alive 连接保持Content-Encoding: gzip 编码Content-Type: text/html;charset=utf-8 类型1.响应体
Accept: 高速浏览器,它所支持的类型Accept-Encoding: 支持哪种编码格式 GBK UTF-8 GB2312 ISO8859-1Accept-Language: 告诉浏览器,它的语言环境Cache-Control: 缓存控制Connection: 告诉浏览器,请求完成是断开还是保持连接Host:主机Refresh:高速客户端,多久刷新一次Location:让网页重新定位2.响应状态码
200:请求响应成功
3xx:请求重定向
- 重定向:你重新到我给你的新位置去
4xx:找不到资源 404
- 资源不存在
5xx:服务器代码错误 500 502(网关错误)
常见面试题:
当你的浏览器中地址拦输入地址并回车的一瞬间到页面能够展示回来,经历了什么?
5.maven环境搭建
我们为什么要学习这个技术?
-
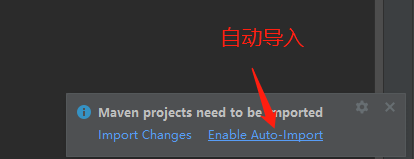
在javaweb开发中,需要使用大量的jar,我们手动去导入
-
如何能够让一个东西自动帮我导入和配置这个jar包
由此,Maven诞生了!
5.1Maven项目架构管理工具
我们目前就是方便导入jar包的
Maven的核心思想:约定大于配置
- 有约束,不要去违反
Maven会规定好你该如何取编写我们的java代码,必须要按照这个规范来。
5.2下载安装Maven
官网:https://maven.apache.org/
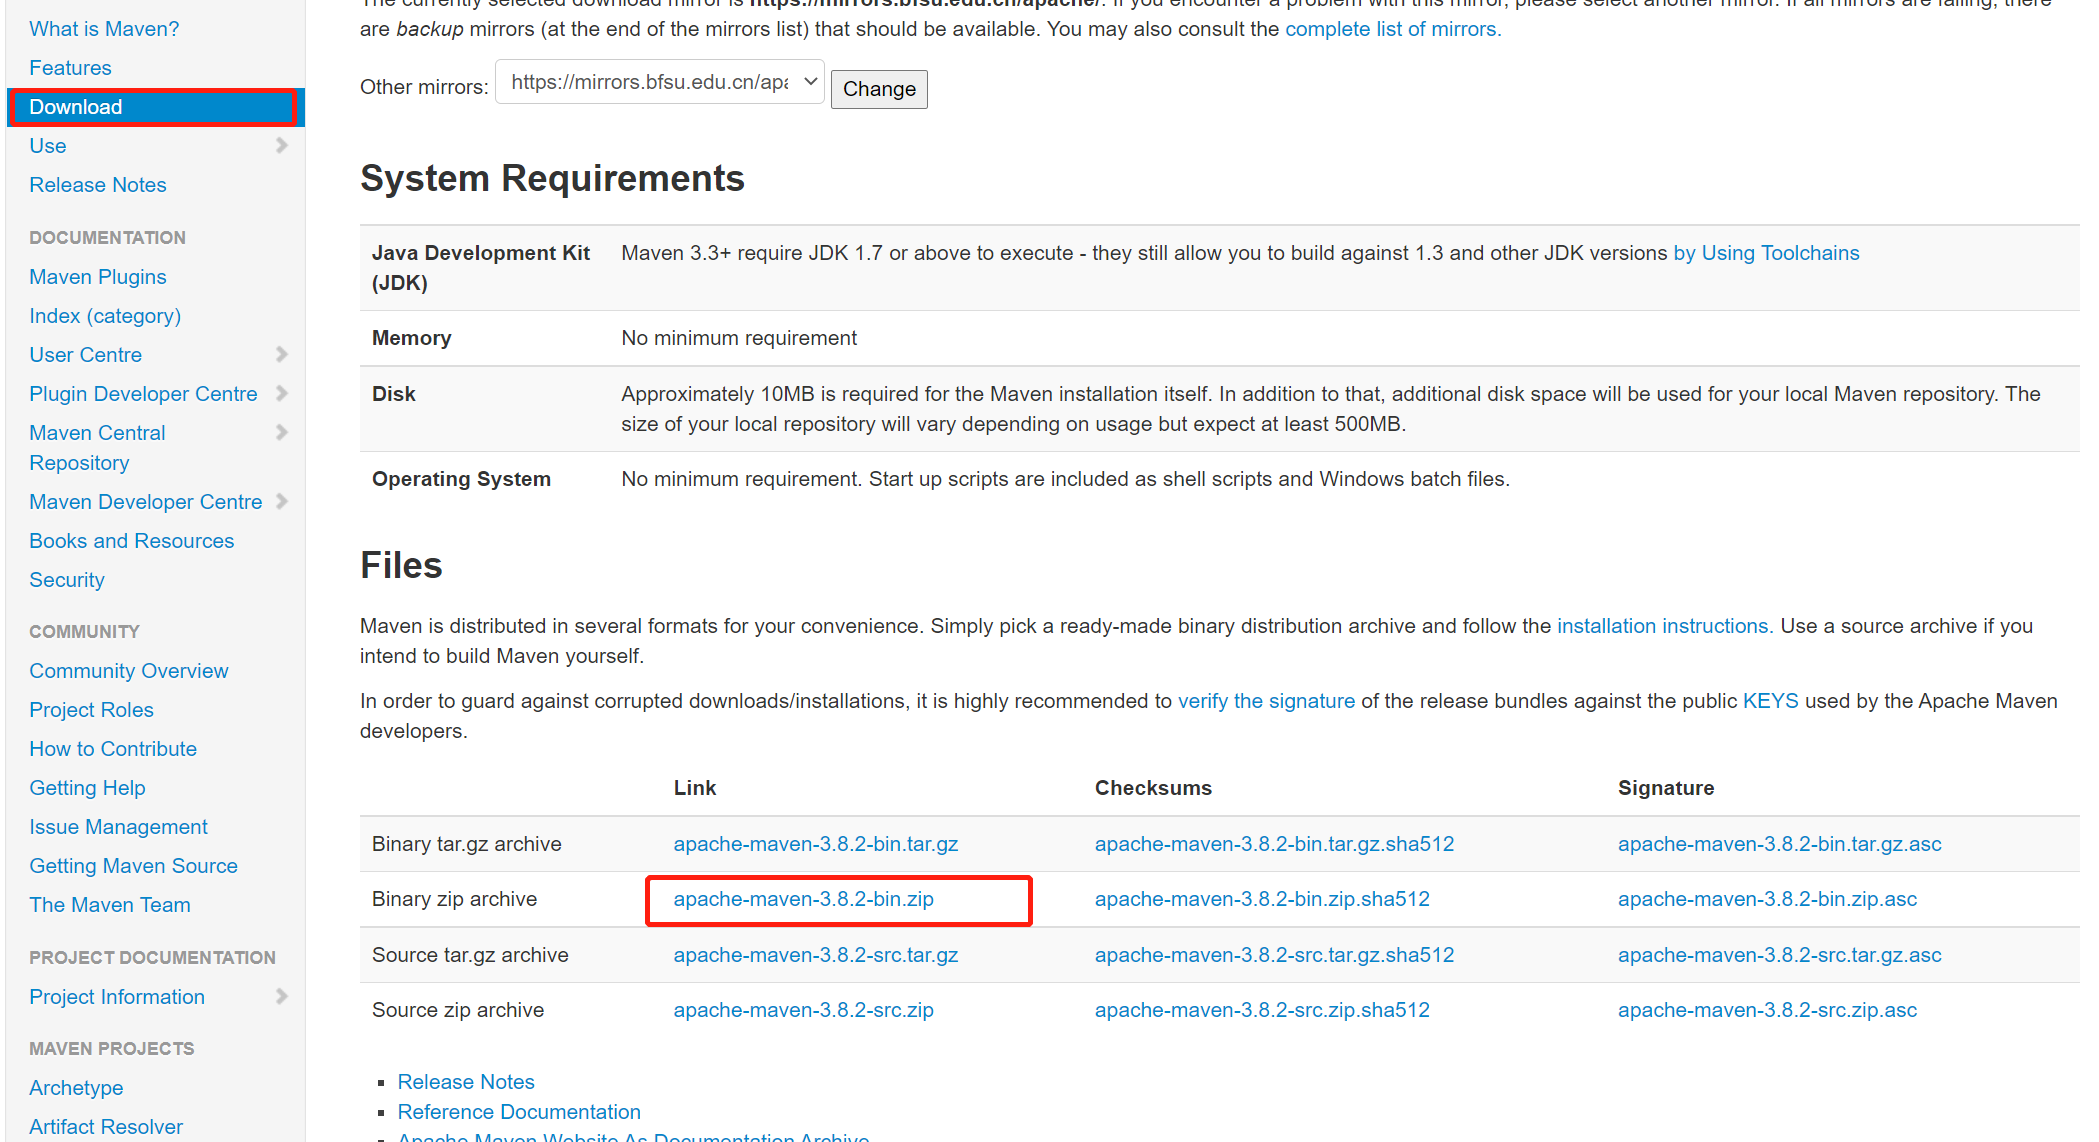
下载完成后,解压即可
友情建议:电脑上的所有环境都放到一个文件夹下,方便管理
5.3环境变量配置
在我们的系统环境变量中
配置如下配置:
- M2_HOME maven目录下的bin目录
- MAVEN_HOME maven的目录
- 在系统的Path中配置%MAVEN_HOME%/bin

测试Maven是否安装成功,保证必须配置完毕!
5.4阿里云镜像
- 镜像:mirrors
- 作用:加速我们的下载
- 国内建议使用阿里云的镜像
<mirror> <id>nexus-aliyun</id> <mirrorOf>*,!jeecg,!jeecg-snapshots</mirrorOf> <name>Nexus aliyun</name> <url>http://maven.aliyun.com/nexus/content/groups/public</url> </mirror>5.5本地仓库
在本地的仓库,远程仓库;
建立一个本地仓库:localRepository
<localRepository>D:/mavenRepository</localRepository>6.idea中的maven操作
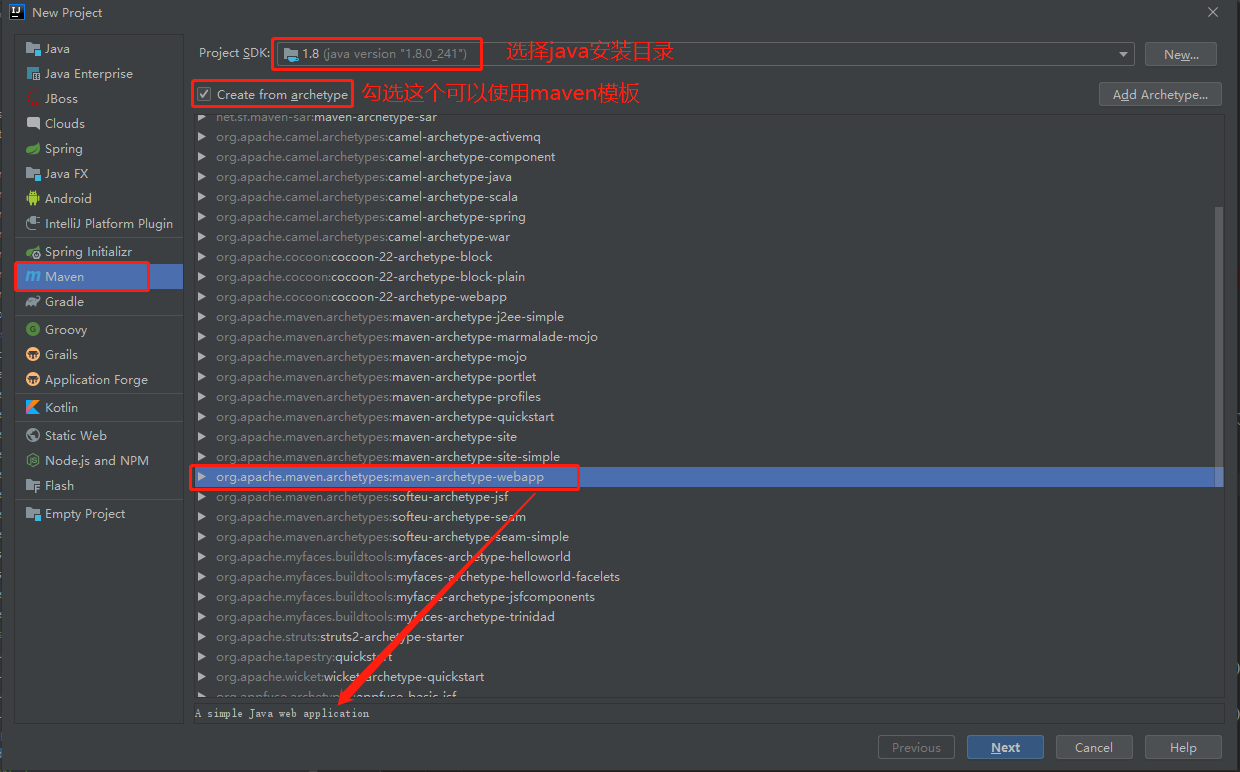
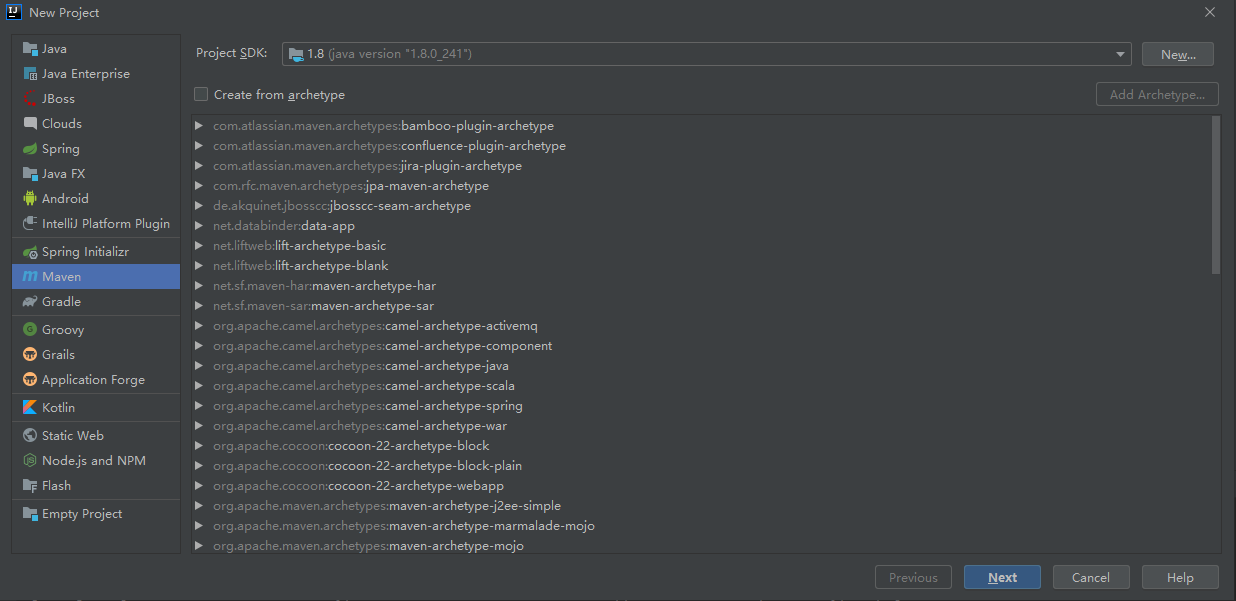
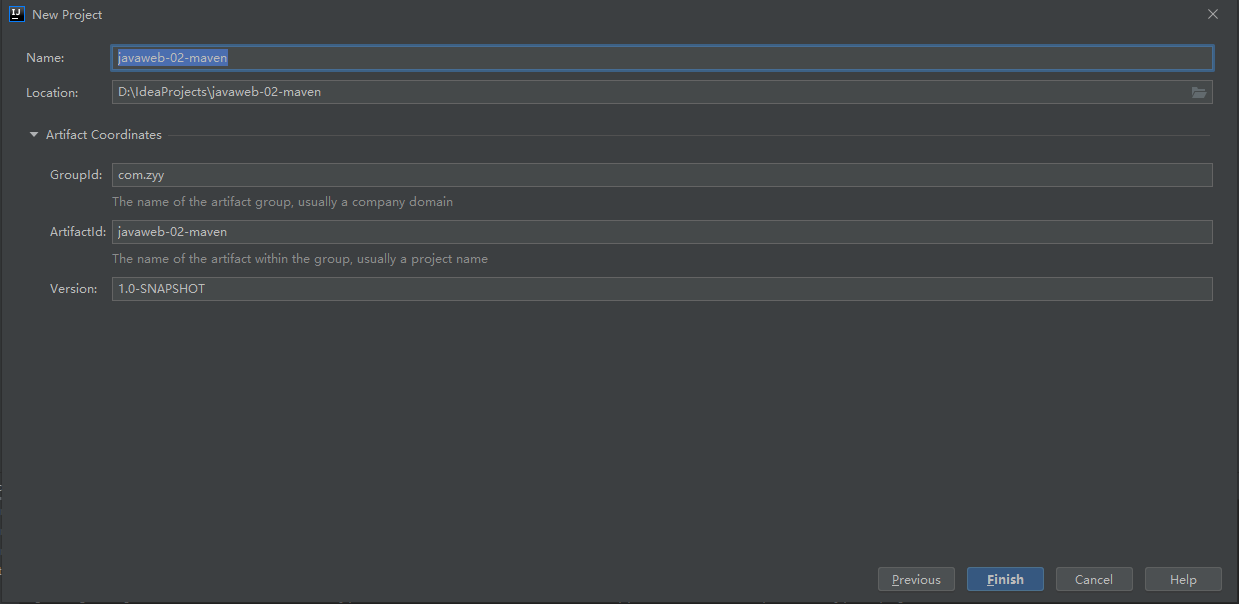
6.1创建一个maven项目
-
启动idea
-
创建一个maven web项目

-
等待项目初始化完毕
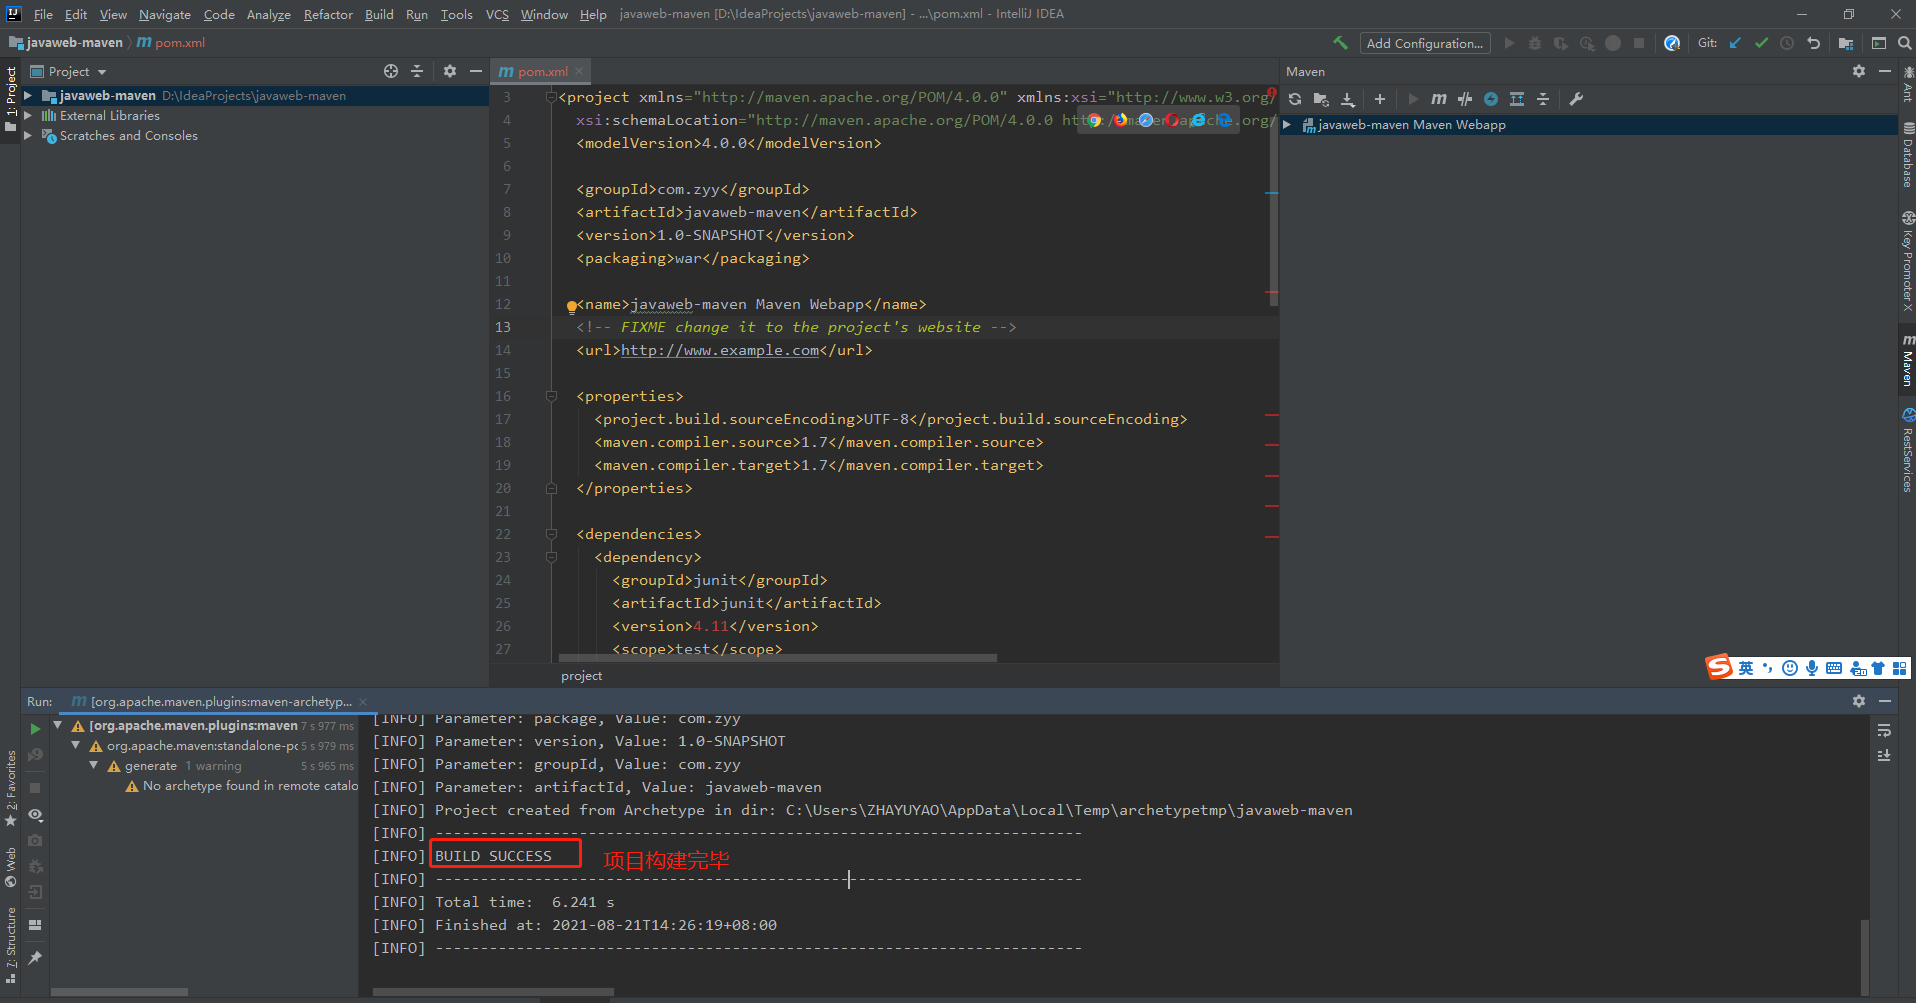
-
观察maven仓库中多了什么东西?
-
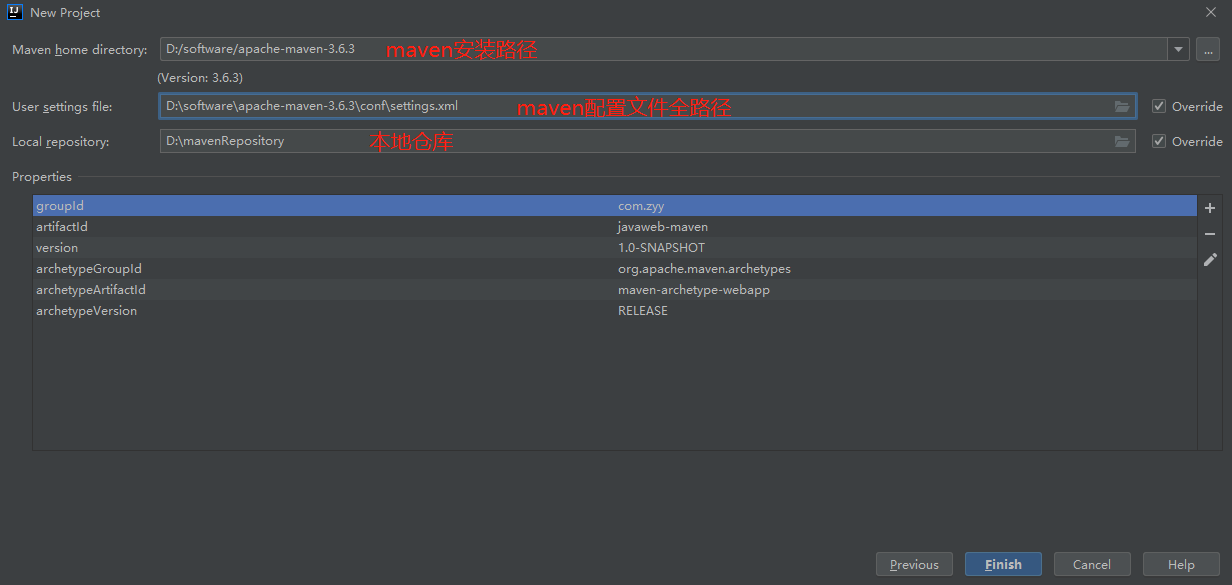
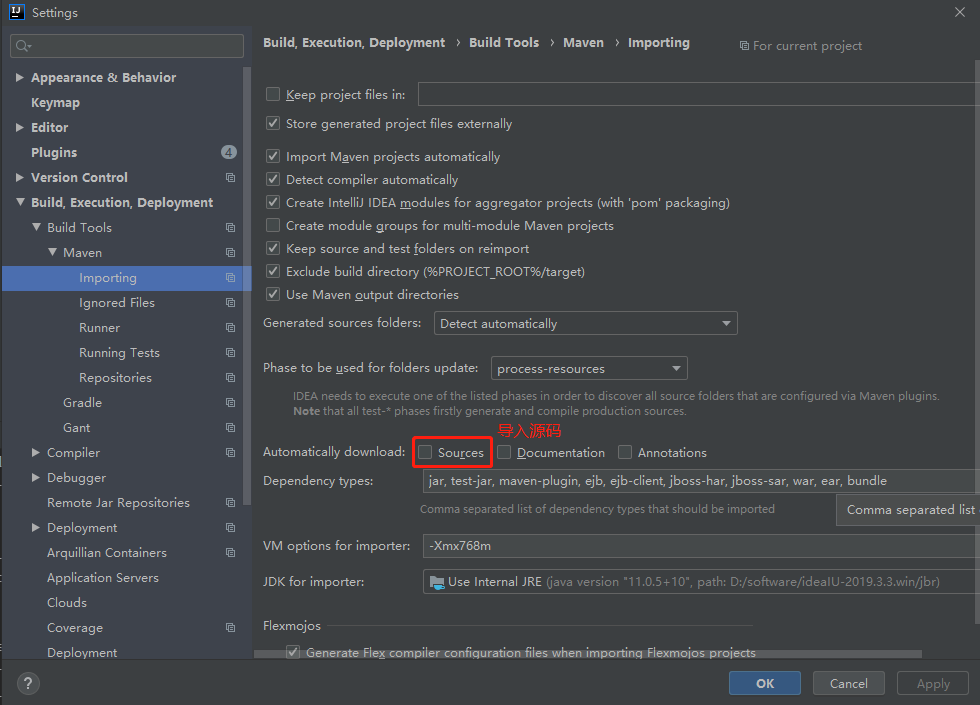
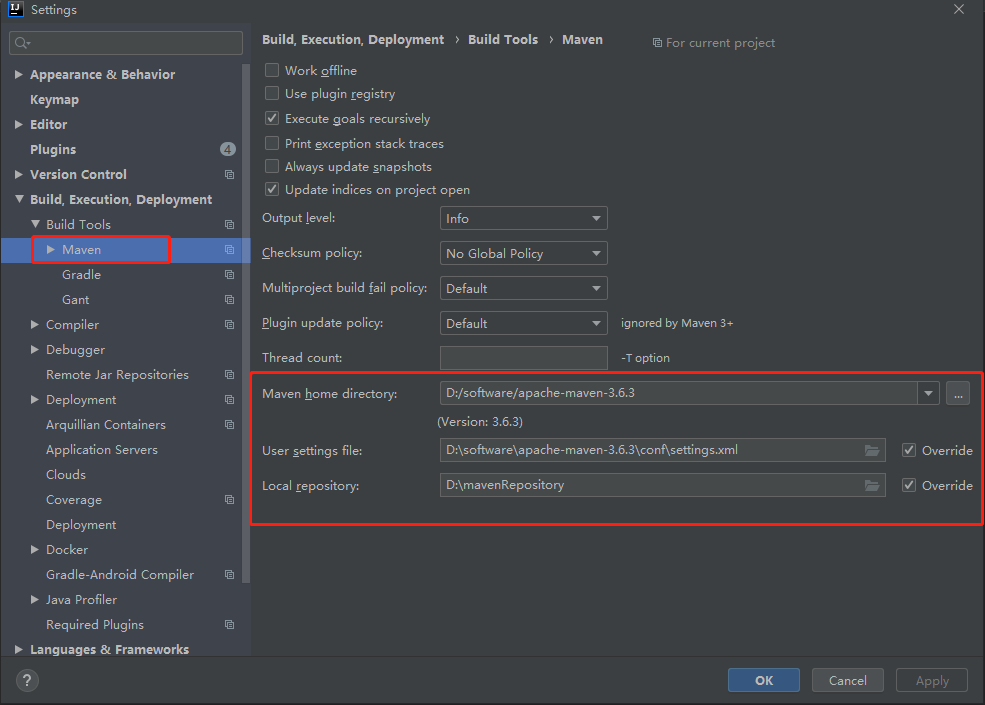
idea中maven设置
idea项目创建成功后,看一眼Maven的配置
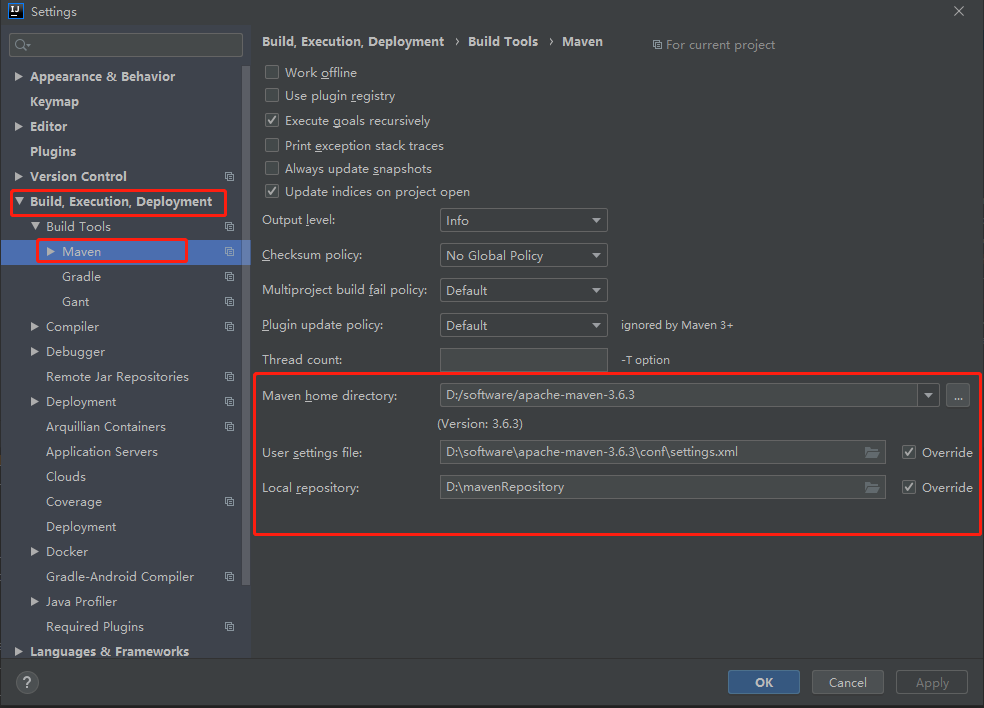
-
到这里,maven在idea中的配置和使用就ok了
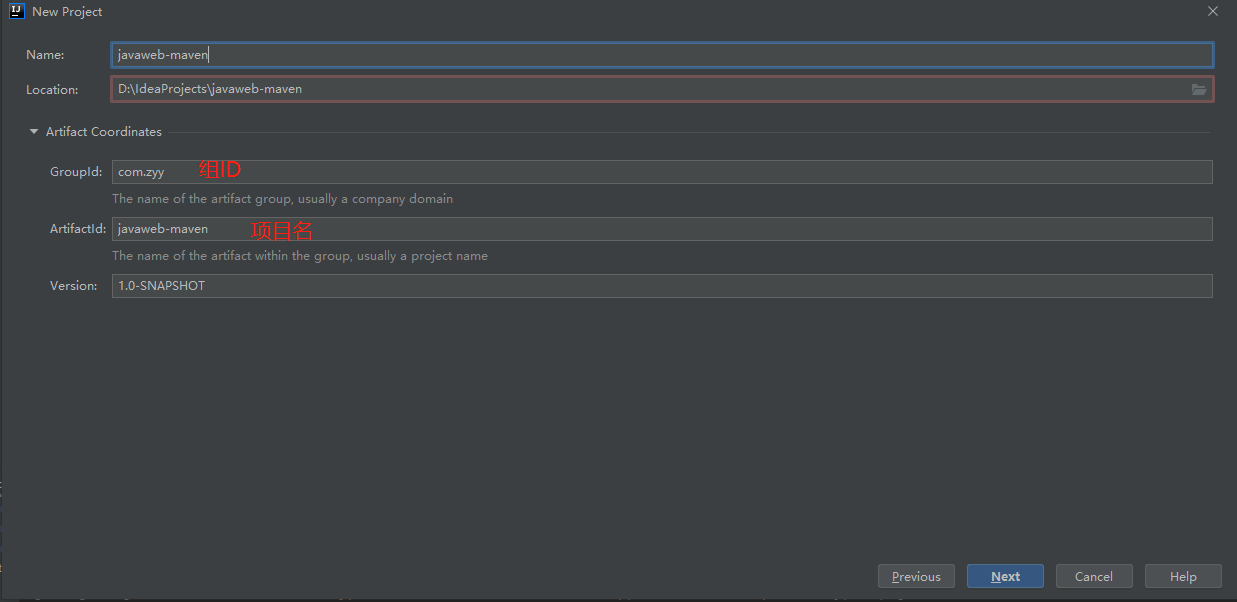
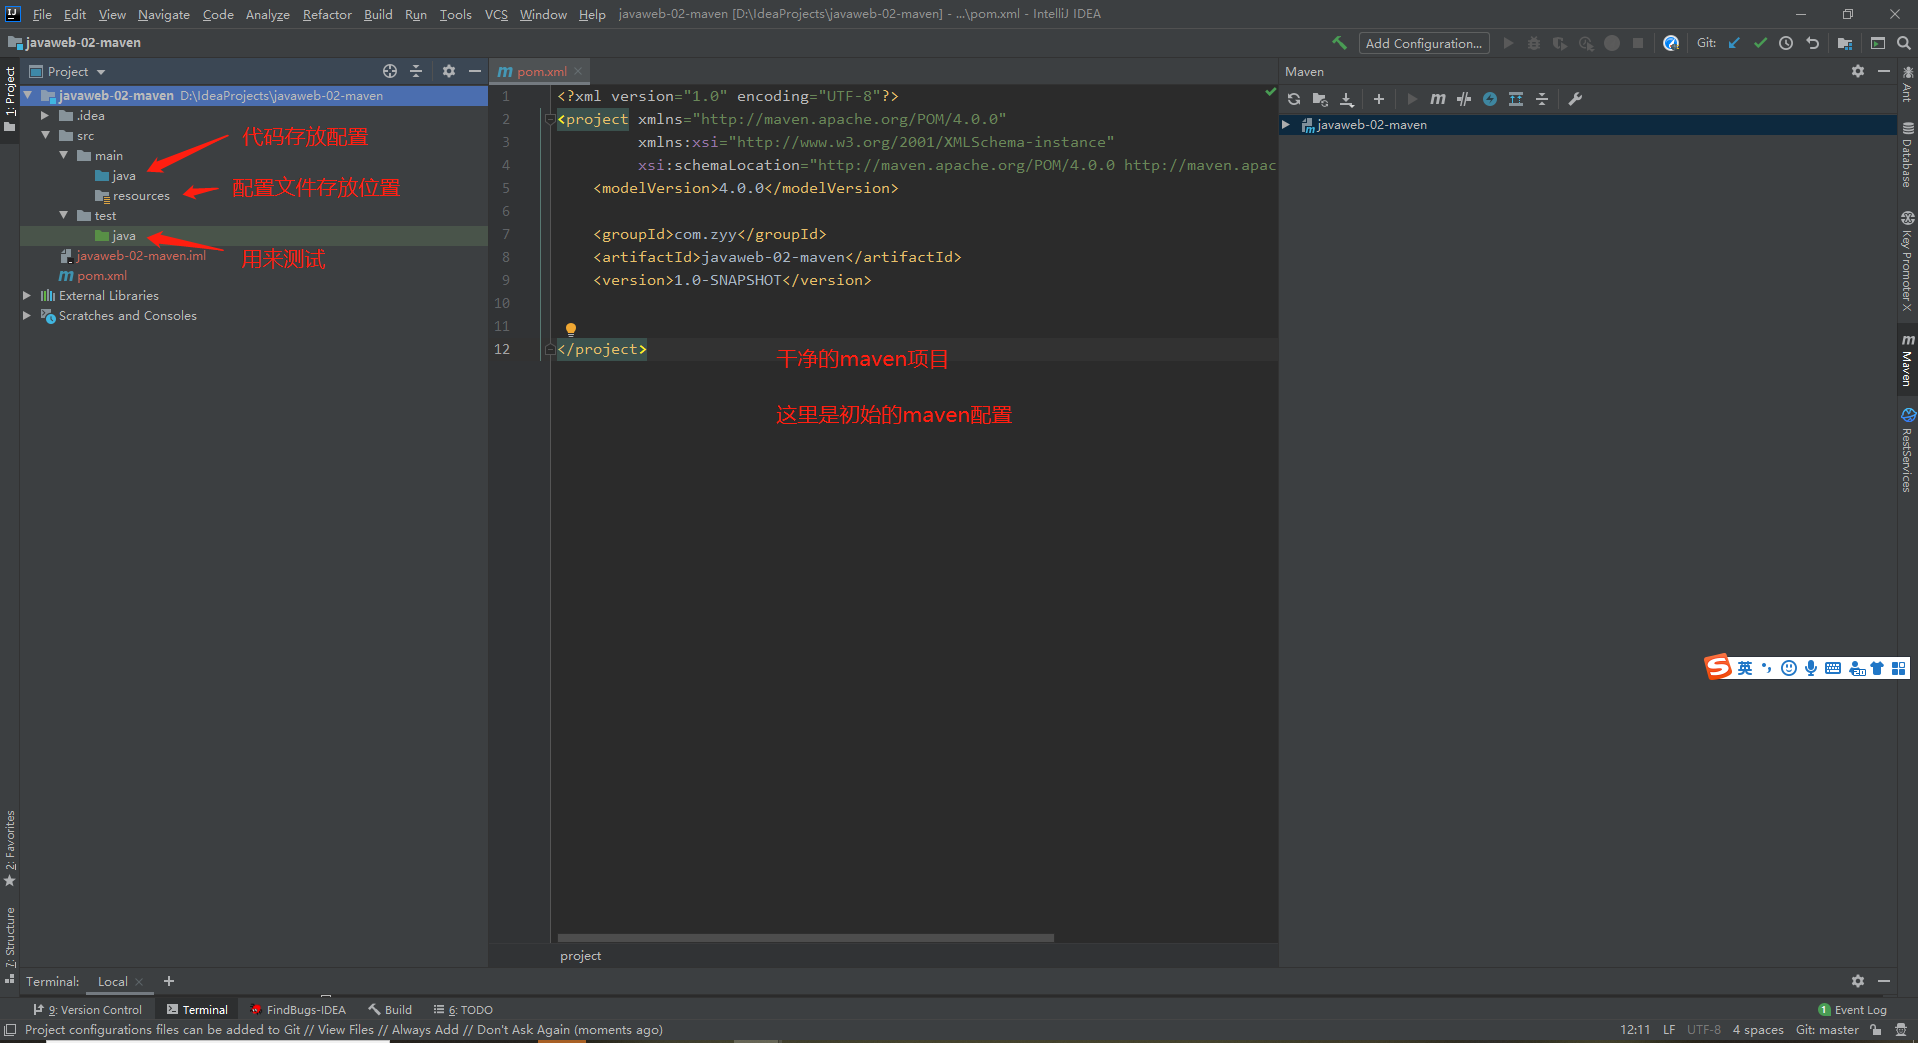
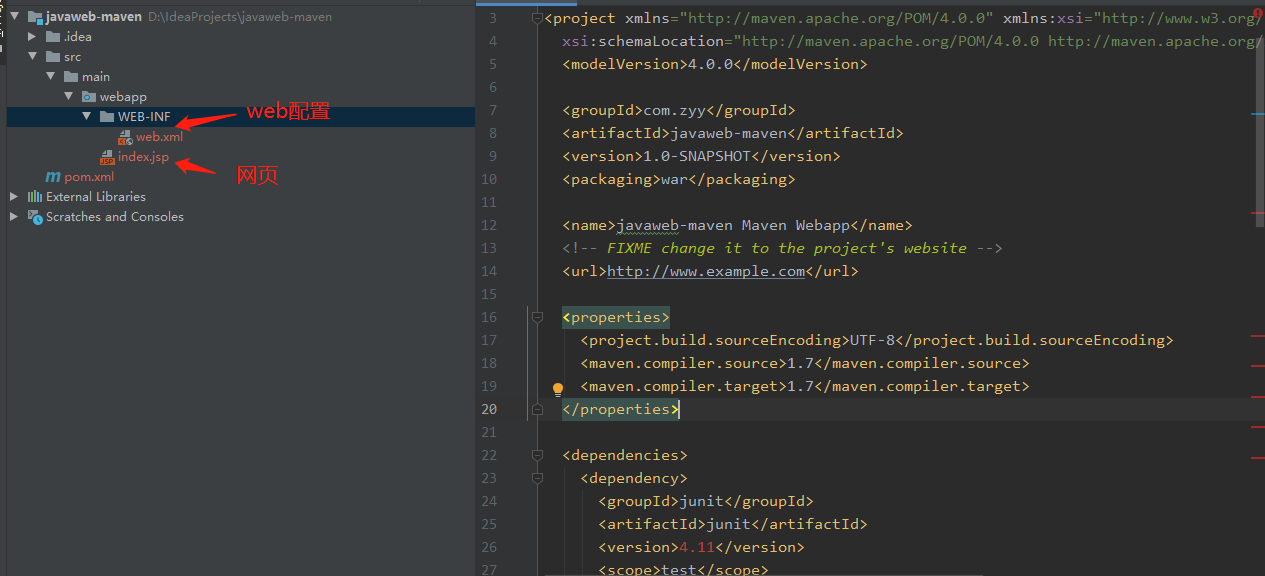
6.2创建一个普通的maven项目
这个只有在web应用下才会有
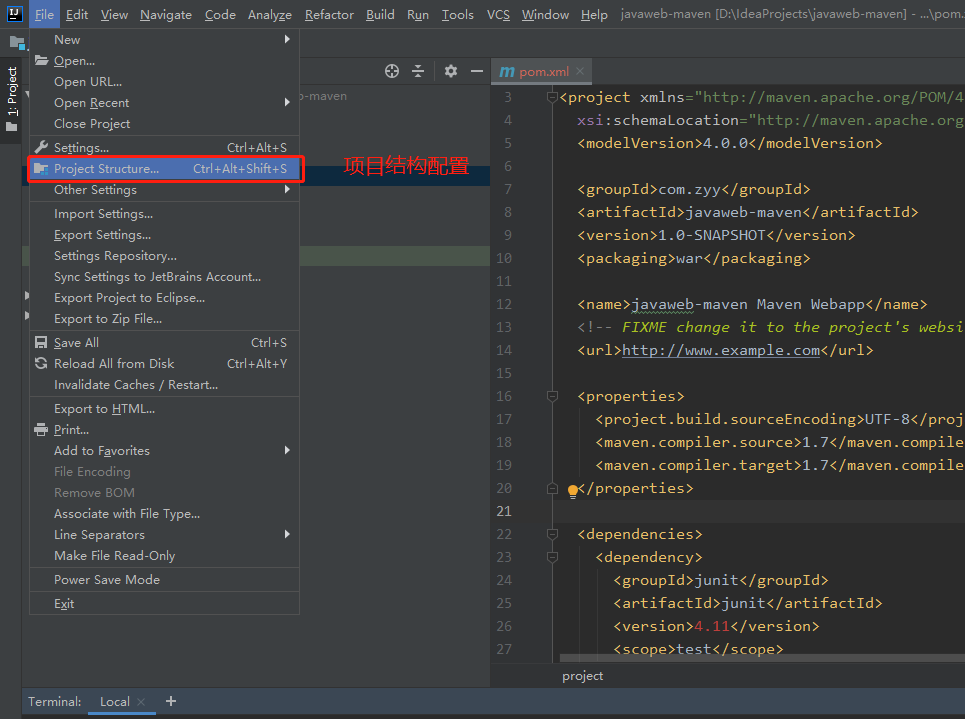
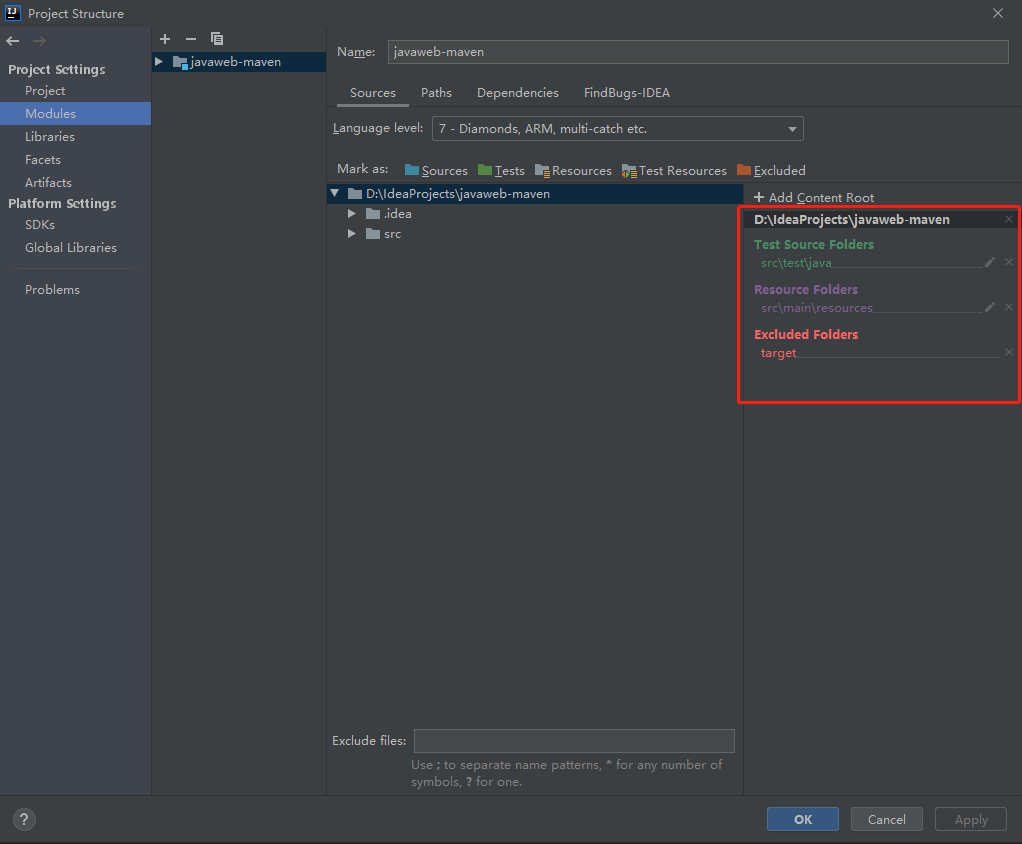
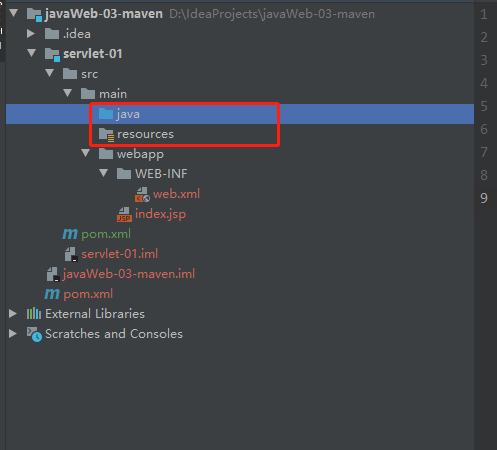
6.3标记文件夹功能
方法【1】
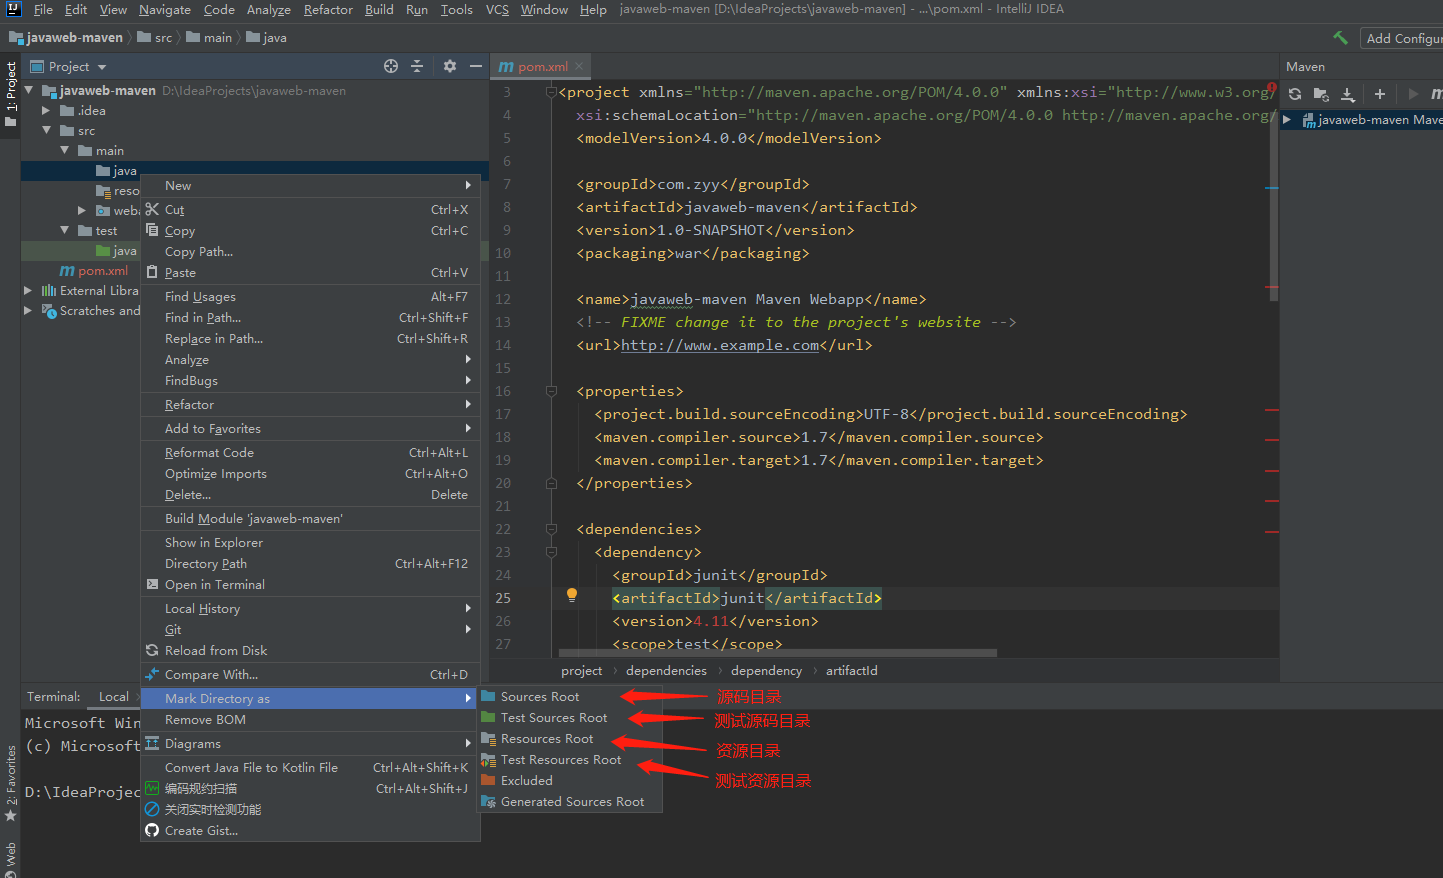
方法【2】

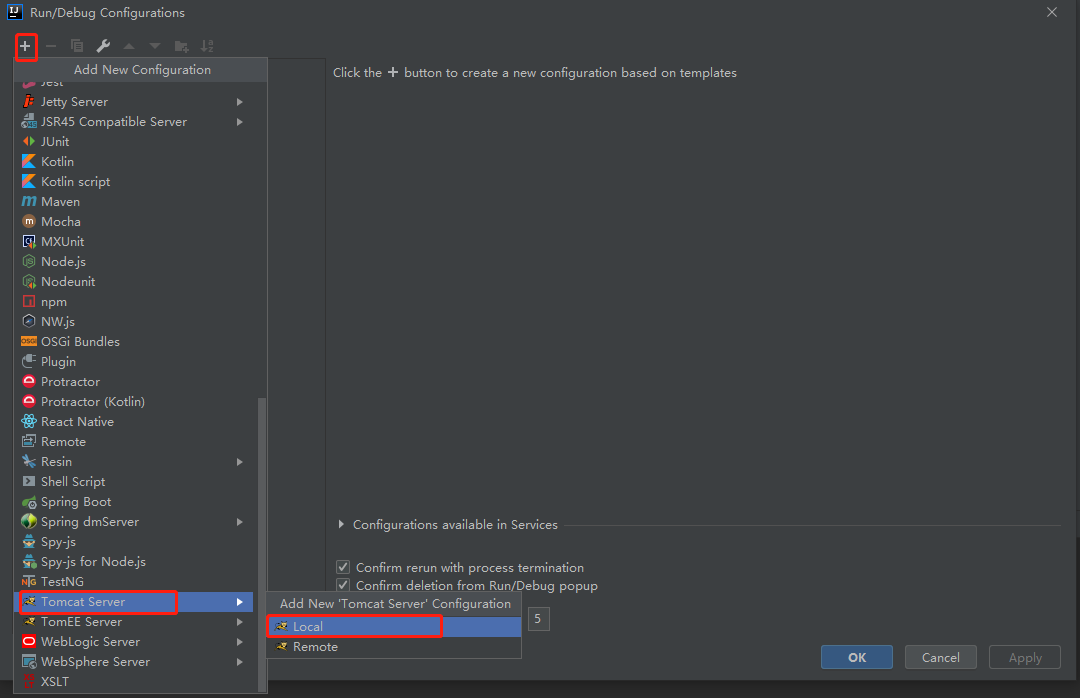
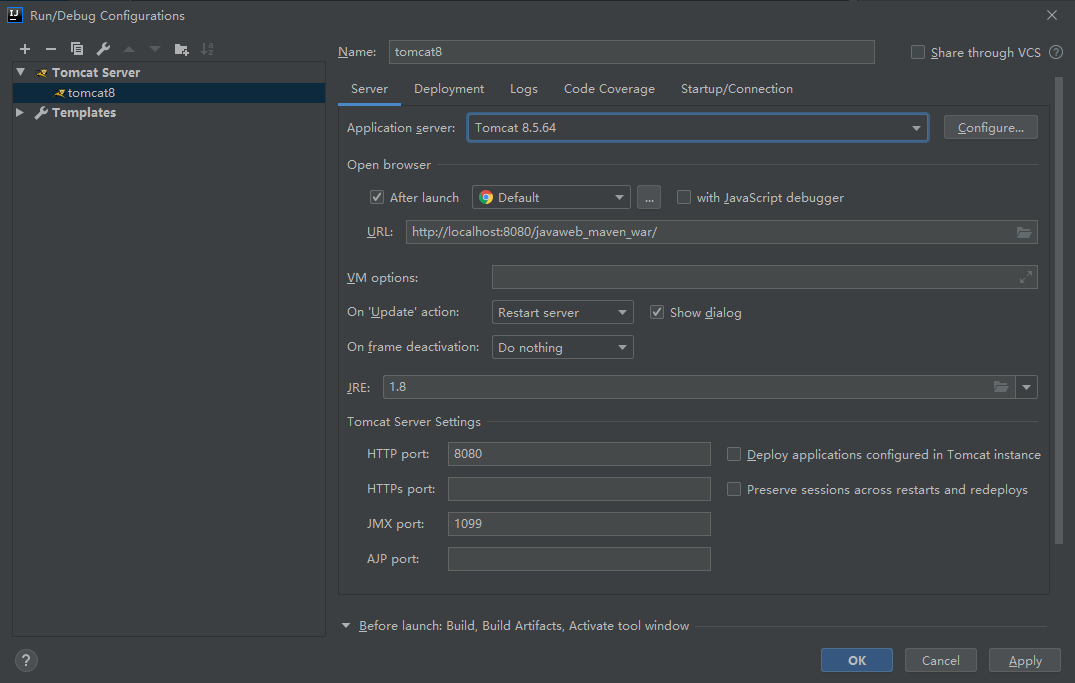
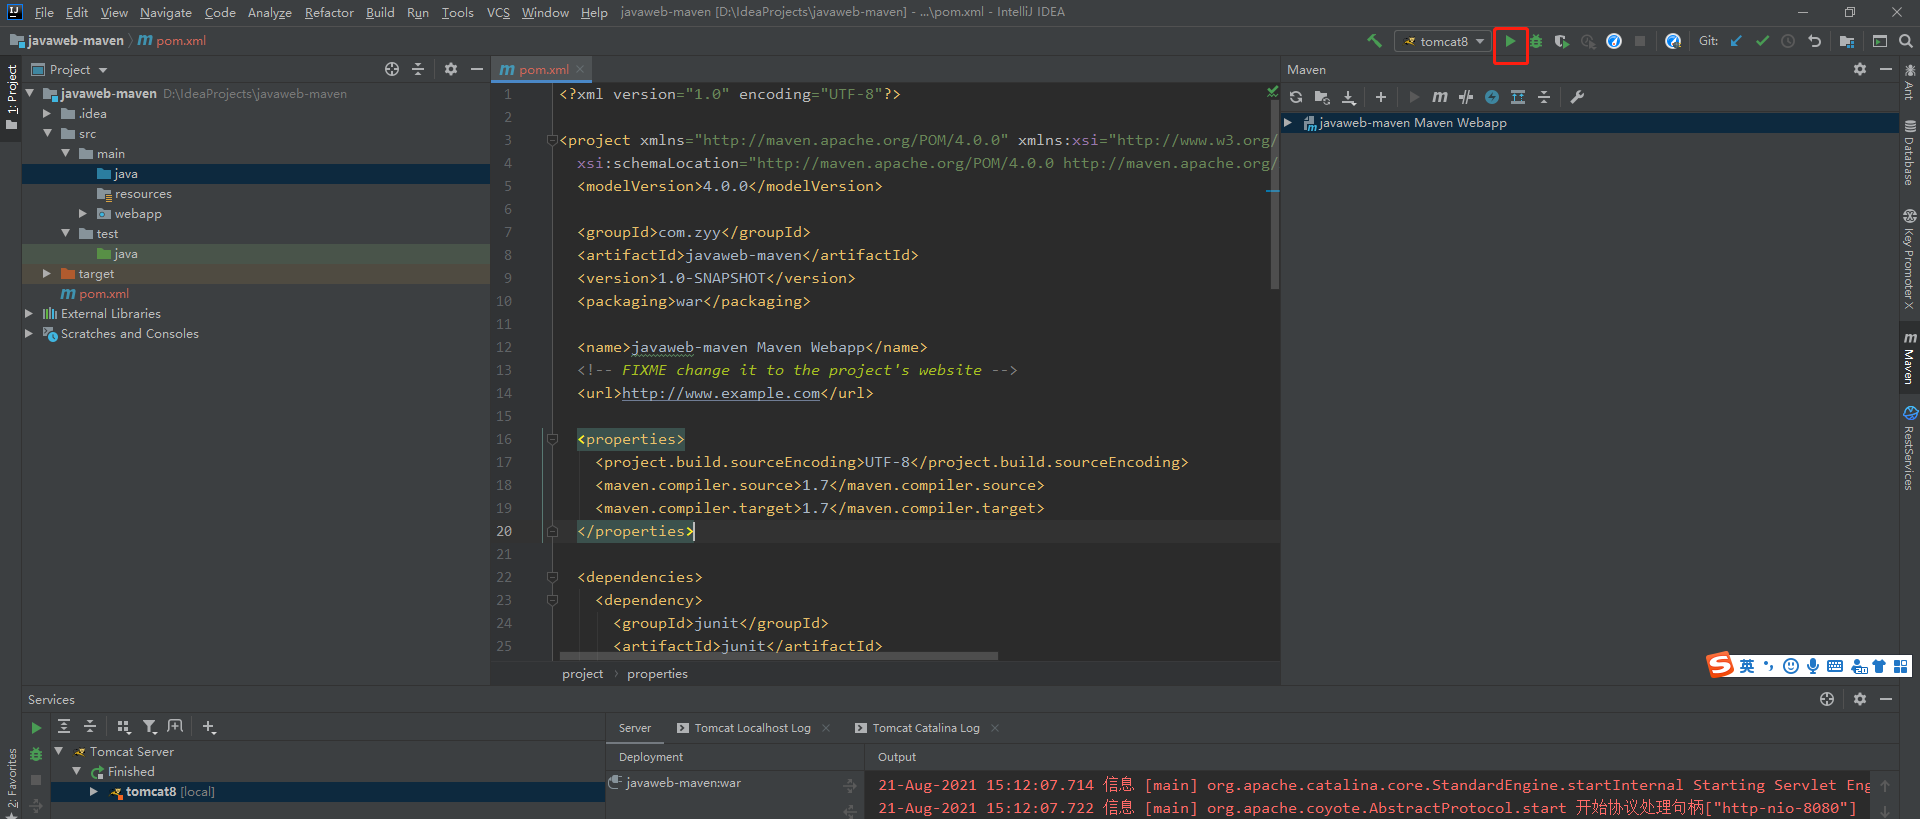
6.4在idea中配置tomcat
-
点击下面这里
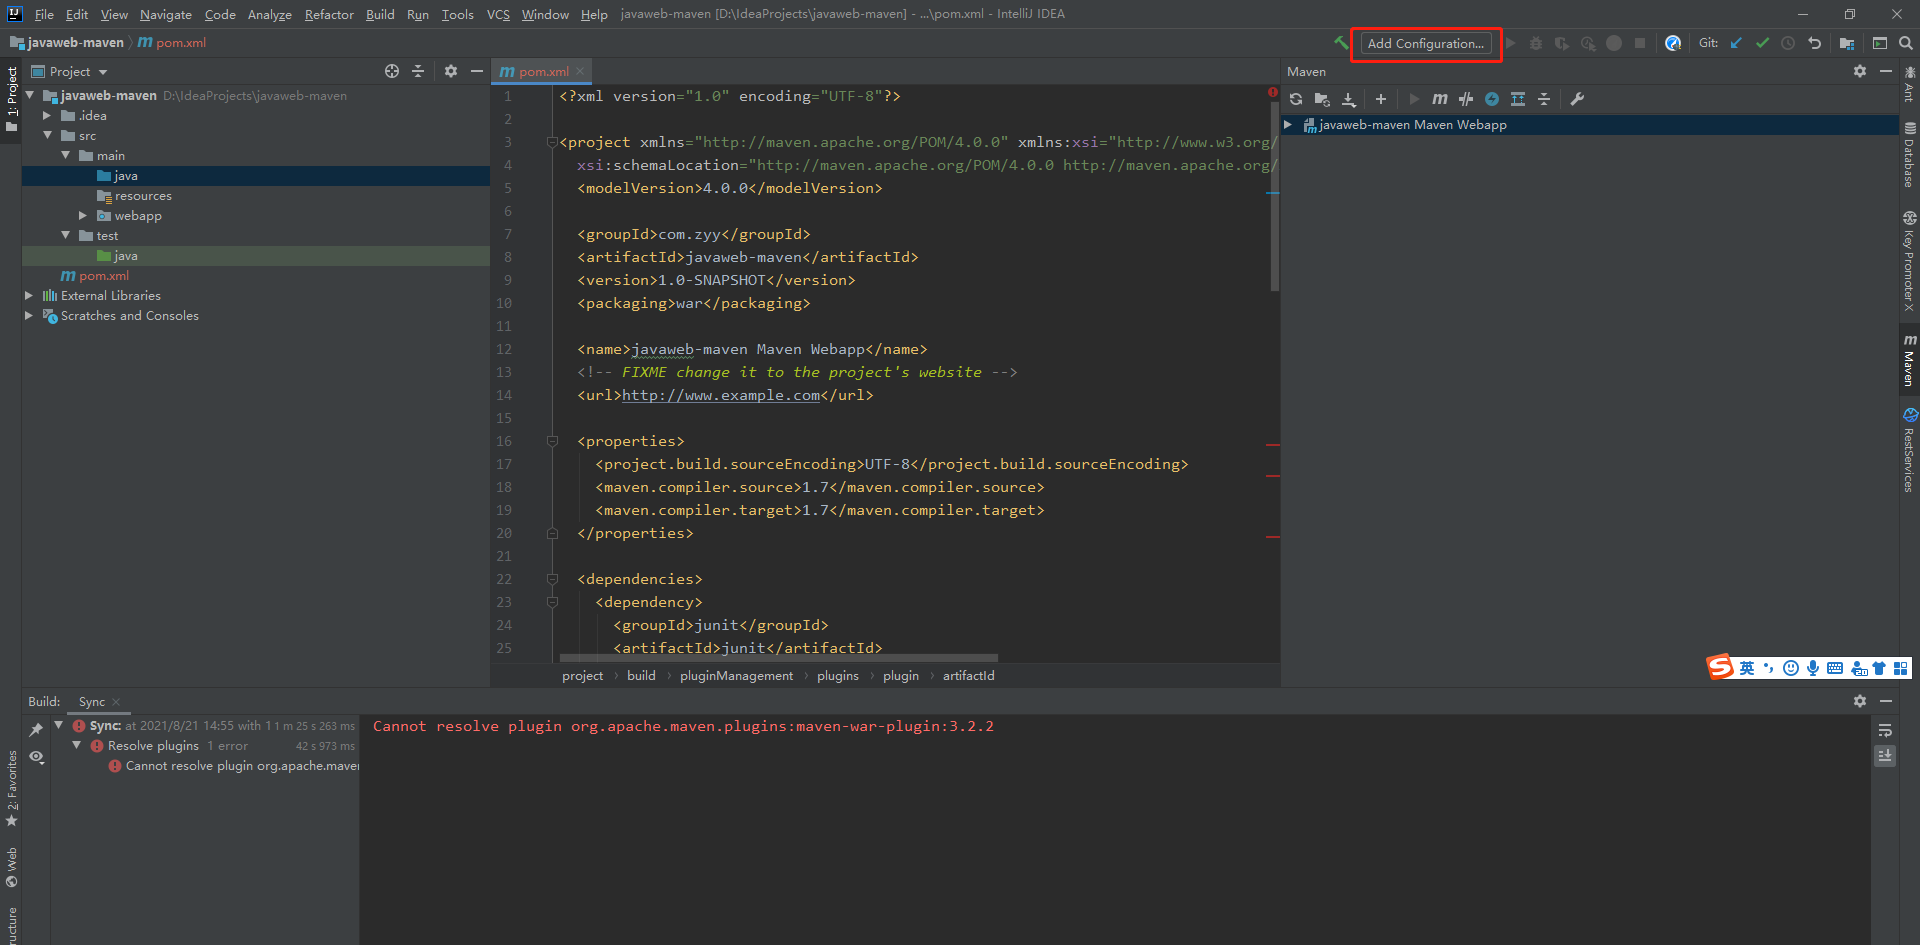
-
点击加号,【tomcat service】 --》【local】
-
配置tomcat服务器
-
启动tomcat
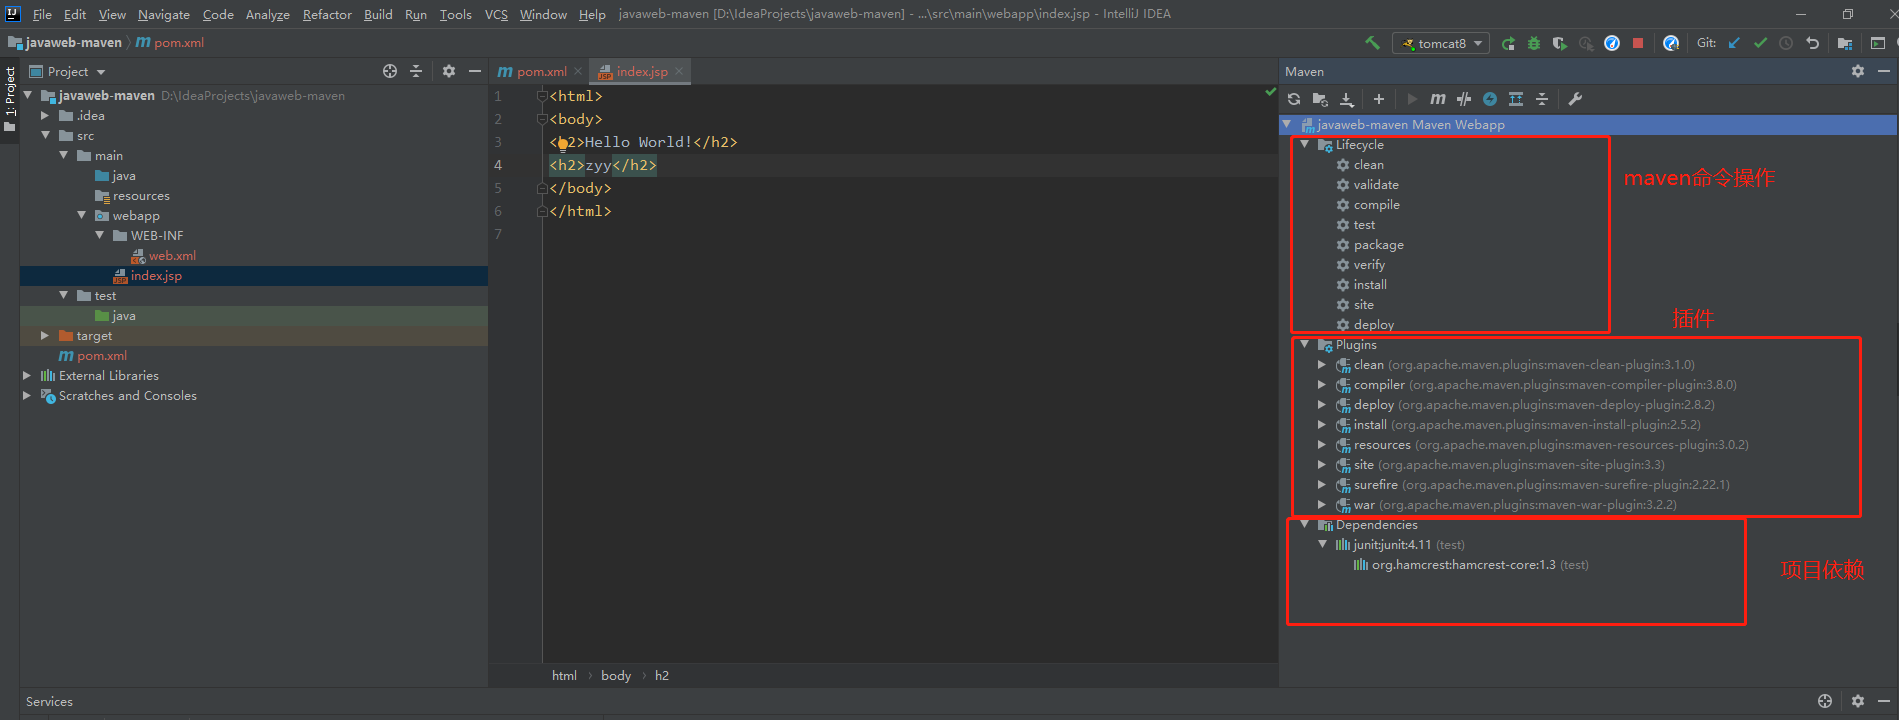
6.5POM文件
pom.xml是maven的核心配置文件
<project xmlns="http://maven.apache.org/POM/4.0.0" xmlns:xsi="http://www.w3.org/2001/XMLSchema-instance" xsi:schemaLocation="http://maven.apache.org/POM/4.0.0 http://maven.apache.org/xsd/maven-4.0.0.xsd"> <modelVersion>4.0.0</modelVersion> <groupId>com.zyy</groupId> <artifactId>javaweb-maven</artifactId> <version>1.0-SNAPSHOT</version> <packaging>war</packaging> <name>javaweb-maven Maven Webapp</name> <url>http://www.example.com</url> <properties> <project.build.sourceEncoding>UTF-8</project.build.sourceEncoding> <maven.compiler.source>1.8</maven.compiler.source> <maven.compiler.target>1.8</maven.compiler.target> </properties> <dependencies> <dependency> <groupId>junit</groupId> <artifactId>junit</artifactId> <version>4.11</version> <scope>test</scope> </dependency> </dependencies> <build> <finalName>javaweb-maven</finalName> <pluginManagement> <plugins> <plugin> <artifactId>maven-clean-plugin</artifactId> <version>3.1.0</version> </plugin> <plugin> <artifactId>maven-resources-plugin</artifactId> <version>3.0.2</version> </plugin> <plugin> <artifactId>maven-compiler-plugin</artifactId> <version>3.8.0</version> </plugin> <plugin> <artifactId>maven-surefire-plugin</artifactId> <version>2.22.1</version> </plugin> <plugin> <artifactId>maven-war-plugin</artifactId> <version>3.2.2</version> </plugin> <plugin> <artifactId>maven-install-plugin</artifactId> <version>2.5.2</version> </plugin> <plugin> <artifactId>maven-deploy-plugin</artifactId> <version>2.8.2</version> </plugin> </plugins> </pluginManagement> </build></project>maven的高级之初在于它会帮你导入这个jar包所依赖的其他jar包
maven由于他的约定大于配置,我们之后可能会遇到我们写的配置文件,无法被导出或者生效的问题,解决方案:
<build> <resources> <resource> <directory>src/main/resources</directory> <includes> <include>/*.properties</include> <include>/*.xml</include> </includes> <filtering>false</filtering> </resource> <resource> <directory>src/main/java</directory> <includes> <include>/*.properties</include> <include>/*.xml</include> </includes> <filtering>false</filtering> </resource> </resources> </build>6.6idea操作
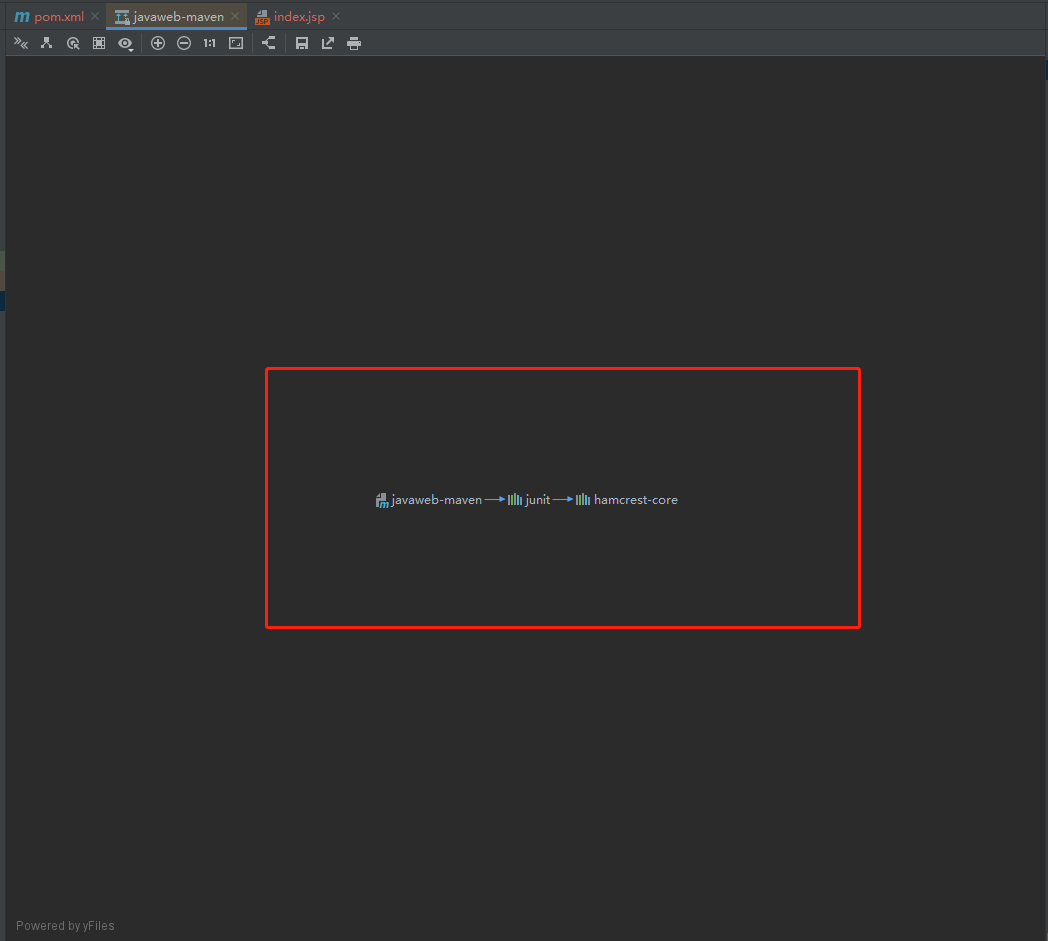
目录树
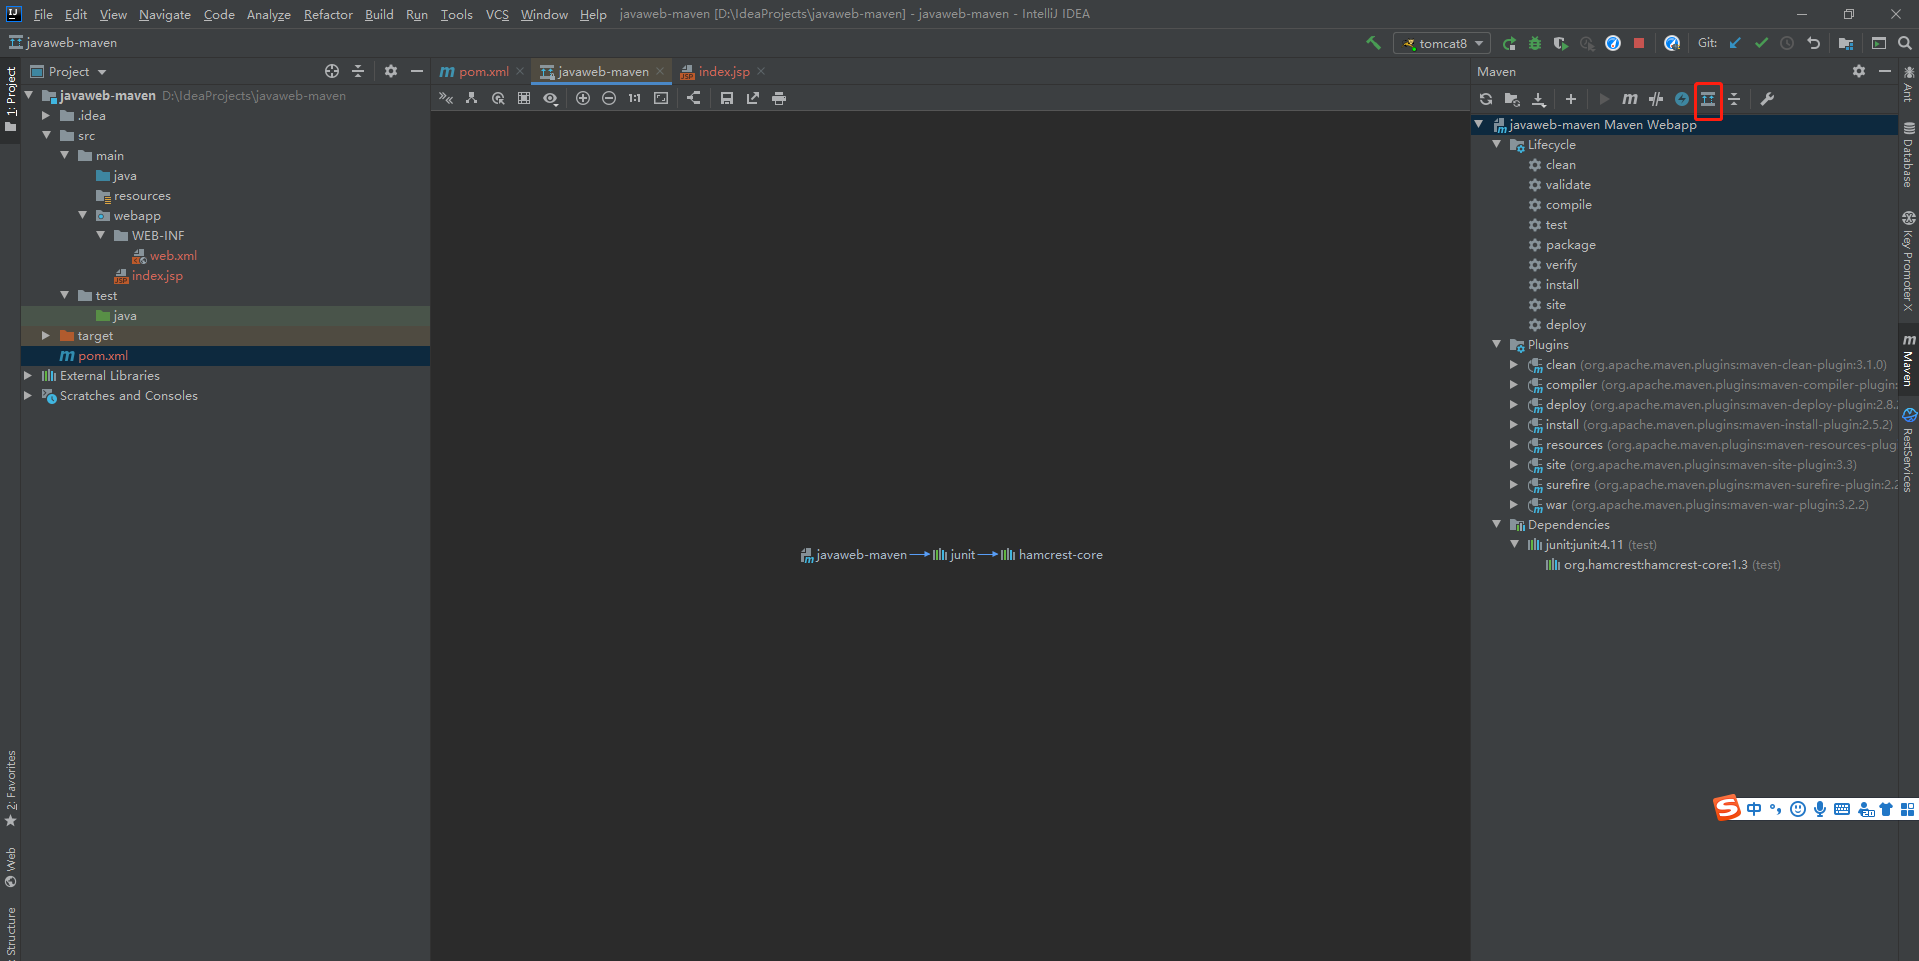
maven中jar的联系关联图
7.解决大家遇到的一些问题
-
maven 3.6.2
报错:unable to import maven project:see logs for details
解决方法:降级为3.6.1
-
tomcat闪退
-
idea中每次都要重复配置maven
在idea中的全局默认配置中去配置
-
maven项目中tomcat无法配置
-
maven默认web项目中的web.xml版本问题
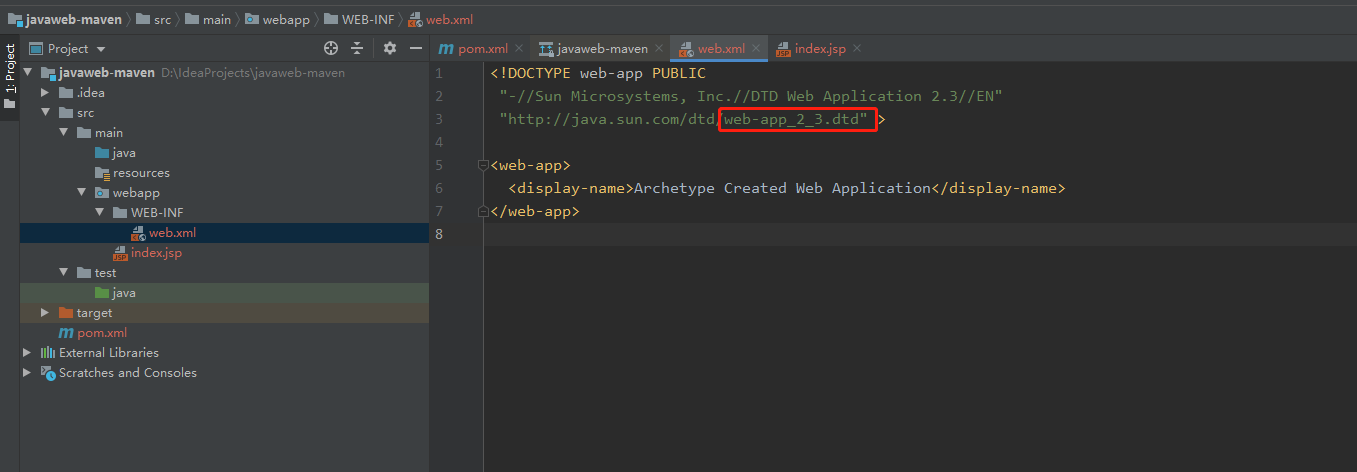
替换为webapp3.1版本和tomcat一致(看tomcat下的webapps里面的官方案例)
<web-app xmlns="http://xmlns.jcp.org/xml/ns/javaee" xmlns:xsi="http://www.w3.org/2001/XMLSchema-instance" xsi:schemaLocation="http://xmlns.jcp.org/xml/ns/javaee http://xmlns.jcp.org/xml/ns/javaee/web-app_3_1.xsd" version="3.1" metadata-complete="true"> <display-name>Welcome to Tomcat</display-name></web-app> -
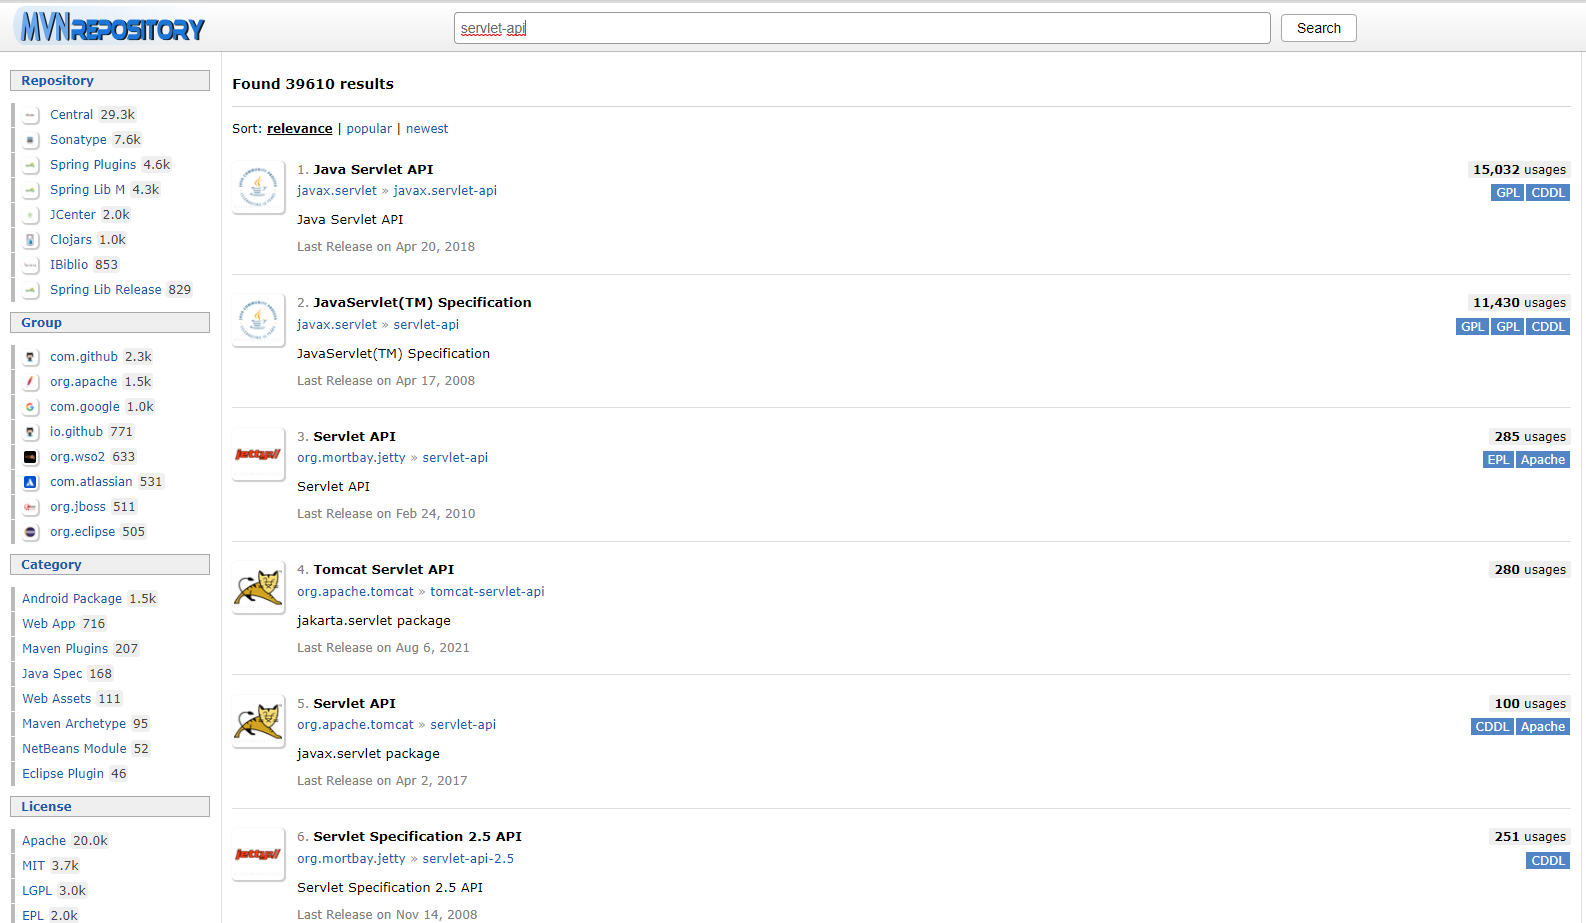
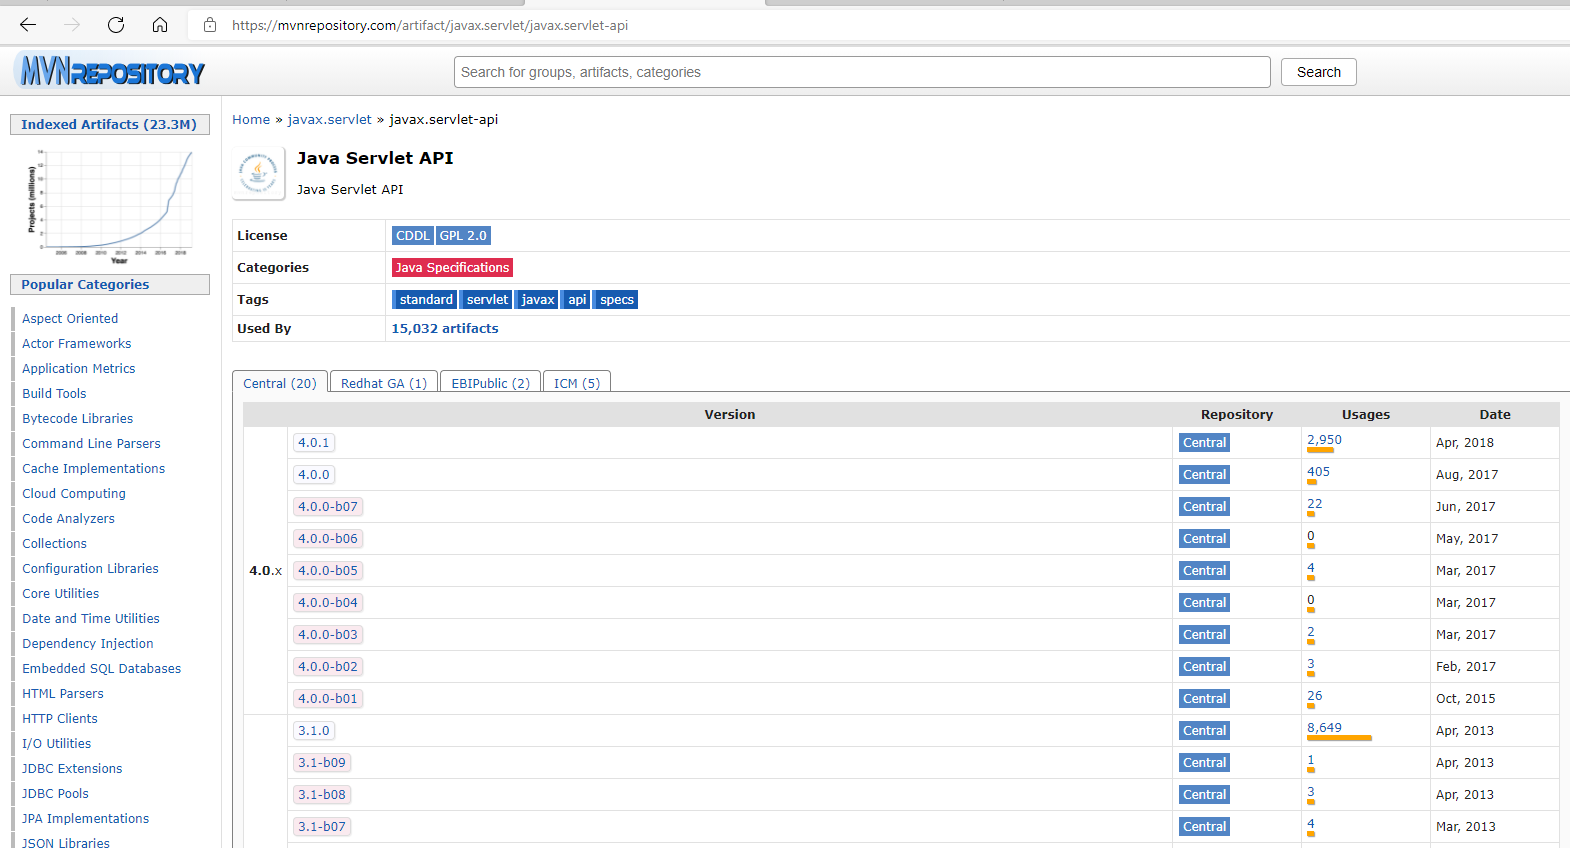
maven仓库的使用
地址:https://mvnrepository.com/

8.helloServlet
8.1servlet简介
- servlet就是sun公司开发动态web的一门技术
- sun在这些api中提供一个接口叫做:servlet,如果你想开发一个servlet程序,只需要完成两个小步骤:
- 编写一个类,实现servlet接口
- 把开发好的java类部署到web服务器中
把实现了servlet接口的java程序叫做,servlet
8.2HelloServlet
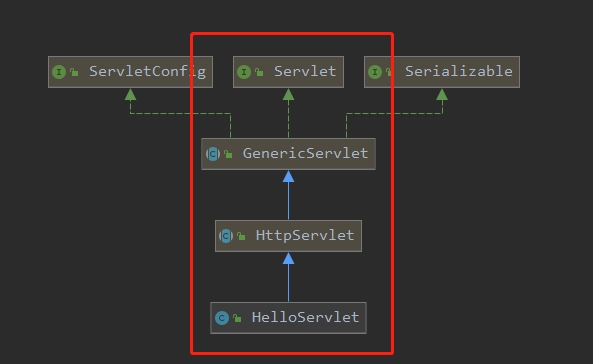
servlet接口sun公司有两个默认的实现类:HttpServlet、GenericServlet
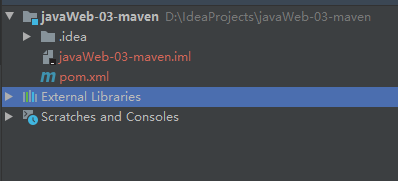
- 建立一个普通的maven项目,删除src目录
-
然后在此项目中,新建一个module(javaweb maven项目)
关于maven父子工程的理解:
父项目中会有
<modules> <module>servlet-01</module> </modules>子项目中会有
<parent> <artifactId>javaWeb-03-maven</artifactId> <groupId>com.zyy</groupId> <version>1.0-SNAPSHOT</version> </parent>父项目中的jar包子项目可以直接使用
son extends father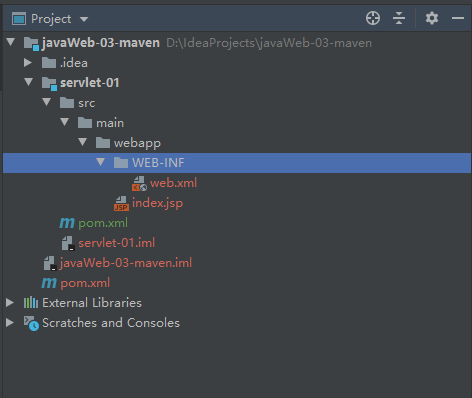
导servlet包(父项目POM文件中)
<project xmlns="http://maven.apache.org/POM/4.0.0" xmlns:xsi="http://www.w3.org/2001/XMLSchema-instance" xsi:schemaLocation="http://maven.apache.org/POM/4.0.0 http://maven.apache.org/xsd/maven-4.0.0.xsd"> <modelVersion>4.0.0</modelVersion> <groupId>com.zyy</groupId> <artifactId>javaWeb-03-maven</artifactId> <packaging>pom</packaging> <version>1.0-SNAPSHOT</version> <modules> <module>servlet-01</module> </modules> <dependencies> <dependency> <groupId>javax.servlet</groupId> <artifactId>javax.servlet-api</artifactId> <version>4.0.1</version> <scope>provided</scope> </dependency> </dependencies></project>-
maven环境优化
-
修改web.xml为最新的
<web-app xmlns="http://xmlns.jcp.org/xml/ns/javaee" xmlns:xsi="http://www.w3.org/2001/XMLSchema-instance" xsi:schemaLocation="http://xmlns.jcp.org/xml/ns/javaee http://xmlns.jcp.org/xml/ns/javaee/web-app_3_1.xsd" version="3.1" metadata-complete="true"></web-app> -
将maven的结构搭建完整
-
-
编写一个servlet程序
编写一个普通类,实现servlet接口,这里我们直接继承HttpServlet
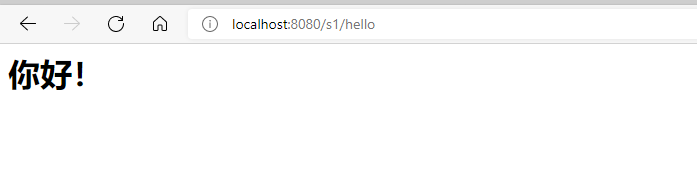
import javax.servlet.ServletException;import javax.servlet.http.HttpServlet;import javax.servlet.http.HttpServletRequest;import javax.servlet.http.HttpServletResponse;import java.io.IOException;import java.io.PrintWriter;/ * @ClassName: HelloServlet * @Description: TODO 类描述 * @Author: zyy * @Date: 2021/08/22 15:35 * @Version: 1.0 */public class HelloServlet extends HttpServlet { @Override protected void doGet(HttpServletRequest req, HttpServletResponse response) throws ServletException, IOException { response.setContentType("text/html"); response.setCharacterEncoding("utf-8"); PrintWriter out = response.getWriter(); out.println(""); out.println(""); out.println("Hello World! "); out.println(""); out.println(""); out.println("你好!
"); out.println(""); out.println(""); } @Override protected void doPost(HttpServletRequest req, HttpServletResponse resp) throws ServletException, IOException { doGet(req, resp); }} -
编写一个servlet的映射
为什么需要映射:我们写的是java程序,但是要通过浏览器访问,而浏览器需要连接web服务器,所以我们需要在web服务中注册我们写的servlet,还需要给他一个浏览器能够访问的路径。
<web-app xmlns="http://xmlns.jcp.org/xml/ns/javaee" xmlns:xsi="http://www.w3.org/2001/XMLSchema-instance" xsi:schemaLocation="http://xmlns.jcp.org/xml/ns/javaee http://xmlns.jcp.org/xml/ns/javaee/web-app_3_1.xsd" version="3.1" metadata-complete="true"> <display-name>Welcome to Tomcat</display-name> <servlet> <servlet-name>helloServlet</servlet-name> <servlet-class>com.zyy.servlet.HelloServlet</servlet-class> </servlet> <servlet-mapping> <servlet-name>helloServlet</servlet-name> <url-pattern>/hello</url-pattern> </servlet-mapping></web-app> -
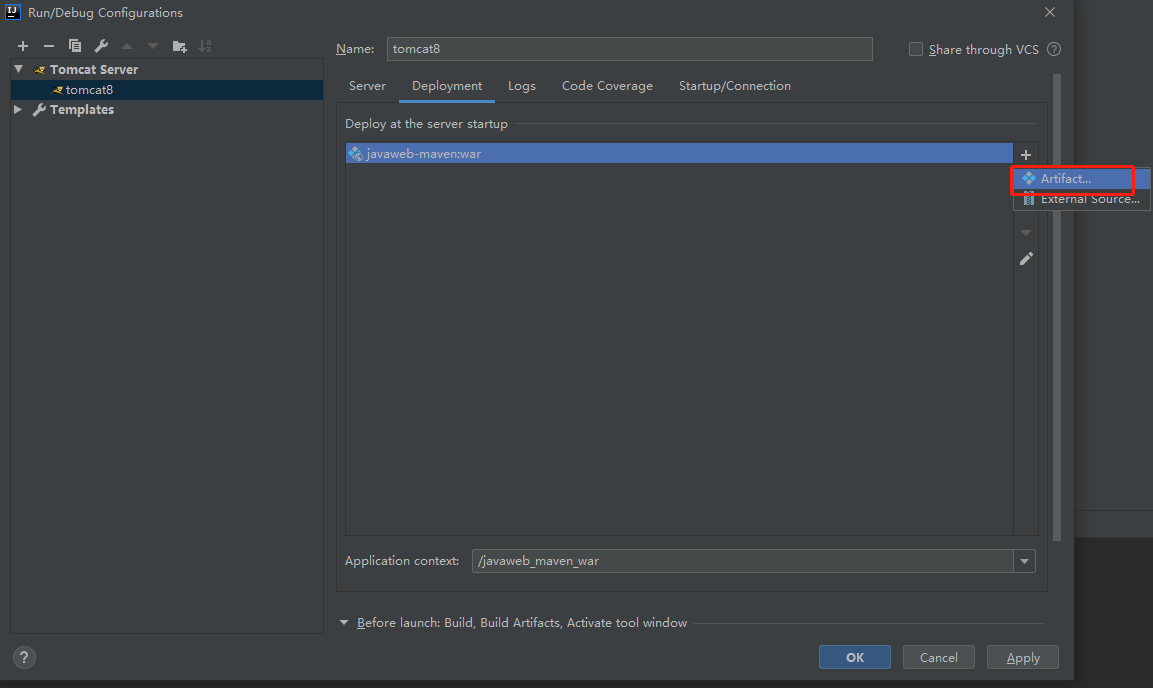
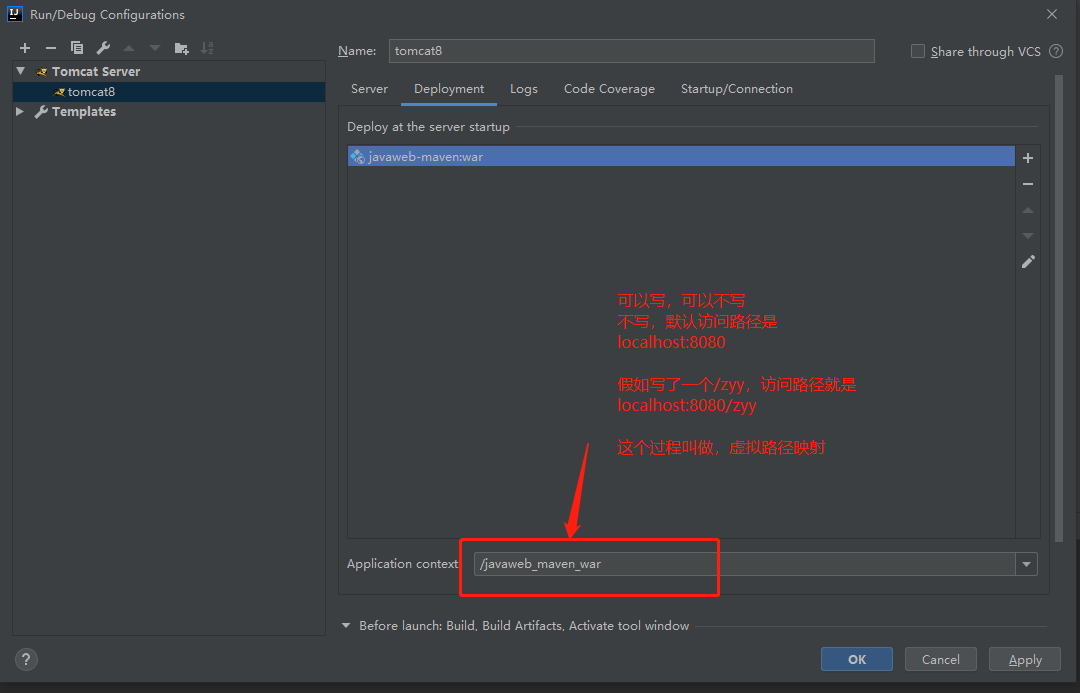
配置tomcat
注意:配置项目发布的路径
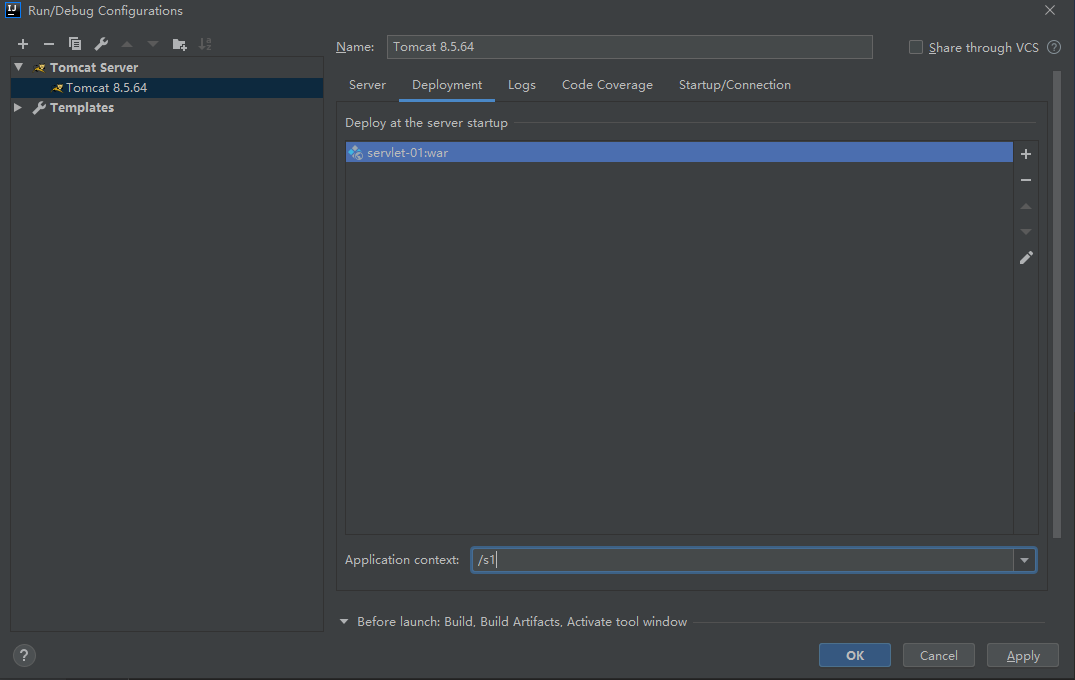
-
测试
-
9.servlet原理
servlet是由web服务器调用
9.1Mapping问题
-
一个servlet可以指定一个映射路径
<servlet-mapping> <servlet-name>helloServlet</servlet-name> <url-pattern>/hello</url-pattern> </servlet-mapping> -
一个servlet可以指定多个映射路径
<servlet-mapping> <servlet-name>helloServlet</servlet-name> <url-pattern>/hello</url-pattern> </servlet-mapping> <servlet-mapping> <servlet-name>helloServlet</servlet-name> <url-pattern>/hello2</url-pattern> </servlet-mapping> -
一个servlet可以指定通用映射路径
<servlet-mapping> <servlet-name>helloServlet</servlet-name> <url-pattern>/hello/*</url-pattern> </servlet-mapping>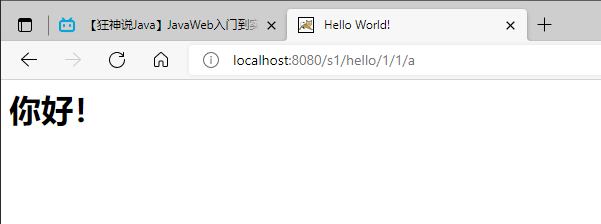
注意下面这样重启服务就不会默认进入到index.jsp页面了(不推荐使用)
<servlet-mapping> <servlet-name>helloServlet</servlet-name> <url-pattern>/*</url-pattern> </servlet-mapping>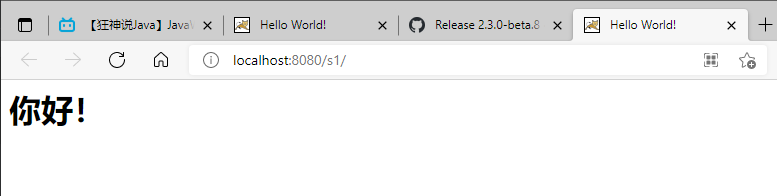
-
指定一些后缀或者前缀等等
<servlet-mapping> <servlet-name>helloServlet</servlet-name> <url-pattern>*.do</url-pattern> </servlet-mapping>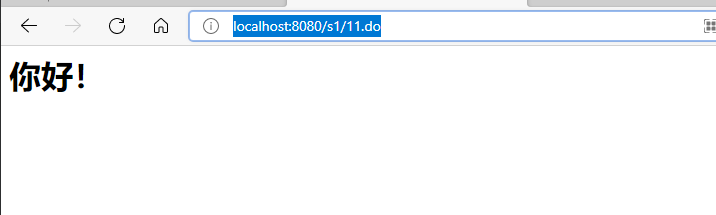
-
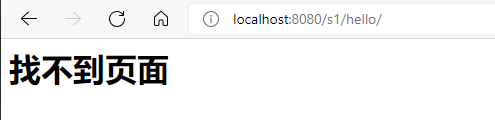
优先级问题
制定了固有的映射路径优先级最高,如果找不到就会走默认的处理请求
<servlet> <servlet-name>helloServlet</servlet-name> <servlet-class>com.zyy.servlet.HelloServlet</servlet-class> </servlet> <servlet-mapping> <servlet-name>helloServlet</servlet-name> <url-pattern>/hello/hi.do</url-pattern> </servlet-mapping> <servlet> <servlet-name>errorServlet</servlet-name> <servlet-class>com.zyy.servlet.ErrorServlet</servlet-class> </servlet> <servlet-mapping> <servlet-name>errorServlet</servlet-name> <url-pattern>/*</url-pattern> </servlet-mapping>import javax.servlet.ServletException;import javax.servlet.http.HttpServlet;import javax.servlet.http.HttpServletRequest;import javax.servlet.http.HttpServletResponse;import java.io.IOException;import java.io.PrintWriter;/ * @ClassName: HelloServlet * @Description: TODO 类描述 * @Author: zyy * @Date: 2021/08/22 15:35 * @Version: 1.0 */public class HelloServlet extends HttpServlet { @Override protected void doGet(HttpServletRequest req, HttpServletResponse response) throws ServletException, IOException { response.setContentType("text/html"); response.setCharacterEncoding("utf-8"); PrintWriter out = response.getWriter(); out.println(""); out.println(""); out.println("Hello World! "); out.println(""); out.println(""); out.println("你好!
"); out.println(""); out.println(""); } @Override protected void doPost(HttpServletRequest req, HttpServletResponse resp) throws ServletException, IOException { doGet(req, resp); }}
10.servletContext对象
web容器在启动的时候,它会为每个web程序都创建一个对应的servletContext对象,它代表了当前的web应用。
1.共享数据
我在这个servlet中保存的数据,可以再另外一个servlet中拿到
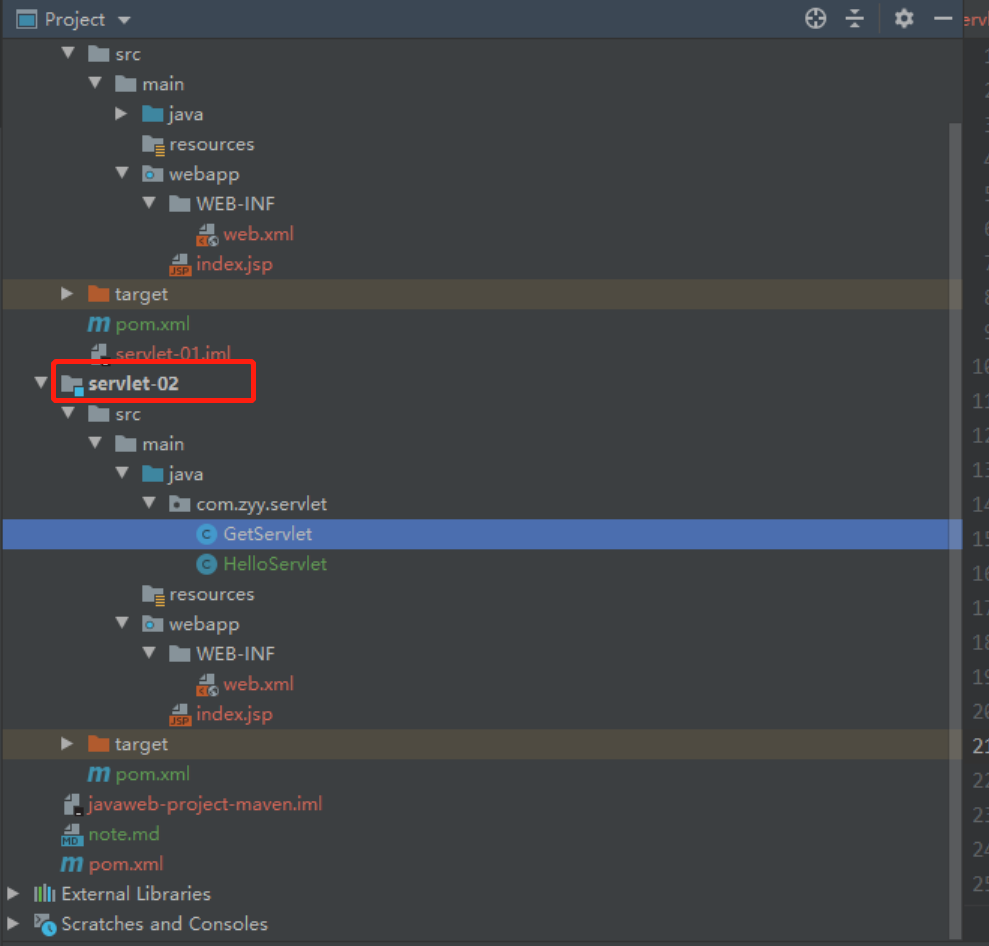
- 新建一个module
-
HelloServlet.java
import javax.servlet.ServletContext;import javax.servlet.ServletException;import javax.servlet.http.HttpServlet;import javax.servlet.http.HttpServletRequest;import javax.servlet.http.HttpServletResponse;import java.io.IOException;/ * @ClassName: HelloServlet * @Description: TODO 类描述 * @Author: zyy * @Date: 2021/08/25 22:14 * @Version: 1.0 */public class HelloServlet extends HttpServlet { @Override protected void doGet(HttpServletRequest req, HttpServletResponse resp) throws ServletException, IOException { //this.getInitParameter() //this.getServletConfig() //servlet 上下文 ServletContext servletContext = this.getServletContext(); String name = "zyy"; //将一个数据保存在了ServletContext中 servletContext.setAttribute("name", name); System.out.println("hello " + name); }} -
GetServlet.java
import javax.servlet.ServletContext;import javax.servlet.ServletException;import javax.servlet.http.HttpServlet;import javax.servlet.http.HttpServletRequest;import javax.servlet.http.HttpServletResponse;import java.io.IOException;/ * @ClassName: GetServlet * @Description: TODO 类描述 * @Author: zyy * @Date: 2021/08/25 22:31 * @Version: 1.0 */public class GetServlet extends HttpServlet { @Override protected void doGet(HttpServletRequest req, HttpServletResponse resp) throws ServletException, IOException { ServletContext servletContext = this.getServletContext(); String name = (String) servletContext.getAttribute("name"); resp.setCharacterEncoding("utf-8"); resp.setContentType("text/html"); resp.getWriter().print("get name is " + name); }} -
web.xml
<web-app xmlns="http://xmlns.jcp.org/xml/ns/javaee" xmlns:xsi="http://www.w3.org/2001/XMLSchema-instance" xsi:schemaLocation="http://xmlns.jcp.org/xml/ns/javaee http://xmlns.jcp.org/xml/ns/javaee/web-app_3_1.xsd" version="3.1" metadata-complete="true"> <servlet-mapping> <servlet-name>hello</servlet-name> <url-pattern>/hello</url-pattern> </servlet-mapping> <servlet> <servlet-name>hello</servlet-name> <servlet-class>com.zyy.servlet.HelloServlet</servlet-class> </servlet> <servlet-mapping> <servlet-name>getName</servlet-name> <url-pattern>/getName</url-pattern> </servlet-mapping> <servlet> <servlet-name>getName</servlet-name> <servlet-class>com.zyy.servlet.GetServlet</servlet-class> </servlet></web-app> -
测试
先调用/hello

再调用/getName

重启,一开始就调用/getName

11.servletContext应用
1.获取初始化参数
<context-param> <param-name>url</param-name> <param-value>jdbc:mysql://localhost:3306/mybatis</param-value> </context-param> <servlet-mapping> <servlet-name>getUrl</servlet-name> <url-pattern>/getUrl</url-pattern> </servlet-mapping> <servlet> <servlet-name>getUrl</servlet-name> <servlet-class>com.zyy.servlet.ServletDemo03</servlet-class> </servlet>import javax.servlet.ServletContext;import javax.servlet.ServletException;import javax.servlet.http.HttpServlet;import javax.servlet.http.HttpServletRequest;import javax.servlet.http.HttpServletResponse;import java.io.IOException;/ * @ClassName: ServletDemo03 * @Description: TODO 类描述 * @Author: zyy * @Date: 2021/08/26 22:43 * @Version: 1.0 */public class ServletDemo03 extends HttpServlet { @Override protected void doGet(HttpServletRequest req, HttpServletResponse resp) throws ServletException, IOException { ServletContext servletContext = req.getServletContext(); String url = servletContext.getInitParameter("url"); resp.getWriter().print(url); } @Override protected void doPost(HttpServletRequest req, HttpServletResponse resp) throws ServletException, IOException { doGet(req, resp); }}
2.请求转发
<servlet-mapping> <servlet-name>dis</servlet-name> <url-pattern>/dis</url-pattern> </servlet-mapping> <servlet> <servlet-name>dis</servlet-name> <servlet-class>com.zyy.servlet.ServletDemo04</servlet-class> </servlet>import javax.servlet.ServletContext;import javax.servlet.ServletException;import javax.servlet.http.HttpServlet;import javax.servlet.http.HttpServletRequest;import javax.servlet.http.HttpServletResponse;import java.io.IOException;/ * @ClassName: ServletDemo03 * @Description: TODO 类描述 * @Author: zyy * @Date: 2021/08/26 22:43 * @Version: 1.0 */public class ServletDemo04 extends HttpServlet { @Override protected void doGet(HttpServletRequest req, HttpServletResponse resp) throws ServletException, IOException { ServletContext servletContext = req.getServletContext();// RequestDispatcher requestDispatcher = servletContext.getRequestDispatcher("/getUrl");// requestDispatcher.forward(req, resp); servletContext.getRequestDispatcher("/getUrl").forward(req, resp); } @Override protected void doPost(HttpServletRequest req, HttpServletResponse resp) throws ServletException, IOException { doGet(req, resp); }}
3.读取资源文件
Properties
- 在java目录下新建properties
- 在resource目录下新建properties
发现:都被打包到同一个路径下:classes 我们俗称这个路径为classpath
思路:需要一个文件流
db.properties
username=rootpassword=123456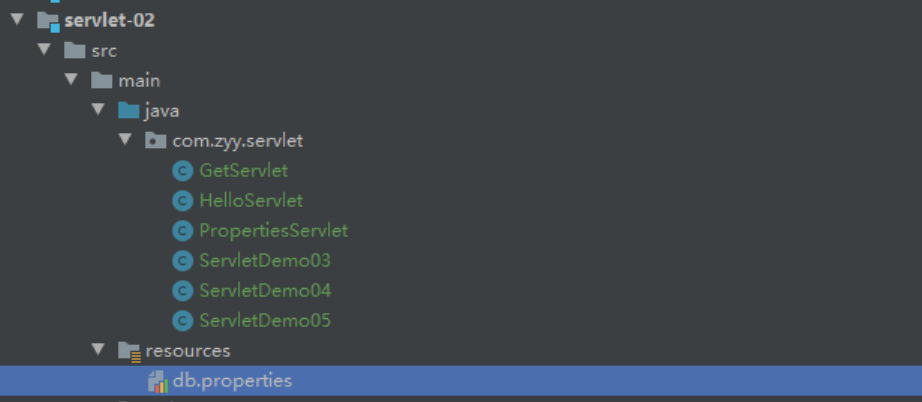
<servlet-mapping> <servlet-name>05</servlet-name> <url-pattern>/05</url-pattern> </servlet-mapping> <servlet> <servlet-name>05</servlet-name> <servlet-class>com.zyy.servlet.ServletDemo05</servlet-class> </servlet>import javax.servlet.ServletException;import javax.servlet.http.HttpServlet;import javax.servlet.http.HttpServletRequest;import javax.servlet.http.HttpServletResponse;import java.io.IOException;import java.io.InputStream;import java.util.Properties;/ * @ClassName: ServletDemo03 * @Description: TODO 类描述 * @Author: zyy * @Date: 2021/08/26 22:43 * @Version: 1.0 */public class ServletDemo05 extends HttpServlet { @Override protected void doGet(HttpServletRequest req, HttpServletResponse resp) throws ServletException, IOException { InputStream in = req.getServletContext().getResourceAsStream("/WEB-INF/classes/db.properties"); Properties pro = new Properties(); pro.load(in); String name = pro.getProperty("username"); String pwd = pro.getProperty("password"); resp.getWriter().print(name + ":" + pwd); } @Override protected void doPost(HttpServletRequest req, HttpServletResponse resp) throws ServletException, IOException { doGet(req, resp); }}
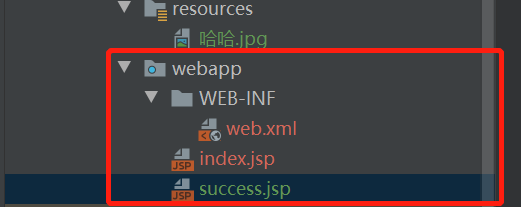
12.response下载文件
1.HttpServletResponse
web服务器接收到客户端的http请求,针对这个请求,分别创建一个代表请求的HttpServletRequest对象,一个代表响应的HttpServletResponse
- 如果要获取客户端请求过来的参数:找HttpServletRequest
- 如果要给客户端响应一些信息:找HttpServletResponse
简单分类
-
负责向浏览器发送数据的方法
public ServletOutputStream getOutputStream() throws IOException; public PrintWriter getWriter() throws IOException; -
负责向浏览器发送响应头的方法
public void setCharacterEncoding(String charset); public void setContentLength(int len); public void setContentLengthLong(long len); public void setContentType(String type); public void setDateHeader(String name, long date); public void addDateHeader(String name, long date); public void setHeader(String name, String value); public void addHeader(String name, String value); public void setIntHeader(String name, int value); public void addIntHeader(String name, int value); -
响应的状态码(常见)
/ * Status code (200) indicating the request succeeded normally. */ public static final int SC_OK = 200; / * Status code (302) indicating that the resource has temporarily * moved to another location, but that future references should * still use the original URI to access the resource. * * This definition is being retained for backwards compatibility. * SC_FOUND is now the preferred definition. */ public static final int SC_MOVED_TEMPORARILY = 302; / * Status code (404) indicating that the requested resource is not * available. */ public static final int SC_NOT_FOUND = 404; / * Status code (500) indicating an error inside the HTTP server * which prevented it from fulfilling the request. */ public static final int SC_INTERNAL_SERVER_ERROR = 500; / * Status code (502) indicating that the HTTP server received an * invalid response from a server it consulted when acting as a * proxy or gateway. */ public static final int SC_BAD_GATEWAY = 502;//...
常见应用
-
向浏览器输出消息
-
下载文件
- 获取下载文件的路径
- 下载的文件名是啥?
- 设置想办法让浏览器能都支持我们下载的东西 文件名是中文的时候,可以设置URLEncoder.encode(fileName, “UTF-8”),否则有可能乱码
- 获取下载文件的输入流
- 创建缓冲区
- 获取OutputStrem对象
- 将FileOutputStream流写入到buffer缓冲区,使用OutputStream将缓冲区中的数据输出到客户端
import javax.servlet.ServletException;import javax.servlet.ServletOutputStream;import javax.servlet.http.HttpServlet;import javax.servlet.http.HttpServletRequest;import javax.servlet.http.HttpServletResponse;import java.io.FileInputStream;import java.io.IOException;import java.net.URLEncoder;/ * @ClassName: FileServlet * @Description: TODO 类描述 * @Author: zyy * @Date: 2021/09/02 22:14 * @Version: 1.0 */public class FileServlet extends HttpServlet { @Override protected void doGet(HttpServletRequest req, HttpServletResponse resp) throws ServletException, IOException { //1. 获取下载文件的路径 String realPath = "D:\\IdeaProjects\\javaweb-project-maven\\servlet-response\\src\\main\\resources\\哈哈.jpg"; //2. 下载的文件名是啥? String fileName = realPath.substring(realPath.lastIndexOf("\\") + 1); //3. 设置想办法让浏览器能都支持我们下载的东西 文件名是中文的时候,可以设置URLEncoder.encode(fileName, "UTF-8"),否则有可能乱码 resp.setHeader("Content-Disposition", "attachment;filename=" + URLEncoder.encode(fileName, "UTF-8")); //4. 获取下载文件的输入流 FileInputStream in = new FileInputStream(realPath); //5. 创建缓冲区 int len = 0; byte[] buffer = new byte[1024]; //6. 获取OutputStrem对象 ServletOutputStream out = resp.getOutputStream(); //7. 将FileOutputStream流写入到buffer缓冲区,使用OutputStream将缓冲区中的数据输出到客户端 while ((len = in.read(buffer)) > 0) { out.write(buffer, 0, len); } out.flush(); out.close(); in.close(); } @Override protected void doPost(HttpServletRequest req, HttpServletResponse resp) throws ServletException, IOException { doGet(req, resp); }}<servlet-mapping> <servlet-name>getFile</servlet-name> <url-pattern>/getFile</url-pattern> </servlet-mapping> <servlet> <servlet-name>getFile</servlet-name> <servlet-class>com.zyy.res.FileServlet</servlet-class> </servlet>
13.response验证码实现
验证码怎么来的?
- 前端实现
- 后端实现,需要用到java图片类,生成一个图片
import javax.imageio.ImageIO;import javax.servlet.ServletException;import javax.servlet.http.HttpServlet;import javax.servlet.http.HttpServletRequest;import javax.servlet.http.HttpServletResponse;import java.awt.*;import java.awt.image.BufferedImage;import java.io.IOException;import java.util.Random;/ * @ClassName: ImageServlet * @Description: TODO 类描述 * @Author: zyy * @Date: 2021/09/09 14:05 * @Version: 1.0 */public class ImageServlet extends HttpServlet { @Override protected void doGet(HttpServletRequest req, HttpServletResponse resp) throws ServletException, IOException { //如何让浏览器三秒自动刷新一次 resp.setHeader("refresh", "3"); //在内存中创建一个图片 BufferedImage bufferedImage = new BufferedImage(80, 20, BufferedImage.TYPE_INT_RGB); //得到图片 Graphics2D bi = (Graphics2D) bufferedImage.getGraphics(); //设置背景颜色为白色 bi.setColor(Color.WHITE); bi.fillRect(0, 0, 80, 20); //给图片写数据 bi.setColor(Color.BLUE); bi.setFont(new Font(null, Font.BOLD, 20)); bi.drawString(makeNum(), 0, 20); //告诉浏览器用图片的方式打开 resp.setContentType("image/jpeg"); //网站存在缓存,不让浏览器缓存 resp.setDateHeader("Expires",0); resp.addHeader("Cache-Control","no-cache"); resp.setHeader("Pragma","no-cache"); ImageIO.write(bufferedImage, "jpeg", resp.getOutputStream()); } / * 生成随机数 * * @return */ private String makeNum() { Random random = new Random(); String num = random.nextInt(999999) + ""; StringBuilder sb = new StringBuilder(); for (int i = 0; i < 6 - num.length(); i++) { sb.append("0"); } return sb.toString() + num; } @Override protected void doPost(HttpServletRequest req, HttpServletResponse resp) throws ServletException, IOException { doGet(req, resp); }} <servlet-mapping> <servlet-name>image</servlet-name> <url-pattern>/image</url-pattern> </servlet-mapping> <servlet> <servlet-name>image</servlet-name> <servlet-class>com.zyy.res.ImageServlet</servlet-class> </servlet>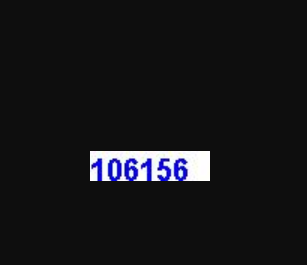
14.response重定向
一个web之源收到客户端A请求后,B会通知A客户端去访问另外一个web资源C,这个过程就叫做重定向。
常见场景:
- 用户登录
public void sendRedirect(String location) throws IOException;package com.zyy.res;import javax.servlet.ServletException;import javax.servlet.http.HttpServlet;import javax.servlet.http.HttpServletRequest;import javax.servlet.http.HttpServletResponse;import java.io.IOException;/ * @ClassName: RedirectServlet * @Description: TODO 类描述 * @Author: zyy * @Date: 2021/09/09 16:34 * @Version: 1.0 */public class RedirectServlet extends HttpServlet { @Override protected void doGet(HttpServletRequest req, HttpServletResponse resp) throws ServletException, IOException { //重定向 resp.sendRedirect("/res/image"); //相当于// resp.setHeader("Location", "/res/image");// resp.setStatus(302); } @Override protected void doPost(HttpServletRequest req, HttpServletResponse resp) throws ServletException, IOException { doGet(req, resp); }} <servlet-mapping> <servlet-name>redirect</servlet-name> <url-pattern>/redirect</url-pattern> </servlet-mapping> <servlet> <servlet-name>redirect</servlet-name> <servlet-class>com.zyy.res.RedirectServlet</servlet-class> </servlet>面试题:请你聊聊重定向和转发的区别?
-
相同点
- 页面都会实现跳转
-
相同点
- 请求转发,URL地址拦不会变; 307
- 重定向,URL地址拦会发生变化。 302
模拟登录
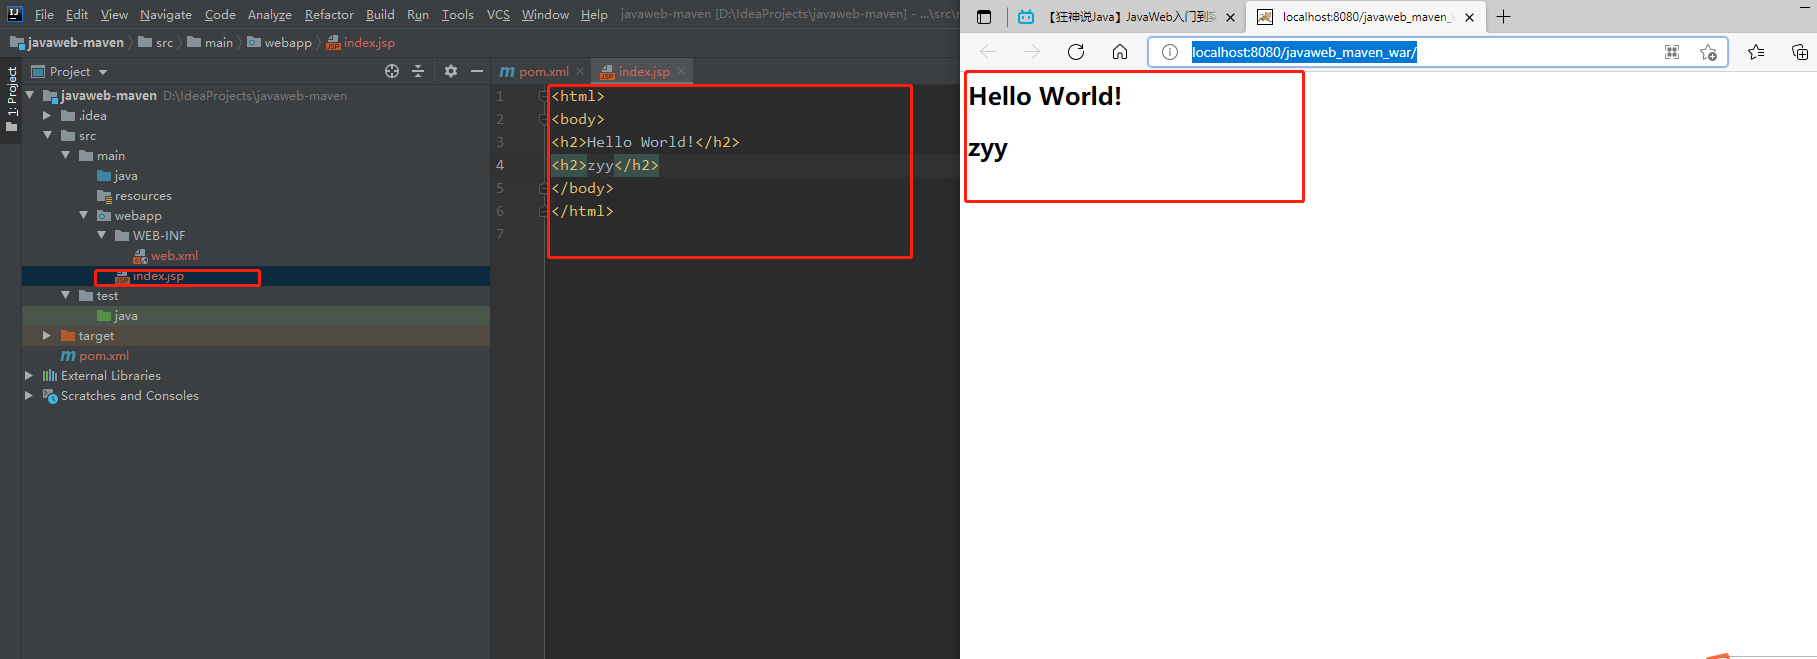
index.jsp
Hello World!    用户名:
    密码:
<servlet-mapping> <servlet-name>req</servlet-name> <url-pattern>/login</url-pattern> </servlet-mapping> <servlet> <servlet-name>req</servlet-name> <servlet-class>com.zyy.res.RequestTest</servlet-class> </servlet>import javax.servlet.ServletException;import javax.servlet.http.HttpServlet;import javax.servlet.http.HttpServletRequest;import javax.servlet.http.HttpServletResponse;import java.io.IOException;/ * @ClassName: RequestTest * @Description: TODO 类描述 * @Author: zyy * @Date: 2021/09/09 17:44 * @Version: 1.0 */public class RequestTest extends HttpServlet { @Override protected void doGet(HttpServletRequest req, HttpServletResponse resp) throws ServletException, IOException { String username = req.getParameter("username"); String pwd = req.getParameter("pwd"); System.out.println(username + ":" + pwd); //重定向的时候,一定要注意路径问题,否则可能会404 resp.sendRedirect("/res/success.jsp"); } @Override protected void doPost(HttpServletRequest req, HttpServletResponse resp) throws ServletException, IOException { doGet(req, resp); }}success.jsp
成功
15.request应用
HttpServletRequest代表客户端的请求,用户通过http协议访问服务器,HTTP请求中的所有信息会被封装到HttpServletRequest中,通过HttpServletRequest这个方法,可以获取客户端的所有信息
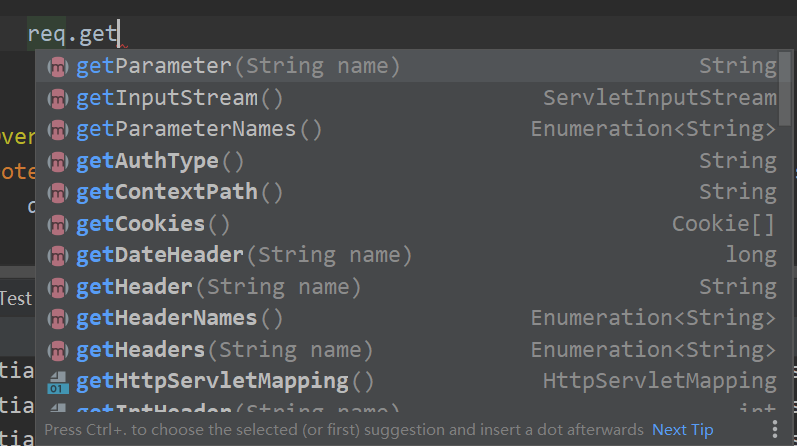
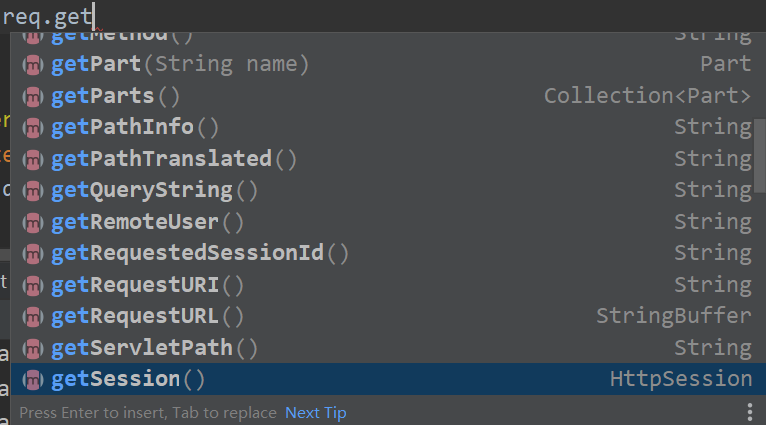
1.获取参数、请求转发
index.jsp
登录 登录
用户名:
密码:
爱好: 看电影 阅读 爬山 摄影
success.jsp
success 登录成功
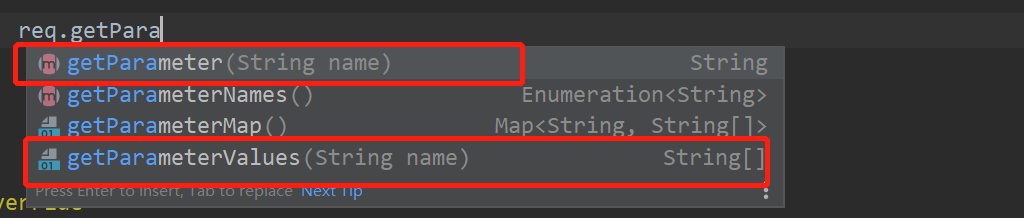
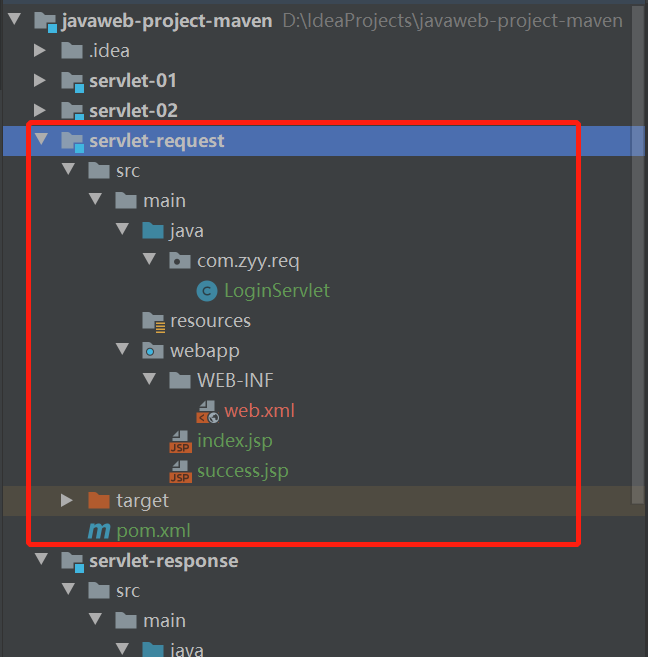
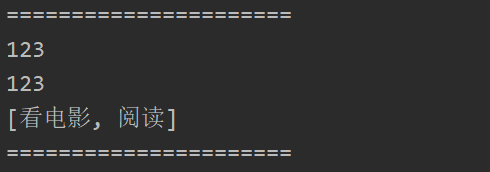
<servlet-mapping> <servlet-name>login</servlet-name> <url-pattern>/login</url-pattern> </servlet-mapping> <servlet> <servlet-name>login</servlet-name> <servlet-class>com.zyy.req.LoginServlet</servlet-class> </servlet>import javax.servlet.ServletException;import javax.servlet.http.HttpServlet;import javax.servlet.http.HttpServletRequest;import javax.servlet.http.HttpServletResponse;import java.io.IOException;import java.util.Arrays;/ * @ClassName: LoginServlet * @Description: TODO 类描述 * @Author: zyy * @Date: 2021/09/10 11:39 * @Version: 1.0 */public class LoginServlet extends HttpServlet { @Override protected void doGet(HttpServletRequest req, HttpServletResponse resp) throws ServletException, IOException { req.setCharacterEncoding("utf-8"); resp.setCharacterEncoding("utf-8"); String username = req.getParameter("username"); String pwd = req.getParameter("pwd"); String[] hobbies = req.getParameterValues("hobbies"); System.out.println("======================"); System.out.println(username); System.out.println(pwd); //后台接收中文乱码问题 System.out.println(Arrays.toString(hobbies)); System.out.println("======================"); //通过请求转发 // 这里的/代表当天的web应用 req.getRequestDispatcher("/success.jsp").forward(req, resp); } @Override protected void doPost(HttpServletRequest req, HttpServletResponse resp) throws ServletException, IOException { doGet(req, resp); }}测试
16.cookie讲解
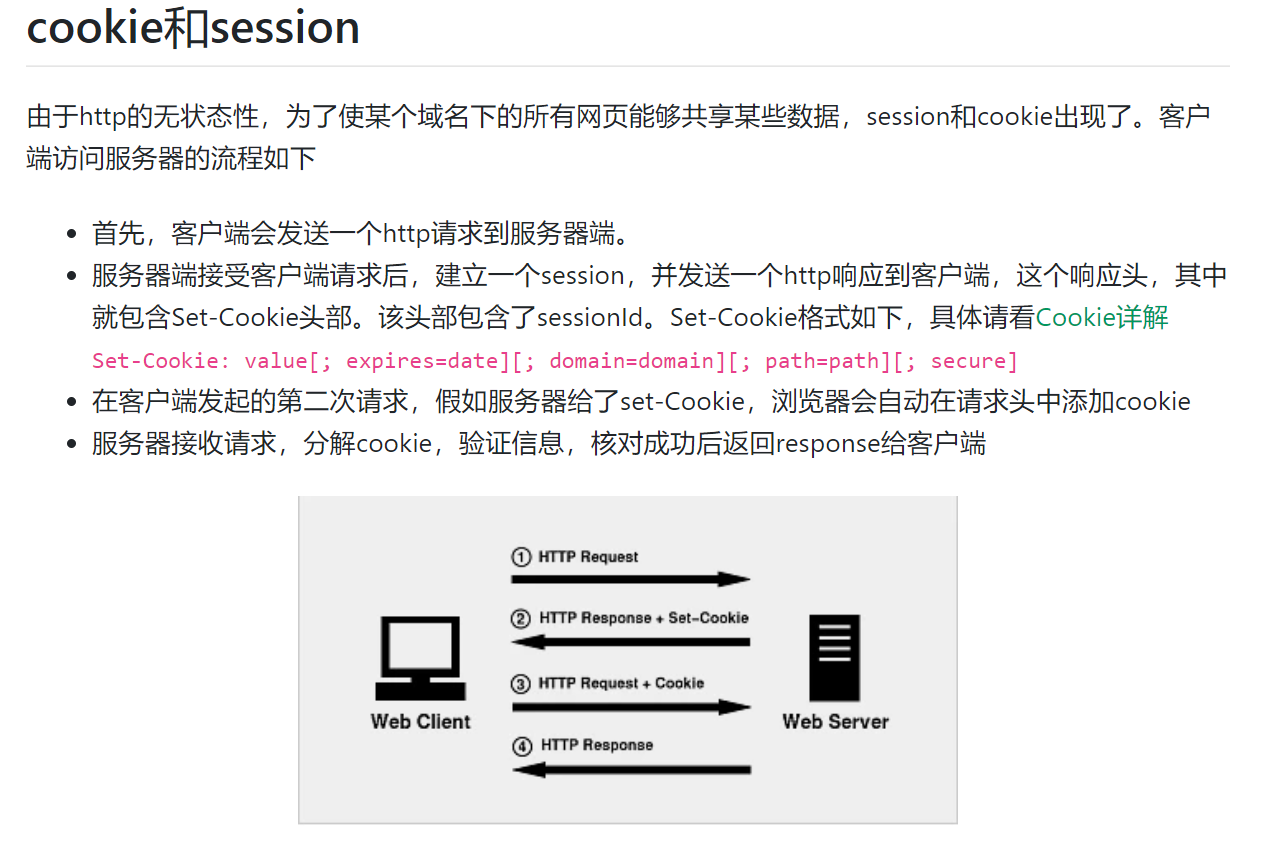
1.会话
会话:用户打开一个浏览器,点击了很多超链接,访问了多个web资源,关闭浏览器,这个过程可以称之为会话。
有状态会话:一个同学曾经来过教室,下次再来的教室的时候,我们会知道这个同学,曾经来过,称之为有状态会话。
你怎么证明你是西开的学生?
你 西开
- 发票 西开给你开发票
- 学校登记 西开标记你过来了
一个网站,怎么证明你来过?
客户端 服务器
- 服务端给客户端一个 信件,客户端下次访问服务端带上信件就可以;cookie
- 服务器登记你过来了,下次你来的时候我来匹配你。session
拓展:
http是一个无状态的协议
什么是无状态:就是说这次请求和上一次请求没有任何关系,互不认识。这种无状态的好处是快速。坏处是假如我们想要把www.zhihu.com/login.html和www.zhihu.com/index.html关联起来,必须使用某些手段和工具
2.会话保持的两种技术
cookie
- 客户端技术(响应,请求)
session
- 服务端技术,利用这个技术,我们可以保存用户的会话信息,我们可以把信息或者数据放在session中。
常见场景:
- 网站登录之后,你下次不用再登录了,第二次访问直接就上去了。
3.Cookie
-
从请求中拿到cookie信息
-
服务器响应给客户端cookie
Cookie[] cookies = req.getCookies();//获取cookiecookie.getName();//获取cookie中的keycookie.getValue();//获取cookie中的valueCookie cookie = new Cookie("lastLoginTime", "" + System.currentTimeMillis());//新建一个cookiecookie.setMaxAge(24*60*60);//设置cookie的有效期resp.addCookie(cookie);//响应给客户端一个cookiecookie:一般会保存在本地的用户目录下/AppData下
一个网站cookie是否存在上限?
- 一个cookie只能保存一个信息
- 一个web站点可以给浏览器发送多个cookie,每个web站点最多存放20个cookie( 不同的浏览器会有所不同)
- cookie大小有限制4kb
- 浏览器上限是300个cookie
删除cookie
- 不设置有效期,关闭浏览器,自动失效
- 设置有效期时间为0
新建一个项目
pom.xml
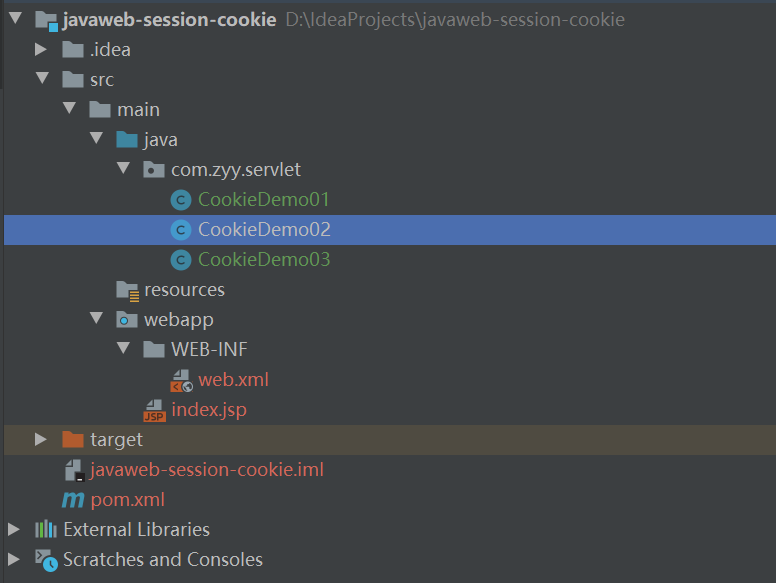
<project xmlns="http://maven.apache.org/POM/4.0.0" xmlns:xsi="http://www.w3.org/2001/XMLSchema-instance" xsi:schemaLocation="http://maven.apache.org/POM/4.0.0 http://maven.apache.org/xsd/maven-4.0.0.xsd"> <modelVersion>4.0.0</modelVersion> <groupId>com.zyy</groupId> <artifactId>javaweb-session-cookie</artifactId> <version>1.0-SNAPSHOT</version> <packaging>war</packaging> <dependencies> <dependency> <groupId>javax.servlet</groupId> <artifactId>servlet-api</artifactId> <version>2.5</version> </dependency> <dependency> <groupId>javax.servlet.jsp</groupId> <artifactId>jsp-api</artifactId> <version>2.2</version> </dependency> </dependencies></project>web.xml
<web-app xmlns="http://xmlns.jcp.org/xml/ns/javaee" xmlns:xsi="http://www.w3.org/2001/XMLSchema-instance" xsi:schemaLocation="http://xmlns.jcp.org/xml/ns/javaee http://xmlns.jcp.org/xml/ns/javaee/web-app_3_1.xsd" version="3.1" metadata-complete="true"> <servlet-mapping> <servlet-name>c1</servlet-name> <url-pattern>/c1</url-pattern> </servlet-mapping> <servlet> <servlet-name>c1</servlet-name> <servlet-class>com.zyy.servlet.CookieDemo01</servlet-class> </servlet> <servlet-mapping> <servlet-name>c2</servlet-name> <url-pattern>/c2</url-pattern> </servlet-mapping> <servlet> <servlet-name>c2</servlet-name> <servlet-class>com.zyy.servlet.CookieDemo02</servlet-class> </servlet> <servlet-mapping> <servlet-name>c3</servlet-name> <url-pattern>/c3</url-pattern> </servlet-mapping> <servlet> <servlet-name>c3</servlet-name> <servlet-class>com.zyy.servlet.CookieDemo03</servlet-class> </servlet></web-app>CookieDemo01.java
import javax.servlet.ServletException;import javax.servlet.http.Cookie;import javax.servlet.http.HttpServlet;import javax.servlet.http.HttpServletRequest;import javax.servlet.http.HttpServletResponse;import java.io.IOException;import java.io.PrintWriter;import java.text.SimpleDateFormat;import java.util.Date;/ * @ClassName: CookieDemo01 * @Description: TODO 类描述 * @Author: zyy * 保存用户上一次的访问时间 * @Date: 2021/09/14 14:13 * @Version: 1.0 */public class CookieDemo01 extends HttpServlet { @Override protected void doGet(HttpServletRequest req, HttpServletResponse resp) throws ServletException, IOException { //解决中文乱码 req.setCharacterEncoding("utf-8"); resp.setCharacterEncoding("utf-8"); PrintWriter writer = resp.getWriter(); //cookie,服务器从客户端中获取 Cookie[] cookies = req.getCookies();//这里返回的是数组,说明Cookie可能存在多个 if (cookies == null) { writer.print("这是您第一次访问本站!"); } else { writer.print("您上一次访问本站的时间是:" ); for (int i = 0; i < cookies.length; i++) { Cookie cookie = cookies[i]; if ("lastLoginTime".equals(cookie.getName())) { long lastLoginTime = Long.parseLong(cookie.getValue()); Date date = new Date(lastLoginTime); SimpleDateFormat sd = new SimpleDateFormat("yyyy-MM-dd HH:mm:ss"); writer.print(sd.format(date)); } } } //添加 or 更新 Cookie cookie = new Cookie("lastLoginTime", "" + System.currentTimeMillis()); //设置cookie为1天 cookie.setMaxAge(24*60*60); resp.addCookie(cookie); writer.flush(); } @Override protected void doPost(HttpServletRequest req, HttpServletResponse resp) throws ServletException, IOException { doGet(req, resp); }}CookieDemo02.java
import javax.servlet.ServletException;import javax.servlet.http.Cookie;import javax.servlet.http.HttpServlet;import javax.servlet.http.HttpServletRequest;import javax.servlet.http.HttpServletResponse;import java.io.IOException;import java.io.PrintWriter;import java.text.SimpleDateFormat;import java.util.Date;/ * @ClassName: CookieDemo02 * @Description: TODO 类描述 * @Author: zyy * @Date: 2021/09/14 14:13 * @Version: 1.0 */public class CookieDemo02 extends HttpServlet { @Override protected void doGet(HttpServletRequest req, HttpServletResponse resp) throws ServletException, IOException { //解决中文乱码 req.setCharacterEncoding("utf-8"); resp.setCharacterEncoding("utf-8"); //添加 or 更新 Cookie cookie = new Cookie("lastLoginTime", "" + System.currentTimeMillis()); //设置有效期为0 cookie.setMaxAge(0); resp.addCookie(cookie); } @Override protected void doPost(HttpServletRequest req, HttpServletResponse resp) throws ServletException, IOException { doGet(req, resp); }}CookieDemo03.java
import javax.servlet.ServletException;import javax.servlet.http.Cookie;import javax.servlet.http.HttpServlet;import javax.servlet.http.HttpServletRequest;import javax.servlet.http.HttpServletResponse;import java.io.IOException;import java.io.PrintWriter;import java.net.URLDecoder;import java.net.URLEncoder;/ * @ClassName: CookieDemo03 * @Description: TODO 类描述 * @Author: zyy * @Date: 2021/09/14 14:13 * @Version: 1.0 */public class CookieDemo03 extends HttpServlet { @Override protected void doGet(HttpServletRequest req, HttpServletResponse resp) throws ServletException, IOException { //解决中文乱码 req.setCharacterEncoding("UTF-8"); resp.setCharacterEncoding("UTF-8"); PrintWriter writer = resp.getWriter(); //cookie,服务器从客户端中获取 Cookie[] cookies = req.getCookies(); if (cookies == null) { writer.print("这是您第一次访问本站!"); } else { for (int i = 0; i < cookies.length; i++) { Cookie cookie = cookies[i]; if ("name".equals(cookie.getName())) { //防止网络传输中文乱码问题 writer.print(URLDecoder.decode(cookie.getValue(), "UTF-8")); } } } //添加 or 更新 Cookie cookie = new Cookie("name", URLEncoder.encode("狂神", "UTF-8")); resp.addCookie(cookie); writer.flush(); } @Override protected void doPost(HttpServletRequest req, HttpServletResponse resp) throws ServletException, IOException { doGet(req, resp); }}17.session详解
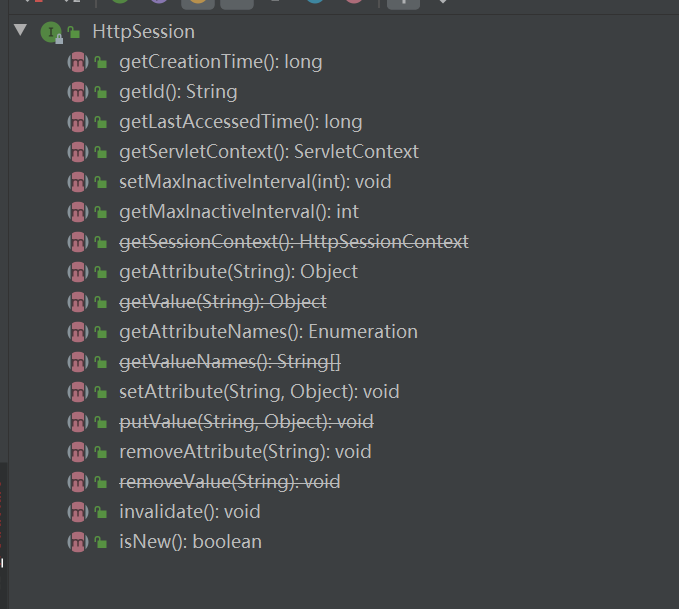
1.session(重点)
什么是session?
- 服务器会给每一个用户(浏览器)创建一个session对象;
- 一个session独占一个浏览器,只要浏览器没有关闭,session就存在;
- 用户登录之后,整个网站它都可以访问。–》保存用户的信息;保存购物车的信息
import javax.servlet.ServletException;import javax.servlet.http.HttpServlet;import javax.servlet.http.HttpServletRequest;import javax.servlet.http.HttpServletResponse;import javax.servlet.http.HttpSession;import java.io.IOException;/ * @ClassName: SessionDemo01 * @Description: TODO 类描述 * @Author: zyy * @Date: 2021/09/14 17:48 * @Version: 1.0 */public class SessionDemo01 extends HttpServlet { @Override protected void doGet(HttpServletRequest req, HttpServletResponse resp) throws ServletException, IOException { //解决乱码问题 req.setCharacterEncoding("UTF-8"); resp.setCharacterEncoding("UTF-8"); resp.setContentType("text/html;charset=utf-8"); //获取session HttpSession session = req.getSession(); //给session存值 session.setAttribute("name", "狂神"); //获取session的id String id = session.getId(); if (session.isNew()) { resp.getWriter().write("session创建成功,id:" + id); } else { resp.getWriter().write("session已经在服务器中存在了,id:" + id); } resp.getWriter().flush(); //session创建的时候做了什么// Cookie cookie = new Cookie("JSESSIONID", id);// resp.addCookie(cookie); } @Override protected void doPost(HttpServletRequest req, HttpServletResponse resp) throws ServletException, IOException { doGet(req, resp); }} <servlet-mapping> <servlet-name>s1</servlet-name> <url-pattern>/s1</url-pattern> </servlet-mapping> <servlet> <servlet-name>s1</servlet-name> <servlet-class>com.zyy.servlet.SessionDemo01</servlet-class> </servlet>也可以存对象
Person.java
/ * @ClassName: Person * @Description: TODO 类描述 * @Author: zyy * @Date: 2021/09/16 10:45 * @Version: 1.0 */public class Person { private String name; private int age; public Person(String name, int age) { this.name = name; this.age = age; } public String getName() { return name; } public int getAge() { return age; } @Override public String toString() { return "Person{" + "name='" + name + '\'' + ", age=" + age + '}'; }}import com.zyy.pojo.Person;import javax.servlet.ServletException;import javax.servlet.http.HttpServlet;import javax.servlet.http.HttpServletRequest;import javax.servlet.http.HttpServletResponse;import javax.servlet.http.HttpSession;import java.io.IOException;/ * @ClassName: SessionDemo01 * @Description: TODO 类描述 * @Author: zyy * @Date: 2021/09/14 17:48 * @Version: 1.0 */public class SessionDemo01 extends HttpServlet { @Override protected void doGet(HttpServletRequest req, HttpServletResponse resp) throws ServletException, IOException { //解决乱码问题 req.setCharacterEncoding("UTF-8"); resp.setCharacterEncoding("UTF-8"); resp.setContentType("text/html;charset=utf-8"); //获取session HttpSession session = req.getSession(); //给session存值 session.setAttribute("person", new Person("zyy", 18)); //获取session的id String id = session.getId(); if (session.isNew()) { resp.getWriter().write("session创建成功,id:" + id); } else { resp.getWriter().write("session已经在服务器中存在了,id:" + id); } resp.getWriter().flush(); //session创建的时候做了什么// Cookie cookie = new Cookie("JSESSIONID", id);// resp.addCookie(cookie); } @Override protected void doPost(HttpServletRequest req, HttpServletResponse resp) throws ServletException, IOException { doGet(req, resp); }}import com.zyy.pojo.Person;import javax.servlet.ServletException;import javax.servlet.http.HttpServlet;import javax.servlet.http.HttpServletRequest;import javax.servlet.http.HttpServletResponse;import javax.servlet.http.HttpSession;import java.io.IOException;/ * @ClassName: SessionDemo01 * @Description: TODO 类描述 * @Author: zyy * @Date: 2021/09/14 17:48 * @Version: 1.0 */public class SessionDemo02 extends HttpServlet { @Override protected void doGet(HttpServletRequest req, HttpServletResponse resp) throws ServletException, IOException { //解决乱码问题 req.setCharacterEncoding("UTF-8"); resp.setCharacterEncoding("UTF-8"); resp.setContentType("text/html;charset=utf-8"); //获取session HttpSession session = req.getSession(); //给session存值 Person person = (Person) session.getAttribute("person"); System.out.println(person.getName()); } @Override protected void doPost(HttpServletRequest req, HttpServletResponse resp) throws ServletException, IOException { doGet(req, resp); }}清空session
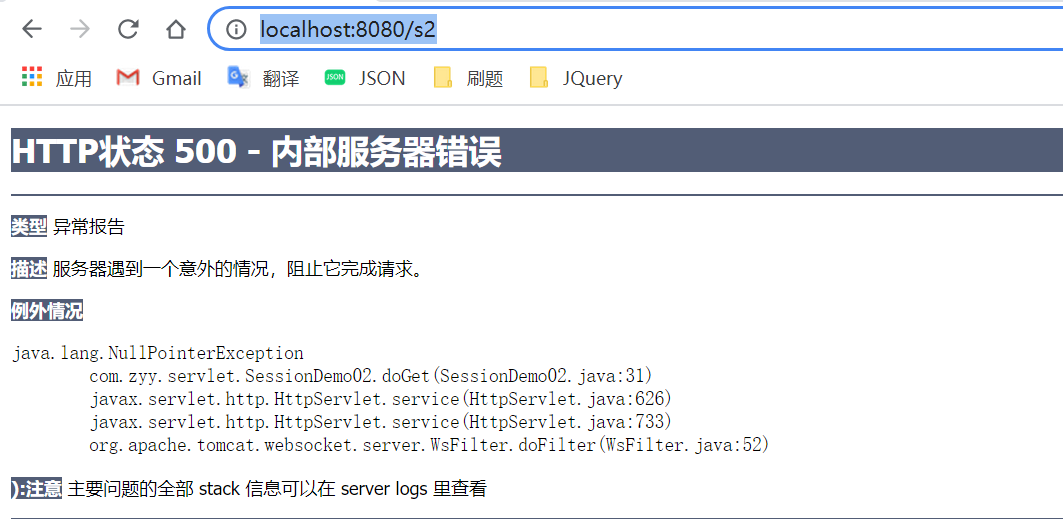
import javax.servlet.ServletException;import javax.servlet.http.HttpServlet;import javax.servlet.http.HttpServletRequest;import javax.servlet.http.HttpServletResponse;import javax.servlet.http.HttpSession;import java.io.IOException;/ * @ClassName: SessionDemo01 * @Description: TODO 类描述 * @Author: zyy * @Date: 2021/09/14 17:48 * @Version: 1.0 */public class SessionDemo03 extends HttpServlet { @Override protected void doGet(HttpServletRequest req, HttpServletResponse resp) throws ServletException, IOException { //解决乱码问题 req.setCharacterEncoding("UTF-8"); resp.setCharacterEncoding("UTF-8"); resp.setContentType("text/html;charset=utf-8"); //获取session HttpSession session = req.getSession(); //手动注销session session.invalidate(); } @Override protected void doPost(HttpServletRequest req, HttpServletResponse resp) throws ServletException, IOException { doGet(req, resp); }} <servlet-mapping> <servlet-name>s2</servlet-name> <url-pattern>/s2</url-pattern> </servlet-mapping> <servlet> <servlet-name>s2</servlet-name> <servlet-class>com.zyy.servlet.SessionDemo02</servlet-class> </servlet> <servlet-mapping> <servlet-name>s3</servlet-name> <url-pattern>/s3</url-pattern> </servlet-mapping> <servlet> <servlet-name>s3</servlet-name> <servlet-class>com.zyy.servlet.SessionDemo03</servlet-class> </servlet>测试:先调用/s3清空,在调用/s2获取session信息,就会报错
web.xml可以设置session自动失效时间
<session-config> <session-timeout>1</session-timeout> </session-config>session和cookie的区别
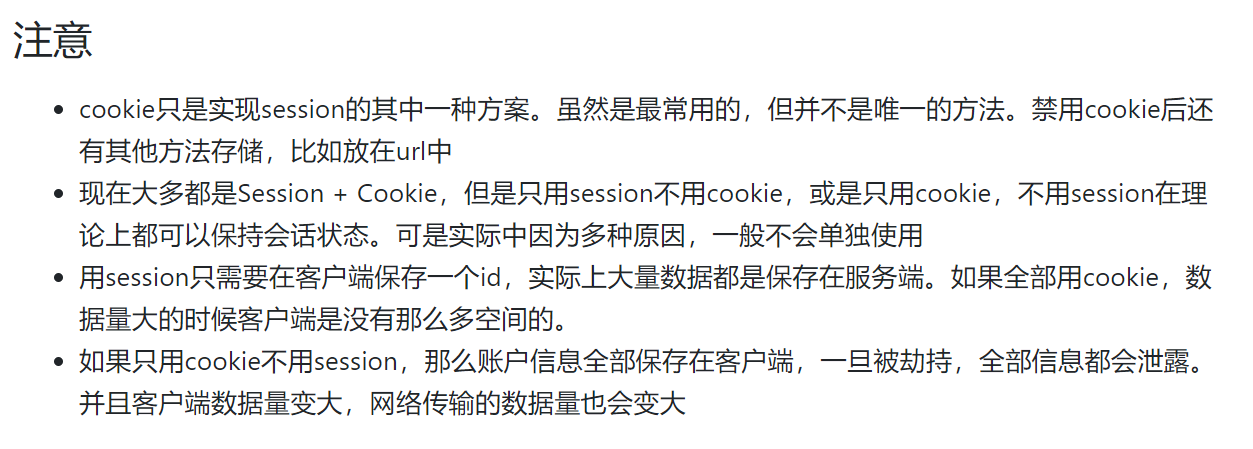
- cookie是把用户的数据写给浏览器,浏览器保存(可以保存多个);
- session是把用户的数据写到用户独占的session中,服务器端保存(保存重要的信息,避免服务器的资源浪费);
- session由服务器创建
使用场景:
- 保存一个登录用户的信息
- 购物车信息
- 在整个网站中经常会使用的数据,我们会将它保存在session中
18.jsp原理剖析
1.什么是jsp
java server pages:java服务器端页面,也是servlet一样,用于动态web技术!
最大的特别:
- 写jsp就像在写html
- 区别:
- html只给用户提供静态数据
- jsp页面中可以嵌入java代码,为用户提供动态数据
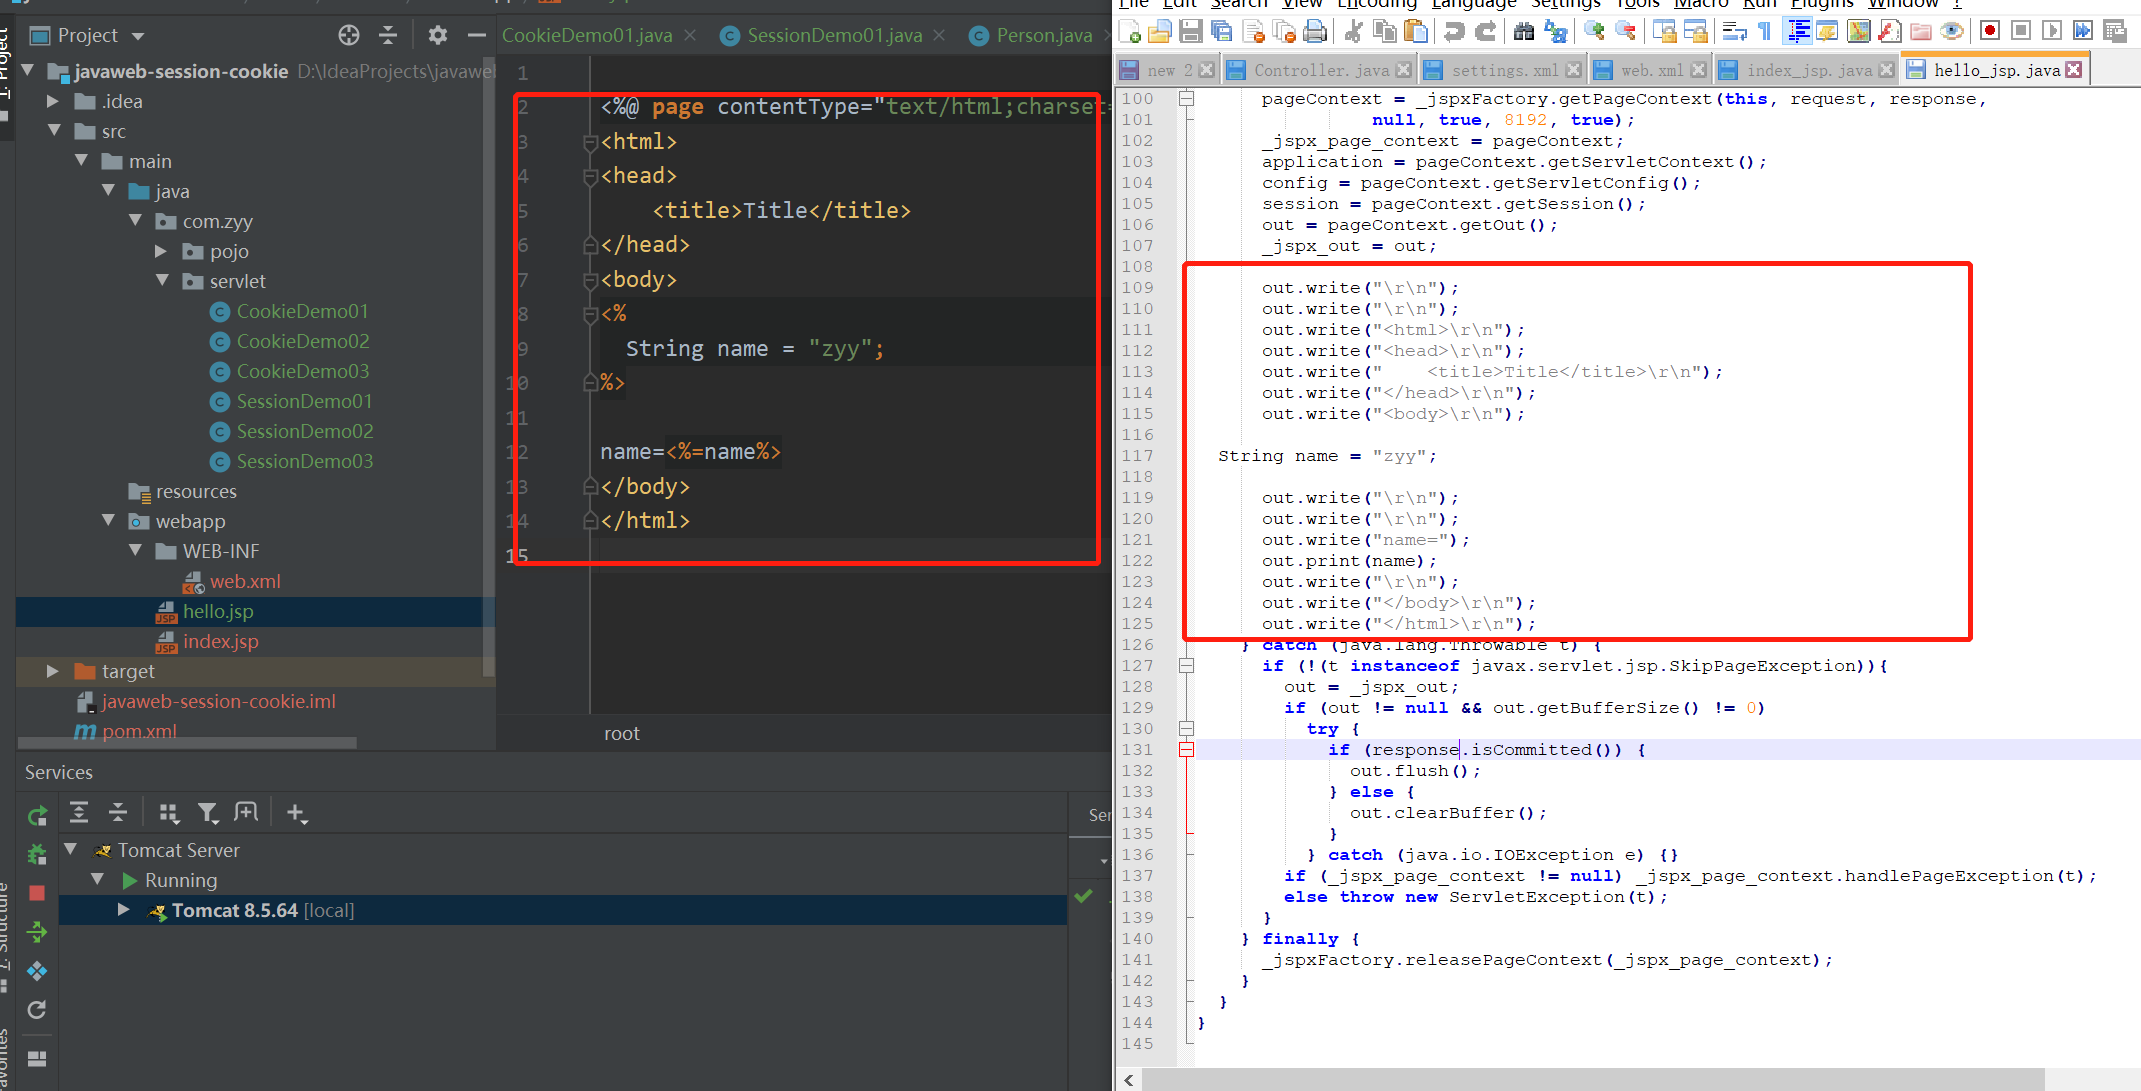
2.jsp原理
思路:jsp到底怎么执行的?
-
代码层面看不出啥(jsp)
-
服务器内部工作
tomcat中有一个work目录
idea使用tomcat的会在idea的tomcat中生产一个work目录
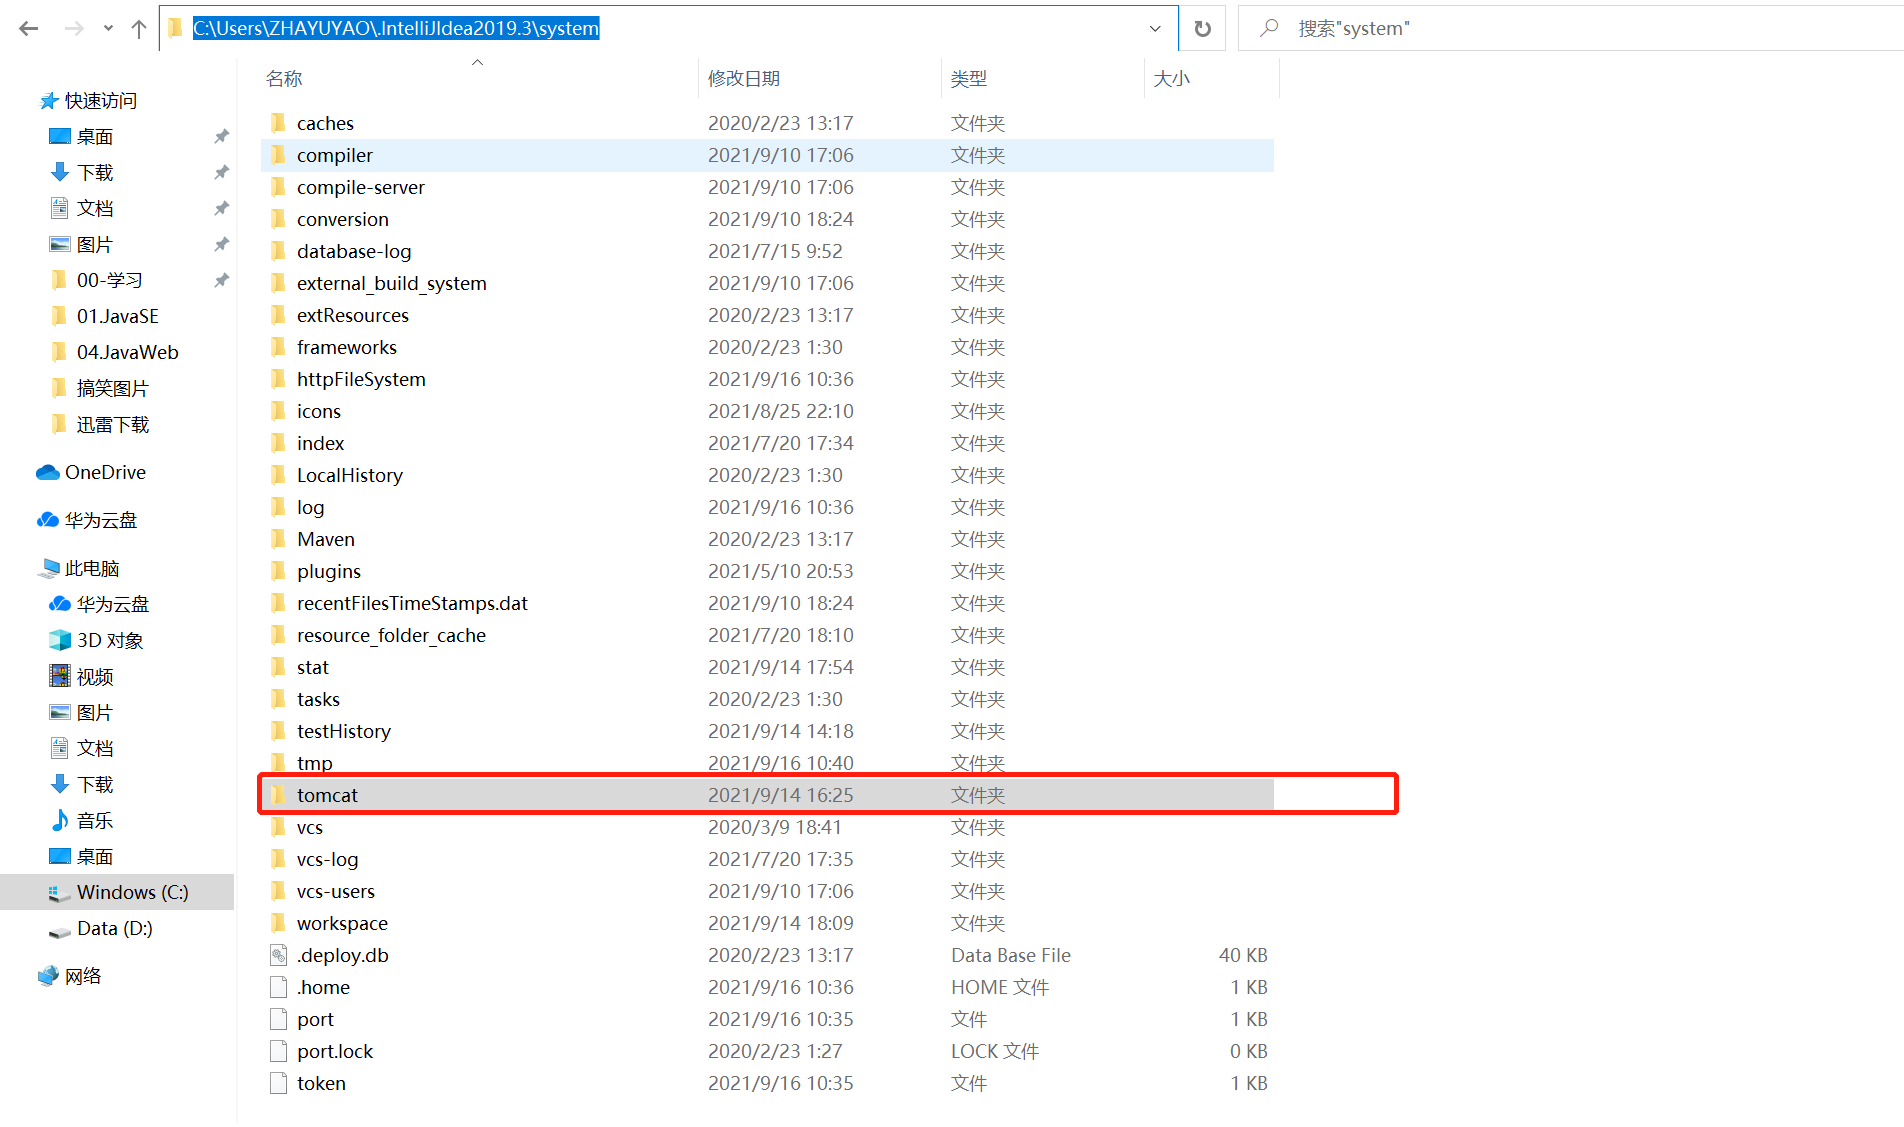
我电脑的地址
C:\Users\ZHAYUYAO\.IntelliJIdea2019.3\system\tomcat\Unnamed_javaweb-session-cookie_2\work\Catalina\localhost\ROOT\org\apache\jsp发现页面转变了java程序!
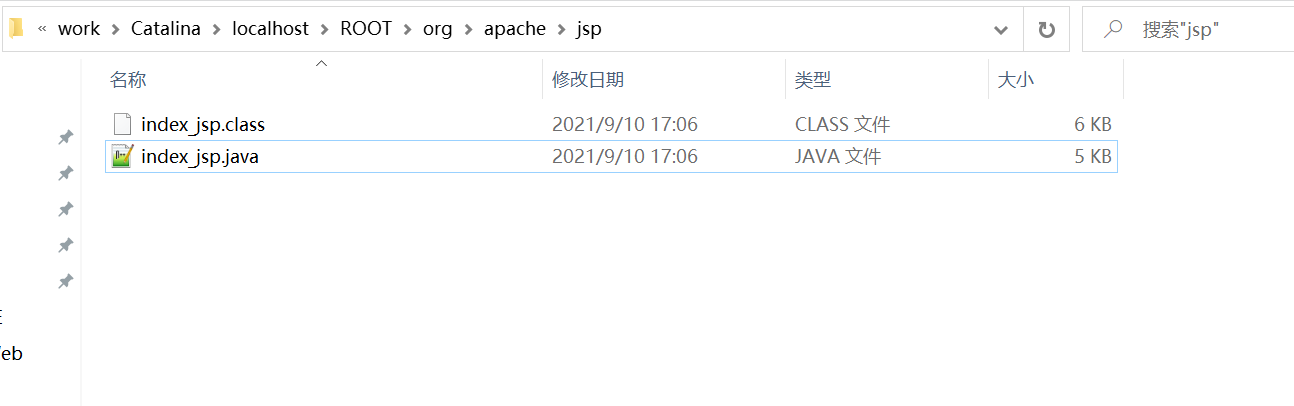
浏览器向服务器发送请求,不管访问什么资源,其实都是在访问servlet
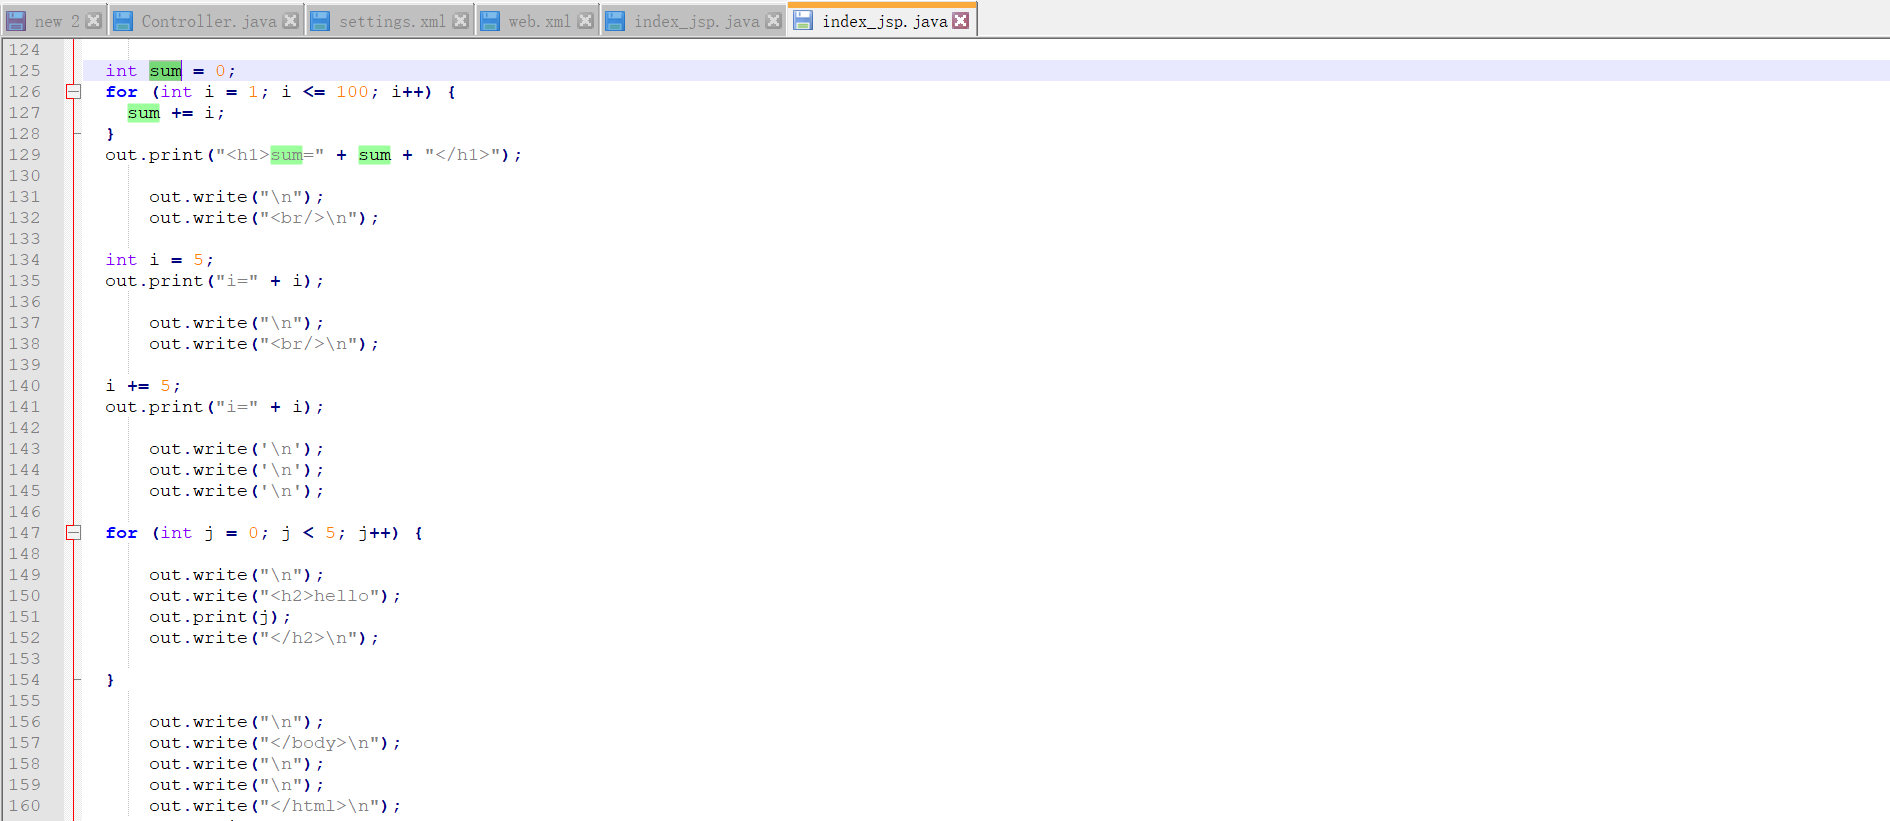
jsp最终也会被转换为一个java类
jsp本质上就是一个servlet
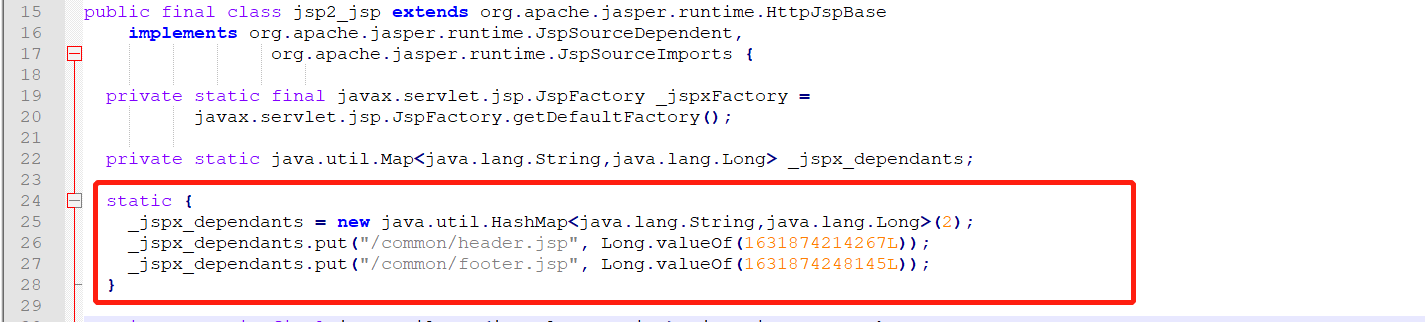
public final class index_jsp extends org.apache.jasper.runtime.HttpJspBase implements org.apache.jasper.runtime.JspSourceDependent, org.apache.jasper.runtime.JspSourceImports { }public abstract class HttpJspBase extends HttpServlet implements HttpJspPage {}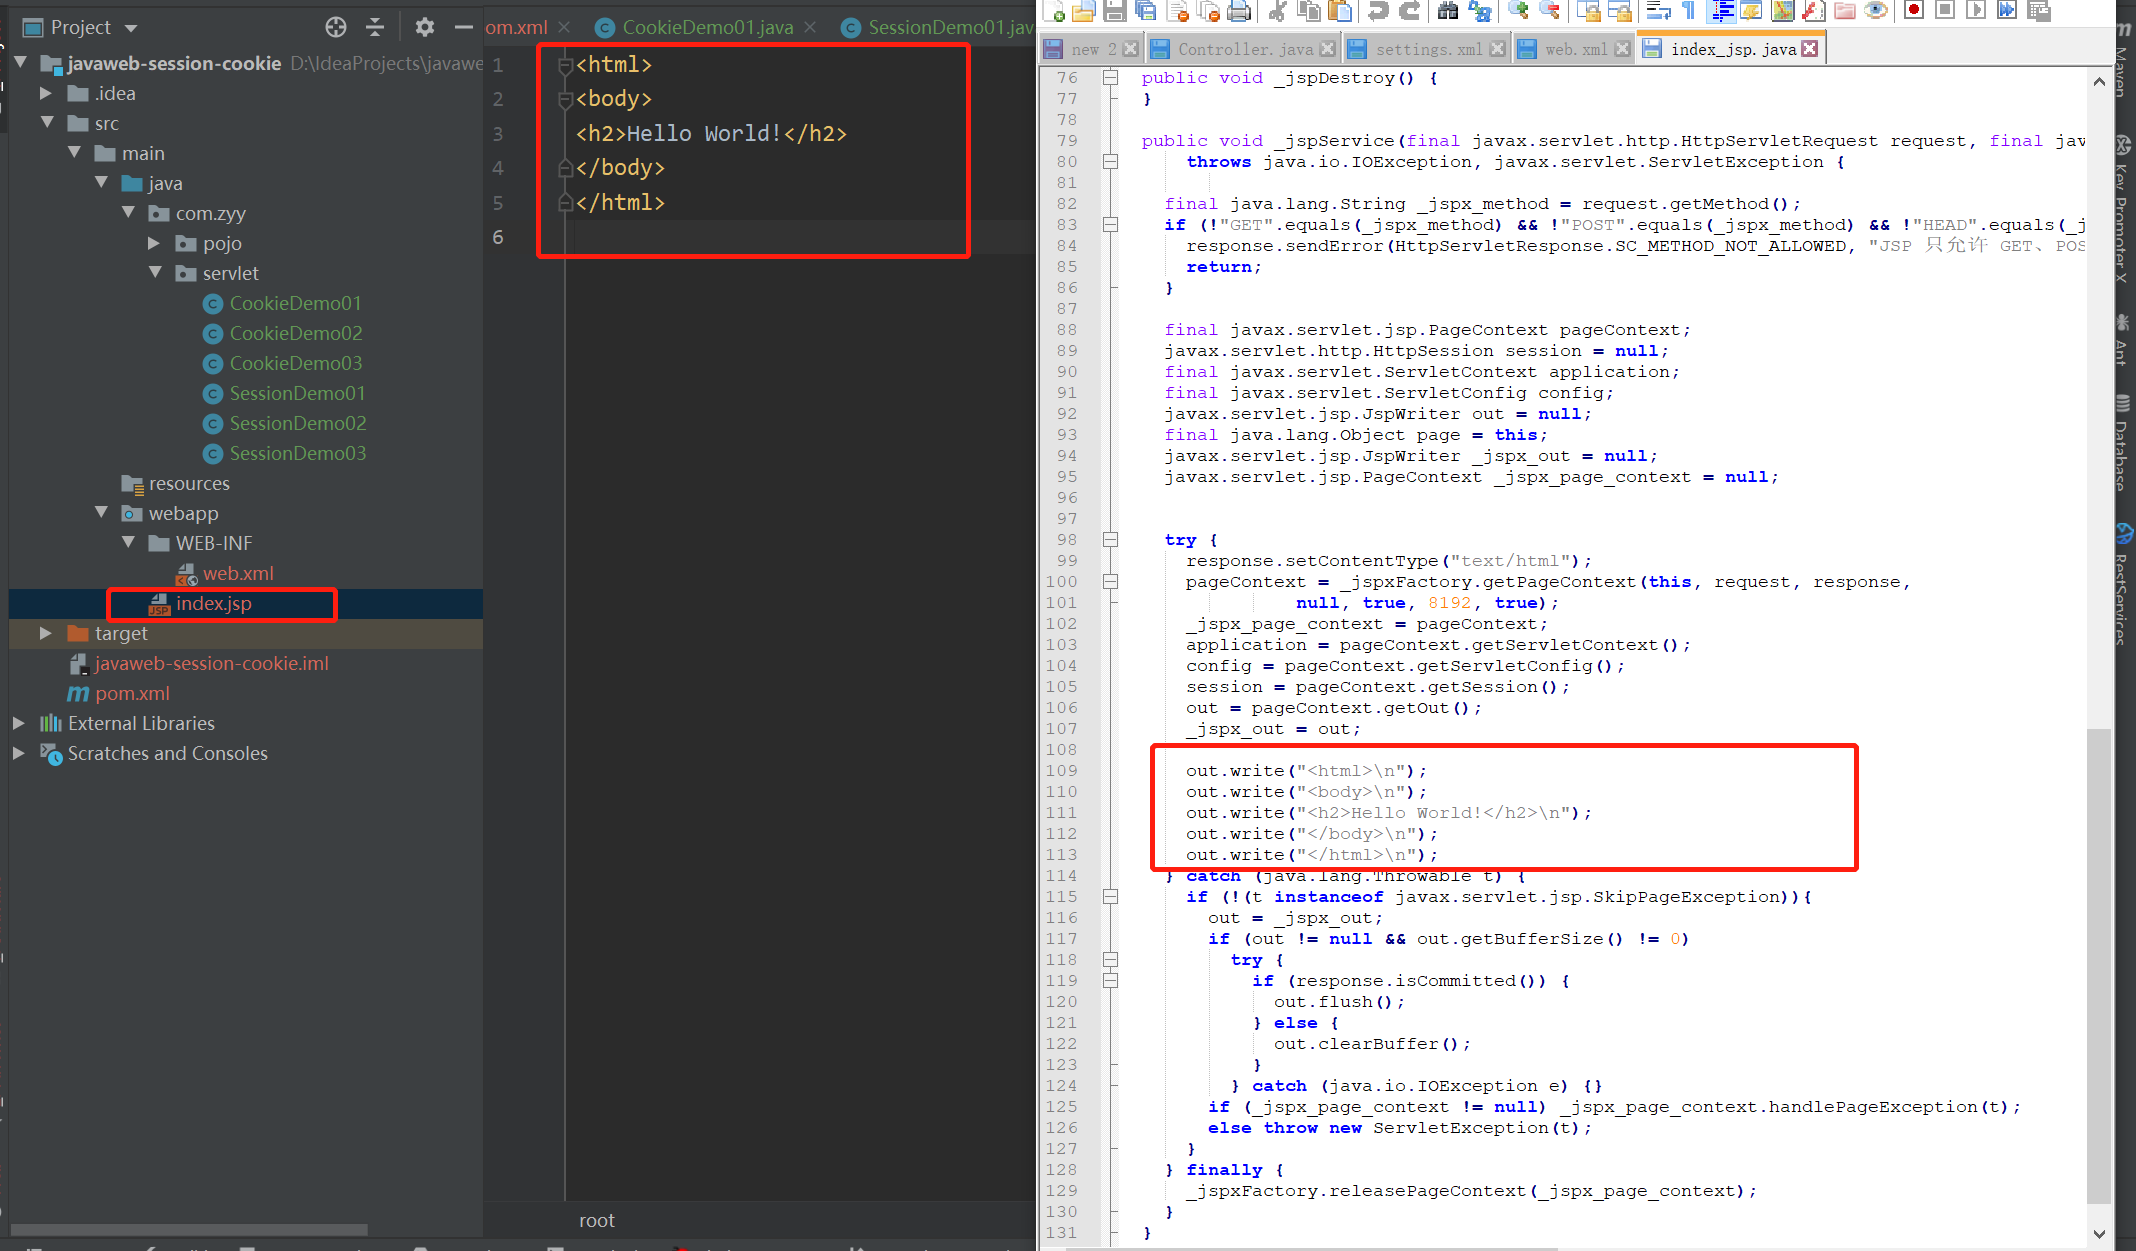
源码分析
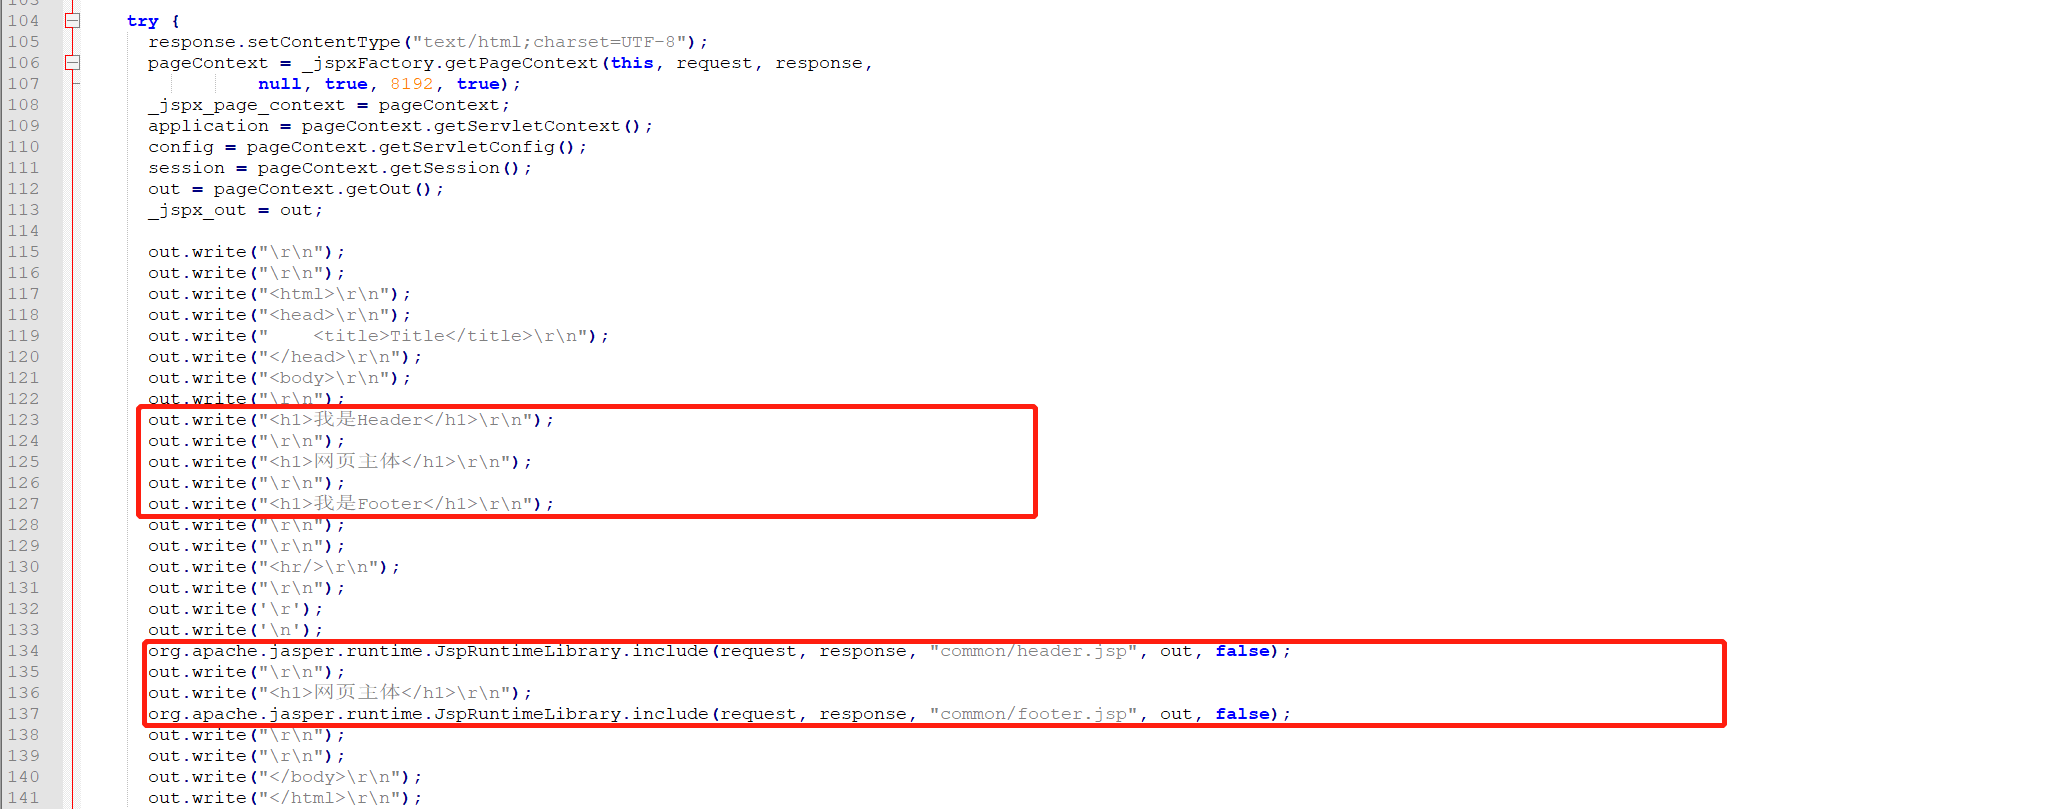
public final class index_jsp extends org.apache.jasper.runtime.HttpJspBase implements org.apache.jasper.runtime.JspSourceDependent, org.apache.jasper.runtime.JspSourceImports { //初始化 public void _jspInit() { } //销毁 public void _jspDestroy() { } //jsp service public void _jspService(final javax.servlet.http.HttpServletRequest request, final javax.servlet.http.HttpServletResponse response) throws java.io.IOException, javax.servlet.ServletException { //1.请求方式判断 //... //2.内置一些对象 final javax.servlet.jsp.PageContext pageContext;//页面上下本 javax.servlet.http.HttpSession session = null;//session final javax.servlet.ServletContext application;//applicationContext final javax.servlet.ServletConfig config;//config javax.servlet.jsp.JspWriter out = null;//out final java.lang.Object page = this;//page:当前 //... //3.输出页面前增加的代码 response.setContentType("text/html");//设置响应页面类型 pageContext = _jspxFactory.getPageContext(this, request, response, null, true, 8192, true); _jspx_page_context = pageContext; application = pageContext.getServletContext(); config = pageContext.getServletConfig(); session = pageContext.getSession(); out = pageContext.getOut(); _jspx_out = out; //4.以上的这些个对象我们可以在jsp中直接使用。 }}
在jsp页面中
只要是java代码就会原封不动的输出
如果是html代码,就会被转换为
out.write("Title \r\n");这样的格式输出到前端
19.jsp基础语法和指令
任何语言都有自己的语法,java有,jsp作为java技术的一种应用,它拥有一些自己扩充的语法(了解,知道即可),java所有语法都支持。
新建一个项目
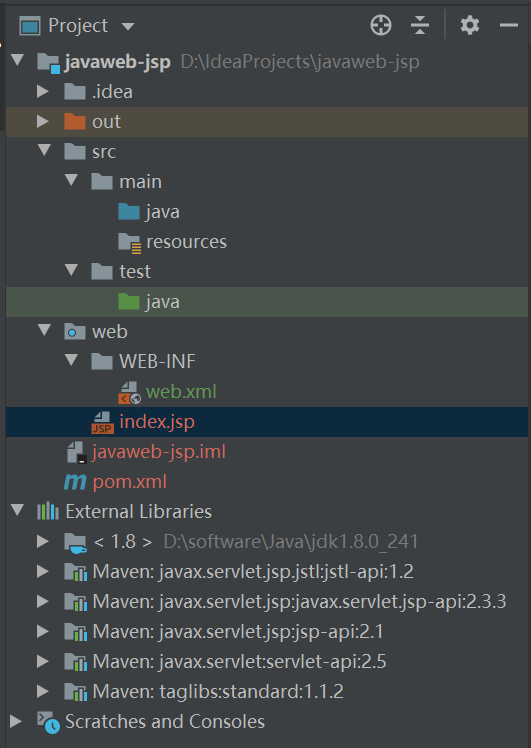
导包pom.xml
<project xmlns="http://maven.apache.org/POM/4.0.0" xmlns:xsi="http://www.w3.org/2001/XMLSchema-instance" xsi:schemaLocation="http://maven.apache.org/POM/4.0.0 http://maven.apache.org/xsd/maven-4.0.0.xsd"> <modelVersion>4.0.0</modelVersion> <groupId>com.zyy</groupId> <artifactId>javaweb-jsp</artifactId> <version>1.0-SNAPSHOT</version> <dependencies> <dependency> <groupId>javax.servlet</groupId> <artifactId>servlet-api</artifactId> <version>2.5</version> </dependency> <dependency> <groupId>javax.servlet.jsp</groupId> <artifactId>javax.servlet.jsp-api</artifactId> <version>2.3.3</version> </dependency> <dependency> <groupId>javax.servlet.jsp.jstl</groupId> <artifactId>jstl-api</artifactId> <version>1.2</version> </dependency> <dependency> <groupId>taglibs</groupId> <artifactId>standard</artifactId> <version>1.1.2</version> </dependency> </dependencies></project>1.jsp表达式
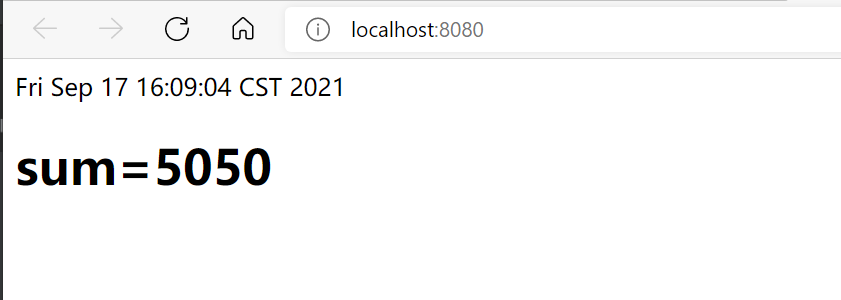
$Title$ <%--jsp表达式 作用:用来将程序的输出到客户端 --%> 2.jsp脚本片段
<% int sum = 0; for (int i = 1; i <= 100; i++) { sum += i; } out.print("sum=" + sum + "
");%>
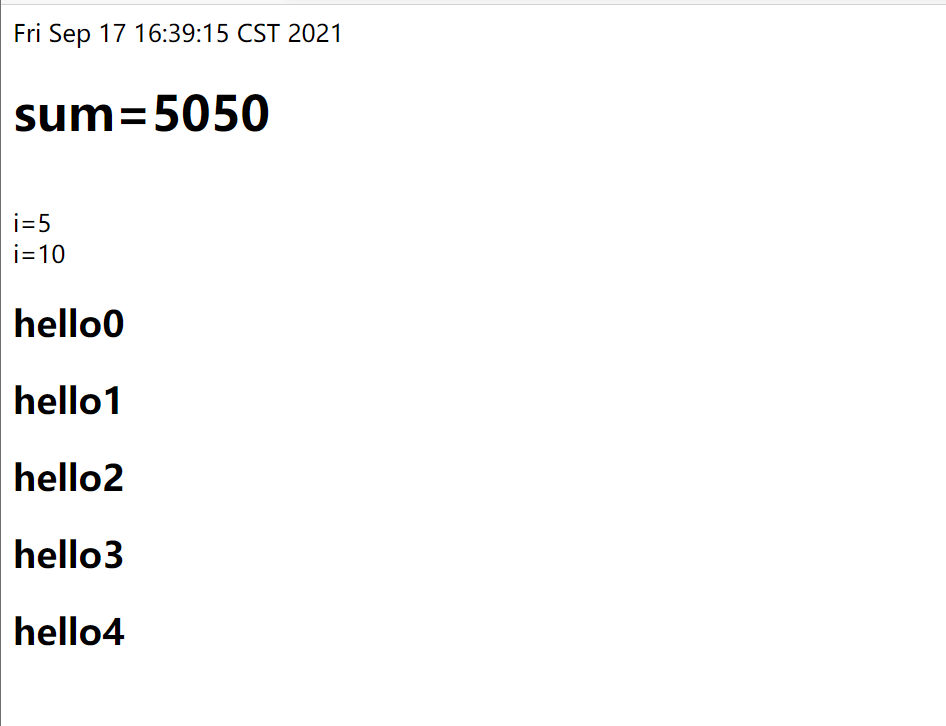
3.脚本片段的再实现
<% for (int j = 0; j hello
4.jsp申明
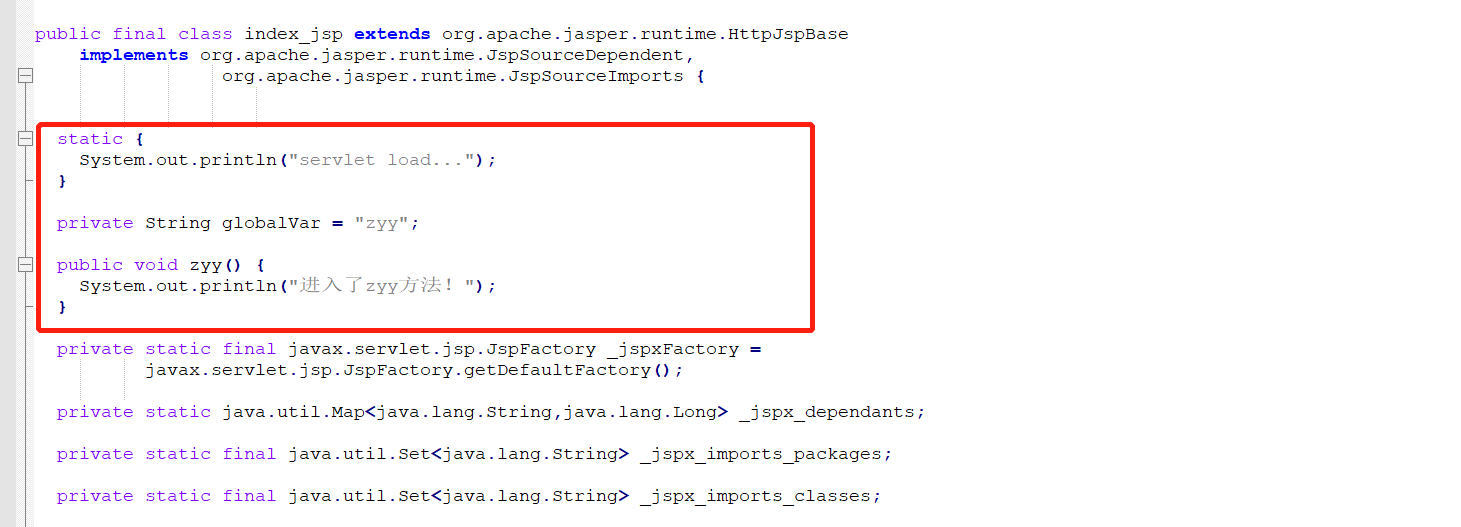
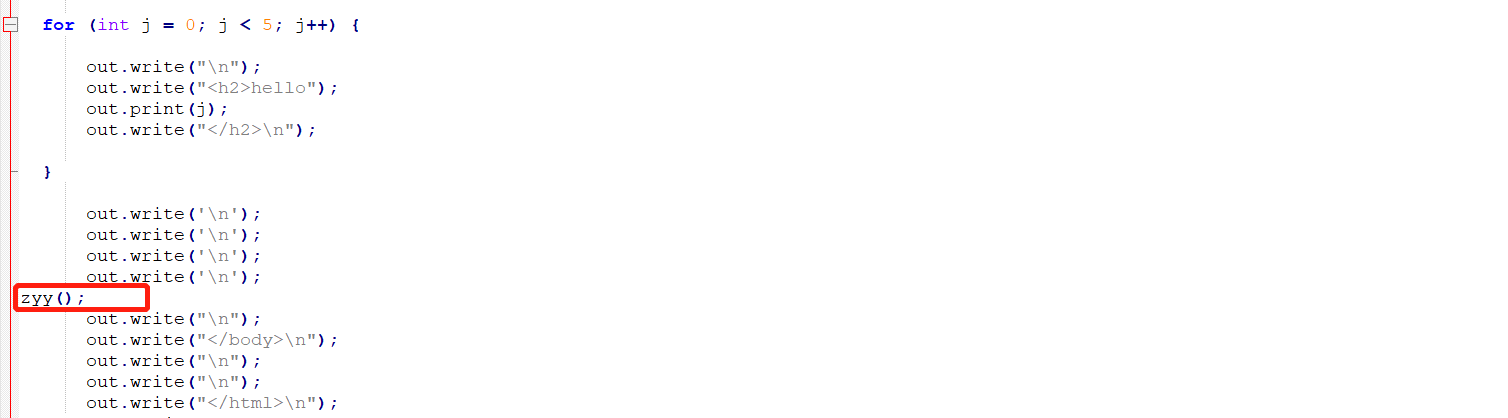
jsp声明,会被编译到jsp生成java代码的类中!其他的,就会被生成到_jspService方法中!
在jsp,嵌入java代码即可
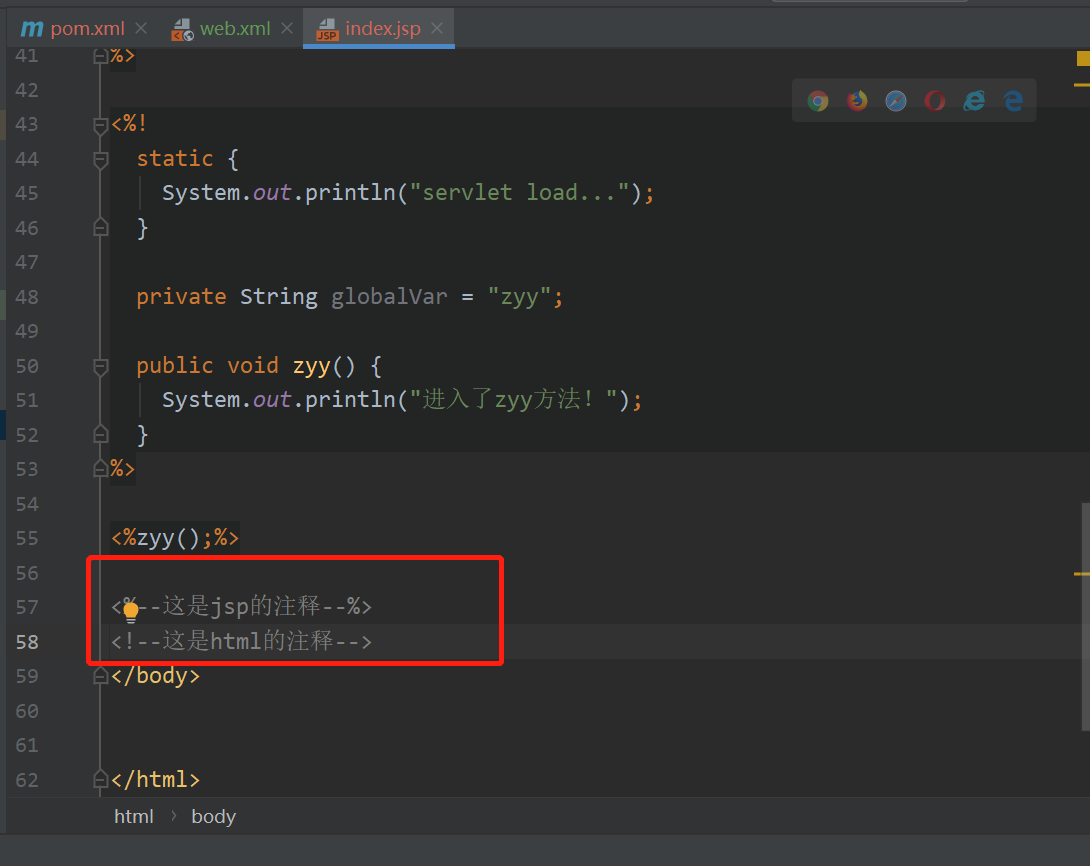
查看页面源代码
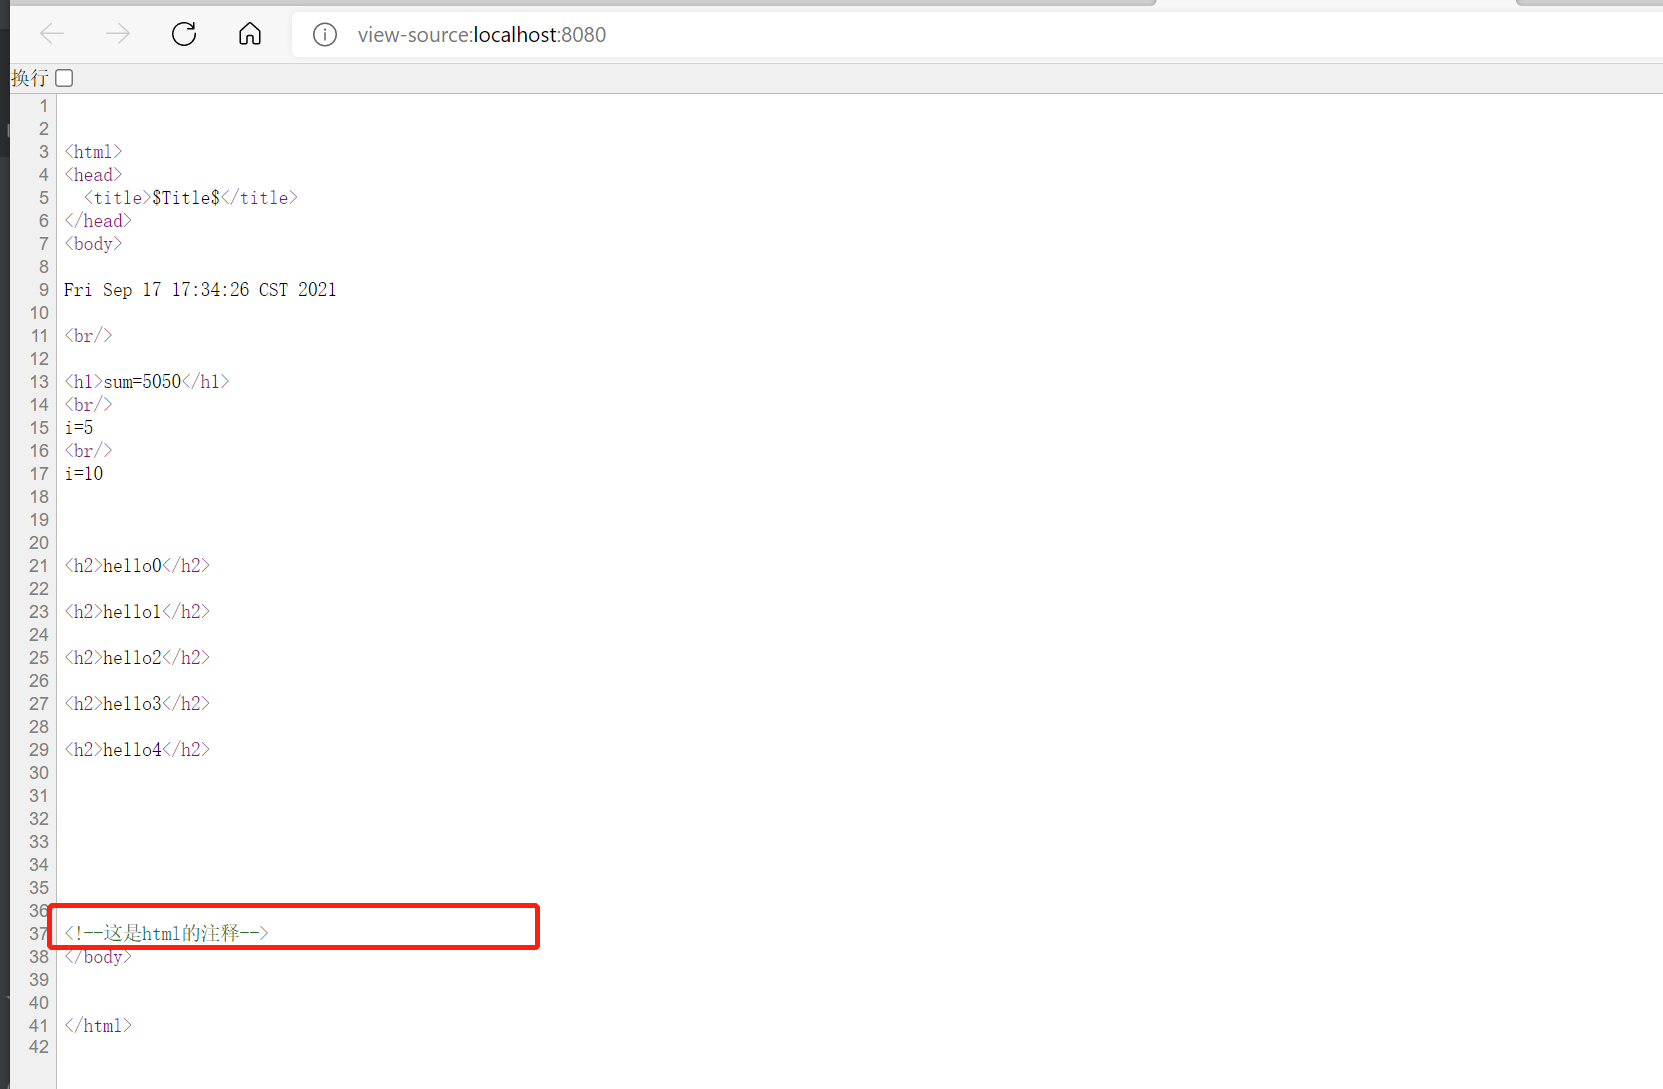
发现:jsp的注释,不会在客户端显示,html会!
5.jsp指令
Title 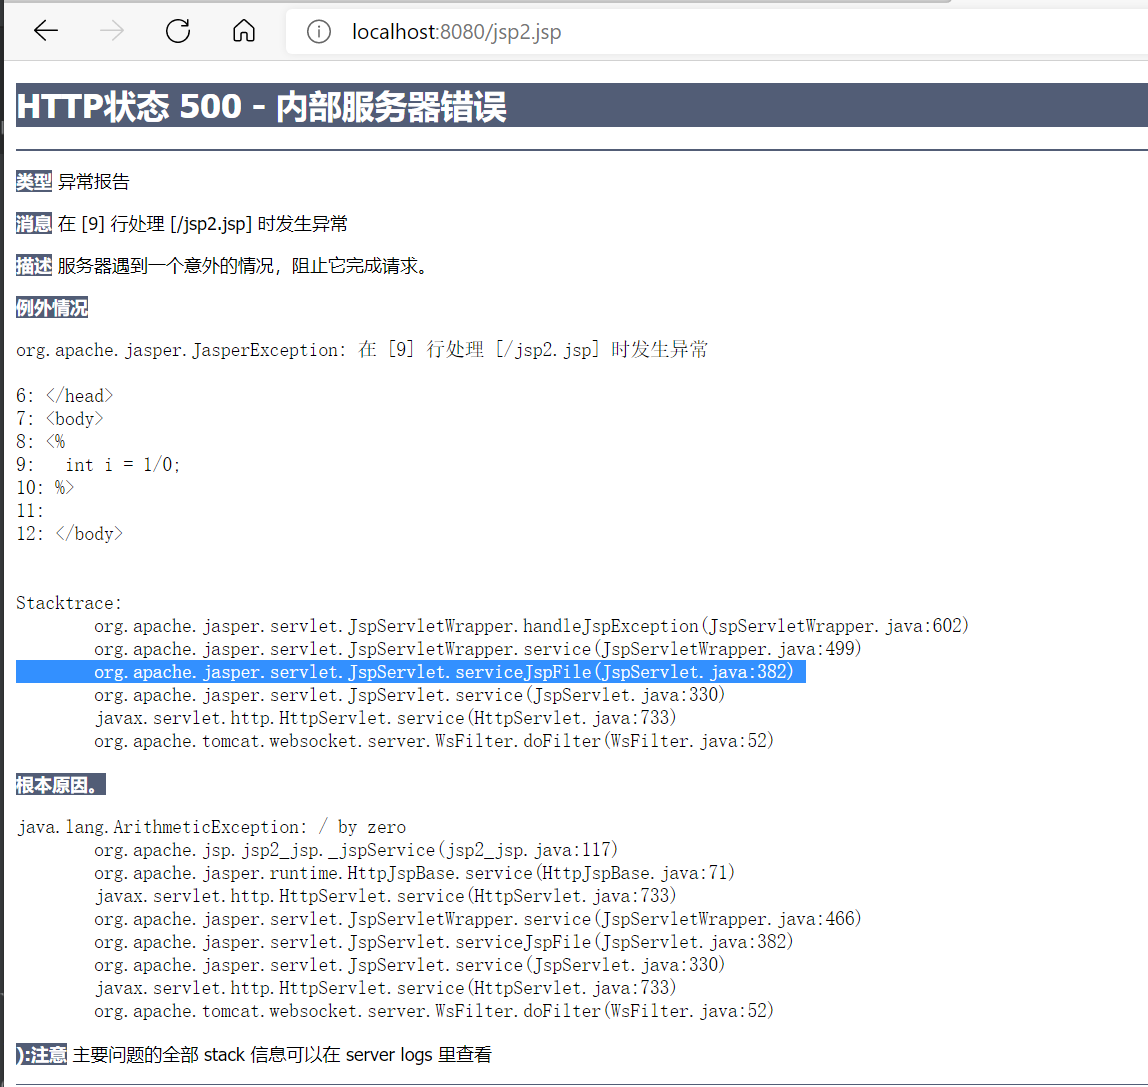
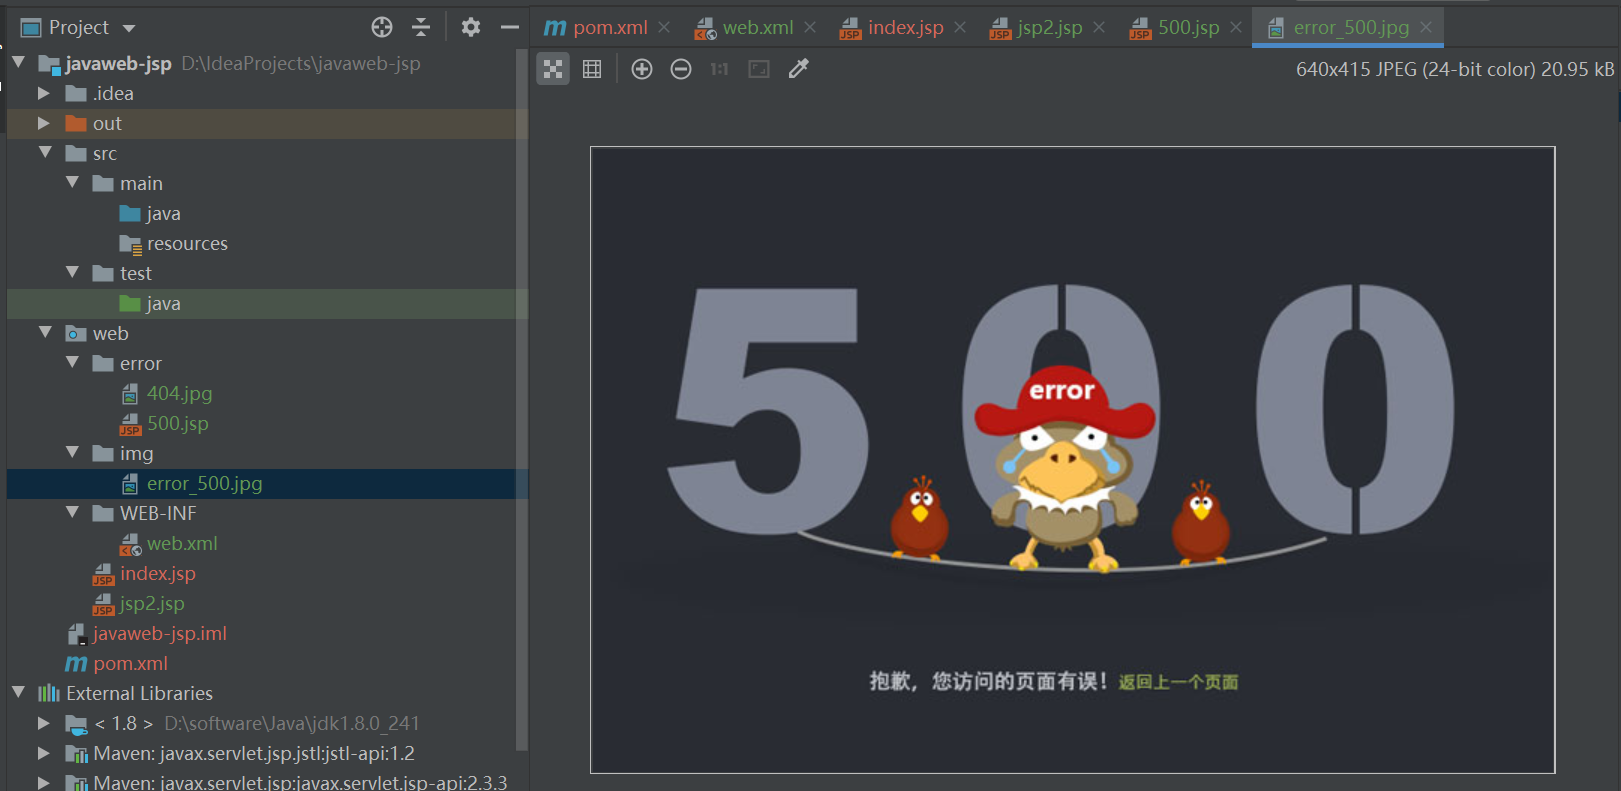
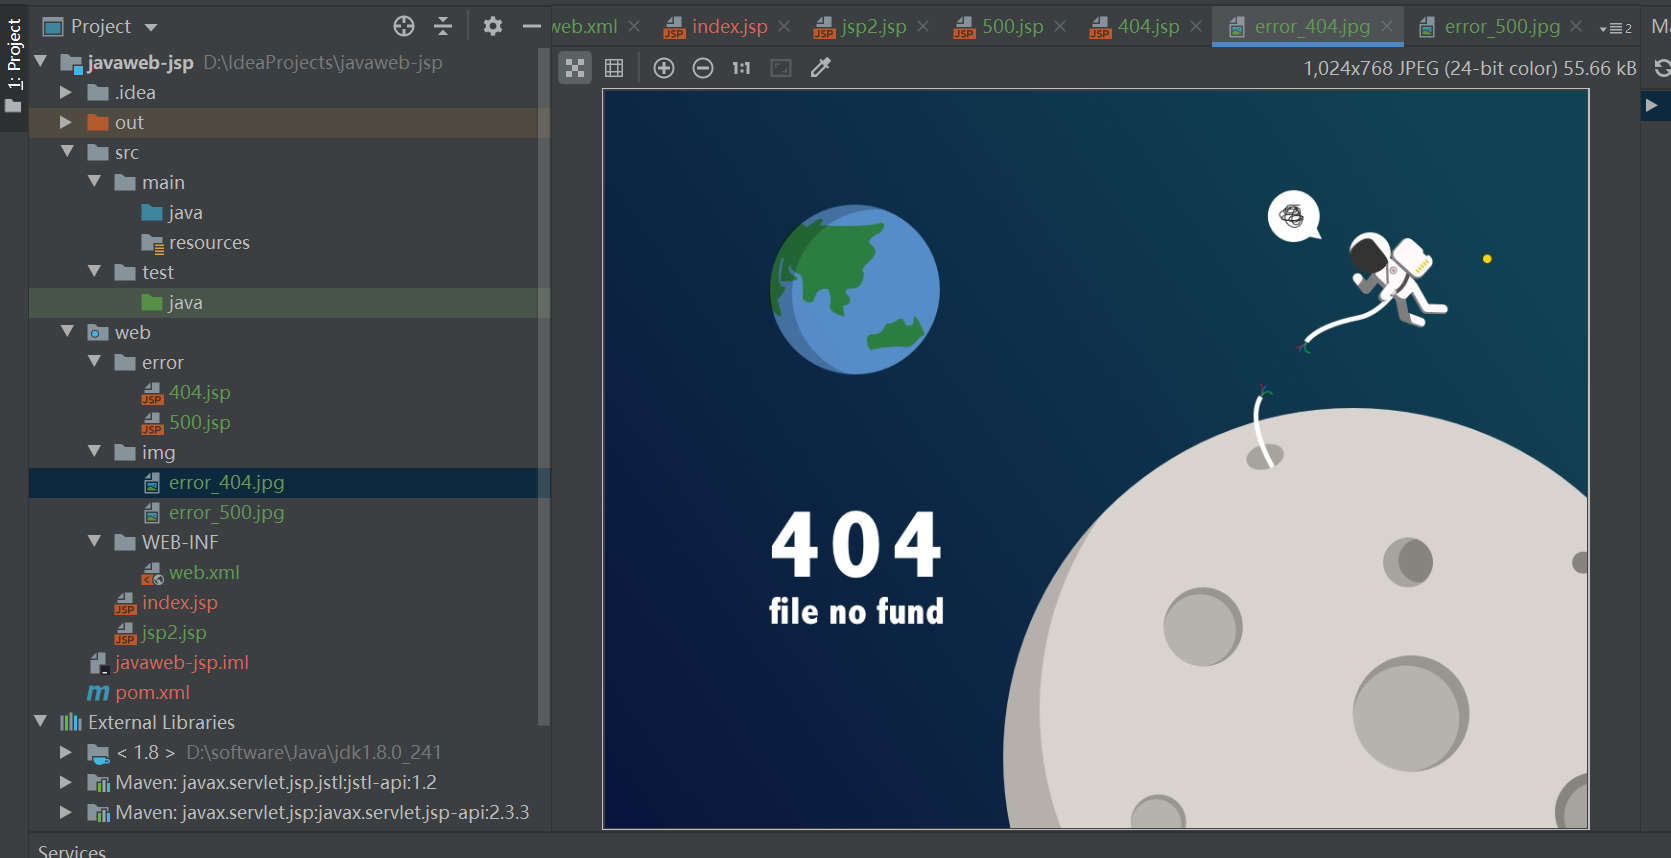
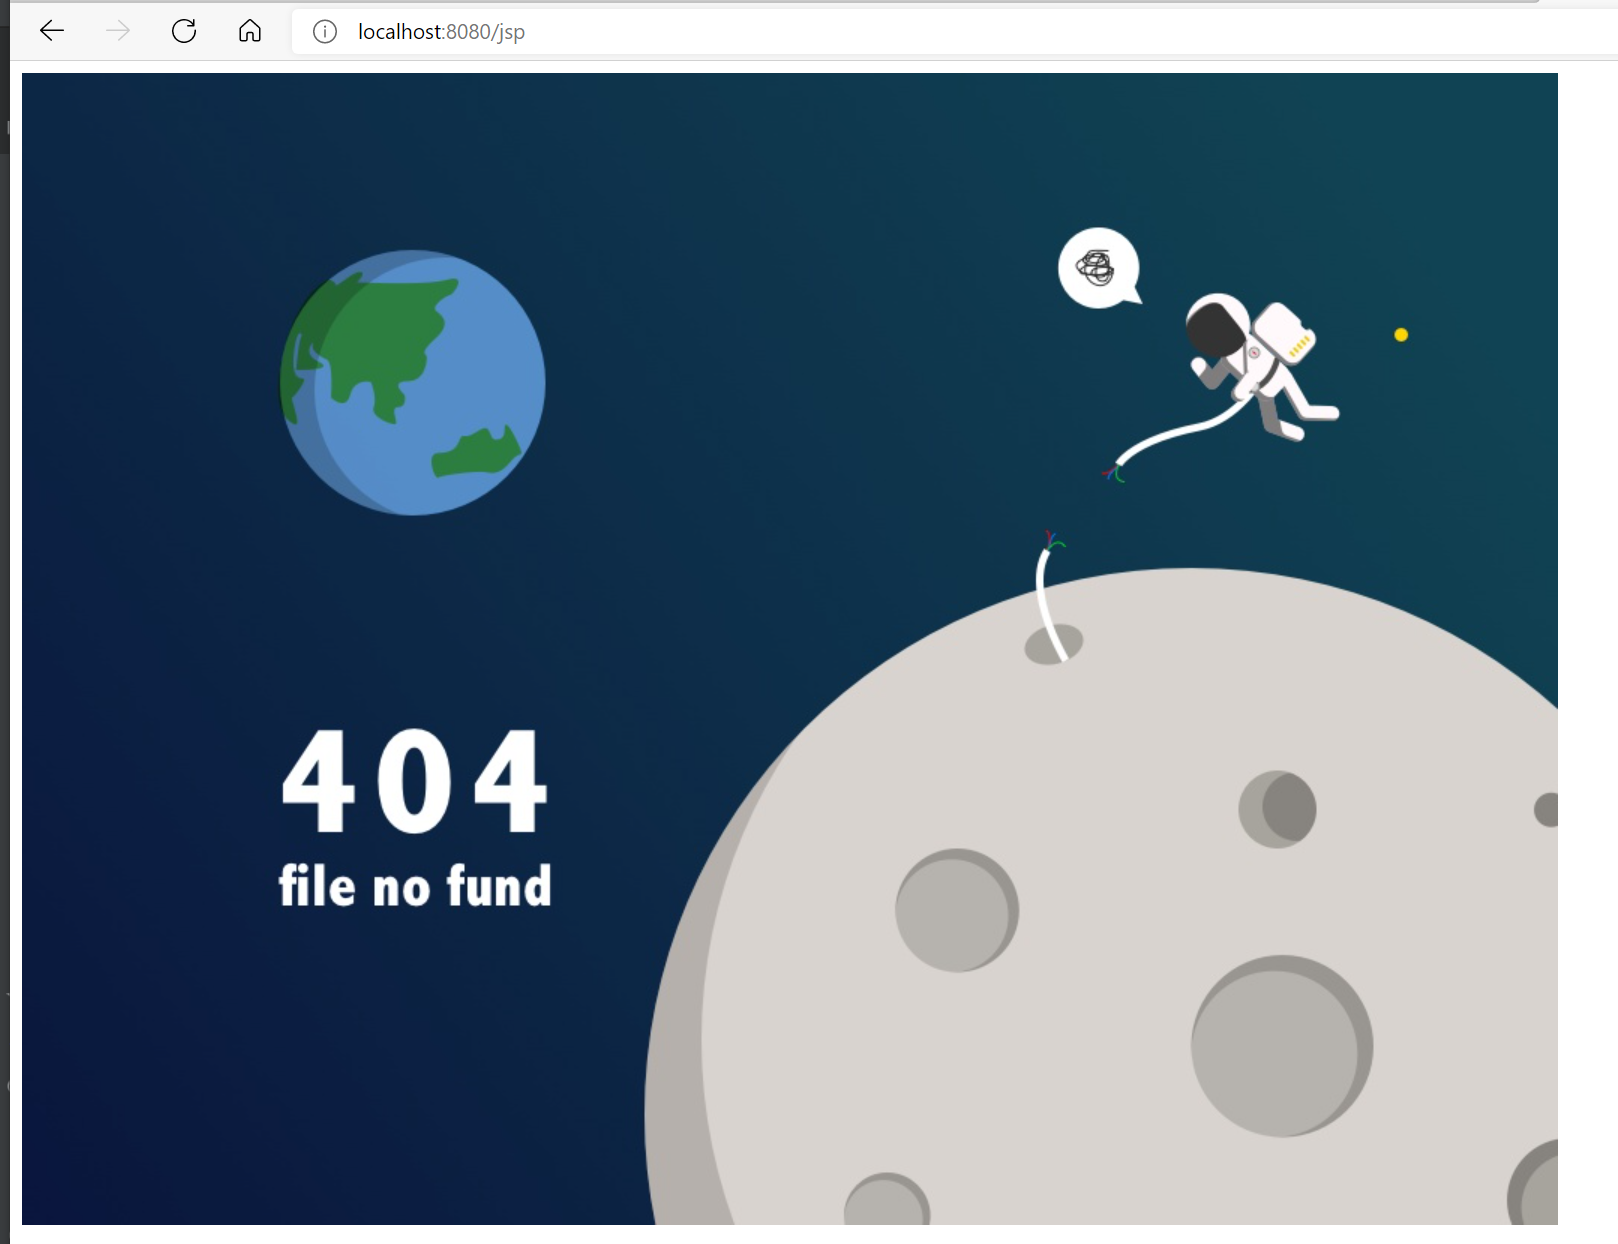
定制错误页面
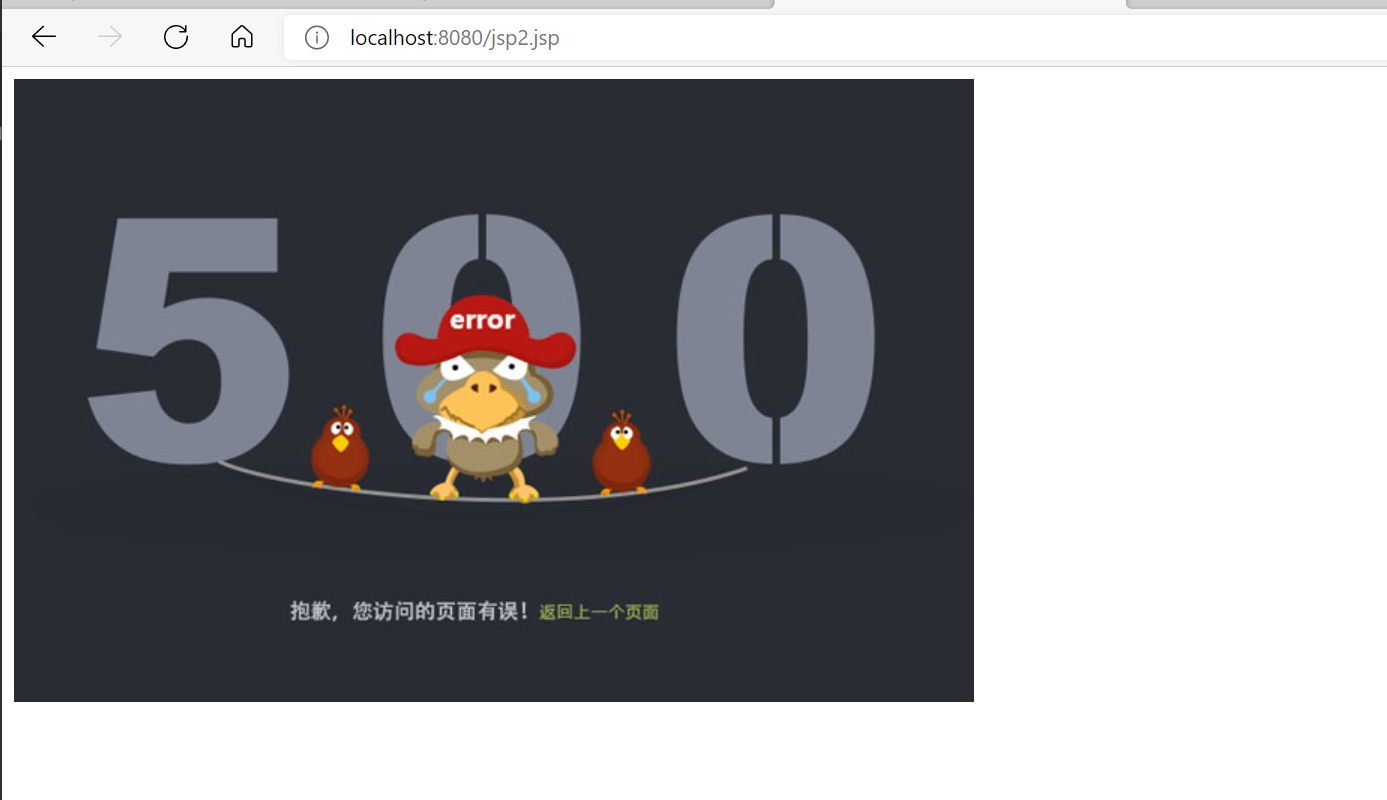
Title 500.jsp
error 
验证
或者web.xml中配置错误页面
Title web.xml
<web-app xmlns="http://xmlns.jcp.org/xml/ns/javaee" xmlns:xsi="http://www.w3.org/2001/XMLSchema-instance" xsi:schemaLocation="http://xmlns.jcp.org/xml/ns/javaee http://xmlns.jcp.org/xml/ns/javaee/web-app_4_0.xsd" version="4.0"> <error-page> <error-code>500</error-code> <location>/error/500.jsp</location> </error-page> <error-page> <error-code>404</error-code> <location>/error/404.jsp</location> </error-page></web-app>404.jsp
error 
测试:
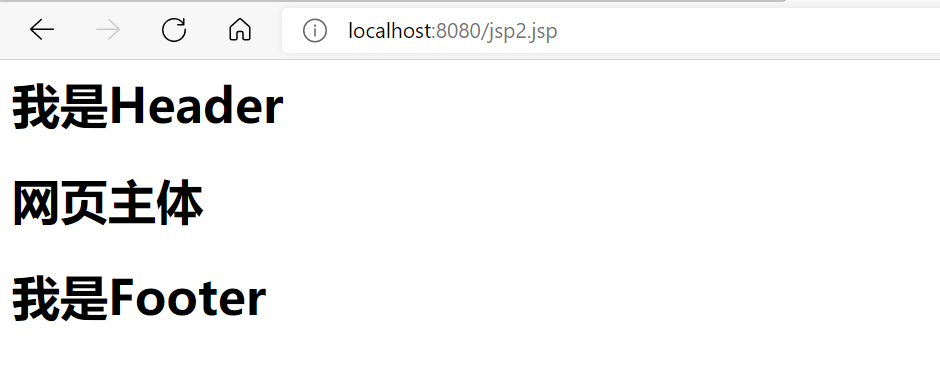
footer.jsp
我是Footer
header.jsp
我是Header
jsp2.jsp
Title 网页主体
测试:
jsp标签
Title 网页主体
网页主体
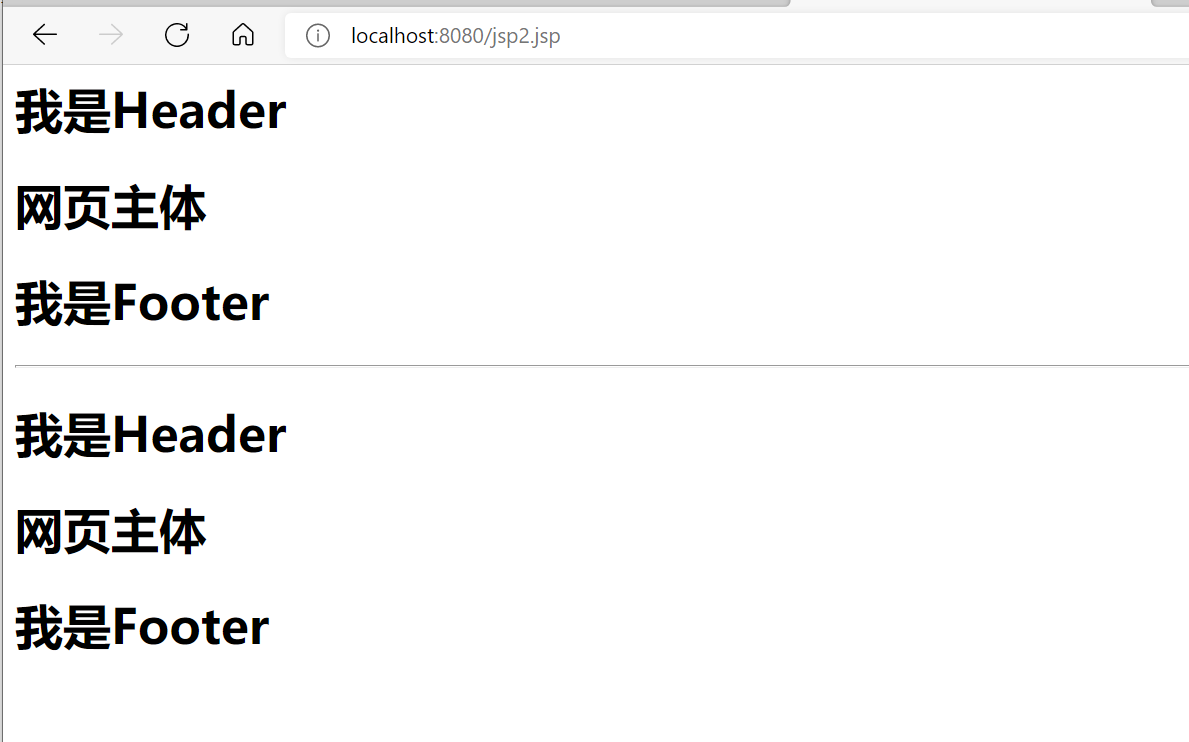
分析一下源码
20.jsp内置对象及作用域
1.九大内置对象
- PageContext【存东西】
- Request 【存东西】
- Response
- Session【存东西】
- Application(ServletContext)【存东西】
- config(ServletConfig)
- out
- page 【基本用不到】
- exception
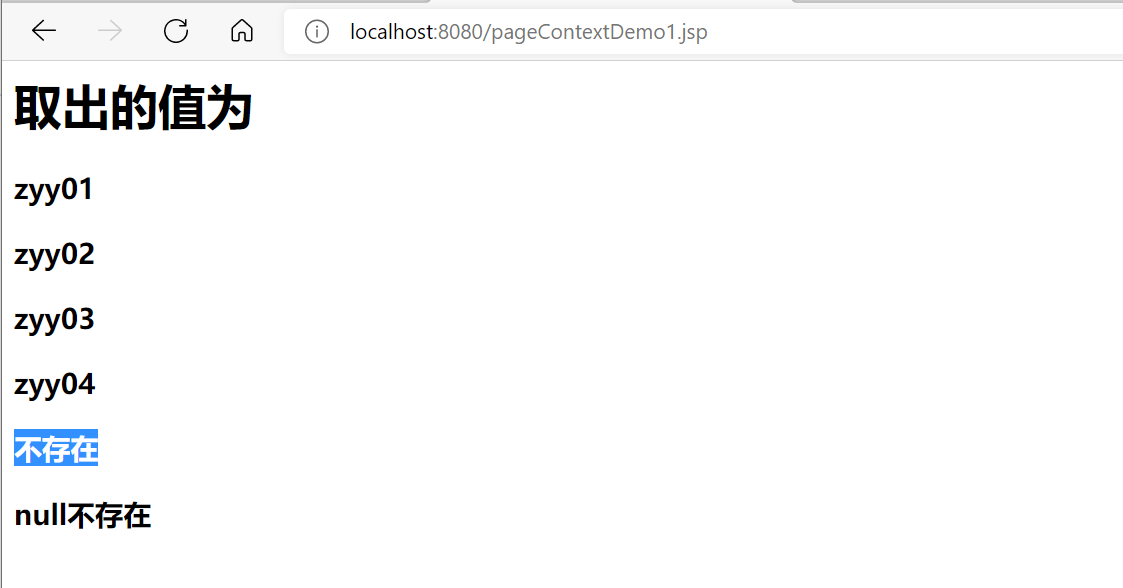
新建pageContextDemo1.jsp
Title 取出的值为
${name1}
${name2}
${name3}
${name4}
${name5}不存在
不存在
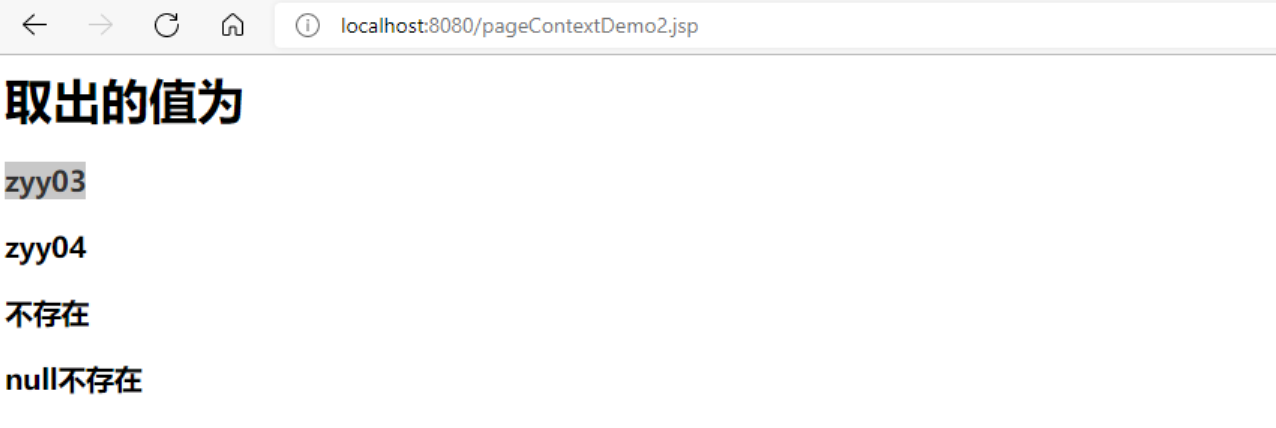
新建pageContextDemo2.jsp
Title 取出的值为
${name1}
${name2}
${name3}
${name4}
${name5}不存在
不存在
结果(需要先请求一下pageContextDemo1.jsp然后再请求pageContextDemo2.jsp,不然都取不到值)
新建pageContextDemo3.jsp
Title 新建pageContextDemo4.jsp
Title 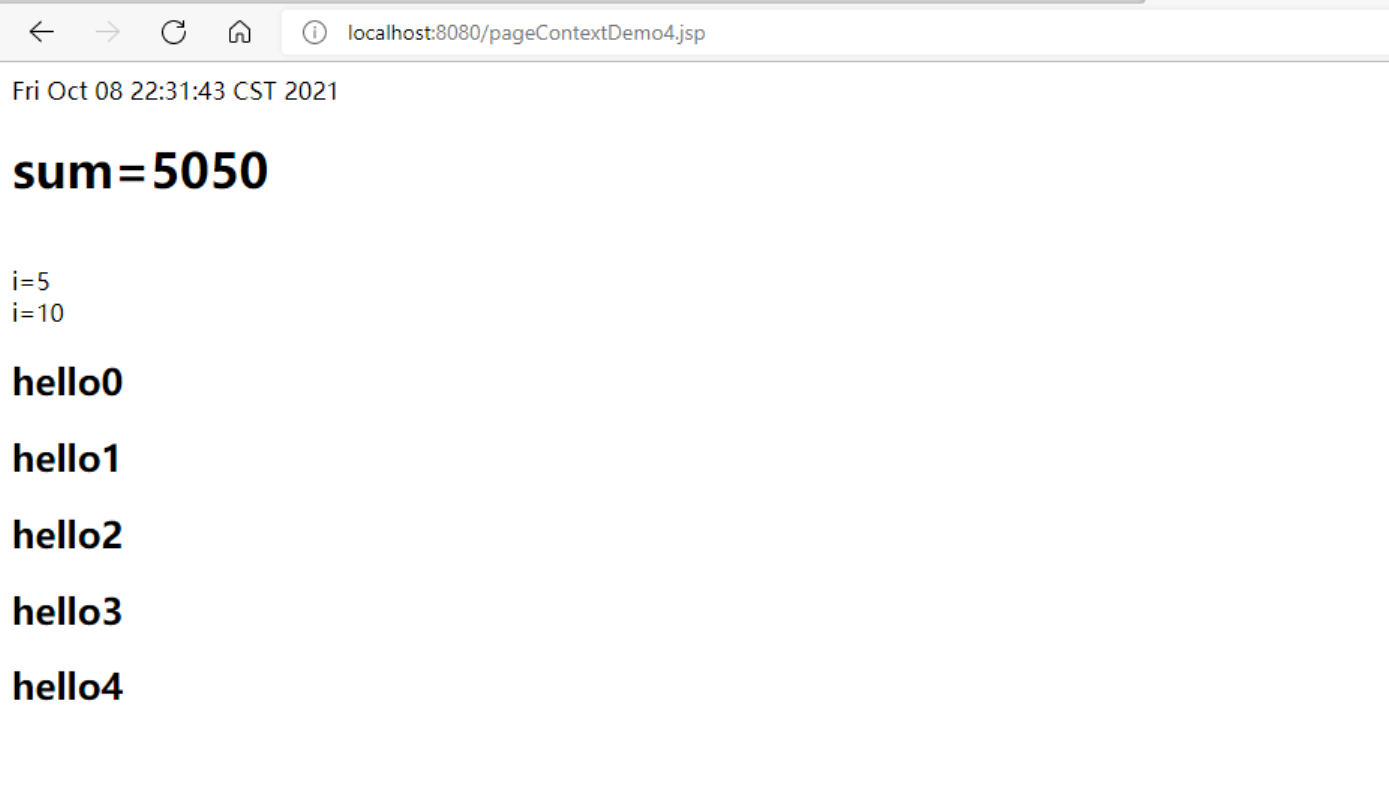
request:客户端向服务器发送请求,产生的数据,用户看完就没用了,比如:新闻
session:客户端向服务器发送请求,产生的数据,用户用完一会还有用,比如:购物车
application:客户端向服务器发送请求,产生的数据,一个用户用完了,其他用户还可能使用,比如:聊天数据
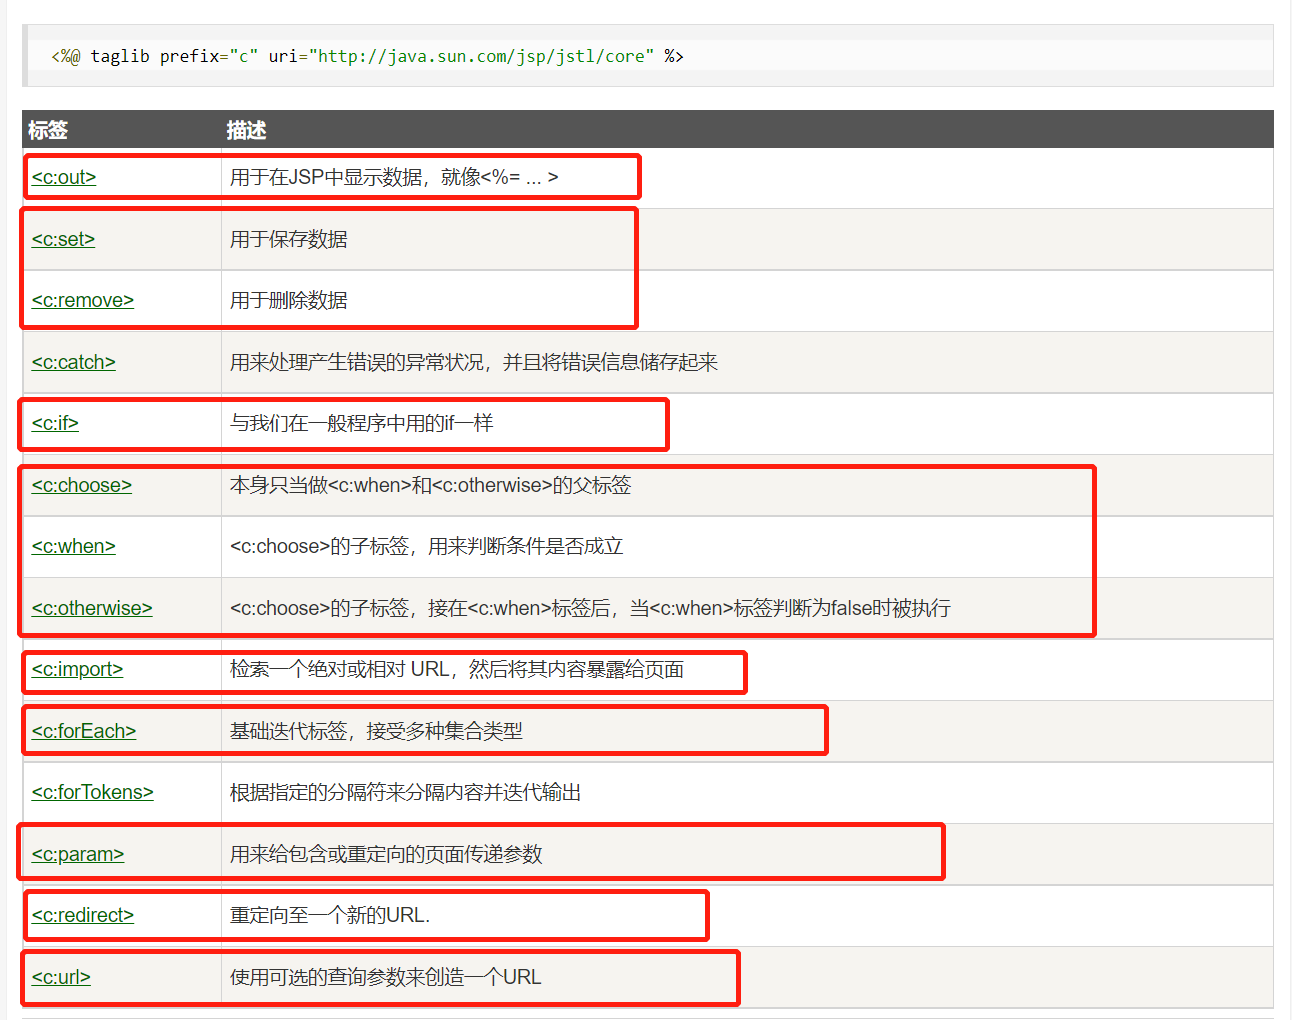
21.jsp、jstl标签、EL表达式
导包
</dependency> <dependency> <groupId>javax.servlet.jsp.jstl</groupId> <artifactId>jstl-api</artifactId> <version>1.2</version> </dependency> <dependency> <groupId>taglibs</groupId> <artifactId>standard</artifactId> <version>1.1.2</version> </dependency>EL表达式: ${ }
- 获取数据
- 执行运算
- 获取web开发的常用对象
- 调用java方法
jsp标签
jsptag.jsp
Title tag1
<%----%> jsptag2.jsp
Title tag2
姓名:年龄: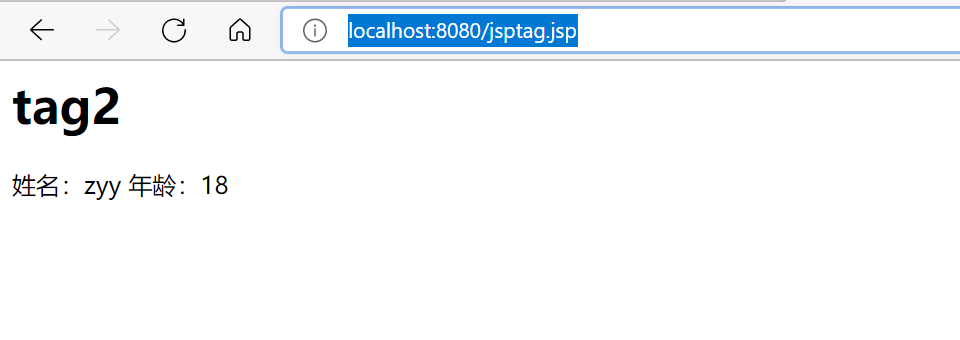
JSTL标签
jstl标签库的使用就是为了弥补html标签的不足;它自定义了许多标签,可以供我们使用,标签的功能和java代码一样!
-
核心标签(掌握)
-
格式化标签
-
sql标签
-
xml标签
核心标签如下:
JSTL标签库使用步骤:
-
引用对应的taglib
-
使用其中的方法
-
在tomcat也需要引入jstl的包,否则会报错
org.apache.jasper.compiler.DefaultErrorHandler.jspError(DefaultErrorHandler.java:55)
coreIf.jsp
Title if测试
coreWhen.jsp
Title 90}">优秀 80}">良好 60}">一般 不及格coreForeach.jsp
Title <% List personList = new ArrayList(); personList.add(0, "张三"); personList.add(1, "李四"); personList.add(2, "王五"); personList.add(3, "赵六"); request.setAttribute("personList", personList);%>
22.javabean及作业
实体类
javaBean特定的写法:
- 必须要有一个无参构造
- 属性必须私有化
- 必须有对应的get/set方法
一般用来和数据库字段做映射
ORM:对象关系映射
- 表—》类
- 字段—》属性
- 行记录–》对象
| id | name | age | address |
|---|---|---|---|
| 1 | 张三 | 18 | 深圳 |
| 2 | 李四 | 17 | 深圳 |
| 3 | 王五 | 18 | 深圳 |
public class Student { private int id; private String name; private int age; private String address; //...省了构造方法和get set 方法}javabean.jsp
<html><head> <title>Title</title></head><body><jsp:useBean id="student" class="com.zyy.pojo.Student" scope="page"/><jsp:setProperty name="student" property="address" value="深圳"/><jsp:setProperty name="student" property="age" value="18"/><jsp:setProperty name="student" property="id" value="1"/><jsp:setProperty name="student" property="name" value="zyy"/><%-- --%>地址:<jsp:getProperty name="student" property="address"/>年龄:<jsp:getProperty name="student" property="age"/>id:<jsp:getProperty name="student" property="id"/>姓名:<jsp:getProperty name="student" property="name"/></body></html>23.mvc三层架构
什么是MVC:Model View Controller 模型视图控制器
1.早些年
用户直接访问控制层,控制层就可以直接操作数据库
[外链图片转存失败,源站可能有防盗链机制,建议将图片保存下来直接上传(img-7HtpIvwj-1647505130036)(C:/Users/ZHAYUYAO/AppData/Roaming/Typora/typora-user-images/image-20211110215809784.png)]
servlet--CRUD[增加(Create)、检索(Retrieve)、更新(Update)和删除(Delete)]-->数据库弊端:程序十分臃肿,不利于维护servlet的代码中:处理请求、响应、视图跳转、处理jdbc、处理业务代码、处理逻辑代码 架构:没有什么是加一层解决不了的!程序员调用|JDBC|Mysql Oracle SqlService2.MVC三层架构

View
- 展示数据
- 提供链接发起Servlet请求
Controller
-
接收用户的请求(req:请求参数 Session信息。。。)
-
交给业务层处理对应的代码
-
控制试图的跳转
登录 ---》 接收用户的登录请求 ---》 处理用户的请求(获取用户登录的参数,username,password)---》 交给业务处理登录业务(判断用户名密码是否正确:事务)---》 Dao层查询用户名和密码是否正确---》 数据库
Model
- 业务处理:业务逻辑(Service)
- 数据持久层:CRUD(Dao)
24.过滤器Filter
Filter:过滤器
- 处理中文乱码
- 登录验证…
[外链图片转存失败,源站可能有防盗链机制,建议将图片保存下来直接上传(img-INMIegEM-1647505130038)(C:/Users/ZHAYUYAO/AppData/Roaming/Typora/typora-user-images/image-20211112155322236.png)]
filter开发步骤
-
导包
-
编写过滤器
-
包不要导入错误了
import javax.servlet.Filter; -
实现Filter接口,重写对应的方法即可
-
web.xml中配置过滤器
-
web.xml
<web-app xmlns="http://xmlns.jcp.org/xml/ns/javaee" xmlns:xsi="http://www.w3.org/2001/XMLSchema-instance" xsi:schemaLocation="http://xmlns.jcp.org/xml/ns/javaee http://xmlns.jcp.org/xml/ns/javaee/web-app_3_1.xsd" version="3.1" metadata-complete="true"> <servlet> <servlet-name>hello</servlet-name> <servlet-class>com.zyy.servlets.HelloServlet</servlet-class> </servlet> <servlet-mapping> <servlet-name>hello</servlet-name> <url-pattern>/hello</url-pattern> </servlet-mapping> <servlet-mapping> <servlet-name>hello</servlet-name> <url-pattern>/servlet/hello</url-pattern> </servlet-mapping> <filter> <filter-name>characterEncodingFilter</filter-name> <filter-class>com.zyy.filters.CharacterEncodingFilter</filter-class> </filter> <filter-mapping> <filter-name>characterEncodingFilter</filter-name> <url-pattern>/servlet/*</url-pattern> </filter-mapping></web-app>HelloServlet.java
package com.zyy.servlets;import javax.servlet.ServletException;import javax.servlet.http.HttpServlet;import javax.servlet.http.HttpServletRequest;import javax.servlet.http.HttpServletResponse;import java.io.IOException;/ * @ClassName: HelloServlet * @Description: TODO 类描述 * @Author: zyy * @Date: 2021/11/12 16:21 * @Version: 1.0 */public class HelloServlet extends HttpServlet { @Override protected void doGet(HttpServletRequest req, HttpServletResponse resp) throws ServletException, IOException { resp.getWriter().write("你好,世界!"); } @Override protected void doPost(HttpServletRequest req, HttpServletResponse resp) throws ServletException, IOException { this.doGet(req, resp); }}package com.zyy.filters;import javax.servlet.Filter;import javax.servlet.FilterChain;import javax.servlet.FilterConfig;import javax.servlet.ServletException;import javax.servlet.ServletRequest;import javax.servlet.ServletResponse;import java.io.IOException;/ * @ClassName: CharacterEncodingFilter * @Description: TODO 类描述 * @Author: zyy * @Date: 2021/11/12 16:14 * @Version: 1.0 */public class CharacterEncodingFilter implements Filter { / * 初始化 * web服务器启动的时候,初始化就会执行 * @param filterConfig * @throws ServletException */ public void init(FilterConfig filterConfig) throws ServletException { System.out.println("CharacterEncodingFilter 初始化。。。"); } / * chain 链 * 1.过滤器中的代码,在过滤特定请求的时候会执行 * 2.必须让过滤器继续通行 * chain.doFilter(request, response); * @param request * @param response * @param chain * @throws IOException * @throws ServletException */ public void doFilter(ServletRequest request, ServletResponse response, FilterChain chain) throws IOException, ServletException { request.setCharacterEncoding("GBK"); response.setCharacterEncoding("GBK"); System.out.println("doFilter执行前。。。。"); //让请求继续走,如果不写程序到这里就被拦截停止了! chain.doFilter(request, response); System.out.println("doFilter执行后。。。。"); } / * 销毁 * web服务器关闭的时候,过滤器会销毁 */ public void destroy() { System.out.println("CharacterEncodingFilter 销毁。。。"); }}25.监听器
实现一个监听器的接口(有N种)
-
实现一个监听器接口
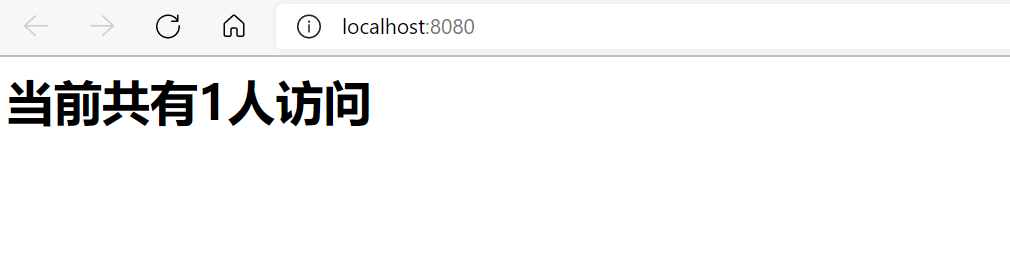
import javax.servlet.ServletContext;import javax.servlet.http.HttpSessionEvent;import javax.servlet.http.HttpSessionListener;/ * @ClassName: OnLineCountListener * @Description: 统计网站在线人数,统计session数 * @Author: zyy * @Date: 2021/12/01 17:17 * @Version: 1.0 */public class OnLineCountListener implements HttpSessionListener { / * 创建session监听,一旦创建session就会触发这个事件 * @param se */ public void sessionCreated(HttpSessionEvent se) { System.out.println(se.getSession().getId()); ServletContext servletContext = se.getSession().getServletContext(); Integer onLineCount = (Integer) servletContext.getAttribute("onLineCount"); if (onLineCount == null) { onLineCount = new Integer(1); } else { onLineCount = new Integer(onLineCount + 1); } servletContext.setAttribute("onLineCount", onLineCount); } / * 销毁session监听,一旦销毁session就会触发这个事件 * @param se */ public void sessionDestroyed(HttpSessionEvent se) { ServletContext servletContext = se.getSession().getServletContext(); Integer onLineCount = (Integer) servletContext.getAttribute("onLineCount"); if (onLineCount == null) { onLineCount = new Integer(0); } else { onLineCount = new Integer(onLineCount - 1); } servletContext.setAttribute("onLineCount", onLineCount); se.getSession().invalidate(); } / * session的销毁 * 1.手动销毁 getSession().invalidate(); * 2.自动销毁 * * 1 * * * 3.关闭服务器 */} -
配置监听器web.xml
<listener> <listener-class>com.zyy.listeners.OnLineCountListener</listener-class> </listener> -
页面验证
$Title$ 当前共有人访问
26.监听器GUI中理解
1.过滤器,监听器常见应用
监听器:GUI编程中经常使用
import java.awt.*;import java.awt.event.WindowAdapter;import java.awt.event.WindowEvent;/ * @ClassName: TestPanel * @Description: TODO 类描述 * @Author: zyy * @Date: 2021/12/02 15:15 * @Version: 1.0 */public class TestPanel { public static void main(String[] args) { Frame frame = new Frame("测试"); Panel panel = new Panel(); frame.setLayout(null); frame.setBounds(300, 300, 500, 500); frame.setBackground(new Color(0, 0, 255)); panel.setBounds(50, 50, 300, 300); panel.setBackground(new Color(255, 0, 0)); frame.add(panel); frame.setVisible(true); //添加一个窗口关闭的监听事件 frame.addWindowListener(new WindowAdapter() { @Override public void windowClosing(WindowEvent e) { System.exit(0); } }); }}用户登录之后才能进入主页!用户注销后就不能进入主页了!
- 用户登录后,想session中放入用户信息
- 进入主页的时候要判断用户是否已经登录(要求:在过滤器中实现)
27.Filter实现权限拦截
登录页面login.jsp
Title 错误页面error.jsp
Title 失败
没有权限,用户输入有误
登录接口LoginServlet
import com.zyy.utils.Constant;import javax.servlet.ServletException;import javax.servlet.http.HttpServlet;import javax.servlet.http.HttpServletRequest;import javax.servlet.http.HttpServletResponse;import java.io.IOException;/ * @ClassName: LoginServlet * @Description: TODO 类描述 * @Author: zyy * @Date: 2021/12/02 15:32 * @Version: 1.0 */public class LoginServlet extends HttpServlet { @Override protected void doGet(HttpServletRequest req, HttpServletResponse resp) throws ServletException, IOException { String userName = req.getParameter("username"); if ("admin".equals(userName)) { //登录成功 req.getSession().setAttribute(Constant.USER_SESSION, req.getSession().getId()); //跳转 resp.sendRedirect("/sys/success.jsp"); } else { //登录失败 resp.sendRedirect("/error.jsp"); } } @Override protected void doPost(HttpServletRequest req, HttpServletResponse resp) throws ServletException, IOException { doGet(req, resp); }}注销页面LogoutServlet
import javax.servlet.ServletException;import javax.servlet.http.HttpServlet;import javax.servlet.http.HttpServletRequest;import javax.servlet.http.HttpServletResponse;import java.io.IOException;/ * @ClassName: LogoutServlet * @Description: TODO 类描述 * @Author: zyy * @Date: 2021/12/02 16:28 * @Version: 1.0 */public class LogoutServlet extends HttpServlet { @Override protected void doGet(HttpServletRequest req, HttpServletResponse resp) throws ServletException, IOException { Object userSession = req.getSession().getAttribute(Constant.USER_SESSION); if (userSession != null) { req.getSession().removeAttribute(Constant.USER_SESSION); //跳转到登录页面 resp.sendRedirect("/login.jsp"); } else { //跳转到登录页面 resp.sendRedirect("/login.jsp"); } } @Override protected void doPost(HttpServletRequest req, HttpServletResponse resp) throws ServletException, IOException { doGet(req, resp); }}常量类Constant
public class Constant { public static final String USER_SESSION = "USER_SESSION";}过滤器LoginFilter
import com.zyy.utils.Constant;import javax.servlet.Filter;import javax.servlet.FilterChain;import javax.servlet.FilterConfig;import javax.servlet.ServletException;import javax.servlet.ServletRequest;import javax.servlet.ServletResponse;import javax.servlet.http.HttpServletRequest;import javax.servlet.http.HttpServletResponse;import java.io.IOException;/ * @ClassName: LoginFilter * @Description: TODO 类描述 * @Author: zyy * @Date: 2021/12/02 17:27 * @Version: 1.0 */public class LoginFilter implements Filter { public void init(FilterConfig filterConfig) throws ServletException { } public void doFilter(ServletRequest request, ServletResponse response, FilterChain chain) throws IOException, ServletException { HttpServletRequest req = (HttpServletRequest) request; HttpServletResponse rep = (HttpServletResponse) response; Object userSession = req.getSession().getAttribute(Constant.USER_SESSION); if (userSession == null) { //跳转错误页面 rep.sendRedirect("/error.jsp"); } chain.doFilter(request, response); } public void destroy() { }}接口配置web.xml
<web-app xmlns="http://xmlns.jcp.org/xml/ns/javaee" xmlns:xsi="http://www.w3.org/2001/XMLSchema-instance" xsi:schemaLocation="http://xmlns.jcp.org/xml/ns/javaee http://xmlns.jcp.org/xml/ns/javaee/web-app_3_1.xsd" version="3.1" metadata-complete="true"> <servlet> <servlet-name>hello</servlet-name> <servlet-class>com.zyy.servlets.HelloServlet</servlet-class> </servlet> <servlet-mapping> <servlet-name>hello</servlet-name> <url-pattern>/hello</url-pattern> </servlet-mapping> <servlet-mapping> <servlet-name>hello</servlet-name> <url-pattern>/servlet/hello</url-pattern> </servlet-mapping> <servlet-mapping> <servlet-name>login</servlet-name> <url-pattern>/servlet/login</url-pattern> </servlet-mapping> <servlet> <servlet-name>login</servlet-name> <servlet-class>com.zyy.servlets.LoginServlet</servlet-class> </servlet> <servlet-mapping> <servlet-name>logout</servlet-name> <url-pattern>/servlet/logout</url-pattern> </servlet-mapping> <servlet> <servlet-name>logout</servlet-name> <servlet-class>com.zyy.servlets.LogoutServlet</servlet-class> </servlet> <filter> <filter-name>characterEncodingFilter</filter-name> <filter-class>com.zyy.filters.CharacterEncodingFilter</filter-class> </filter> <filter-mapping> <filter-name>characterEncodingFilter</filter-name> <url-pattern>/servlet/*</url-pattern> </filter-mapping> <filter> <filter-name>loginFilter</filter-name> <filter-class>com.zyy.filters.LoginFilter</filter-class> </filter> <filter-mapping> <filter-name>loginFilter</filter-name> <url-pattern>/sys/*</url-pattern> </filter-mapping> <listener> <listener-class>com.zyy.listeners.OnLineCountListener</listener-class> </listener> <session-config> <session-timeout>10</session-timeout> </session-config></web-app>28.jdbc复习
什么是jdbc:java连接数据库!

需要jar包的支持:
- java.sql
- javax.sql
- mysql-connection-java…(连接驱动)
实验环境搭建
DROP TABLE `users`;CREATE TABLE `users`( `id` INT PRIMARY KEY, `name` VARCHAR(50) NOT NULL, `password` VARCHAR(40) NOT NULL, `email` VARCHAR(60) NOT NULL, `birthday` DATE) ENGINE=INNODB DEFAULT CHARSET=utf8INSERT INTO `users` (`id`, `name`, `password`, `email`, `birthday`) VALUES('1','张三','123456','zs@sina.com','2021-07-14');INSERT INTO `users` (`id`, `name`, `password`, `email`, `birthday`) VALUES('2','李四','123456','lisi@sina.com','1981-12-04');INSERT INTO `users` (`id`, `name`, `password`, `email`, `birthday`) VALUES('3','王五','123456','wangwu@sina.com','1982-12-04');INSERT INTO `users` (`id`, `name`, `password`, `email`, `birthday`) VALUES('4','赵六','123456','zhaoliu@sina.com','1987-12-05');INSERT INTO `users` (`id`, `name`, `password`, `email`, `birthday`) VALUES('5','钱七','123456','qianqi@sina.com','2021-07-19');INSERT INTO `users` (`id`, `name`, `password`, `email`, `birthday`) VALUES('6','刘八','123456','liuba@sina.com','2021-07-19');导入数据库依赖pom.xml
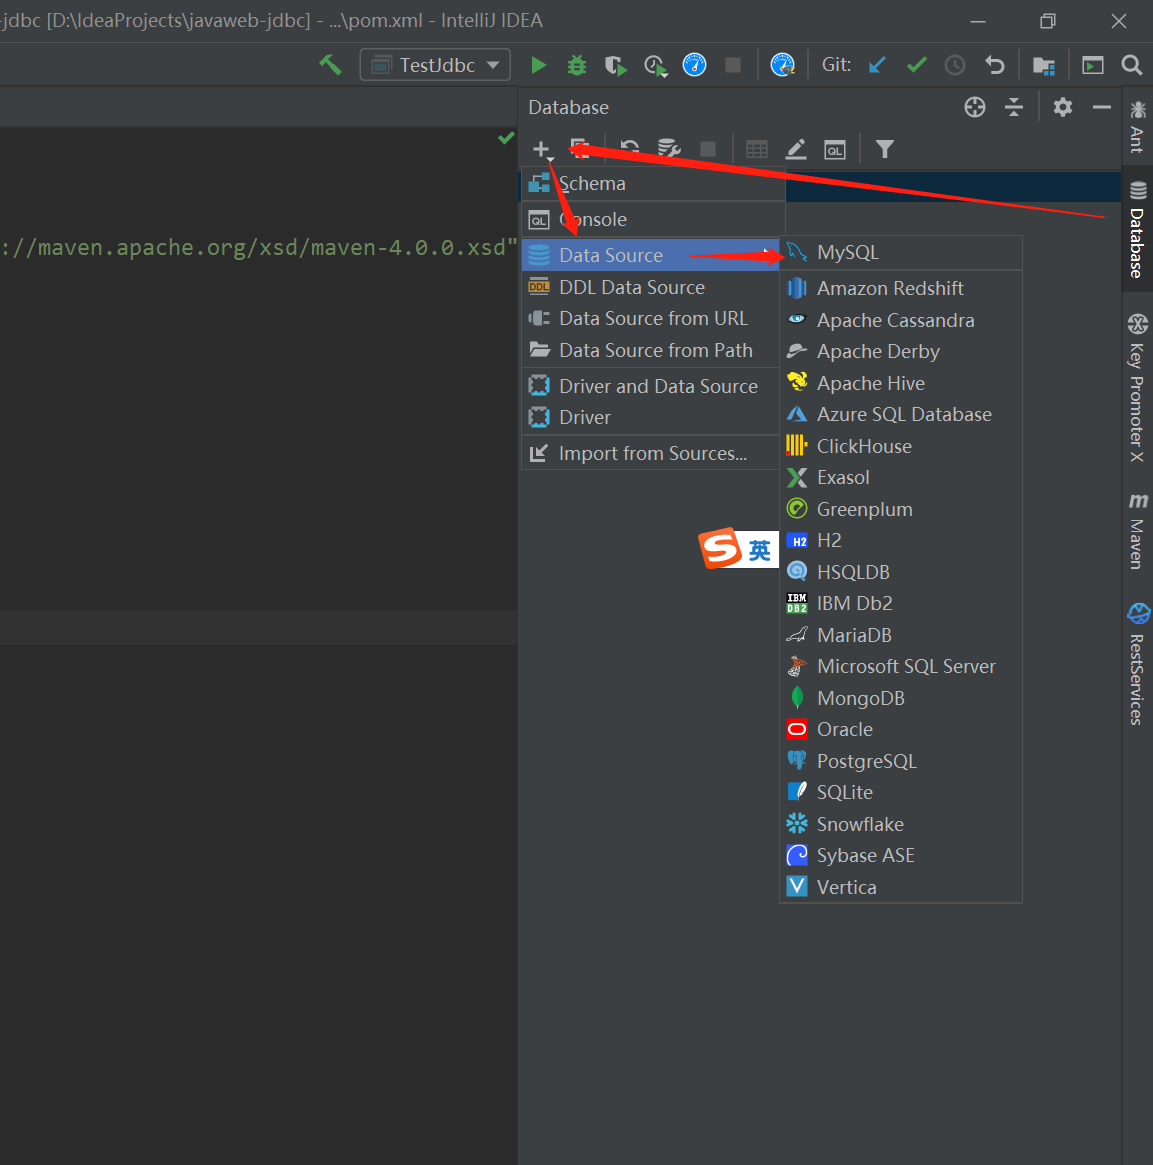
<project xmlns="http://maven.apache.org/POM/4.0.0" xmlns:xsi="http://www.w3.org/2001/XMLSchema-instance" xsi:schemaLocation="http://maven.apache.org/POM/4.0.0 http://maven.apache.org/xsd/maven-4.0.0.xsd"> <modelVersion>4.0.0</modelVersion> <groupId>com.zyy</groupId> <artifactId>javaweb-jdbc</artifactId> <version>1.0-SNAPSHOT</version> <dependencies> <dependency> <groupId>mysql</groupId> <artifactId>mysql-connector-java</artifactId> <version>5.1.49</version> </dependency> </dependencies></project>idea连接数据库
jdbc固定步骤:
- 加载驱动
- 连接数据库
- 创建Statement
- 编写sql
- 执行sql
- 关闭连接
import java.sql.Connection;import java.sql.DriverManager;import java.sql.ResultSet;import java.sql.SQLException;import java.sql.Statement;/ * @ClassName: TestJdbc * @Description: TODO 类描述 * @Author: zyy * @Date: 2021/12/14 17:16 * @Version: 1.0 */public class TestJdbc { public static void main(String[] args) { String url = "jdbc:mysql://localhost:3306/jdbcstudy?useUnicode=true&characterEncoding=utf-8"; String user = "root"; String pwd = "123456"; try { //1. 加载驱动 Class.forName("com.mysql.jdbc.Driver"); //2. 连接数据库 Connection con = DriverManager.getConnection(url, user, pwd); //3. 向数据库发送sql的对象Statement Statement statement = con.createStatement(); //4.sql String str = "select * from users"; //5.执行sql ResultSet rs = statement.executeQuery(str); while (rs.next()) { System.out.println("id=" + rs.getInt("id")); System.out.println("name=" + rs.getString("name")); System.out.println("password=" + rs.getString("password")); System.out.println("email=" + rs.getString("email")); System.out.println("birthday=" + rs.getString("birthday")); } //6.关闭 rs.close(); statement.close(); con.close(); } catch (ClassNotFoundException e) { e.printStackTrace(); } catch (SQLException e) { e.printStackTrace(); } }}预编译
public class Test2Jdbc { public static void main(String[] args) { String url = "jdbc:mysql://localhost:3306/jdbcstudy?useUnicode=true&characterEncoding=utf-8"; String user = "root"; String pwd = "123456"; try { //1. 加载驱动 Class.forName("com.mysql.jdbc.Driver"); //2. 连接数据库 Connection con = DriverManager.getConnection(url, user, pwd); //3.sql String str = "insert into users(id, name, password, email, birthday) values (?,?,?,?,?)"; //4. 预编译 PreparedStatement statement = con.prepareStatement(str); statement.setInt(1,8); statement.setString(2,"小红"); statement.setString(3,"123456"); statement.setString(4,"xiaohong@sina.com"); statement.setDate(5,new java.sql.Date(System.currentTimeMillis())); //5.执行sql int count = statement.executeUpdate(); if (count > 0) { System.out.println("插入成功!"); } statement.close(); con.close(); } catch (ClassNotFoundException e) { e.printStackTrace(); } catch (SQLException e) { e.printStackTrace(); } }}29.jdbc事务
要么都成功,要么都失败
ACID原则:保证数据的安全
开启事务事务提交 commit()事务回滚 rollback()关闭事务转账:A:1000B:1000A(900) ---100--> B(1100)Junit单元测试
依赖
<dependency> <groupId>junit</groupId> <artifactId>junit</artifactId> <version>4.13</version> </dependency>简单实用
@Test注解只有在方法上有效,只要加了这个注解的方法,就可以直接运行!
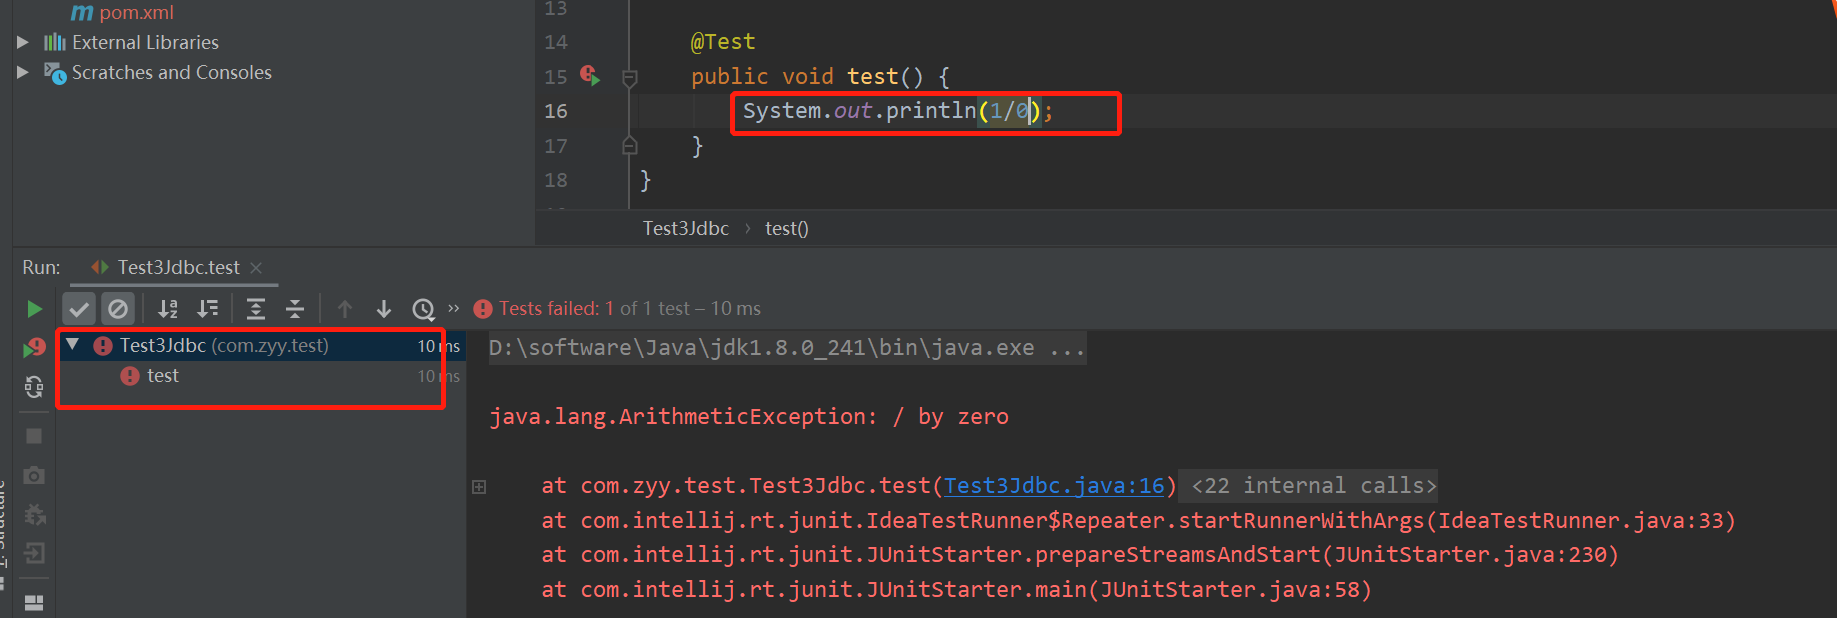
import org.junit.Test;/ * @ClassName: Test3Jdbc * @Description: TODO 类描述 * @Author: zyy * @Date: 2021/12/16 21:11 * @Version: 1.0 */public class Test3Jdbc { @Test public void test() { System.out.println("hello"); }} 失败情况
失败情况
新建表并插入数据
CREATE TABLE `account`( `id` INT PRIMARY KEY, `name` VARCHAR(50) NOT NULL, `money` FLOAT NOT NULL) ENGINE=INNODB DEFAULT CHARSET=utf8INSERT INTO `account` (`id`, `name`, `money`) VALUES(1,'A',1000);INSERT INTO `account` (`id`, `name`, `money`) VALUES(2,'B',1000);INSERT INTO `account` (`id`, `name`, `money`) VALUES(3,'C',1000);# 开启事务start transaction ;# 模拟转账update account set money=money-100 where name='A';update account set money=money+100 where name='B';# 回滚rollback ;# 提交commit;import org.junit.Test;import java.sql.Connection;import java.sql.DriverManager;import java.sql.SQLException;/ * @ClassName: Test3Jdbc * @Description: TODO 类描述 * @Author: zyy * @Date: 2021/12/16 21:11 * @Version: 1.0 */public class Test3Jdbc { @Test public void test() { String url = "jdbc:mysql://localhost:3306/jdbcstudy?useUnicode=true&characterEncoding=utf-8"; String user = "root"; String pwd = "123456"; Connection con = null; try { Class.forName("com.mysql.jdbc.Driver"); con = DriverManager.getConnection(url, user, pwd); //开启事务 这里不开启事务的话异常情况就会有问题 false是开启 con.setAutoCommit(false); con.prepareStatement("update account set money=money-100 where name='A'").executeUpdate(); //制造错误// int i = 1 / 0; con.prepareStatement("update account set money=money+100 where name='B'").executeUpdate(); con.commit(); System.out.println("success"); } catch (Exception e) { System.out.println("error rollback"); if (con != null) { try { con.rollback(); } catch (SQLException ex) { ex.printStackTrace(); } } } finally { if (con != null) { try { con.close(); } catch (SQLException e) { e.printStackTrace(); } } } }}30.smbms项目搭建
数据库
DROP TABLE IF EXISTS `smbms_address`;CREATE TABLE `smbms_address` ( `id` BIGINT(20) NOT NULL AUTO_INCREMENT COMMENT '主键ID', `contact` VARCHAR(15) NULL DEFAULT NULL COMMENT '联系人姓名', `addressDesc` VARCHAR(50) NULL DEFAULT NULL COMMENT '收货地址明细', `postCode` VARCHAR(15) NULL DEFAULT NULL COMMENT '邮编', `tel` VARCHAR(20) NULL DEFAULT NULL COMMENT '联系人电话', `createdBy` BIGINT(20) NULL DEFAULT NULL COMMENT '创建者', `creationDate` DATETIME NULL DEFAULT NULL COMMENT '创建时间', `modifyBy` BIGINT(20) NULL DEFAULT NULL COMMENT '修改者', `modifyDate` DATETIME NULL DEFAULT NULL COMMENT '修改时间', `userId` BIGINT(20) NULL DEFAULT NULL COMMENT '用户ID', PRIMARY KEY (`id`) USING BTREE) ENGINE=INNODB DEFAULT CHARSET=utf8;INSERT INTO `smbms_address` VALUES (1, '王丽', '北京市东城区东交民巷44号', '100010', '13678789999', 1, '2016-04-13 00:00:00', NULL, NULL, 1);INSERT INTO `smbms_address` VALUES (2, '张红丽', '北京市海淀区丹棱街3号', '100000', '18567672312', 1, '2016-04-13 00:00:00', NULL, NULL, 1);INSERT INTO `smbms_address` VALUES (3, '任志强', '北京市东城区美术馆后街23号', '100021', '13387906742', 1, '2016-04-13 00:00:00', NULL, NULL, 1);INSERT INTO `smbms_address` VALUES (4, '曹颖', '北京市朝阳区朝阳门南大街14号', '100053', '13568902323', 1, '2016-04-13 00:00:00', NULL, NULL, 2);INSERT INTO `smbms_address` VALUES (5, '李慧', '北京市西城区三里河路南三巷3号', '100032', '18032356666', 1, '2016-04-13 00:00:00', NULL, NULL, 3);INSERT INTO `smbms_address` VALUES (6, '王国强', '北京市顺义区高丽营镇金马工业区18号', '100061', '13787882222', 1, '2016-04-13 00:00:00', NULL, NULL, 3);DROP TABLE IF EXISTS `smbms_bill`;CREATE TABLE `smbms_bill` ( `id` BIGINT(20) NOT NULL AUTO_INCREMENT COMMENT '主键ID', `billCode` VARCHAR(20) NULL DEFAULT NULL COMMENT '账单编码', `productName` VARCHAR(20) NULL DEFAULT NULL COMMENT '商品名称', `productDesc` VARCHAR(50) NULL DEFAULT NULL COMMENT '商品描述', `productUnit` VARCHAR(10) NULL DEFAULT NULL COMMENT '商品单位', `productCount` DECIMAL(20, 2) NULL DEFAULT NULL COMMENT '商品数量', `totalPrice` DECIMAL(20, 2) NULL DEFAULT NULL COMMENT '商品总额', `isPayment` INT(10) NULL DEFAULT NULL COMMENT '是否支付(1:未支付 2:已支付)', `createdBy` BIGINT(20) NULL DEFAULT NULL COMMENT '创建者(userId)', `creationDate` DATETIME NULL DEFAULT NULL COMMENT '创建时间', `modifyBy` BIGINT(20) NULL DEFAULT NULL COMMENT '更新者(userId)', `modifyDate` DATETIME NULL DEFAULT NULL COMMENT '更新时间', `providerId` BIGINT(20) NULL DEFAULT NULL COMMENT '供应商ID', PRIMARY KEY (`id`) USING BTREE) ENGINE=INNODB DEFAULT CHARSET=utf8;INSERT INTO `smbms_bill` VALUES (2, 'BILL2016_002', '香皂、肥皂、药皂', '日用品-皂类', '块', 1000.00, 10000.00, 2, 1, '2016-03-23 04:20:40', NULL, NULL, 13);INSERT INTO `smbms_bill` VALUES (3, 'BILL2016_003', '大豆油', '食品-食用油', '斤', 300.00, 5890.00, 2, 1, '2014-12-14 13:02:03', NULL, NULL, 6);INSERT INTO `smbms_bill` VALUES (4, 'BILL2016_004', '橄榄油', '食品-进口食用油', '斤', 200.00, 9800.00, 2, 1, '2013-10-10 03:12:13', NULL, NULL, 7);INSERT INTO `smbms_bill` VALUES (5, 'BILL2016_005', '洗洁精', '日用品-厨房清洁', '瓶', 500.00, 7000.00, 2, 1, '2014-12-14 13:02:03', NULL, NULL, 9);INSERT INTO `smbms_bill` VALUES (6, 'BILL2016_006', '美国大杏仁', '食品-坚果', '袋', 300.00, 5000.00, 2, 1, '2016-04-14 06:08:09', NULL, NULL, 4);INSERT INTO `smbms_bill` VALUES (7, 'BILL2016_007', '沐浴液、精油', '日用品-沐浴类', '瓶', 500.00, 23000.00, 1, 1, '2016-07-22 10:10:22', NULL, NULL, 14);INSERT INTO `smbms_bill` VALUES (8, 'BILL2016_008', '不锈钢盘碗', '日用品-厨房用具', '个', 600.00, 6000.00, 2, 1, '2016-04-14 05:12:13', NULL, NULL, 14);INSERT INTO `smbms_bill` VALUES (9, 'BILL2016_009', '塑料杯', '日用品-杯子', '个', 350.00, 1750.00, 2, 1, '2016-02-04 11:40:20', NULL, NULL, 14);INSERT INTO `smbms_bill` VALUES (10, 'BILL2016_010', '豆瓣酱', '食品-调料', '瓶', 200.00, 2000.00, 2, 1, '2013-10-29 05:07:03', NULL, NULL, 8);INSERT INTO `smbms_bill` VALUES (11, 'BILL2016_011', '海之蓝', '饮料-国酒', '瓶', 50.00, 10000.00, 1, 1, '2016-04-14 16:16:00', NULL, NULL, 1);INSERT INTO `smbms_bill` VALUES (12, 'BILL2016_012', '芝华士', '饮料-洋酒', '瓶', 20.00, 6000.00, 1, 1, '2016-09-09 17:00:00', NULL, NULL, 1);INSERT INTO `smbms_bill` VALUES (13, 'BILL2016_013', '长城红葡萄酒', '饮料-红酒', '瓶', 60.00, 800.00, 2, 1, '2016-11-14 15:23:00', NULL, NULL, 1);INSERT INTO `smbms_bill` VALUES (14, 'BILL2016_014', '泰国香米', '食品-大米', '斤', 400.00, 5000.00, 2, 1, '2016-10-09 15:20:00', NULL, NULL, 3);INSERT INTO `smbms_bill` VALUES (15, 'BILL2016_015', '东北大米', '食品-大米', '斤', 600.00, 4000.00, 2, 1, '2016-11-14 14:00:00', NULL, NULL, 3);INSERT INTO `smbms_bill` VALUES (16, 'BILL2016_016', '可口可乐', '饮料', '瓶', 2000.00, 6000.00, 2, 1, '2012-03-27 13:03:01', NULL, NULL, 2);INSERT INTO `smbms_bill` VALUES (17, 'BILL2016_017', '脉动', '饮料', '瓶', 1500.00, 4500.00, 2, 1, '2016-05-10 12:00:00', NULL, NULL, 2);INSERT INTO `smbms_bill` VALUES (18, 'BILL2016_018', '哇哈哈', '饮料', '瓶', 2000.00, 4000.00, 2, 1, '2015-11-24 15:12:03', NULL, NULL, 2);DROP TABLE IF EXISTS `smbms_provider`;CREATE TABLE `smbms_provider` ( `id` BIGINT(20) NOT NULL AUTO_INCREMENT COMMENT '主键ID', `proCode` VARCHAR(20) NULL DEFAULT NULL COMMENT '供应商编码', `proName` VARCHAR(20) NULL DEFAULT NULL COMMENT '供应商名称', `proDesc` VARCHAR(50) NULL DEFAULT NULL COMMENT '供应商详细描述', `proContact` VARCHAR(20) NULL DEFAULT NULL COMMENT '供应商联系人', `proPhone` VARCHAR(20) NULL DEFAULT NULL COMMENT '联系电话', `proAddress` VARCHAR(50) NULL DEFAULT NULL COMMENT '地址', `proFax` VARCHAR(20) NULL DEFAULT NULL COMMENT '传真', `createdBy` BIGINT(20) NULL DEFAULT NULL COMMENT '创建者(userId)', `creationDate` DATETIME NULL DEFAULT NULL COMMENT '创建时间', `modifyDate` DATETIME NULL DEFAULT NULL COMMENT '更新时间', `modifyBy` BIGINT(20) NULL DEFAULT NULL COMMENT '更新者(userId)', PRIMARY KEY (`id`) USING BTREE) ENGINE=INNODB DEFAULT CHARSET=utf8;INSERT INTO `smbms_provider` VALUES (1, 'BJ_GYS001', '北京三木堂商贸有限公司', '长期合作伙伴,主营产品:茅台、五粮液、郎酒、酒鬼酒、泸州老窖、赖茅酒、法国红酒等', '张国强', '13566667777', '北京市丰台区育芳园北路', '010-58858787', 1, '2013-03-21 16:52:07', NULL, NULL);INSERT INTO `smbms_provider` VALUES (2, 'HB_GYS001', '石家庄帅益食品贸易有限公司', '长期合作伙伴,主营产品:饮料、水饮料、植物蛋白饮料、休闲食品、果汁饮料、功能饮料等', '王军', '13309094212', '河北省石家庄新华区', '0311-67738876', 1, '2016-04-13 04:20:40', NULL, NULL);INSERT INTO `smbms_provider` VALUES (3, 'GZ_GYS001', '深圳市泰香米业有限公司', '初次合作伙伴,主营产品:良记金轮米,龙轮香米等', '郑程瀚', '13402013312', '广东省深圳市福田区深南大道6006华丰大厦', '0755-67776212', 1, '2014-03-21 16:56:07', NULL, NULL);INSERT INTO `smbms_provider` VALUES (4, 'GZ_GYS002', '深圳市喜来客商贸有限公司', '长期合作伙伴,主营产品:坚果炒货.果脯蜜饯.天然花茶.营养豆豆.特色美食.进口食品.海味零食.肉脯肉', '林妮', '18599897645', '广东省深圳市福龙工业区B2栋3楼西', '0755-67772341', 1, '2013-03-22 16:52:07', NULL, NULL);INSERT INTO `smbms_provider` VALUES (5, 'JS_GYS001', '兴化佳美调味品厂', '长期合作伙伴,主营产品:天然香辛料、鸡精、复合调味料', '徐国洋', '13754444221', '江苏省兴化市林湖工业区', '0523-21299098', 1, '2015-11-22 16:52:07', NULL, NULL);INSERT INTO `smbms_provider` VALUES (6, 'BJ_GYS002', '北京纳福尔食用油有限公司', '长期合作伙伴,主营产品:山茶油、大豆油、花生油、橄榄油等', '马莺', '13422235678', '北京市朝阳区珠江帝景1号楼', '010-588634233', 1, '2012-03-21 17:52:07', NULL, NULL);INSERT INTO `smbms_provider` VALUES (7, 'BJ_GYS003', '北京国粮食用油有限公司', '初次合作伙伴,主营产品:花生油、大豆油、小磨油等', '王驰', '13344441135', '北京大兴青云店开发区', '010-588134111', 1, '2016-04-13 00:00:00', NULL, NULL);INSERT INTO `smbms_provider` VALUES (8, 'ZJ_GYS001', '慈溪市广和绿色食品厂', '长期合作伙伴,主营产品:豆瓣酱、黄豆酱、甜面酱,辣椒,大蒜等农产品', '薛圣丹', '18099953223', '浙江省宁波市慈溪周巷小安村', '0574-34449090', 1, '2013-11-21 06:02:07', NULL, NULL);INSERT INTO `smbms_provider` VALUES (9, 'GX_GYS001', '优百商贸有限公司', '长期合作伙伴,主营产品:日化产品', '李立国', '13323566543', '广西南宁市秀厢大道42-1号', '0771-98861134', 1, '2013-03-21 19:52:07', NULL, NULL);INSERT INTO `smbms_provider` VALUES (10, 'JS_GYS002', '南京火头军信息技术有限公司', '长期合作伙伴,主营产品:不锈钢厨具等', '陈女士', '13098992113', '江苏省南京市浦口区浦口大道1号新城总部大厦A座903室', '025-86223345', 1, '2013-03-25 16:52:07', NULL, NULL);INSERT INTO `smbms_provider` VALUES (11, 'GZ_GYS003', '广州市白云区美星五金制品厂', '长期合作伙伴,主营产品:海绵床垫、坐垫、靠垫、海绵枕头、头枕等', '梁天', '13562276775', '广州市白云区钟落潭镇福龙路20号', '020-85542231', 1, '2016-12-21 06:12:17', NULL, NULL);INSERT INTO `smbms_provider` VALUES (12, 'BJ_GYS004', '北京隆盛日化科技', '长期合作伙伴,主营产品:日化环保清洗剂,家居洗涤专卖、洗涤用品网、墙体除霉剂、墙面霉菌清除剂等', '孙欣', '13689865678', '北京市大兴区旧宫', '010-35576786', 1, '2014-11-21 12:51:11', NULL, NULL);INSERT INTO `smbms_provider` VALUES (13, 'SD_GYS001', '山东豪克华光联合发展有限公司', '长期合作伙伴,主营产品:洗衣皂、洗衣粉、洗衣液、洗洁精、消杀类、香皂等', '吴洪转', '13245468787', '山东济阳济北工业区仁和街21号', '0531-53362445', 1, '2015-01-28 10:52:07', NULL, NULL);INSERT INTO `smbms_provider` VALUES (14, 'JS_GYS003', '无锡喜源坤商行', '长期合作伙伴,主营产品:日化品批销', '周一清', '18567674532', '江苏无锡盛岸西路', '0510-32274422', 1, '2016-04-23 11:11:11', NULL, NULL);INSERT INTO `smbms_provider` VALUES (15, 'ZJ_GYS002', '乐摆日用品厂', '长期合作伙伴,主营产品:各种中、高档塑料杯,塑料乐扣水杯(密封杯)、保鲜杯(保鲜盒)、广告杯、礼品杯', '王世杰', '13212331567', '浙江省金华市义乌市义东路', '0579-34452321', 1, '2016-08-22 10:01:30', NULL, NULL);DROP TABLE IF EXISTS `smbms_role`;CREATE TABLE `smbms_role` ( `id` BIGINT(20) NOT NULL AUTO_INCREMENT COMMENT '主键ID', `roleCode` VARCHAR(15) NULL DEFAULT NULL COMMENT '角色编码', `roleName` VARCHAR(15) NULL DEFAULT NULL COMMENT '角色名称', `createdBy` BIGINT(20) NULL DEFAULT NULL COMMENT '创建者', `creationDate` DATETIME NULL DEFAULT NULL COMMENT '创建时间', `modifyBy` BIGINT(20) NULL DEFAULT NULL COMMENT '修改者', `modifyDate` DATETIME NULL DEFAULT NULL COMMENT '修改时间', PRIMARY KEY (`id`) USING BTREE) ENGINE=INNODB DEFAULT CHARSET=utf8;INSERT INTO `smbms_role` VALUES (1, 'SMBMS_ADMIN', '系统管理员', 1, '2016-04-13 00:00:00', NULL, NULL);INSERT INTO `smbms_role` VALUES (2, 'SMBMS_MANAGER', '经理', 1, '2016-04-13 00:00:00', NULL, NULL);INSERT INTO `smbms_role` VALUES (3, 'SMBMS_EMPLOYEE', '普通员工', 1, '2016-04-13 00:00:00', NULL, NULL);DROP TABLE IF EXISTS `smbms_user`;CREATE TABLE `smbms_user` ( `id` BIGINT(20) NOT NULL AUTO_INCREMENT COMMENT '主键ID', `userCode` VARCHAR(15) NULL DEFAULT NULL COMMENT '用户编码', `userName` VARCHAR(15) NULL DEFAULT NULL COMMENT '用户名称', `userPassword` VARCHAR(15) NULL DEFAULT NULL COMMENT '用户密码', `gender` INT(10) NULL DEFAULT NULL COMMENT '性别(1:女、 2:男)', `birthday` DATE NULL DEFAULT NULL COMMENT '出生日期', `phone` VARCHAR(15) NULL DEFAULT NULL COMMENT '手机', `address` VARCHAR(30) NULL DEFAULT NULL COMMENT '地址', `userRole` BIGINT(20) NULL DEFAULT NULL COMMENT '用户角色(取自角色表-角色id)', `createdBy` BIGINT(20) NULL DEFAULT NULL COMMENT '创建者(userId)', `creationDate` DATETIME NULL DEFAULT NULL COMMENT '创建时间', `modifyBy` BIGINT(20) NULL DEFAULT NULL COMMENT '更新者(userId)', `modifyDate` DATETIME NULL DEFAULT NULL COMMENT '更新时间', PRIMARY KEY (`id`) USING BTREE) ENGINE=INNODB DEFAULT CHARSET=utf8;INSERT INTO `smbms_user` VALUES (1, 'admin', '111', '111111', 1, '2021-04-22', '13688889999', '北京市海淀区成府路207号', 3, 1, '2013-03-21 16:52:07', 1, '2021-04-22 17:43:02');INSERT INTO `smbms_user` VALUES (2, 'liming', '李明', '0000000', 2, '1983-12-10', '13688884457', '北京市东城区前门东大街9号', 2, 1, '2014-12-31 19:52:09', NULL, NULL);INSERT INTO `smbms_user` VALUES (5, 'hanlubiao', '韩路彪', '0000000', 2, '1984-06-05', '18567542321', '北京市朝阳区北辰中心12号', 2, 1, '2014-12-31 19:52:09', NULL, NULL);INSERT INTO `smbms_user` VALUES (6, 'zhanghua', '张华', '0000000', 1, '1983-06-15', '13544561111', '北京市海淀区学院路61号', 3, 1, '2013-02-11 10:51:17', NULL, NULL);INSERT INTO `smbms_user` VALUES (7, 'wangyang', '王洋', '0000000', 2, '1982-12-31', '13444561124', '北京市海淀区西二旗辉煌国际16层', 3, 1, '2014-06-11 19:09:07', NULL, NULL);INSERT INTO `smbms_user` VALUES (8, 'zhaoyan', '赵燕', '0000000', 2, '2021-04-22', '18098764545', '北京市海淀区回龙观小区10号楼', 2, 1, '2016-04-21 13:54:07', 1, '2021-04-22 17:56:11');INSERT INTO `smbms_user` VALUES (10, 'sunlei', '孙磊', '0000000', 2, '1981-01-04', '13387676765', '北京市朝阳区管庄新月小区12楼', 3, 1, '2015-05-06 10:52:07', NULL, NULL);INSERT INTO `smbms_user` VALUES (11, 'sunxing', '孙兴', '0000000', 2, '1978-03-12', '13367890900', '北京市朝阳区建国门南大街10号', 3, 1, '2016-11-09 16:51:17', NULL, NULL);INSERT INTO `smbms_user` VALUES (12, 'zhangchen', '张晨', '0000000', 1, '1986-03-28', '18098765434', '朝阳区管庄路口北柏林爱乐三期13号楼', 3, 1, '2016-08-09 05:52:37', 1, '2016-04-14 14:15:36');INSERT INTO `smbms_user` VALUES (13, 'dengchao', '邓超', '0000000', 2, '1981-11-04', '13689674534', '北京市海淀区北航家属院10号楼', 3, 1, '2016-07-11 08:02:47', NULL, NULL);INSERT INTO `smbms_user` VALUES (15, 'zhaomin', '赵敏', '0000000', 1, '1987-12-04', '18099897657', '北京市昌平区天通苑3区12号楼', 2, 1, '2015-09-12 12:02:12', NULL, NULL);INSERT INTO `smbms_user` VALUES (18, '111', '111', '111111', 1, '2021-04-22', '15072151323', '111', 3, 1, '2021-04-22 18:13:07', NULL, NULL);架构设计图
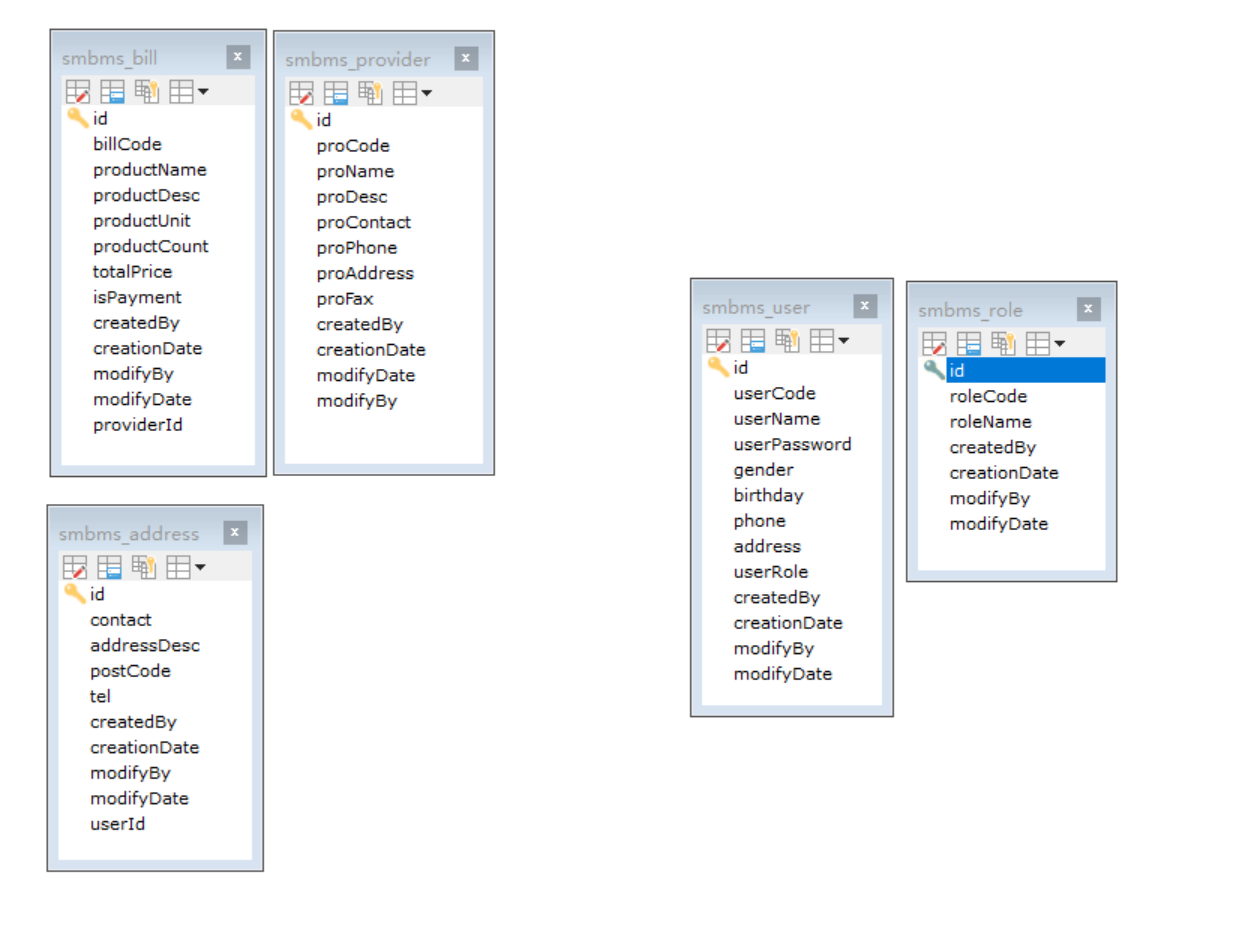
项目如何搭建
考虑是否使用maven? 依赖,jar
项目搭建准备工作
-
搭建一个maven web项目
-
配置tomcat
-
测试项目是否可以跑起来
-
导入项目中所需jar包
-
创建项目包结构
-
编写实体类
ORM映射:表-类映射
-
编写基础公共类
- 数据库配置文件
- 编写数据库的公共类
- 编写字符编码过滤器
-
导入静态资源
详细的相关代码见:大垚大摆/smsbs - 码云 - 开源中国 (gitee.com)
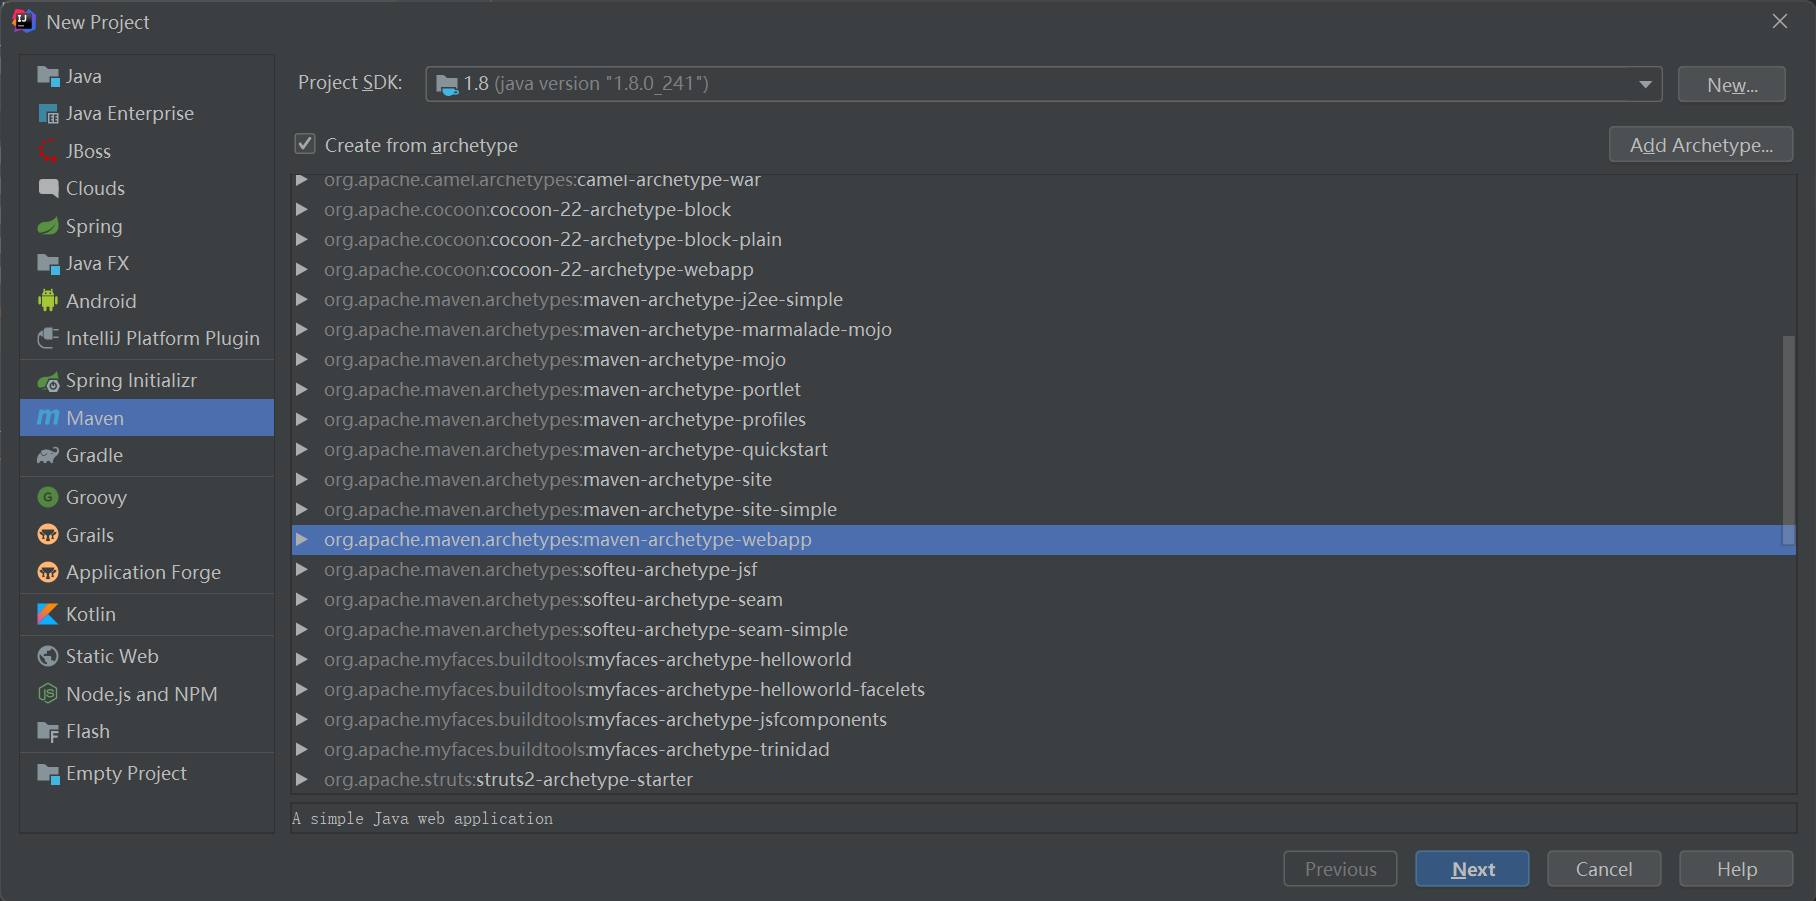
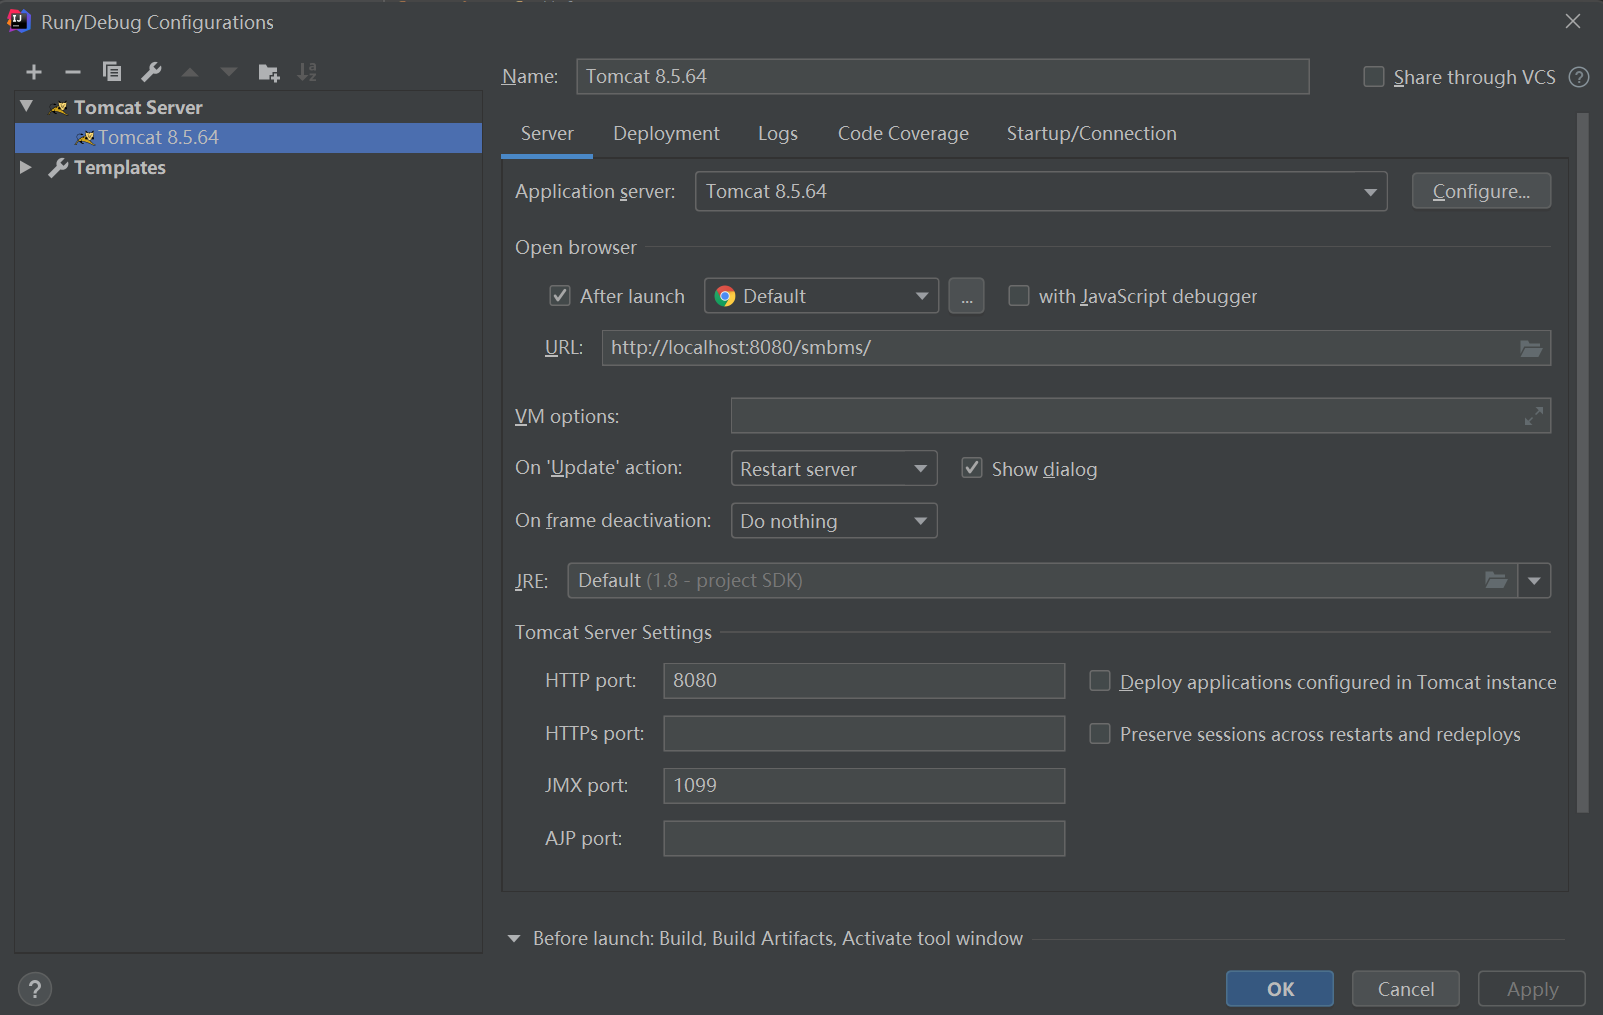
pom.xml
<project xmlns="http://maven.apache.org/POM/4.0.0" xmlns:xsi="http://www.w3.org/2001/XMLSchema-instance" xsi:schemaLocation="http://maven.apache.org/POM/4.0.0 http://maven.apache.org/xsd/maven-4.0.0.xsd"> <modelVersion>4.0.0</modelVersion> <groupId>com.zyy</groupId> <artifactId>smbms</artifactId> <version>1.0-SNAPSHOT</version> <packaging>war</packaging> <dependencies> <dependency> <groupId>javax.servlet</groupId> <artifactId>servlet-api</artifactId> <version>2.5</version> </dependency> <dependency> <groupId>javax.servlet.jsp</groupId> <artifactId>javax.servlet.jsp-api</artifactId> <version>2.3.3</version> </dependency> <dependency> <groupId>mysql</groupId> <artifactId>mysql-connector-java</artifactId> <version>5.1.47</version> </dependency> <dependency> <groupId>javax.servlet.jsp.jstl</groupId> <artifactId>jstl-api</artifactId> <version>1.2</version> </dependency> <dependency> <groupId>taglibs</groupId> <artifactId>standard</artifactId> <version>1.1.2</version> </dependency> <dependency> <groupId>junit</groupId> <artifactId>junit</artifactId> <version>4.12</version> </dependency> </dependencies></project>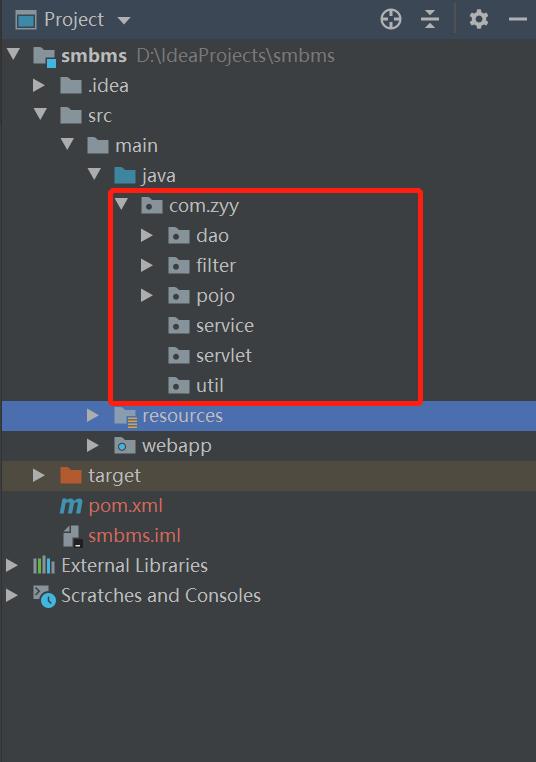
import java.util.Date;/ * @ClassName: Address * @Description: TODO 类描述 * @Author: zyy * @Date: 2021/12/22 17:35 * @Version: 1.0 */public class Address { private Integer id; private String contact; private String addressDesc; private String postCode; private String tel; private Integer createdBy; private Integer modifyBy; private Date creationDate; private Date modifyDate; private Integer userId; //...省略get set方法}import java.util.Date;/ * @ClassName: Bill * @Description: TODO 类描述 * @Author: zyy * @Date: 2021/12/22 17:35 * @Version: 1.0 */public class Bill { private Integer id; private String billCode; private String productName; private String productDesc; private String productUnit; private Double productCount; private Double totalPrice; private Integer isPayment; private Integer createdBy; private Integer modifyBy; private Date creationDate; private Date modifyDate; private Integer providerId; //...省略get set方法}import java.util.Date;/ * @ClassName: Provider * @Description: TODO 类描述 * @Author: zyy * @Date: 2021/12/22 17:35 * @Version: 1.0 */public class Provider { private Integer id; private String proCode; private String proName; private String proDesc; private String proContact; private String proPhone; private String proAddress; private String proFax; private Integer createdBy; private Integer modifyBy; private Date creationDate; private Date modifyDate; //...省略get set方法}import java.util.Date;/ * @ClassName: Role * @Description: TODO 类描述 * @Author: zyy * @Date: 2021/12/22 17:35 * @Version: 1.0 */public class Role { private Integer id; private String roleCode; private String roleName; private Integer createdBy; private Integer modifyBy; private Date creationDate; private Date modifyDate; //...省略get set方法}import java.util.Calendar;import java.util.Date;/ * @ClassName: User * @Description: TODO 类描述 * @Author: zyy * @Date: 2021/12/22 17:34 * @Version: 1.0 */public class User { private Integer id; private String userCode; private String userName; private String userPassword; private Integer gender; private Date birthday; private String phone; private String address; private Integer userRole; private Integer createdBy; private Integer modifyBy; private Date creationDate; private Date modifyDate; private Integer age; private String userRoleName; public Integer getAge() { Date date = new Date(); Calendar calendar = Calendar.getInstance(); calendar.setTime(date); int nowYear = calendar.get(Calendar.YEAR); calendar.setTime(birthday); int birthYear = calendar.get(Calendar.YEAR); return nowYear - birthYear; } //...省略其他get set方法}db.properties
注意这里需要指定数据库
driver=com.mysql.jdbc.Driverurl=jdbc:mysql://localhost:3306/smbms?useUnicode=true&characterEncoding=utf-8username=rootpassword=123456import java.io.IOException;import java.io.InputStream;import java.sql.Connection;import java.sql.DriverManager;import java.sql.PreparedStatement;import java.sql.ResultSet;import java.sql.SQLException;import java.util.Properties;/ * @ClassName: BaseDao * @Description: TODO 类描述 * @Author: zyy * @Date: 2021/12/23 10:14 * @Version: 1.0 */public class BaseDao { private static String driver; private static String url; private static String userName; private static String password; static { Properties properties = new Properties(); InputStream is = BaseDao.class.getClassLoader().getResourceAsStream("db.properties"); try { properties.load(is); driver = properties.getProperty("driver"); url = properties.getProperty("url"); userName = properties.getProperty("username"); password = properties.getProperty("password"); } catch (IOException e) { e.printStackTrace(); } } public static Connection getConnection() { Connection con = null; try { Class.forName(driver); con = DriverManager.getConnection(url, userName, password); } catch (ClassNotFoundException e) { e.printStackTrace(); } catch (SQLException e) { e.printStackTrace(); } return con; } public static ResultSet execute(Connection con, PreparedStatement ps, ResultSet rs, String sql, Object[] params) throws SQLException { ps = con.prepareStatement(sql); for (int i = 0; i < params.length; i++) { //setObject 占位符下标从1开始,我们数组是从0开始 ps.setObject(i + 1, params[i]); } rs = ps.executeQuery(); return rs; } public static int execute(Connection con, PreparedStatement ps, String sql, Object[] params) throws SQLException { ps = con.prepareStatement(sql); for (int i = 0; i < params.length; i++) { //setObject 占位符下标从1开始,我们数组是从0开始 ps.setObject(i + 1, params[i]); } return ps.executeUpdate(); } public static boolean closeResource(Connection con, PreparedStatement ps, ResultSet rs) { boolean closeFlag = true; if (rs != null) { try { rs.close(); rs = null; } catch (SQLException e) { e.printStackTrace(); closeFlag = false; } } if (ps != null) { try { ps.close(); ps = null; } catch (SQLException e) { e.printStackTrace(); closeFlag = false; } } if (con != null) { try { con.close(); con = null; } catch (SQLException e) { e.printStackTrace(); closeFlag = false; } } return closeFlag; } public static boolean closeResource(Connection con) { boolean closeFlag = true; if (con != null) { try { con.close(); con = null; } catch (SQLException e) { e.printStackTrace(); closeFlag = false; } } return closeFlag; } public static boolean closeResource(PreparedStatement ps, ResultSet rs) { boolean closeFlag = true; if (rs != null) { try { rs.close(); rs = null; } catch (SQLException e) { e.printStackTrace(); closeFlag = false; } } if (ps != null) { try { ps.close(); ps = null; } catch (SQLException e) { e.printStackTrace(); closeFlag = false; } } return closeFlag; }}import javax.servlet.Filter;import javax.servlet.FilterChain;import javax.servlet.FilterConfig;import javax.servlet.ServletException;import javax.servlet.ServletRequest;import javax.servlet.ServletResponse;import java.io.IOException;/ * @ClassName: CharacterEncodingFilter * @Description: TODO 类描述 * @Author: zyy * @Date: 2021/12/23 11:36 * @Version: 1.0 */public class CharacterEncodingFilter implements Filter { public void init(FilterConfig filterConfig) throws ServletException { } public void doFilter(ServletRequest request, ServletResponse response, FilterChain chain) throws IOException, ServletException { request.setCharacterEncoding("utf-8"); response.setCharacterEncoding("utf-8"); chain.doFilter(request, response); } public void destroy() { }}web.xml
<web-app xmlns="http://xmlns.jcp.org/xml/ns/javaee" xmlns:xsi="http://www.w3.org/2001/XMLSchema-instance" xsi:schemaLocation="http://xmlns.jcp.org/xml/ns/javaee http://xmlns.jcp.org/xml/ns/javaee/web-app_3_1.xsd" version="3.1" metadata-complete="true"> <filter> <filter-name>characterEncoding</filter-name> <filter-class>com.zyy.filter.CharacterEncodingFilter</filter-class> </filter> <filter-mapping> <filter-name>characterEncoding</filter-name> <url-pattern>/*</url-pattern> </filter-mapping></web-app>31.smbms登录流程实现
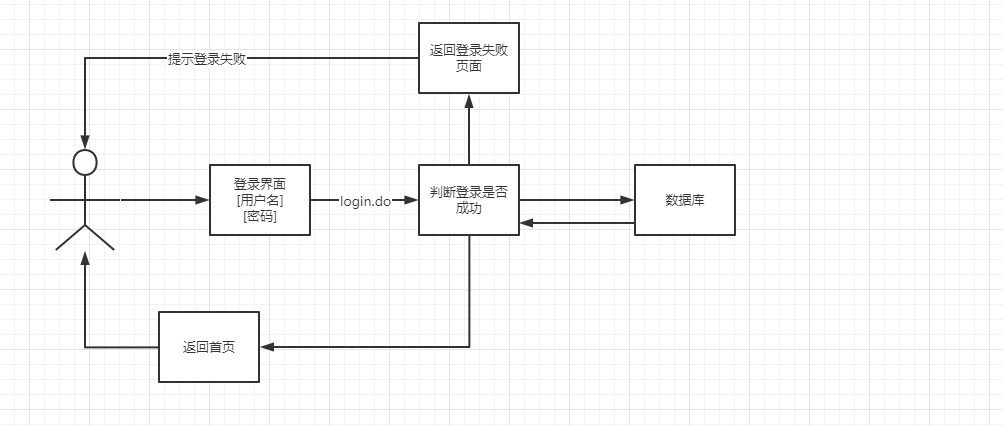
-
编写前端页面login.jsp
-
设置页面web.xml
<welcome-file-list> <welcome-file>login.jsp</welcome-file> </welcome-file-list> -
编写dao层登录用户的接口
import com.zyy.pojo.User;import java.sql.Connection;import java.sql.SQLException;/ * @ClassName: UserDao * @Description: TODO 类描述 * @Author: zyy * @Date: 2022/01/09 10:38 * @Version: 1.0 */public interface UserDao { / * 根据用户编码获取用户信息 * @param con * @param userCode * @return */ User getLoginUser(Connection con, String userCode) throws SQLException;} -
编写dao接口的实现类
import com.zyy.dao.BaseDao;import com.zyy.dao.user.UserDao;import com.zyy.pojo.User;import java.sql.Connection;import java.sql.PreparedStatement;import java.sql.ResultSet;import java.sql.SQLException;/ * @ClassName: UserDaoImpl * @Description: TODO 类描述 * @Author: zyy * @Date: 2022/01/09 10:51 * @Version: 1.0 */public class UserDaoImpl implements UserDao { public User getLoginUser(Connection con, String userCode) throws SQLException { PreparedStatement ps = null; ResultSet rs = null; User user = null; if (con != null) { String sql = "select id, userCode, userName, userPassword, gender, birthday, phone, address, userRole, createdBy, creationDate, modifyBy, modifyDate from smbms_user where userCode=?"; Object[] params = {userCode}; rs = BaseDao.execute(con, ps, rs, sql, params); if (rs.next()) { user = new User(); user.setId(rs.getInt("id")); user.setUserCode(rs.getString("userCode")); user.setUserName(rs.getString("userName")); user.setUserPassword(rs.getString("userPassword")); user.setGender(rs.getInt("gender")); user.setBirthday(rs.getDate("birthday")); user.setPhone(rs.getString("phone")); user.setAddress(rs.getString("address")); user.setUserRole(rs.getInt("userRole")); user.setCreatedBy(rs.getInt("createdBy")); user.setModifyBy(rs.getInt("modifyBy")); user.setCreationDate(rs.getTimestamp("creationDate")); user.setModifyDate(rs.getTimestamp("modifyDate")); } //关闭 BaseDao.closeResource(ps, rs); } return user; }} -
业务层接口
import com.zyy.pojo.User;/ * @InterfaceName: UserService * @Description: TODO 接口描述 * @Author: zyy * @Date: 2022/01/09 11:18 * @Version: 1.0 */public interface UserService { / * 登录 * @param userCode * @param password * @return */ User login(String userCode, String password);} -
业务层实现类
import com.zyy.dao.BaseDao;import com.zyy.dao.user.UserDao;import com.zyy.dao.user.impl.UserDaoImpl;import com.zyy.pojo.User;import com.zyy.service.user.UserService;import java.sql.Connection;import java.sql.SQLException;/ * @ClassName: UserServiceImpl * @Description: TODO 类描述 * @Author: zyy * @Date: 2022/01/09 11:20 * @Version: 1.0 */public class UserServiceImpl implements UserService { / * 业务层会调用dao层,所以这里引入Dao层 */ private UserDao userDao; public UserServiceImpl() { userDao = new UserDaoImpl(); } public User login(String userCode, String password) { Connection con = null; User user = null; try { con = BaseDao.getConnection(); user = userDao.getLoginUser(con, userCode); } catch (SQLException e) { e.printStackTrace(); } finally { BaseDao.closeResource(con); } return user; }}-
编写servlet
import com.zyy.pojo.User;import com.zyy.service.user.UserService;import com.zyy.service.user.impl.UserServiceImpl;import com.zyy.util.Constants;import javax.servlet.ServletException;import javax.servlet.http.HttpServlet;import javax.servlet.http.HttpServletRequest;import javax.servlet.http.HttpServletResponse;import java.io.IOException;/ * @ClassName: LoginServlet * @Description: TODO 类描述 * @Author: zyy * @Date: 2022/01/09 11:36 * @Version: 1.0 */public class LoginServlet extends HttpServlet { @Override protected void doGet(HttpServletRequest req, HttpServletResponse resp) throws ServletException, IOException { System.out.println("LoginServlet---start----"); //用户前端输入的用户名和密码 String userCode = req.getParameter("userCode"); String userPassword = req.getParameter("userPassword"); //调用业务层 UserService userService = new UserServiceImpl(); User user = userService.login(userCode, userPassword); if (user != null) { //查有此人 //将用户的信息放到session中 req.getSession().setAttribute(Constants.USER_SESSION, user); //跳转到主页 resp.sendRedirect("jsp/frame.jsp"); } else { //查无此人 //转发回登录页面,并提示它用户名或者密码错误 req.setAttribute("error", "用户名或者密码错误"); req.getRequestDispatcher("login.jsp").forward(req, resp); } } @Override protected void doPost(HttpServletRequest req, HttpServletResponse resp) throws ServletException, IOException { this.doGet(req, resp); }} -
注册Servlet
<servlet> <servlet-name>LoginServlet</servlet-name> <servlet-class>com.zyy.servlet.LoginServlet</servlet-class> </servlet> <servlet-mapping> <servlet-name>LoginServlet</servlet-name> <url-pattern>/login.do</url-pattern> </servlet-mapping> -
测试访问,确保上面功能成功!
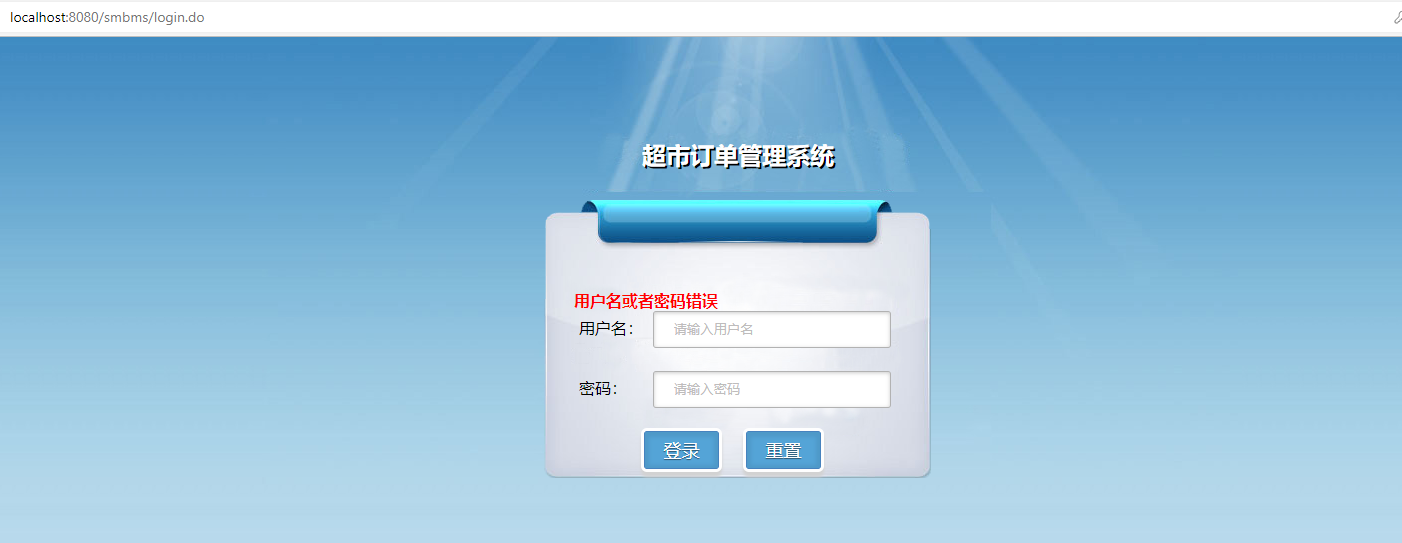
-
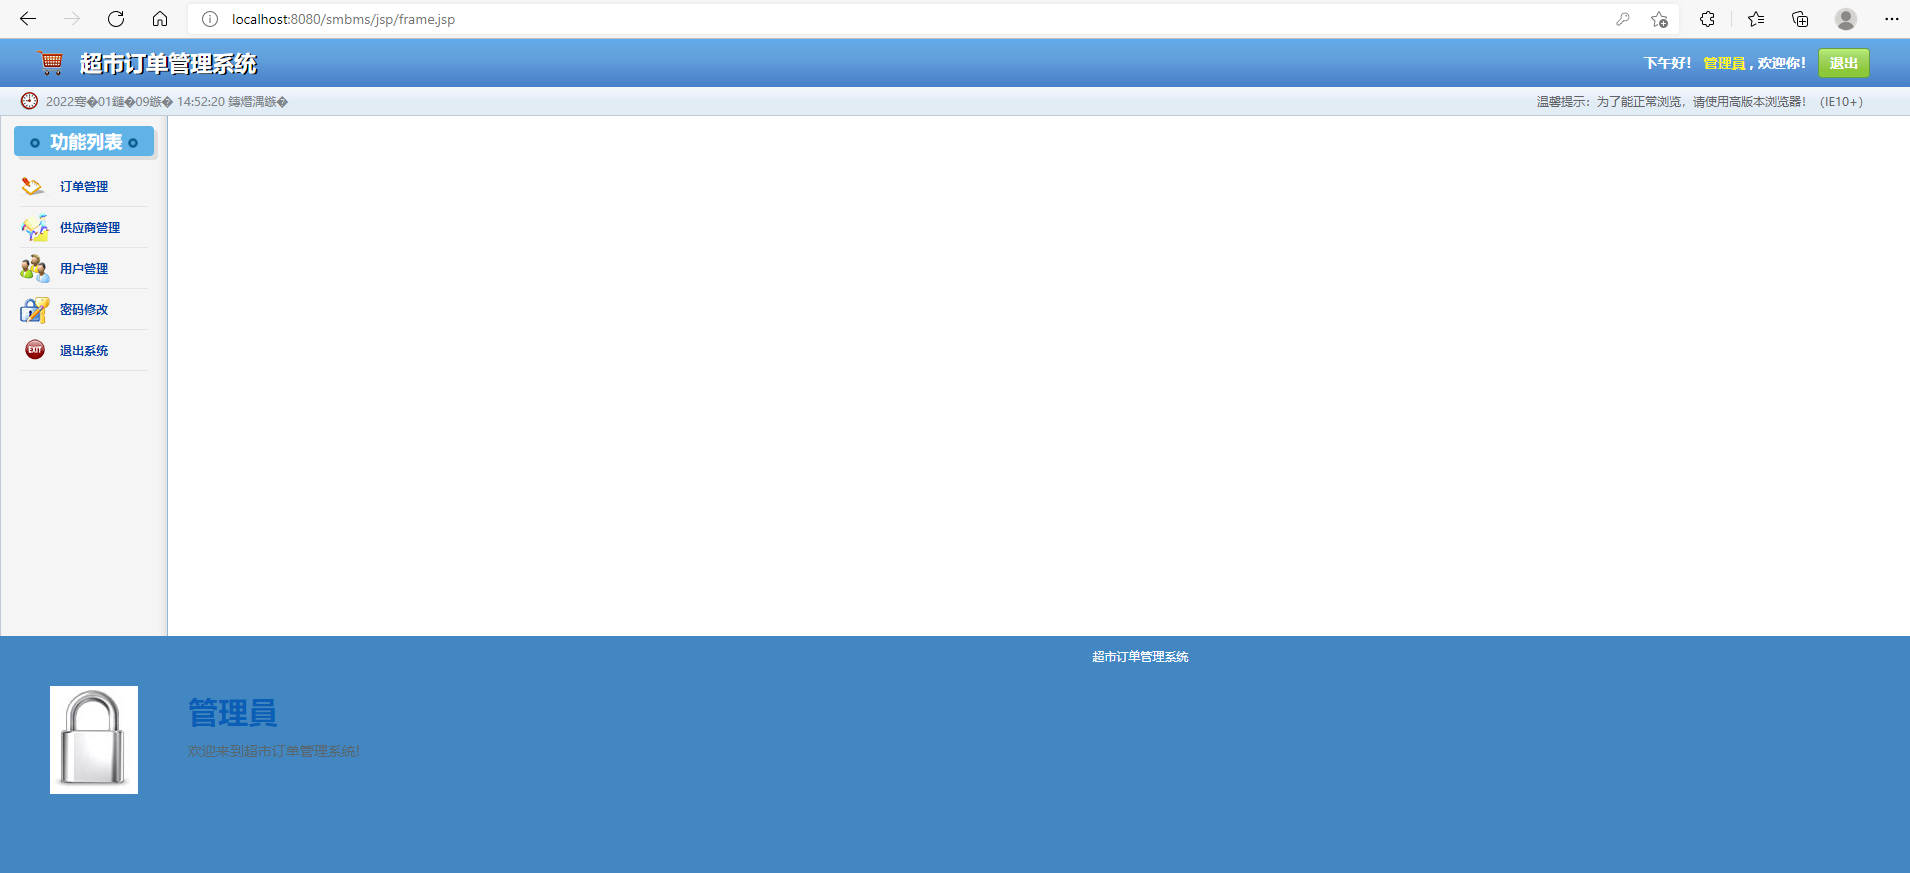
32.smbms注销及权限过滤
注销功能:
思路:移除session,返回登录页面
编写退出servlet
import com.zyy.util.Constants;import javax.servlet.ServletException;import javax.servlet.http.HttpServlet;import javax.servlet.http.HttpServletRequest;import javax.servlet.http.HttpServletResponse;import java.io.IOException;/ * @ClassName: LogoutServlet * @Description: TODO 类描述 * @Author: zyy * @Date: 2022/01/09 14:13 * @Version: 1.0 */public class LogoutServlet extends HttpServlet { @Override protected void doGet(HttpServletRequest req, HttpServletResponse resp) throws ServletException, IOException { //移除session req.getSession().removeAttribute(Constants.USER_SESSION); //跳转登录页面 resp.sendRedirect(req.getContextPath() + "/login.jsp"); } @Override protected void doPost(HttpServletRequest req, HttpServletResponse resp) throws ServletException, IOException { this.doGet(req, resp); }}注册退出接口
<servlet> <servlet-name>LogoutServlet</servlet-name> <servlet-class>com.zyy.servlet.LogoutServlet</servlet-class> </servlet> <servlet-mapping> <servlet-name>LogoutServlet</servlet-name> <url-pattern>/user/logout</url-pattern> </servlet-mapping>登录拦截优化
编写一个过滤器并注册
import com.zyy.pojo.User;import com.zyy.util.Constants;import javax.servlet.Filter;import javax.servlet.FilterChain;import javax.servlet.FilterConfig;import javax.servlet.ServletException;import javax.servlet.ServletRequest;import javax.servlet.ServletResponse;import javax.servlet.http.HttpServletRequest;import javax.servlet.http.HttpServletResponse;import java.io.IOException;/ * @ClassName: SysFilter * @Description: TODO 类描述 * @Author: zyy * @Date: 2022/01/09 14:28 * @Version: 1.0 */public class SysFilter implements Filter { public void init(FilterConfig filterConfig) throws ServletException { } public void doFilter(ServletRequest request, ServletResponse response, FilterChain chain) throws IOException, ServletException { HttpServletRequest req = (HttpServletRequest) request; HttpServletResponse resp = (HttpServletResponse) response; User user = (User) req.getSession().getAttribute(Constants.USER_SESSION); if (user == null) { //已经被移除或者注销了,或者没有登录 resp.sendRedirect("/smbms/error.jsp"); return; } chain.doFilter(req, resp); } public void destroy() { }} <filter> <filter-name>SysFilter</filter-name> <filter-class>com.zyy.filter.SysFilter</filter-class> </filter> <filter-mapping> <filter-name>SysFilter</filter-name> <url-pattern>/jsp/*</url-pattern> </filter-mapping>验证功能!
没有登录直接请求http://localhost:8080/smbms/jsp/frame.jsp

33.smbms密码修改实现
-
导入前端素材pwdmodify.jsp
-
写项目,建议从底层向上写
-
UserDao接口
/ * 修改密码 * * @param con * @param id * @param password * @return * @throws SQLException */ int updatePwd(Connection con, int id, String password) throws SQLException; -
UserDao接口实现
public int updatePwd(Connection con, int id, String password) throws SQLException { int updateCount = 0; if (con != null) { PreparedStatement ps = null; String str = "update smbms_user set userPassword = ? where id = ?"; Object[] params = {password, id}; updateCount = BaseDao.execute(con, ps, str, params); BaseDao.closeResource(ps, null);} return updateCount; } -
UserService接口
/ * 修改密码 * * @param id * @param password * @return */ boolean updatePwd(int id, String password); -
UserService接口实现
public boolean updatePwd(int id, String password) { Connection con = null; boolean updateFlag = false; try { con = BaseDao.getConnection(); int updateCount = userDao.updatePwd(con, id, password); if (updateCount > 0) { updateFlag = true; }} catch (SQLException e) { e.printStackTrace();} finally { BaseDao.closeResource(con);} return updateFlag; } -
编写servlet
import com.mysql.jdbc.StringUtils;import com.zyy.pojo.User;import com.zyy.service.user.UserService;import com.zyy.service.user.impl.UserServiceImpl;import com.zyy.util.Constants;import javax.servlet.ServletException;import javax.servlet.http.HttpServlet;import javax.servlet.http.HttpServletRequest;import javax.servlet.http.HttpServletResponse;import java.io.IOException;/ * @ClassName: UserServlet * @Description: Servlet复用 * @Author: zyy * @Date: 2022/01/15 15:39 * @Version: 1.0 */public class UserServlet extends HttpServlet { @Override protected void doGet(HttpServletRequest req, HttpServletResponse resp) throws ServletException, IOException { String method = req.getParameter("method"); if (method != null && "savepwd".equals(method)) { updatePwd(req, resp);} } protected void updatePwd(HttpServletRequest req, HttpServletResponse resp) throws ServletException, IOException { //从session获取用户id Object obj = req.getSession().getAttribute(Constants.USER_SESSION); //获取入参中的新密码 String newPassWord = req.getParameter("newpassword"); if (obj == null || StringUtils.isNullOrEmpty(newPassWord)) { req.setAttribute("message", "新密码不可为空~");} else { UserService userService = new UserServiceImpl(); boolean flag = userService.updatePwd(((User) obj).getId(), newPassWord); if (flag) { req.setAttribute("message", "密码修改成功,请退出,使用新密码登录~"); //修改成功,移除session req.getSession().removeAttribute(Constants.USER_SESSION); } else { req.setAttribute("message", "密码修改失败~"); }} req.getRequestDispatcher("pwdmodify.jsp").forward(req, resp); } @Override protected void doPost(HttpServletRequest req, HttpServletResponse resp) throws ServletException, IOException { this.doGet(req, resp); }} -
注册servlet
<servlet> <servlet-name>UserServlet</servlet-name> <servlet-class>com.zyy.servlet.UserServlet</servlet-class> </servlet> <servlet-mapping> <servlet-name>UserServlet</servlet-name> <url-pattern>/jsp/user.do</url-pattern> </servlet-mapping> -
验证功能
34.ajax验证旧密码实现
-
添加fastjson包
<dependency> <groupId>com.alibaba</groupId> <artifactId>fastjson</artifactId> <version>1.2.79</version> </dependency> -
UserServlet中添加方法
protected void doGet(HttpServletRequest req, HttpServletResponse resp) throws ServletException, IOException { String method = req.getParameter("method"); if (method != null) { if ("savepwd".equals(method)) { updatePwd(req, resp); } else if ("checkoldpwd".equals(method)) { checkOldPwd(req, resp); } } } protected void checkOldPwd(HttpServletRequest req, HttpServletResponse resp) throws ServletException, IOException { //从session中获取旧密码 Object obj = req.getSession().getAttribute(Constants.USER_SESSION); //获取入参中的旧密码 String oldPassWord = req.getParameter("oldpassword"); Map<String, Object> resultMap = new HashMap<String, Object>(16); if (obj == null) { //session过期 resultMap.put("result", "sessionerror"); } else if (StringUtils.isNullOrEmpty(oldPassWord)) { //旧密码输入为空 resultMap.put("result", "error"); } else { if (oldPassWord.equals(((User) obj).getUserPassword())) { //旧密码输入正确 resultMap.put("result", "true"); } else { //旧密码输入有误 resultMap.put("result", "false"); } } resp.setContentType("application/json"); PrintWriter writer = resp.getWriter(); writer.write(JSON.toJSONString(resultMap)); writer.flush(); writer.close(); }
35.smbms用户管理底层实现
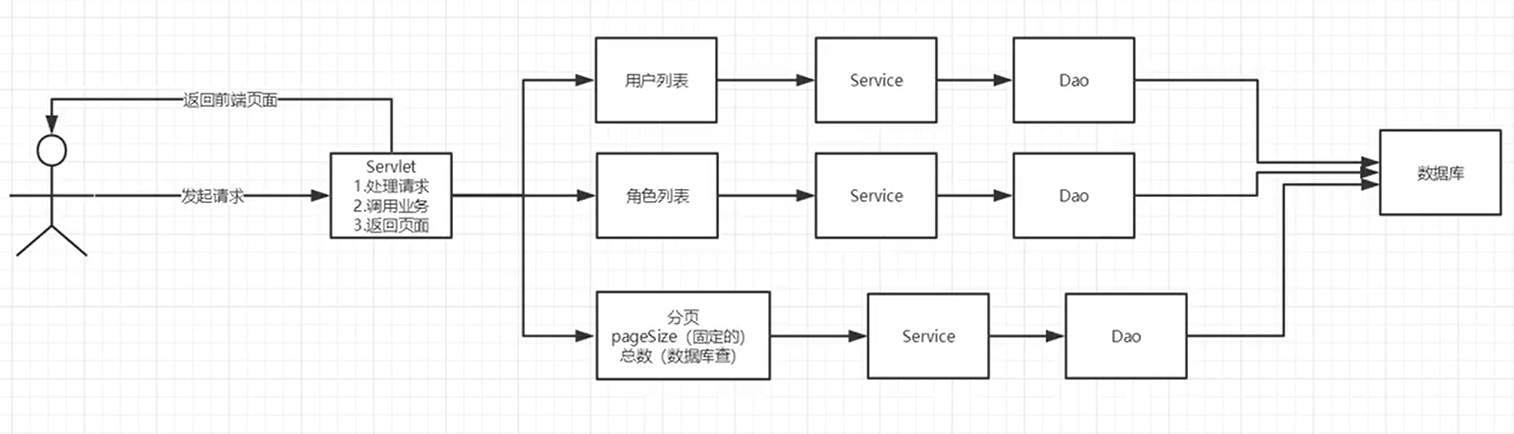
- 导入分页的工具类
- 用户列表 userlist.jsp 和分页页面userlist.jsp
获取用户数据量
-
UserDao
/ * 根据用户名或者角色查询用户总数 * @param con * @param userName * @param userRole * @return * @throws SQLException */ int getUserCount(Connection con, String userName, int userRole) throws SQLException; -
UserDaoImpl
public int getUserCount(Connection con, String userName, int userRole) throws SQLException { PreparedStatement ps = null; ResultSet rs = null; int count = 0; if (con != null) { StringBuffer sql = new StringBuffer("select count(1) as 'count' from smbms_user u,smbms_role r where u.userRole=r.id"); List<Object> list = new ArrayList<Object>(); if (!StringUtils.isNullOrEmpty(userName)) { sql.append(" and u.userName like ?"); list.add("%" + userName + "%"); } if (userRole > 0) { sql.append(" and r.id = ?"); list.add(userRole); } Object[] params = list.toArray(); rs = BaseDao.execute(con, ps, rs, sql.toString(), params); if (rs.next()) { count = rs.getInt("count"); } BaseDao.closeResource(ps, rs); } return count; } -
UserService
/ * 查询记录数 * @param userName * @param userRole * @return */ int getUserCount(String userName, int userRole); -
UserServiceImpl
public int getUserCount(String userName, int userRole) { Connection con = null; int count = 0; try { con = BaseDao.getConnection(); count = userDao.getUserCount(con, userName, userRole); } catch (SQLException e) { e.printStackTrace(); } finally { BaseDao.closeResource(con); } return count; }
获取用户列表
-
UserDao
/ * 获取用户列表 * * @param con * @param userName * @param userRole * @param currentPageNo * @param pageSize * @return * @throws SQLException */ List<User> getUserList(Connection con, String userName, int userRole, int currentPageNo, int pageSize) throws SQLException; -
UserDaoImpl
public List<User> getUserList(Connection con, String userName, int userRole, int currentPageNo, int pageSize) throws SQLException { PreparedStatement ps = null; ResultSet rs = null; List<User> userList = new ArrayList<User>(); if (con != null) { StringBuffer sql = new StringBuffer("select u.*,r.roleName as `userRoleName` from smbms_user u,smbms_role r where u.userRole=r.id"); List<Object> list = new ArrayList<Object>(); if (!StringUtils.isNullOrEmpty(userName)) { sql.append(" and u.userName like ?"); list.add("%" + userName + "%"); } if (userRole > 0) { sql.append(" and r.id = ?"); list.add(userRole); } //mysql 分页使用limit startIndex, pageSize //比如现在一共13条数据,每页最大容量是5 //0,5 01234 第一页 //5,5 56789 第二页 //10,3 10,11,12 第三页 sql.append(" order by u.creationDate desc limit ?,?"); currentPageNo = (currentPageNo - 1) * pageSize; list.add(currentPageNo); list.add(pageSize); Object[] params = list.toArray(); rs = BaseDao.execute(con, ps, rs, sql.toString(), params); while (rs.next()) { User user = new User(); user.setId(rs.getInt("id")); user.setUserCode(rs.getString("userCode")); user.setUserName(rs.getString("userName")); user.setGender(rs.getInt("gender")); user.setBirthday(rs.getDate("birthday")); user.setPhone(rs.getString("phone")); user.setUserRole(rs.getInt("userRole")); user.setUserRoleName(rs.getString("userRoleName")); userList.add(user); } BaseDao.closeResource(ps, rs); } return userList; } -
UserService
/ * 根据条件查询用户列表 * * @param queryUserName * @param queryUserRole * @param currentPageNo * @param pageSize * @return */ List<User> getUserList(String queryUserName, int queryUserRole, int currentPageNo, int pageSize); -
UserServiceImpl
public List<User> getUserList(String queryUserName, int queryUserRole, int currentPageNo, int pageSize) { Connection con = null; List<User> userList = null; try { con = BaseDao.getConnection(); userList = userDao.getUserList(con, queryUserName, queryUserRole, currentPageNo, pageSize); } catch (SQLException e) { e.printStackTrace(); } finally { BaseDao.closeResource(con); } return userList;
36.smbms用户管理分页ok
获取角色操作
为了我们职责统一,可以把角色的操作单独放在一个包中,和POJO类对应
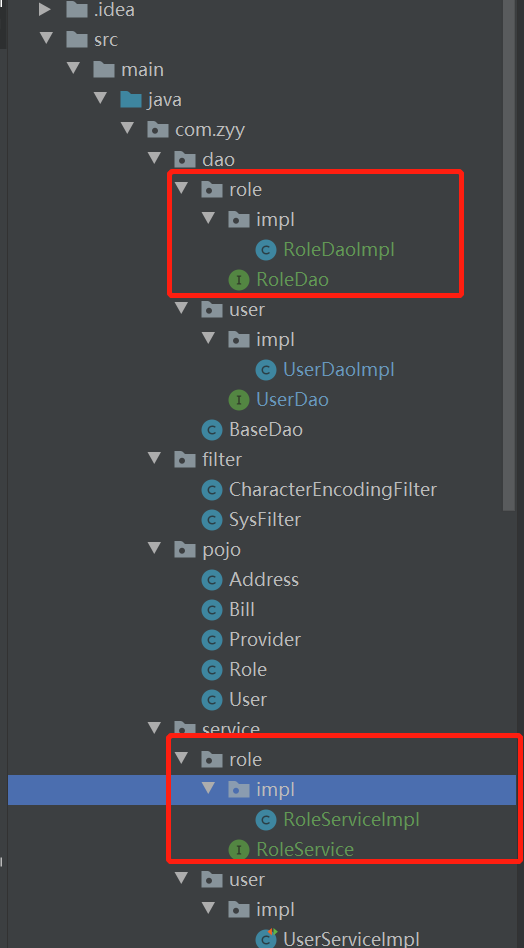
-
RoleDao
package com.zyy.dao.role;import com.zyy.pojo.Role;import java.sql.Connection;import java.sql.SQLException;import java.util.List;/ * @InterfaceName: RoleDao * @Description: TODO 接口描述 * @Author: zyy * @Date: 2022/02/10 21:10 * @Version: 1.0 */public interface RoleDao { / * 获取角色列表 * @param con * @return * @throws SQLException */ List<Role> getRoleList(Connection con) throws SQLException;} -
RoleDaoImpl
package com.zyy.dao.role.impl;import com.zyy.dao.BaseDao;import com.zyy.dao.role.RoleDao;import com.zyy.pojo.Role;import java.sql.Connection;import java.sql.PreparedStatement;import java.sql.ResultSet;import java.sql.SQLException;import java.util.ArrayList;import java.util.List;/ * @ClassName: RoleDaoImpl * @Description: TODO 类描述 * @Author: zyy * @Date: 2022/02/10 21:10 * @Version: 1.0 */public class RoleDaoImpl implements RoleDao { public List<Role> getRoleList(Connection con) throws SQLException { PreparedStatement ps = null; ResultSet rs = null; List<Role> roleList = new ArrayList<Role>(); if (con != null) { String sql = "select id, roleName, roleCode from smbms_role"; Object[] params = {}; rs = BaseDao.execute(con, ps, rs, sql, params); while (rs.next()) { Role role = new Role(); role.setId(rs.getInt("id")); role.setRoleCode(rs.getString("roleCode")); role.setRoleName(rs.getString("roleName")); roleList.add(role); } } return roleList; }} -
RoleService
package com.zyy.service.role;import com.zyy.pojo.Role;import java.util.List;/ * @InterfaceName: RoleService * @Description: TODO 接口描述 * @Author: zyy * @Date: 2022/02/10 21:12 * @Version: 1.0 */public interface RoleService { / * 获取角色列表 * @return */ List<Role> getRoleList();} -
RoleServiceImpl
package com.zyy.service.role.impl;import com.zyy.dao.BaseDao;import com.zyy.dao.role.RoleDao;import com.zyy.dao.role.impl.RoleDaoImpl;import com.zyy.pojo.Role;import com.zyy.service.role.RoleService;import java.sql.Connection;import java.sql.SQLException;import java.util.List;/ * @ClassName: RoleServiceImpl * @Description: TODO 类描述 * @Author: zyy * @Date: 2022/02/10 21:13 * @Version: 1.0 */public class RoleServiceImpl implements RoleService { private RoleDao roleDao; public RoleServiceImpl() { roleDao = new RoleDaoImpl(); } public List<Role> getRoleList() { Connection con = null; List<Role> roleList = null; try { con = BaseDao.getConnection(); roleList = roleDao.getRoleList(con); } catch (SQLException e) { e.printStackTrace(); } finally { BaseDao.closeResource(con); } return roleList; }}
用户显示的servlet
-
获取用户前端的数据(查询)
-
判断请求是否需要执行,看参数的值判断
-
为了实现分页,需要计算出当前页面和总页数,页面大小。。
-
用户列表展示
-
返回前端
protected void query(HttpServletRequest req, HttpServletResponse resp) throws ServletException, IOException { //获取入参 String queryName = req.getParameter("queryname"); String temp = req.getParameter("queryUserRole"); String pageIndex = req.getParameter("pageIndex"); //角色 int queryUserRole = 0; //每页最大容量可以前端传入,也可以写成配置项,这里暂时写死 int pageSize = 5; int currentPageNo = 1; //参数处理 if (temp != null && temp.length() > 0) { queryUserRole = Integer.parseInt(temp); } if (pageIndex != null && pageIndex.length() > 0) { currentPageNo = Integer.parseInt(pageIndex); } UserService userService = new UserServiceImpl(); //获取用户总数(上一页,下一页) int totalCount = userService.getUserCount(queryName, queryUserRole); //总页数支持 PageSupport pageSupport = new PageSupport(); pageSupport.setCurrentPageNo(currentPageNo); pageSupport.setPageSize(pageSize); pageSupport.setTotalCount(totalCount); int totalPageCount = pageSupport.getTotalPageCount(); //控制首页和尾页 if (currentPageNo < 0) { currentPageNo = 0; } else if (currentPageNo > totalPageCount) { currentPageNo = totalPageCount; } //查询用户列表 List<User> userList = userService.getUserList(queryName, queryUserRole, currentPageNo, pageSize); //获取角色列表 RoleService roleService = new RoleServiceImpl(); List<Role> roleList = roleService.getRoleList(); req.setAttribute("userList", userList); req.setAttribute("roleList", roleList); req.setAttribute("totalCount", totalCount); req.setAttribute("currentPageNo", currentPageNo); req.setAttribute("totalPageCount", totalPageCount); req.setAttribute("queryUserName", queryName); req.setAttribute("queryUserRole", queryUserRole); req.getRequestDispatcher("userlist.jsp").forward(req, resp); }
37.smbms架构分析及方法
38.文件传输原理及介绍
39.文件上传及拓展鸡汤
导包
commons-fileupload-1.4.jar
commons-io-2.11.0.jar
index.jsp
  $Title$  上传用户:
       |
web.xml
<web-app xmlns="http://xmlns.jcp.org/xml/ns/javaee" xmlns:xsi="http://www.w3.org/2001/XMLSchema-instance" xsi:schemaLocation="http://xmlns.jcp.org/xml/ns/javaee http://xmlns.jcp.org/xml/ns/javaee/web-app_4_0.xsd" version="4.0"> <servlet> <servlet-name>FileServlet</servlet-name> <servlet-class>com.zyy.servlet.FileServlet</servlet-class> </servlet> <servlet-mapping> <servlet-name>FileServlet</servlet-name> <url-pattern>/upload.do</url-pattern> </servlet-mapping></web-app>FileServlet.java
import org.apache.commons.fileupload.FileItem;import org.apache.commons.fileupload.FileUploadException;import org.apache.commons.fileupload.ProgressListener;import org.apache.commons.fileupload.disk.DiskFileItemFactory;import org.apache.commons.fileupload.servlet.ServletFileUpload;import javax.servlet.ServletException;import javax.servlet.http.HttpServlet;import javax.servlet.http.HttpServletRequest;import javax.servlet.http.HttpServletResponse;import java.io.File;import java.io.FileOutputStream;import java.io.IOException;import java.io.InputStream;import java.util.List;import java.util.UUID;public class FileServlet extends HttpServlet { @Override protected void doPost(HttpServletRequest request, HttpServletResponse response) throws ServletException, IOException { //判断上传的表单是普通表单还是文件表单 if (!ServletFileUpload.isMultipartContent(request)) { //终止方法运行,说明这是一个普通的表单,直接返回 return; } //创建上传文件的保存路径,建议在web-inf路径下,安全,用户无法直接访问上传的文件 String uploadPath = this.getServletContext().getRealPath("/WEB-INF/upload"); File uploadFile = new File(uploadPath); if (!uploadFile.exists()) { uploadFile.mkdir(); } //临时文件 //临时路径,假如文件超过了预期的大小,我们就把他放到一个临时文件中,过几天自助删除,或者提醒用户转存为永久 String tempPath = this.getServletContext().getRealPath("/WEB-INF/temp"); File tempFile = new File(tempPath); if (!tempFile.exists()) { tempFile.mkdir(); } //处理上传的文件,一般都需要通过流来获取,我们可以使用request.getInputStream(),原生态的文件上传流获取,十分麻烦 //但是我们都是建议使用Apache的文件上传组件来实现,common-fileupload,它需要依赖于commons-io组件 //1.创建DiskFileItemFactory对象,处理文件路径上传或者大小限制的 DiskFileItemFactory factory = createDiskFileItemFactory(tempFile); //2.获取ServletFileUpload ServletFileUpload upload = creatServletFileUpload(factory); //3.处理上传的文件 String msg = uploadFile(request, uploadPath, upload); //转发 request.setAttribute("msg", msg); request.getRequestDispatcher("/info.jsp").forward(request, response); } private String uploadFile(HttpServletRequest request, String uploadPath, ServletFileUpload upload) throws IOException { String msg = ""; //把前端请求解析,封装成一个FileItem对象,需要从ServletFileUpload对象中获取 try { List<FileItem> fileItems = upload.parseRequest(request); for (FileItem fileItem : fileItems) { if (fileItem.isFormField()) { String fieldName = fileItem.getFieldName(); //处理乱码 String value = fileItem.getString("UTF-8"); System.out.println(fieldName + ":" + value); } else { //文件 //===========处理文件============ String uploadFileName = fileItem.getName(); System.out.println("uploadFileName:" + uploadFileName); //可能存在文件名不合法的情况 if (uploadFileName == null || "".equals(uploadFileName.trim())) { continue; } //获取上传的文件名 String fileName = uploadFileName.substring(uploadFileName.lastIndexOf("/") + 1); //获取文件的后缀名 String fileExtName = uploadFileName.substring(uploadFileName.lastIndexOf(".") + 1); //如果文件后缀名fileExtName不是我们所需要的,就直接return,不处理,告诉用户文件类型不对 //可以使用UUID(统一识别的通用码),保证文件名唯一 //UUID.randomUUID() 随机生一个唯一识别的通用码 //网络从传输中的东西,都需要序列化 //implements java.io.Serializable 标记接口 本地方法栈--》C++ String uuidPath = UUID.randomUUID().toString(); //===========存放地址============ String realPath = uploadPath + "/" + uuidPath; File realPathFile = new File(realPath); if (!realPathFile.exists()) { realPathFile.mkdir(); } //===========文件传输============ InputStream inputStream = fileItem.getInputStream(); FileOutputStream fos = new FileOutputStream(realPath + "/" + fileName); byte[] buffer = new byte[1024 * 1024]; int len = 0; while ((len = inputStream.read(buffer)) > 0) { fos.write(buffer, 0, len); } fos.close(); inputStream.close(); msg = "上传成功~"; } } } catch (FileUploadException e) { e.printStackTrace(); msg = "上传失败~"; } return msg; } private ServletFileUpload creatServletFileUpload(DiskFileItemFactory factory) { ServletFileUpload upload = new ServletFileUpload(factory); //监听文件上传进度 upload.setProgressListener(new ProgressListener() { / * * @param pBytesRead 已经读取到的文件大小 * @param pContentLength 文件总大小 * @param pItems */ @Override public void update(long pBytesRead, long pContentLength, int pItems) { System.out.println("总大小:" + pContentLength + "已经上传:" + pBytesRead); } }); //处理乱码问题 upload.setHeaderEncoding("UTF-8"); //设置单个文件的最大值 upload.setFileSizeMax(1020 * 1024 * 10); //设置总共能够上传文件的大小 //1020 = 1kb * 1024 = 1M * 10 = 10M upload.setSizeMax(1020 * 1024 * 10); return upload; } private DiskFileItemFactory createDiskFileItemFactory(File tempFile) { DiskFileItemFactory factory = new DiskFileItemFactory(); //通过这个工厂设置一个缓冲区,当上传的文件大于这个缓冲区的时候,将他放到临时文件中 //缓冲区大小为1M factory.setSizeThreshold(1024 * 1024); //临时目录的保存目录 factory.setRepository(tempFile); return factory; } @Override protected void doGet(HttpServletRequest request, HttpServletResponse response) throws ServletException, IOException { }}40.邮件发送原理及实现
-
需要导包
activation-1.1.1.jar
mail-1.4.7.jar
-
编写代码
import com.sun.mail.util.MailSSLSocketFactory;import javax.mail.Authenticator;import javax.mail.Message;import javax.mail.PasswordAuthentication;import javax.mail.Session;import javax.mail.Transport;import javax.mail.internet.InternetAddress;import javax.mail.internet.MimeMessage;import java.util.Properties;/ * @ClassName: MailDemo01 * @Description: 发送一个简单邮件 * @Author: zyy * @Date: 2022/02/26 16:06 * @Version: 1.0 */public class MailDemo01 { public static void main(String[] args) throws Exception { Properties properties = new Properties(); //设置QQ邮件服务器 properties.setProperty("mail.host", "smtp.qq.com"); //邮件发送协议 properties.setProperty("mail.transport.protocol", "smtp"); //需要验证用户名密码 properties.setProperty("mail.smtp.auth", "true"); //关于QQ邮箱,还需要设置SSL加密,加上以下以下代码即可 MailSSLSocketFactory sf = new MailSSLSocketFactory(); sf.setTrustAllHosts(true); properties.put("mail.smtp.ssl.enable", "true"); properties.put("mail.smtp.ssl.socketFactory", sf); //使用javaMail发送邮件的5个步骤 //1.创建定义整个应用程序所需的环境信息的Session对象 Session session = Session.getDefaultInstance(properties, new Authenticator() { @Override protected PasswordAuthentication getPasswordAuthentication() { //发件人邮件用户名、授权码 return new PasswordAuthentication("2550705615@qq.com", "授权码"); } }); //--开启debug模式,这样就可以查看到程序发送email的运行状态 session.setDebug(true); //2.通过session得到transport对象 Transport ts = session.getTransport(); //3.使用邮箱的用户名和授权码连上邮件服务器 ts.connect("smtp.qq.com", "2550705615@qq.com", "授权码"); //4.创建邮件 MimeMessage message = new MimeMessage(session); //--邮件的发件人 message.setFrom(new InternetAddress("2550705615@qq.com")); //--邮件的收件人 message.setRecipient(Message.RecipientType.TO, new InternetAddress("2550705615@qq.com")); //--邮件的标题 message.setSubject("hello"); //--邮件的文本内容 message.setContent("你好啊
", "text/html;charset=UTF-8"); //5.发送邮件 ts.sendMessage(message, message.getAllRecipients()); //6.关闭连接 ts.close(); }}import com.sun.mail.util.MailSSLSocketFactory;import javax.activation.DataHandler;import javax.activation.FileDataSource;import javax.mail.Authenticator;import javax.mail.Message;import javax.mail.PasswordAuthentication;import javax.mail.Session;import javax.mail.Transport;import javax.mail.internet.InternetAddress;import javax.mail.internet.MimeBodyPart;import javax.mail.internet.MimeMessage;import javax.mail.internet.MimeMultipart;import java.util.Properties;/ * @ClassName: MailDemo01 * @Description: 发送一个简单邮件 * @Author: zyy * @Date: 2022/02/26 16:06 * @Version: 1.0 */public class MailDemo02 { public static void main(String[] args) throws Exception { Properties properties = new Properties(); //设置QQ邮件服务器 properties.setProperty("mail.host", "smtp.qq.com"); //邮件发送协议 properties.setProperty("mail.transport.protocol", "smtp"); //需要验证用户名密码 properties.setProperty("mail.smtp.auth", "true"); //关于QQ邮箱,还需要设置SSL加密,加上以下以下代码即可 MailSSLSocketFactory sf = new MailSSLSocketFactory(); sf.setTrustAllHosts(true); properties.put("mail.smtp.ssl.enable", "true"); properties.put("mail.smtp.ssl.socketFactory", sf); //使用javaMail发送邮件的5个步骤 //1.创建定义整个应用程序所需的环境信息的Session对象 Session session = Session.getDefaultInstance(properties, new Authenticator() { @Override protected PasswordAuthentication getPasswordAuthentication() { //发件人邮件用户名、授权码 return new PasswordAuthentication("2550705615@qq.com", "授权码"); } }); //--开启debug模式,这样就可以查看到程序发送email的运行状态 session.setDebug(true); //2.通过session得到transport对象 Transport ts = session.getTransport(); //3.使用邮箱的用户名和授权码连上邮件服务器 ts.connect("smtp.qq.com", "2550705615@qq.com", "授权码"); //4.创建邮件 MimeMessage message = new MimeMessage(session); //--邮件的发件人 message.setFrom(new InternetAddress("2550705615@qq.com")); //--邮件的收件人 message.setRecipient(Message.RecipientType.TO, new InternetAddress("2550705615@qq.com")); //--邮件的标题 message.setSubject("hello"); //》》》》》》》》》》《《《《《《《《《 //图片 MimeBodyPart image = new MimeBodyPart(); //图片需要数据处理 DataHandler DataHandler dh = new DataHandler(new FileDataSource("src/resources/bz.jpg")); image.setDataHandler(dh); //给图片设置一个id image.setContentID("bz.jpg"); //文本 MimeBodyPart text = new MimeBodyPart(); text.setContent("这是一封邮件带图片 的邮件","text/html;charset=UTF-8"); //整合 MimeMultipart mm = new MimeMultipart(); mm.addBodyPart(text); mm.addBodyPart(image); mm.setSubType("related"); //放到消息中,保存修改 message.setContent(mm); message.saveChanges();; //》》》》》》》》》》《《《《《《《《《 //5.发送邮件 ts.sendMessage(message, message.getAllRecipients()); //6.关闭连接 ts.close(); }}
41.网站注册发送邮件实现
pom.xml
<project xmlns="http://maven.apache.org/POM/4.0.0" xmlns:xsi="http://www.w3.org/2001/XMLSchema-instance" xsi:schemaLocation="http://maven.apache.org/POM/4.0.0 http://maven.apache.org/xsd/maven-4.0.0.xsd"> <modelVersion>4.0.0</modelVersion> <groupId>com.zyy</groupId> <artifactId>webMail</artifactId> <version>1.0-SNAPSHOT</version> <dependencies> <dependency> <groupId>javax.servlet</groupId> <artifactId>javax.servlet-api</artifactId> <version>4.0.1</version> </dependency> <dependency> <groupId>javax.mail</groupId> <artifactId>mail</artifactId> <version>1.4.7</version> </dependency> <dependency> <groupId>javax.activation</groupId> <artifactId>activation</artifactId> <version>1.1.1</version> </dependency> </dependencies></project>index.jsp
    注册    用户名:
    密码:
    邮箱:
info.jsp
Title ${message}web.xml
<web-app xmlns="http://xmlns.jcp.org/xml/ns/javaee" xmlns:xsi="http://www.w3.org/2001/XMLSchema-instance" xsi:schemaLocation="http://xmlns.jcp.org/xml/ns/javaee http://xmlns.jcp.org/xml/ns/javaee/web-app_4_0.xsd" version="4.0"> <servlet-mapping> <servlet-name>registerServlet</servlet-name> <url-pattern>/registerServlet.do</url-pattern> </servlet-mapping> <servlet> <servlet-name>registerServlet</servlet-name> <servlet-class>com.zyy.servlet.RegisterServlet</servlet-class> </servlet></web-app>User.java
import java.io.Serializable;/ * @ClassName: User * @Description: TODO 类描述 * @Author: zyy * @Date: 2022/02/26 23:53 * @Version: 1.0 */public class User implements Serializable { private String userName; private String password; private String email; public User() { } public User(String userName, String password, String email) { this.userName = userName; this.password = password; this.email = email; } public String getUserName() { return userName; } public void setUserName(String userName) { this.userName = userName; } public String getPassword() { return password; } public void setPassword(String password) { this.password = password; } public String getEmail() { return email; } public void setEmail(String email) { this.email = email; } @Override public String toString() { return "User{" + "userName='" + userName + '\'' + ", password='" + password + '\'' + ", email='" + email + '\'' + '}'; }}RegisterServlet.java
import com.zyy.pojo.User;import com.zyy.util.SendMail;import javax.servlet.ServletException;import javax.servlet.http.HttpServlet;import javax.servlet.http.HttpServletRequest;import javax.servlet.http.HttpServletResponse;import java.io.IOException;public class RegisterServlet extends HttpServlet { @Override protected void doPost(HttpServletRequest request, HttpServletResponse response) throws ServletException, IOException { //接受用户请求,封装成对象 String userName = request.getParameter("userName"); String password = request.getParameter("password"); String email = request.getParameter("email"); User user = new User(userName, password, email); SendMail sendMail = new SendMail(user); sendMail.run(); request.setAttribute("message", "发送成功"); request.getRequestDispatcher("info.jsp").forward(request, response); } @Override protected void doGet(HttpServletRequest request, HttpServletResponse response) throws ServletException, IOException { }}SendMail.java
import com.sun.mail.util.MailSSLSocketFactory;import com.zyy.pojo.User;import javax.mail.Authenticator;import javax.mail.Message;import javax.mail.PasswordAuthentication;import javax.mail.Session;import javax.mail.Transport;import javax.mail.internet.InternetAddress;import javax.mail.internet.MimeMessage;import java.util.Properties;/ * @ClassName: SendMail * @Description: TODO 类描述 * @Author: zyy * @Date: 2022/02/26 23:59 * @Version: 1.0 */public class SendMail extends Thread { private String from = "2550705615@qq.com"; private String userName = "2550705615@qq.com"; private String password = "授权码"; private String host = "smtp.qq.com"; private User user; public SendMail(User user) { this.user = user; } @Override public void run() { try { Properties properties = new Properties(); //设置QQ邮件服务器 properties.setProperty("mail.host", host); //邮件发送协议 properties.setProperty("mail.transport.protocol", "smtp"); //需要验证用户名密码 properties.setProperty("mail.smtp.auth", "true"); //关于QQ邮箱,还需要设置SSL加密,加上以下以下代码即可 MailSSLSocketFactory sf = new MailSSLSocketFactory(); sf.setTrustAllHosts(true); properties.put("mail.smtp.ssl.enable", "true"); properties.put("mail.smtp.ssl.socketFactory", sf); //使用javaMail发送邮件的5个步骤 //1.创建定义整个应用程序所需的环境信息的Session对象 Session session = Session.getDefaultInstance(properties, new Authenticator() { @Override protected PasswordAuthentication getPasswordAuthentication() { //发件人邮件用户名、授权码 return new PasswordAuthentication(from, password); } }); //--开启debug模式,这样就可以查看到程序发送email的运行状态 session.setDebug(true); //2.通过session得到transport对象 Transport ts = session.getTransport(); //3.使用邮箱的用户名和授权码连上邮件服务器 ts.connect(host, from, password); //4.创建邮件 MimeMessage message = new MimeMessage(session); //--邮件的发件人 message.setFrom(new InternetAddress(userName)); //--邮件的收件人 message.setRecipient(Message.RecipientType.TO, new InternetAddress(userName)); //--邮件的标题 message.setSubject("hello"); //--邮件的文本内容 message.setContent("你好啊
", "text/html;charset=UTF-8"); //5.发送邮件 ts.sendMessage(message, message.getAllRecipients()); //6.关闭连接 ts.close(); } catch (Exception e) { e.printStackTrace(); } }}注意:spring框架可以用JavaMailSenderImpl实现

