springboot整合xxl-job分布式任务调度平台
springboot整合xxl-job分布式任务调度平台
-
-
- 1、下载xxl-job源码
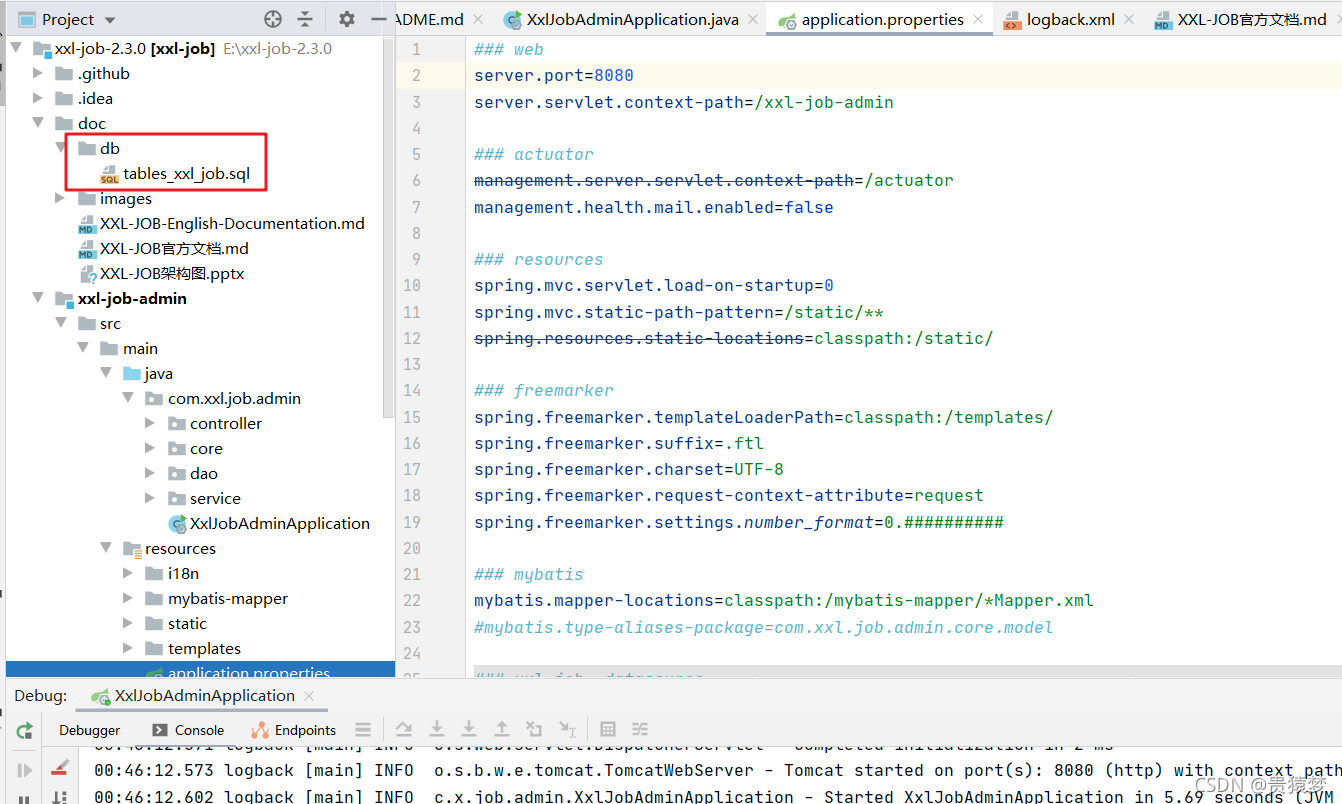
- 2、运行数据库文件、修改propertis为自己数据库
- 3、在自己工程新建xxl-job模块
- 4、引入xxl-job依赖,添加yml配置
- 5、xxl-job配置类
- 6、定时任务小测试
- 7、启动两个项目,xxl-job默认端口链接:
- 8、配置执行器
- 9、配置任务管理
-
1、下载xxl-job源码
链接: https://www.xuxueli.com/xxl-job/
XXL-JOB是一个分布式任务调度平台,其核心设计目标是开发迅速、学习简单、轻量级、易扩展、开箱即用。
2、运行数据库文件、修改propertis为自己数据库
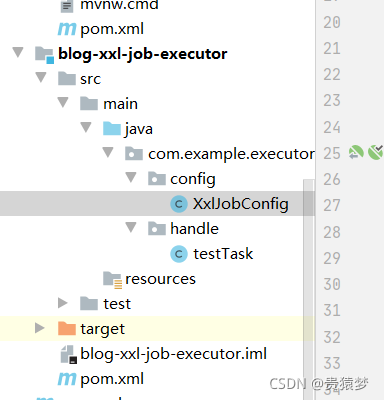
3、在自己工程新建xxl-job模块
因为xxl-job就是一个项目,我们连接连到他的地址,帮我们管理,
部署需要把xxl-job和我们工程一起部署
4、引入xxl-job依赖,添加yml配置
<dependency> <groupId>com.xuxueli</groupId> <artifactId>xxl-job-core</artifactId> <version>2.3.0</version> </dependency>xxl: job: accessToken: '' admin: addresses: http://127.0.0.1:8080/xxl-job-admin executor: address: '' appname: xxl-job-executor-sample ip: '' logpath: /data/applogs/xxl-job/jobhandler logretentiondays: 30 port: 9999 #xxl-job连接端口 或propertis 调度中心部署跟地址 [选填]:如调度中心集群部署存在多个地址则用逗号分隔。执行器将会使用该地址进行"执行器心跳注册"和"任务结果回调";为空则关闭自动注册; xxl.job.admin.addresses=http://127.0.0.1:8080/xxl-job-admin 执行器通讯TOKEN [选填]:非空时启用; xxl.job.accessToken= 执行器AppName [选填]:执行器心跳注册分组依据;为空则关闭自动注册 xxl.job.executor.appname=xxl-job-executor-sample 执行器注册 [选填]:优先使用该配置作为注册地址,为空时使用内嵌服务 ”IP:PORT“ 作为注册地址。从而更灵活的支持容器类型执行器动态IP和动态映射端口问题。 xxl.job.executor.address= 执行器IP [选填]:默认为空表示自动获取IP,多网卡时可手动设置指定IP,该IP不会绑定Host仅作为通讯实用;地址信息用于 "执行器注册" 和 "调度中心请求并触发任务"; xxl.job.executor.ip= 执行器端口号 [选填]:小于等于0则自动获取;默认端口为9999,单机部署多个执行器时,注意要配置不同执行器端口; xxl.job.executor.port=9999 执行器运行日志文件存储磁盘路径 [选填] :需要对该路径拥有读写权限;为空则使用默认路径; xxl.job.executor.logpath=/data/applogs/xxl-job/jobhandler 执行器日志文件保存天数 [选填] : 过期日志自动清理, 限制值大于等于3时生效; 否则, 如-1, 关闭自动清理功能; xxl.job.executor.logretentiondays=305、xxl-job配置类
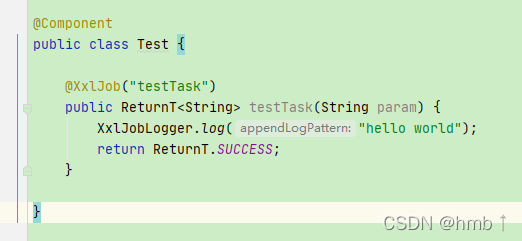
package com.example.executor.core.config;import com.xxl.job.core.executor.impl.XxlJobSpringExecutor;import org.springframework.beans.factory.annotation.Value;import org.springframework.context.annotation.Bean;import org.springframework.context.annotation.Configuration;@Configurationpublic class XxlJobConfig {@Value("${xxl.job.admin.addresses}")private String adminAddresses;@Value("${xxl.job.executor.appname}")private String appName;@Value("${xxl.job.executor.ip}")private String ip;@Value("${xxl.job.executor.port}")private int port;@Value("${xxl.job.executor.logretentiondays}")private int logRetentionDays;@Bean(initMethod = "start", destroyMethod = "destroy")public XxlJobSpringExecutor xxlJobExecutor() {XxlJobSpringExecutor xxlJobSpringExecutor = new XxlJobSpringExecutor();xxlJobSpringExecutor.setAdminAddresses(adminAddresses);xxlJobSpringExecutor.setAppname(appName);xxlJobSpringExecutor.setIp(ip);xxlJobSpringExecutor.setPort(port);xxlJobSpringExecutor.setLogRetentionDays(logRetentionDays);return xxlJobSpringExecutor;}}6、定时任务小测试
@Component记得要写
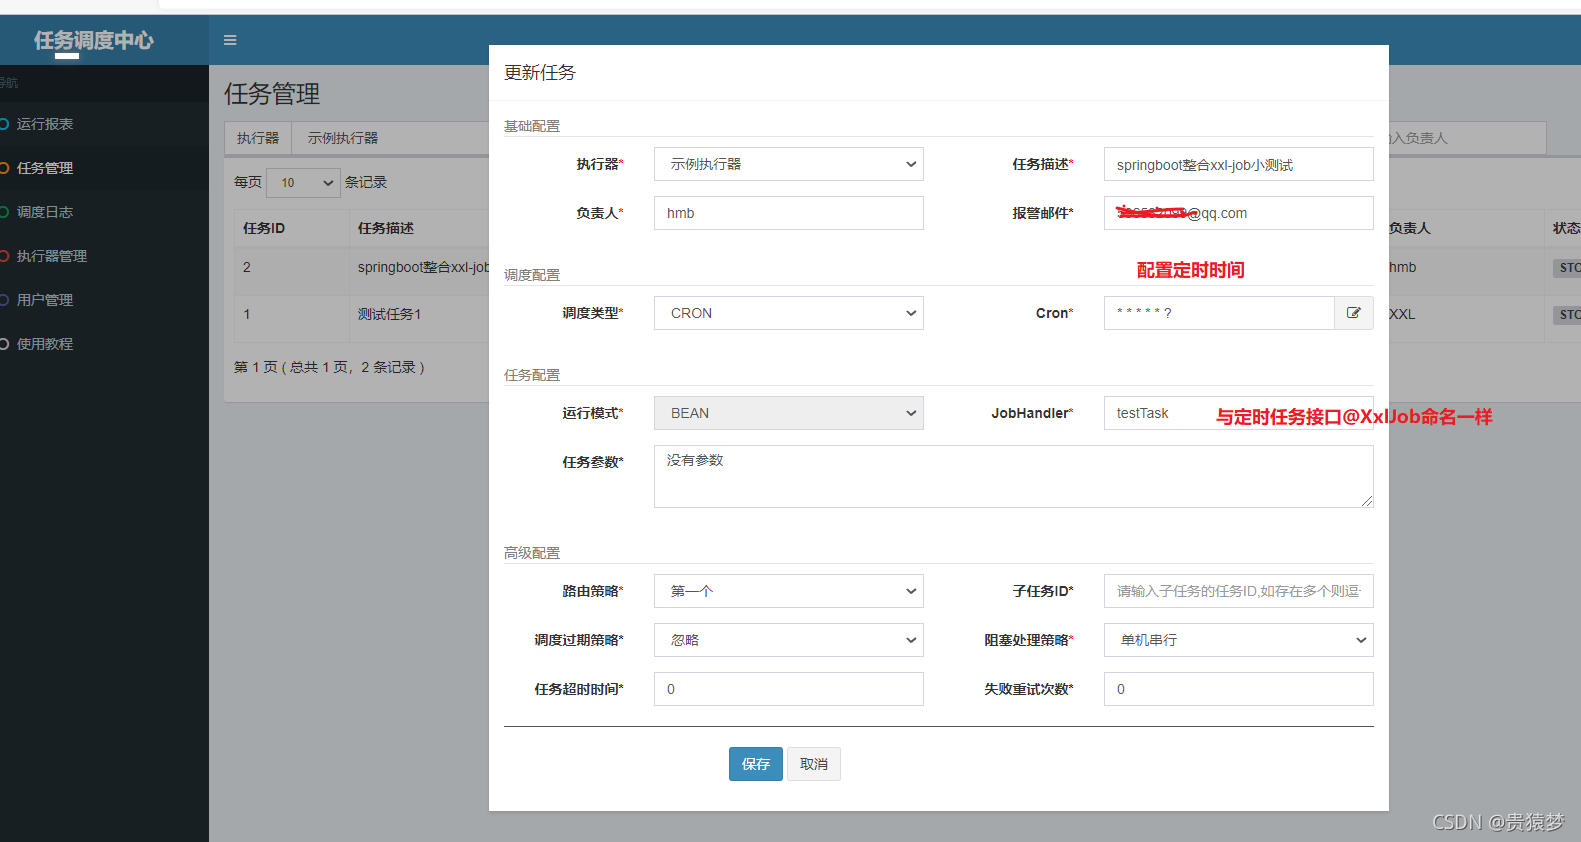
@XxlJob(“testTask”) 就是你任务管理配置的JobHandler
7、启动两个项目,xxl-job默认端口链接:
http://localhost:8080/xxl-job-admin
账号:admin
密码:123456
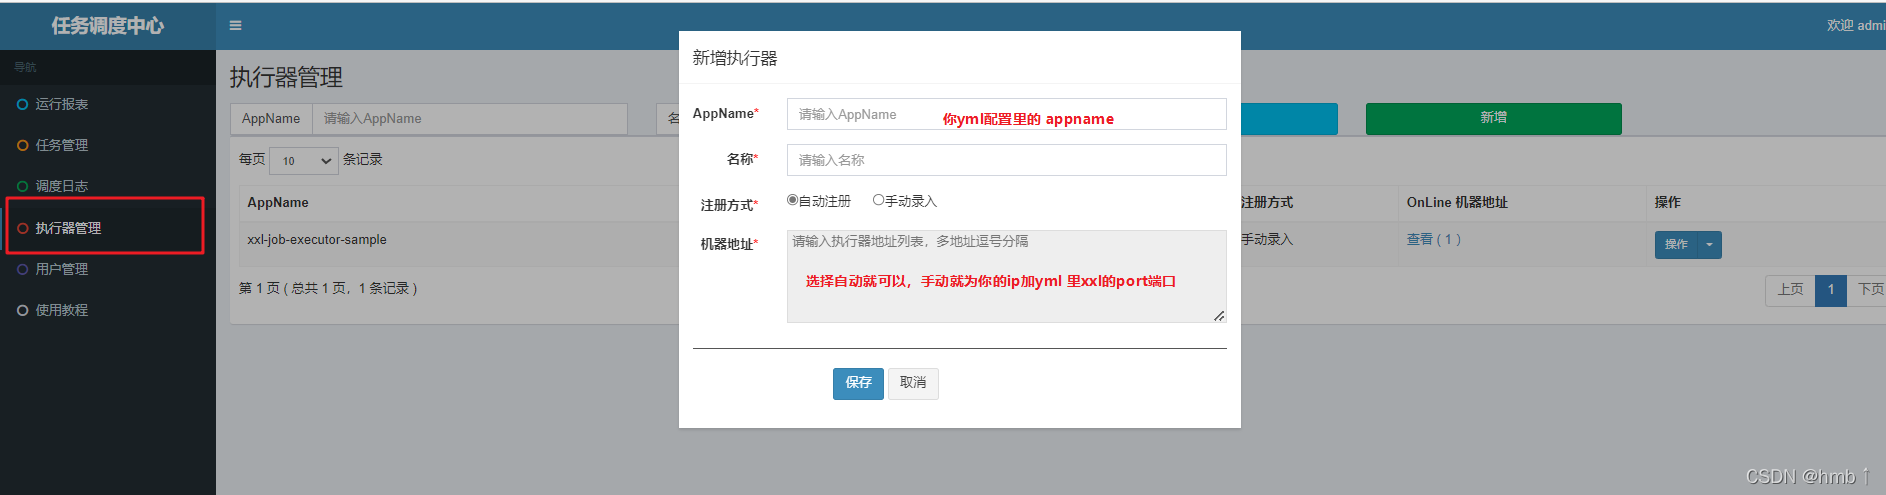
8、配置执行器
9、配置任务管理
此时你的定时器就会被xxl-job管理了

