WinFrom,C#.NET开源实战——用户登录界面
在本专栏的前面几篇博客中我们了解了WIn From的基本结构和基本原理,本篇博客我将开始介绍实战项目,今天就来开发第一个项目——用户登陆界面。
目录
直接上效果图
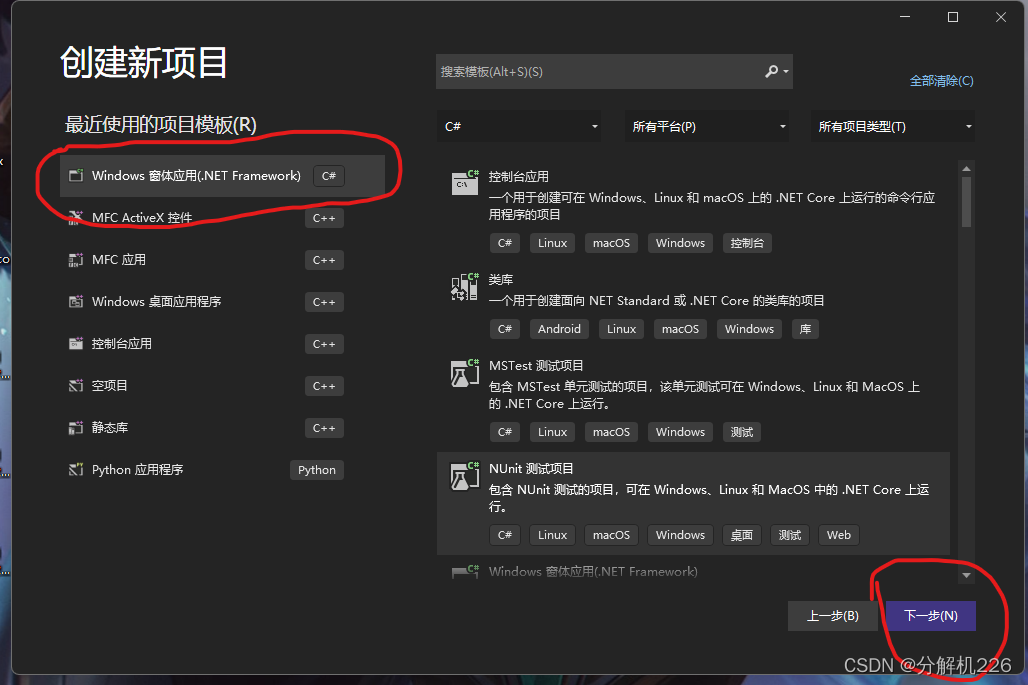
首先创建一个窗体项目,打开VS,新建项目
控件的添加:
控件属性设置:
该项目的窗体完整代码如下
直接上效果图

首先创建一个窗体项目,打开VS,新建项目
控件的添加:
点击“视图”—“工具箱”在控件工具箱中拖拽2个Button控件,2个label控件,2个Textbox控件到From1窗体中,根据效果图调整好每个控件的布局,大小

控件属性设置:
又击各个控件点击属性和窗体为其添加属性值(因为属性值比较多,大家可以仔细找一下)
| 窗体和控件 | 属性 | 属性值 |
| From1 | Text | QQ(可以是你想的任意字符串) |
| label1 | Text | 用户名 |
|
label2 |
Text | 密码 |
| textBox1 | Name | txtName |
| textBox2 | Name | txtpassword |
| UseSyteamPasswordChar | Ture | |
| button1 | Name | btnLogin |
| Text | 登录 | |
| button2 | Name | btnReset |
| Text | 重置 |
这个时候我们的窗体应用就有雏形了

窗体设计好了之后现在开始添加控件的事件:
双击登录按钮将以下代码添加到函数private void btnLogin_Click(object sender, EventArgs e)下
if (txtName.Text == "3139423588" && txtPassword.Text == "dbjl991029.") { MessageBox.Show("登录成功"); } else { MessageBox.Show("用户名或密码错误"); }//txtName.Text == 用来判断用户名的值 //txtPassword.Text == 判断密码的值双击重置按钮将以下代码添加到函数private void btnreset_Click(object sender, EventArgs e)下
foreach (Control item in this.Controls) { if (item is TextBox) { item.Text = ""; } }运行程序就完成了该项目的开发。
该项目的窗体完整代码如下
using System;using System.Collections.Generic;using System.ComponentModel;using System.Data;using System.Drawing;using System.Linq;using System.Text;using System.Threading.Tasks;using System.Windows.Forms;namespace 用户登录界面{ public partial class Form1 : Form { public Form1() { InitializeComponent(); } private void btnLogin_Click(object sender, EventArgs e) { if (txtName.Text == "3139423588" && txtPassword.Text == "dbjl991029.") { MessageBox.Show("登录成功"); } else { MessageBox.Show("用户名或密码错误"); } } private void btnreset_Click(object sender, EventArgs e) { foreach (Control item in this.Controls) { if (item is TextBox) { item.Text = ""; } } } private void Form1_Load(object sender, EventArgs e) { } }}
