爬虫初始教学总结
1.Requests库:
1.1 包含工具
1.1.1 status_code 状态码
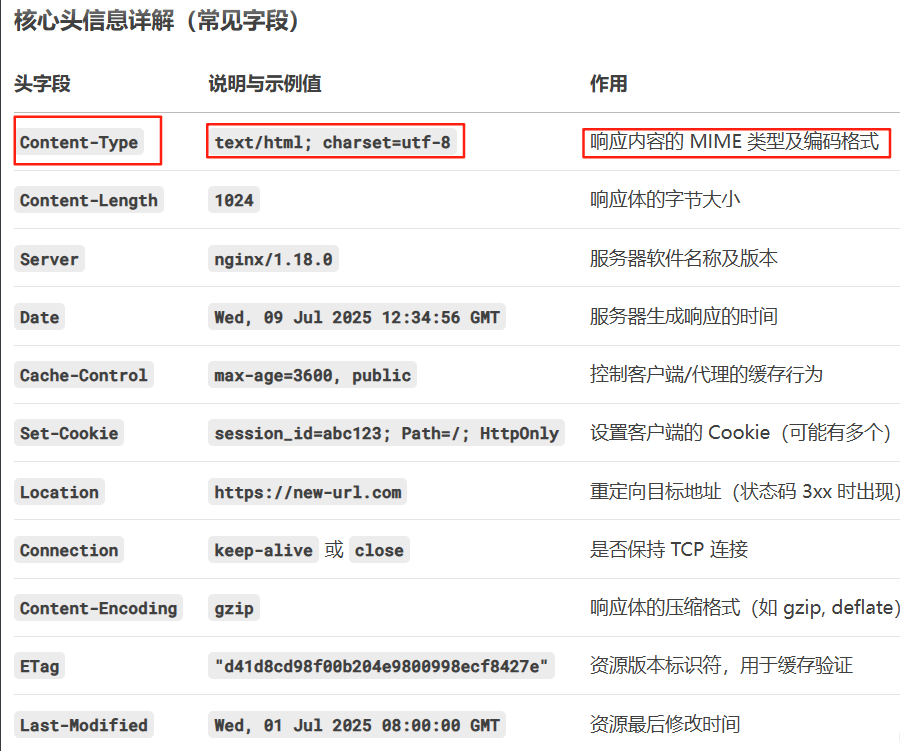
1.1.2headers 头信息
response.headers:是服务器返回的 HTTP 响应头信息,它包含了服务器对请求的元数据响应。这些信息描述了响应的特性、服务器状态、内容属性等
1.1.3encoding 指定编码
用处:如果先前在使用text报错,可使用encoding重新指定编码
常见编码 计算机只能处理数字01,如果要处理文本,就必须把文本转换为数字01二进制的格式,这种转换方式称为字符编码。常用的几种编码格式:
ASCI编码:为字母编码,不兼容汉字
Unicode编码:万国码,可以容纳所有文字和符号。2个字节表示汉字
UTF-8编码:为了节省字节数,在万国码基础上优化的编码,兼容ASCII编码,所以最流行
GB2312:我国早期自己制定的中文编码,世界范围不通用
1.1.4 content 转换为二进制数据
常用于图片处理,让爬出的数据以二进制的形式存在
1.1.5 text 以字符串输出
将爬出的信息完全转换为文本形式,在转换时候会
1.2比较
1.2.1
response.text

