SpringCloud微服务框架一套就够(上集)
个人简介
作者是一个来自河源的大三在校生,以下笔记都是作者自学之路的一些浅薄经验,如有错误请指正,将来会不断的完善笔记,帮助更多的Java爱好者入门。
文章目录
Spring Cloud Netflix
搭建提供者、消费者模块
1:创建一个空Maven项目,删除src目录
2:父POM
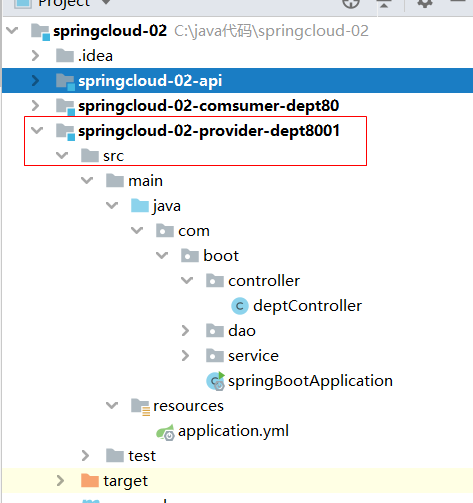
<packaging>pom</packaging> <properties> <spring.cloud-version>Hoxton.RELEASE</spring.cloud-version> <spring.boot-version>2.2.4.RELEASE</spring.boot-version> <project.build.sourceEncoding>UTF-8</project.build.sourceEncoding> <project.reporting.outputEncoding>UTF-8</project.reporting.outputEncoding> <java.version>1.8</java.version> <maven.compiler.source>10</maven.compiler.source> <maven.compiler.target>10</maven.compiler.target> <encoding>UTF-8</encoding> </properties> <dependencyManagement> <dependencies> <dependency> <groupId>org.springframework.cloud</groupId> <artifactId>spring-cloud-dependencies</artifactId> <version>${spring.cloud-version}</version> <type>pom</type> <scope>import</scope> </dependency> <dependency> <groupId>org.springframework.boot</groupId> <artifactId>spring-boot-dependencies</artifactId> <version>${spring.boot-version}</version> <type>pom</type> <scope>import</scope> </dependency> <dependency> <groupId>org.mybatis.spring.boot</groupId> <artifactId>mybatis-spring-boot-starter</artifactId> <version>1.3.1</version> </dependency> <dependency> <groupId>mysql</groupId> <artifactId>mysql-connector-java</artifactId> <version>5.1.47</version> </dependency> <dependency> <groupId>com.alibaba</groupId> <artifactId>druid</artifactId> <version>1.0.9</version> </dependency> </dependencies> </dependencyManagement> <build> <resources> <resource> <directory>src/main/java</directory> <includes> <include>/*.xml</include> </includes> <filtering>true</filtering> </resource> </resources> </build>3.创建一个子模块,作微服务的提供者,端口号为8001
里面代码如下。。。
deptController
@RestControllerpublic class deptController { private deptService deptService; @Autowired @Qualifier("deptServiceImpl") public void setDeptService(com.boot.service.deptService deptService) { this.deptService = deptService; } @GetMapping(path = "/queryAllDept") public List<dept> queryAllDept(){ return deptService.queryAllDept(); }}dao层。deptMapper
@Mapper //把这个Mapper接口变成可以注入的Bean,*一定要。@Repository //变成组件 *一定要public interface deptMapper { List<dept> queryAllDept(); }Mapper.xml
<mapper namespace="com.boot.dao.deptMapper"> <select id="queryAllDept" resultType="com.pojo.dept"> select deptid,deptName from dept; </select> </mapper>service层省略,和普通springBoot项目构建是一样的
application.yml(8001)
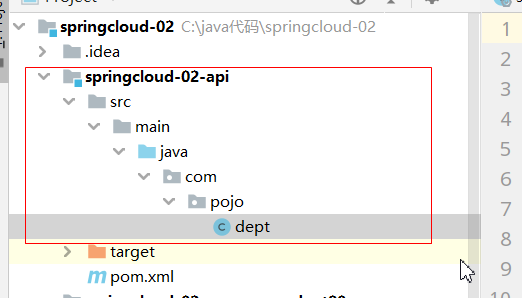
server: port: 8001spring: application:# 微服务名 name: provider_dept8001/8002 datasource: url: jdbc:mysql://localhost:3306/ssmrl?serverTimezone=UTC driver-class-name: com.mysql.jdbc.Driver username: root password: 18420163207 type: com.alibaba.druid.pool.DruidDataSource创建一个子模块(springcloud-02-api),专门放实体类
public class dept implements Serializable { private String deptid; private String deptName; public dept() { } public dept(String deptid, String deptName) { this.deptid = deptid; this.deptName = deptName; } public String getDeptid() { return deptid; } public void setDeptid(String deptid) { this.deptid = deptid; } public String getDeptName() { return deptName; } public void setDeptName(String deptName) { this.deptName = deptName; } @Override public String toString() { return "dept{" + "deptid='" + deptid + '\'' + ", deptName='" + deptName + '\'' + '}'; }}创建另外一个子模块,springcloud-02-provider-dept8002
把springcloud-02-provider-dept8001代码全部复制上去,修改配置文件application.yml(8002)
server: port: 8002spring: application:# 微服务名 name: provider_dept8001/8002 datasource: url: jdbc:mysql://localhost:3306/ssmrl?serverTimezone=UTC driver-class-name: com.mysql.jdbc.Driver username: root password: 18420163207 type: com.alibaba.druid.pool.DruidDataSource为什么我们要复制多一份微服务提供者代码?
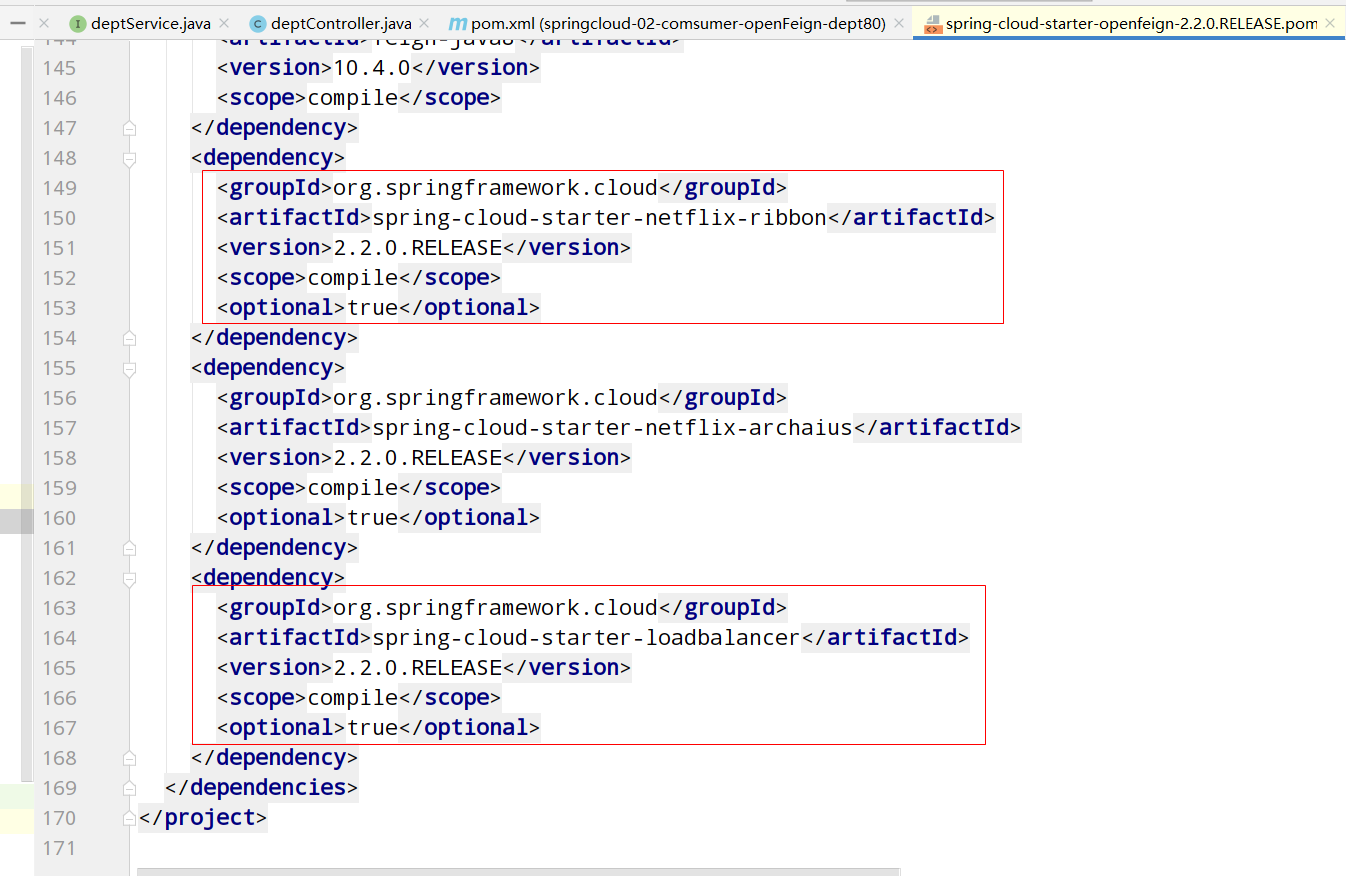
因为考虑到后面我们要使用负载均衡ribbon或者openFeign(不过底层也是ribbon)
4.创建子模块springcloud-02-comsumer-dept80
controller层:
@RestControllerpublic class deptController80 { @Autowired private RestTemplate restTemplate; private final String URL_DEPT="http://localhost:8001/"; @GetMapping("/comsumer/queryAllDept") public List<dept> queryAllDept80(){ List<dept> res = restTemplate.getForObject(URL_DEPT + "queryAllDept", List.class); return res; }}因为默认的RestTemplate没有放入IOC容器中(也就是没有Bean),我们需要手动的放入IOC容器
config层
@Configurationpublic class restTemplateConfig { @Bean public RestTemplate restTemplate(){ return new RestTemplate(); }}application.yml(80)
server: port: 80#spring: application: name: comsumer_dept80为什么微服务消费者层的端口是80,因为80端口可以省略不写,就比如我们打开百度,也是不需要写端口号的,因为微服务消费者层是给用户去访问的
消费者层只需要Controller去远程调用提供者的Controller方法即可,所以消费者层—不能—有dao,service层
这样提供者和消费者就搭建好了,接下来我们可以引入SpringCloud组件了。。。。。。。
引入注册中心SpringCloud Eureka
配置如下:
创建子模块springcloud-02-eureka7001(eureka注册中心服务端)
pom.xml
<dependencies> <dependency> <groupId>org.springframework.boot</groupId> <artifactId>spring-boot-starter-web</artifactId> </dependency> <dependency> <groupId>org.springframework.boot</groupId> <artifactId>spring-boot-starter-actuator</artifactId> </dependency> <dependency> <groupId>org.springframework.cloud</groupId> <artifactId>spring-cloud-starter-netflix-eureka-server</artifactId> </dependency> </dependencies>eureka模块主启动类
@SpringBootApplication@EnableEurekaServer //开启Eureka服务器public class SpringBootApplication7001 { public static void main(String[] args) { SpringApplication.run(SpringBootApplication7001.class,args); }}application.yml(7001)
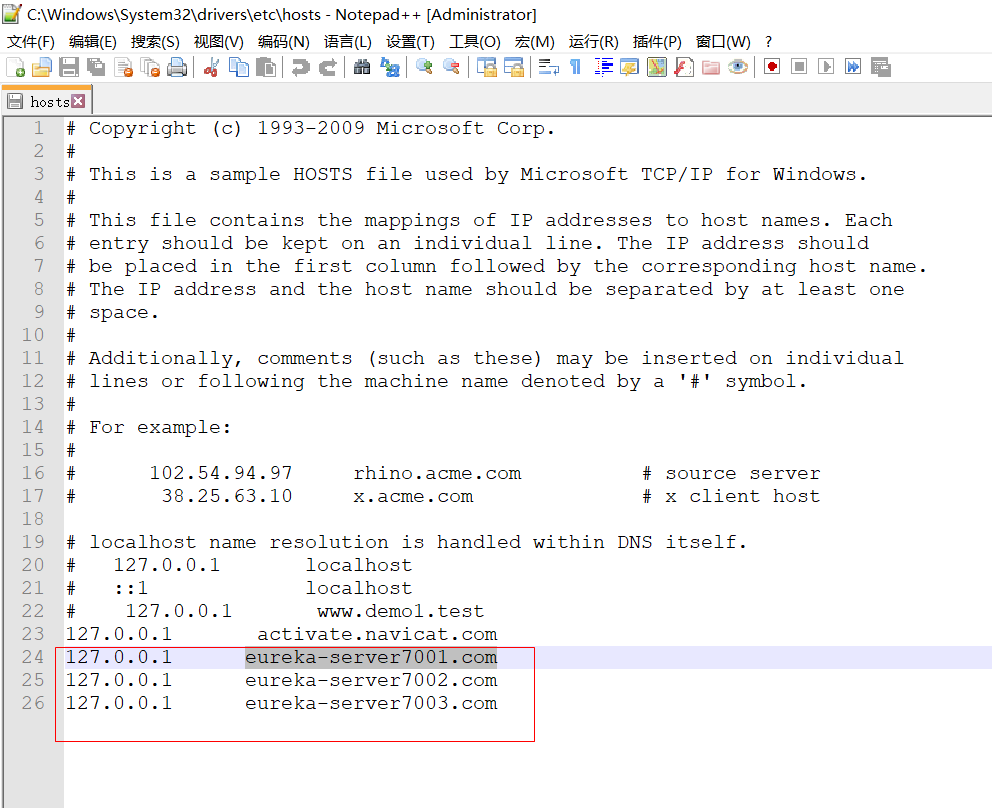
server: port: 7001# 配置eurekaeureka: instance: hostname: eureka-server7001.com client: register-with-eureka: false fetchRegistry: false service-url: defaultZone: http://${eureka.instance.hostname}:7001/eureka/给提供者springcloud-02-provider-dept8001和8002修改如下
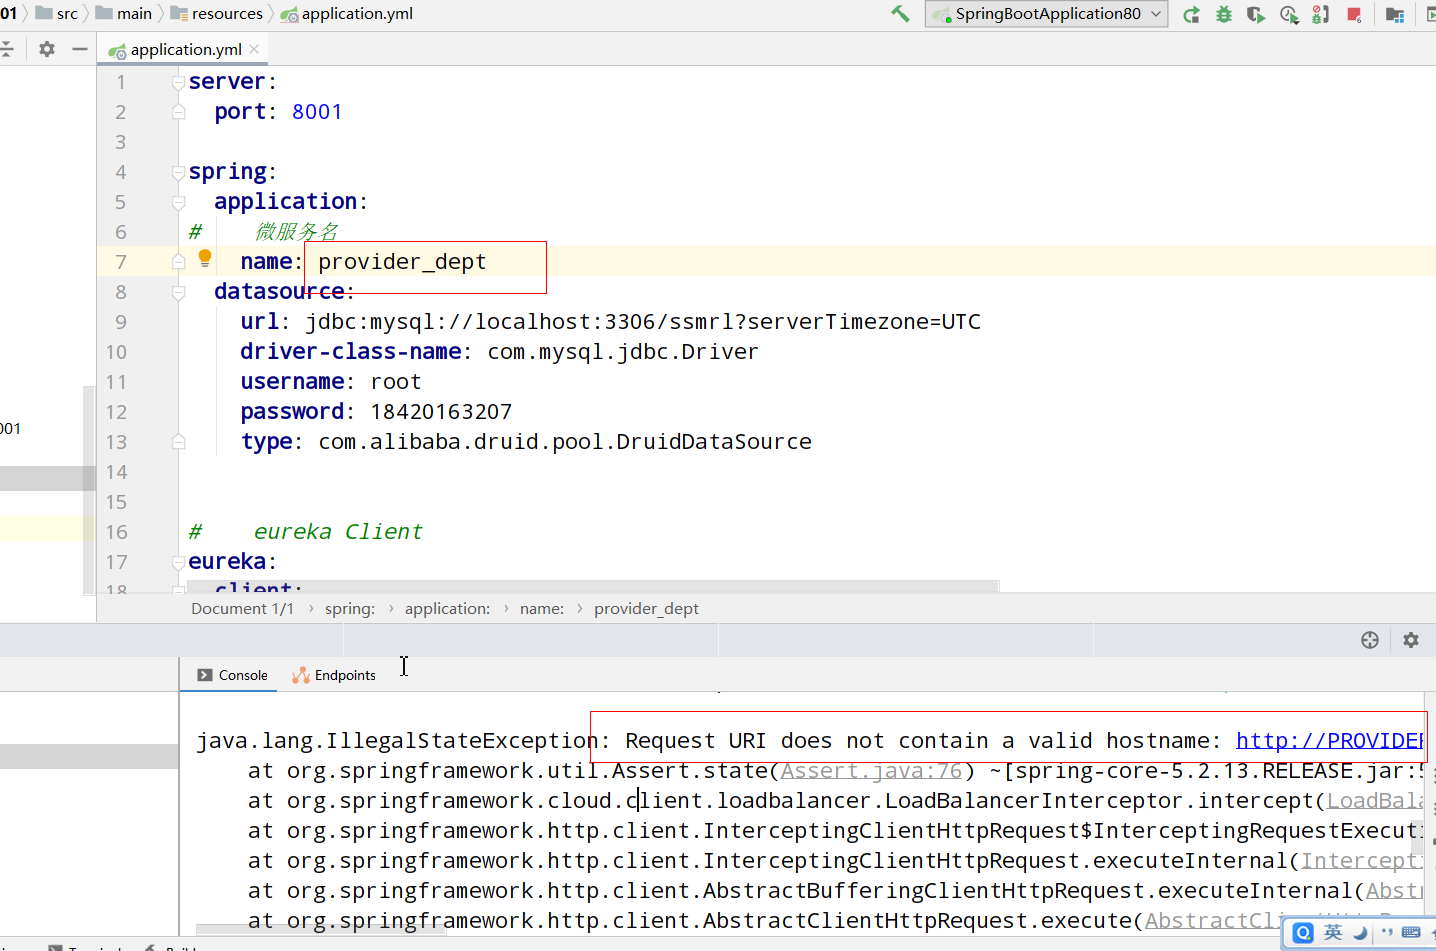
@SpringBootApplication@EnableEurekaClient //eureka客户端public class SpringBootApplication8001 { public static void main(String[] args) { SpringApplication.run(SpringBootApplication8001.class,args); }}server: port: 8001spring: application:# 微服务名 name: provider_dept datasource: url: jdbc:mysql://localhost:3306/ssmrl?serverTimezone=UTC driver-class-name: com.mysql.jdbc.Driver username: root password: 18420163207 type: com.alibaba.druid.pool.DruidDataSource# eureka Clienteureka: client: service-url: defaultZone: http://eureka-server7001.com:7001/eureka/ register-with-eureka: true fetch-registry: false instance: instance-id: eureka-client8001server: port: 8002spring: application:# 微服务名 name: provider_dept datasource: url: jdbc:mysql://localhost:3306/ssmrl?serverTimezone=UTC driver-class-name: com.mysql.jdbc.Driver username: root password: 18420163207 type: com.alibaba.druid.pool.DruidDataSource# eurekaeureka: client: fetch-registry: false register-with-eureka: true service-url: defaultZone: http://eureka-server7001.com:7001/eureka/ instance: prefer-ip-address: true instance-id: eureka-client8002Bug:引入Eureka后报错。
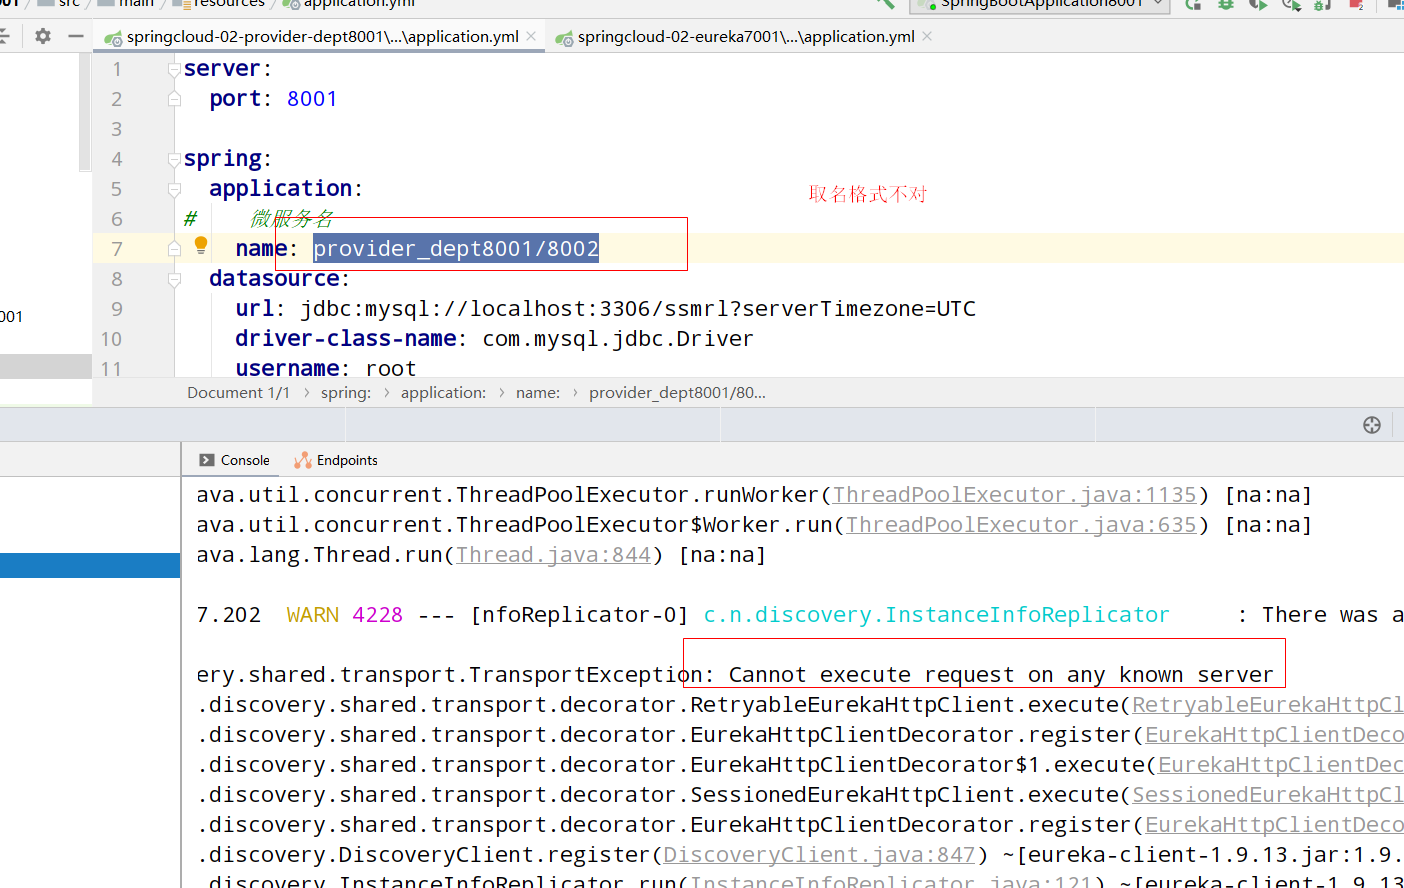
。。。取名要规范。。。
搭建Eureka集群
创建springcloud-02-eureka7002和7003两个模块
application.yml(7001)
server: port: 7001# 配置eurekaeureka: instance: hostname: eureka-server7001.com client: register-with-eureka: false fetchRegistry: false service-url: defaultZone: http://eureka-server7002.com:7002/eureka/,http://eureka-server7003.com:7003/eureka/ #集群版就修改这个。单机认自己,集群认其他 application.yml(7002)
server: port: 7002spring: application: name: eureka7002 #这里可有可无,除了微服务提供者。eureka: instance: hostname: eureka-server7002.com client: fetch-registry: false register-with-eureka: false service-url: defaultZone: http://eureka-server7001.com:7001/eureka/,http://eureka-server7003.com:7003/eureka/application.yml(7003)
server: port: 7003spring: application: name: eureka7003eureka: instance: hostname: eureka-server7003.com client: register-with-eureka: false fetch-registry: false service-url: defaultZone: http://eureka-server7001.com:7001/eureka/,http://eureka-server7002.com:7002/eureka/其实Eureka集群没啥变化,也就是修改了serviceUrl的defaultZone罢了。记住一句话,单机版认自己,集群版认其他
搭建提供者集群(为了负载均衡)
在8001和8002微服务中修改defaultZone。
eureka: client: service-url: defaultZone: http://eureka-server7001.com:7001/eureka/, http://eureka-server7002.com:7002/eureka/, http://eureka-server7003.com:7003/eureka/还有8001和8002的微服务名要一致(spring.application.name)
spring: application:# 微服务名 name: provider-dept #8001和8002要一致在springcloud-02-comsumer-dept80消费者层
@Configurationpublic class restTemplateConfig { @Bean @LoadBalanced //开启负载均衡 public RestTemplate restTemplate(){ return new RestTemplate(); }}@SpringBootApplication@EnableEurekaClientpublic class SpringBootApplication80 { public static void main(String[] args) { SpringApplication.run(SpringBootApplication80.class,args); }}用Ribbon+RestTemplate员工调用提供者的Controller方法
@RestControllerpublic class deptController80 { @Autowired private RestTemplate restTemplate; private final String URL_DEPT="http://PROVIDER-DEPT/"; //实现负载均衡用提供者微服务名代替IP:Port @GetMapping("/comsumer/queryAllDept") public List<dept> queryAllDept80(){ List<dept> res = restTemplate.getForObject(URL_DEPT + "queryAllDept", List.class); return res; }}application.yml(80)
server: port: 80#spring: application: name: comsumer-dept80eureka: client: fetch-registry: true register-with-eureka: false service-url: defaultZone: http://eureka-server7001.com:7001/eureka/,http://eureka-server7002.com:7002/eureka/,http://eureka-server7003.com:7003/eureka/Bug:ribbon+restTemplate报错
ribbon不支持微服务名有下划线(_),修改过来即可
spring: application:# 微服务名 name: provider-dept使用actuator功能
#暴露端点。使用actuator功能management: endpoints: web: exposure: include: "*"
Feign/OpenFeign
创建子模块springcloud-02-comsumer-openFeign-dept80
所需的依赖
<dependency> <groupId>org.springframework.cloud</groupId> <artifactId>spring-cloud-starter-openfeign</artifactId> </dependency>点进去看看
我们可以发现,Feign/openFeign的底层就是Ribbon,所以openFeign自带了负载均衡的功能,相较于Ribbon+restTemplate,openFeign无需手动的使用@LoadBalanced注解来开启负载均衡,而Ribbon需要在restTemplate的Bean上加这个注解才有负载均衡的能力
主启动类
@SpringBootApplication@EnableFeignClients //开启Feign的客户端支持public class springApplicationFeign80 { public static void main(String[] args) { SpringApplication.run(springApplicationFeign80.class,args); }}编写微服务接口
@Service@FeignClient("PROVIDER-DEPT") //标注这个微服务接口是属于“PROVIDER-DEPT”这个微服务的public interface deptService { //下面的代码直接从微服务提供者的controller复制过来即可 @GetMapping(path = "/queryAllDept") public List<dept> queryAllDept();}然后便是使用
@RestControllerpublic class deptController { @Autowired private deptService deptService; @RequestMapping("/feign/queryAllDept") public List<dept> queryAllDept(){ return deptService.queryAllDept(); }}Bug:OpenFeign调用失败报错405
错误类型:
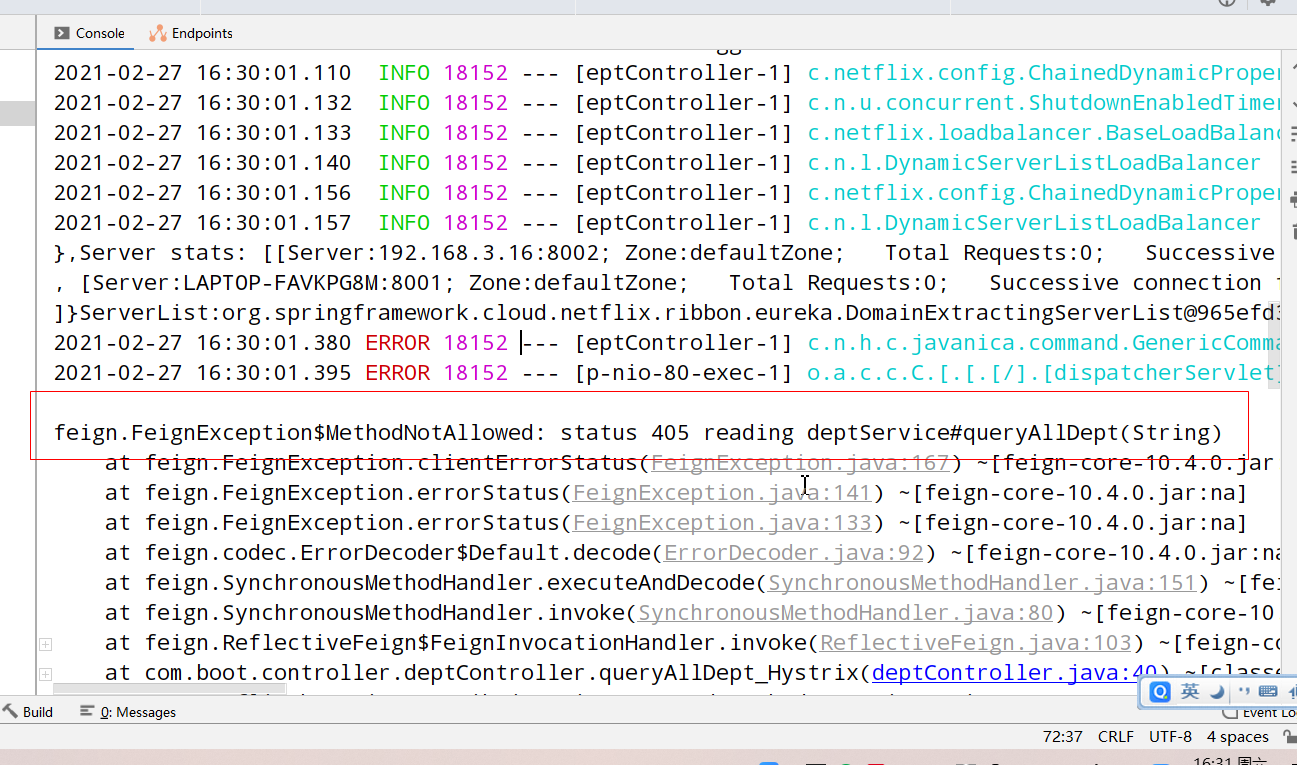
原因是我们没有在提供者加上@PathVariable或者@RequestParam注解
解决方法一:在提供者加上@RequestParam注解(每个提供者传入的参数都要加上这个注解)
@RestControllerpublic class deptController { private deptService deptService; @Value("${server.port}") private String port; @Autowired @Qualifier("deptServiceImpl") public void setDeptService(com.boot.service.deptService deptService) { this.deptService = deptService; } @GetMapping(path = "/queryAllDept") @HystrixCommand(fallbackMethod = "queryAllDept_Hystrix",commandProperties = { @HystrixProperty(name = "circuitBreaker.enabled",value = "true"), @HystrixProperty(name = "circuitBreaker.requestVolumeThreshold",value = "10"), @HystrixProperty(name = "circuitBreaker.sleepWindowInMilliseconds",value = "20000"),//注意这是毫秒。1秒=1000毫秒 @HystrixProperty(name = "circuitBreaker.errorThresholdPercentage",value = "50") }) public List<dept> queryAllDept(@RequestParam("id") String id){ List<dept> depts = deptService.queryAllDept(); depts.add(new dept("999",port)); if(Integer.parseInt(id)<0){ throw new RuntimeException(); } return depts; } / * 服务熔断 */ public List<dept> queryAllDept_Hystrix(@RequestParam("id") String id){ List<dept> depts = deptService.queryAllDept(); depts.add(new dept("1066","Break")); return depts; }}修改openFeign的微服务接口
@Service@FeignClient("PROVIDER-DEPT")public interface deptService { @GetMapping(path = "/queryAllDept") public List<dept> queryAllDept(@RequestParam("id") String id);}没有报错了!!!

解决方法二:在微服务提供者加上@PathVariable注解。。
省略!!!

