纯手写SpringFramework-第二代(原创)
个人简介
作者是一个来自河源的大三在校生,以下笔记都是作者自学之路的一些浅薄经验,如有错误请指正,将来会不断的完善笔记,帮助更多的Java爱好者入门。
文章目录
-
- 个人简介
- 纯手写SpringFramework-第二代
-
- 详细介绍Spring是什么?
- 我们手写的第二代Spring新增了什么?
- 手写Spring的生命周期
- 项目结构图
- 新增内容
-
- DI依赖注入
- Aware回调
- InitializingBean初始化bean
- PostProcessor机制
- cglib实现AOP
-
- cglib代理过程
- 手写Spring的源码
- 测试手写的Spring
- 手写SpringFramework第三代预告
纯手写SpringFramework-第二代
详细介绍Spring是什么?
- 再来介绍一下什么是Spring,一方面为了字数防止限流、另一方面是为了有的朋友直接看第二代手写SpringFramework而不知道什么是Spring。为了防止这种情况(之后的每一篇都要介绍一下伟大的Spring),当然这是题外话了=__=
Spring是一个开源框架,它由Rod Johnson创建。它是为了解决企业应用开发的复杂性而创建的。Spring使用基本的JavaBean来完成以前只可能由EJB完成的事情。然而,Spring的用途不仅限于服务器端的开发。从简单性、可测试性和松耦合的角度而言,任何Java应用都可以从Spring中受益。
Spring是一个轻量级的控制反转(IOC)和面向切面(AOP)的容器框架。
轻量——从大小与开销两方面而言Spring都是轻量的。完整的Spring框架可以在一个大小只有1MB多的JAR文件里发布。并且Spring所需的处理开销也是微不足道的。此外,Spring是非侵入式的:典型地,Spring应用中的对象不依赖于Spring的特定类。
控制反转——Spring通过一种称作控制反转(IoC)的技术促进了松耦合。当应用了IoC,一个对象依赖的其它对象会通过被动的方式传递进来,而不是这个对象自己创建或者查找依赖对象。你可以认为IoC与JNDI相反——不是对象从容器中查找依赖,而是容器在对象初始化时不等对象请求就主动将依赖传递给它。
面向切面——Spring提供了面向切面编程的丰富支持,允许通过分离应用的业务逻辑与系统级服务(例如审计(auditing)和事务(transaction)管理)进行内聚性的开发。应用对象只实现它们应该做的——完成业务逻辑——仅此而已。它们并不负责(甚至是意识)其它的系统级关注点,例如日志或事务支持。
容器——Spring包含并管理应用对象的配置和生命周期,在这个意义上它是一种容器,你可以配置你的每个bean如何被创建——基于一个可配置原型(prototype),你的bean可以创建一个单独的实例或者每次需要时都生成一个新的实例——以及它们是如何相互关联的。然而,Spring不应该被混同于传统的重量级的EJB容器,它们经常是庞大与笨重的,难以使用。
框架——Spring可以将简单的组件配置、组合成为复杂的应用。在Spring中,应用对象被声明式地组合,典型地是在一个XML文件里。Spring也提供了很多基础功能(事务管理、持久化框架集成等等),将应用逻辑的开发留给了你。
MVC——Spring的作用是整合,但不仅仅限于整合,Spring 框架可以被看做是一个企业解决方案级别的框架。客户端发送请求,服务器控制器(由DispatcherServlet实现的)完成请求的转发,控制器调用一个用于映射的类HandlerMapping,该类用于将请求映射到对应的处理器来处理请求。HandlerMapping 将请求映射到对应的处理器Controller(相当于Action)在Spring 当中如果写一些处理器组件,一般实现Controller 接口,在Controller 中就可以调用一些Service 或DAO 来进行数据操作 ModelAndView 用于存放从DAO 中取出的数据,还可以存放响应视图的一些数据。 如果想将处理结果返回给用户,那么在Spring 框架中还提供一个视图组件ViewResolver,该组件根据Controller 返回的标示,找到对应的视图,将响应response 返回给用户。
(以上摘选自:《百度百科》)
我们手写的第二代Spring新增了什么?
1:AOP面向切面
2:DI依赖注入
3:Aware回调机制
4:InitializingBean初始化bean
5:PostProcessor机制
手写Spring的生命周期
- 推断构造方法(这里我全都采用无參构造)->创建bean对象->DI依赖注入->Aware回调(BeanName和BeanFactory)->初始化前->初始化->初始化后(AOP)
- 我们的Spring并没有实现完整的生命周期,所以很多并不完善。后面应该不会继续完善这个生命周期。以上的生命周期均已实现。
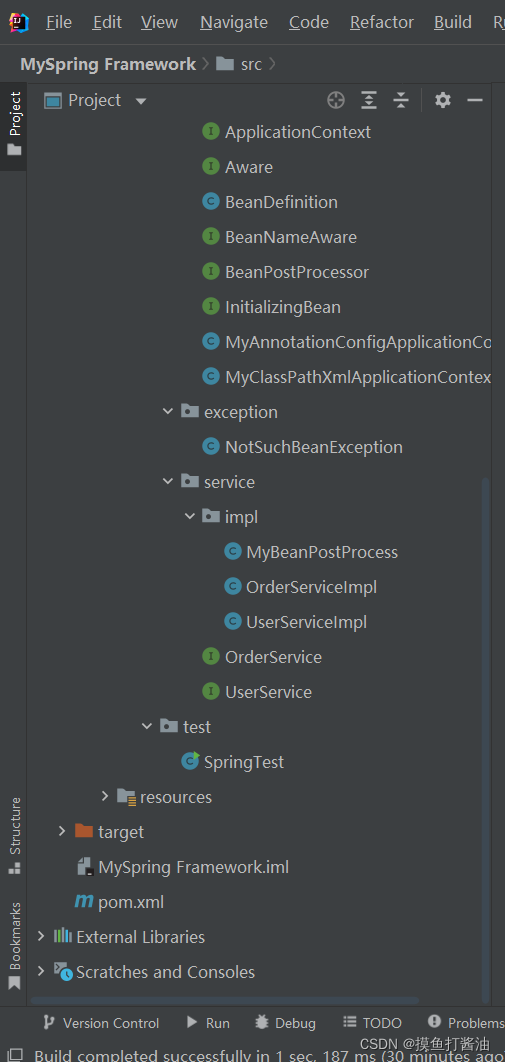
项目结构图

新增内容
- 直接上源码!!!
DI依赖注入
package com.springframework.core.service.impl;import com.springframework.core.annotation.MyAutowired;import com.springframework.core.annotation.MyComponent;import com.springframework.core.annotation.MyScope;import com.springframework.core.constant.ScopeType;import com.springframework.core.context.BeanNameAware;import com.springframework.core.context.InitializingBean;import com.springframework.core.service.UserService;@MyComponent //标记组件@MyScope(ScopeType.SINGLETON) //标记单例public class UserServiceImpl implements UserService, BeanNameAware, InitializingBean { @MyAutowired //自动注入,但是目前支持byName模式 private OrderServiceImpl orderServiceImpl; private String beanName; @Override public void getOrderService(){ System.out.println(orderServiceImpl); } @Override public void setBeanName(String beanName) { this.beanName=beanName; } @Override public void getBeanName() { System.out.println(beanName); } @Override public void afterPropertiesSet() { System.out.println("初始化Bean..."); }} Object obj = aClass.getConstructor().newInstance(); Field[] fields = aClass.getDeclaredFields(); for (Field field : fields) { if(field.isAnnotationPresent(MyAutowired.class)){ field.setAccessible(true); Object bean = getBean(field.getName()); field.set(obj,bean); } }- 1:可以看出我们先通过反射无參构造方法创建对象
- 2:然后获取全部字段属性,一定要这个getDeclaredFields,不然private获取不到
- 3:遍历Field数组,判断该字段是否有@MyAutowired注解
- 4:如果有这个注解的话则进行依赖注入
- 5:根据byName模式拿到bean并且注入
Aware回调
package com.springframework.core.context;/ * Aware回调接口的顶层接口 */public interface Aware {}package com.springframework.core.context;/ * BeanNameAware回调接口 * @author 游政杰 */public interface BeanNameAware extends Aware { void setBeanName(String beanName);} if(obj instanceof Aware){ if(obj instanceof BeanNameAware){ ((BeanNameAware) obj).setBeanName(beanName); } }使用回调必须实现Aware接口,比如BeanNameAware接口
- 1:首先我们要判断对象是否实现了Aware接口
- 2:其次因为Aware回调接口有很多,所以我们要具体判断是哪个Aware
- 3:使用instanceof关键字找到实现了BeanNameAware的类。
- 4:由我们的Spring去调用而不是用户去调用。(Spring的精髓之处,控制反转IOC)
- 5:可以更多自己想要的Aware,比如BeanFactoryAware,这里我们不做实现。
InitializingBean初始化bean
package com.springframework.core.context;/ * 初始化bean */public interface InitializingBean { void afterPropertiesSet();} if(obj instanceof InitializingBean){ ((InitializingBean) obj).afterPropertiesSet(); }- 初始化bean只需要实现InitializingBean接口即可。
- 至于做什么Spring不管,Spring只负责调用这个方法。
PostProcessor机制
bean的处理器
package com.springframework.core.context;/ * * @author 游政杰 * TODO: 2022/3/22 */public interface BeanPostProcessor { //bean的前置处理器 default Object postProcessorBeforeInitialization(Object bean,String beanName){ return bean; }; //bean的后置处理器 default Object postProcessorAfterInitialization(Object bean,String beanName){ return bean; }}- 实现BeanPostProcessor接口即可。
例如:
package com.springframework.core.service.impl;import com.springframework.core.annotation.MyComponent;import com.springframework.core.context.BeanPostProcessor;import com.springframework.core.context.InitializingBean;import net.sf.cglib.proxy.Enhancer;import net.sf.cglib.proxy.MethodInterceptor;import net.sf.cglib.proxy.MethodProxy;import java.lang.reflect.Method;@MyComponentpublic class MyBeanPostProcess implements BeanPostProcessor, InitializingBean { @Override public Object postProcessorBeforeInitialization(Object bean, String beanName) { System.out.println("postProcessorBeforeInitialization"); return bean; } @Override public Object postProcessorAfterInitialization(Object bean, String beanName) { System.out.println("postProcessorAfterInitialization"); return bean; } @Override public void afterPropertiesSet() { System.out.println("初始化bean"); }}看看我们手写的框架干了什么?
if(BeanPostProcessor.class.isAssignableFrom(aClass)){ BeanPostProcessor obj = (BeanPostProcessor) aClass.getConstructor().newInstance(); beanPostProcessors.add(obj); }- 我们可以看到判断完如果有MyComponent注解之后立马判断该类是否是BeanPostProcessor的实现类
- 然后创建这个对象
- 最后放入BeanPostProcessor集合中
//BeanPostProcessor集合 private CopyOnWriteArrayList<BeanPostProcessor> beanPostProcessors;//处理器-before //通过无參构造 Object obj = aClass.getConstructor().newInstance();if(beanPostProcessors!=null&&beanPostProcessors.size()>0){ for (BeanPostProcessor beanPostProcessor : beanPostProcessors) { obj = beanPostProcessor.postProcessorBeforeInitialization(obj, beanName); } } //初始化bean if(obj instanceof InitializingBean){ ((InitializingBean) obj).afterPropertiesSet(); } //处理器-after if(beanPostProcessors!=null&&beanPostProcessors.size()>0){ for (BeanPostProcessor beanPostProcessor : beanPostProcessors) { obj=beanPostProcessor.postProcessorAfterInitialization(obj,beanName); } }- 我们可以看出这个步骤是:bean的前置处理器->初始化bean->bean的后置处理器
cglib实现AOP
package com.springframework.core.service.impl;import com.springframework.core.annotation.MyComponent;import com.springframework.core.context.BeanPostProcessor;import com.springframework.core.context.InitializingBean;import net.sf.cglib.proxy.Enhancer;import net.sf.cglib.proxy.MethodInterceptor;import net.sf.cglib.proxy.MethodProxy;import java.lang.reflect.Method;@MyComponentpublic class MyBeanPostProcess implements BeanPostProcessor, InitializingBean { @Override public Object postProcessorBeforeInitialization(Object bean, String beanName) { System.out.println("postProcessorBeforeInitialization"); return bean; } @Override public Object postProcessorAfterInitialization(Object bean, String beanName) { System.out.println("postProcessorAfterInitialization"); //cglib实现AOP if(beanName.equals("userServiceImpl")){ Enhancer enhancer=new Enhancer(); enhancer.setSuperclass(UserServiceImpl.class); enhancer.setCallback(new MethodInterceptor() { @Override public Object intercept(Object o, Method method, Object[] objects, MethodProxy methodProxy) throws Throwable { //指定切入的方法 if(method.getName().equals("getBeanName")){ System.out.println("aop之前"); Object invoke = method.invoke(bean, objects); //执行被代理的方法 System.out.println("aop之后"); return invoke; } return method.invoke(bean,objects); } }); Object proxyObject = enhancer.create(); return proxyObject; //返回代理对象 } return bean; } @Override public void afterPropertiesSet() { System.out.println("初始化bean"); }}-
AOP的底层就是动态代理,由于JDK动态代理必须实现接口,所以一般来说大部分框架(例如:Spring)都不会采用JDK动态代理,而是用一个更加强大的cglib动态代理,我们也不例外,使用cglib动态代理可以避免强制统一接口。
-
我们在bean的后置处理器实现AOP,因为我们代理的是整个类,故调用类的所有方法都会进入这里,所以我们加了一个判断条件:
-
先判断beanName是否是我们要指定代理的那个类的bean(找到代理类)
-
再通过method.getName()找到代理类的代理方法。
cglib代理过程
要求:代理UserServiceImpl类的getBeanName方法
伪代码:
- 首先会生成一个代理类(当然这个类名没有这么简单),并且继承(extends)被代理类
- 然后会重写父类的方法。(这个重写后的方法就是代理方法)
- 生成被代理的类的属性,并且属性名为target
- 最后有这个target属性去调用父类的同名方法(也就是被代理方法)
class UserServiceImplProxy extends UserServiceImpl{ UserServiceImpl target; @Override public void getBeanName(){ //代理逻辑 xxx target.getBeanName(); xxx //代理逻辑 } }手写Spring的源码
package com.springframework.core.context;import com.springframework.core.annotation.MyAutowired;import com.springframework.core.annotation.MyComponent;import com.springframework.core.annotation.MyComponentScan;import com.springframework.core.annotation.MyScope;import com.springframework.core.constant.ScopeType;import com.springframework.core.exception.NotSuchBeanException;import java.beans.Introspector;import java.io.File;import java.lang.reflect.Field;import java.lang.reflect.InvocationTargetException;import java.net.URISyntaxException;import java.util.Objects;import java.util.concurrent.ConcurrentHashMap;import java.util.concurrent.CopyOnWriteArrayList;/ * 纯手写一个Spring框架(基于注解模式) * @author 游政杰 * TODO: 2022/3/19 */public class MyAnnotationConfigApplicationContext implements ApplicationContext { //bean定义池 private ConcurrentHashMap<String,BeanDefinition> beanDefinitionMap; //单例池 private ConcurrentHashMap<String,Object> singletonMap; //BeanPostProcessor集合 private CopyOnWriteArrayList<BeanPostProcessor> beanPostProcessors; //私有构造器 private MyAnnotationConfigApplicationContext(){ } public MyAnnotationConfigApplicationContext(final Class<?> configClass) { try { //判断扫描类上是否有MyComponentScan注解存在 if (configClass.isAnnotationPresent(MyComponentScan.class)) { this.beanDefinitionMap=new ConcurrentHashMap<>(); this.singletonMap=new ConcurrentHashMap<>(); this.beanPostProcessors=new CopyOnWriteArrayList<>(); //获取MyComponentScan注解对象 MyComponentScan componentScan = configClass.getAnnotation(MyComponentScan.class); //获取MyComponentScan注解的值 // com.springframework.core.service String scc = componentScan.value(); // 转换成 com/springframework/core/service String sc = scc.replace(".", "/"); ClassLoader classLoader = this.getClass().getClassLoader(); //这种写法可以防止Java把空格路径转换成%20而导致找不到文件夹 String uri = Objects.requireNonNull(classLoader.getResource(sc)).toURI().getPath(); String scp = uri.substring(1, uri.length()); File dir = new File(scp); //如果指定的包路径正确,则扫描这个包的class文件,然后加载到beanDefinitionMap中 if (dir.isDirectory()) { File[] files = dir.listFiles(); if(files!=null&&files.length>0){ for (File file : files) {//暂时不做这个处理。这个可以递归实现//if(file.isDirectory()){////}//我们只找后缀名为.class的文件if(file.getName().endsWith(".class")){ //取类名 String cn = file.getName().substring(0,file.getName().length()-6); //全类名 String className=scc+"."+cn; //通过classloader类加载器去加载类,获取类实例 Class<?> aClass = classLoader.loadClass(className); //如果不是接口并且还有MyComponent注解就把这个bean放到beanDefinitionMap中 if(!aClass.isInterface()&&aClass.isAnnotationPresent(MyComponent.class)) { //判断完如果有MyComponent注解之后立马判断该类是否是BeanPostProcessor的实现类 if(BeanPostProcessor.class.isAssignableFrom(aClass)){ //然后创建这个对象 BeanPostProcessor obj = (BeanPostProcessor) aClass.getConstructor().newInstance(); //放入BeanPostProcessor集合中 beanPostProcessors.add(obj); } BeanDefinition beanDefinition = new BeanDefinition(); //获取类名 String simpleName = aClass.getSimpleName(); //把类名转换成bean名,也就是首字母小写的name String beanName = Introspector.decapitalize(simpleName); //beanDefinition的class类型 beanDefinition.setType(aClass); //是单例还是多例 //判断是否有MyScope注解 if(aClass.isAnnotationPresent(MyScope.class)){ //如果有,则获取值 MyScope myScope = aClass.getAnnotation(MyScope.class); //取注解值 String sv = myScope.value(); //为null则报错 sv = Objects.requireNonNull(sv); //如果是多例 if(sv.equals(ScopeType.PROTOTYPE)){ //设置为多例即可 beanDefinition.setScope(ScopeType.PROTOTYPE); }else {//如果写了单例或者没写、又或者写错了全都作为单例 //设置成单例即可 beanDefinition.setScope(ScopeType.SINGLETON); } } //不管是单例还是多例都放到beanDefinitionMap中,等待下面的处理 beanDefinitionMap.put(beanName,beanDefinition); }} } } } //到这里就扫描结束了,beanDefinitionMap已经存储了所有的组件信息 /* * 找出单例并把它生成bean对象放入单例池中 */ ConcurrentHashMap.KeySetView<String, BeanDefinition> beanDefinitionKeySetView = beanDefinitionMap.keySet(); //遍历出beanName for (String beanName : beanDefinitionKeySetView) { BeanDefinition beanDefinition = beanDefinitionMap.get(beanName); String scope = beanDefinition.getScope(); if(scope!=null&&scope.equals(ScopeType.PROTOTYPE)){ //多例则不管它 //不做任何事 }else { //如果是单例的,我们就要去单例池找一下,看看有没有 if(!singletonMap.containsKey(beanName)){//如果单例池没有这个对象就要创建了//创建对象Object obj = this.createBean(beanName);//放入单例池singletonMap.put(beanName,obj); } } } }else { throw new RuntimeException("指定配置类上没有MyComponentScan注解存在"); } }catch (URISyntaxException e1){ e1.printStackTrace(); } catch (ClassNotFoundException e) { e.printStackTrace(); } catch (InvocationTargetException e) { e.printStackTrace(); } catch (InstantiationException e) { e.printStackTrace(); } catch (IllegalAccessException e) { e.printStackTrace(); } catch (NoSuchMethodException e) { e.printStackTrace(); } } / * 创建bean对象 * bean的生命周期:推断构造方法(这里我全都采用无參构造)->创建bean对象->DI依赖注入->Aware回调(BeanName和BeanFactory)->初始化前->初始化->初始化后(AOP) * @param beanName * @return */ private Object createBean(String beanName) { BeanDefinition beanDefinition = beanDefinitionMap.get(beanName); //由于对象的BeanDefinition全都在加载阶段放到beanDefinitionMap中了,如果通过beanName拿不到说明根本就没有这个bean if(beanDefinition==null){ throw new NotSuchBeanException("beanDefinitionMap没有该bean的定义"); }else { Class<?> aClass = beanDefinition.getType(); try { //通过无參构造 Object obj = aClass.getConstructor().newInstance(); //DI依赖注入 //获取全部字段属性----一定要这个getDeclaredFields,不然private获取不到 Field[] fields = aClass.getDeclaredFields(); for (Field field : fields) { //判断该字段是否有@MyAutowired注解 if(field.isAnnotationPresent(MyAutowired.class)){ //如果有这个注解的话则进行依赖注入 //进行爆破,使我们可以操作private属性 field.setAccessible(true); //根据byName模式拿到bean并且注入 Object bean = getBean(field.getName()); //DI依赖注入 field.set(obj,bean); } } //判断对象是否实现了Aware接口 if(obj instanceof Aware){ //因为Aware回调接口有很多,所以我们要具体判断是哪个Aware //先找BeanNameAware if(obj instanceof BeanNameAware){ //具体干什么Spring不管,只负责调用 ((BeanNameAware) obj).setBeanName(beanName); } //....可以更多自己想要的Aware,比如BeanFactoryAware } //处理器-before if(beanPostProcessors!=null&&beanPostProcessors.size()>0){ for (BeanPostProcessor beanPostProcessor : beanPostProcessors) { obj = beanPostProcessor.postProcessorBeforeInitialization(obj, beanName); } } //初始化bean if(obj instanceof InitializingBean){ ((InitializingBean) obj).afterPropertiesSet(); } //处理器-after if(beanPostProcessors!=null&&beanPostProcessors.size()>0){ for (BeanPostProcessor beanPostProcessor : beanPostProcessors) { obj=beanPostProcessor.postProcessorAfterInitialization(obj,beanName); } } return obj; } catch (InstantiationException e) { e.printStackTrace(); } catch (IllegalAccessException e) { e.printStackTrace(); } catch (InvocationTargetException e) { e.printStackTrace(); } catch (NoSuchMethodException e) { e.printStackTrace(); } return null; } } @Override public Object getBean(String beanName) { BeanDefinition beanDefinition = beanDefinitionMap.get(beanName); if(beanDefinition==null){// throw new NotSuchBeanException("beanDefinitionMap没有该bean的定义"); return null; }else { //判断是单例还是多例 String scope = beanDefinition.getScope(); //如果是单例的话 if(scope!=null&&scope.equals(ScopeType.PROTOTYPE)){ //多例则每次都创建对象 Object obj = this.createBean(beanName); return obj; }else { //如果是单例的,我们就要去单例池找一下,看看有没有 //如果有的话就返回这个单例池对象即可 if(singletonMap.containsKey(beanName)){ //返回bean对象 return singletonMap.get(beanName); }else { //如果单例池没有这个对象就要创建了 //创建对象 Object obj = this.createBean(beanName); //放入单例池 singletonMap.put(beanName,obj); return obj; } } } }}测试手写的Spring
ApplicationContext applicationContext=new MyAnnotationConfigApplicationContext(SpringApplicationConfig.class); System.out.println(applicationContext.getBean("userServiceImpl")); System.out.println(applicationContext.getBean("userServiceImpl")); System.out.println(applicationContext.getBean("userServiceImpl")); System.out.println(applicationContext.getBean("userServiceImpl")); System.out.println(applicationContext.getBean("userServiceImpl")); UserService userService = (UserService) applicationContext.getBean("userServiceImpl"); userService.getOrderService(); userService.getBeanName();输出结果
postProcessorBeforeInitializationpostProcessorAfterInitializationpostProcessorBeforeInitialization初始化Bean...postProcessorAfterInitializationWARNING: An illegal reflective access operation has occurredWARNING: Illegal reflective access by net.sf.cglib.core.ReflectUtils$1 (file:/D:/maven-3.6.3/apache-maven-3.6.3/bin/repository/cglib/cglib/3.3.0/cglib-3.3.0.jar) to method java.lang.ClassLoader.defineClass(java.lang.String,byte[],int,int,java.security.ProtectionDomain)WARNING: Please consider reporting this to the maintainers of net.sf.cglib.core.ReflectUtils$1WARNING: Use --illegal-access=warn to enable warnings of further illegal reflective access operationsWARNING: All illegal access operations will be denied in a future releasepostProcessorBeforeInitialization初始化beanpostProcessorAfterInitializationcom.springframework.core.service.impl.UserServiceImpl@2db7a79bcom.springframework.core.service.impl.UserServiceImpl@2db7a79bcom.springframework.core.service.impl.UserServiceImpl@2db7a79bcom.springframework.core.service.impl.UserServiceImpl@2db7a79bcom.springframework.core.service.impl.UserServiceImpl@2db7a79bOrderServiceImpl{aByte=0, aShort=0, aInt=0, aLong=0, aDouble=0.0, aFloat=0.0, aChar= , aBoolean=false, aString='null'}aop之前userServiceImplaop之后- 我们可以看到已经成功了!
手写SpringFramework第三代预告
- 我打算直接手写ClassPathXmlApplicationContext的IOC部分,前两代提供MyAnnotationConfigApplicationContext实现类主要是实现了注解Spring的版本,后面主要手写的是Spring基于XML文件的版本,敬请期待!!!

