鸿蒙5.0开发进阶:NDK代码开发-包管理(NativeBundle开发指南)_鸿蒙系统5.0开发
往期鸿蒙5.0全套实战文章必看:(文中附带全栈鸿蒙5.0学习资料)
-
鸿蒙开发核心知识点,看这篇文章就够了
-
最新版!鸿蒙HarmonyOS Next应用开发实战学习路线
-
鸿蒙HarmonyOS NEXT开发技术最全学习路线指南
-
鸿蒙应用开发实战项目,看这一篇文章就够了(部分项目附源码)
NativeBundle开发
场景介绍
开发者可以通过本指导了解在HarmonyOS应用中,如何使用Native Bundle接口获取应用自身相关信息。
接口说明
开发步骤
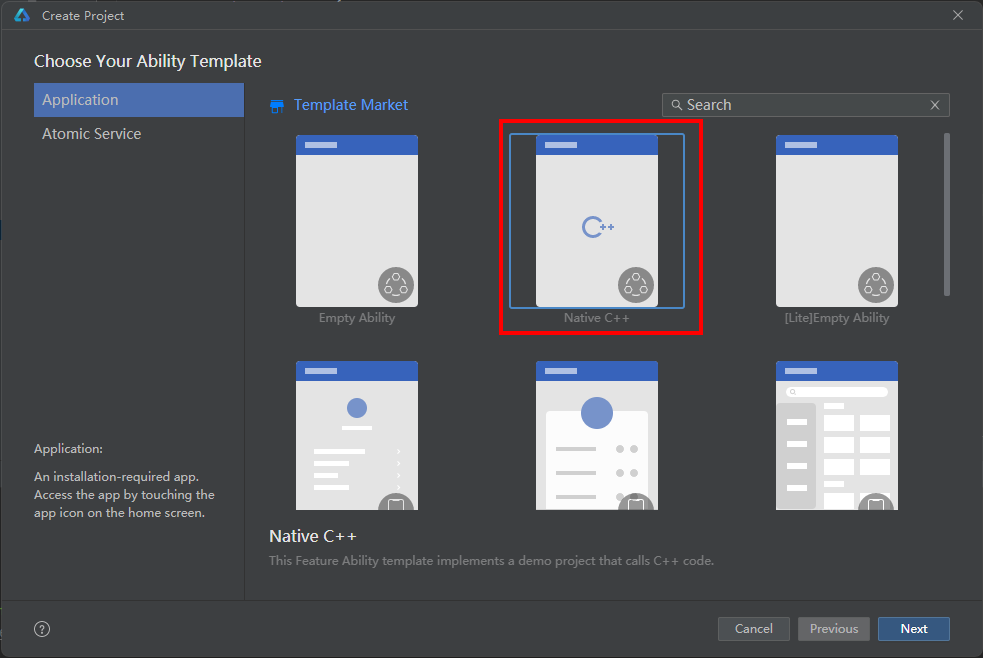
1. 创建工程
2. 添加依赖
创建完成后,DevEco Studio会在工程生成cpp目录,目录有types/libentry/index.d.ts、napi_init.cpp、CMakeLists.txt等文件。
-
打开src/main/cpp/CMakeLists.txt,在target_link_libraries依赖中添加包管理的libbundle_ndk.z.so。
target_link_libraries(entry PUBLIC libace_napi.z.so libbundle_ndk.z.so) -
打开src/main/cpp/napi_init.cpp文件,添加头文件。
#include \"bundle/native_interface_bundle.h\"
3. 修改源文件
-
打开src/main/cpp/napi_init.cpp文件,文件Init会对当前方法进行初始化映射,这里定义对外接口为getCurrentApplicationInfo。
EXTERN_C_STARTstatic napi_value Init(napi_env env, napi_value exports){ napi_property_descriptor desc[] = { { \"getCurrentApplicationInfo\", nullptr, GetCurrentApplicationInfo, nullptr, nullptr, nullptr, napi_default, nullptr} }; napi_define_properties(env, exports, sizeof(desc) / sizeof(desc[0]), desc); return exports;}EXTERN_C_END -
在src/main/cpp/napi_init.cpp文件中,增加对应的方法,如下所示:
static napi_value GetCurrentApplicationInfo(napi_env env, napi_callback_info info) -
在src/main/cpp/napi_init.cpp文件中获取Native的包信息对象,并转为js的包信息对象,即可在js测获取应用的信息:
static napi_value GetCurrentApplicationInfo(napi_env env, napi_callback_info info){ // 调用Native接口获取应用信息 OH_NativeBundle_ApplicationInfo nativeApplicationInfo = OH_NativeBundle_GetCurrentApplicationInfo(); napi_value result = nullptr; napi_create_object(env, &result); // Native接口获取的应用包名转为js对象里的bundleName属性 napi_value bundleName; napi_create_string_utf8(env, nativeApplicationInfo.bundleName, NAPI_AUTO_LENGTH, &bundleName); napi_set_named_property(env, result, \"bundleName\", bundleName); // Native接口获取的指纹信息转为js对象里的fingerprint属性 napi_value fingerprint; napi_create_string_utf8(env, nativeApplicationInfo.fingerprint, NAPI_AUTO_LENGTH, &fingerprint); napi_set_named_property(env, result, \"fingerprint\", fingerprint); char* appId = OH_NativeBundle_GetAppId(); // Native接口获取的appId转为js对象里的appId属性 napi_value napi_appId; napi_create_string_utf8(env, appId, NAPI_AUTO_LENGTH, &napi_appId); napi_set_named_property(env, result, \"appId\", napi_appId); char* appIdentifier = OH_NativeBundle_GetAppIdentifier(); // Native接口获取的appIdentifier转为js对象里的appIdentifier属性 napi_value napi_appIdentifier; napi_create_string_utf8(env, appIdentifier, NAPI_AUTO_LENGTH, &napi_appIdentifier); napi_set_named_property(env, result, \"appIdentifier\", napi_appIdentifier); // 最后为了防止内存泄漏,手动释放 free(nativeApplicationInfo.bundleName); free(nativeApplicationInfo.fingerprint); free(appId); free(appIdentifier); return result;}
4. js侧调用
-
打开src\\main\\ets\\pages\\index.ets, 导入\"libentry.so\"。
-
调用Native接口getCurrentApplicationInfo即可获取应用信息。示例如下:
import hilog from \'@ohos.hilog\';import testNapi from \'libentry.so\';@Entry@Componentstruct Index {@State message: string = \'Hello World\'; build() { Row() { Column() { Text(this.message) .fontSize(50) .fontWeight(FontWeight.Bold) Button(){ Text(\"GetCurrentApplicationInfo\").fontSize(30) }.type(ButtonType.Capsule) .margin({ top: 20 }) .backgroundColor(\'#0D9FFB\') .width(\'70%\') .height(\'5%\') .onClick(()=>{ try { let data = testNapi.getCurrentApplicationInfo(); console.info(\"getCurrentApplicationInfo success, data is \" + JSON.stringify(data)); } catch (error) { console.error(\"getCurrentApplicationInfo failed\"); this.message = \"getCurrentApplicationInfo failed\"; } }) } .width(\'100%\') } .height(\'100%\') }}


