JavaWeb(苍穹外卖)--学习笔记11(微信小程序开发,HttpClient)
前言
本篇文章是学习B站黑马程序员苍穹外卖的学习笔记📑。我的学习路线是Java基础语法-JavaWeb-做项目,管理端的功能学习完之后,就进入到了用户端微信小程序的开发,先来看看小程序开发流程以及HttpClient在小程序开发中的运用。
这里省略微信开发者平台接入,以及微信开发着这软件的下载,不了解接入过程的可以直接去B站看视频啊!!!黑马程序员苍穹外卖项目里的小程序开发讲的很清楚。
🧩首先看一下小程序开发需要掌握的知识
微信小程序开发是一项非常实用的技能,尤其适合想从事前端开发、移动开发或想快速搭建轻量级应用的开发者。(从这个简介可以看出,微信小程序开发其实涉及了好多前端的内容,但是我前端学的不太好,这里就稍微了解一下,以后学好了再更,今天主要讲后端开发流程)
- 打开微信开发者工具(这个图标真的好可爱呀🥰🥰🥰🥰😍😍😍😍😗😗😗🤩🤩🤩🤩🤩🤩😽😽😽😍😍😍😍)

- 小程序目录结构: 如果学过一点前端的会感觉很熟悉,这个跟VSCode有点像:
项目结构: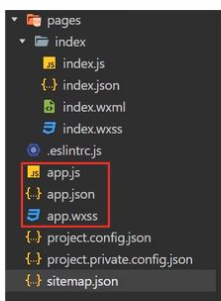
app.js:全局逻辑
app.json:全局配置(页面路径、窗口样式、tab栏等)
app.wxss:全局样式
页面结构:
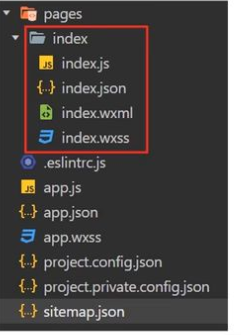
js:页面逻辑
json:页面配置
wxml:页面结构
wxss:页面样式表
🧠接下来从实现微信登录这个功能来了解小程序开发整个流程
首先还是从前端的界面来看看这个功能: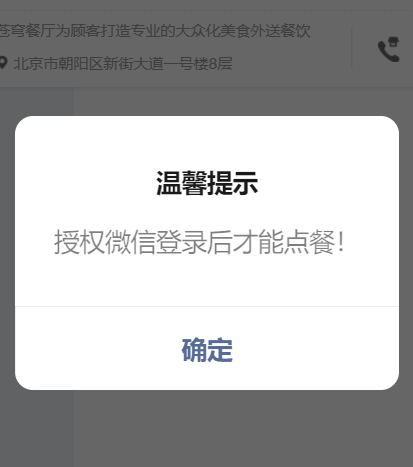
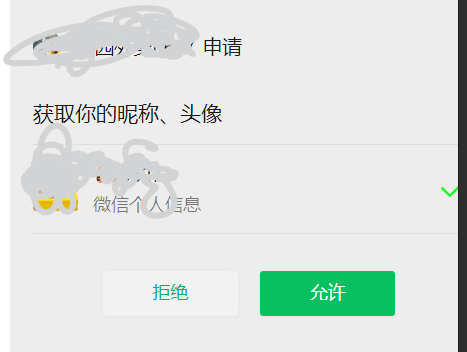
点击确认后会弹出界面授权信息,点击允许从而创建用户信息登录
🔍实现流程
登录流程图: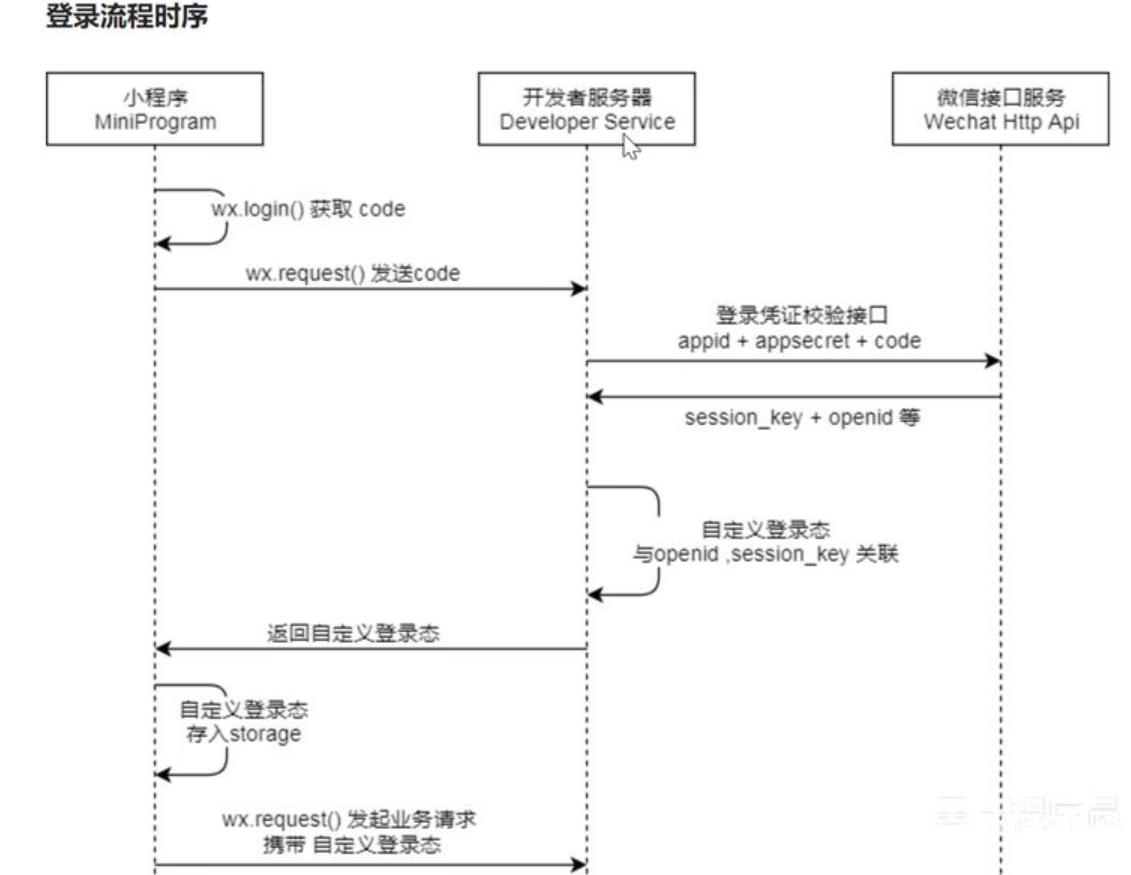
大致可以概括为:
小程序用户点击登录按钮
↓
调用 wx.login() 获取临时登录凭证 code
↓
将 code 发送到你自己的服务器
↓
服务器用 code 向微信请求换取 openid 和 session_key
↓
服务器生成自己的 token(如 JWT)返回给小程序
↓
小程序保存 token,后续请求带上 token 做身份验证
在第三步 “服务器用 code 向微信请求换取 openid 和 session_key” 中我们的服务器需要向微信官方的服务器发送请求 “https://api.weixin.qq.com/sns/jscode2session?appid=APPID&secret=SECRET&js_code=JSCODE&grant_type=authorization_code” 这个功能是HttpClient实现的
🌐 什么是 HttpClient?
你可以把 HttpClient 想象成一个“会联网的浏览器”,但它不是给人用的,而是给程序(代码)用的。
它能让你的 Java 程序像浏览器一样访问网页、发送请求、获取数据。比如你打开淘宝,其实是浏览器在背后做了这些事,而 HttpClient 就是让你的 Java 程序也能做类似的事情。
在Java中通过编码的方式发送HTTP请求:
1.maven:
<dependency> <groupId>org.apache.httpcomponents</groupId> <artifactId>httpclient</artifactId> <version>4.5.13</version></dependency>2.在key-server/src/test/java/com/sky/test下面创建HttpClientTes测试t类通过HttpClient发GET请求
public class HttpClientTest{ @Test public void testGET() throws Exception { //创建httpclient对象 CloseableHttpClient httpClient = HttpClients.createDefault(); //创建请求对象 HttpGet httpGet = new HttpGet(\"http://localhost:8080/user/shop/status\"); //发送请求 CloseableHttpResponse response = httpClient.execute(httpGet); //获取服务端返回的状态码 int statusCode = response.getStatusLine().getStatusCode(); System.out.println(\"服务端返回的状态码为:\"+statusCode); //获取服务端返回的数据 HttpEntity entity = response.getEntity(); String body = EntityUtils.toString(entity); System.out.println(\"服务端返回的数据为:\"+body); //关闭资源 response.close(); httpClient.close(); }}3.测试通过httpclient发送Post方式请求
@Test public void testPost() throws Exception { //创建httpclient对象 CloseableHttpClient httpClient = HttpClients.createDefault(); //创建请求对象 HttpPost httpPost = new HttpPost(\"http://localhost:8080/admin/employee/login\"); //创建Json参数 JSONObject jsonObject = new JSONObject(); jsonObject.put(\"username\",\"admin\"); jsonObject.put(\"password\",\"123456\"); StringEntity entity = new StringEntity(jsonObject.toString()); //指定请求编码方式 entity.setContentEncoding(\"utf-8\"); //数据格式 entity.setContentType(\"application/json\"); httpPost.setEntity(entity); //发送请求 接受响应结果 CloseableHttpResponse response = httpClient.execute(httpPost); //解析返回结果 int statusCode = response.getStatusLine().getStatusCode(); System.out.println(\"服务端返回的状态码为\"+statusCode); HttpEntity entity1 = response.getEntity(); String body = EntityUtils.toString(entity1); System.out.println(\"服务端返回的响应结果为\"+body); //关闭资源 response.close(); httpClient.close(); }}✨了解完HttpClient,我们继续来看登录功能的代码(顺便来看看HttpClient在项目中的使用)
🥰准备工作:
- 安装依赖配置:
applicaton-dev.yml:
sky: wechat: appid: ... secret: ...application.yml:
sky: wechat: appid: ${sky.wechat.appit} secret: ${sky.wechat.secret}//还要配置jwy,在是sky:jwt:上加上 # 设置前端传递过来的令牌名称 admin-token-name: token user-secret-key: itcast user-ttl: 7200000 user-token-name: authentication🙌代码:
Controller:
package com.sky.controller.user;...@RestController@RequestMapping(\"/user/user\")@Api(tags = \"C端用户接口\")@Slf4jpublic class UserController { @Autowired private UserService userService; @Autowired private JwtProperties jwtProperties; /** * 微信登录 */ @RequestMapping(\"/login\") @ApiOperation(\"微信登录\") public Result<UserLoginVO> login(@RequestBody UserLoginDTO userLoginDTO){ log.info(\"用户登录:{}\", userLoginDTO); // 调用service完成微信登录 User user = userService.weixinlogin(userLoginDTO); //为微信用户生成JWT令牌 Map<String, Object> claims = new HashMap<>(); claims.put(JwtClaimsConstant.USER_ID, user.getId()); String token =JwtUtil.createJWT(jwtProperties.getUserSecretKey(), jwtProperties.getUserTtl(), claims); UserLoginVO userLoginVO = UserLoginVO.builder() .id(user.getId()) .openid(user.getOpenid()) .token(token) .build(); return Result.success(userLoginVO); }}service:
public interface UserService { //微信登录 User wxLogin(UserLoginDTO userLoginDTO);}UserServiceImpl:
package com.sky.service.impl;...@Service@Slf4jpublic class UserServiceImpl implements UserService { //微信公众号的接口地址 public static final String WX_LOGIN = \"https://api.weixin.qq.com/sns/jscode2session\"; @Autowired private WeChatProperties weChatProperties; @Autowired private UserMapper userMapper; /** * 微信登录 * @param userLoginDTO * @return */ @Override public User weixinlogin(UserLoginDTO userLoginDTO) { //调用微信接口服务,获取用户的openid String openid =getOpenid(userLoginDTO.getCode()); //判断当前用户是否为为空,为空表示登陆失败,抛出异常 if (openid == null) { throw new RuntimeException(MessageConstant.LOGIN_FAILED); } //判断不为空,判断是否为新用户 User user = userMapper.getByOpenid(openid); // 是则自动完成注册 if (user == null) { user = User.builder() .openid(openid) .createTime(LocalDateTime.now()) .build(); userMapper.insert(user); } //返回用户对象 return user; } /** * 获取微信用户openid * @param code * @return */ private String getOpenid(String code) { //调用微信接口服务,获取用户的openid HashMap<String, String> map = new HashMap<>(); map.put(\"appid\",weChatProperties.getAppid()); map.put(\"secret\",weChatProperties.getSecret()); map.put(\"js_code\", code); map.put(\"grant_type\",\"authorization_code\"); String json =HttpClientUtil.doGet(WX_LOGIN, map); log.info(\"微信接口返回的json数据:{}\",json); JSONObject jsonObject = JSON.parseObject(json); String openid = jsonObject.getString(\"openid\"); return openid; }}UserMapper:
package com.sky.mapper;@Mapperpublic interface UserMapper { /** * 根据OpenId查询用户 * @param * @return */ @Select(\"select * from user where openid = #{openid}\") User getByOpenid(String openid); /** * 自动完成注册 * @param user */ void insert(User user);}UserMapper.XML
<!DOCTYPE mapper PUBLIC \"-//mybatis.org//DTD Mapper 3.0//EN\" \"http://mybatis.org/dtd/mybatis-3-mapper.dtd\" ><mapper namespace=\"com.sky.mapper.UserMapper\"> <insert id=\"insert\" useGeneratedKeys=\"true\" keyProperty=\"id\"> insert into user(openid,name,phone,sex,id_number,avatar,create_time) values(#{openid},#{name},#{phone},#{sex},#{idNumber},#{avatar},#{createTime}) </insert></mapper>小白啊!!!写的不好轻喷啊🤯如果觉得写的不好,点个赞吧🤪(批评是我写作的动力)
…。。。。。。。。。。。…
…。。。。。。。。。。。…


