深度解读微软Speech服务:让语音识别走进现实
大家好,今天我们来探讨一个激动人心的技术话题:微软的语音识别服务如何为我们提供强大的语音识别解决方案,特别是在电话录音中识别出不同的说话人。
场景描绘
想象一下,你有一段电话录音,并需要将其中的多个说话人区分开来,这在客户服务、会议记录等场景中尤为重要。通过调研不同的技术方案,我们发现微软的Speech服务提供了高效的解决方案。
认识Speech Studio
首先,让我带大家认识一下微软提供的在线测试平台:Speech Studio。通过这个网址可以直接访问 Speech Studio 进行服务体验。
在正式使用前,我们需要准备两类服务资源:语音服务和语言服务。在Speech Studio中,你可以在线快速测试并体验其功能。
https://speech.microsoft.com/portal/callcenter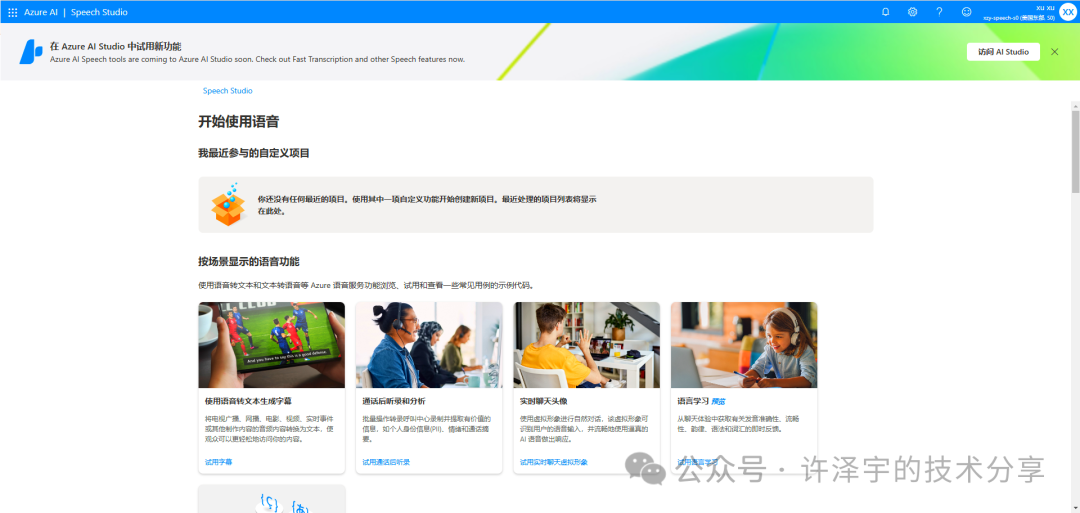
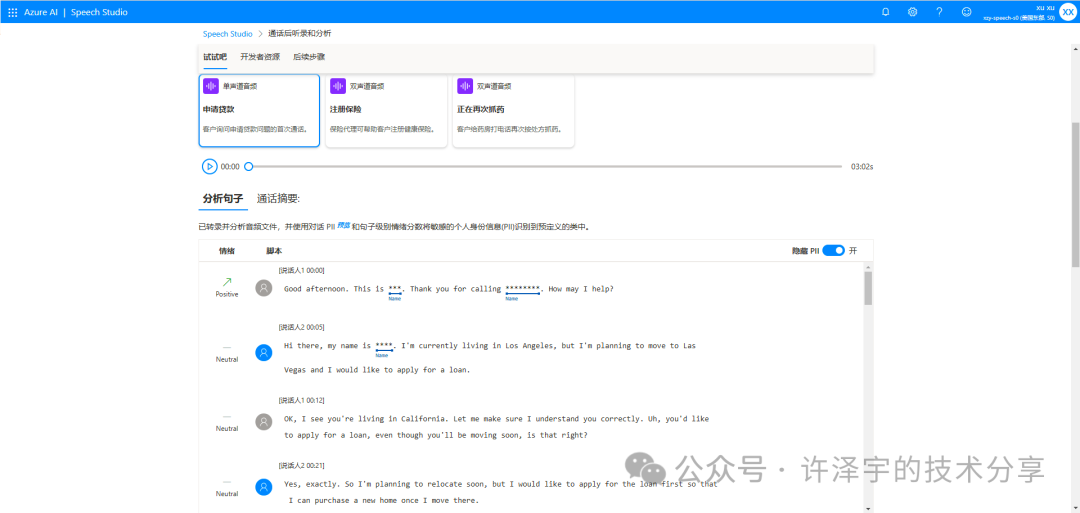
我们可以看到Speech Studio服务中可以把wav的对话人区分出来,并且可以提取对于的姓名、邮箱等。甚至可以对敏感信息进行过滤处理。
C# SDK实现语音识别
为了在实际项目中应用,接下来我们来看看如何使用C# SDK来实现这一功能。首先,我们需要在项目中引入相关的NuGet包:
然后,在代码中导入相关命名空间:
using Microsoft.CognitiveServices.Speech;using Microsoft.CognitiveServices.Speech.Audio;using Microsoft.CognitiveServices.Speech.Transcription;
核心代码示例
以下是一个完整的代码示例,展示了如何通过C# SDK来实现语音识别及说话人区分:
class Program{ // 设置环境变量用于存储密钥和区域信息 static string speechKey = \"your_speech_key\"; static string speechRegion = \"your_speech_region\"; async static Task Main(string[] args) { var filepath = @\"test.wav\"; var speechConfig = SpeechConfig.FromSubscription(speechKey, speechRegion); speechConfig.SpeechRecognitionLanguage = \"en-US\"; speechConfig.SetProperty(PropertyId.SpeechServiceResponse_DiarizeIntermediateResults, \"true\"); var stopRecognition = new TaskCompletionSource(TaskCreationOptions.RunContinuationsAsynchronously); // 使用音频文件创建一个音频流 using (var audioConfig = AudioConfig.FromWavFileInput(filepath)) { // 创建会话记录器 using (var conversationTranscriber = new ConversationTranscriber(speechConfig, audioConfig)) { conversationTranscriber.Transcribing += (s, e) => { Console.WriteLine($\"TRANSCRIBING: Text={e.Result.Text} Speaker ID={e.Result.SpeakerId}\"); }; conversationTranscriber.Transcribed += (s, e) => { if (e.Result.Reason == ResultReason.RecognizedSpeech) { Console.WriteLine(); Console.WriteLine($\"TRANSCRIBED: Text={e.Result.Text} Speaker ID={e.Result.SpeakerId}\"); Console.WriteLine(); } else if (e.Result.Reason == ResultReason.NoMatch) { Console.WriteLine($\"NOMATCH: Speech could not be transcribed.\"); } }; conversationTranscriber.Canceled += (s, e) => { Console.WriteLine($\"CANCELED: Reason={e.Reason}\"); if (e.Reason == CancellationReason.Error) { Console.WriteLine($\"CANCELED: ErrorCode={e.ErrorCode}\"); Console.WriteLine($\"CANCELED: ErrorDetails={e.ErrorDetails}\"); Console.WriteLine($\"CANCELED: Did you set the speech resource key and region values?\"); stopRecognition.TrySetResult(0); } stopRecognition.TrySetResult(0); }; conversationTranscriber.SessionStopped += (s, e) => { Console.WriteLine(\"\\n Session stopped event.\"); stopRecognition.TrySetResult(0); }; await conversationTranscriber.StartTranscribingAsync(); // 等待识别完成 Task.WaitAny(new[] { stopRecognition.Task }); await conversationTranscriber.StopTranscribingAsync(); } } }}代码解析
-
环境变量配置:首先,确保设定\"speechKey\"和\"speechRegion\",这两个参数是调用微软语音识别服务的基础。
-
SpeechConfig对象:通过
SpeechConfig.FromSubscription方法,使用你的密钥和区域信息创建一个SpeechConfig对象,并设定识别语言为英语(en-US)。 -
设定属性:通过
SetProperty方法开启中间结果的说话人区分功能。 -
创建音频流:利用
AudioConfig.FromWavFileInput方法从音频文件中创建一个音频流。 -
创建会话记录器:使用
ConversationTranscriber类创建一个会话记录器,并订阅相关事件(如Transcribing、Transcribed、Canceled、SessionStopped),以处理实时语音识别和说话人区分结果。 -
开启识别:调用
StartTranscribingAsync方法开始识别,并等待任务结束,通过事件处理语音识别的各个阶段输出信息。
实际应用效果
上述代码运行起来,将会实时打印出语音识别结果以及每段话的说话人ID。通过这些信息,我们可以非常方便地将识别到的文本进行进一步处理,例如存储、分析等。
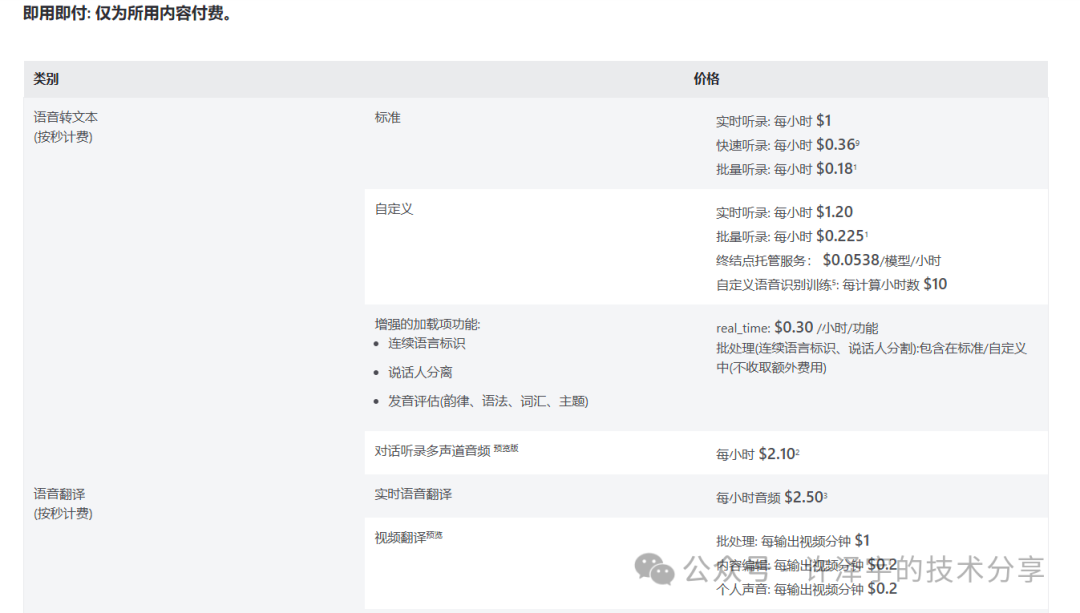
价格
我们可以查看官方定价标准:
https://azure.microsoft.com/zh-cn/pricing/details/cognitive-services/speech-services/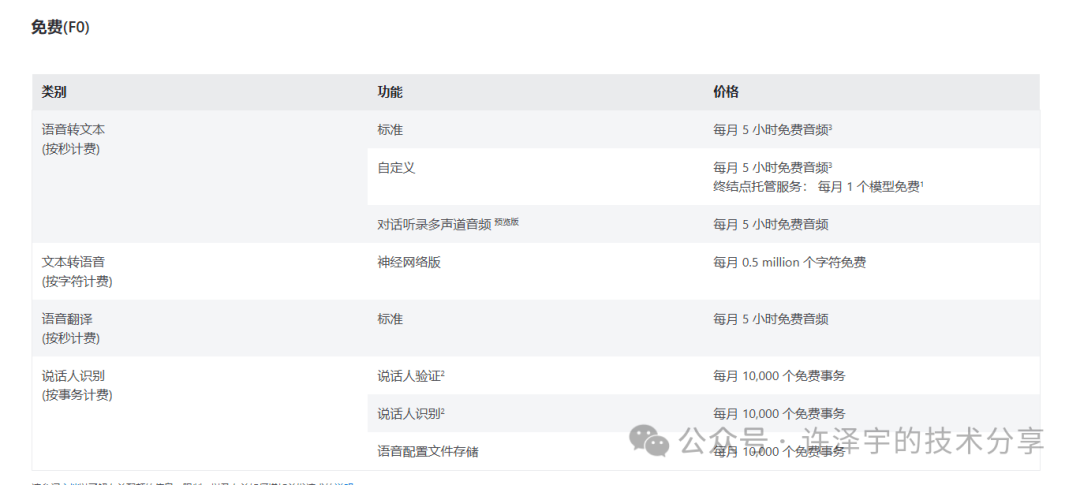
总结
微软的Speech服务提供了强大的语音识别能力,通过简单的配置和调用C# SDK,我们能够高效地实现电话录音的说话人区分。希望这篇文章能够帮助大家更好地理解和使用这一服务,让我们在实际项目中发挥其强大功能。如果你有任何问题或需要进一步了解更多技术细节,欢迎在评论区留下你的评论!
期待你的关注,我们下期再见!
更多AIGC文章


