unity 动态天空盒_unity 天空盒
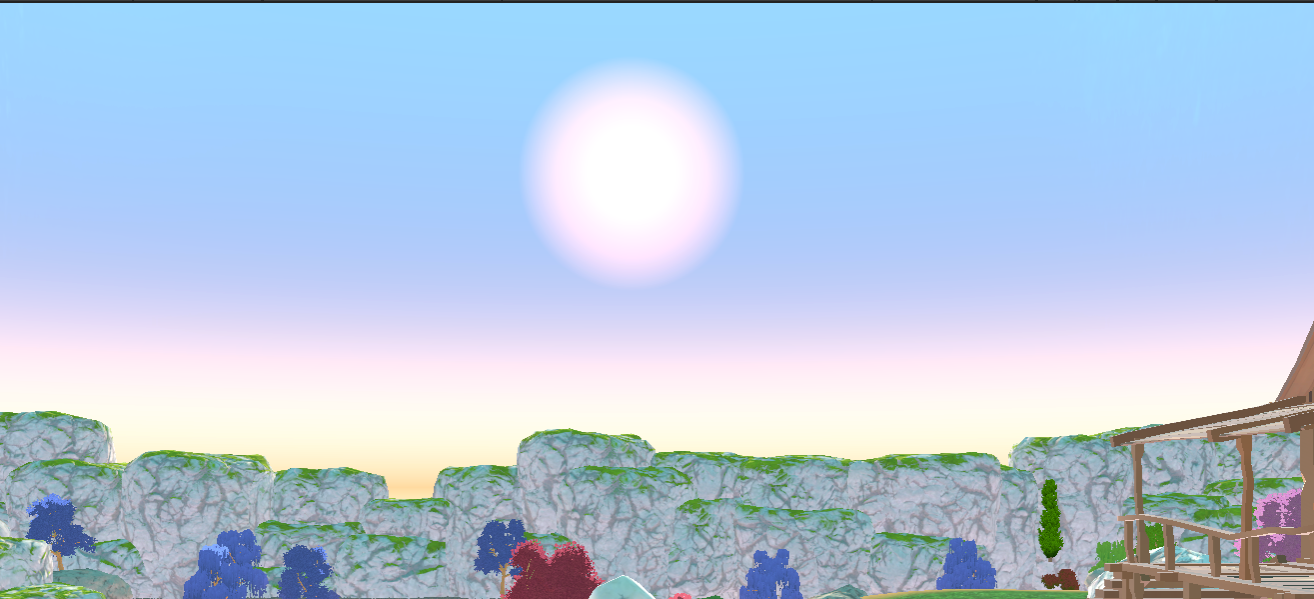
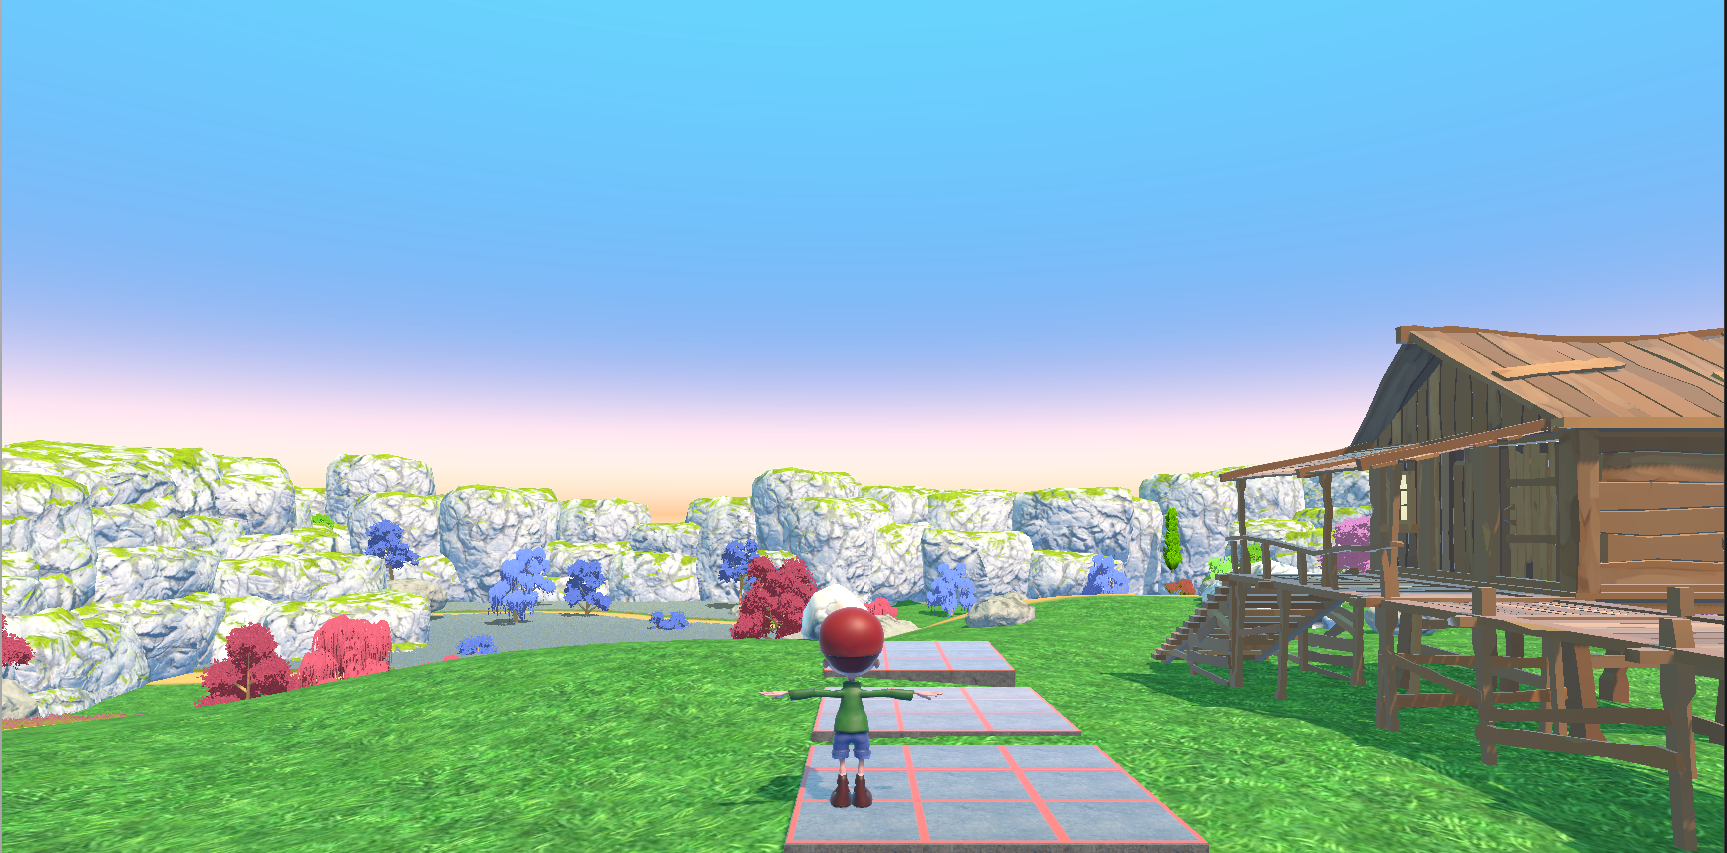
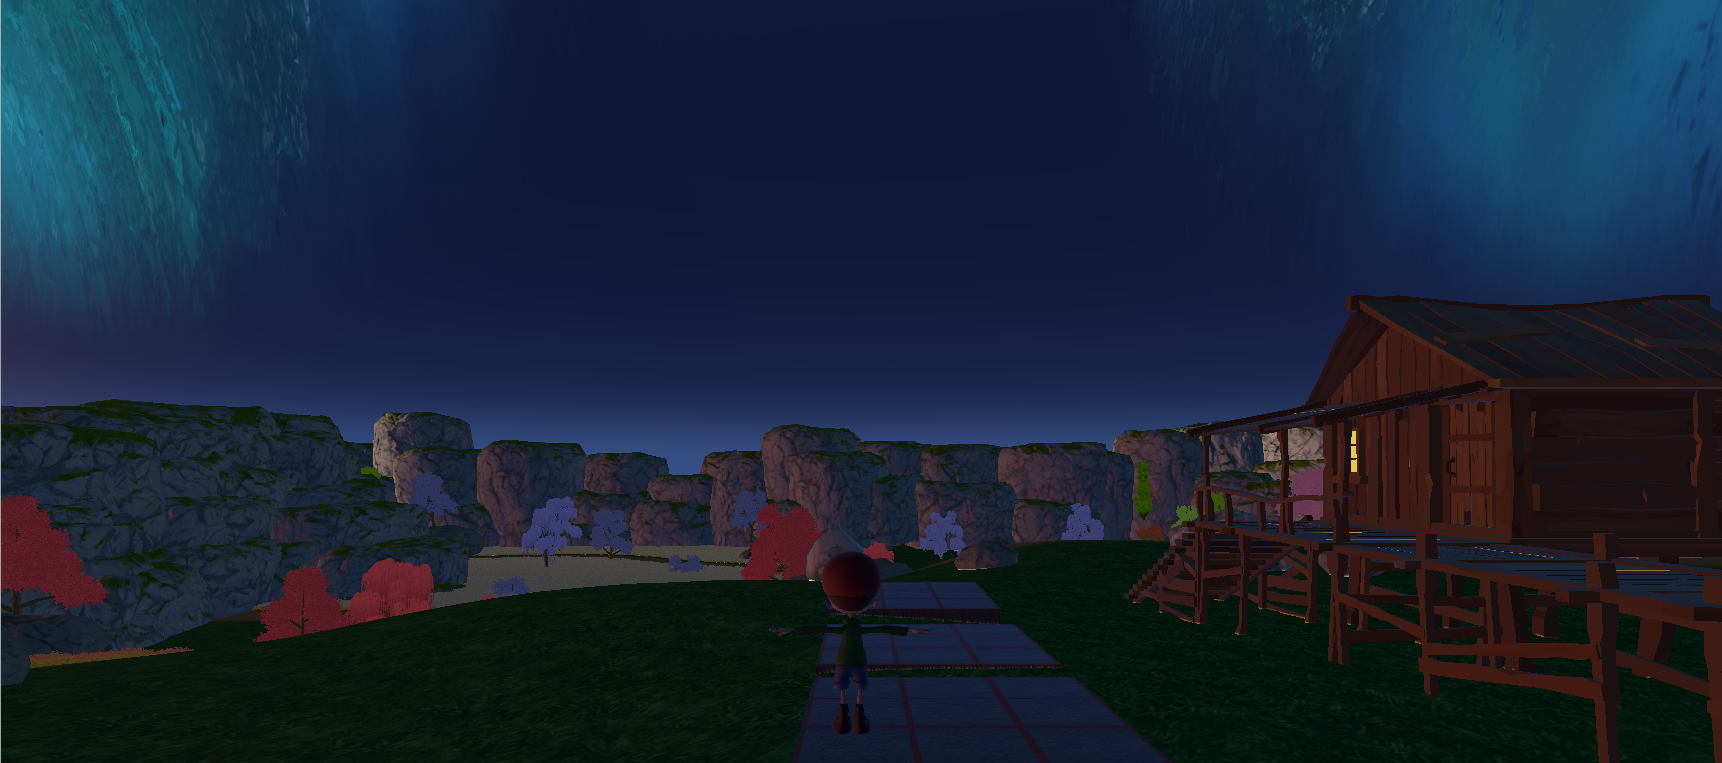
效果:
6月20日
天空盒效果:
- 日月绘制
- 天空颜色
- 星星、银河绘制
- 大气散射
- 云
前期准备:创建一个天空盒shader可以在摄像机下加天空盒组件,或直接加到lighting设置里的方便shader里直接调用天空盒变量(本文加在lighting设置里)。
日月绘制:
可以参考这篇文章
【unity URP】昼夜循环天空球 - 知乎![]() https://zhuanlan.zhihu.com/p/404704243
https://zhuanlan.zhihu.com/p/404704243
-
太阳计算:
-
基于到光源的距离计算太阳区域
-
使用
smoothstep创建平滑过渡的太阳圆盘 -
根据光源高度调整太阳颜色(地平线附近更暗)
-
注意:_WorldSpaceLightPos0在传统内置管线中表示光源方向或位置(平行光为方向),而在URP中,我们可以通过GetMainLight().direction获取。

-
// 【太阳计算 - 跟随主光源】 float sun = distance(worldDir, mainLight.direction); float sunDisc = 1 - (sun / _SunRadius); sunDisc = saturate(sunDisc * _SunFilling); float3 sunColor = sunDisc * _SunColor.rgb;
-
-
太阳光晕效果:
-
创建太阳周围的辉光效果
-
使用光源高度控制光晕可见性
-
float sunMask2 = smoothstep(-0.4, 0.4, -sunUV.z) - 0.3; float sunInfScaleMask = smoothstep(-0.01, 0.1, mainLight.direction.y) * smoothstep(-0.4, -0.01, -mainLight.direction.y); float3 finalSunInfColor = _SunInfColor.rgb * sunMask2 * _SunInfScale * sunInfScaleMask;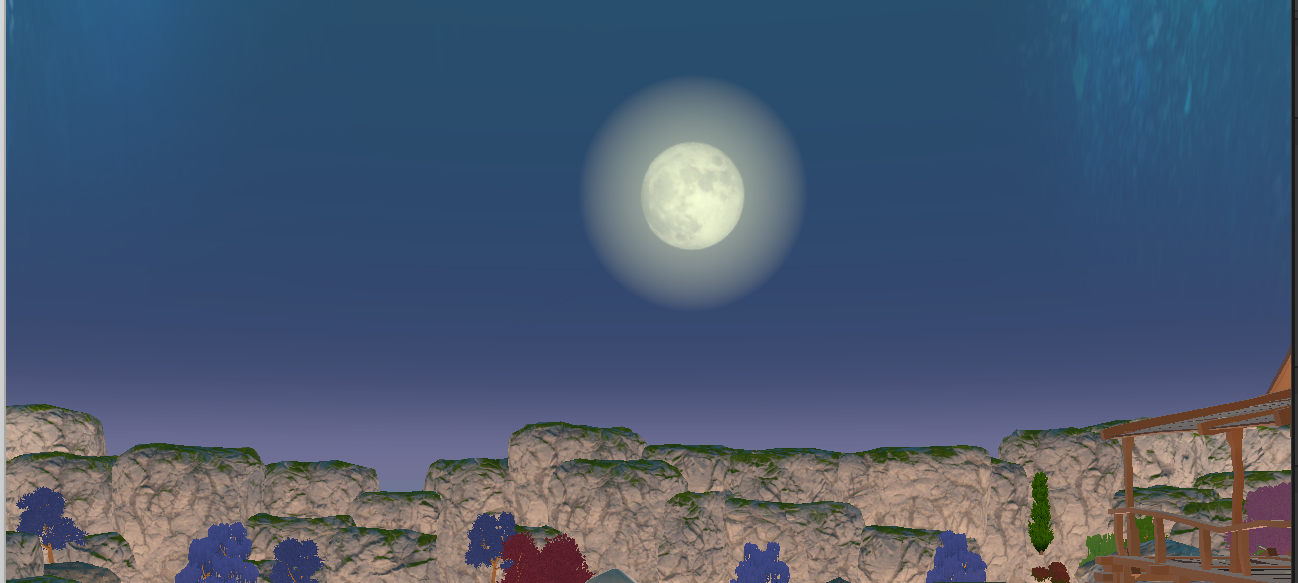
-
-
月亮计算:
-
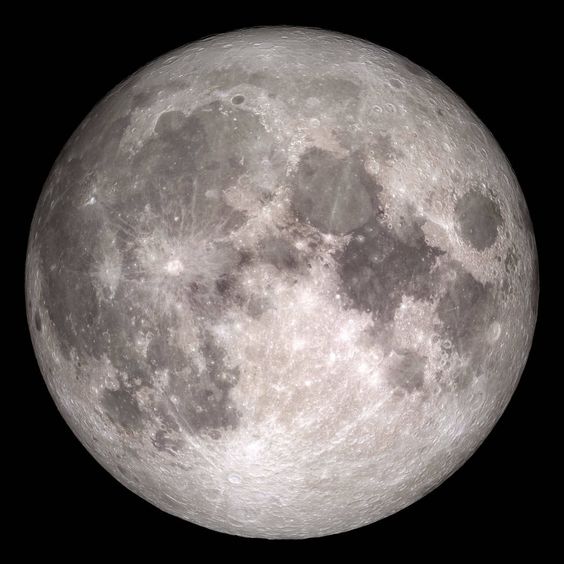
使用纹理贴图绘制月亮
-
_MoonTex_ST控制纹理的缩放和偏移 -
step(0, sunUV.z)确保只显示面向相机的月亮部分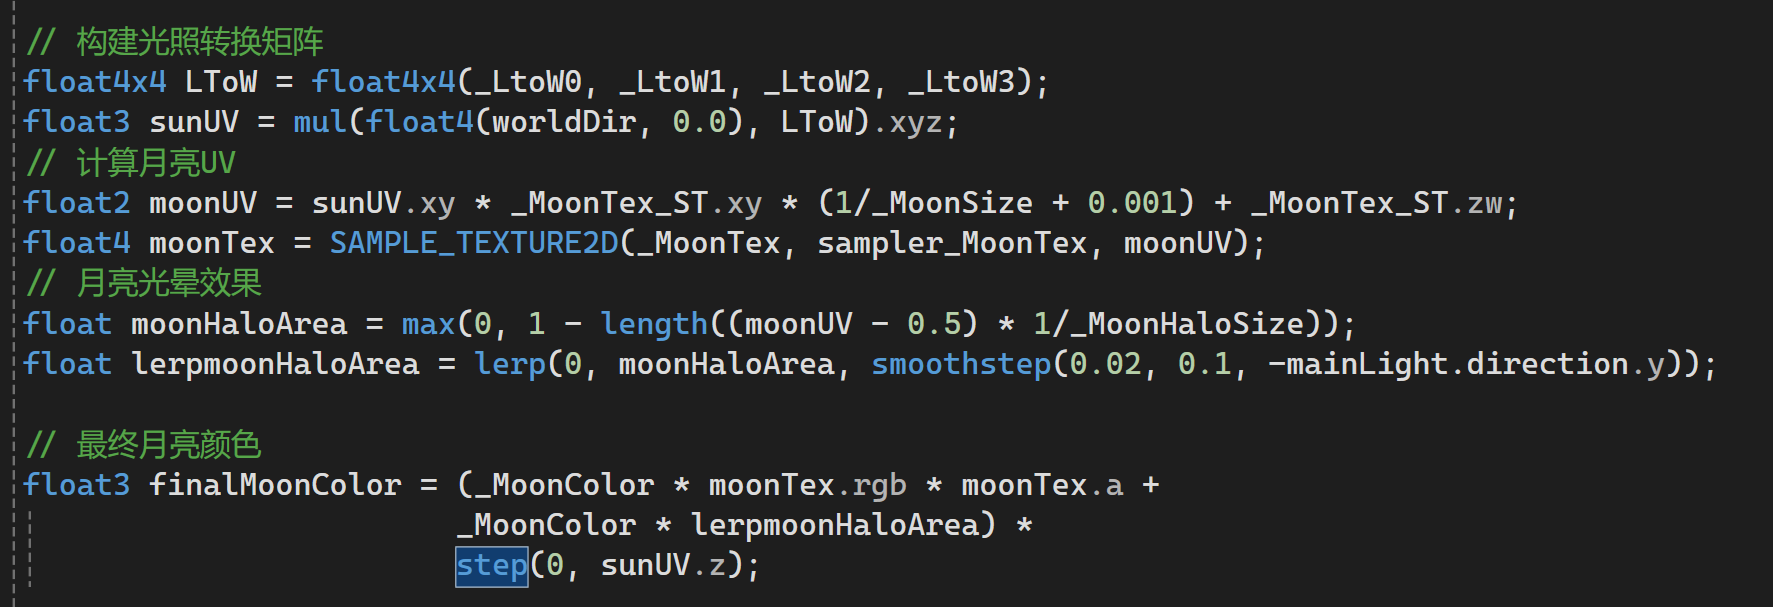
-
光照坐标系矩阵 (LToW)用于实现为月亮上贴图需要从脚本中获取:
-
这是一个4x4变换矩阵,用于将位置从光照空间转换到世界空间
-
通常由脚本动态设置,基于主光源的方向
-
矩阵的四个向量
_LtoW0到_LtoW3需要通过材质属性传递
-
-
为了正确地将月亮固定在原点并根据光线方向旋转,我们需要在脚本中创建并传递一个转换矩阵。这个矩阵用于将光源的局部空间的方向向量转换到世界空间,在着色器中,我们使用这个矩阵来处理月亮的位置,使其能够随着光源(方向光)的旋转而旋转。
核心思路:
-
在脚本中创建光源的局部到世界矩阵:
-
获取代表太阳/月亮的方向光源的
Transform -
使用
localToWorldMatrix获取其转换矩阵 -
将矩阵传递给着色器
-
确保脚本正确挂载和赋值。在 Unity 编辑器中:
-
创建一个空的 GameObject(例如命名为 \"SkyboxController\")
-
将
SkyboxLightMatrix脚本附加到这个 GameObject -
在 Inspector 窗口中:
-
将您的天空盒材质拖到 \"Skybox Material\" 槽
-
将场景中的方向光源(太阳)拖到 \"Sun Light\" 槽
-
-
-
-
在着色器中使用该矩阵:
-
将天空盒的UV坐标转换到光源空间
-
在光源空间中进行月亮的绘制
-
using UnityEngine;[ExecuteAlways]public class SkyboxLightMatrix : MonoBehaviour{ public Material skyboxMaterial; public Light sunLight; // 拖拽场景中的方向光源(太阳) void Update() { if (skyboxMaterial == null || sunLight == null) return; // 获取光源的局部到世界矩阵 Matrix4x4 localToWorldMatrix = sunLight.transform.localToWorldMatrix; // 将矩阵分解为4个Vector4传递给着色器 skyboxMaterial.SetVector(\"_LtoW0\", localToWorldMatrix.GetRow(0)); skyboxMaterial.SetVector(\"_LtoW1\", localToWorldMatrix.GetRow(1)); skyboxMaterial.SetVector(\"_LtoW2\", localToWorldMatrix.GetRow(2)); skyboxMaterial.SetVector(\"_LtoW3\", localToWorldMatrix.GetRow(3)); }}-
月亮纹理设置: 设置 Wrap Mode 为 Clamp 避免边缘重复
在纹理导入设置中启用 Alpha is Transparency 使用圆形月亮纹理(带 alpha 通道)
星星、银河绘制
效果
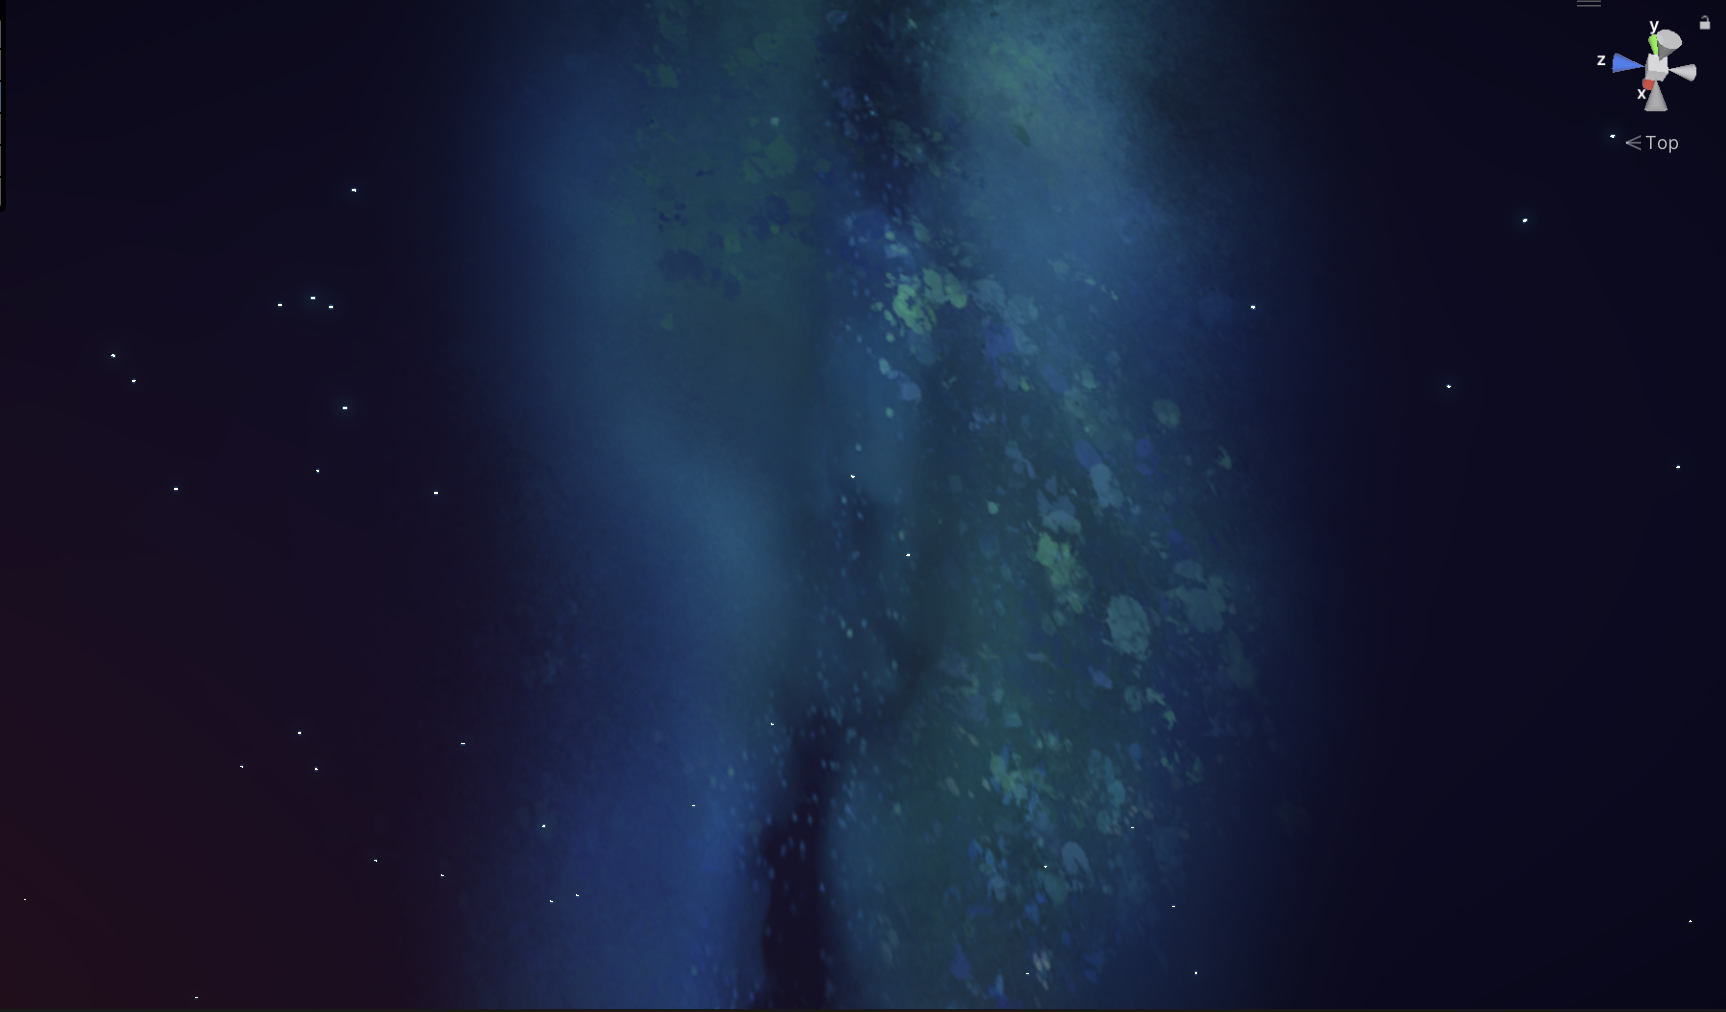
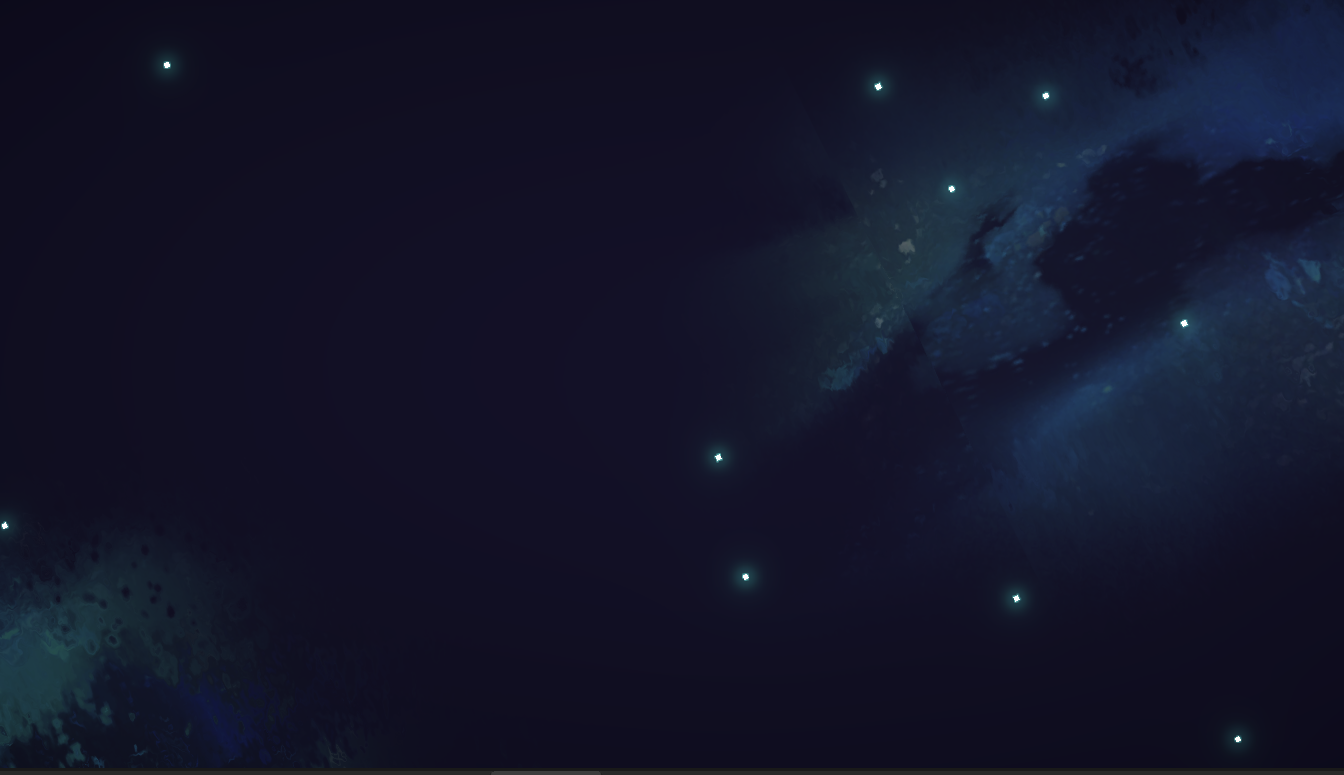
// 【星星效果】float3 stars = 0;// 1. 计算星星UV(使用球面投影)float scaleFactor = 1.0 / max(abs(worldDir.y), 0.001);float2 starsUV = worldDir.xz * scaleFactor;// 2. 采样星星纹理float4 starTex = SAMPLE_TEXTURE2D(_StarTex, sampler_StarTex, starsUV);// 3. 应用阈值创建星星(二值化)float starsValue = step(_StarsCutoff, starTex.r);// 4. 添加闪烁效果float twinkle = 1.0 + sin(_Time.y * _TwinkleSpeed) * _TwinkleAmount;starsValue *= twinkle;// 5. 应用颜色和强度stars = starsValue * _StarsColor.rgb * _StarsIntensity;// 6. 只在夜晚显示float nightFactor = smoothstep(0.0, 0.1, -mainLight.direction.y);stars *= nightFactor;//【银河效果】// 1. 计算银河噪声纹理(带时间动画) float2 galaxyNoiseUV = worldDir.xz * _GalaxyNoiseTex_ST.xy + _GalaxyNoiseTex_ST.zw; galaxyNoiseUV += float2(0, _Time.x * _GalaxySpeed * 0.67); float4 galaxyNoiseTex = SAMPLE_TEXTURE2D(_GalaxyNoiseTex, sampler_GalaxyNoiseTex, galaxyNoiseUV);// 2. 计算主银河纹理(受噪声影响)float2 galaxyUV = worldDir.xz * _galaxyTex_ST.xy + _galaxyTex_ST.zw; galaxyUV += (galaxyNoiseTex.rg - 0.5) * 0.2; // 添加噪声扰动 float4 galaxyTex = SAMPLE_TEXTURE2D(_galaxyTex, sampler_galaxyTex, galaxyUV);// 3. 计算银河颜色 galaxyTex.w = pow(galaxyTex.w,10);float3 galaxyColor =clamp((galaxyTex.xyz*galaxyTex.w *_galaxy_INT*_galaxy_intensity),0,1); // 6. 应用强度和可见性控制 galaxyColor *= _galaxy_intensity; galaxyColor *= (1 - dayNightFactor); // 只在夜晚显示 galaxyColor *= smoothstep(0.1, 0.3, abs(worldDir.y)); // 地平线附近减弱-
银河纹理采样:
-
使用两个纹理:主纹理(_GalaxyTex)和噪声纹理(_GalaxyNoiseTex)
-
噪声纹理用于扰动主纹理,创造动态流动效果
-
-
时间动画:
-
两层噪声以不同速度移动,创造复杂效果
-
_GalaxySpeed参数控制整体动画速度
-

天空颜色渐变与地平线光晕
效果
// 【天空颜色渐变与地平线光晕 】 // 1. 计算日夜过渡因子 float sunNightStep = smoothstep(-0.3, 0.25, mainLight.direction.y); // 2. 计算垂直位置 [-1,1] -> [0,1] float verticalPos = saturate(worldDir.y * 0.5 + 0.5); // 3. 计算天空方向分量 (用于渐变混合) float skyDirection = sign(worldDir.y); // 上=1, 下=-1 float absY = abs(worldDir.y); // 4. 计算白天渐变 float3 gradientDay = // 下半天空 (从底部到中间) lerp(_DayBottomColor.rgb, _DayMidColor.rgb, saturate(-worldDir.y)) * step(0, -worldDir.y) + // 上半天空 (从中间到顶部) lerp(_DayMidColor.rgb, _DayTopColor.rgb, saturate(worldDir.y)) * step(0, worldDir.y); // 5. 计算夜晚渐变 float3 gradientNight = lerp(_NightBottomColor.rgb, _NightTopColor.rgb, verticalPos); // 6. 混合日夜天空 float3 skyGradients = lerp(gradientNight, gradientDay, sunNightStep); // 7. 计算地平线光晕 // 7.1 混合日夜参数 float horWidth = lerp(_NightHorWidth, _DayHorWidth, sunNightStep); float horStrenth = lerp(_NightHorStrenth, _DayHorStrenth, sunNightStep); float3 horLineColor = lerp(_NightHorColor.rgb, _DayHorColor.rgb, sunNightStep); // 7.2 创建地平线遮罩 float horLineMask = smoothstep(-horWidth, 0.0, worldDir.y) * smoothstep(-horWidth, 0.0, -worldDir.y); // 7.3 应用强度 float3 horLineEffect = horLineColor * horLineMask * horStrenth; // 8. 组合基础天空和地平线光晕 float3 skyColor = skyGradients + horLineEffect;大气散射效果
完整的效果可以参考文章:原神昼夜天空盒还原 unity shader 源码,大气散射 - 知乎![]() https://zhuanlan.zhihu.com/p/638762287
https://zhuanlan.zhihu.com/p/638762287
这位大佬写的非常全面了:
天气渲染系统:大气散射理论基础 - 知乎![]() https://zhuanlan.zhihu.com/p/548799663
https://zhuanlan.zhihu.com/p/548799663
使用Rayleigh和Mie散射的简化模型
步骤: 1. 定义大气参数(半径、高度等)
2. 实现射线与球体的相交函数
3. 实现散射积分(简化版)
4. 将散射结果应用到天空颜色
1. 射线-球体相交计算
float2 RaySphereIntersection(float3 rayStart, float3 rayDir, float3 sphereCenter, float sphereRadius){ float3 oc = rayStart - sphereCenter; float a = dot(rayDir, rayDir); float b = 2.0 * dot(oc, rayDir); float c = dot(oc, oc) - sphereRadius * sphereRadius; float discriminant = b * b - 4 * a * c; if (discriminant < 0) return float2(-1, -1); // 无交点 float sqrtDiscriminant = sqrt(discriminant); return float2( (-b - sqrtDiscriminant) / (2 * a), // 近交点 (-b + sqrtDiscriminant) / (2 * a) // 远交点 );}2. 散射积分计算
float4 IntegrateInscattering(float3 rayStart, float3 rayDir, float rayLength, float3 lightDir, int steps){ float stepSize = rayLength / steps; float3 step = rayDir * stepSize; float4 totalScattering = 0; [unroll] for (int i = 0; i < steps; ++i) { float3 currentPos = rayStart + step * i; float height = length(currentPos - planetCenter) - _PlanetRadius; float density = exp(-height / (_AtmosphereHeight * 0.5)); // 简化计算:假设太阳光线在大气中均匀衰减 totalScattering += float4(density, density, density, 1) * stepSize; } return totalScattering;}考虑性能使用简化版
float3 SimpleAtmosphericScattering(float3 worldDir, float3 lightDir){ // 1. 基础散射 float scatter = saturate(dot(worldDir, lightDir) * 0.5 + 0.5); scatter = pow(scatter, 8.0) * _MieStrength; // 2. 地平线增强 float horizon = 1.0 - saturate(abs(worldDir.y) * 2.0); scatter += horizon * horizon * _MieStrength * 0.5; // 3. 应用颜色 return scatter * _MieColor.rgb;}// 在片段着色器中替换为:float3 scatteringColor = SimpleAtmosphericScattering(worldDir, -mainLight.direction);补充:
光的射散光的散射(瑞利散射、拉曼散射、米氏散射) - 知乎![]() https://zhuanlan.zhihu.com/p/560705804
https://zhuanlan.zhihu.com/p/560705804
【深度科普】更适合「物理」宝宝体质|光学发展史|瑞利散射|米氏散射_哔哩哔哩_bilibili![]() https://www.bilibili.com/video/BV1iC4y127D6/?vd_source=fbd763a548d9e28a3d6d5b03f90de474
https://www.bilibili.com/video/BV1iC4y127D6/?vd_source=fbd763a548d9e28a3d6d5b03f90de474
一、 真实世界中的大气散射 (追求物理模拟)
-
核心原理:
-
瑞利散射: 主要影响短波长光线(蓝、紫光)。这是天空呈现蓝色的原因。散射强度与波长的四次方成反比。
-
米氏散射: 主要影响所有波长光线,但对长波长(红光)散射略强。由大气中较大的颗粒(气溶胶、灰尘、水蒸气/云)引起。这是雾霾、薄雾和云呈现白色或灰白色的原因,也是日出日落时天空呈现橙红色的主要原因(阳光穿过更厚的大气层,蓝光被大量散射掉,剩下红光)。散射强度受颗粒大小和密度影响更大。
-
-
在真实感渲染中的应用目标:
-
模拟真实的视觉效果: 精确计算不同光照条件下(正午、黄昏、不同天气)的天空颜色、大气透射率、物体颜色的衰减和偏移。
-
创造深度感和空间感: 距离观察者越远的物体,其颜色会向大气散射光(通常是天空的蓝色或雾的白色)偏移,同时对比度降低(被“冲淡”),细节模糊。这就是“大气透视”或“空气透视”。
-
模拟体积光/上帝光: 当光线穿过有悬浮颗粒的区域(如云隙、森林、有灰尘的房间)时,光线路径变得可见。
-
-
实现方式 (在计算机图形学中):
-
基于物理的复杂计算: 使用包含瑞利和米氏散射参数的物理模型,沿视线光线积分计算光线的衰减和散射贡献。计算量通常很大。
-
分层大气模型: 将大气分层,模拟不同高度密度、成分的变化。
-
深度缓冲与后处理: 利用场景深度信息,应用基于距离的颜色偏移和模糊(模拟大气透视)。
-
体积光技术: 利用光线步进等方法,在光线穿过参与介质(体积)的区域计算散射光。
-
-
视觉特点:
-
色彩过渡平滑自然。
-
远近物体的色彩、饱和度和对比度变化符合物理规律。
-
体积光效果柔和,有真实的弥散感。
-
二、 卡通渲染中的大气散射 (追求风格化表达)
-
核心目标:
-
强化艺术风格: 服务于卡通、动漫、水彩、手绘等特定视觉风格。
-
表达情绪和氛围: 使用夸张或非写实的色彩和效果来传达特定的情感(如浪漫、神秘、危险)。
-
简化视觉信息/突出主体: 通过风格化的大气效果简化背景或远景,引导观众视线到主要角色或物体上。
-
创造独特的“绘画感”或“平面感”: 模仿传统艺术媒介的效果。
-
-
应用方式 (风格化处理):
-
夸张的色彩:
-
天空可能使用非常饱和的蓝色、紫色、粉红色或渐变色,而非物理模拟的结果。
-
雾和薄雾可能使用非白色的、鲜艳的颜色(如粉红雾、梦幻紫雾)。
-
-
简化的深度衰减 (大气透视):
-
色阶化/分色: 不是平滑的蓝色偏移,而是将远景分成几个明显的色带(例如:近景正常色 -> 中景偏青 -> 远景偏紫)。
-
硬边模糊/轮廓线: 远处的物体可能直接用单色填充、轮廓线勾勒或应用硬边模糊,而非精细的散射计算。
-
忽略波长差异: 通常不严格区分瑞利散射(蓝)和米氏散射(白/红),而是根据艺术需要选择主色调。
-
-
风格化的体积光:
-
几何化/图形化光柱: 光柱可能被绘制成清晰的几何形状(圆柱、圆锥)、带有硬边,或者用条纹、光斑等图形元素表示。
-
强烈的颜色与对比: 使用高饱和度和强对比度的颜色。
-
非物理形态: 光柱的形状、分布可以完全脱离物理约束,只为构图和美感服务。
-
-
作为“笔触”或“纹理”: 大气效果(如云、雾)可能被绘制成类似水彩晕染、墨水笔触或漫画网点的效果。
-
-
实现方式:
-
手工绘制/贴图: 背景、天空盒、雾效贴图直接由艺术家绘制。
-
基于深度的后处理着色器: 使用深度信息,但应用非真实的、风格化的颜色查找表或硬过渡规则。
-
自定义体积效果着色器: 编写专门用于生成硬边光柱、条纹光效或特定形状体积雾的着色器。
-
叠加 2D 元素: 直接在画面上叠加 2D 的烟雾、光斑、光晕等精灵图。
-
三、 关键区别总结
四、 举个栗子
-
《荒野大镖客:救赎2》 (真实): 远处的山峦呈现柔和的蓝灰色,细节模糊,与近处色彩鲜艳、细节丰富的景物形成自然的空间过渡。黄昏时,阳光穿过长长的空气路径,呈现出由黄到橙到红的真实渐变。
-
《塞尔达传说:旷野之息》/《原神》 (卡通): 远景的山脉可能被分成清晰的几层色带(比如深绿->青绿->蓝紫)。天空可能是纯净的湛蓝或梦幻的紫红渐变。雾可能是粉紫色的,并且边缘相对清晰。阳光光柱可能被渲染成几条清晰的、带有光晕的直线条。
-
吉卜力动画电影: 大气透视非常明显,但色彩是主观的(如《哈尔的移动城堡》中金黄的草原远景)。云朵和雾气形状高度艺术化,带有水彩晕染感。
一、真实物理向大气散射实现
1. 基于物理的模型(PBS)
-
核心算法:
使用瑞利散射(Rayleigh)和米氏散射(Mie Scattering)的积分公式,沿视线(View Ray)从相机到物体或天空进行光线步进(Raymarching),累计散射光强度。
关键公式简化版:text
最终颜色 = 太阳光强度 × [ 透射率(T) + 散射积分(S) ]T = exp(-β_extinction × 距离) // 光线衰减S = ∑(散射系数 × 相函数 × 透射率) // 路径上累加散射光
2. 实现方案
❌ 无法处理遮挡体积光
❌ 显存和计算开销大
❌ 无法动态变化
❌ 实现复杂
-
移动端/卡通项目:
✅ 深度分层色阶雾效 + 天空盒贴图
✅ 性能消耗:<5% GPU -
PC/主机写实项目:
✅ 动态体积雾(UE5 Lumen / Unity HDRP)
✅ 性能消耗:10%~30% GPU -
极限性能场景(VR/低端机):
✅ 预烘焙天空LUT + 屏幕空间散射后处理
更深入的以后再写吧
3. Unity Shader
// 光线步进计算散射float3 CalculateScattering(float3 rayStart, float3 rayDir, float maxDist) { float3 totalScattering = 0; float stepSize = maxDist / NUM_STEPS; for (int i = 0; i < NUM_STEPS; i++) { float3 samplePos = rayStart + rayDir * (i * stepSize); float density = GetAtmosphereDensity(samplePos); // 获取大气密度 // 瑞利散射(蓝色波段) float3 rayleigh = density * _RayleighCoeff * scatterPhase; // 米氏散射(白色/橙色) float3 mie = density * _MieCoeff * miePhase; totalScattering += (rayleigh + mie) * exp(-_Extinction * stepSize * i); } return totalScattering * _SunIntensity;}4. 优化技巧
-
LUT纹理预计算:将复杂的散射积分结果烘焙到2D纹理(太阳高度角 vs 视角仰角)
-
动态降采样:对远处体积雾使用低分辨率体素
-
TAA抗锯齿:缓解步进产生的噪点
二、卡通渲染中的风格化实现
1. 核心目标
-
艺术可控性 > 物理精确性
-
用极简数学模拟“氛围感”
2. 实现方案
color = lerp(_NearColor, _FarColor, saturate(depth/_FadeDist))if (depth > _FogStart) return _FogColor;3. Shader(色阶大气透视)
fixed4 frag (v2f i) : SV_Target { float depth = LinearEyeDepth(i.depth); // 获取像素深度 // 分三段色域:近景/中景/远景 fixed3 color = (depth < _Distance1) ? _ColorNear : (depth < _Distance2) ? _ColorMid : _ColorFar; return fixed4(color, 1.0);}关键总结:物理向实现依赖光线步进+体素化,风格化实现依赖深度分层+美术参数控制。技术本质是用计算资源换取视觉表现,需根据目标平台与艺术风格灵活取舍。
云朵的实现
面片云
Unity-URP-原神风格程序化天空盒-(1)纸片卡通云 - 知乎![]() https://zhuanlan.zhihu.com/p/660806535
https://zhuanlan.zhihu.com/p/660806535
在blender中创造半球形的纸片云导出fbx文件
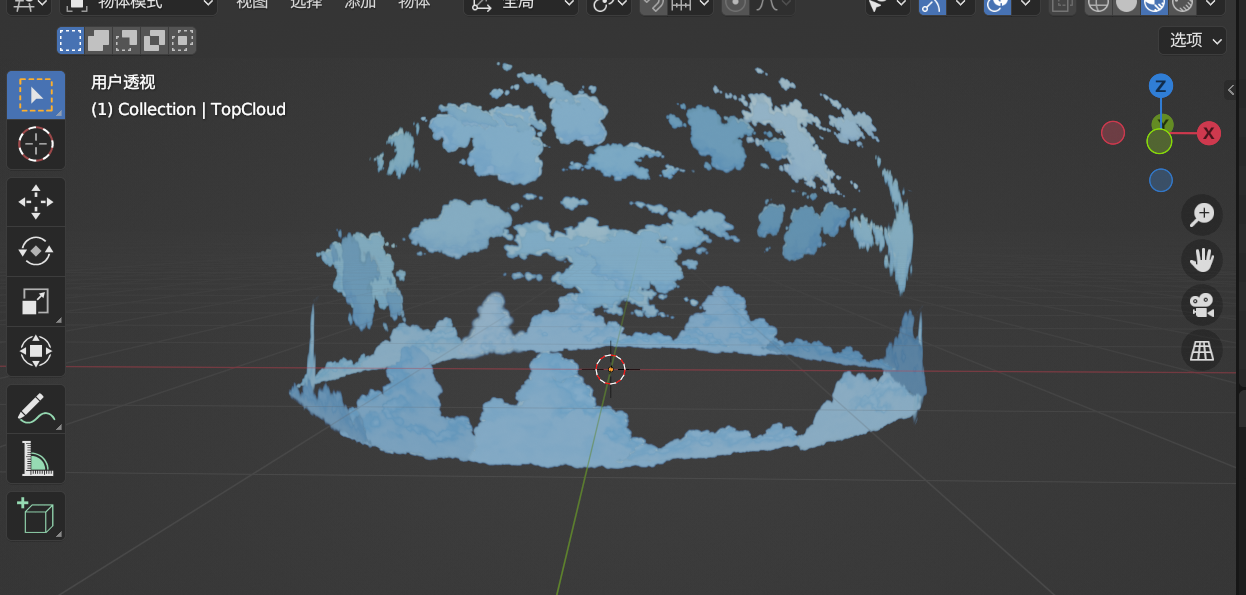 展uv写一个普通的材质
补充:SDF
Signed Distance Field - 知乎![]() https://zhuanlan.zhihu.com/p/337944099 卡通渲染之基于SDF生成面部阴影贴图的效果实现(URP) - 知乎
https://zhuanlan.zhihu.com/p/337944099 卡通渲染之基于SDF生成面部阴影贴图的效果实现(URP) - 知乎![]() https://zhuanlan.zhihu.com/p/361716315
https://zhuanlan.zhihu.com/p/361716315
如何快速生成混合卡通光照图 - 知乎![]() https://zhuanlan.zhihu.com/p/356185096 用Unity Shader入门有向距离场 SDF_哔哩哔哩_bilibili
https://zhuanlan.zhihu.com/p/356185096 用Unity Shader入门有向距离场 SDF_哔哩哔哩_bilibili![]() https://www.bilibili.com/video/BV1Qz4y1p7CE/?spm_id_from=333.337.search-card.all.click&vd_source=fbd763a548d9e28a3d6d5b03f90de474
https://www.bilibili.com/video/BV1Qz4y1p7CE/?spm_id_from=333.337.search-card.all.click&vd_source=fbd763a548d9e28a3d6d5b03f90de474
【Blender】SDF阴影的制作流程,包会的!_哔哩哔哩_bilibili![]() https://www.bilibili.com/video/BV1o4ANe6EBf/?spm_id_from=333.337.search-card.all.click&vd_source=fbd763a548d9e28a3d6d5b03f90de474
https://www.bilibili.com/video/BV1o4ANe6EBf/?spm_id_from=333.337.search-card.all.click&vd_source=fbd763a548d9e28a3d6d5b03f90de474
二次元SDF贴图SP生成器_哔哩哔哩_bilibili![]() https://www.bilibili.com/video/BV1eM411E7g1/?spm_id_from=333.337.search-card.all.click&vd_source=fbd763a548d9e28a3d6d5b03f90de474
https://www.bilibili.com/video/BV1eM411E7g1/?spm_id_from=333.337.search-card.all.click&vd_source=fbd763a548d9e28a3d6d5b03f90de474
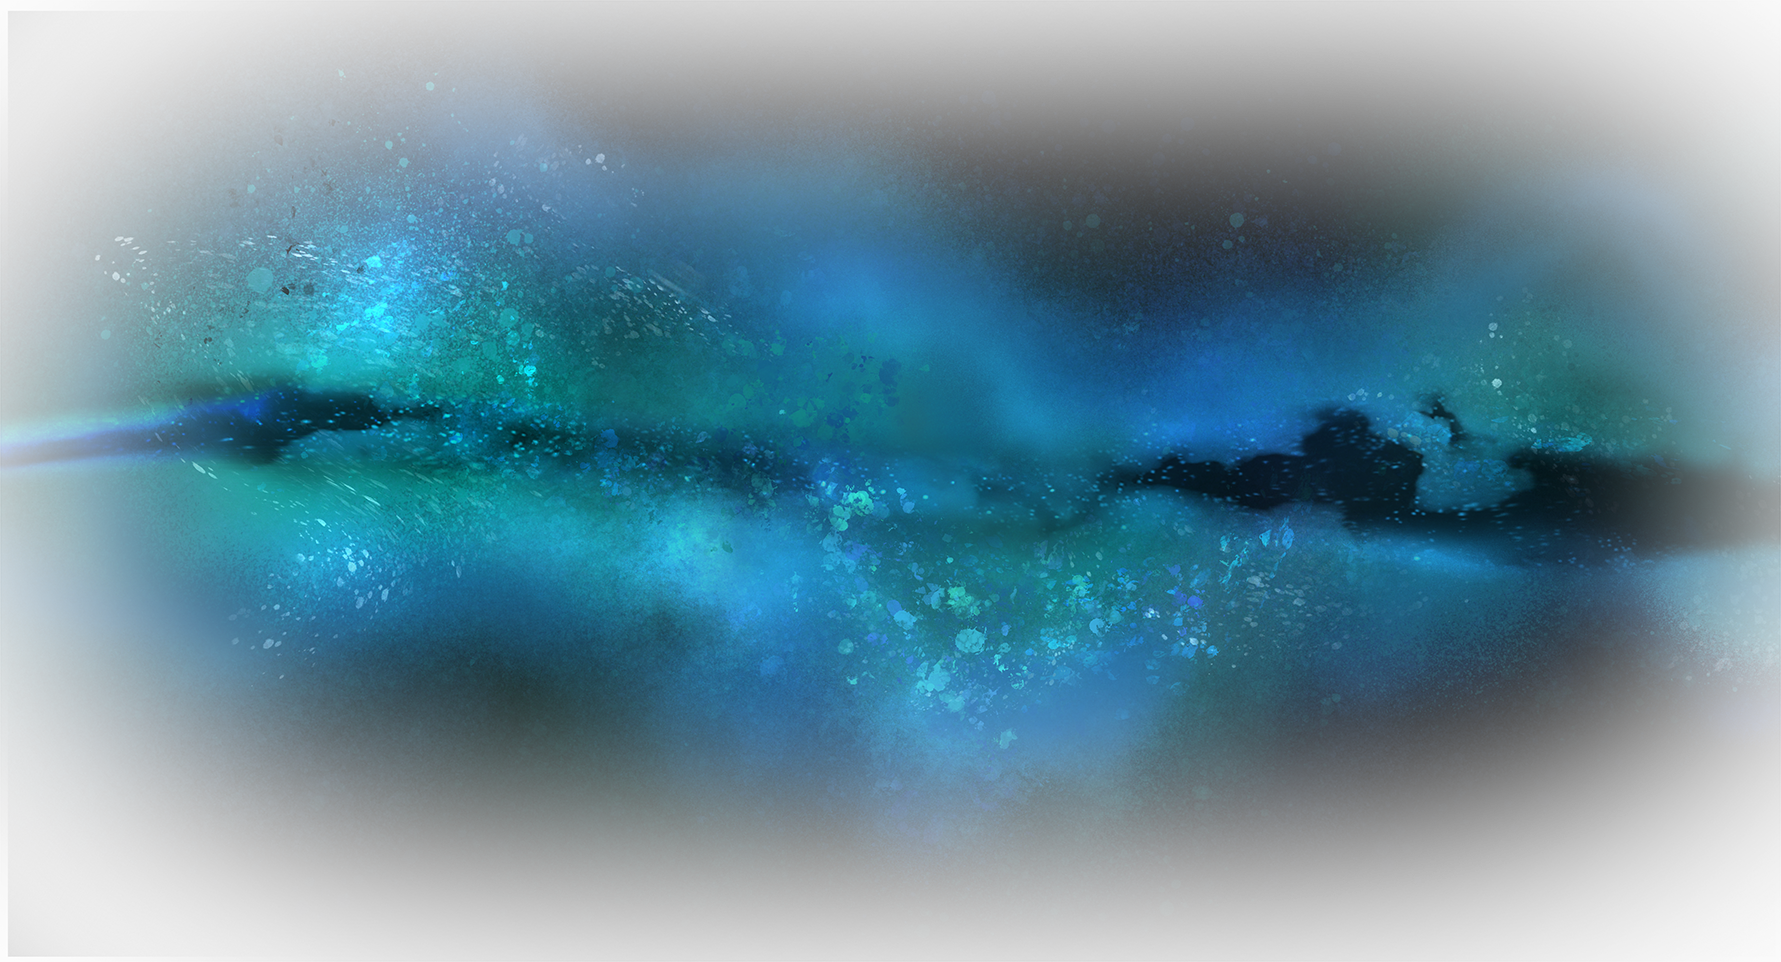
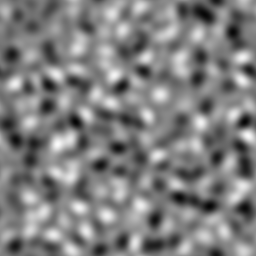
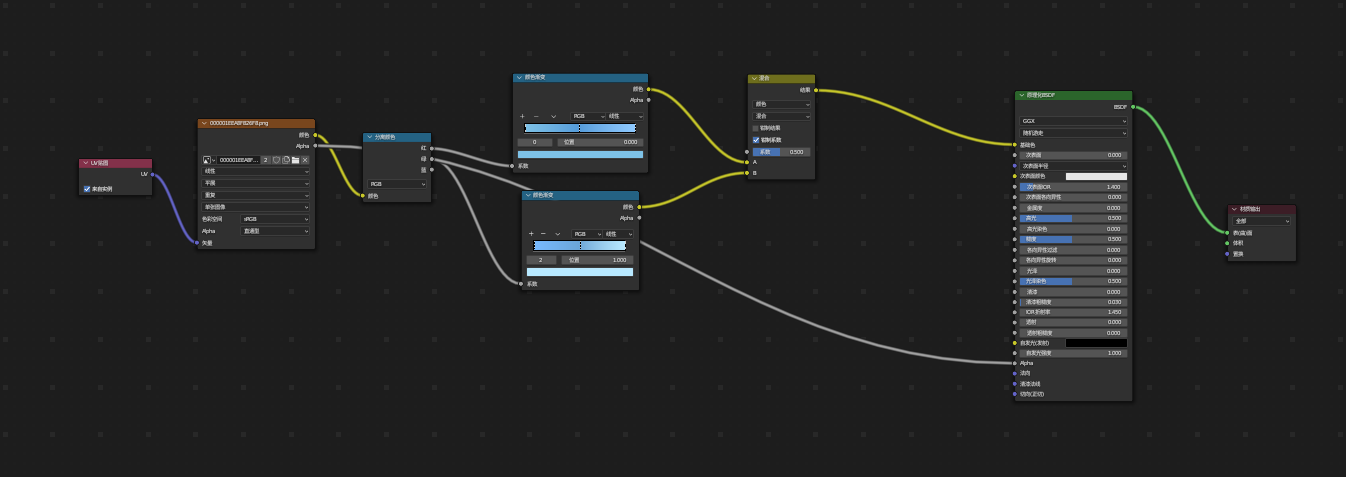
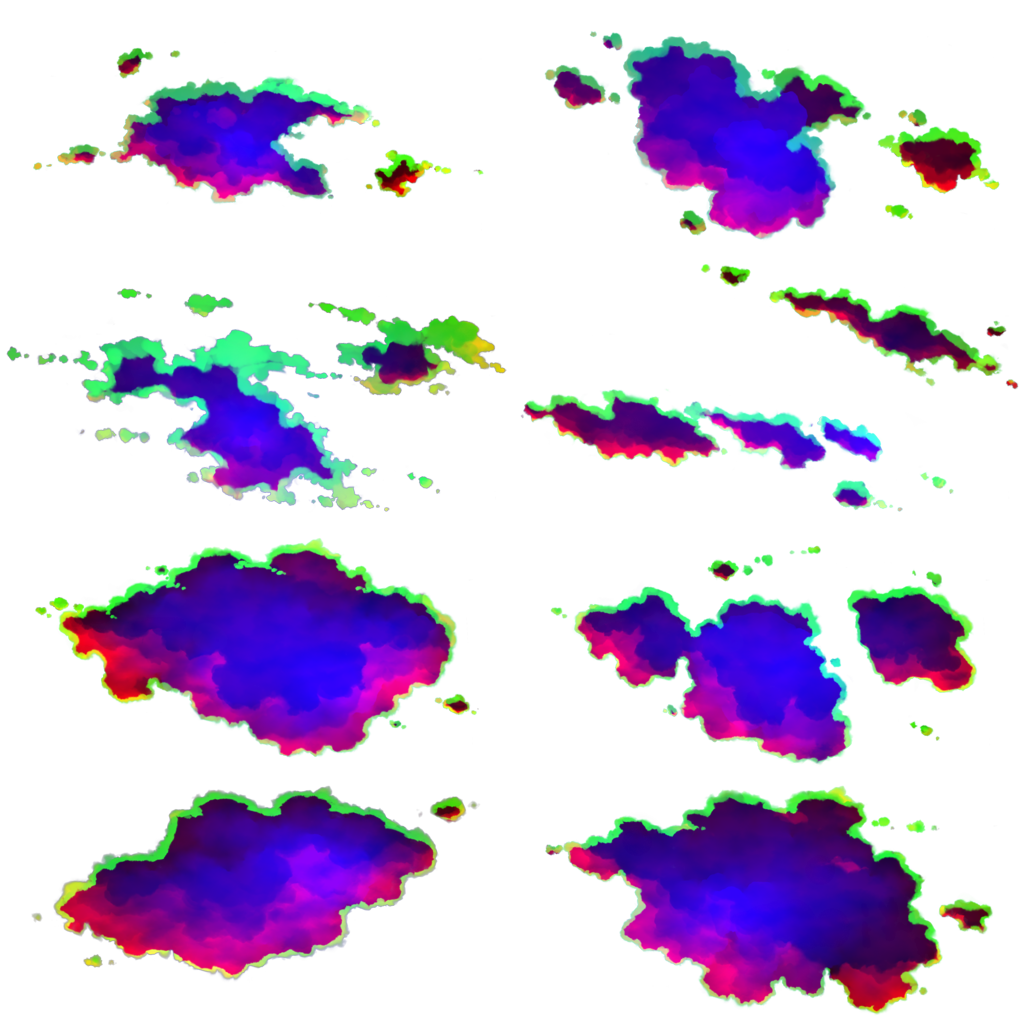
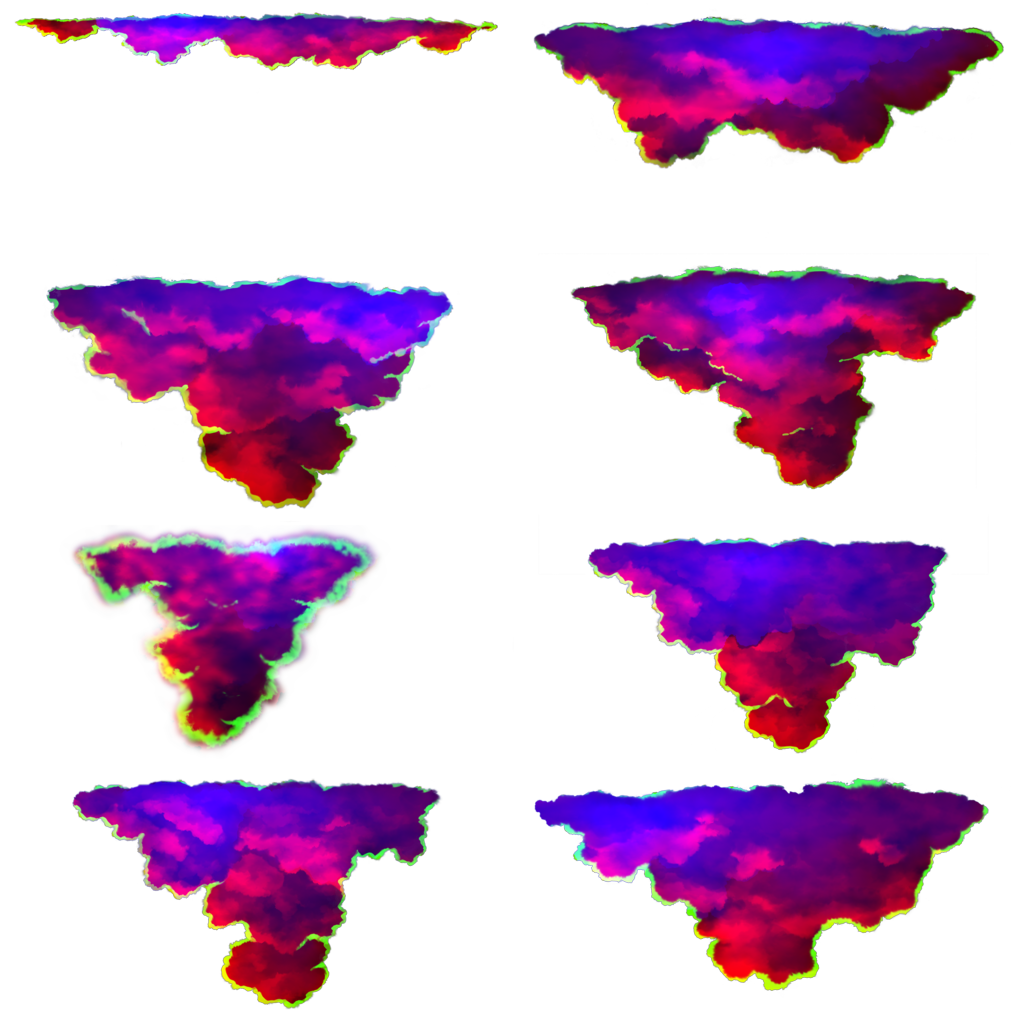
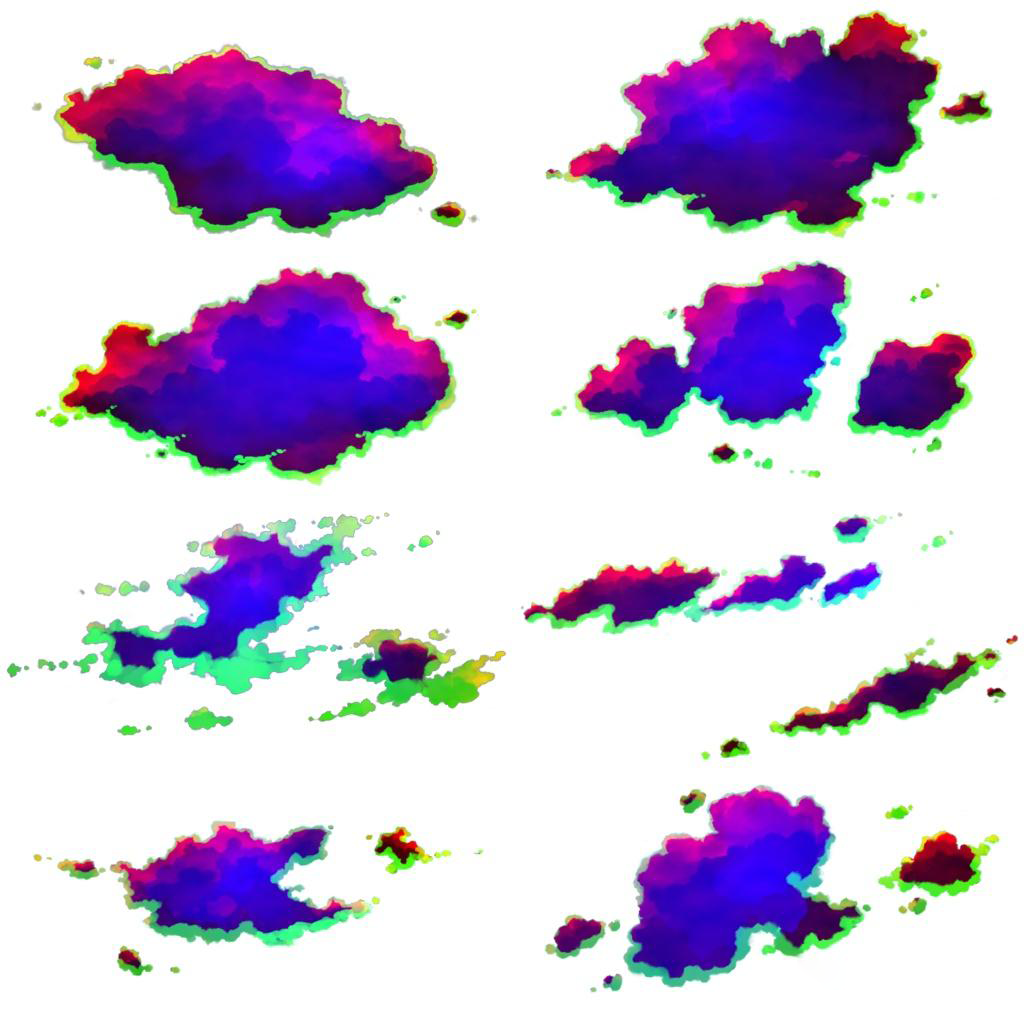
云贴图
开始写shader,创建一个\"cartoon/SkyBox_Cloud\" shader
边缘光效果
// 动态强度计算float rimIntensity = smoothstep(0.3, 0.5, lightDir.y) - smoothstep(0.6, 0.9, lightDir.y);rimIntensity = saturate(rimIntensity * _RimIntensityScale);// 日夜颜色切换float3 rimColor = lerp(_RimNightColor, _RimDayColor, smoothstep(0.1, 0.6, lightDir.y));// 结合纹理和法线点积float3 edgeGlow = rimColor * cloudMap.g * sunDot * rimIntensity;finalColor += edgeGlow;云朵消散效果
在日出日落时云层剧烈消散,白天和夜晚正常时间消散平缓。
// 计算当前时间的消散因子float CalculateDissolveFactor(float3 lightDirection){ // 光源高度 - 决定日出/日落/白天/夜晚 float sunHeight = lightDirection.y; // 日出日落判断(太阳接近地平线) float sunsetFactor = smoothstep(-0.2, 0.0, sunHeight) - smoothstep(0.0, 0.2, sunHeight); // 白天/夜晚因子 float dayFactor = smoothstep(0.1, 0.5, sunHeight); float nightFactor = smoothstep(-0.1, -0.5, -sunHeight); // 组合消散因子 float dissolveFactor = (sunsetFactor * _SunsetDissolveFactor) + (dayFactor * _DayDissolveFactor) + (nightFactor * _NightDissolveFactor); return dissolveFactor;}// 动态云密度计算float baseDensity = _Cloud_SDF_TSb;// 日出日落时增加消散效果float densityAdjustment = dissolveFactor * _DissolveIntensity;float minDensity = clamp(baseDensity - densityAdjustment * 0.3, 0.003, 1.5);float maxDensity = clamp(baseDensity + densityAdjustment * 0.7, 0.003, 1.5);float cloudDensity = smoothstep( minDensity, maxDensity, cloudMap.b);在日出日落时还增强了边缘光效果:
// 添加边缘光效果(日出日落时增强)float rimIntensity = 1.0 + dissolveFactor * 2.0;float3 edgeGlow = _Cloud_edgeColor * cloudMap.g * sunDot * rimIntensity;天空盒shader
Shader \"Unlit/Cartoon_skybox\"{ Properties{//【地平线设置】[Header(Horizon Settings)]_OffsetHorizon (\"地平线位移\", Range(-1, 1)) = 0_HorizonIntensity (\"地平线强度\", Range(0, 10)) = 3.3_SunSet (\"太阳升起颜色\", Color) = (1, 0.8, 1, 1)_HorizonColorDay (\"白天地平线颜色\", Color) = (0, 0.8, 1, 1)_HorizonColorNight (\"夜晚地平线颜色\", Color) = (0, 0.8, 1, 1)// 【地平线光晕属性】 [Header(Horizon Glow)] _DayHorWidth(\"Day Horizon Width\", Range(0, 0.5)) = 0.1 _NightHorWidth(\"Night Horizon Width\", Range(0, 0.5)) = 0.05 _DayHorStrenth(\"Day Horizon Strength\", Range(0, 5)) = 2.0 _NightHorStrenth(\"Night Horizon Strength\", Range(0, 5)) = 1.0 _DayHorColor(\"Day Horizon Color\", Color) = (1.0, 0.8, 0.6, 1) _NightHorColor(\"Night Horizon Color\", Color) = (0.2, 0.3, 0.5, 1)//【白天天空设置】[Header(Day Sky Settings)]_DayTopColor (\"白天顶部颜色\", Color) = (0.6, 0.8, 1.0, 1)_DayMidColor(\"Day Mid Color\", Color) = (0.4, 0.6, 1.0, 1)_DayBottomColor (\"白天底部颜色\", Color) = (0.2, 0.4, 0.8, 1)//【夜晚天空设置】[Header(Night Sky Settings)]_NightTopColor (\"夜晚顶部天空颜色\", Color) = (0.0, 0.02, 0.05, 1)_NightBottomColor (\"夜晚底部天空颜色\", Color) = (0.0, 0.05, 0.1, 1)//【太阳设置位置】[Header(Sun Settings)][HDR]_SunColor (\"太阳颜色\", Color) = (1, 1, 1, 1)_SunRadius (\"太阳半径\", Range(0, 2)) = 0.1_SunFilling (\"太阳缩放范围调整\", Range(0, 5)) = 1_SunInfColor(\"Sun Influence Color\", Color) = (1,0.8,0.5,1) _SunInfScale(\"Sun Influence Scale\", Range(0, 5)) = 1.0//【月亮设置位置】[Header(Moon Settings)][HDR]_MoonColor (\"月亮颜色\", Color) = (1, 1, 1, 1)_MoonRadius (\"月亮半径\", Range(0, 2)) = 0.1_MoonOffset (\"月亮位移\", Range(-1, 1)) = -0.1_MoonFilling (\"月亮缩放范围调整\", Range(0, 10)) = 1_MoonFilling2 (\"遮罩月亮缩放范围调整\", Range(0, 10)) = 1_MoonTex(\"Moon Texture\", 2D) = \"black\" {} _MoonSize(\"Moon Size\", Range(0.01, 1)) = 0.1 _MoonHaloSize(\"Moon Halo Size\", Range(0.1, 5)) = 1.0//【星星设置位置】[Header(Stars Settings)]_StarTex(\"Star Texture(星星贴图)\", 2D) = \"black\" { }//_StarNoiseTex(\"Star Noise Texture\", 2D) = \"white\" {}//_StarNoiseSpeed(\"Noise Speed\", Vector) = (0.1, 0.2, 0, 0) _TwinkleSpeed(\"Twinkle Speed\", Float) = 1.0 _TwinkleAmount(\"Twinkle Amount\", range(0, 1)) = 0.5 _StarsColor(\"Stars Color\", Color) = (1,1,1,1)_StarsIntensity(\"星星强度\", range(0,2)) = 1_StarsCutoff(\"Stars Cutoff\", range(0.01, 1)) = 0.1_galaxyTex(\"银河贴图\", 2D) = \"white\"{}_GalaxyNoiseTex(\"Galaxy Noise Texture\", 2D) = \"gray\" {} _galaxy_INT(\"银河默认强度\", range(0,1)) = 0.2 _galaxy_intensity(\"银河强度\", range(0,2)) = 1_GalaxySpeed(\"Galaxy Speed\", range(0,2)) = 1//【矩阵属性】 _LtoW0(\"LToW Row 0\", Vector) = (1,0,0,0) _LtoW1(\"LToW Row 1\", Vector) = (0,1,0,0) _LtoW2(\"LToW Row 2\", Vector) = (0,0,1,0) _LtoW3(\"LToW Row 3\", Vector) = (0,0,0,1)// 【大气散射属性】 [Header(Atmospheric Scattering)] _PlanetRadius(\"Planet Radius\", Float) = 6371.0 _AtmosphereHeight(\"Atmosphere Height\", Float) = 100.0 _MieColor(\"Mie Scattering Color\", Color) = (1.0, 0.8, 0.6, 1) _MieStrength(\"Mie Scattering Strength\", Range(0, 10)) = 1.0 _RayleighStrength(\"Rayleigh Strength\", Range(0, 5)) = 0.5 _ScatteringSteps(\"Scattering Steps\", Int) = 16}SubShader{Tags { \"RenderType\" = \"Opaque\" \"RenderPipeline\" = \"UniversalRenderPipeline\" \"IgnoreProjector\" = \"True\" \"PreviewType\"=\"Skybox\" }LOD 100Pass{Cull OffHLSLPROGRAM#pragma vertex vert#pragma fragment frag#pragma shader_feature FUZZY#include \"Packages/com.unity.render-pipelines.universal/ShaderLibrary/Core.hlsl\"#include \"Packages/com.unity.render-pipelines.universal/ShaderLibrary/Lighting.hlsl\"TEXTURE2D(_BaseNoise);SAMPLER(sampler_BaseNoise);TEXTURE2D(_Distort);SAMPLER(sampler_Distort);TEXTURE2D(_SecNoise);SAMPLER(sampler_SecNoise);TEXTURE2D(_StarTex);SAMPLER(sampler_StarTex);TEXTURE2D(_StarNoiseTex); SAMPLER(sampler_StarNoiseTex);TEXTURE2D(_MoonTex); SAMPLER(sampler_MoonTex);TEXTURE2D(_galaxyTex); SAMPLER(sampler_galaxyTex);TEXTURE2D(_GalaxyNoiseTex); SAMPLER(sampler_GalaxyNoiseTex);float4 _LtoW0, _LtoW1, _LtoW2, _LtoW3; //地平线设置 float _OffsetHorizon; float _HorizonIntensity; float4 _SunSet; float4 _HorizonColorDay; float4 _HorizonColorNight; //【太阳设置位置】 float _SunRadius; float4 _SunColor; float _SunFilling; float4 _SunInfColor; float _SunInfScale; //【月亮设置位置】 float _MoonRadius; float _MoonOffset; float _MoonFilling; float _MoonFilling2; float4 _MoonTex_ST; float _MoonSize; float _MoonHaloSize; float4 _MoonColor; //【星星设置位置】 float4 _StarTex_ST; float _TwinkleSpeed; float _TwinkleAmount; float4 _StarsColor; float _StarsIntensity; float _StarsCutoff; //银河 float4 _galaxyTex_ST;float4 _GalaxyNoiseTex_ST; float _galaxy_INT; float _galaxy_intensity;float _GalaxySpeed;//float4 _StarNoiseTex_ST;// _StarNoiseSpeed;// 天空颜色属性 float4 _DayBottomColor; float4 _DayMidColor; float4 _DayTopColor; float4 _NightBottomColor; float4 _NightTopColor; // 地平线光晕属性 float _DayHorWidth; float _NightHorWidth; float _DayHorStrenth; float _NightHorStrenth; float4 _DayHorColor; float4 _NightHorColor;// 大气散射属性 float _PlanetRadius; float _AtmosphereHeight; float4 _MieColor; float _MieStrength; float _RayleighStrength; int _ScatteringSteps;struct appdata{float4 vertex : POSITION;float3 uv : TEXCOORD0;};struct v2f{float3 uv : TEXCOORD0;float4 vertex : SV_POSITION;float3 worldPos : TEXCOORD1;};v2f vert(appdata v){v2f o;o.vertex = TransformObjectToHClip(v.vertex);o.uv = v.uv;o.worldPos = TransformObjectToWorld(v.vertex.xyz);return o;} // 球体射线相交函数 float2 RaySphereIntersection(float3 rayStart, float3 rayDir, float3 sphereCenter, float sphereRadius) { float3 oc = rayStart - sphereCenter; float a = dot(rayDir, rayDir); float b = 2.0 * dot(oc, rayDir); float c = dot(oc, oc) - sphereRadius * sphereRadius; float discriminant = b * b - 4 * a * c; if (discriminant < 0) return float2(-1, -1); float sqrtDiscriminant = sqrt(discriminant); float t1 = (-b - sqrtDiscriminant) / (2 * a); float t2 = (-b + sqrtDiscriminant) / (2 * a); return float2(t1, t2); } // 简化版散射积分 float4 IntegrateInscattering(float3 rayStart, float3 rayDir, float rayLength, float3 lightDir, int steps) { float stepSize = rayLength / steps; float3 step = rayDir * stepSize; float4 totalScattering = 0; float3 currentPos = rayStart; for (int i = 0; i 0 ? sunIntersection.y : 1000; // 简化积分 float sunDensity = exp(-height / (_AtmosphereHeight * 0.3)); float scattering = density * sunDensity; totalScattering += float4(scattering, scattering, scattering, 1) * stepSize; currentPos += step; } return totalScattering; } // ACES色调映射(简化版) float3 ACESFilm(float3 x) { float a = 2.51; float b = 0.03; float c = 2.43; float d = 0.59; float e = 0.14; return saturate((x * (a * x + b)) / (x * (c * x + d) + e)); }float4 frag(v2f i) : SV_Target{Light mainLight = GetMainLight();float3 worldDir = normalize(i.worldPos);//【天空颜色渐变与地平线光晕】// 1. 计算日夜过渡因子 float sunNightStep = smoothstep(-0.3, 0.25, mainLight.direction.y);// 2. 计算垂直位置 [-1,1] -> [0,1] float verticalPos = saturate(worldDir.y * 0.5 + 0.5); // 3. 计算天空方向分量 (用于渐变混合) float skyDirection = sign(worldDir.y); // 上=1, 下=-1 float absY = abs(worldDir.y); // 4. 计算白天渐变 float3 gradientDay = // 下半天空 (从底部到中间) lerp(_DayBottomColor.rgb, _DayMidColor.rgb, saturate(-worldDir.y)) * step(0, -worldDir.y) + // 上半天空 (从中间到顶部) lerp(_DayMidColor.rgb, _DayTopColor.rgb, saturate(worldDir.y)) * step(0, worldDir.y); // 5. 计算夜晚渐变 float3 gradientNight = lerp(_NightBottomColor.rgb, _NightTopColor.rgb, verticalPos); // 6. 混合日夜天空 float3 skyGradients = lerp(gradientNight, gradientDay, sunNightStep); // 7. 计算地平线光晕 // 7.1 混合日夜参数 float horWidth = lerp(_NightHorWidth, _DayHorWidth, sunNightStep); float horStrenth = lerp(_NightHorStrenth, _DayHorStrenth, sunNightStep); float3 horLineColor = lerp(_NightHorColor.rgb, _DayHorColor.rgb, sunNightStep); // 使用更快的光晕遮罩计算 float horLineMask = exp(-(absY * absY) / (horWidth * horWidth)); // 7.3 应用强度 float3 horLineEffect = horLineColor * horLineMask * horStrenth; // 8. 组合基础天空和地平线光晕 // 使用half精度 half3 skyColor = half3(skyGradients) + half3(horLineEffect);// 更平滑的地平线过渡 float horizonBlend = exp(-absY * 10.0) * 0.5; skyColor = lerp(skyColor, horLineColor, horizonBlend * horStrenth);// 添加黄昏/黎明色调 float3 twilightColor = float3(1.0, 0.5, 0.3); float twilightFactor = smoothstep(0.3, 0.5, sunNightStep) * (1 - smoothstep(0.5, 0.7, sunNightStep)); skyColor = lerp(skyColor, twilightColor, twilightFactor * 0.3);// 大气散射(简化版) //float3 sunDir = mainLight.direction; //float sunDot = dot(worldDir, sunDir); //float scatter = pow(saturate(sunDot), 8.0) * 0.5; //float3 atmosphericScattering = scatter * _SunColor.rgb; // 【大气散射效果 】 // =========================================== float3 scatteringColor = 0; // 1. 设置射线起点(相机位置) float3 rayStart = float3(0, _PlanetRadius * 0.01, 0); // 稍微高于地面 rayStart.y = saturate(rayStart.y) * _PlanetRadius * 0.02; // 2. 射线方向(观察方向) float3 rayDir = worldDir; // 3. 计算与大气层的交点 float3 planetCenter = float3(0, -_PlanetRadius, 0); float2 atmosphereIntersection = RaySphereIntersection( rayStart, rayDir, planetCenter, _PlanetRadius + _AtmosphereHeight ); float rayLength = atmosphereIntersection.y;// 4. 检查是否与地面相交 float2 groundIntersection = RaySphereIntersection( rayStart, rayDir, planetCenter, _PlanetRadius ); if (groundIntersection.x > 0) rayLength = min(rayLength, groundIntersection.x); // 5. 只计算有效距离的散射 if (rayLength > 0) { // 6. 积分计算散射 float4 inscattering = IntegrateInscattering( rayStart, rayDir, rayLength, -mainLight.direction, _ScatteringSteps ); // 7. 应用Mie散射和色调映射 scatteringColor = _MieColor.rgb * _MieStrength * ACESFilm(inscattering.rgb); // 8. 添加Rayleigh散射(简化版) float3 rayleigh = saturate(dot(worldDir, mainLight.direction) * 0.5 + 0.5); scatteringColor += rayleigh * _RayleighStrength * _MieColor.rgb; } // 应用到天空颜色 // skyColor += atmosphericScattering;float dayNightFactor = saturate(mainLight.direction.y * 2.0); //【太阳设置位置】float sun = distance(i.uv.xyz, float4(mainLight.direction, 0.0));//通过UV与主方向光的方向的相差值得到太阳的遮罩float sunDisc = 1 - (sun / _SunRadius);//太阳遮罩提取sunDisc = saturate(sunDisc * _SunFilling);//太阳的填充//【月亮设置位置】:月亮通过双圆进行相差得到我们的月亮弧度// 构建光照转换矩阵 float4x4 LToW = float4x4(_LtoW0, _LtoW1, _LtoW2, _LtoW3); float3 sunUV = mul(float4(worldDir, 0.0), LToW).xyz;// 计算月亮UV float2 moonUV = sunUV.xy * _MoonTex_ST.xy * (1/_MoonSize + 0.001) + _MoonTex_ST.zw;float4 moonTex = SAMPLE_TEXTURE2D(_MoonTex, sampler_MoonTex, moonUV);// 月亮光晕效果 float moonHaloArea = max(0, 1 - length((moonUV - 0.5) * 1/_MoonHaloSize)); float lerpmoonHaloArea = lerp(0, moonHaloArea, smoothstep(0.02, 0.1, -mainLight.direction.y));// 最终月亮颜色 float3 finalMoonColor = (_MoonColor * moonTex.rgb * moonTex.a + _MoonColor * lerpmoonHaloArea) * step(0, sunUV.z); float sunMask2 = smoothstep(-0.4, 0.4, -sunUV.z) - 0.3; float sunInfScaleMask = smoothstep(-0.01, 0.1, mainLight.direction.y) * smoothstep(-0.4, -0.01, -mainLight.direction.y); float3 finalSunInfColor = _SunInfColor.rgb * sunMask2 * _SunInfScale * sunInfScaleMask;//【太阳月亮合并】 float3 SunAndMoon = sunDisc * _SunColor.rgb + finalMoonColor; SunAndMoon += finalSunInfColor; // 添加太阳光晕效果// 【星星效果】 float3 stars = 0; // 1. 计算星星UV(使用球面投影) float scaleFactor = 1.0 / max(abs(worldDir.y), 0.001); float2 starsUV = worldDir.xz * scaleFactor; // 2. 采样星星纹理 float4 starTex = SAMPLE_TEXTURE2D(_StarTex, sampler_StarTex, starsUV); // 3. 应用阈值创建星星(二值化) float starsValue = step(_StarsCutoff, starTex.r); // 4. 添加闪烁效果 float twinkle = 1.0 + sin(_Time.y * _TwinkleSpeed) * _TwinkleAmount; starsValue *= twinkle; // 5. 应用颜色和强度 stars = starsValue * _StarsColor.rgb * _StarsIntensity; // 6. 只在夜晚显示 float nightFactor = smoothstep(0.0, 0.1, -mainLight.direction.y); stars *= nightFactor;//【银河效果】// 1. 计算银河噪声纹理(带时间动画) float2 galaxyNoiseUV = worldDir.xz * _GalaxyNoiseTex_ST.xy + _GalaxyNoiseTex_ST.zw; galaxyNoiseUV += float2(0, _Time.x * _GalaxySpeed * 0.67); float4 galaxyNoiseTex = SAMPLE_TEXTURE2D(_GalaxyNoiseTex, sampler_GalaxyNoiseTex, galaxyNoiseUV);// 2. 计算主银河纹理(受噪声影响)float2 galaxyUV = worldDir.xz * _galaxyTex_ST.xy + _galaxyTex_ST.zw; galaxyUV += (galaxyNoiseTex.rg - 0.5) * 0.2; // 添加噪声扰动 float4 galaxyTex = SAMPLE_TEXTURE2D(_galaxyTex, sampler_galaxyTex, galaxyUV);// 3. 计算银河颜色 galaxyTex.w = pow(galaxyTex.w,10); float3 galaxyColor =clamp((galaxyTex.xyz*galaxyTex.w *_galaxy_INT*_galaxy_intensity),0,1); // 6. 应用强度和可见性控制 galaxyColor *= _galaxy_intensity; galaxyColor *= (1 - dayNightFactor); // 只在夜晚显示 galaxyColor *= smoothstep(0.1, 0.3, abs(worldDir.y)); // 地平线附近减弱 // 将星星叠加到银河上 galaxyColor += stars; float3 finalColor = skyColor + SunAndMoon + stars + galaxyColor+ scatteringColor ; return float4( finalColor, 1.0);}ENDHLSL}}}Cloud Shader
Shader \"cartoon/SkyBox_Cloud\"{ Properties { [HDR]_CloudColorD(\"近太阳云颜色B\",color) = (1,1,1,1) [HDR]_CloudColorB(\"近太阳云颜色B\",color) = (1,1,1,1) [HDR]_CloudColorC(\"远太阳云颜色A\",color) = (1,1,1,1) [HDR]_CloudColorA(\"远太阳云颜色A\",color) = (1,1,1,1) _CloudMap(\"CloudMap\", 2D) = \"white\" {} _NoiseMap(\"NoiseMap\", 2D) = \"white\" {} _Cloud_SDF_TSb(\"云大小变化\", Range(0.003, 1.5)) = 0.5 [HDR]_Cloud_edgeColor(\"云边缘光颜色\",color) = (1,1,1,1) _SunMoon(\"唯一日月光切换\", Range(0, 1)) = 0 [HDR]_RimDayColor(\"白天边缘光颜色\", Color) = (1,0.5,0,1) [HDR]_RimNightColor(\"夜晚边缘光颜色\", Color) = (0.2,0.2,1,1) _RimIntensityFactor(\"边缘光整体强度\", Range(0,10)) = 1 _RimIntensityScale(\"边缘光整体大小\", Range(0,10)) = 1 // 消散效果参数 _DissolveIntensity(\"消散强度\", Range(0, 5)) = 1.0 _SunsetDissolveFactor(\"日出日落消散因子\", Range(0, 10)) = 5.0 _DayDissolveFactor(\"白天消散因子\", Range(0, 2)) = 0.5 _NightDissolveFactor(\"夜晚消散因子\", Range(0, 2)) = 0.3 } SubShader { Tags { \"Queue\"=\"Transparent\" \"RenderType\" = \"Transparent\" \"IgnoreProjector\" = \"True\" \"RenderPipeline\" = \"UniversalPipeline\" } LOD 100 Blend SrcAlpha OneMinusSrcAlpha //ZWrite Off CULL Off ZWrite Off ZTest LEqual Pass { HLSLPROGRAM // Required to compile gles 2.0 with standard srp library #pragma prefer_hlslcc gles #pragma exclude_renderers d3d11_9x #pragma vertex vert #pragma fragment frag #pragma multi_compile_fog #include \"Packages/com.unity.render-pipelines.core/ShaderLibrary/Color.hlsl\" #include \"Packages/com.unity.render-pipelines.universal/ShaderLibrary/Core.hlsl\" #include \"Packages/com.unity.render-pipelines.universal/ShaderLibrary/Lighting.hlsl\" #include \"Packages/com.unity.render-pipelines.core/ShaderLibrary/UnityInstancing.hlsl\" struct appdata { float4 positionOS : POSITION; float2 texUV1 : TEXCOORD0; float2 texUV2 : TEXCOORD1; }; struct v2f { float4 positionCS : SV_POSITION; float2 uv : TEXCOORD0; float fogCoord : TEXCOORD1; float2 noiseuv : TEXCOORD2; float3 positionWS : TEXCOORD3; }; CBUFFER_START(UnityPerMaterial) float4 _CloudColorA; float4 _CloudColorB; float4 _CloudColorC; float4 _CloudColorD; float4 _RimDayColor; float4 _RimNightColor; float _RimIntensityScale; float _RimIntensityFactor;sampler2D _CloudMap; float4 _CloudMap_ST; sampler2D _NoiseMap; float4 _NoiseMap_ST; float _Cloud_SDF_TSb; float4 _Cloud_edgeColor; float3 _SunDirection; float _DissolveIntensity; float _SunsetDissolveFactor; float _DayDissolveFactor; float _NightDissolveFactor; CBUFFER_END half remap(half x, half t1, half t2, half s1, half s2) { return (x - t1) / (t2 - t1) * (s2 - s1) + s1; } // 计算当前时间的消散因子 float CalculateDissolveFactor(float3 lightDirection) { // 光源高度 - 决定日出/日落/白天/夜晚 float sunHeight = lightDirection.y; // 日出日落判断(太阳接近地平线) float sunsetFactor = smoothstep(-0.2, 0.0, sunHeight) - smoothstep(0.0, 0.2, sunHeight); // 白天/夜晚因子 float dayFactor = smoothstep(0.1, 0.5, sunHeight); float nightFactor = smoothstep(-0.1, -0.5, -sunHeight); // 组合消散因子 float dissolveFactor = (sunsetFactor * _SunsetDissolveFactor) + (dayFactor * _DayDissolveFactor) + (nightFactor * _NightDissolveFactor); return dissolveFactor; } v2f vert (appdata v) { v2f o = (v2f)0; o.positionCS = TransformObjectToHClip(v.positionOS.xyz); o.positionWS = TransformObjectToWorld(v.positionOS.xyz); o.uv = v.texUV2; o.noiseuv = TRANSFORM_TEX(v.texUV2, _NoiseMap); o.noiseuv = o.noiseuv * _NoiseMap_ST.xy + _NoiseMap_ST.zw + _Time.x*0.1; return o; } half4 frag (v2f i) : SV_Target { // 获取主光源方向 Light mainLight = GetMainLight(); float3 lightDirection = mainLight.direction; // 计算天空点方向 float3 skyDirection = normalize(i.positionWS); float3 SunDirection = saturate(dot(skyDirection, lightDirection));SunDirection = pow(SunDirection,3); float3 CloudColorAB = lerp(_CloudColorA,_CloudColorB,SunDirection.x) ; float3 CloudColorCD = lerp(_CloudColorC,_CloudColorD,SunDirection.x) ;float4 Noise = tex2D(_NoiseMap,i.noiseuv);float UVdisturbance = remap(Noise.b,0,1,0,0.03); float4 baseMap = tex2D(_CloudMap, i.uv + UVdisturbance); float baseMapSMstep = smoothstep(clamp((_Cloud_SDF_TSb-0.08),0,1.5),_Cloud_SDF_TSb,baseMap.b); float3 CloudColor = lerp(CloudColorAB,CloudColorCD,baseMap.r) ; // 动态强度计算 float rimIntensity = smoothstep(0.3, 0.5, lightDirection.y) - smoothstep(0.6, 0.9, lightDirection.y); rimIntensity = saturate(rimIntensity * _RimIntensityScale); // 日夜颜色切换 float3 rimColor = lerp(_RimNightColor, _RimDayColor, smoothstep(0.1, 0.6, lightDirection.y)); // 结合纹理和法线点积 float3 EdgeColor= rimColor * baseMap.g * SunDirection * rimIntensity; // 计算动态消散因子 float dissolveFactor = CalculateDissolveFactor(lightDirection); // 日出日落时增加消散效果 // 动态云密度计算 float baseDensity = _Cloud_SDF_TSb; float densityAdjustment = dissolveFactor * _DissolveIntensity; float minDensity = clamp(baseDensity - densityAdjustment * 0.3, 0.003, 1.5); float maxDensity = clamp(baseDensity + densityAdjustment * 0.7, 0.003, 1.5); float cloudDensity = smoothstep( minDensity, maxDensity, baseMap.b );CloudColor = CloudColor + EdgeColor; return float4( CloudColor,baseMapSMstep*baseMap.a*cloudDensity); } ENDHLSL } }}参考资料
(38 条消息) 程序化天空盒-面片云 - 知乎
(34 条消息) Unity-URP-原神风格程序化天空盒-(1)纸片卡通云 - 知乎
(38 条消息) Unity-URP-原神风格程序化天空盒-(2)天空盒本体 - 知乎
(38 条消息) 【unity URP】昼夜循环天空球 - 知乎
(38 条消息) Unity 卡通渲染 程序化天空盒 - 知乎
(38 条消息) 程序化天空盒实现昼夜变换 - 知乎
(38 条消息) Unity日夜循环天空球(Procedural Skybox) - 知乎

