Jenkins中集成Allure报告生成_jenkins allure
在Jenkins中集成Allure报告生成,可实现测试结果的可视化、可追溯及多维度分析。以下是完整的集成方案,涵盖环境准备、Pipeline配置、报告生成及高级功能使用:
一、环境准备
1. 安装Allure核心组件
-
Allure Commandline
- Linux/macOS:通过包管理器安装(以Ubuntu为例)
curl -o allure.zip -L https://repo.maven.apache.org/maven2/io/qameta/allure/allure-commandline/2.21.0/allure-commandline-2.21.0.zipunzip allure.zip -d /opt/allureecho \'export PATH=/opt/allure/bin:$PATH\' >> ~/.bashrcsource ~/.bashrc - Windows:下载ZIP包并解压,将
allure.bat所在目录添加到系统PATH。
- Linux/macOS:通过包管理器安装(以Ubuntu为例)
-
验证安装
allure --version # 应显示版本号(如2.21.0)
2. Jenkins插件安装
- Allure Jenkins Plugin
- 进入Jenkins管理界面 → Manage Jenkins → Manage Plugins → Available
- 搜索
Allure Jenkins Plugin并安装,重启Jenkins。
二、Jenkins Pipeline配置
1. 基础Pipeline示例(Declarative语法)
pipeline { agent any stages { stage(\'Checkout\') { steps { git branch: \'main\', url: \'https://github.com/your/repo.git\' } } stage(\'Test\') { steps { // 示例:使用pytest生成Allure原始数据 sh \'\'\' pip install pytest allure-pytest pytest --alluredir=./allure-results test_suite/ \'\'\' } } stage(\'Generate Report\') { steps { // 生成Allure HTML报告 allure includeProperties: false, jdk: \'\', results: [[path: \'./allure-results\']] } } } post { always { // 归档测试结果(可选) archiveArtifacts artifacts: \'allure-results/**\', fingerprint: true } }}2. 关键参数说明
includePropertiesfalse。results--alluredir生成的目录)。jdk\'java11\'),若为空则使用Jenkins全局配置。三、高级配置与优化
1. 自定义报告标题与分类
-
修改
allure.properties
在项目根目录创建allure.properties文件,定义报告元数据:allure.results.directory=./allure-resultsallure.link.issue.pattern=https://jira.example.com/browse/{}allure.link.tms.pattern=https://testlink.example.com/testcases/{} -
分类测试用例
通过@allure.epic、@allure.feature、@allure.story注解分层标记测试:import allure@allure.epic(\"用户管理\")@allure.feature(\"登录功能\")class TestLogin: @allure.story(\"正常登录\") def test_valid_login(self): assert True
2. 历史趋势与对比
-
启用历史趋势
在Jenkins系统配置中,勾选Enable Allure Report Plugin的Keep all historical builds选项。- 效果:报告页面新增
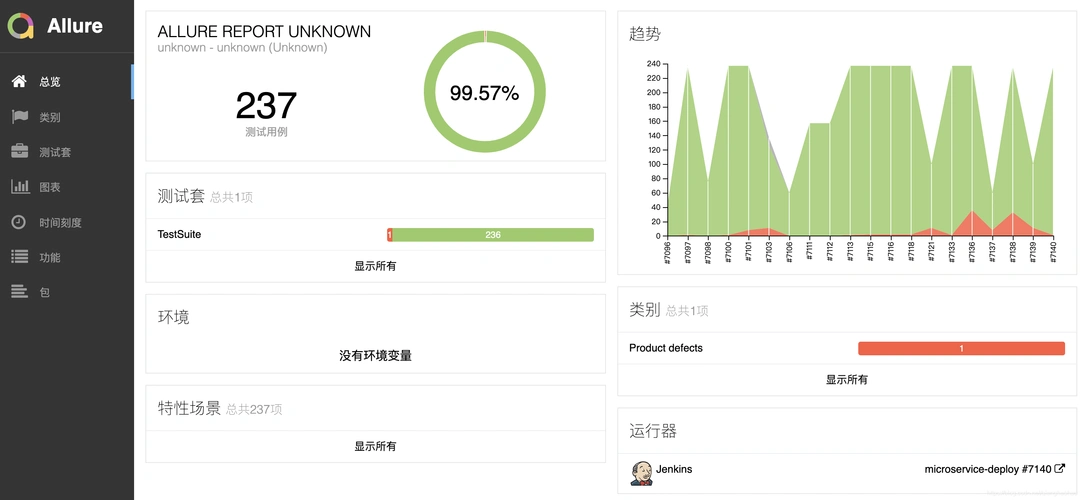
History标签页,展示历次构建的趋势图(如通过率、用例数量变化)。
- 效果:报告页面新增
-
对比基线版本
在Pipeline中指定基线版本:allure includeProperties: false, jdk: \'\', results: [[path: \'./allure-results\']], comparisonBuild: \'10\' # 对比第10次构建的结果
3. 集成通知与告警
-
邮件通知模板
在Jenkins邮件配置中,引用Allure报告链接:测试报告: ${BUILD_URL}allure通过率: ${ALLURE_REPORT_PASS_RATE}% -
Slack/企业微信告警
通过插件(如Slack Notification Plugin)发送报告摘要:post { failure { slackSend color: \'danger\', message: \"测试失败!查看报告: ${BUILD_URL}allure\" }}
四、报告分析与优化
1. 关键视图解读
-
Overview(概览)
- 核心指标:用例总数、通过率、执行时间、缺陷分布。
- 趋势图:展示近10次构建的通过率变化。
-
Categories(分类)
按@allure.epic或@allure.feature分组统计,快速定位问题模块。 -
Behaviors(行为)
关联需求(如Jira ID)与测试用例,实现需求覆盖度分析。
2. 性能优化建议
-
并行生成报告
对于大型项目,通过--batch-size参数并行处理结果:allure generate --batch-size 4 ./allure-results -o ./allure-report -
增量生成
避免重复生成无变化的数据,通过--clean参数控制:allure generate ./allure-results -o ./allure-report --clean # 强制清理旧报告
五、常见问题与解决方案
allure-results目录是否存在且非空。2. 确保Jenkins用户有目录读写权限。
allure.properties中添加:allure.results.encoding=UTF-8。2. 手动触发一次完整构建初始化历史数据。
publishAllure步骤的results路径与生成路径一致。六、完整案例:微服务QoS测试报告
假设项目使用pytest测试容器化QoS策略,通过Allure生成多维报告:
-
测试代码(
test_qos.py)import allureimport pytest@allure.epic(\"网络QoS测试\")@allure.feature(\"带宽限制\")class TestBandwidth: @allure.story(\"高优先级流量限速\") def test_high_priority_bandwidth(self): assert check_bandwidth(\"192.168.1.100\", 50, 52) # 允许±2%波动 @allure.story(\"低优先级流量限速\") def test_low_priority_bandwidth(self): assert check_bandwidth(\"192.168.1.101\", 30, 32)@allure.epic(\"网络QoS测试\")@allure.feature(\"延迟保障\")class TestLatency: @allure.story(\"核心业务延迟\") def test_core_latency(self): assert measure_latency(\"192.168.1.100\") < 50 # 延迟<50ms -
Jenkinsfile
pipeline { agent { label \'docker\' } stages { stage(\'Run QoS Tests\') { steps { sh \'\'\' pip install pytest allure-pytest pytest --alluredir=./allure-results test_qos.py \'\'\' } } stage(\'Generate Report\') { steps { allure includeProperties: false, jdk: \'\', results: [[path: \'./allure-results\']],comparisonBuild: \'lastCompletedBuild\' } } } post { always { archiveArtifacts artifacts: \'allure-results/**\' publishHTML([allowMissing: false, alwaysLinkToLastBuild: false, keepAll: true, reportDir: \'allure-report\', reportFiles: \'index.html\', reportName: \'Allure QoS Report\']) } }} -
报告效果
- 分类视图:清晰展示带宽限制、延迟保障等模块的通过率。
- 历史对比:直观看到某次策略调整后延迟是否优化。
- 缺陷追踪:通过
@allure.issue链接直接跳转到Jira缺陷单。
七、总结与最佳实践
-
标准化命名
- 统一
allure-results目录命名,避免因路径差异导致报告生成失败。
- 统一
-
版本化测试数据
- 在
allure.properties中添加版本号:allure.label.version=1.2.0
- 在
-
自动化清理
- 通过Pipeline定期清理过期报告数据:
post { cleanup { sh \'rm -rf allure-results allure-report\' }}
- 通过Pipeline定期清理过期报告数据:
-
与CI/CD深度集成
- 在代码提交时触发测试,报告链接自动嵌入PR(如GitHub Actions的
@jenkins机器人通知)。
- 在代码提交时触发测试,报告链接自动嵌入PR(如GitHub Actions的
通过以上方案,可实现Allure报告与Jenkins的无缝集成,将测试结果转化为可驱动决策的数据资产,提升团队对QoS策略的迭代效率。

