Nginx 学习
通过网盘分享的文件:Nginx
链接: https://pan.baidu.com/s/1dCc7FoND90H_x7rvRUXJqg 提取码: yyds
通过网盘分享的文件:Tomcat
链接: https://pan.baidu.com/s/1nj_5j_66gS_YHUAX1C25jg 提取码: yyds
Nginx安装、启动
- 安装依赖库
#安装C编译器yum install -y gcc gcc-c++- 安装pcre 、zlib、openssl
mkdir /softcd /soft将安装包上传到Linux
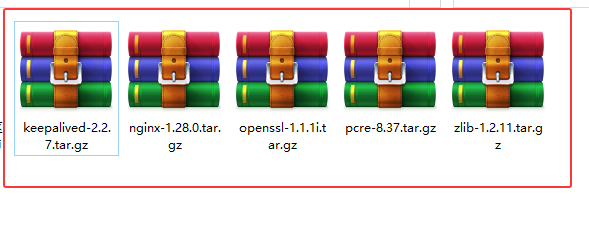
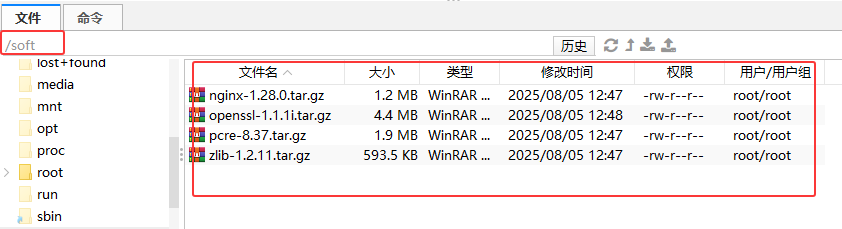
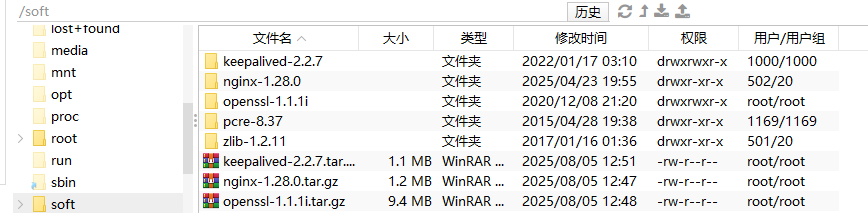
cd /softtar -zxvf nginx-1.28.0.tar.gz tar -zxvf openssl-1.1.1i.tar.gz tar -zxvf pcre-8.37.tar.gztar -zxvf zlib-1.2.11.tar.gz tar -zxvf keepalived-2.2.7.tar.gz解压之后:
- 解压Nginx包,并安装
cd /softcd /soft/pcre-8.37/./configuremake && make installcd /soft/zlib-1.2.11/./configuremake && make installcd /soft/openssl-1.1.1i/./configuremake && make installln -s /usr/local/lib64/libssl.so.1.1 /usr/lib64/libssl.so.1.1ln -s /usr/local/lib64/libcrypto.so.1.1 /usr/lib64/libcrypto.so.1.1cd /soft/nginx-1.28.0/./configuremake && make install- 进入
nginx所在目录
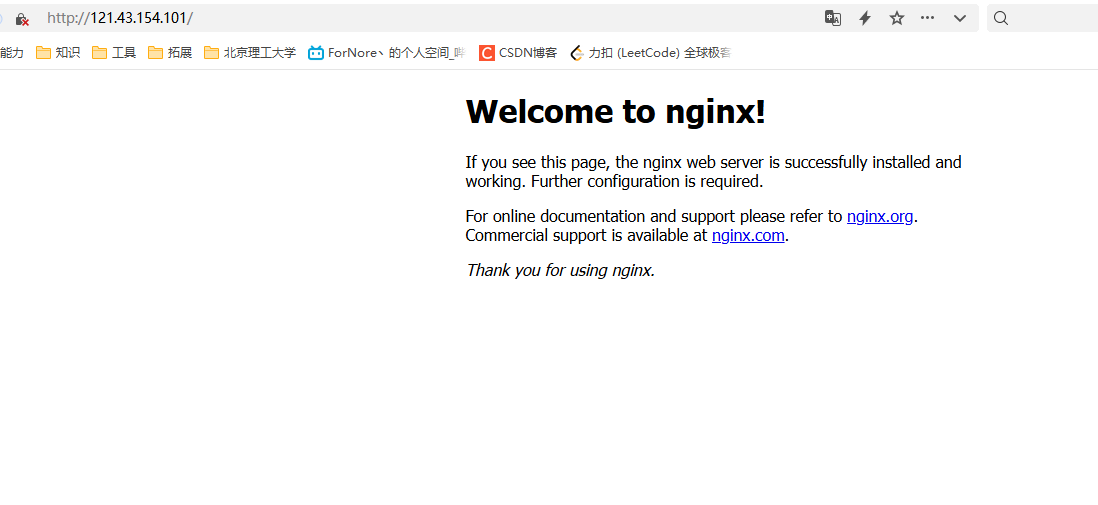
# 关闭防火墙systemctl stop firewalldcd /usr/local/nginx/sbin./nginx # 启动nginx服务# 查看nginx状态ps -ef|grep nginx访问Nginx:
- 补充Nginx命令
./nginx -s stop #快速停止./nginx -s quit #完成已接受的请求后,停止./nginx -s reload #重新加载配置./nginx -t #检查nginx配置是否正确#查看nginx状态ps -ef|grep nginx
- 注册系统服务
在这之前最好
停止nginx
通过系统服务的方式启动nginx
cd /usr/local/nginx/sbin./nginx -s stop #快速停止vim /usr/lib/systemd/system/nginx.service注册系统服务:
[Unit] Description=nginxAfter=network.target remote-fs.target nss-lookup.target[Service]Type=forkingPIDFile=/usr/local/nginx/logs/nginx.pidExecStartPre=/usr/local/nginx/sbin/nginx -t -c /usr/local/nginx/conf/nginx.confExecStart=/usr/local/nginx/sbin/nginx -c /usr/local/nginx/conf/nginx.confExecReload=/usr/local/nginx/sbin/nginx -s reloadExecStop=/usr/local/nginx/sbin/nginx -s stopExecQuit=/usr/local/nginx/sbin/nginx -s quit PrivateTmp=true [Install] WantedBy=multi-user.target # 多用户以系统服务启动:
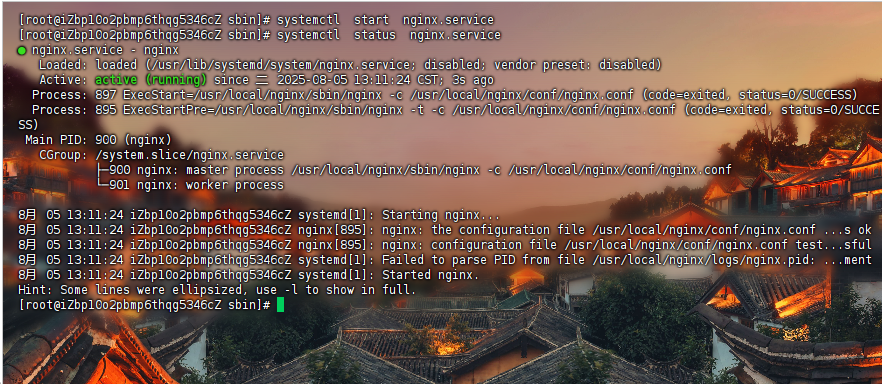
systemctl status nginx.servicesystemctl stop nginx.servicesystemctl start nginx.servicesystemctl restart nginx.service 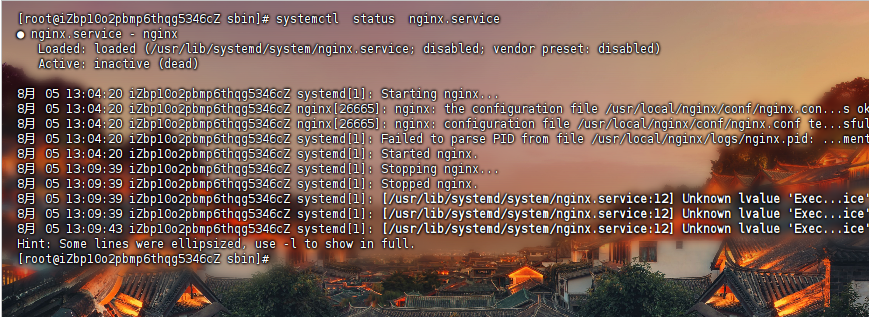
Nginx 目录
conf #配置文件|-nginx.conf # 主配置文件|-其他配置文件,都被引入到了nginx.confhtml #静态页面logs|-access.log #访问日志(每次访问都会记录)|-error.log #错误日志|-nginx.pid #进程号sbin|-nginx #主进程文件*_temp #运行时,生成临时文件
Nginx的location规则详解
=
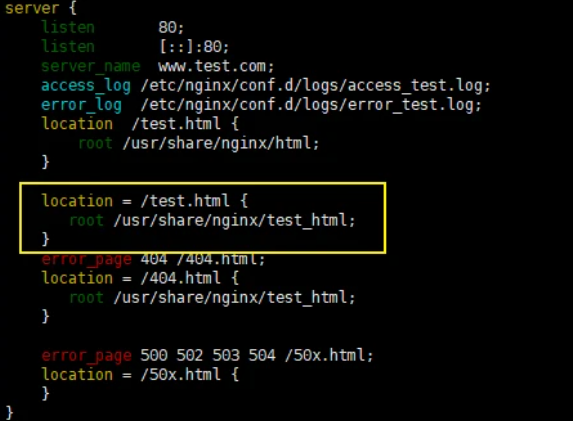
通过域名和路径访问后的内容如下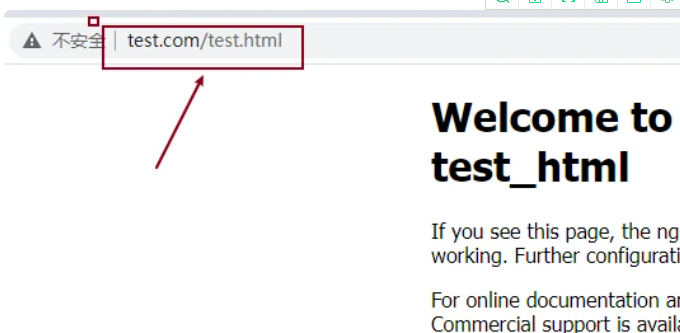
注意:
/usr/share/nginx/test_html文件夹下需要有test.html才可以正常访问
root与alias
请求的条件为test.html
通过root指定的路径为/usr/share/nginx/test_html,因此在匹配的时候,这个路径下就必须要有test.html这个文件才可以,否则就会找不到而报错,
如果用alias,那么通过浏览器进行请求的时候,alias也是指定到/usr/share/nginx/test_htm路径下,但是会匹配默认的index.html,而无须强制匹配test.html,但是此时就不能使用”=”来进行精确匹配,现在将root改为alias,如图: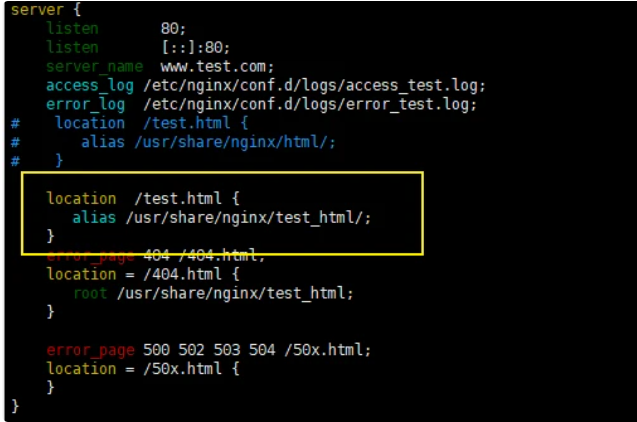
location / { alias /app/html/; index index.html index.htm; }两者区别:
alias是目录别名,root是最上层目录的定义alias后必须用\"/\"结束,不然找不到文件,root可有可无
注意:alias指定的路径结尾要
加”/”
^~
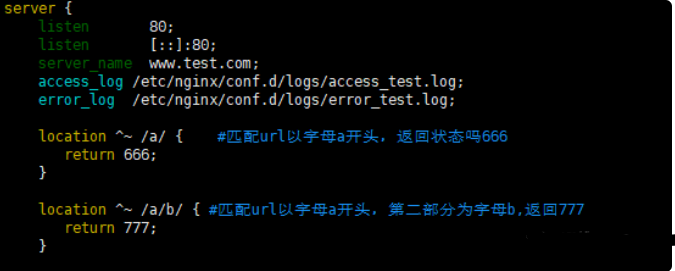
发起同样的请求,观察返回状态码,如图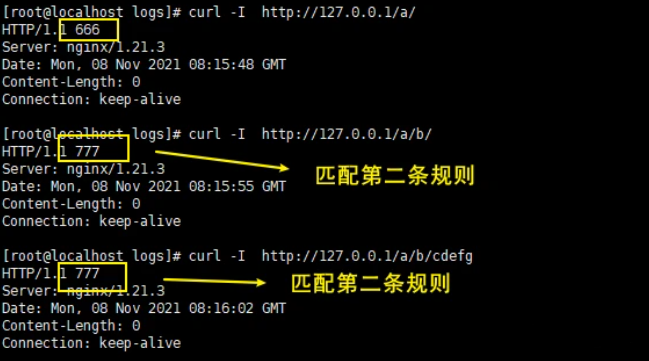
注意:如果
^~匹配成功了,那么表示阻断正则表达式,不再进行正则匹配
Nginx配置
指令
- ① listen

listen 127.0.0.1:8000; # 监听localhost:8000 监听指定的IP和端口listen 127.0.0.1;#监听指定IP的所有端口listen 8000;#监听指定端口上的连接listen *:8000;#监听指定端口上的连接
default_server属性是标识符,用来将此虚拟主机设置成默认主机。所谓的默认主机指的是如果没有匹配到对应的address:port,则会默认执行的。如果不指定默认使用的是第一个server。
server{listen 8080 default_server;server_name localhost;default_type text/plain;return 444 \'This is a error request\';}- ② server_name
~ : 用于表示当前uri中包含了正则表达式,并且区分大小写~*: 用于表示当前uri中包含了正则表达式,并且不区分大小写^~: 用于不包含正则表达式的uri前缀,功能和不加符号的一致,唯一不同的是,如果模式匹配,那么就停止搜索其他模式了
关于
server_name的配置方式有三种,分别是:
精确匹配
通配符匹配
正则表达式匹配
server {listen 80;#server_name www.dhy.cn www.xpy.cn; 精确匹配#server_name *.itcast.cnwww.itheima.*; 通配符匹配#server_name ~^www\\.(\\w+)\\.com$; #正则表达式匹配, \\是把后面的.转义:让.不做匹配, ^开始$结束,()代表一个正则表达式}匹配顺序分别为
#准确的server_name匹配#以通配符开始的字符串#以通配符结束的字符串#匹配正则表达式- ③ location
location:用来设置请求的URI
不带符号,要求必须以指定模式开始
server {listen 80;server_name 127.0.0.1; # 等同localhostlocation /abc{default_type text/plain;return 200 \"access success\";}}#以下访问都是正确的#http://192.168.200.133/abc#http://192.168.200.133/abc?p1=TOM#http://192.168.200.133/abc/#http://192.168.200.133/abcdef= : 用于
不包含正则表达式的uri前,必须与指定的模式精确匹配
server {listen 80;server_name 127.0.0.1;location =/abc{default_type text/plain;return 200 \"access success\";}}#可以匹配到#http://192.168.200.133/abc #代表/资源下#http://192.168.200.133/abc?p1=TOM 带参数#匹配不到#http://192.168.200.133/abc/ #代表abc这个资源下#http://192.168.200.133/abcdef- ④ error_page
(1)可以指定具体跳转的地址
server {error_page 404 http://www.dhy.cn;}(2)可以指定重定向地址
server{error_page 404 /50x.html;error_page 500 502 503 504 /50x.html;location =/50x.html{root html;}}简化版的nginx.conf
worker_processes 1; # 启动的worker进程数events{#设置Nginx网络连接序列化accept_mutex on;#设置Nginx的worker进程是否可以同时接收多个请求multi_accept on;#设置Nginx的worker进程最大的连接数worker_connections 1024;#设置Nginx使用的事件驱动模型use epoll;}http { include mime.types; #include是引入关键字,这里引入了mime.types这个配置文件(同在conf目录下,mime.types是用来定义,求返回的content-type) default_type application/octet-stream; #mime.types未定义的,使用默认格式application/octet-stream sendfile on; # 开启 高效文件传输模式。tcp_nopush on; #需要在 sendfile开启模式才有效,防止网路阻塞,积极的减少网络报文段的数量。将响应头和正文的开始部分一起发送,而不一个接一个的发送tcp_nodelay on; keepalive_timeout 65; #长链接超时时间#一个nginx可以启用多个server(虚拟服务器) server { listen 80;#监听端口80 server_name localhost; #接收的域名 location / { root html; #根目录指向html目录,看下图 index index.html index.htm; #域名/index 指向 index.html index.htm文件,看下图 } error_page 500 502 503 504 /50x.html; # 服务器错误码为500 502 503 504,转到\"域名/50x.html\" location = /50x.html { # 指定到html文件夹下找/50x.htm root html;#根目录指向html目录,看下图 } }}

sendfile
打开sendfile,用户请求的数据不用再加载到nginx的内存中,而是直接发送
Nginx配置使用场景
修改nginx配置文件后,记得
重新加载nginx==>./nginx -s reload
不同二级域名,映射到不同静态网页
可以写多个server字段,从前向后匹配,先匹配到哪个就用哪个
用户访问pro.hedaodao.ltd,就会走到第一个server配置;test.hedaodao.ltd走到第二个配置
http { #....其他属性 server { listen 80; server_name pro.hedaodao.ltd; location / { root html/pro; index index.html index.htm; } error_page 500 502 503 504 /50x.html; location = /50x.html { root html; }} server { listen 80; server_name test.hedaodao.ltd; location / { root html/test; index index.html index.htm; } error_page 500 502 503 504 /50x.html; location = /50x.html { root html; }}}不同域名,映射到同一静态页面
server_name
- 可以写多个,用空格分开
- 使用通配符(*)
- 使用正则表达式(https://blog.csdn.net/yangyelin/article/details/112976539)
http{ server { listen 80; server_name *.hedaodao.ltd ~^[0-9]+\\.hedaodao\\.ltd$; # \"\\.\"是转译\".\" location / { root html/test; index index.html index.htm; } error_page 500 502 503 504 /50x.html; location = /50x.html { root html; }}}Nginx命令配置到系统环境
(1)修改/etc/profile文件
vim /etc/profile#在最后一行添加export PATH=$PATH:/usr/local/nginx/sbinsource /etc/profile #使之立即生效nginx -v #检测是否配置成功正则表达式

反向代理与负载均衡
反向代理:这种代理方式叫做,隧道代理。有性能瓶颈,因为所有的数据都经过Nginx,所以Nginx服务器的性能至关重要
负载均衡:把请求,按照一定算法规则,分配给多台业务服务器(即使其中一个坏了/维护升级,还有其他服务器可以继续提供服务)

反向代理
启用proxy_pass,root和index字段就会失效
proxy_pass后的地址必须写完整 http://xxx,不支持https
当访问localhost时(Nginx服务器),网页打开的是http://xxx(应用服务器),网页地址栏写的还是localhost
http{ server { listen 80; server_name localhost; location / { proxy_pass http://xxx; #配置后root和index失效 #root html/test; #index index.html index.htm; } error_page 500 502 503 504 /50x.html; location = /50x.html { root html; }}}编写proxy_pass的时候,后面的值要不要加\"/\"?
server {listen 80;server_name localhost;location /{#proxy_pass http://192.168.200.146;proxy_pass http://192.168.200.146/;}}# 当客户端访问 http://localhost/index.html,效果是一样的server{listen 80;server_name localhost;location /server{#proxy_pass http://192.168.200.146;proxy_pass http://192.168.200.146/;}}当客户端访问 http://localhost/server/index.html这个时候,第一个proxy_pass就变成了http://localhost/server/index.html第二个proxy_pass就变成了http://localhost/index.html效果就不一样了。结论:
不加了/,拼接location的uri,
加了/,不拼接
负载均衡
使用upstream定义一组地址【在server字段下】
服务端设置
这里不准备三台虚拟机,充当真实服务器,而使用端口进行区分
server { listen 9001; server_name localhost; default_type text/html; location /{ return 200 \'192.168.111.101:9001
\'; }}server { listen 9002; server_name localhost; default_type text/html; location /{ return 200 \'192.168.111.101:9002
\'; }}server { listen 9003; server_name localhost; default_type text/html; location /{ return 200 \'192.168.111.101:9003
\'; }}负载均衡器设置
upstream backend{server 192.168.111.101:9091;server 192.168.111.101:9092;server 192.168.111.101:9093;}server {listen 80;server_name localhost;location /{proxy_pass http://backend;}}① 负载均衡状态
代理服务器在负责均衡调度中的状态有以下几个:

down
down:将该服务器标记为永久不可用,那么该代理服务器将不参与负载均衡
upstream backend{server 192.168.111.101:9001 down;server 192.168.111.101:9002;server 192.168.111.101:9003;}server {listen 80;server_name localhost;location /{proxy_pass http://backend;}}该状态一般会对需要停机维护的服务器进行设置。
backupbackup:将该服务器标记为备份服务器,当主服务器不可用时,将用来传递请求。
当主服务器恢复时,会使用主服务器来处理请求
upstream backend{server 192.168.111.101:9001 ;server 192.168.111.101:9002 backup;server 192.168.111.101:9003;}server {listen 80;server_name localhost;location /{proxy_pass http://backend;}}介绍一个工具firewall-cmd,该工具是Linux提供的专门用来操作firewall的。
- 查询防火墙中指定的端口是否开放
firewall-cmd --query-port=9001/tcp- 如何开放一个指定的端口
firewall-cmd --permanent --add-port=9002/tcp- 批量添加开发端口
firewall-cmd --permanent --add-port=9001-9003/tcp- 如何移除一个指定的端口
firewall-cmd --permanent --remove-port=9003/tcp- 重新加载
firewall-cmd --reload其中:
-
--permanent表示设置为持久
-
--add-port表示添加指定端口
-
--remove-port表示移除指定端口
max_connsmax_conns=number:用来设置代理服务器同时活动链接的最大数量,默认为0,表示不限制,使用该配置可以根据后端服务器处理请求的并发量来进行设置,防止后端服务器被压垮。
upstream backend{server 192.168.111.101:9001 ;server 192.168.111.101:9002 ;server 192.168.111.101:9003 max_conns=100 ;}server {listen 80;server_name localhost;location /{proxy_pass http://backend;}}max_fails和fail_timeoutmax_fails=number:设置允许请求代理服务器失败的次数,默认为1。
fail_timeout=time:设置经过max_fails失败后,服务暂停的时间,默认是10秒
upstream backend{server 192.168.111.101:9001 ;server 192.168.111.101:9002 ;server 192.168.111.101:9003 max_fails=3 fail_timeout=15;}server {listen 80;server_name localhost;location /{proxy_pass http://backend;}}② 负载均衡策略
weight加权[加权轮询]
访问使用哪个地址的权重
upstream backend{server 192.168.111.101:9001 weight=10;server 192.168.111.101:9002 weight=5;server 192.168.111.101:9003 weight=3;}server {listen 80;server_name localhost;location /{proxy_pass http://backend;}}ip hash
可以解决session共享问题
upstream backend{ip_hash;server 192.168.111.101:9001 ;server 192.168.111.101:9002 ;server 192.168.111.101:9003 ;}server {listen 80;server_name localhost;location /{proxy_pass http://backend;}}url_hash
upstream backend{hash &request_uri;server 192.168.111.101:9001 ;server 192.168.111.101:9002 ;server 192.168.111.101:9003 ;}server {listen 80;server_name localhost;location /{proxy_pass http://backend;}}least_conn
最少连接,把请求转发给连接数较少的后端服务器。轮询算法是把请求平均的转发给各个后端,使它们的负载大致相同;但是,有些请求占用的时间很长,会导致其所在的后端负载较高。这种情况下,
least_conn这种方式就可以达到更好的负载均衡效果
upstream backend{least_conn;server 192.168.111.101:9001 ;server 192.168.111.101:9002 ;server 192.168.111.101:9003 ;}server {listen 80;server_name localhost;location /{proxy_pass http://backend;}}动静分离
当用户请求时,
动态请求分配到Tomcat业务服务器,静态资源请求放在Nginx服务器中
例子:
图片目录

Nginx配置

index.html引入两个图片

访问

URL重写
rewrite是URL重写的关键指令,根据regex(正则表达式)部分内容,重定向到replacement,结尼是flag标记。rewrite <regex> <replacement> [flag];关键字正则替代内容 flagt标记正则:per1森容正则表达式语句进行规则匹配替代内容:将正则匹配的内容替换成replacementflag标记说明:last #本条规则匹配完成后,继续向下匹配新的1ocation URI规则break #本条规则匹配完成即终止,不再匹配后面的任何规则redirect #返回302临重定向,游览器地址会显示跳转后的URL地址permanent #返回301永久重定向,测览器地址栏会显示跳转后的URL地址浏览器地址栏访问 http://localhost/123.html实际上是访问http://localhost//index.jsp?pageNum=123
server { listen 80; server_name localhost;location / { rewrite ^/([0-9]+).html$ /index.jsp?pageNum=$1 break; #$1 代表第一个正则表达式的结果 proxy_pass http://xxx; } error_page 500 502 503 504 /50x.html; location = /50x.html { root html; }}网关服务器

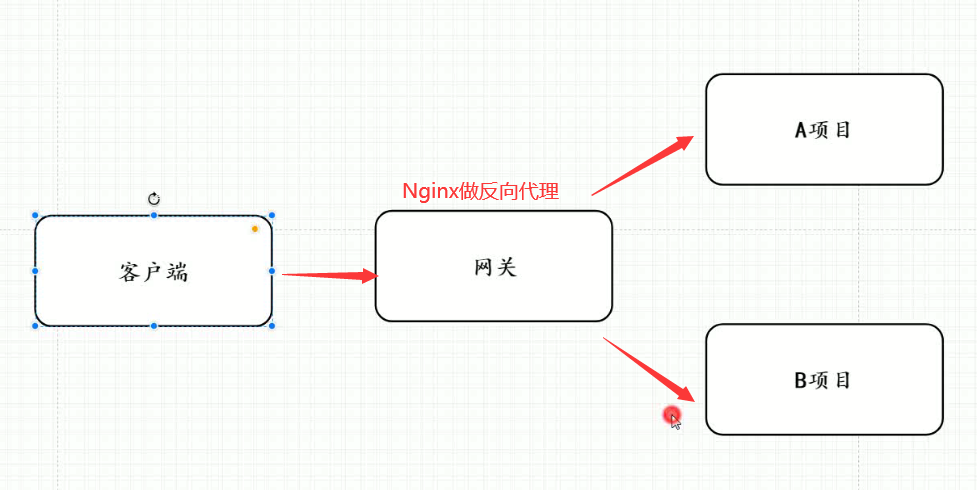
上图中,应用服务器,不能直接被外网访问到,只能通过Nginx服务器进行访问(
使用proxy_pass),这时候这台Nginx服务器就成为了网关服务器(承担入口的功能)
所以,我们启动应用服务器的防火墙,设置其只能接受这台Nginx服务器的请求
启动防火墙
systemctl start firewalld.service不让外网直接访问的加上rich规则
例:在
192.168.111.102上加
- ① 添加rich规则
firewall-cmd --permanent --add-rich-rule=\"rule family=\"ipv4\" source address=\"192.168.111.101\" port protocol=\"tcp\" port=\"8080\" accept\" #配置意思:外网不能访问,但是让192.168.111.101这个地址可以访问8080端口- ② 移除rich规则
firewall-cmd --permanent --remove-rich-rule=\"rule family=\"ipv4\" source address=\"192.168.111.101\" port port=\"8080\" protocol=\"tcp\" accept\"- ③ 重启
移除和添加规则都要重启才能生效
firewall-cmd --reload查看所有规则
firewall-cmd --list-all #所有开启的规则
- ④ 配置Nginx
在
192.168.111.101
查看指定端口的进程号
netstat -tanlp |grep 端口号 #即可查到占用该端口号的进程nginx配置,访问该主机的80端口,可以跳到
192.168.111.102:8080

- ⑤ 访问

防盗链
当我们请求到一个页面后,这个页面一般会再去请求其中的静态资源,这时候请求头中,会有一个
referer字段,表示当前这个请求的来源,我们可以限制指定来源的请求才返回,否则就不返回,这样可以节省资源

valid_referers none|server_name
设置有效的referer值
- none:检测地址
没有referer,则有效 - server_name:检测主机地址,
referer显示是从这个地址来的,则有效(server_name必须是完整的http://xxxx)
注意:if ($invalid_referer)中if后有个空格,不写就会报错
nginx: [emerg] unknown directive \"if($invalid_referer)\" in /usr/local/nginx/conf/nginx.conf:27- ① Nginx配置
例子:这里设置nginx服务器中的img目录下的图片必须referer为http:192.168.174/133才能访问
server { listen 80; server_name localhost;location / { proxy_pass http://xxx; } location /img{ valid_referers http:192.168.174/133; if ($invalid_referer){ #无效的 return 403;#返回状态码403 } root html; index index.html index.htm; } error_page 500 502 503 504 /50x.html; location = /50x.html { root html; }}如果引用这张图片的页面且
referer并没有被设置,图片无法加载出来
如果直接访问图片地址,因为没有refer字段指向来源,会直接显示Nginx的页面

- ② 设置盗链图片
将提示图片放在html/img/x.png,访问设置防盗链图片时,就返回这x.png张图
location /img{ valid_referers http:192.168.174/133; if ($invalid_referer){#无效的 rewrite ^/ /img/x.png break; } root html; index index.html index.htm;}跨域问题解决
- ① 同源策略
浏览器的同源策略:是一种约定,是浏览器最核心也是最基本的安全功能,如果浏览器少了同源策略,则浏览器的正常功能可能都会受到影响
同源: 协议、域名(IP)、端口相同即为同源
http://192.168.200.131/user/1https://192.168.200.131/user/1不http://192.168.200.131/user/1http://192.168.200.132/user/1不http://192.168.200.131/user/1http://192.168.200.131:8080/user/1不http://www.nginx.com/user/1http://www.nginx.org/user/1不http://192.168.200.131/user/1http://192.168.200.131:8080/user/1不http://www.nginx.org:80/user/1http://www.nginx.org/user/1满足- ② 跨域问题
简单描述下:
有两台服务器分别为A,B,如果从服务器A的页面发送异步请求到服务器B获取数据,
如果服务器A和服务器B不满足同源策略,则就会出现跨域问题。
案例演示

1)nginx的html目录下新建一个a.html
<html> <head> <meta charset=\"utf-8\"> <title>跨域问题演示</title> <script src=\"jquery.js\"></script> <script> $(function(){ $(\"#btn\").click(function(){ $.get(\'http://192.168.200.133:8080/getUser\',function(data){ alert(JSON.stringify(data)); }); }); }); </script> </head> <body> <input type=\"button\" value=\"获取数据\" id=\"btn\"/> </body></html>2)在nginx.conf配置如下内容
server{ listen 8080; server_name localhost; location /getUser{ default_type application/json; return 200 \'{\"id\":1,\"name\":\"TOM\",\"age\":18}\'; }}server{listen 80;server_name localhost;location /{root html;index index.html;}}3)通过浏览器访问测试
- ③ 解决方案
使用add_header指令,该指令可以用来添加一些头信息
Access-Control-Allow-Origin: 直译过来是允许跨域访问的源地址信息,可以配置多个(多个用逗号分隔),也可以使用*代表所有源Access-Control-Allow-Methods:直译过来是允许跨域访问的请求方式,值可以为 GET POST PUT DELETE…,可以全部设置,也可以根据需要设置,多个用逗号分隔
具体配置方式
location /getUser{#可以跨域请求,并设置跨域请求的请求方式 add_header Access-Control-Allow-Origin *; add_header Access-Control-Allow-Methods GET,POST,PUT,DELETE; default_type application/json; return 200 \'{\"id\":1,\"name\":\"TOM\",\"age\":18}\';}高可用场景

用户访问时,
访问的是一个虚拟IP,keepalived会选定一个主服务器使用这个虚拟IP
每台机器上的keepalived会相互通信,根据其他机器上的keepalived进程是否存在,判断服务器状态,如果默认的Master停止了,就会在剩下的Backup机器中,竞选出一台Nginx服务器作为Master
安装keepalived
yum install -y keepalived修改keepalived配置
- 配置文件在
/etc/keepalived/keepalived.conf vrrp_instance、authentication、virtual_router_id、virtual_ipaddress这几个一样的机器,才算是同一个组里。这个组才会选出一个作为Master机器
这里我们设置两台机器,分别下载好keepalived,然后进行配置
vim /etc/keepalived/keepalived.conf #进行配置机器一:
! Configuration File for keepalivedglobal_defs { router_id lb # 名字与其他配置了keepalive的机器不重复就行}vrrp_script chk_http_port { script \"/usr/local/src/nginx_check.sh\" interval 2 #(检测脚本执行的间隔) weight 2 } vrrp_instance dingchao {#vrrp实例名可以随意取 state MASTER #只能有一个默认的Master,其他写BACKUP interface ens33 # ifconfig 或ipaddr查看下网卡名,默认时ens33 virtual_router_id 51 # 主、备机的 virtual_router_id 必须相同 priority 100 # 多台安装了keepalived的机器竞争成为Master的优先级,BACKUP 优先级低于MASTER advert_int 1 #通信时间 authentication { auth_type PASS auth_pass 1111 } virtual_ipaddress { 192.168.111.110 #虚拟IP }}机器二:
! Configuration File for keepalivedglobal_defs { router_id lb2 # 名字与其他配置了keepalive的机器不重复就行}vrrp_script chk_http_port { script \"/usr/local/src/nginx_check.sh\" interval 2 #(检测脚本执行的间隔) weight 2 } vrrp_instance dingchao {#vrrp实例名可以随意取 state BACKUP #只能有一个默认的Master,其他写BACKUP interface ens33 # ip addr查看下网卡名,默认时ens33 virtual_router_id 51 # 主、备机的 virtual_router_id 必须相同 priority 50# 多台安装了keepalived的机器竞争成为Master的优先级 advert_int 1 #通信时间 authentication { auth_type PASS auth_pass 1111 } virtual_ipaddress { 192.168.111.110 #虚拟IP }}添加检测脚本
vim /usr/local/src/nginx_check.sh #将脚本添加进去chmod +x /usr/local/src/nginx_check.sh #添加执行权限#!/bin/bashA=`ps -C nginx –no-header |wc -l`if [ $A -eq 0 ];then /usr/local/nginx/sbin/nginx sleep 2 if [ `ps -C nginx --no-header |wc -l` -eq 0 ];then killall keepalived fifi启动
cd /usr/local/sbin./keepalived # 启动Nginx 限流
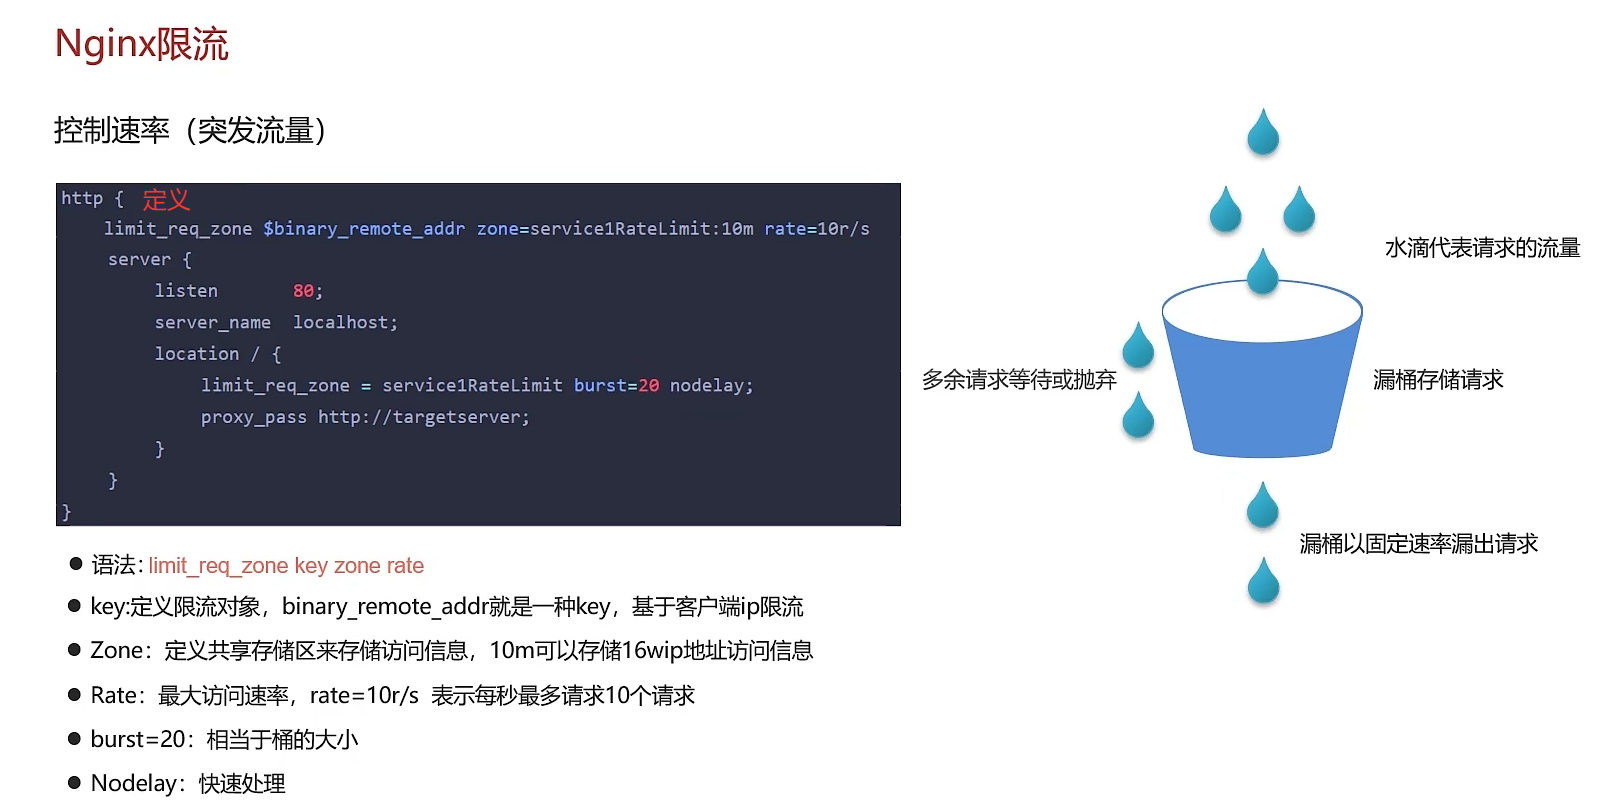
控制速率
- nodelay 针对的是 burst 参数,burst=20 nodelay
配置 server,使用 limit_req 指令应用限流
server { location / {limit_req zone=service1RateLimit; proxy_pass http://my_upstream; }}- key :定义限流对象,binary_remote_addr 是一种key,表示基于 remote_addr(客户端IP) 来做限流,binary_ 的目的是压缩内存占用量
- zone:定义共享内存区来存储访问信息, myRateLimit:10m 表示一个大小为10M,名字为myRateLimit的内存区域。1M能存储16000 IP地址的访问信息,10M可以存储16W IP地址访问信息。
- rate 用于设置最大访问速率,rate=10r/s 表示每秒最多处理10个请求。Nginx 实际上以毫秒为粒度来跟踪请求信息,因此 10r/s 实际上是限制:每100毫秒处理一个请求。这意味着,自上一个请求处理完后,若后续100毫秒内又有请求到达,将拒绝处理该请求。
控制并发
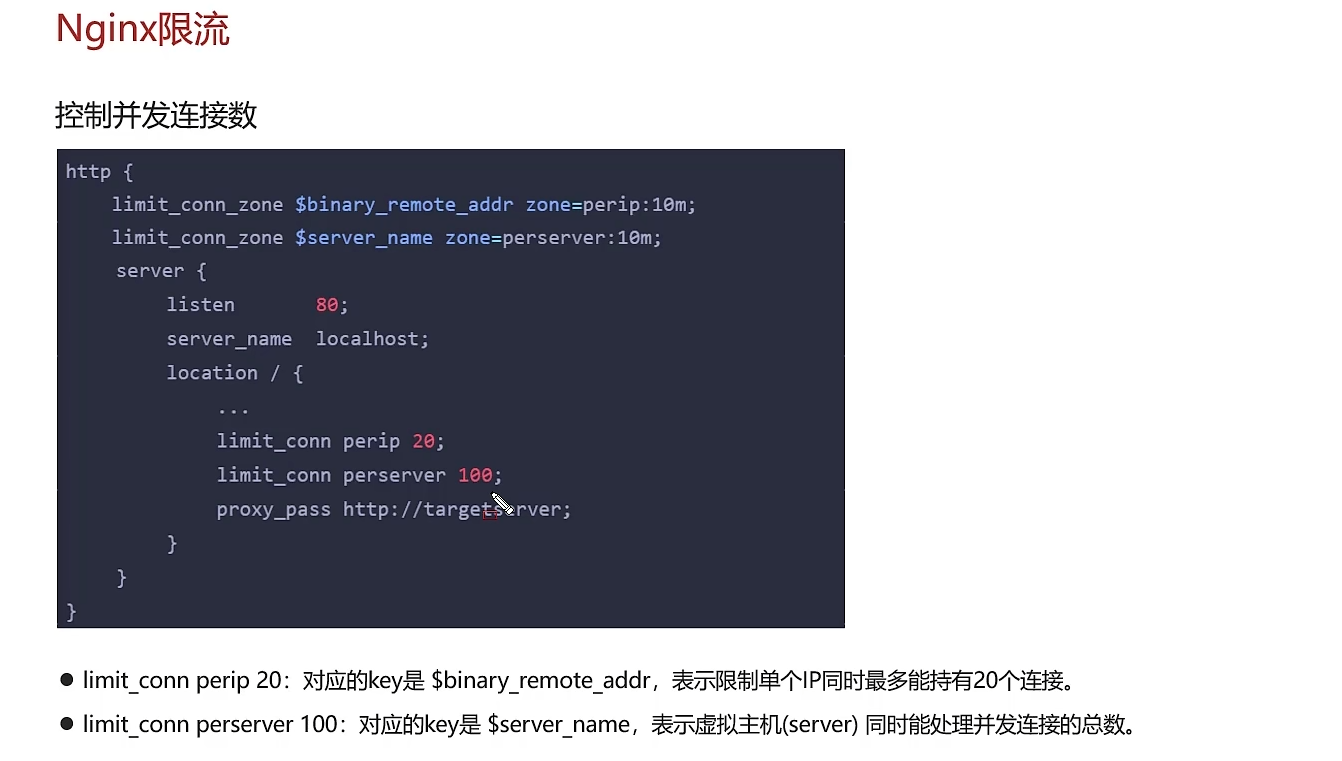
需要注意的是:只有当 request header 被后端server处理后,这个连接才进行计数
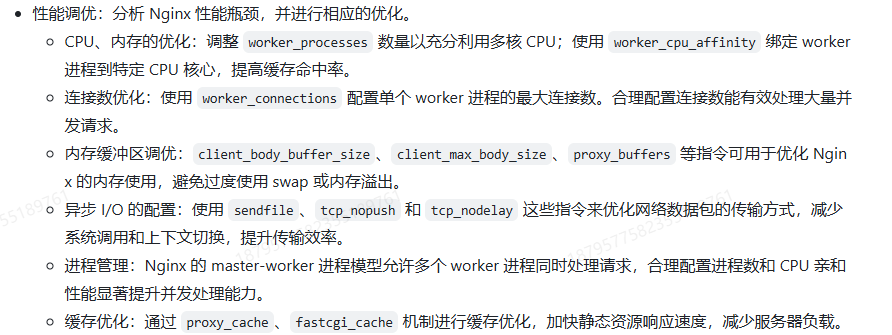
Nginx 优化
Nginx UI
https://nginxui.com/zh_CN/guide/getting-started.html#%E4%BD%BF%E7%94%A8-docker
Nginx应用场景
- 负载均衡、反向代理
- 跨域问题解决
- 网关 服务器
- 封禁IP
- 防盗链
- 动静分离
- 限流等
基本配置优化
查看CPU核数
cat /proc/cpuinfo| grep \"cpu cores\"| uniq
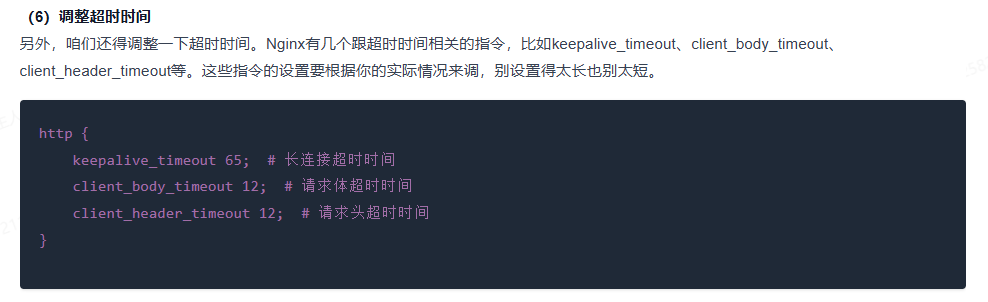
worker_processes 4 ; # 设为cpu核数 启动的worker进程数events{#设置Nginx网络连接序列化accept_mutex on;#设置Nginx的worker进程是否可以同时接收多个请求multi_accept on;#设置Nginx的worker进程最大的连接数worker_connections 1024;#设置Nginx使用的事件驱动模型use epoll;}http { include mime.types; #include是引入关键字,这里引入了mime.types这个配置文件(同在conf目录下,mime.types是用来定义,求返回的content-type) default_type application/octet-stream; #mime.types未定义的,使用默认格式application/octet-stream sendfile on; # 开启 高效文件传输模式。tcp_nopush on; #需要在 sendfile开启模式才有效,防止网路阻塞,积极的减少网络报文段的数量。将响应头和正文的开始部分一起发送,而不一个接一个的发送tcp_nodelay on; #有数据随时发送 keepalive_timeout 65; #长链接超时时间#一个nginx可以启用多个server(虚拟服务器) server { listen 80;#监听端口80 server_name localhost; #接收的域名 location / { root html; #根目录指向html目录,看下图 index index.html index.htm; #域名/index 指向 index.html index.htm文件,看下图 } error_page 500 502 503 504 /50x.html; # 服务器错误码为500 502 503 504,转到\"域名/50x.html\" location = /50x.html { # 指定到html文件夹下找/50x.htm root html;#根目录指向html目录,看下图 } }}keepalive、worker_connections
转发请求 提高效率
upstream backend{server 192.168.111.101:9001;server 192.168.111.101:9002;server 192.168.111.101:9003;keepalive 300; # 300个长连接,转发请求效率大大提高!}server {listen 80;server_name localhost;location /{proxy_pass http://backend;}}
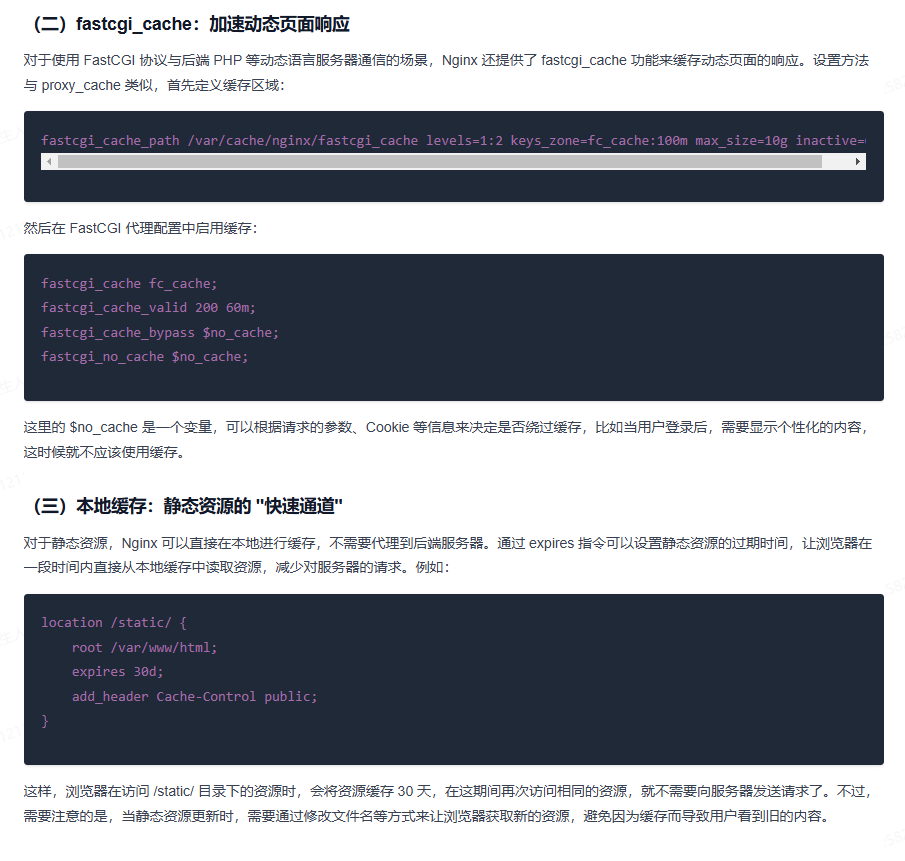
缓存优化
# 代理缓存配置 # meitecache:256m,大小256m,失效时间1天 inactive=1d proxy_cache_path \"./meite_cachedata\" levels=1:2 keys_zone=meitecache:256m inactive=1d max_size=1000g; server { listen 80; server_name localhost; location /details { #使用缓存名称 proxy_cache meitecache; #对以下状态码实现缓存~~~~ proxy_cache_valid 200 206 304 301 302 1d; # 缓存的key--》请求路径 proxy_cache_key $request_uri; add_header X-Cache-Status $upstream_cache_status; proxy_pass http://127.0.0.1:8080; index index.html index.htm; }}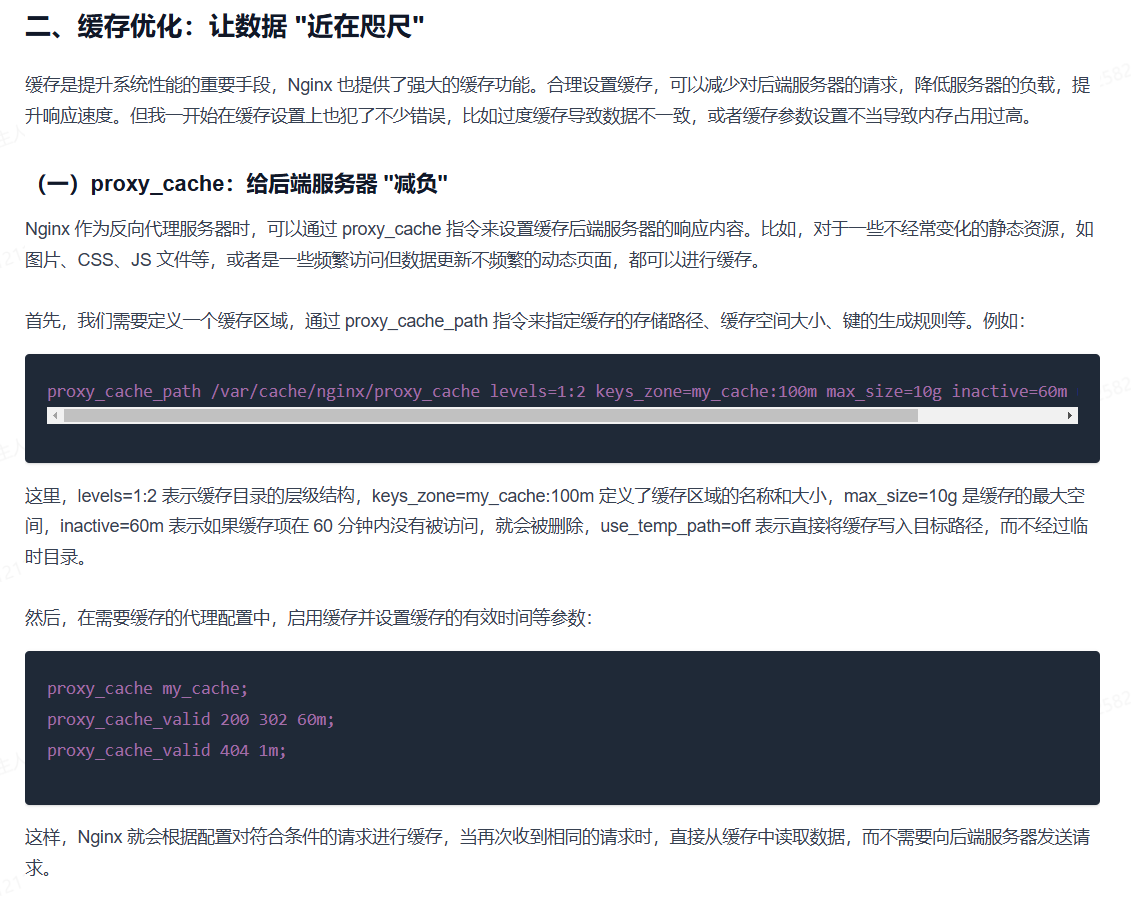
开启gzip压缩
server { listen 80; server_name localhost; gzip on; gzip_buffers 32 4K; gzip_comp_level 6; gzip_min_length 100; gzip_types application/javascript text/css text/xml application/json; gzip_disable \"MSIE [1-6]\\.\"; #配置禁用gzip条件,支持正则。此处表示ie6及以下不启用gzip(因为ie低版本不支持) gzip_vary on; #accept-encoding gzip_static on; #如果有压缩好的,直接使用location / { proxy_pass http://127.0.0.1:8080; } }配置文件内容详细介绍:
gzip配置的常用参数
gzip on|off; #是否开启gzipgzip_buffers32 4K| 16 8K #缓冲(压缩在内存中缓冲几块? 每块多大?)gzip_comp_level[1-9] #推荐6 压缩级别(级别越高,压的越小,越浪费CPU计算资源)gzip_disable#正则匹配UA 什么样的Uri不进行gzipgzip_min_length200 # 开始压缩的最小长度(再小就不要压缩了,意义不在)gzip_http_version1.0|1.1 # 开始压缩的http协议版本(可以不设置,目前几乎全是1.1协议)gzip_proxied# 设置请求者代理服务器,该如何缓存内容gzip_typestext/plain application/xml # 对哪些类型的文件用压缩 如txt,xml,html ,cssgzip_vary on|off# 是否传输gzip压缩标志
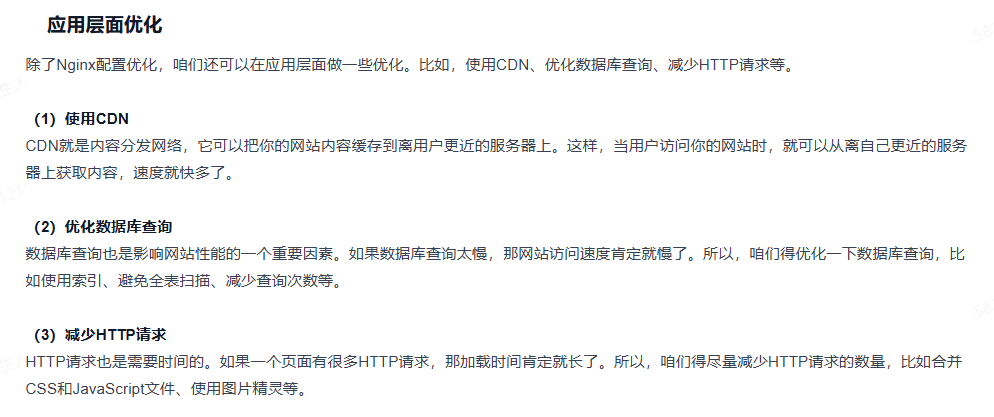
应用层面优化
TCP优化
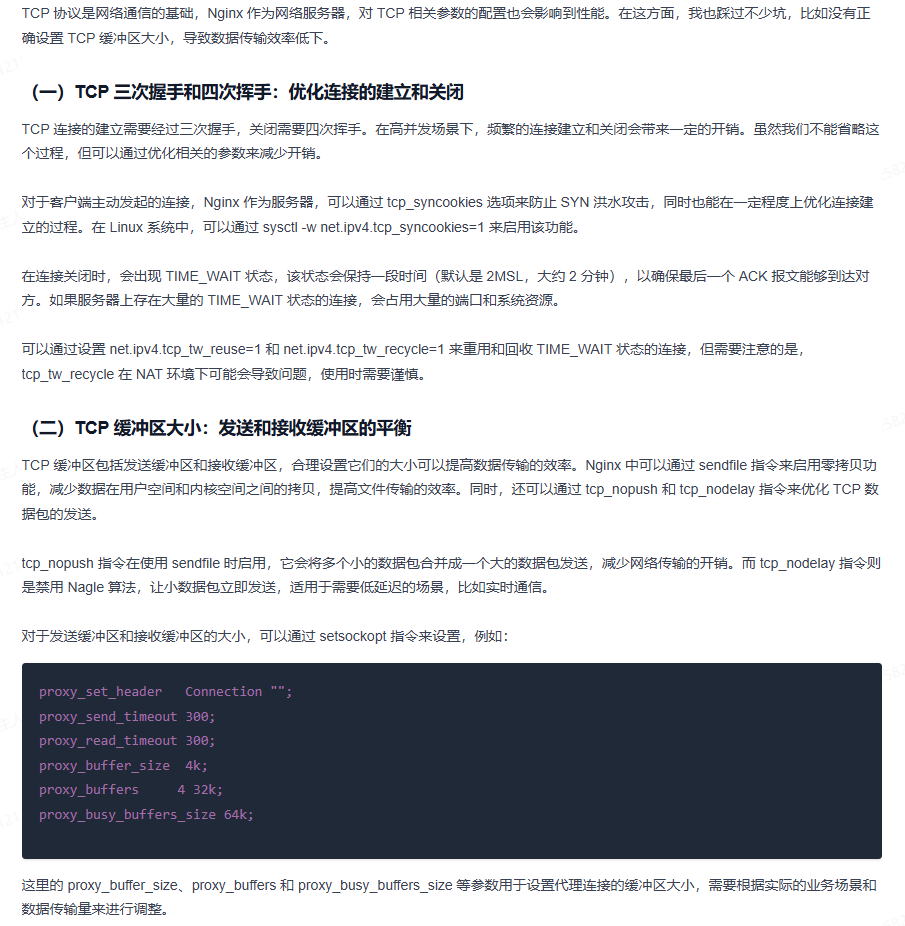
vi /etc/sysctl.conf 配置内容
# 防止一个套接字过多连接到达时引起负载net.ipv4.tcp_syncookies=1#默认128,socket的监听队列,微调大net.core.somaxconn=1024 # timeout的超时时间,调小,tcp握手时间net.ipv4.tcp_fin_timeout=10 #os直接使用timewait的连接net.ipv4.tcp_tw_reuse=1 #回收禁用,若开启---》快速回收处于 TIME_WAIT状态的socketnet.ipv4.tcp_tw_recycle=0 加载配置!
sysctl -p监控

调优