可以抛弃postman啦, API测试工具Bruno实用教程(二):进阶篇_bruno api使用教程详解
在前文 【github星标超3万!Postman最强平替Bruno你用了吗?】和 【Postman最佳平替, API测试工具Bruno实用教程(一):基础篇】中,我们分别对Bruno 这个近来备受关注的接口测试工具的优缺点和基本使用方法进行了介绍,本文我们会继续在上一篇的基础上,介绍 Bruno 和自动化测试相关的进阶用法
Bruno的六层变量作用域
和 postman 类似,Bruno 中也同样对接口测试中的变量使用提供了多层设计,可以通过不同层级的作用域区分,为接口测试和自动化提供了更多灵活性和应用场景。
Bruno中提供了6类不同的变量,其作用范围次序如下:
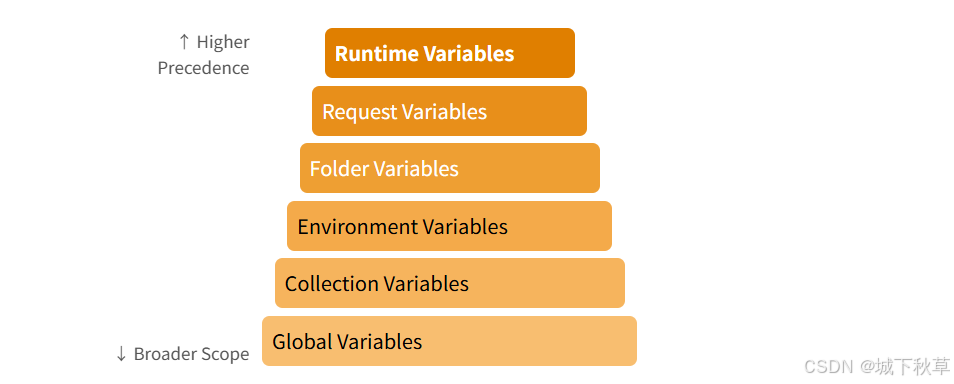
全局变量
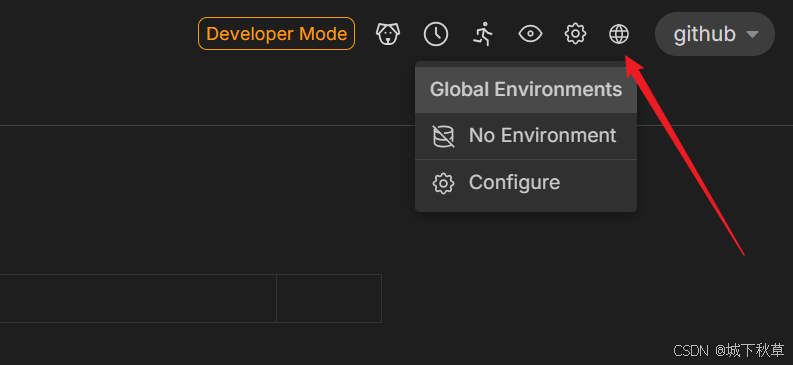
全局变量是作用范围最大的变量类型。设置全局变量是通过 Bruno 的 global Environments 设置,位置如下:
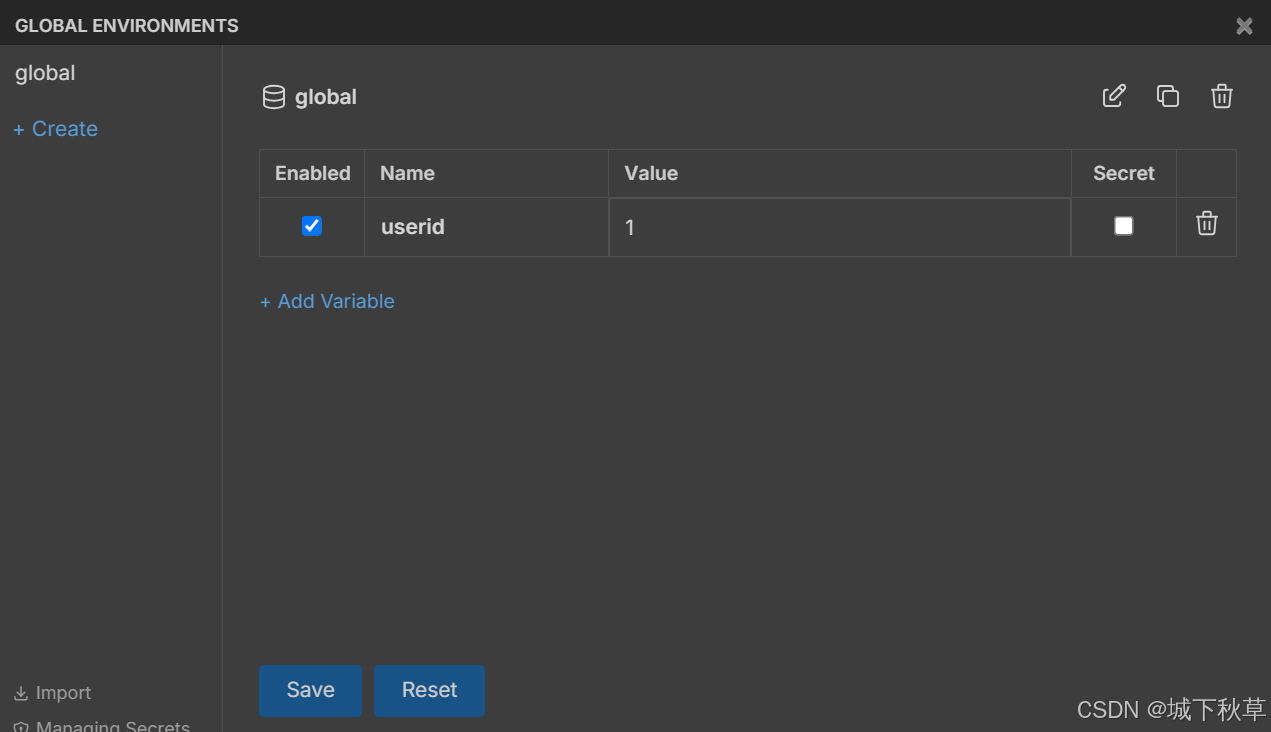
然后比如增加一个全局变量,配置并启用:
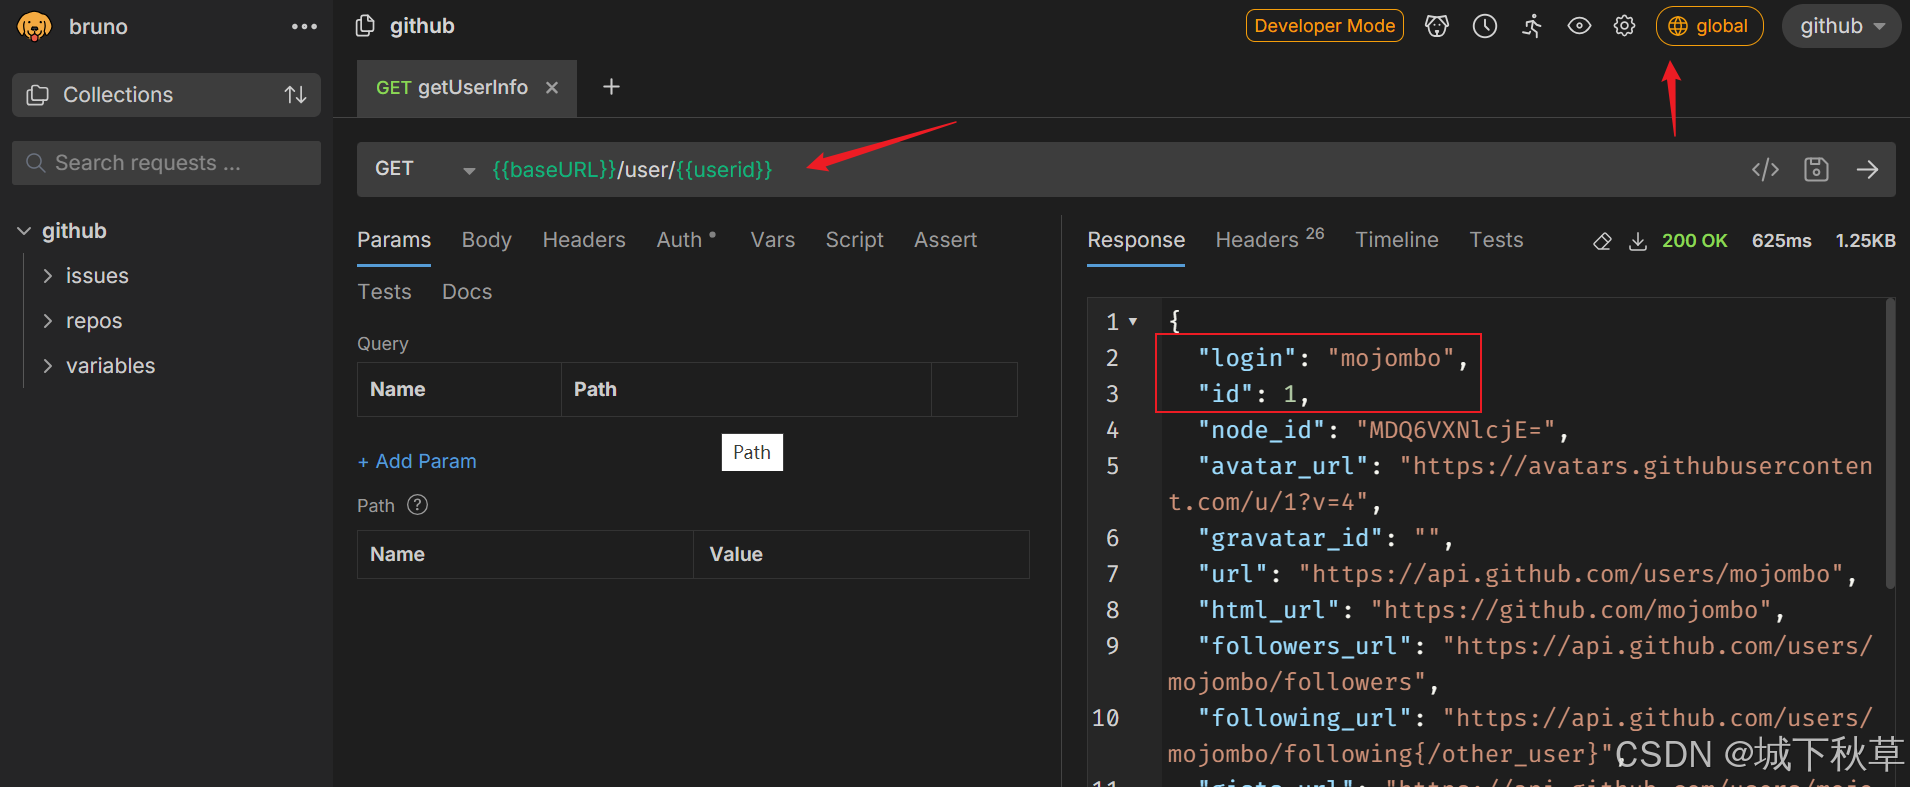
这时我们获取Github API中的用户信息,可以获取userid = 1 的用户
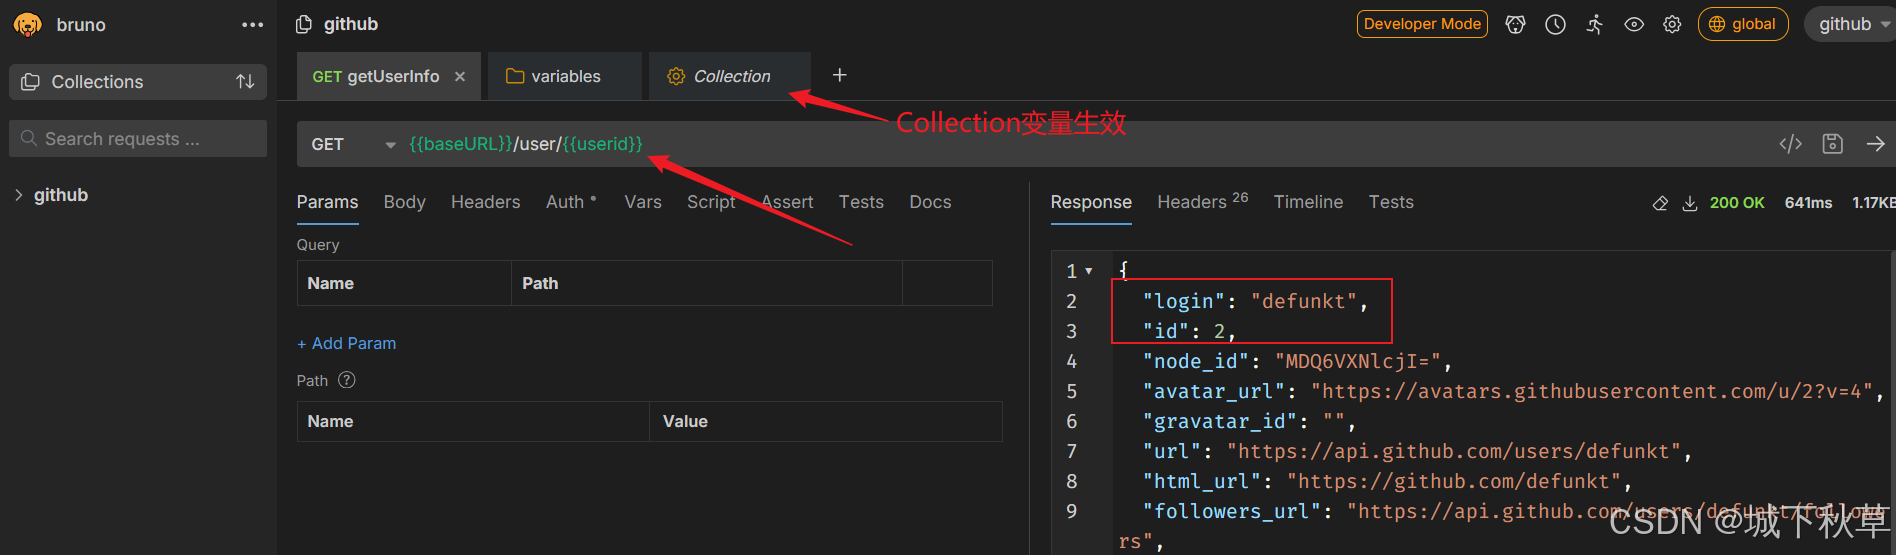
Collection变量
在设置了全局变量后,再设置 collection 集合变量
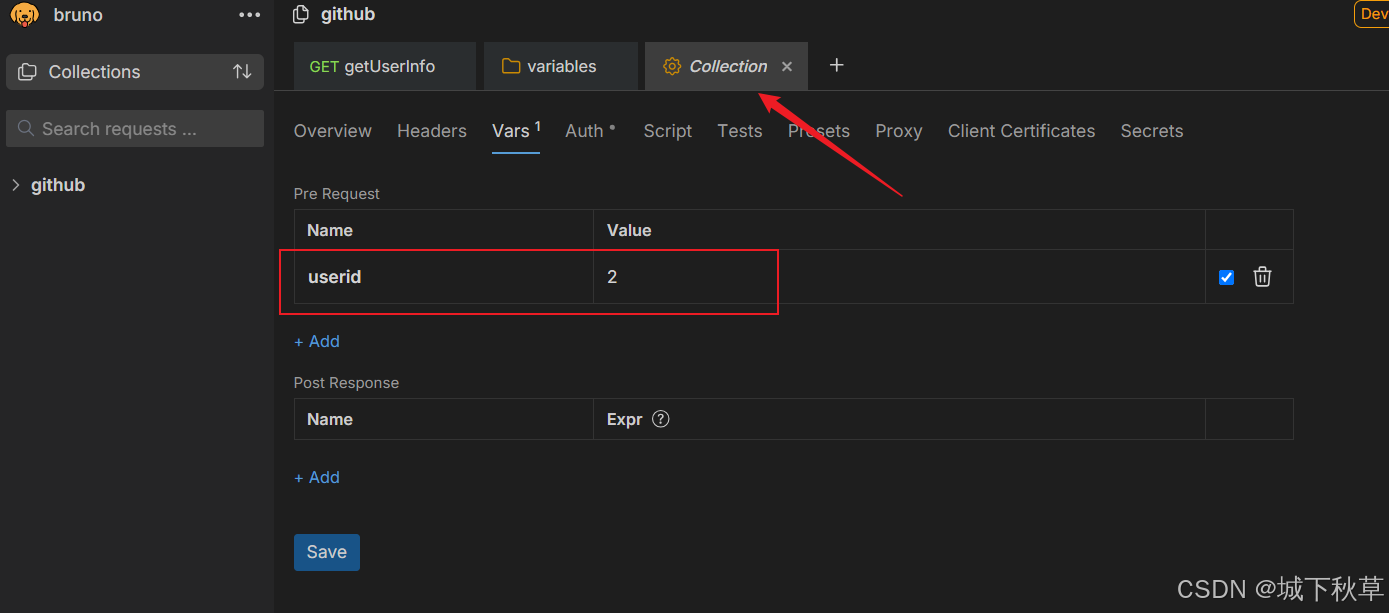
然后发送请求,此时生效的就是集合变量
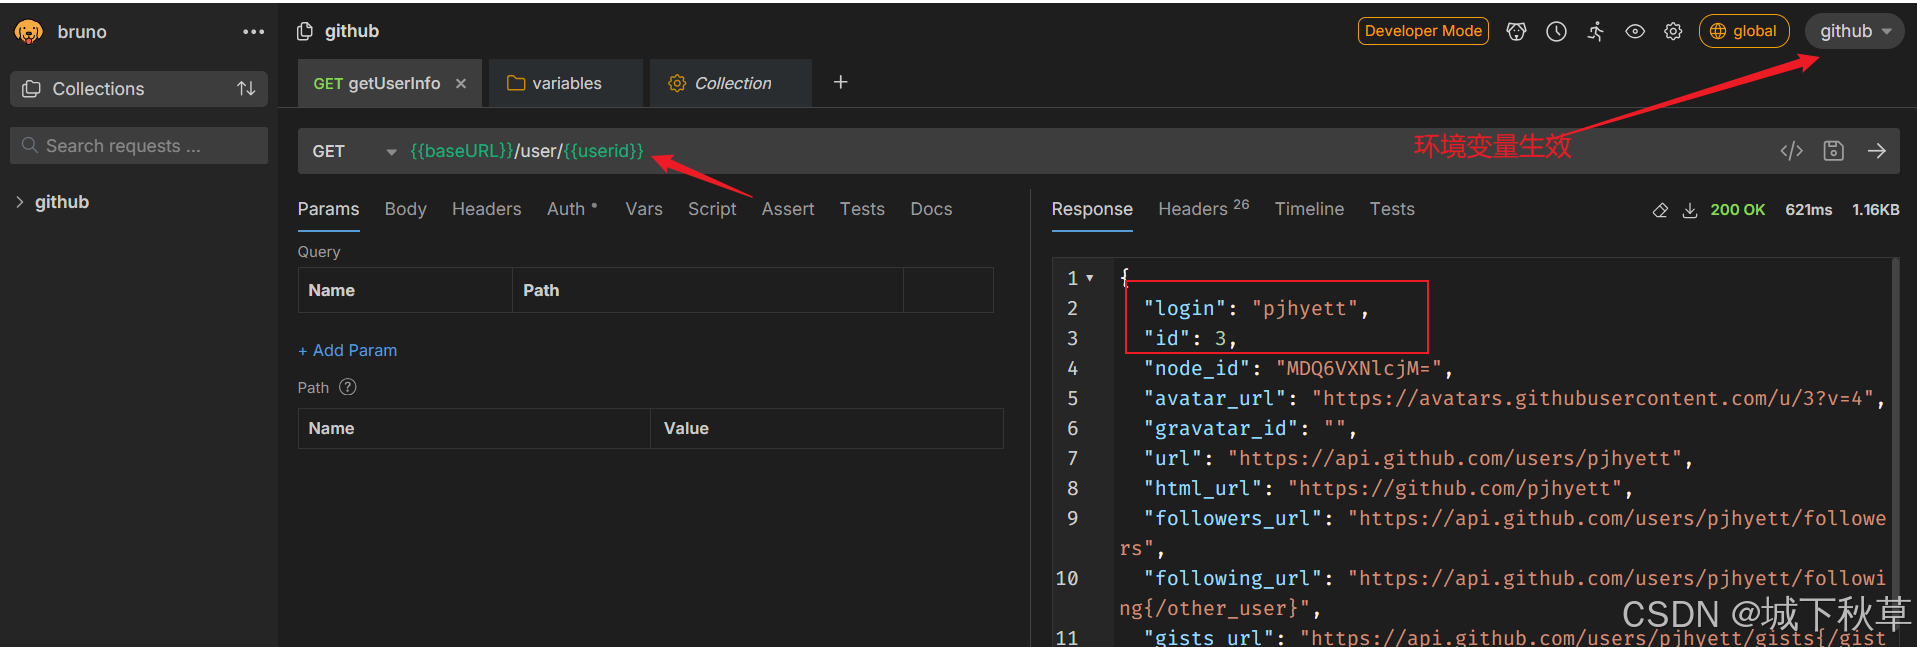
环境变量
下一层是可以设置不同的环境,在如下位置配置:
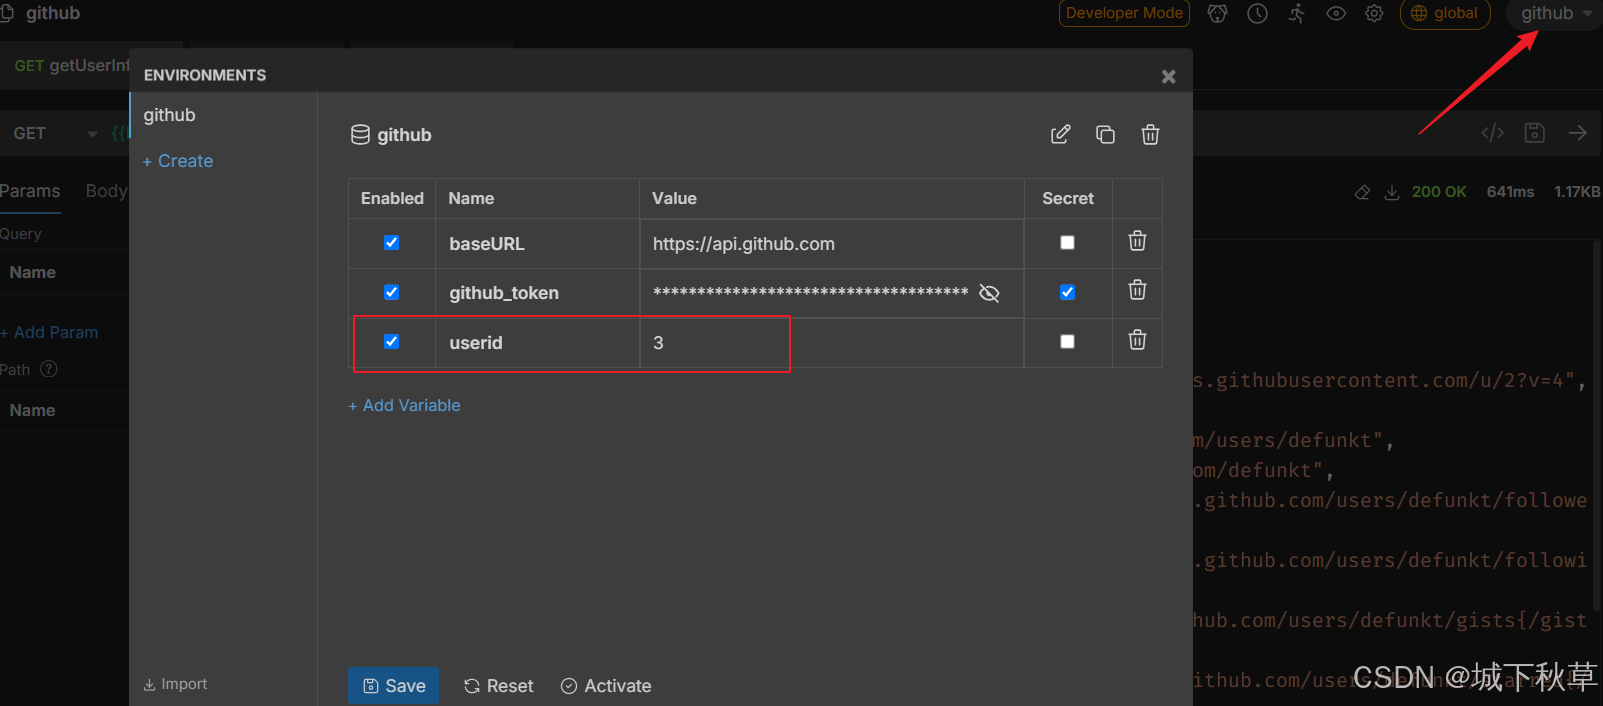
此时生效的是 userid = 3
Folder变量
在collection下一层,可以创建目录,这里设置变量, 生效的就是目录变量

