redis的安装,重要文件,命令行客户端
欢迎拜访:雾里看山-CSDN博客
本篇主题:redis的安装,重要文件,命令行客户端
发布时间:2025.8.8
隶属专栏:redis

目录
- 安装
-
- Windows和Linux
- 在 Ubuntu 上安装redis
-
- 使用 apt 安装
- 支持远程连接
- 在 CentOS 上安装redis
-
- 使用yum安装
- 支持远程连接
- 控制 Redis 服务(推荐使用系统命令)
-
- 启动redis服务
- 停止redis服务
- 重启redis服务
- 开启开机自启动
- 关闭开机自启动
- 重要文件
-
- 启动/停止命令或脚本
- 配置文件
- 持久化文件存储目录
- 日志文件目录
- 命令行客户端
-
- 交互式方式:
- 命令方式
安装
Windows和Linux
Redis 的官方并不支持微软的 Windows 操作系统,因为 Redis 的许多特性都是和操作系统相关的,所以支持 Windows 会增加维护成本,而且更重要的是大部分公司都在使用 Linux 操作系统,而 Redis 在 Linux 操作系统上的表现已经得到实践的证明。
当然 Redis 作为一款优秀的开源技术,还是吸引到微软公司的注意,微软公司的开源技术组在 Github 上维护了一个Redis 分支:https://github.com/MSOpenTech/redis。不过我还是强烈建议大家在 Linux
上使用 Redis。
在 Ubuntu 上安装redis
以Ubuntu20.04为例
使用 apt 安装
sudo apt install redis -y支持远程连接
修改redis的配置文件
sudo vim /etc/redis/redis.conf- 修改
bind 127.0.0.1为bind 0.0.0.0 - 修改
protected-mode yes为protected-mode no
# By default, if no \"bind\" configuration directive is specified, Redis listens# for connections from all the network interfaces available on the server.# It is possible to listen to just one or multiple selected interfaces using# the \"bind\" configuration directive, followed by one or more IP addresses.## Examples:## bind 192.168.1.100 10.0.0.1# bind 127.0.0.1 ::1## ~~~ WARNING ~~~ If the computer running Redis is directly exposed to the# internet, binding to all the interfaces is dangerous and will expose the# instance to everybody on the internet. So by default we uncomment the# following bind directive, that will force Redis to listen only into# the IPv4 loopback interface address (this means Redis will be able to# accept connections only from clients running into the same computer it# is running).## IF YOU ARE SURE YOU WANT YOUR INSTANCE TO LISTEN TO ALL THE INTERFACES# JUST COMMENT THE FOLLOWING LINE.# ~~~~~~~~~~~~~~~~~~~~~~~~~~~~~~~~~~~~~~~~~~~~~~~~~~~~~~~~~~~~~~~~~~~~~~~~# bind 127.0.0.1 # 注释掉这行bind 0.0.0.0 # 添加这行protected-mode no # 把 yes 改成 no在 CentOS 上安装redis
以CentOS8为例
使用yum安装
sudo yum install -y redis支持远程连接
修改redis的配置文件
sudo vim /etc/redis.conf- 修改
bind 127.0.0.1为bind 0.0.0.0 - 修改
protected-mode yes为protected-mode no
# By default, if no \"bind\" configuration directive is specified, Redis listens# for connections from all the network interfaces available on the server.# It is possible to listen to just one or multiple selected interfaces using# the \"bind\" configuration directive, followed by one or more IP addresses.## Examples:## bind 192.168.1.100 10.0.0.1# bind 127.0.0.1 ::1## ~~~ WARNING ~~~ If the computer running Redis is directly exposed to the# internet, binding to all the interfaces is dangerous and will expose the# instance to everybody on the internet. So by default we uncomment the# following bind directive, that will force Redis to listen only into# the IPv4 loopback interface address (this means Redis will be able to# accept connections only from clients running into the same computer it# is running).## IF YOU ARE SURE YOU WANT YOUR INSTANCE TO LISTEN TO ALL THE INTERFACES# JUST COMMENT THE FOLLOWING LINE.# ~~~~~~~~~~~~~~~~~~~~~~~~~~~~~~~~~~~~~~~~~~~~~~~~~~~~~~~~~~~~~~~~~~~~~~~~# bind 127.0.0.1 # 注释掉这行bind 0.0.0.0 # 添加这行protected-mode no # 把 yes 改成 no控制 Redis 服务(推荐使用系统命令)
启动redis服务
# 操作系统命令sudo systemctl start redis-server# redis 自带命令service redis-server start停止redis服务
# 操作系统命令sudo systemctl stop redis-server# redis 自带命令service redis-server stop重启redis服务
# 操作系统命令sudo systemctl restart redis-server# redis 自带命令service redis-server restart开启开机自启动
# 操作系统命令sudo systemctl enable redis-server关闭开机自启动
# 操作系统命令sudo systemctl disable redis-server重要文件
启动/停止命令或脚本
/usr/bin/redis-benchmark/usr/bin/redis-check-aof -> /usr/bin/redis-server/usr/bin/redis-check-rdb -> /usr/bin/redis-server/usr/bin/redis-cli/usr/bin/redis-sentinel -> /usr/bin/redis-server/usr/bin/redis-server/usr/libexec/redis-shutdownredis-server 是 Redis 服务器程序,其余的几个例如:redis-check-aof、redis-check-rdb、redis-sentinel 也都是 redis-server 的软链接。
redis-check-aof是修复 AOF 文件件用的工具,同理redis-check-rdb是修复 RDB 文件的工具,redis-sentinel是 Redis 哨兵程序。redis-cli是在我们学习阶段需要频繁用到的一个命令行客户端程序,随后做介绍。redis-benchmark用于对 Redis 做性能基准测试的工具。redis-shutdown是用于停止 Redis 的专用脚本。
相比较直接使用这些命令,我们更建议使用上面讲过的,systemd 托管(操作系统)的方式来进行Redis 的启动 / 停⽌。
配置文件
/etc/redis-sentinel.conf/etc/redis.conf/etc/redis.conf 是 Redis 服务器的配置文件。/etc/redis-sentinel.conf 是 Redis Sentinel 的配置文件。
持久化文件存储目录
/var/lib/redis/Redis 持久化生产的 RDB 和 AOF 文件都默认生成于该目录下。后边文章我写到持久化时会观察这里面持久化的一些现象。
日志文件目录
/var/log/redis//var/log/redis/ 目录下会保存 Redis 运行期间生产的日志文件,默认按照天进行分割,并且会将一定日期的日志文件使用 gzip 格式压缩保存。可以使用任意文本编辑器打开,后边章节我们会通过日志来观察一些现象。
命令行客户端
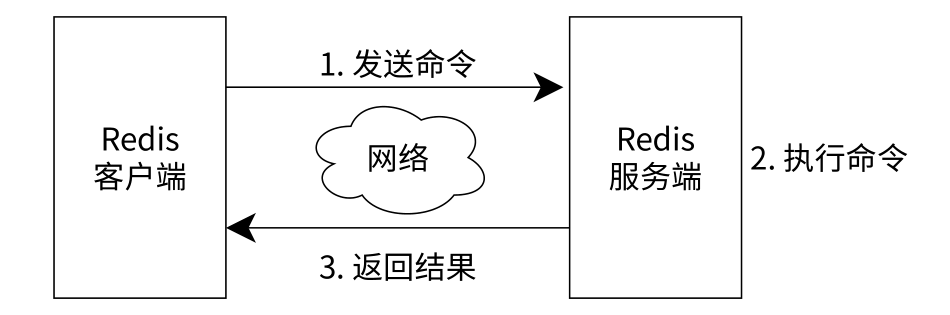
现在我们已经启动了 Redis 服务,下面将介绍如何使用 redis-cli 连接、操作 Redis 服务。客户端和服务端的交互过程如图所示。
redis-cli 可以使用两种方式连接 Redis 服务器。
由于我们连接的 Redis 服务位于 127.0.0.1,端口也使用的是默认的 6379
端口,所以可以省略 -h { host } -p { port }。
交互式方式:
通过 redis-cli -h { host } -p { port } 的方式连接到 Redis 服务,后续所有的操作都是通过交互式的方式实现,不需要再执行 redis-cli 了,例如:
[root@host ~]# redis-cli -h 127.0.0.1 -p 6379127.0.0.1:6379> pingPONG127.0.0.1:6379> set key helloOK127.0.0.1:6379> get key\"hello\"命令方式
用redis-cli -h { host } -p { port } { command } 就可以直接得到命令的返回结果,例如:
[root@host ~]# redis-cli -h 127.0.0.1 -p 6379 pingPONG[root@host ~]# redis-cli -h 127.0.0.1 -p 6379 set key helloOK[root@host ~]# redis-cli -h 127.0.0.1 -p 6379 get key\"hello\"⚠️ 写在最后:以上内容是我在学习以后得一些总结和概括,如有错误或者需要补充的地方欢迎各位大佬评论或者私信我交流!!!


