uniapp实现小票打印 兼容微信小程序安卓_uniapp 打印小票
在uni-app中实现蓝牙打印需要分平台处理,因为不同平台(App/小程序/H5)的蓝牙API和权限机制不同。以下是分步骤实现方案:
核心实现思路
平台适配:主要适配App和小程序(H5因浏览器限制通常无法直接连接蓝牙硬件)
设备发现:扫描附近的蓝牙打印机
连接管理:建立并维护蓝牙连接
数据发送:将打印内容转换为ESC打印机指令集
异常处理:处理连接中断、设备不兼容等问题
小程序蓝牙API核心代码调用
// 初始化蓝牙适配器uni.openBluetoothAdapter({ success(res) { console.log(\'适配器已打开\'); // 开始扫描 uni.startBluetoothDevicesDiscovery({ services: [], success(res) { console.log(\'扫描到设备:\', res.devices); } }); }});// 连接设备uni.createBLEConnection({ deviceId: \'设备ID\', success(res) { console.log(\'连接成功\'); // 获取服务UUID uni.getBLEDeviceServices({ deviceId: \'设备ID\', success(res) { const serviceId = res.services[0].uuid; // 获取特征值 uni.getBLEDeviceCharacteristics({ deviceId, serviceId, success(res) { const characteristicId = res.characteristics[0].uuid; // 发送数据 const printData = this.generateEscPosData(\'Hello World\\n\'); uni.writeBLECharacteristicValue({ deviceId, serviceId, characteristicId, value: printData, success(res) { console.log(\'打印成功\'); } }); } }); } }); }});核心ESC代码
核心ESC代码类库来源于网上。
import encode from \'./encoding.js\';var app = getApp();var jpPrinter = { createNew: function() { var jpPrinter = {}; var data = []; var bar = [\"UPC-A\", \"UPC-E\", \"EAN13\", \"EAN8\", \"CODE39\", \"ITF\", \"CODABAR\", \"CODE93\", \"CODE128\"]; jpPrinter.name = \"蓝牙打印机\"; jpPrinter.init = function() { //初始化打印机 data.push(27) data.push(64) }; jpPrinter.setText = function(content) { //设置文本内容 var code = new encode.TextEncoder( \'gb2312\', { NONSTANDARD_allowLegacyEncoding: true }).encode(content) for (var i = 0; i 6) { // width = 6; // } // if (width 15) { n = 15 } if (n < 1) { n = 1 } data.push(n) } jpPrinter.setSelectErrorCorrectionLevelForQRCode = function(n) { //设置纠错等级 /* n 功能 纠错能力 48 选择纠错等级 L 7 49 选择纠错等级 M 15 50 选择纠错等级 Q 25 51 选择纠错等级 H 30 */ data.push(29) data.push(40) data.push(107) data.push(3) data.push(0) data.push(49) data.push(69) data.push(n) } jpPrinter.setStoreQRCodeData = function(content) { //设置二维码内容 var code = new encode.TextEncoder( \'gb18030\', { NONSTANDARD_allowLegacyEncoding: true }).encode(content) data.push(29) data.push(40) data.push(107) data.push(parseInt((code.length + 3) % 256)) data.push(parseInt((code.length + 3) / 256)) data.push(49) data.push(80) data.push(48) for (var i = 0; i < code.length; ++i) { data.push(code[i]) } } jpPrinter.setPrintQRCode = function() { //打印二维码 data.push(29) data.push(40) data.push(107) data.push(3) data.push(0) data.push(49) data.push(81) data.push(48) } jpPrinter.setHorTab = function() { //移动打印位置到下一个水平定位点的位置 data.push(9) } jpPrinter.setAbsolutePrintPosition = function(where) { //设置绝对打印位置 data.push(27) data.push(36) data.push(parseInt(where % 256)) data.push(parseInt(where / 256)) } jpPrinter.setRelativePrintPositon = function(where) { //设置相对横向打印位置 data.push(27) data.push(92) data.push(parseInt(where % 256)) data.push(parseInt(where / 256)) } jpPrinter.setSelectJustification = function(which) { //对齐方式 /* 0, 48 左对齐 1, 49 中间对齐 2, 50 右对齐 */ data.push(27) data.push(97) data.push(which) } jpPrinter.space = function (n) { //设置横向跳格位置 data.push(27) data.push(68) data.push(n) } jpPrinter.setLeftMargin = function(n) { //设置左边距 data.push(29) data.push(76) data.push(parseInt(n % 256)) data.push(parseInt(n / 256)) } jpPrinter.textMarginRight = function (n) { //设置字符右间距 data.push(27) data.push(32) data.push(n) } jpPrinter.rowSpace = function (n) { //设置行间距 data.push(27) data.push(51) data.push(n) } jpPrinter.setPrintingAreaWidth = function(width) { //设置打印区域宽度 data.push(29) data.push(87) data.push(parseInt(width % 256)) data.push(parseInt(width / 256)) } jpPrinter.setSound = function(n, t) { //设置蜂鸣器 data.push(27) data.push(66) if (n 9) { n = 9; } if (t 9) { t = 9; } data.push(n) data.push(t) } jpPrinter.setBitmap = function(res) { //参数,画布的参数 console.log(res) var width = parseInt((res.width + 7) / 8 * 8 / 8) var height = res.height; var time = 1; var temp = res.data.length - width * 32; var point_list = [] console.log(width + \"--\" + height) data.push(29) data.push(118) data.push(48) data.push(0) data.push((parseInt((res.width + 7) / 8) * 8) / 8) data.push(0) data.push(parseInt(res.height % 256)) data.push(parseInt(res.height / 256)) console.log(res.data.length) console.log(\"temp=\" + temp) for (var i = 0; i < height; ++i) { for (var j = 0; j < width; ++j) { for (var k = 0; k < 32; k += 4) { var po = {} if (res.data[temp] == 0 && res.data[temp + 1] == 0 && res.data[temp + 2] == 0 && res.data[temp + 3] == 0) { po.point = 0; } else { po.point = 1; } point_list.push(po) temp += 4 } } time++ temp = res.data.length - width * 32 * time } for (var i = 0; i < point_list.length; i += 8) { var p = point_list[i].point * 128 + point_list[i + 1].point * 64 + point_list[i + 2].point * 32 + point_list[i + 3].point * 16 + point_list[i + 4].point * 8 + point_list[i + 5].point * 4 + point_list[i + 6].point * 2 + point_list[i + 7].point data.push(p) } } jpPrinter.setPrint = function() { //打印并换行 data.push(10) } jpPrinter.setPrintAndFeed = function(feed) { //打印并走纸feed个单位 data.push(27) data.push(74) data.push(feed) } jpPrinter.setPrintAndFeedRow = function(row) { //打印并走纸row行 data.push(27) data.push(100) data.push(row) } jpPrinter.getData = function() { //获取打印数据 return data; }; return jpPrinter; }, Query: function() { var queryStatus = {}; var buf; var dateView; queryStatus.getRealtimeStatusTransmission = function(n) { //查询打印机实时状态 /* n = 1:传送打印机状态 n = 2:传送脱机状态 n = 3:传送错误状态 n = 4:传送纸传感器状态 */ buf = new ArrayBuffer(3) dateView = new DataView(buf) dateView.setUint8(0, 16) dateView.setUint8(1, 4) dateView.setUint8(2, n) queryStatus.query(buf) } queryStatus.query = function(buf) { wx.writeBLECharacteristicValue({ deviceId: app.BLEInformation.deviceId, serviceId: app.BLEInformation.writeServiceId, characteristicId: app.BLEInformation.writeCharaterId, value: buf, success: function(res) { }, complete: function(res) { console.log(res) buf = null dateView = null; } }) } return queryStatus; }};var esc={jpPrinter}export default esc;小票实现过程
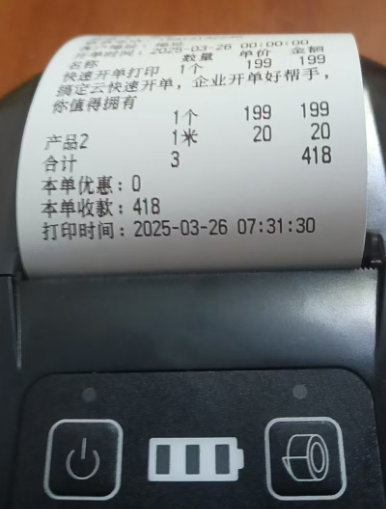
UniApp中使用ESC指令进行蓝牙小票打印时,如何实现每行显示商品名、单价、数量和金额的问题。用户之前已经得到了如何让文本左对齐、金额右对齐的指导,现在需要更复杂的排版,即一行内有四个数据项,分别对齐。
首先,我需要回顾用户提供的代码。之前的示例中使用了绝对定位来实现左右对齐,但这次用户需要四个列,可能需要不同的方法。ESC/POS指令的对齐指令是针对整行的,所以如果用户直接使用对齐指令,可能无法在同一行内实现多列的不同对齐方式。因此,可能需要结合使用绝对定位或者制表符来分隔各列。
接下来,我需要确定用户的具体需求。用户提到“每行商品名 单价 数量 金额”,这四个数据项可能需要分别左对齐、右对齐等。通常,商品名左对齐,单价、数量、金额右对齐,但具体排版可能根据用户需求有所不同。比如,商品名占较宽的位置,单价、数量、金额依次右对齐。
然后,我需要考虑现有的代码结构。用户提供的`jpPrinter`对象有设置绝对位置和对齐的方法,比如`setSelectJustification`和`setAbsolutePrintPosition`。可能需要利用这些方法,或者结合制表符来分隔各列。例如,设置多个制表位,让每个列在指定位置打印。
另外,还需要处理字体宽度的问题。不同字体大小会影响每个字符占用的点数,需要计算每列的起始位置。例如,默认字体每个字符12点宽,如果放大字体,需要调整计算方式。同时,中文和英文字符的宽度可能不同,需要确认编码是否正确,避免乱码。
// 计算右对齐X坐标const charWidth = 12; // 单个字符宽度(需实测)item.products.forEach(product=>{command.setSelectJustification(0);//居左command.setText(product.title);if(product.title.length>6){command.setPrint()}command.setAbsolutePrintPosition(170);command.setText(product.number+\"\"+product.unit);command.setAbsolutePrintPosition(250 + 4*charWidth - getStringWidth(product.price+\"\")*charWidth);command.setText(product.price);command.setAbsolutePrintPosition(320 + 4*charWidth - getStringWidth(product.total+\"\")*charWidth);command.setText(product.total);command.setPrint()})
