nestjs连接oracle
1、下载安装
npm install @nestjs/typeorm typeorm oracledb2、配置typeOrm
TypeOrmModule.forRootAsync({ name: \"oracle\", inject: [ConfigService], useFactory: async (configService: ConfigService) => { return { type: \'oracle\', ...configService.get(\'db.oracle\'), logger: \'advanced-console\', timezone: \'+08:00\', entities: [__dirname + \'/../**/*.entity.{js,ts}\'], } as TypeOrmModuleOptions; },}),如果启动不报错最好,如果报错code为NJS-138,说明需要本地安装 Oracle Instant Client
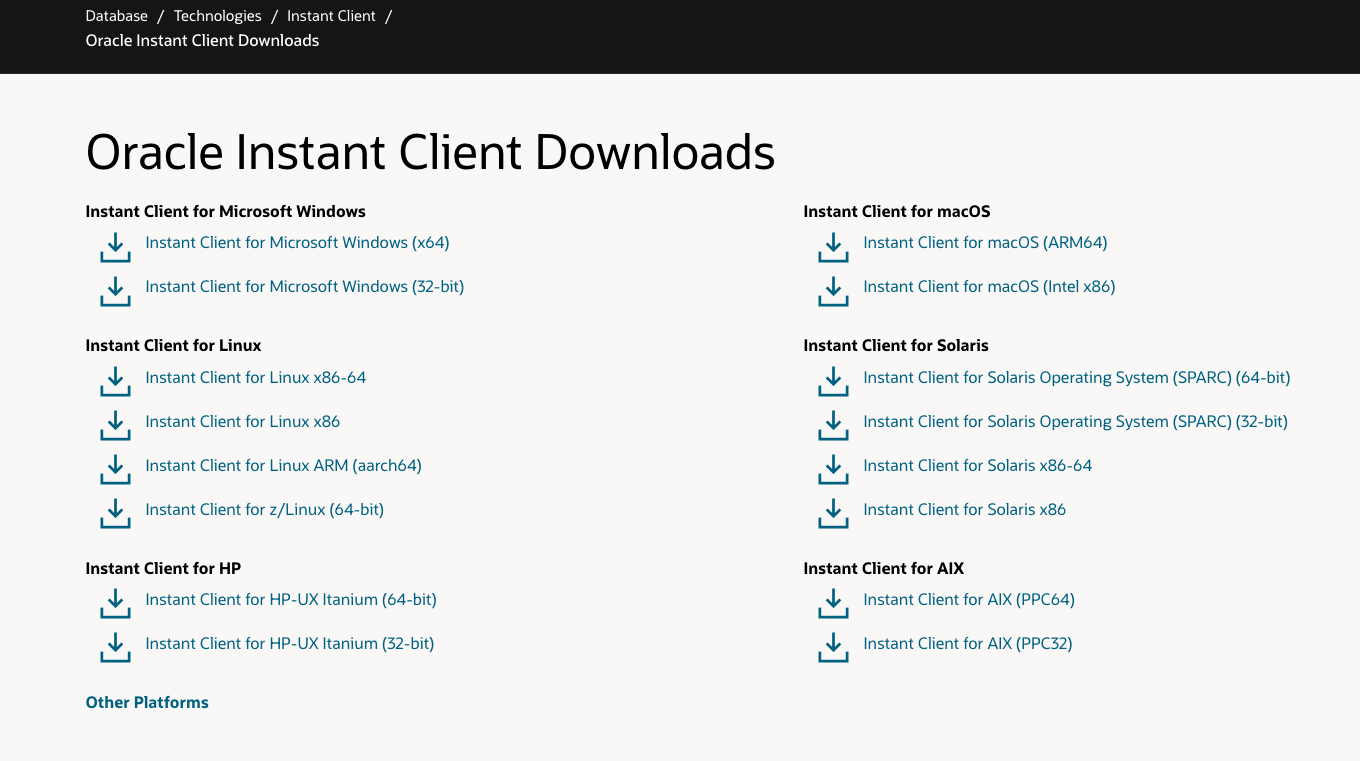
选择自己的系统点击,进入后选择下图第一个,大概一百兆左右,进行下载即可
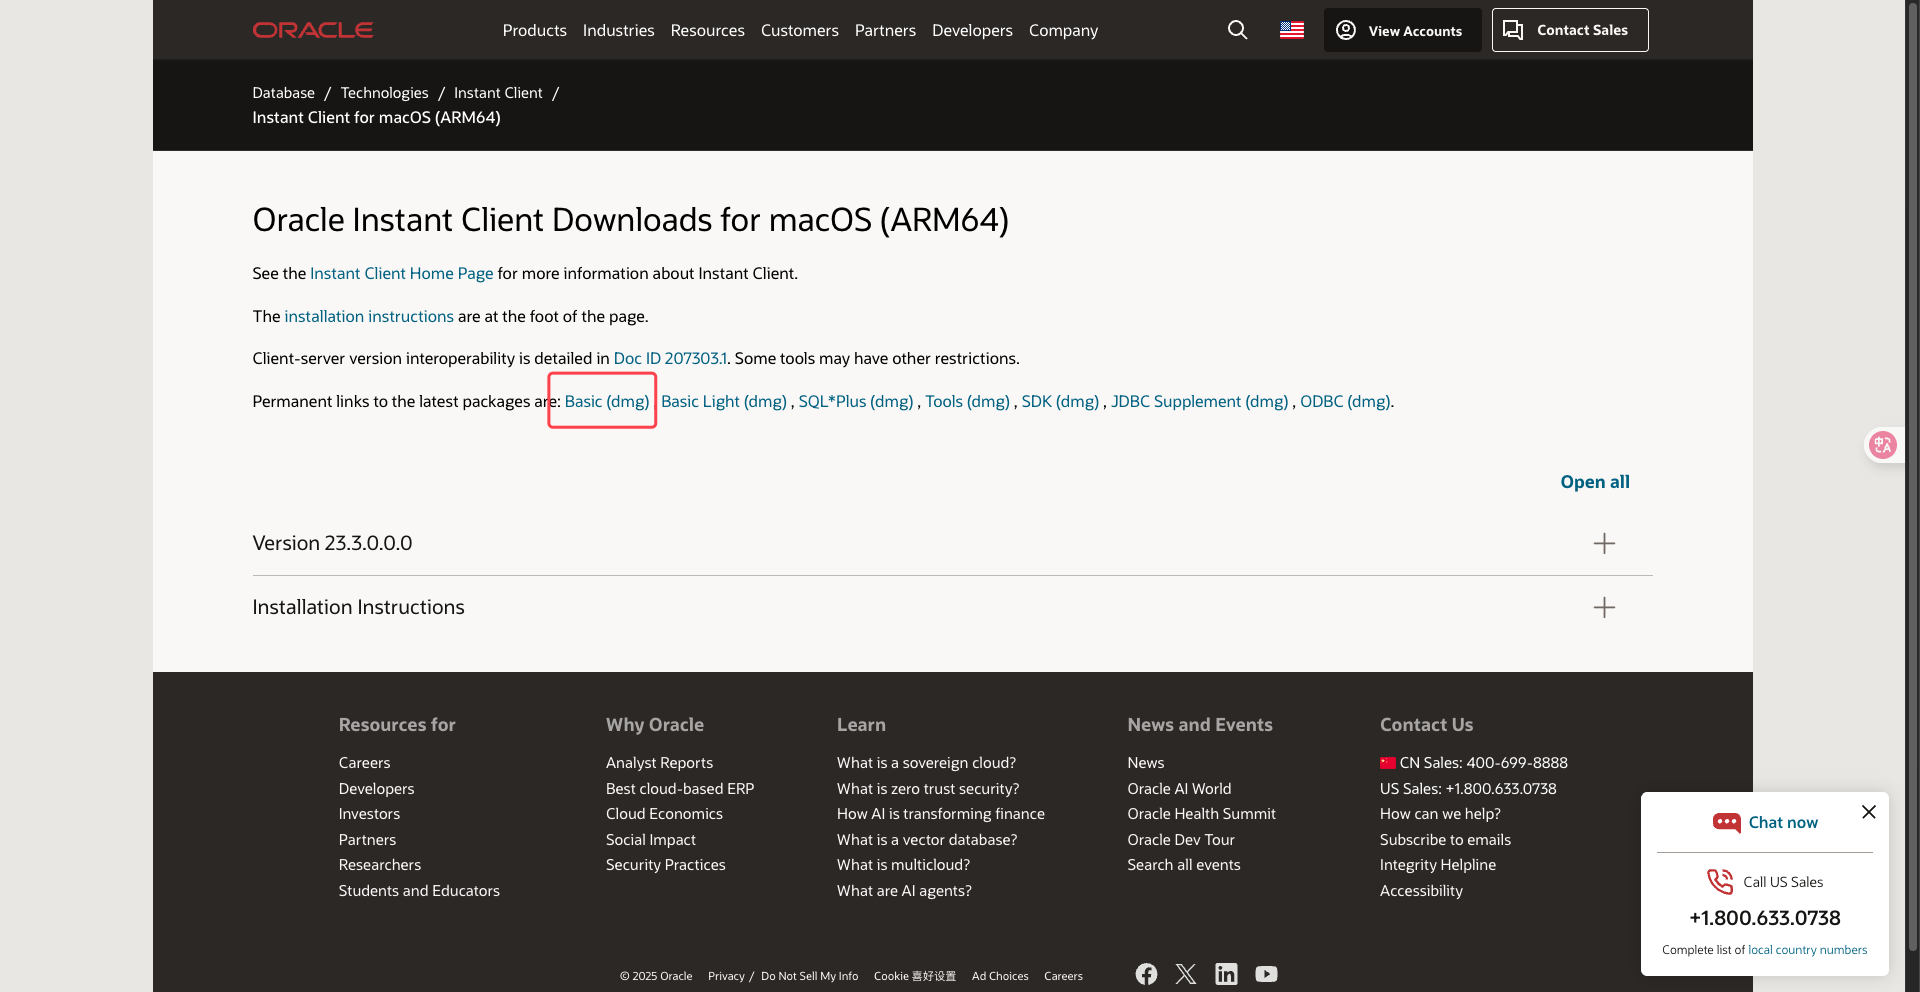
下载好后打开是这个样子的

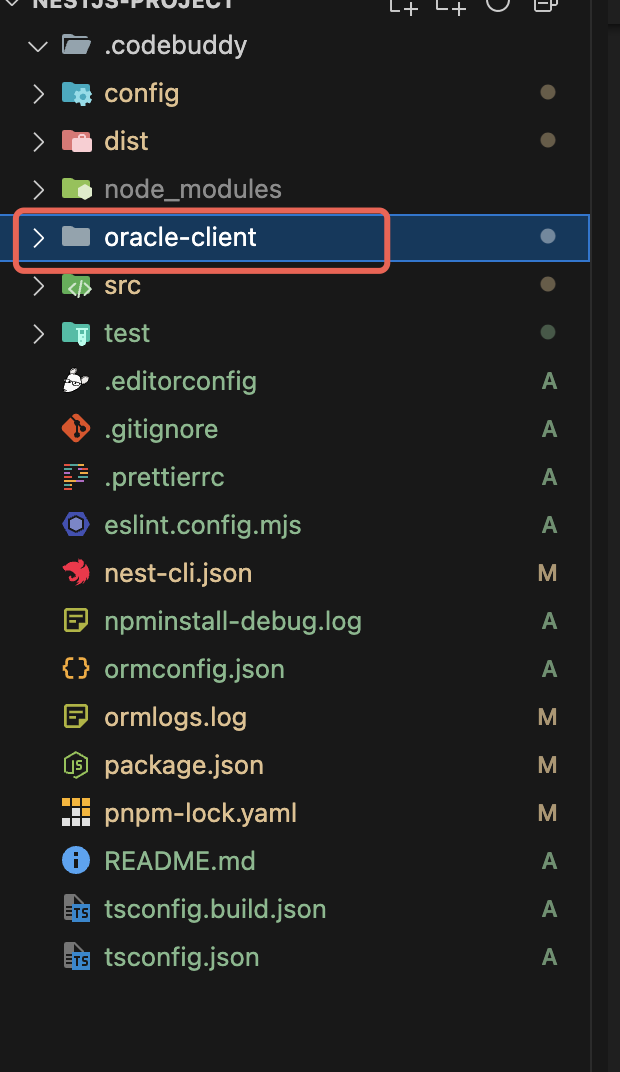
然后根目录创建一个文件夹(oracle-client),将这些文件复制到文件夹下,如图:
然后在nest-cli.json中添加文件复制(只需要oracle-client的即可,.yml是我的配置文件):,不然运行时不会将oracle-client一起打包到dist
{ \"$schema\": \"https://json.schemastore.org/nest-cli\", \"collection\": \"@nestjs/schematics\", \"sourceRoot\": \"src\", \"compilerOptions\": { \"deleteOutDir\": true, \"assets\": [ // 这个是配置静态资源 { \"include\": \"../config/*.yml\", \"outDir\": \"./dist/config\" }, // 这个是配置oracle-client { \"include\": \"../oracle-client\", \"outDir\": \"./dist/oracle-client\" } ] }}
1、在main.ts中函数的顶部进行手动指定 Oracle 客户端库(OCI - Oracle Call Interface)的加载位置
try { await oracledb.initOracleClient({ libDir: path.join(__dirname, \'../oracle-client\') });} catch (e) { console.log(e); process.exit(1);}2、在服务启动后监听进程退出(main.ts中的listen之后)
[\'SIGINT\', \'SIGTERM\'].forEach((event) => { process.once(event, async () => { await app.close(); console.log(\'关闭服务\'); process.exit(0); }); });完整代码如下:
import { NestFactory } from \'@nestjs/core\';import { AppModule } from \'./app.module\';import { ConfigService } from \'@nestjs/config\';import { ValidationPipe } from \'@nestjs/common\';import helmet from \'helmet\';import { DocumentBuilder, SwaggerModule } from \'@nestjs/swagger\';import oracledb from \'oracledb\';import path from \'path\';import { DataSource } from \'typeorm\';async function bootstrap() { /** * oracledb */ try { await oracledb.initOracleClient({ libDir: path.join(__dirname, \'../oracle-client\') }); } catch (e) { console.log(e); process.exit(1); } const app = await NestFactory.create(AppModule, { // logger:false, }); // 获取配置文件 const configService = app.get(ConfigService); // 全局前缀 app.setGlobalPrefix(configService.get(\'app.prefix\') ?? \'api\'); //管道 app.useGlobalPipes( new ValidationPipe({ whitelist: true, //过滤掉方法处理程序不应该接收的属性 transform: true, //根据其 DTO 类自动将有效负载转换为类型化的对象 }), ); // 安全防护 app.use(helmet()); // 集成Swagger const config = new DocumentBuilder() .setTitle(\'测试接口文档\') .setDescription(\'接口文档\') .setVersion(\'1.0\') .addTag(\'测试\') .build(); const documentBuilder = () => SwaggerModule.createDocument(app, config); SwaggerModule.setup(\'swagger-ui\', app, documentBuilder()); // 启动服务. \'0.0.0.0\'设置是为了记录ipV4 await app.listen(configService.get(\'app.port\') ?? 3000, \'0.0.0.0\'); /** * 监听进程退出 */ [\'SIGINT\', \'SIGTERM\'].forEach((event) => { process.once(event, async () => { await app.close(); console.log(\'关闭服务\'); process.exit(0); }); }); console.log( `Application is running on: http://localhost:${configService.get(\'app.port\') ?? 3000}`, );}bootstrap();
ctrl+c结束进程时有个报错,暂无没有好的办法去除,不影响程序的运行,大家有好的方法也可以评论区告诉我
# 开发环境配置env: \'development\'app: prefix: \'api\' port: 8080 logger: # 项目日志存储路径,相对路径(相对本项目根目录)或绝对路径 dir: \'../logs\' # 文件相关 file: # 是否为本地文件服务或cos isLocal: true # location 文件上传后存储目录,相对路径(相对本项目根目录)或绝对路径 location: \'../upload\' # 文件服务器地址,这是开发环境的配置 生产环境请自行配置成可访问域名 domain: \'http://localhost:8080\' # 文件虚拟路径, 必须以 / 开头, 如 http://localhost:8080/profile/****.jpg , 如果不需要则 设置 \'\' serveRoot: \'/profile\' # 文件大小限制,单位M maxSize: 10# 腾讯云cos配置cos: secretId: \'\' secretKey: \'\' bucket: \'\' region: \'\' domain: \'\' location: \'\'# 数据库配置db: mysql: host: \'127.0.0.1\' username: \'root\' password: \'123456789\' database: \'nestjs\' port: 3306 charset: \'utf8mb4\' logger: \'file\' logging: true multipleStatements: true dropSchema: false synchronize: false supportBigNumbers: true bigNumberStrings: true oracle: host: \'192.168.20.171\' port: 1521 username: \'flyco_md\' password: \'password\' serviceName: \'maindb\' synchronize: false# redis 配置redis: url: \'redis://localhost:6379\' password: 123456# jwt 配置jwt: secretkey: \'you_secretkey\' expiresin: \'9999y\'# axios配置http: timeout: 5000 maxRedirects: 5# 权限 白名单配置perm: router: whitelist: [ { path: \'/api/auth/getCaptCha\', method: \'GET\' }, { path: \'/api/auth/login\', method: \'POST\' }, { path: \'/register\', method: \'POST\' }, { path: \'/api/test/test\', method: \'GET\' }, { path: \'/logout\', method: \'POST\' }, { path: \'/perm/{id}\', method: \'GET\' }, { path: \'/upload\', method: \'POST\' }, ]# 是否开启验证码sys: captchaEnabled: true

