Vue 2 项目中快速集成 Jest 单元测试(超详细教程)_vue2 单元测试工具
在 Vue 项目中编写单元测试,是提升代码质量和维护性的关键一步。本文将带你从零开始,在一个 Vue 2 + Vue CLI 项目中集成 Jest 作为单元测试框架,并运行第一个测试用例。
✅ 适用于 Vue 2 项目(如你使用的是 vue-cli-service)
✅ 基于 @vue/cli-plugin-unit-jest 官方插件
✅ 包含完整命令、配置说明和测试示例
一、安装 Jest 及相关依赖
如果你的项目已经使用 Vue CLI 创建,只需添加官方的 Jest 插件即可。
1. 安装 Jest 插件
vue add @vue/unit-jest⚠️ 注意:这个命令会自动安装 @vue/cli-plugin-unit-jest 和 @vue/test-utils 等必要依赖。
二、检查 package.json 脚本
确保你的 package.json 中有以下脚本:
\"scripts\": { \"test:unit\": \"vue-cli-service test:unit\", \"test\": \"jest\", \"test:watch\": \"jest --watch\", \"test:coverage\": \"jest --coverage\"}- npm run test:unit:使用 Vue CLI 运行测试(推荐)
- npm run test:直接运行 Jest(适合 CI)
- --watch:监听文件变化
- --coverage:生成测试覆盖率报告
三、创建第一个测试文件
假设你有一个组件:src/components/HelloWorld.vue
1. 创建测试文件
在 tests/unit/ 目录下创建 HelloWorld.spec.js:
// tests/unit/HelloWorld.spec.jsimport { shallowMount } from \'@vue/test-utils\'import HelloWorld from \'@/components/HelloWorld.vue\'describe(\'HelloWorld.vue\', () => { it(\'renders props.msg when passed\', () => { const msg = \'Welcome to Jest Testing\' const wrapper = shallowMount(HelloWorld, { propsData: { msg } }) expect(wrapper.text()).toMatch(msg) })})四、运行测试
1. 运行所有测试
npm run test:unit或使用 Jest 命令:
npm run test2. 查看测试覆盖率
npm run test:coverage运行后会在项目根目录生成 coverage/ 文件夹,打开 coverage/lcov-report/index.html 可查看详细报告。
五、Jest 配置(可选)
Jest 的配置默认由 Vue CLI 管理,你也可以在 package.json 中添加 jest 字段进行自定义:
\"jest\": { \"testMatch\": [ \"**/tests/unit/**/*.spec.(js|jsx|ts|tsx)\" ], \"moduleFileExtensions\": [ \"js\", \"json\", \"vue\" ], \"transform\": { \"^.+\\\\.js$\": \"babel-jest\", \".*\\\\.(vue)$\": \"vue-jest\" }, \"testEnvironment\": \"jsdom\", \"setupFiles\": [ \"/tests/setup.js\" ]}创建 setup.js(处理 DOM 操作)
有些组件会操作 document,在测试中可能报错(如 querySelector is null),可创建 tests/setup.js:
// tests/setup.jsif (typeof document !== \'undefined\') { if (!document.body) { document.body = document.createElement(\'body\') }}并在 jest 配置中引入。
六、常见问题解决
七、推荐最佳实践
- 测试文件命名:xxx.spec.js 或 xxx.test.js
- 测试文件位置:src同级创建 tests文件夹 或者在测试的源码同级目录添加
- 使用 shallowMount:避免渲染子组件
- mock 接口请求:避免真实网络调用
- 覆盖核心逻辑:props、events、computed、methods
八、遇到的问题
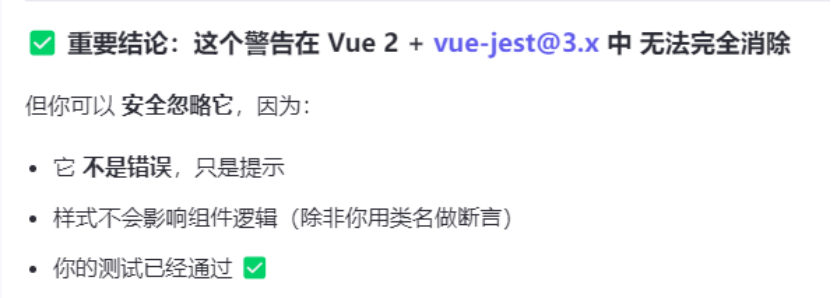
1. [vue-jest]: Less are not currently compiled by vue-jest
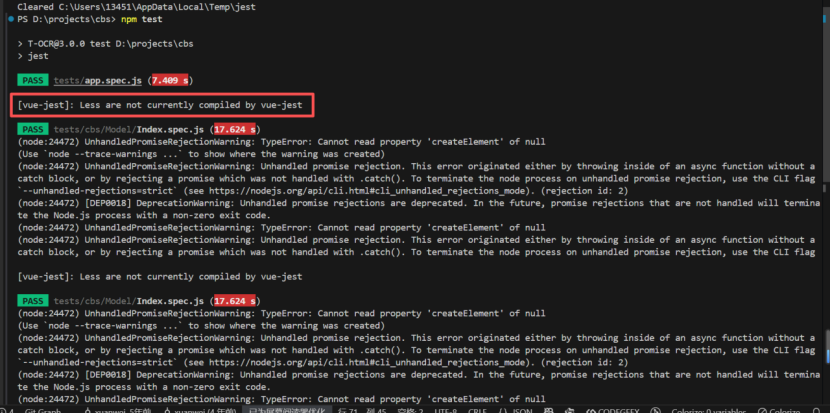
这个报错大模型回答受限于vue2,所以解决不掉,有解决办法烦请共享下
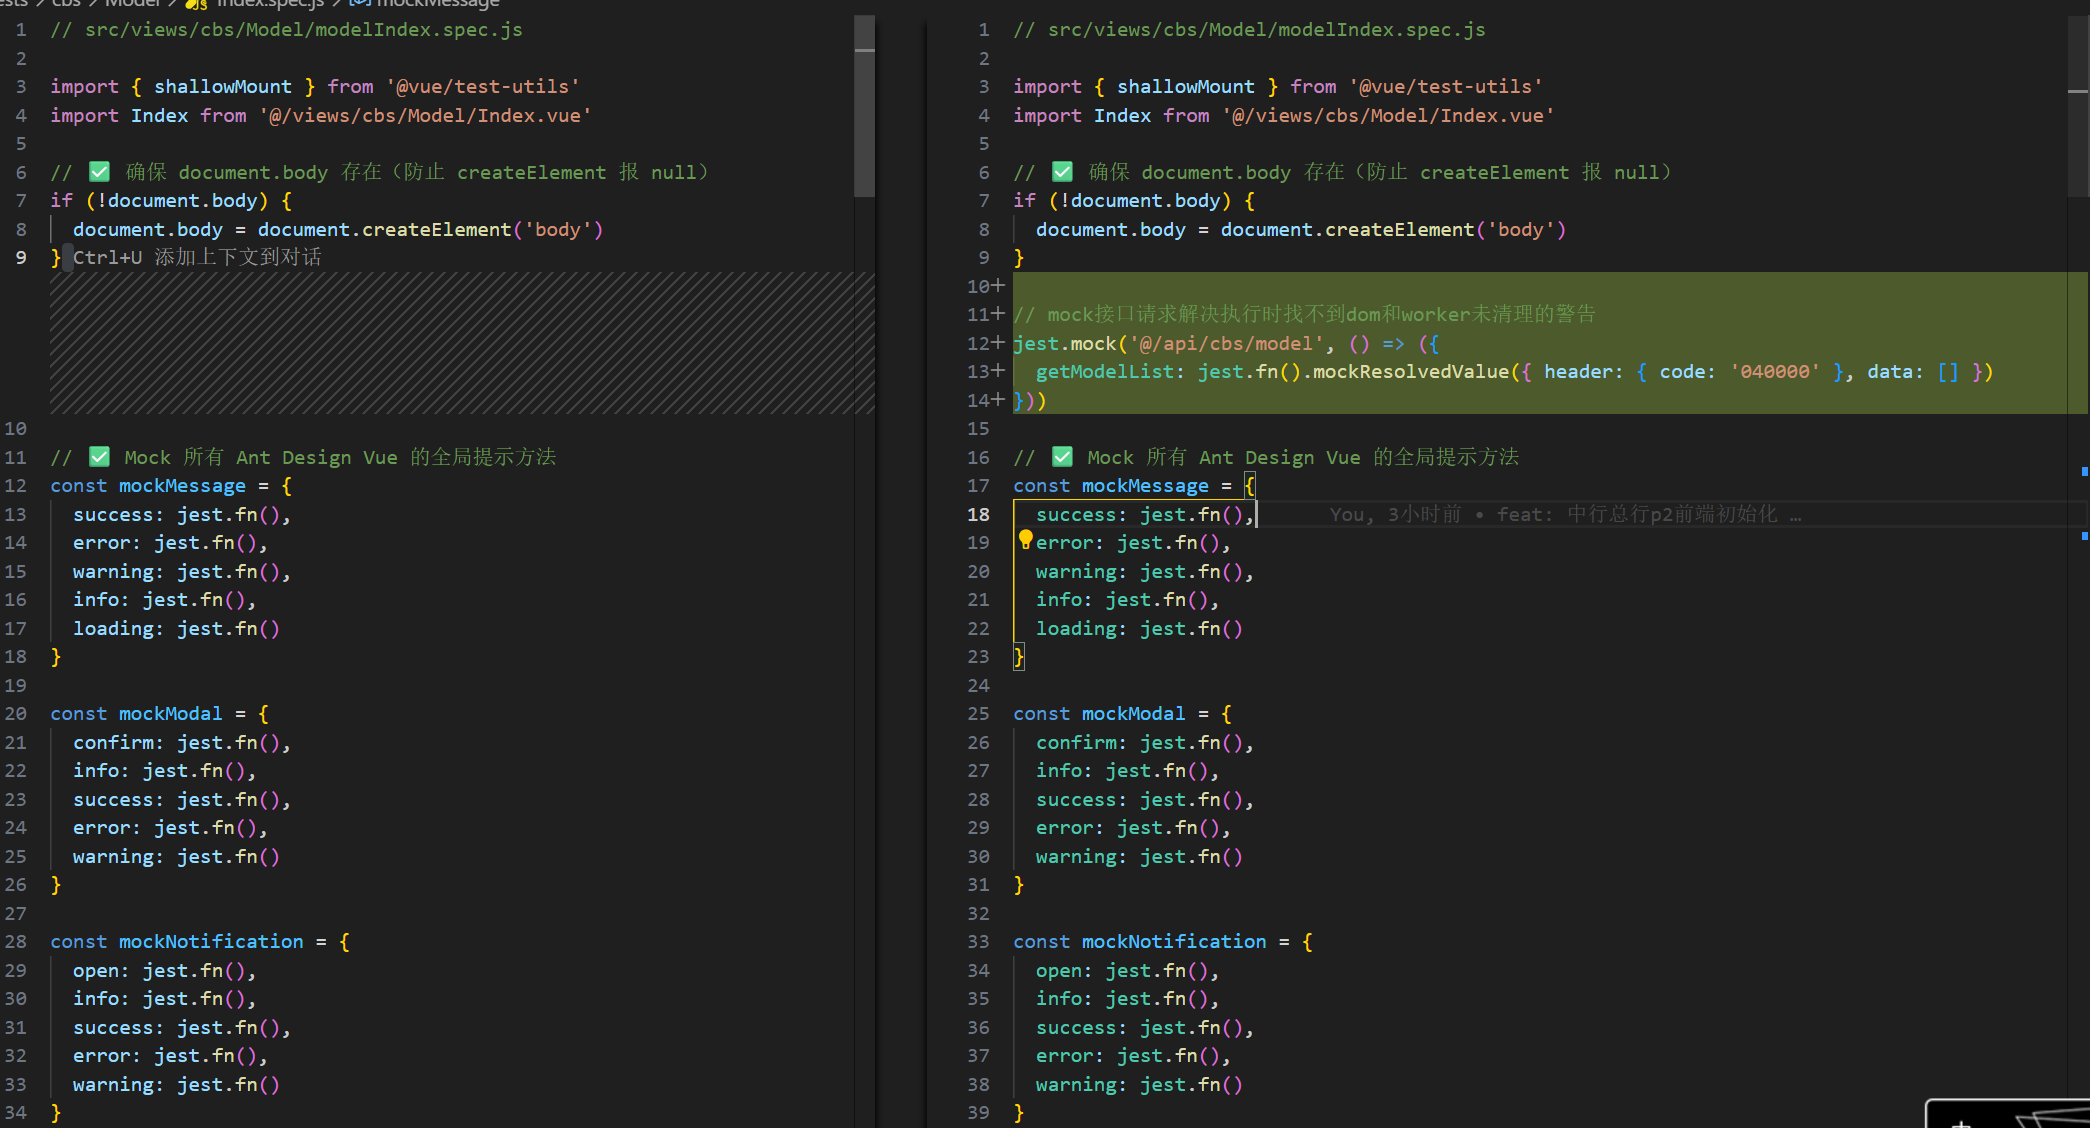
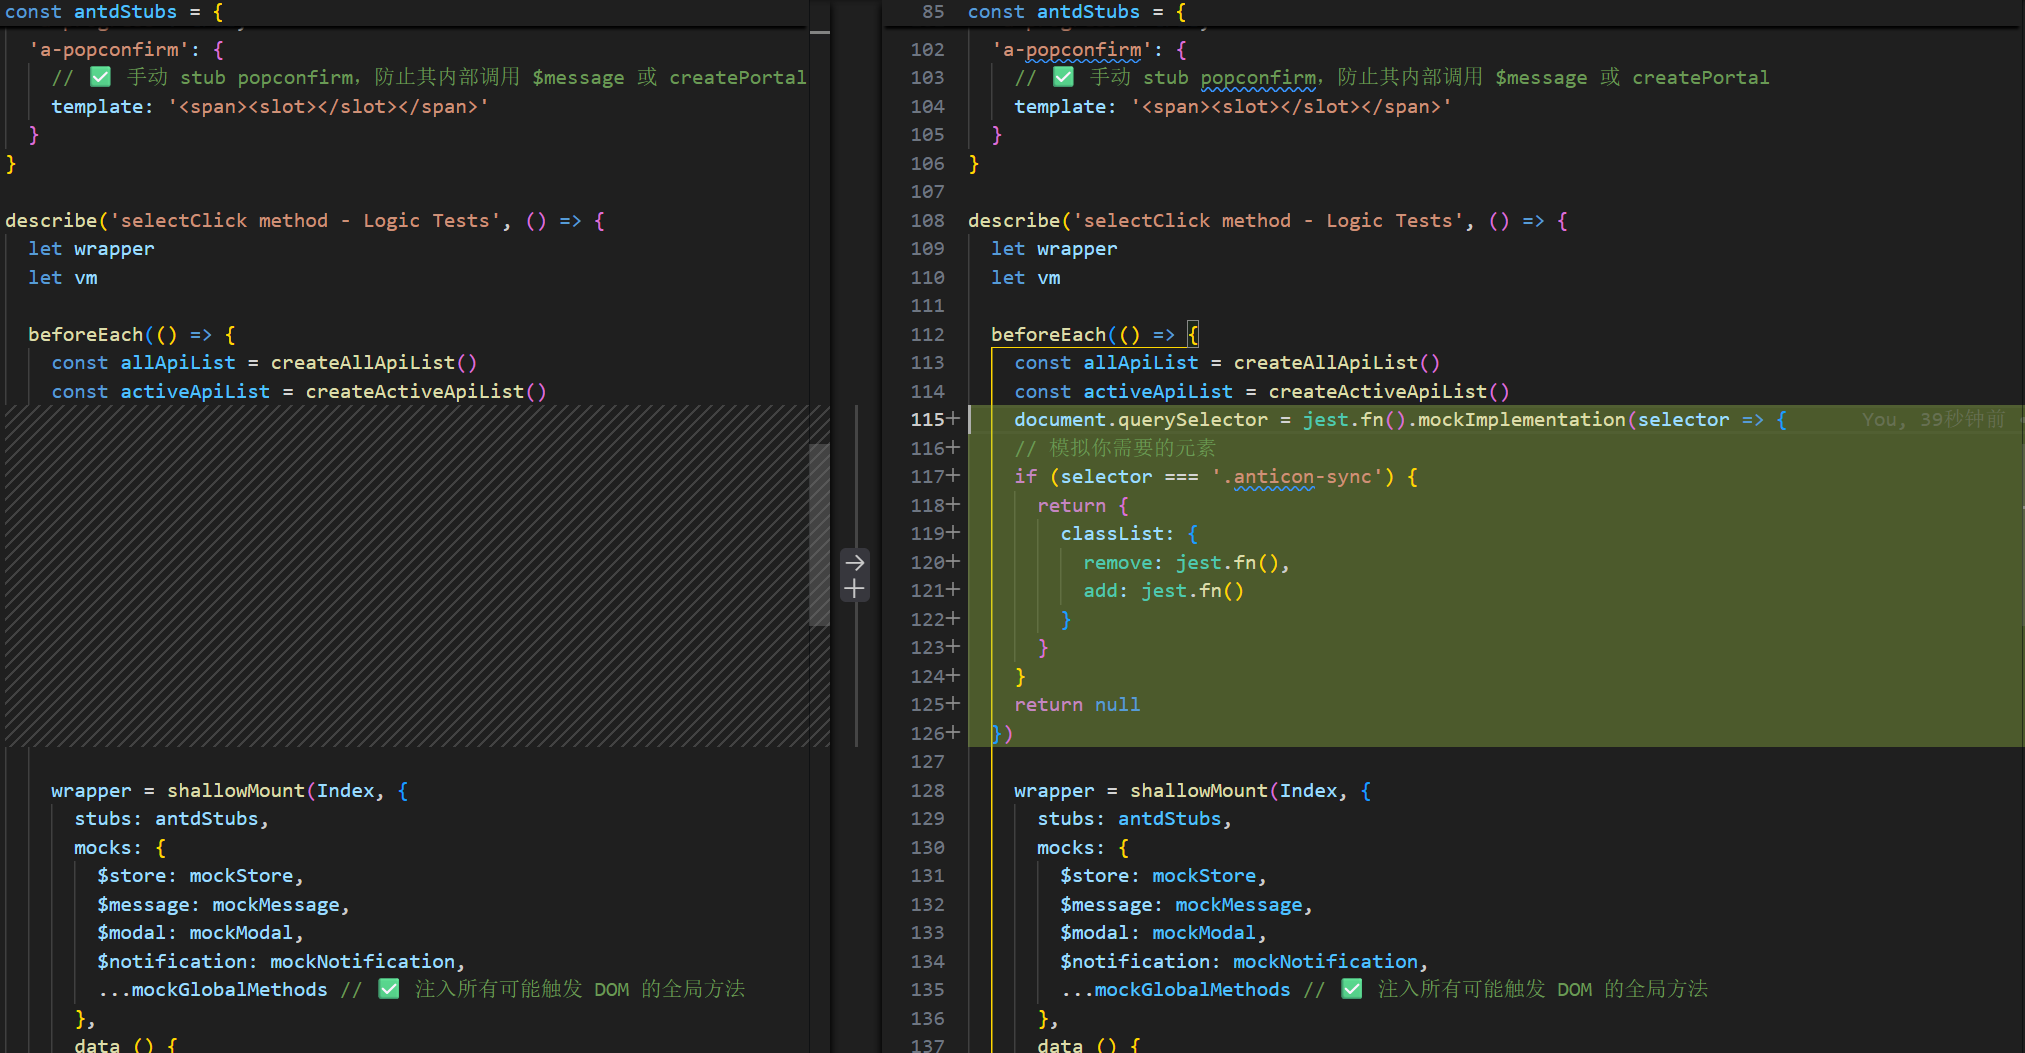
2. TypeError: Cannot read property \'createElement\' of null
报错信息
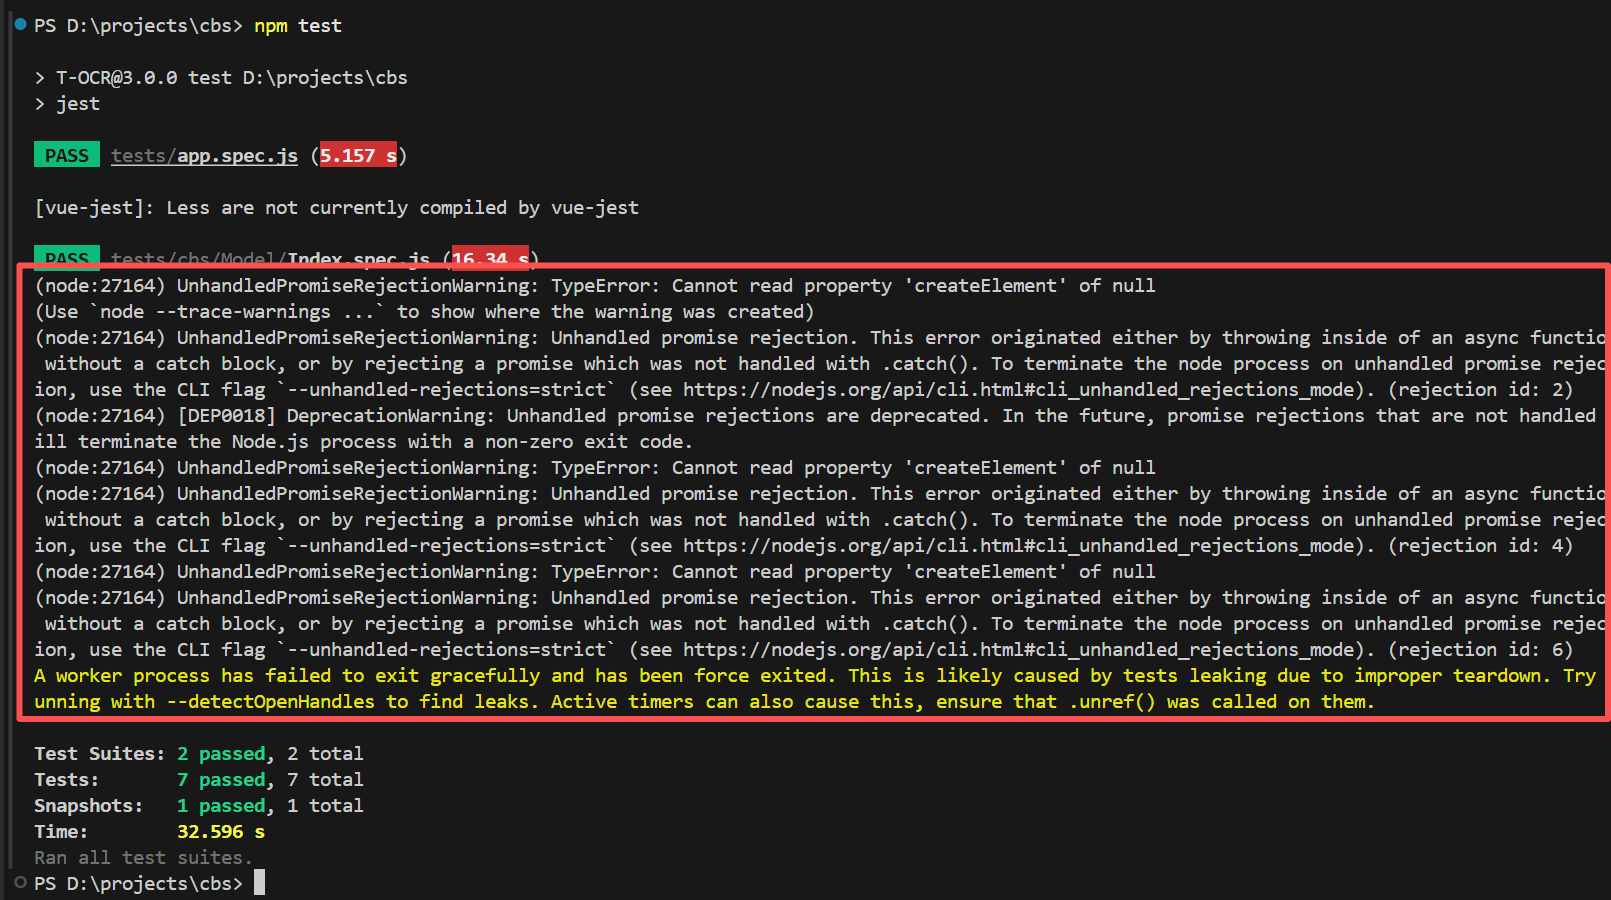
问题定位
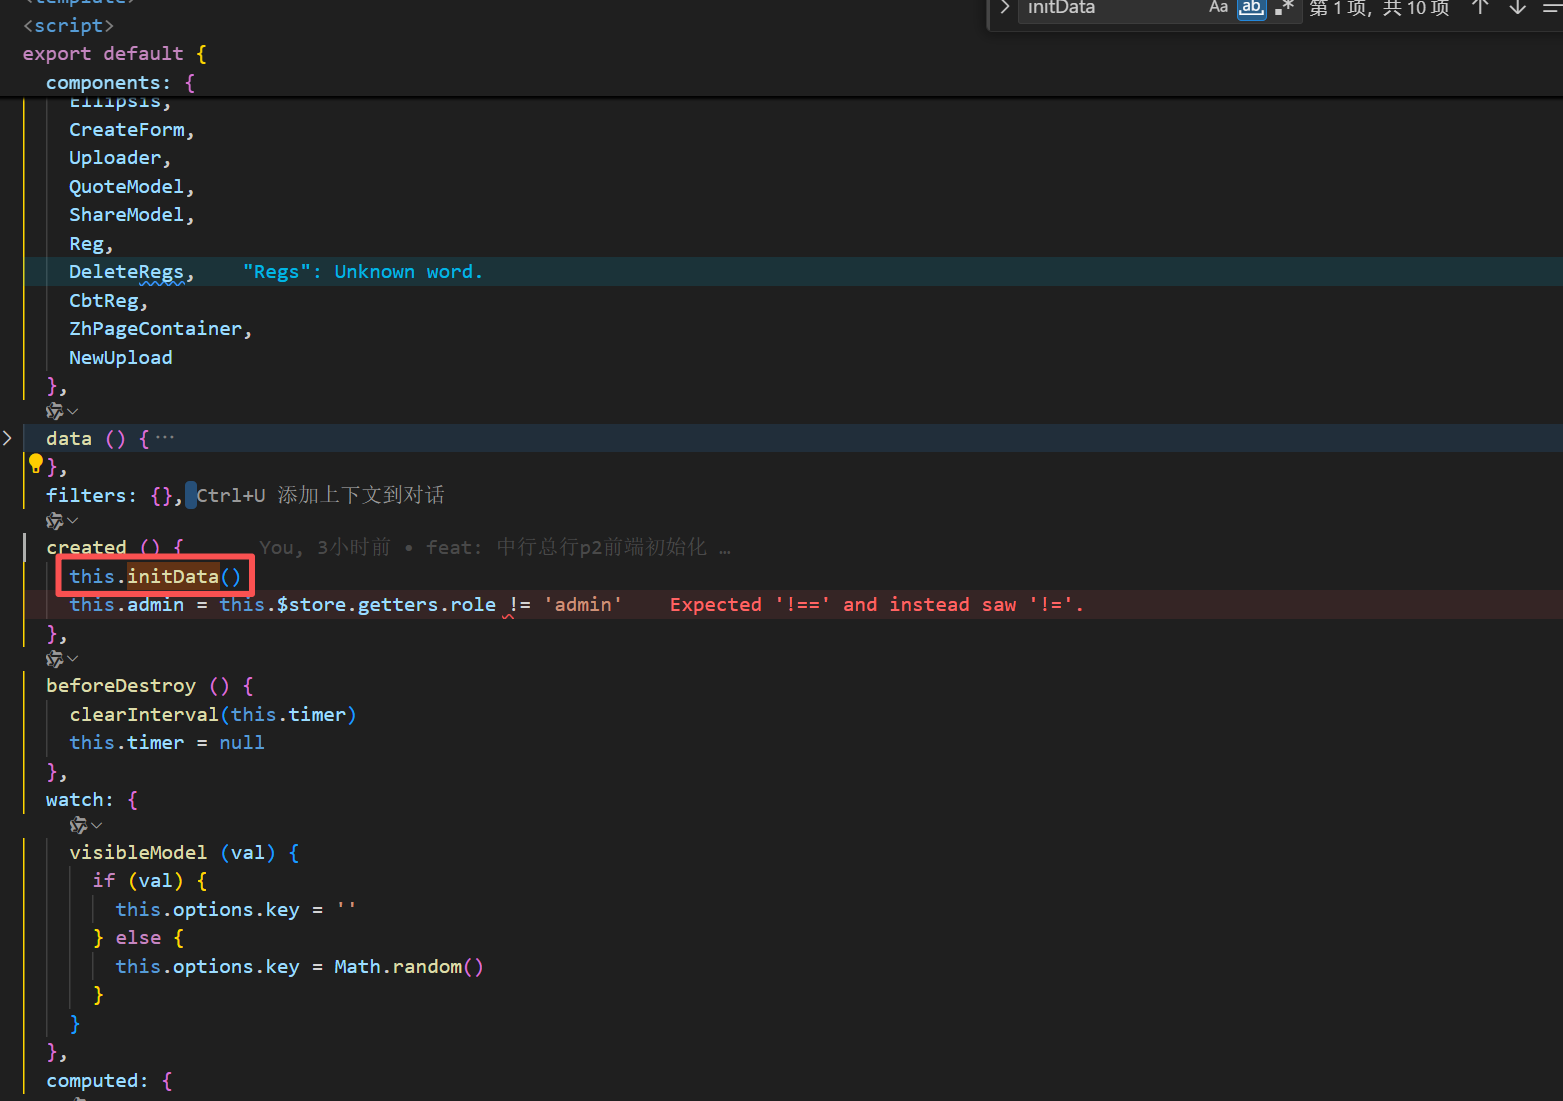
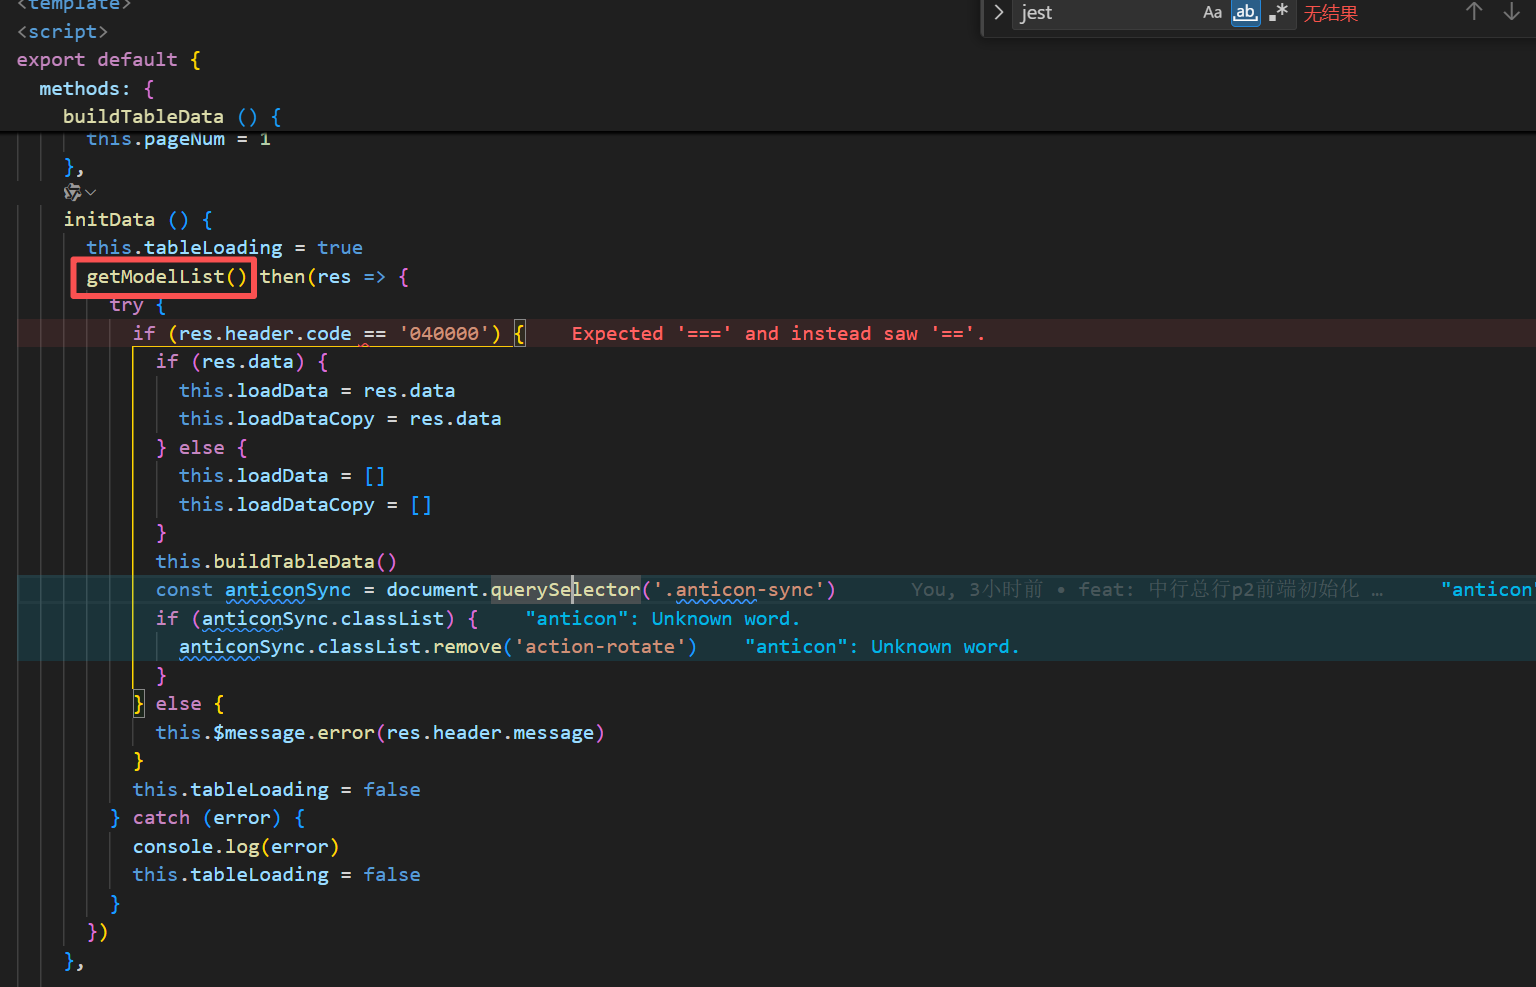
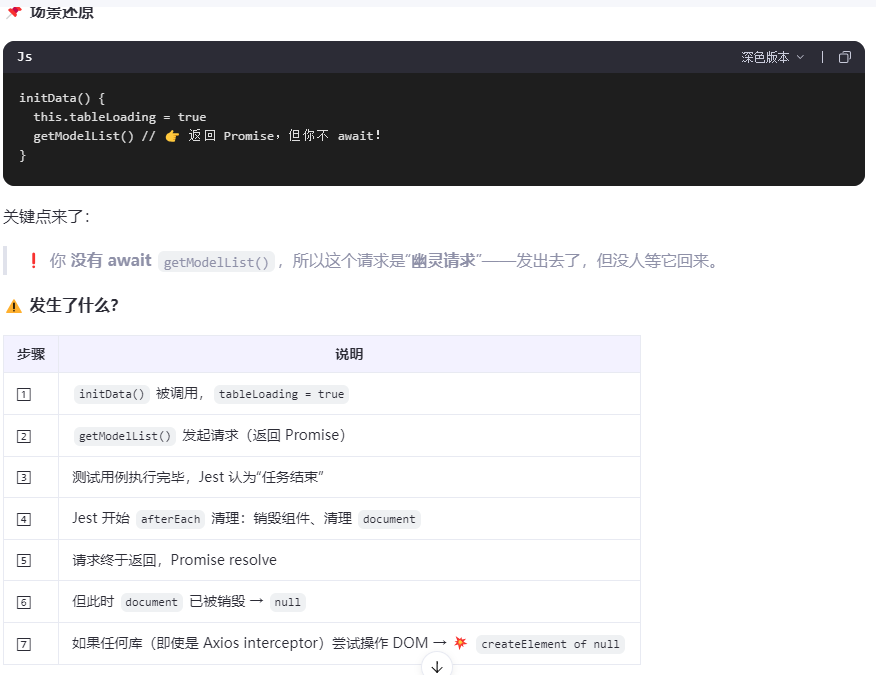
耗费大量时间排查之后发现是因为代码中在created()调用了getModelList()这个接口请求的方法导致报错读不到createElement和worker process得问题
原因分析
大模型回答如下
解决方案
mock接口请求并document.querySelector(不然会在调用此方法时报错报错)