OpenWebUI(1)图像集成——deepseek+comfyUI文生图搭建_comfyui deepseek
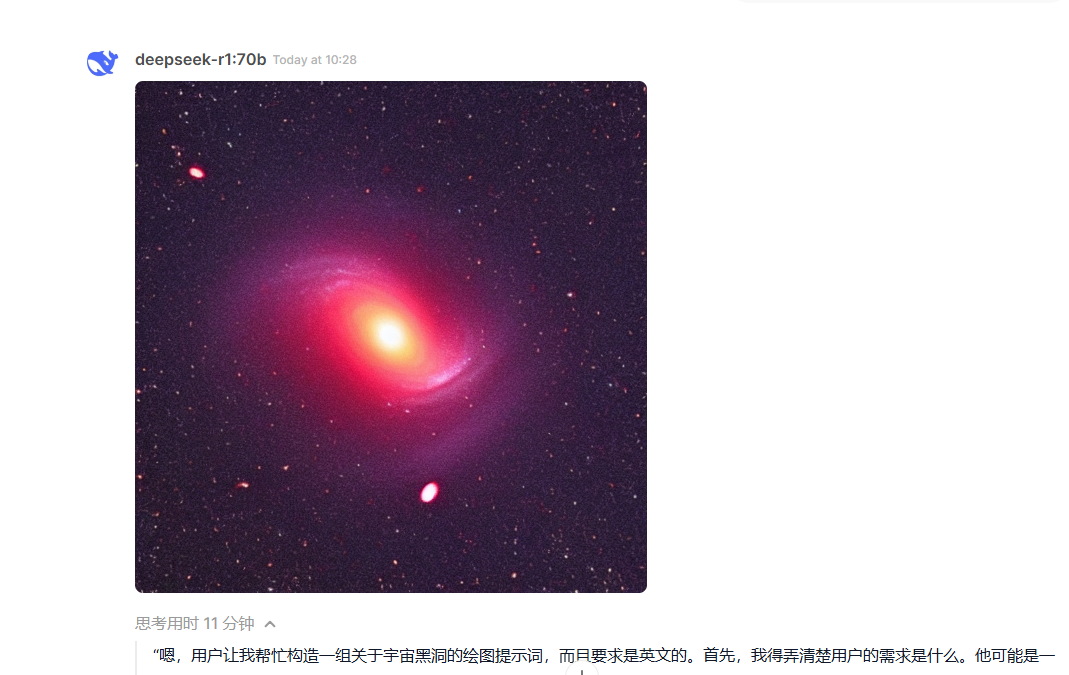
1. 看效果
2. 环境搭配
- openwebUI 建议docker安装
- ollama建议宿主机安装
- ComfyUI建议宿主机安装
- Python环境:非常建议anaconda环境
- model模型下载:在虚拟环境下安装ComfyUI,由于ComfyUI需要下载较多模型,国内网络问题,建议用魔搭社区 ,或者用hf-mirror镜像替换
抱抱脸huggingface中模型下载 - 开发工具:如果开发需要,建议在conda虚拟环境中,
jupyter notebook,在线编辑Python代码,实现下载,启动非常方便
3. ComfyUI操作
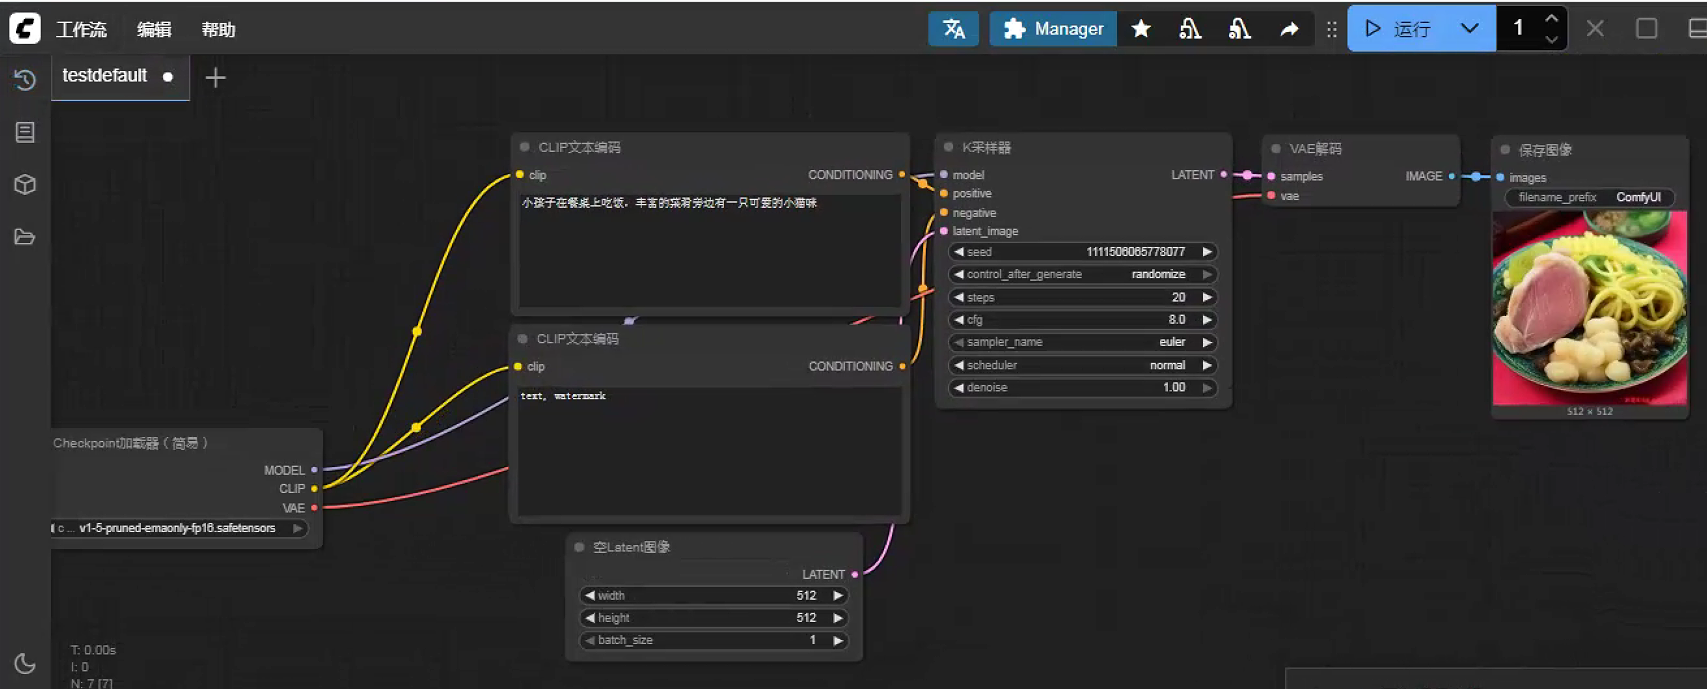
3.1 创建工作流
3.2 导出工作流
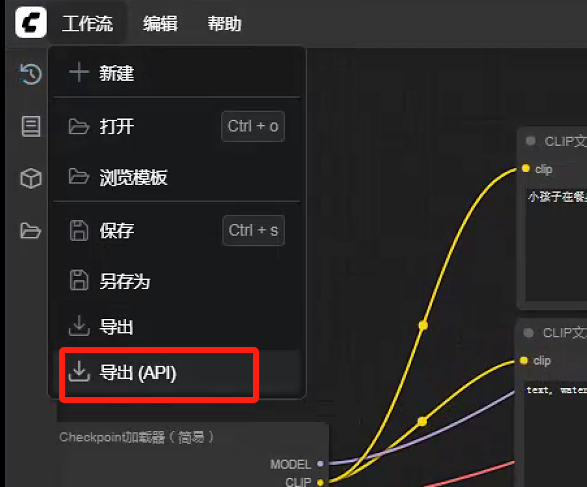
导出后保存为workflow.json的文件
3.3 设置comfyUI为开发模式

3.4 工作流json
{ \"3\": { \"inputs\": { \"seed\": 1111506065778077, \"steps\": 20, \"cfg\": 8, \"sampler_name\": \"euler\", \"scheduler\": \"normal\", \"denoise\": 1, \"model\": [ \"4\", 0 ], \"positive\": [ \"6\", 0 ], \"negative\": [ \"7\", 0 ], \"latent_image\": [ \"5\", 0 ] }, \"class_type\": \"KSampler\", \"_meta\": { \"title\": \"K采样器\" } }, \"4\": { \"inputs\": { \"ckpt_name\": \"v1-5-pruned-emaonly-fp16.safetensors\" }, \"class_type\": \"CheckpointLoaderSimple\", \"_meta\": { \"title\": \"Checkpoint加载器(简易)\" } }, \"5\": { \"inputs\": { \"width\": 512, \"height\": 512, \"batch_size\": 1 }, \"class_type\": \"EmptyLatentImage\", \"_meta\": { \"title\": \"空Latent图像\" } }, \"6\": { \"inputs\": { \"text\": \"小孩子在餐桌上吃饭,丰富的菜肴旁边有一只可爱的小猫咪\", \"clip\": [ \"4\", 1 ] }, \"class_type\": \"CLIPTextEncode\", \"_meta\": { \"title\": \"CLIP文本编码\" } }, \"7\": { \"inputs\": { \"text\": \"text, watermark\", \"clip\": [ \"4\", 1 ] }, \"class_type\": \"CLIPTextEncode\", \"_meta\": { \"title\": \"CLIP文本编码\" } }, \"8\": { \"inputs\": { \"samples\": [ \"3\", 0 ], \"vae\": [ \"4\", 2 ] }, \"class_type\": \"VAEDecode\", \"_meta\": { \"title\": \"VAE解码\" } }, \"9\": { \"inputs\": { \"filename_prefix\": \"ComfyUI\", \"images\": [ \"8\", 0 ] }, \"class_type\": \"SaveImage\", \"_meta\": { \"title\": \"保存图像\" } }}4. OpenWebUI的设置
4.1 功能设置
管理员面板设置中,找到图形功能界面,如下:
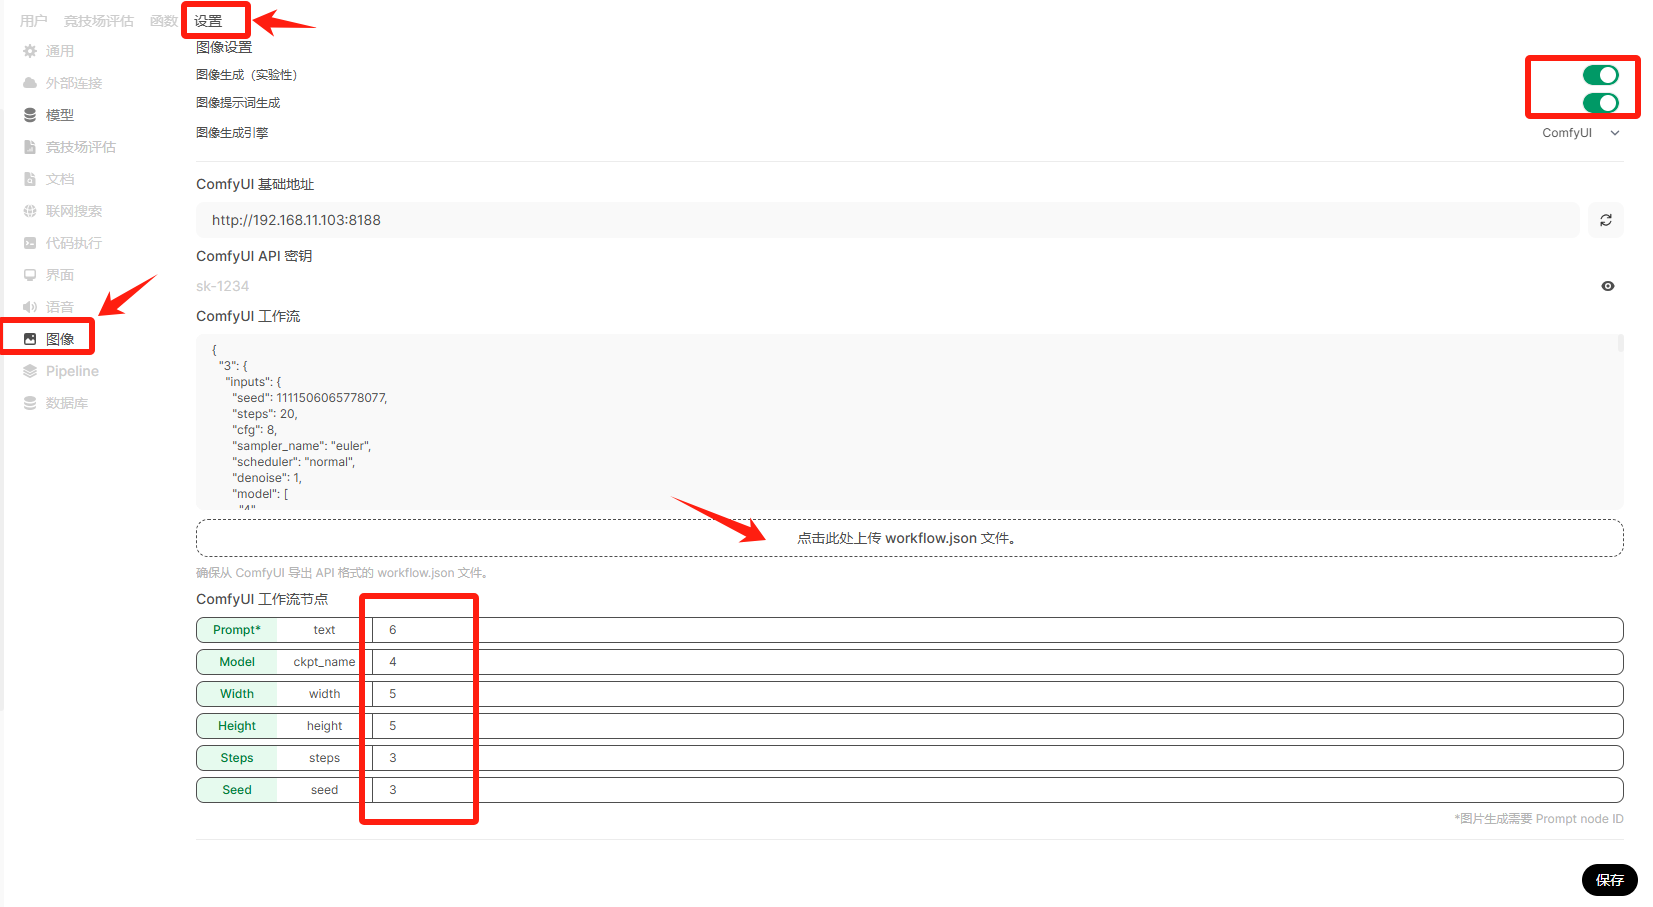
将从ComfyUI中导出的工作流json文件上传,对于ComfyUI工作流节点的数字,需要自己根据json中节点名称填写。
4.2工作流节点配置
工作流json中共7个根元素
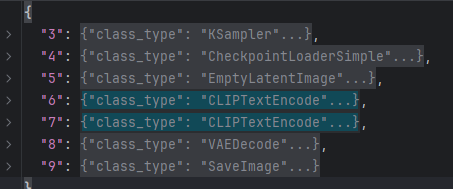
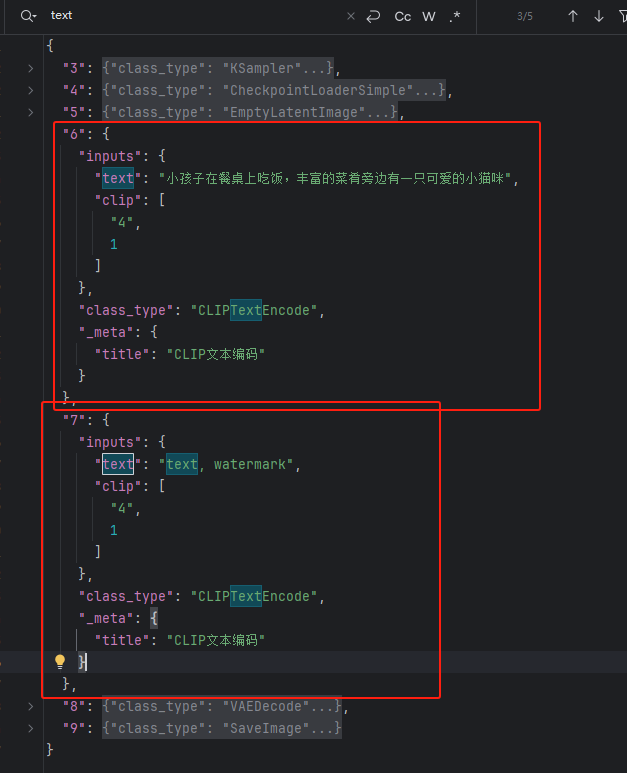
4.2.1 prompt*提示词text节点
text提示词:节点6是正向提示词,节点7是负向提示词,此处填写节点6
4.2.2 model模型 ckpt_name配置
选择节点4

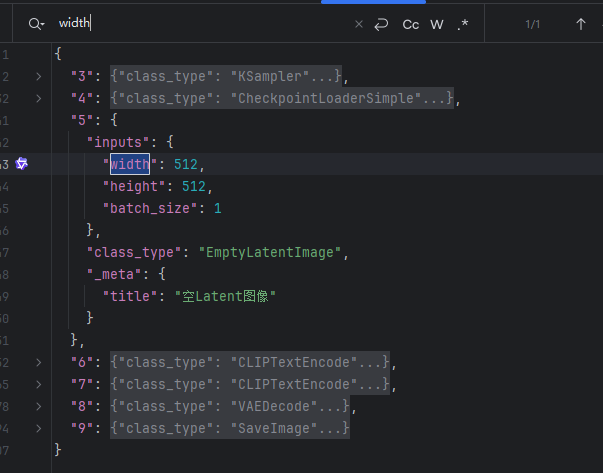
4.2.3 图像生成宽width高height配置
都是节点5
4.2.4 steps配置
节点3
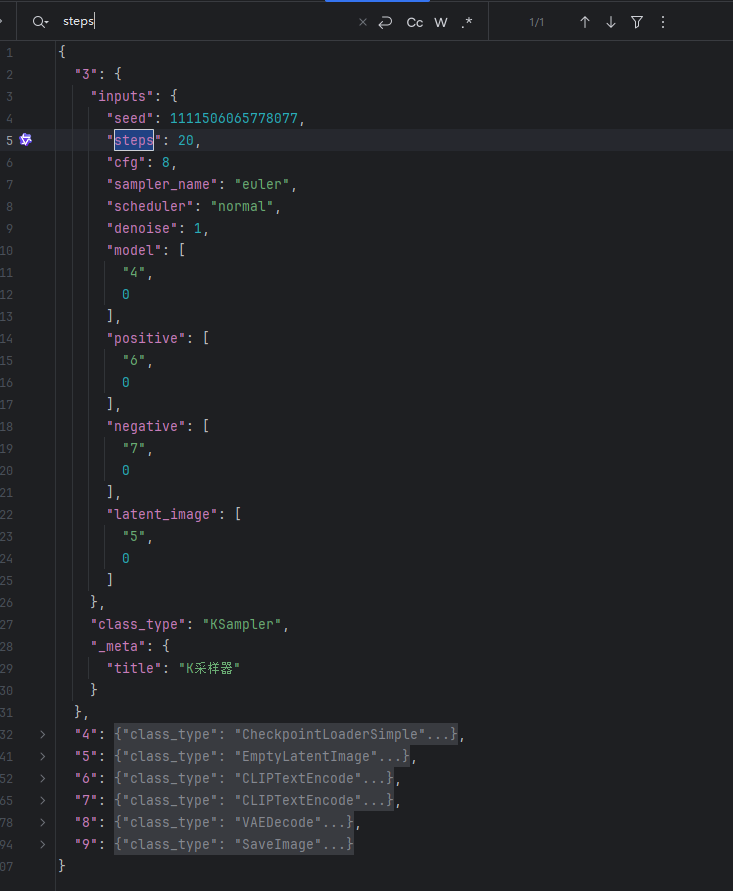
4.2.4 seed配置
节点3,截图同上
5.注意事项
该模型提示语为英文,目前中文提示语牛头不对马嘴


