WPF+IOC学习记录_wpf 搭建ioc
最近在学WPF,上一篇文章记录了WPF的MVVM自己实现和用框架的区别(WPF+MVVM入门学习),接下这篇文章记录一下在WPF中使用IOC,这里演示用的是微软官方的DependencyInjection,也可以用其他的第三方框架。
项目源码:https://gitee.com/cplmlm/SelfServiceReportPrinter
GitHub - cplmlm/SelfServiceReportPrinter: WPF+IOC+MVVM 医院自助检验检查报告打印
推荐学习博主:B站UP十月的寒流
一、基本概念
为什么要用IOC?
可以提高代码的耦合度、更方便的控制生命周期、提高代码复用和可维护性、便于测试。
控制反转
本来要在一个类里面实现依赖,现在我们可以把这个依赖抽出来。
依赖注入
通过依赖的方式注入到类里面的,我们通常使用构造函数注入,还有属性注入、接口注入。
生命周期
二、示例代码
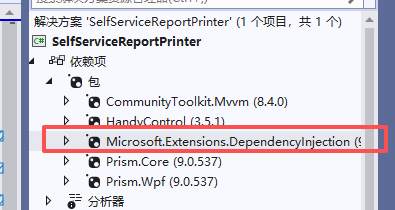
1、安装Microsoft.Extensions.DependencyInjectio包。
2、在app.cs添加以下代码,目的是为了实现注入,我这里直接从微软官方复制过来的,代码地址: CommunityToolkit.Mvvm 的 IoC 控制反转
/// /// Interaction logic for App.xaml /// public partial class App : Application { public App() { Services = ConfigureServices(); this.InitializeComponent(); } /// /// 获取当前应用程序实例 /// public new static App Current => (App)Application.Current; /// /// 获取当前应用程序的服务提供程序 /// public IServiceProvider Services { get; } /// /// 配置服务 /// private static IServiceProvider ConfigureServices() { var services = new ServiceCollection(); services.AddTransient(); services.AddTransient(); services.AddTransient(); services.AddTransient(sp=>new MainWindow() { DataContext=sp.GetRequiredService()}); return services.BuildServiceProvider(); } }3、MainWindow窗口我们也是通过注入的方式,所有和之前的有区别,之前是在StartupUri设置的,通过依赖注入的方式需要重写了OnStartup方法。
修改前:
修改后:
public partial class App : Application{ public App() { Services = ConfigureServices(); this.InitializeComponent(); } /// /// 获取当前应用程序实例 /// public new static App Current => (App)Application.Current; /// /// 获取当前应用程序的服务提供程序 /// public IServiceProvider Services { get; } /// /// 配置服务 /// private static IServiceProvider ConfigureServices() { var services = new ServiceCollection(); services.AddTransient(); services.AddTransient(); services.AddTransient(); services.AddTransient(sp=>new MainWindow() { DataContext=sp.GetRequiredService()}); return services.BuildServiceProvider(); } /// /// 启动应用程序 /// /// protected override void OnStartup(StartupEventArgs e) { base.OnStartup(e); MainWindow= Services.GetRequiredService(); MainWindow?.Show(); }}
