【AI绘画+本地部署】基于krita的AI绘画(含windows一键整合包)_kritaai

comfyui+krita所有相关资源整合包:关注wx公众号后,发文字: krita
krita绘画软件官网地址 https://krita.org/en/download/krita-desktop/
krita-ai-diffusion 插件:https://github.com/Acly/krita-ai-diffusion
英文文字教程:https://weirdwonderfulai.art/tutorial/generative-ai-for-krita/
B站视频教程: 实时AI绘画工作流 Krita+ComfyUI+LCM 完全开源免费本地部署 手残也能轻松愉快涂鸦了
其他说明:https://docs.interstice.cloud/comfyui-setup/
文章目录
- 准备
- 一、krita+AI绘画插件安装
-
- 导入 krita_ai_diffusion-1.7.1.zip (无需解压)
-
- 启动插件
- 二、开始使用
-
- 运行前先配置参数
- 原始生成模式(generate)
-
- 全画布大小生成
- 附录:制作整合包需要的资源(如果找不到模型,请参考路径反复核对):
-
- 需要安装的自定义节点(需要访问github)
- 需要的模型
-
- Shared
- SD 1.5
- SD XL
- Checkpoints The following checkpoints are used by the default styles:
- 链接本地的comfyui
-
- 缺少 CLIPVision model pytorch_model.bin
- 缺少 IPAdapter model ip-adapter_sd15.safetensors
- LCM相关(运行实时生成流)
- BUG调试
-
- 首先找到 报错原因和文档
准备
关注wx公众号后,发文字: krita

一、krita+AI绘画插件安装
krita是开源的类似photoshop的多图层绘图软件
新建图像后出现下面界面

导入 krita_ai_diffusion-1.7.1.zip (无需解压)
工具 》 脚本 》》 从文件导入Python插件

导入成功

启动插件
显示AI图像生成面板

启用后界面
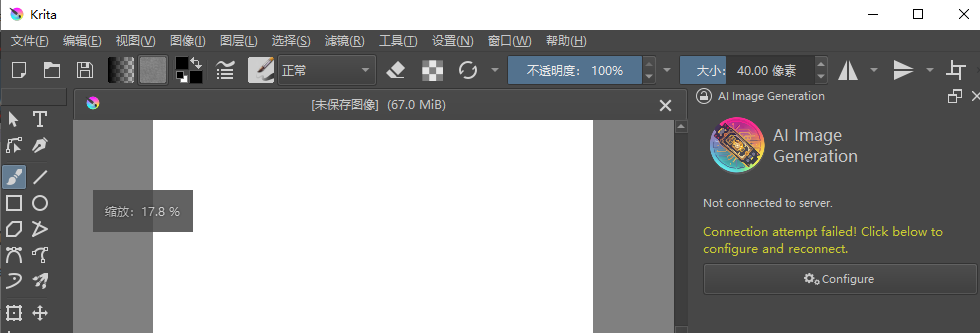
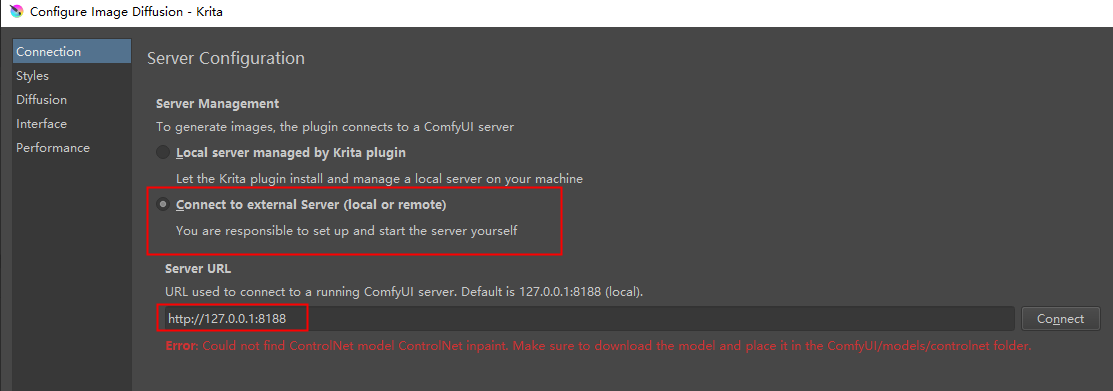
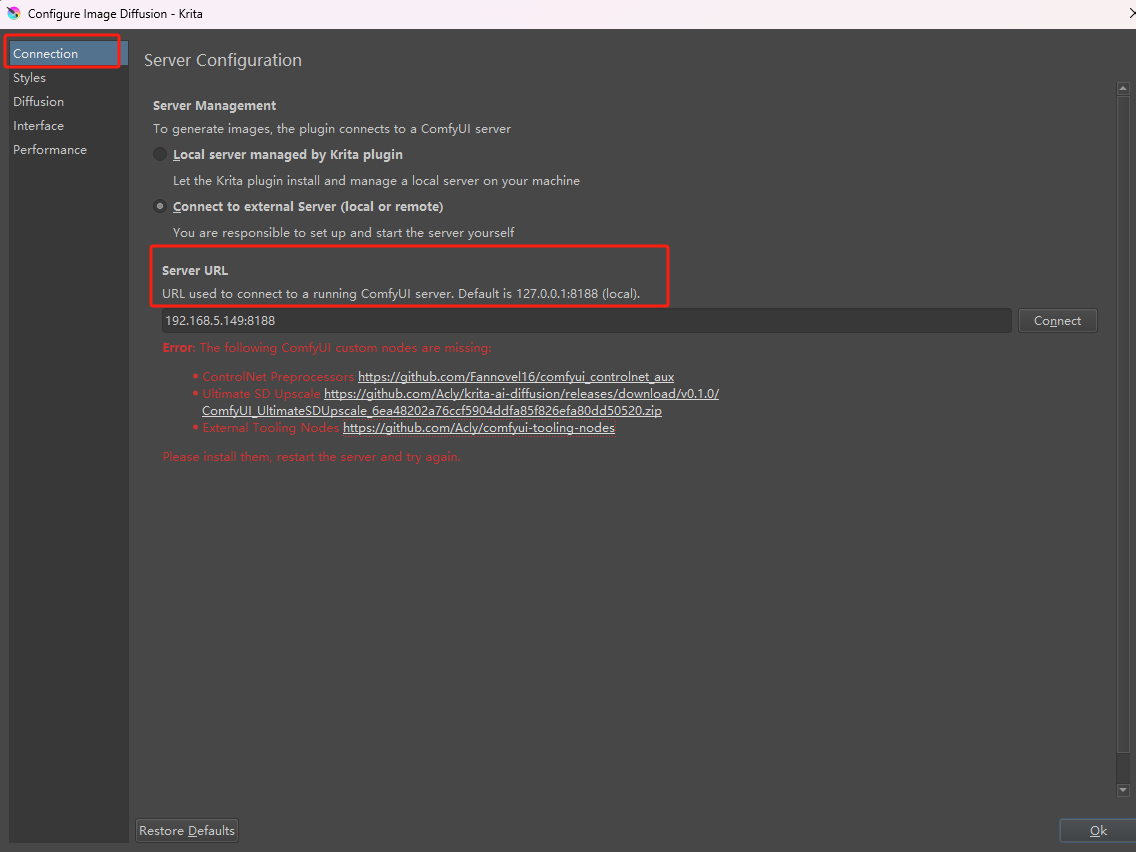
配置 链接启动的comfyu
https://127.0.0.1:8188
二、开始使用
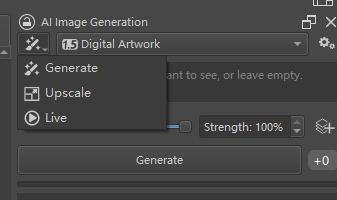
3个模式:生成(generate) 超分 (upscale ) Live (实时绘画)
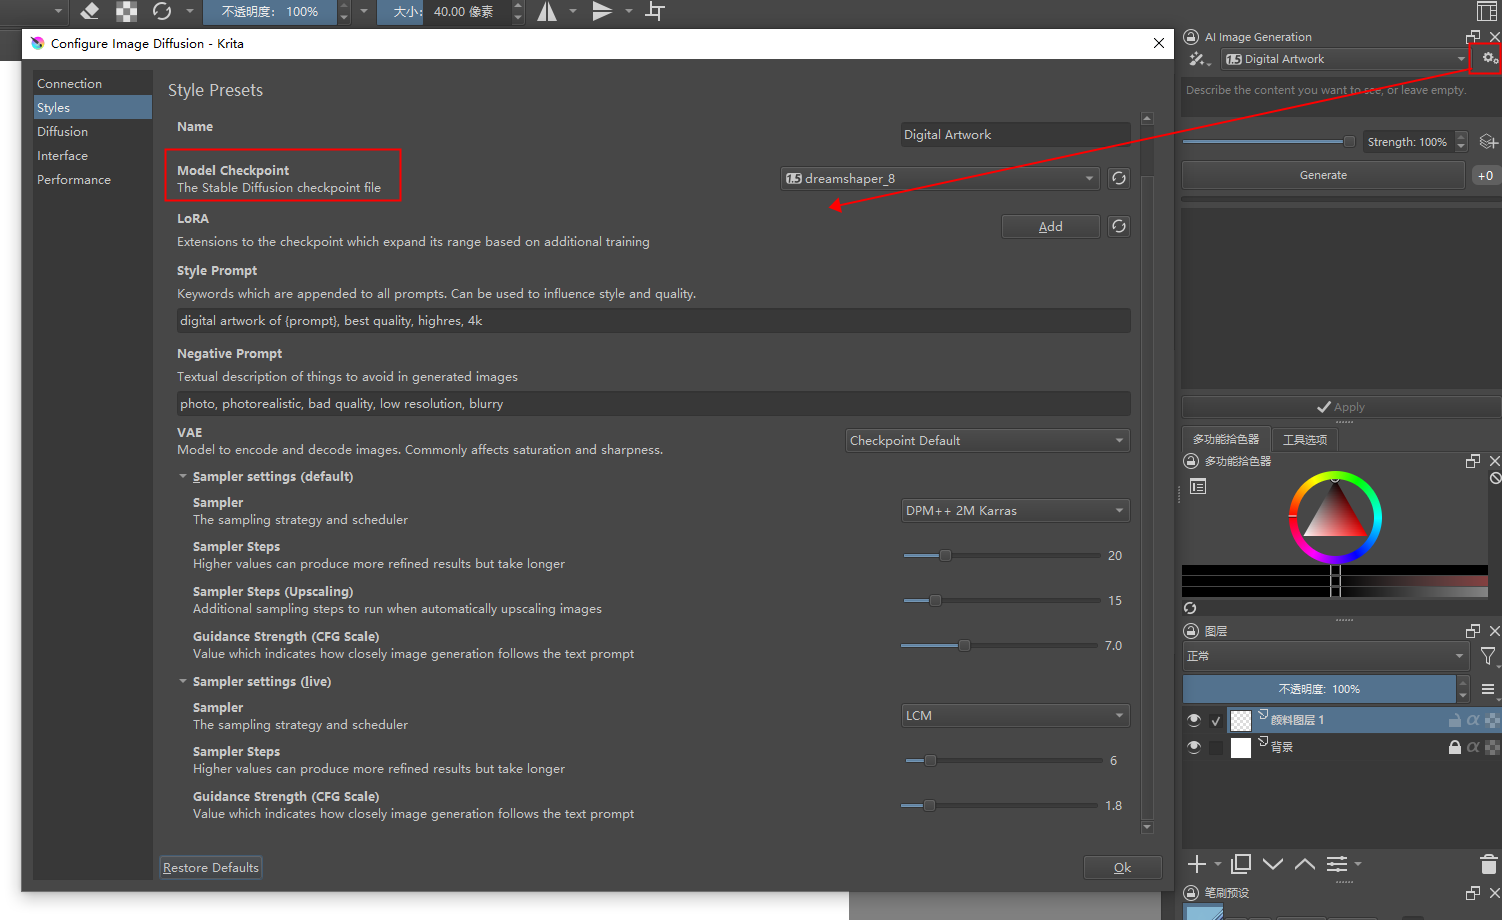
运行前先配置参数
选择模型,lora , 采样次数等
原始生成模式(generate)
速度慢,精度略有提升
全画布大小生成
画布太大 3000x2000 ,跑了2分钟(新建时一定注意)

附录:制作整合包需要的资源(如果找不到模型,请参考路径反复核对):
https://github.com/Acly/krita-ai-diffusion/blob/main/doc/comfy-requirements.md
需要安装的自定义节点(需要访问github)
Install custom nodes according to the instructions of the respective projects, or use ComfyUI Manager.
- ControlNet preprocessors
- IP-Adapter
- Ultimate SD Upscale
- External tooling nodes
需要的模型
Download models to the paths indicated below. If you are using
extra_model_paths.yml, those will also work. Shared
models are always required, and at least one of SD1.5 and SDXL is needed.Shared
- Clip-Vision to
models/clip_vision/SD1.5- NMKD Superscale SP_178000_G to
models/upscale_modelsSD 1.5
- ControlNet inpaint to
models/controlnet- ControlNet tile to
models/controlnet- IP-Adapter (SD1.5) to
custom_nodes/ComfyUI_IPAdapter_plus/models- LCM-LoRA (SD1.5) to
models/loras/lcm-lora-sdv1-5.safetensors_ !*一定记住改名!SD XL
- IP-Adapter (SDXL) to
custom_nodes/ComfyUI_IPAdapter_plus/models- LCM-LoRA (SDXL) to
models/loras/lcm-lora-sdxl.safetensorsrename!Checkpoints The following checkpoints are used by the default styles:
- Realistic Vision
- DreamShaper
- JuggernautXL

链接本地的comfyui
缺少 CLIPVision model pytorch_model.bin
官方下载地址:
https://huggingface.co/h94/IP-Adapter/tree/main/models/image_encoder

缺少 IPAdapter model ip-adapter_sd15.safetensors

LCM相关(运行实时生成流)
这里是引用
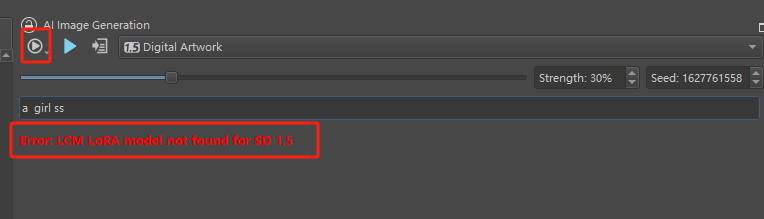
记住改名就可以了
- LCM-LoRA (SD1.5) to
models/loras/lcm-lora-sdv1-5.safetensors_ !**一定记住`改名
BUG调试
首先找到 报错原因和文档
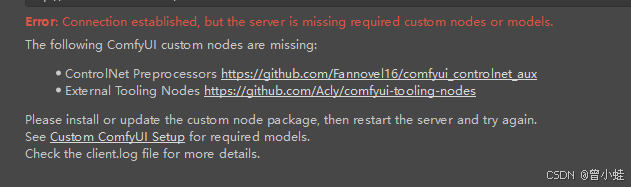
C:\\Users\\admin\\AppData\\Roaming\\krita\\ai_diffusion\\logs


