【计算机视觉】pyrealsense2:Intel RealSense 深度相机的 Python 接口实战指南
pyrealsense2:Intel RealSense 深度相机的 Python 接口实战
- 一、项目概述与技术背景
-
-
- 1.1 pyrealsense2 是什么?
- 1.2 技术背景与核心价值
- 1.3 相关学术研究
-
- 二、环境配置与安装
-
-
- 2.1 硬件要求
- 2.2 软件安装
-
- Linux 系统安装
- Windows 系统安装
- 2.3 验证安装
-
- 三、基础使用实战
-
-
- 3.1 设备初始化与数据流配置
- 3.2 帧数据获取与处理
-
- 四、高级功能开发
-
-
- 4.1 点云生成与可视化
- 4.2 深度图像对齐
- 4.3 后处理滤波器应用
-
- 五、常见问题与解决方案
-
-
- 5.1 设备连接问题
- 5.2 帧同步问题
- 5.3 深度数据噪声问题
- 5.4 Python性能优化
-
- 六、典型应用案例
-
-
- 6.1 实时三维重建
- 6.2 人体姿态估计
- 6.3 手势交互系统
-
- 七、性能优化与进阶技巧
-
-
- 7.1 多相机同步
- 7.2 自定义处理回调
- 7.3 固件更新与校准
-
- 八、项目扩展与生态整合
-
-
- 8.1 与ROS集成
- 8.2 与PyTorch/TensorFlow集成
- 8.3 Web应用集成
-
- 九、总结与展望
一、项目概述与技术背景
1.1 pyrealsense2 是什么?
pyrealsense2 是 Intel® RealSense™ 深度相机官方 SDK 的 Python 绑定库,属于 librealsense 项目的一部分。它提供了对 RealSense 系列深度相机(如 D400 系列、L500 系列、SR300 等)的完整 Python 接口支持,使开发者能够通过 Python 快速访问深度相机的高级功能。
1.2 技术背景与核心价值
深度相机技术通过主动投射红外图案(结构光)或测量激光飞行时间(ToF)来获取场景的深度信息。RealSense 相机结合了传统的 RGB 成像和深度感知能力,在三维重建、SLAM、手势识别等地方有广泛应用。
pyrealsense2 的核心价值在于:
- 将 C++ 的 librealsense SDK 功能完整暴露给 Python 生态
- 简化深度视觉应用的开发流程
- 与 NumPy、OpenCV 等科学计算库无缝集成
- 支持跨平台(Windows/Linux/macOS)
1.3 相关学术研究
RealSense 相机在学术研究中被广泛使用,相关论文包括:
- “Real-time 3D Reconstruction with Intel RealSense” (ICRA 2017)
- “Evaluation of Intel RealSense D415 for Visual Odometry” (Sensors 2019)
- “Deep Learning-based Hand Gesture Recognition Using RealSense Camera” (IEEE Access 2020)
二、环境配置与安装
2.1 硬件要求
- Intel RealSense 深度相机(推荐 D435i 或 D455)
- USB 3.0 及以上接口(深度数据传输需要高带宽)
- 推荐配置:4GB+ RAM,支持 OpenGL 3.2 的 GPU
2.2 软件安装
Linux 系统安装
# 安装依赖sudo apt-get install python3 python3-pip libgl1-mesa-glx libglfw3# 安装pyrealsense2pip install pyrealsense2# 可选:安装开发版pip install git+https://github.com/IntelRealSense/librealsense.git@master#subdirectory=wrappers/pythonWindows 系统安装
# 通过pip安装pip install pyrealsense2# 如果遇到权限问题,添加--user参数pip install --user pyrealsense22.3 验证安装
import pyrealsense2 as rsprint(rs.__version__) # 应输出类似2.54.1的版本号三、基础使用实战
3.1 设备初始化与数据流配置
import pyrealsense2 as rsimport numpy as npimport cv2# 创建管道pipeline = rs.pipeline()# 创建配置对象config = rs.config()# 启用彩色和深度流config.enable_stream(rs.stream.depth, 640, 480, rs.format.z16, 30)config.enable_stream(rs.stream.color, 640, 480, rs.format.bgr8, 30)# 开始流传输profile = pipeline.start(config)# 获取深度传感器的深度标尺(单位:米)depth_sensor = profile.get_device().first_depth_sensor()depth_scale = depth_sensor.get_depth_scale()print(f\"Depth Scale: {depth_scale}\")3.2 帧数据获取与处理
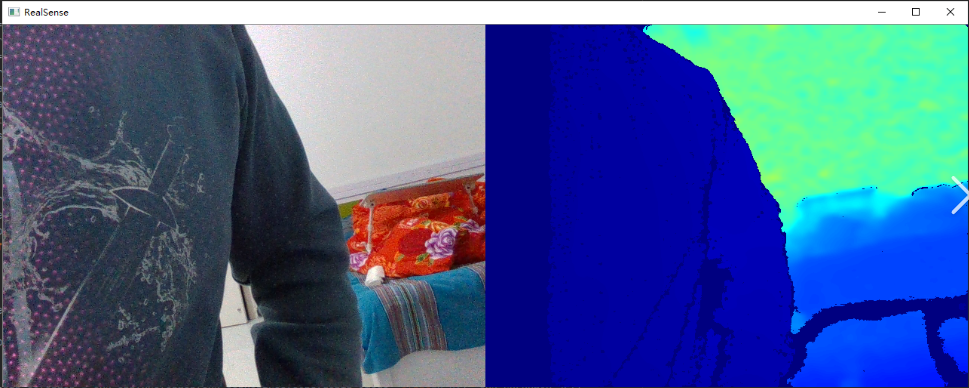
try: while True: # 等待一组帧(深度和彩色) frames = pipeline.wait_for_frames() # 获取深度帧和彩色帧 depth_frame = frames.get_depth_frame() color_frame = frames.get_color_frame() if not depth_frame or not color_frame: continue # 转换为numpy数组 depth_image = np.asanyarray(depth_frame.get_data()) color_image = np.asanyarray(color_frame.get_data()) # 应用颜色映射到深度图像(用于可视化) depth_colormap = cv2.applyColorMap( cv2.convertScaleAbs(depth_image, alpha=0.03), cv2.COLORMAP_JET) # 显示图像 cv2.imshow(\'Color\', color_image) cv2.imshow(\'Depth\', depth_colormap) if cv2.waitKey(1) == ord(\'q\'): breakfinally: # 停止管道 pipeline.stop() cv2.destroyAllWindows()四、高级功能开发
4.1 点云生成与可视化
# 创建点云对象pc = rs.pointcloud()points = rs.points()while True: frames = pipeline.wait_for_frames() depth_frame = frames.get_depth_frame() color_frame = frames.get_color_frame() # 生成点云 points = pc.calculate(depth_frame) pc.map_to(color_frame) # 获取顶点和纹理坐标 vtx = np.asanyarray(points.get_vertices()) tex = np.asanyarray(points.get_texture_coordinates()) # 此处可添加点云处理或可视化代码 # 例如使用Open3D进行可视化: # import open3d as o3d # pcd = o3d.geometry.PointCloud() # pcd.points = o3d.utility.Vector3dVector(vtx) # o3d.visualization.draw_geometries([pcd])4.2 深度图像对齐
# 创建对齐对象(将深度对齐到彩色)align_to = rs.stream.coloralign = rs.align(align_to)try: while True: frames = pipeline.wait_for_frames() # 对齐帧 aligned_frames = align.process(frames) # 获取对齐后的帧 aligned_depth_frame = aligned_frames.get_depth_frame() color_frame = aligned_frames.get_color_frame() # 后续处理...finally: pipeline.stop()4.3 后处理滤波器应用
# 创建滤波器dec_filter = rs.decimation_filter() # 降采样spat_filter = rs.spatial_filter() # 空间平滑temp_filter = rs.temporal_filter() # 时域滤波# 应用滤波器链filtered_frame = dec_filter.process(depth_frame)filtered_frame = spat_filter.process(filtered_frame)filtered_frame = temp_filter.process(filtered_frame)五、常见问题与解决方案
5.1 设备连接问题
问题描述:RuntimeError: No device connected
解决方案:
- 检查USB连接(必须使用USB 3.0及以上接口)
- 在Linux系统运行
lsusb确认设备被识别 - 可能需要安装udev规则:
sudo cp config/99-realsense-libusb.rules /etc/udev/rules.d/sudo udevadm control --reload-rules && udevadm trigger
5.2 帧同步问题
问题描述:彩色和深度帧不同步
解决方案:
- 启用硬件同步(如果设备支持):
cfg.enable_stream(rs.stream.depth, preset=rs.option.inter_cam_sync_mode, value=1) - 使用软件对齐(见4.2节)
- 降低帧率(如从30FPS降到15FPS)
5.3 深度数据噪声问题
优化方案:
- 调整深度相机预设:
sensor = profile.get_device().first_depth_sensor()sensor.set_option(rs.option.visual_preset, 3) # 3 = High Accuracy - 使用后处理滤波器(见4.3节)
- 校准相机(使用Intel RealSense Viewer工具)
5.4 Python性能优化
问题描述:帧率低,延迟高
优化技巧:
- 降低分辨率(如从1280x720降到640x480)
- 使用多线程处理:
import threadingclass FrameProcessor: def __init__(self): self.latest_frames = None def callback(self, frame): self.latest_frames = frameprocessor = FrameProcessor()pipeline.start(config, processor.callback) - 禁用不需要的流(如只启用深度流)
六、典型应用案例
6.1 实时三维重建
结合Open3D或PCL实现实时表面重建:
import open3d as o3d# 创建可视化窗口vis = o3d.visualization.Visualizer()vis.create_window()# 主循环中更新点云pcd = o3d.geometry.PointCloud()while True: # 获取点云数据... pcd.points = o3d.utility.Vector3dVector(vtx) vis.update_geometry(pcd) vis.poll_events() vis.update_renderer()6.2 人体姿态估计
结合MediaPipe实现实时姿态估计:
import mediapipe as mpmp_pose = mp.solutions.posepose = mp_pose.Pose(min_detection_confidence=0.5)while True: # 获取彩色帧... results = pose.process(color_image) if results.pose_landmarks: # 获取3D关节点坐标(结合深度数据) landmarks = results.pose_landmarks.landmark hip_z = depth_frame.get_distance( int(landmarks[mp_pose.PoseLandmark.LEFT_HIP].x * width), int(landmarks[mp_pose.PoseLandmark.LEFT_HIP].y * height))6.3 手势交互系统
# 结合深度信息的手势识别def detect_gesture(depth_frame, hand_landmarks): # 计算手掌深度 wrist_depth = depth_frame.get_distance( int(hand_landmarks.landmark[0].x * width), int(hand_landmarks.landmark[0].y * height)) # 计算手指伸展程度 finger_tips = [4,8,12,16,20] # 指尖关节点索引 extended = 0 for tip in finger_tips: # 判断手指是否伸展... pass return gesture_mapping[extended]七、性能优化与进阶技巧
7.1 多相机同步
对于多RealSense相机系统:
# 配置主从相机同步master = rs.config()master.enable_device(\'serial_number_1\')master.enable_stream(rs.stream.depth, preset=rs.option.inter_cam_sync_mode, value=1)slave = rs.config()slave.enable_device(\'serial_number_2\')slave.enable_stream(rs.stream.depth, preset=rs.option.inter_cam_sync_mode, value=2)7.2 自定义处理回调
class CustomProcessingBlock(rs.processing_block): def __init__(self): super().__init__(self.process) def process(self, frame): # 自定义帧处理逻辑 data = np.asanyarray(frame.get_data()) processed_data = custom_algorithm(data) new_frame = rs.frame(processed_data) self.frame_queue.enqueue(new_frame)# 使用自定义处理块custom_block = CustomProcessingBlock()pipeline = rs.pipeline()pipeline.start(config, custom_block)7.3 固件更新与校准
- 使用
rs-fw-update工具更新固件 - 通过Intel RealSense Viewer进行动态校准
- 使用
rs-depth-quality工具评估深度质量
八、项目扩展与生态整合
8.1 与ROS集成
# 安装RealSense ROS包sudo apt-get install ros-$ROS_DISTRO-realsense2-camera8.2 与PyTorch/TensorFlow集成
# 创建深度数据加载器class RealSenseDataset(torch.utils.data.Dataset): def __init__(self, pipeline, num_frames=100): self.pipeline = pipeline self.frames = [] def __getitem__(self, idx): frames = self.pipeline.wait_for_frames() depth = torch.from_numpy(np.asanyarray( frames.get_depth_frame().get_data())) return depth8.3 Web应用集成
使用Flask创建实时视频流:
from flask import Flask, Responseapp = Flask(__name__)def generate_frames(): while True: frames = pipeline.wait_for_frames() color_frame = frames.get_color_frame() frame = np.asanyarray(color_frame.get_data()) ret, buffer = cv2.imencode(\'.jpg\', frame) yield (b\'--frame\\r\\n\' b\'Content-Type: image/jpeg\\r\\n\\r\\n\' + buffer.tobytes() + b\'\\r\\n\')@app.route(\'/video_feed\')def video_feed(): return Response(generate_frames(), mimetype=\'multipart/x-mixed-replace; boundary=frame\')九、总结与展望
pyrealsense2 作为 Intel RealSense 相机的 Python 接口,为开发者提供了便捷的深度视觉开发工具。随着深度感知技术在AR/VR、机器人、智能监控等地方的广泛应用,掌握 RealSense 和 pyrealsense2 的使用将成为计算机视觉工程师的重要技能。
未来发展方向:
- 更紧密的AI模型集成(如实时语义分割)
- 云端深度数据处理框架
- 更低延迟的Python接口优化
- 新型传感器(如LiDAR)的支持扩展
通过本指南介绍的基础到高级用法,开发者可以快速构建基于深度相机的创新应用,推动三维视觉技术的实际落地。

