deepseek在ubuntu本地部署(docker+ollama+open-webui)_ubantu22.04 部署deepseek ollama openwebui
deepseek在ubuntu本地部署(docker+ollama+open-webui)
1. docker安装
安装docker的前置条件
# 安装前先卸载操作系统默认安装的docker(需要root权限)sudo apt-get remove docker docker-engine docker.io containerd runc# 安装必要支持sudo apt install apt-transport-https ca-certificates curl software-properties-common gnupg lsb-release准备安装
# 1.添加 Docker 官方 GPG keycurl -fsSL https://download.docker.com/linux/ubuntu/gpg | sudo gpg --dearmor -o /usr/share/keyrings/docker-archive-keyring.gpg# 阿里源(如果不能访问Docker的官方GPG key,推荐使用阿里的GPG key)curl -fsSL https://mirrors.aliyun.com/docker-ce/linux/ubuntu/gpg | sudo gpg --dearmor -o /usr/share/keyrings/docker-archive-keyring.gpg# 2.添加 apt 源:# docker官方源echo \"deb [arch=$(dpkg --print-architecture) signed-by=/usr/share/keyrings/docker-archive-keyring.gpg] https://download.docker.com/linux/ubuntu $(lsb_release -cs) stable\" | sudo tee /etc/apt/sources.list.d/docker.list > /dev/null# 阿里apt源(与1相同)echo \"deb [arch=$(dpkg --print-architecture) signed-by=/usr/share/keyrings/docker-archive-keyring.gpg] https://mirrors.aliyun.com/docker-ce/linux/ubuntu $(lsb_release -cs) stable\" | sudo tee /etc/apt/sources.list.d/docker.list > /dev/null# 更新源sudo apt updatesudo apt-get update安装docker
# 安装最新版本的Dockersudo apt install docker-ce docker-ce-cli containerd.io# 等待安装完成# 查看Docker版本sudo docker version# 查看Docker运行状态sudo systemctl status docker安装docker命令补全工具
sudo apt-get install bash-completionsudo curl -L https://raw.githubusercontent.com/docker/docker-ce/master/components/cli/contrib/completion/bash/docker -o /etc/bash_completion.d/docker.shsource /etc/bash_completion.d/docker.sh允许非Root用户执行docker 命令
# 添加docker用户组sudo groupadd docker# 将当前用户添加到用户组sudo usermod -aG docker $USER# 将其它用户名的用户添加到用户组sudo usermod -aG docker username# 使权限生效newgrp docker# 测试# 查看所有容器docker ps -a# 更新用户的.bashrc文件#如果没有此行命令,你会发现,当你每次打开新的终端#你都必须先执行一次 “newgrp docker” 命令#否则当前用户还是不可以执行docker命令groupadd -f docker2. docker内ollama和open-webui安装
把下属代码保存到docker-compose.yml文件中
services: ollama: image: ollama/ollama container_name: ollama ports: - \"11434:11434\" volumes: - ./ollama:/root/.ollama restart: unless-stopped open-webui: image: ghcr.io/open-webui/open-webui:main container_name: open-webui environment: ROOT_PATH: \"ollama\" OLLAMA_BASE_URL: \"http://ollama:11434\" ports: - \"3020:8080\" volumes: - ./open-webui:/app/backend/data restart: always depends_on: - ollama在当前文件夹运行下述命令
docker compose up -d#等待ollama和open-webui安装并启动# 查看docker内ollama及open-webui是否正常运行docker compose ps# 从上面设置的端口3020登录open-webui(网页输入)http://$ip:3020# 查看本机iphostname -I# 停止服务docker compose down在open-webui下安装不同大模型,如下图所示,登录open-webui后可在左上角选择不同的大模型下载使用,可下载的大模型可从ollama.com网站找到。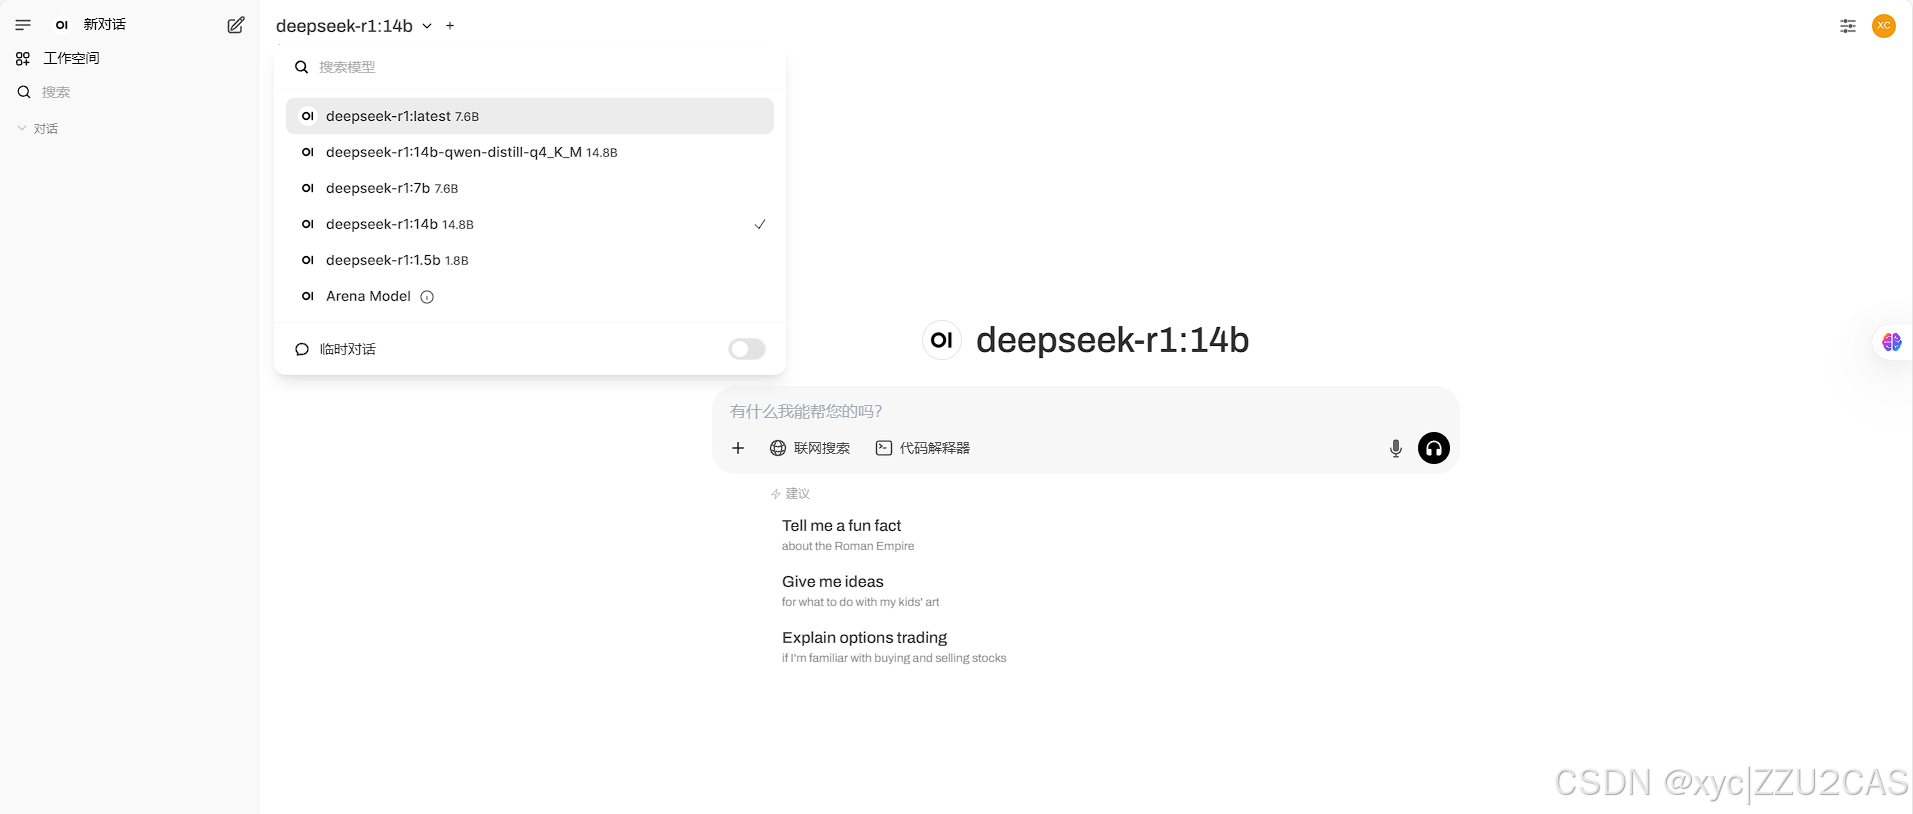
3. 大模型联网搜索设置
上述步骤1和2已经部署大模型到本地,如需要联网搜索,可按照下述步骤设置(需要fanqiang进行设置,配置完成后不需要fanqiang)
- 登录google开发者账号(有Google账号可以直接一键注册) https://developers.google.com/custom-search
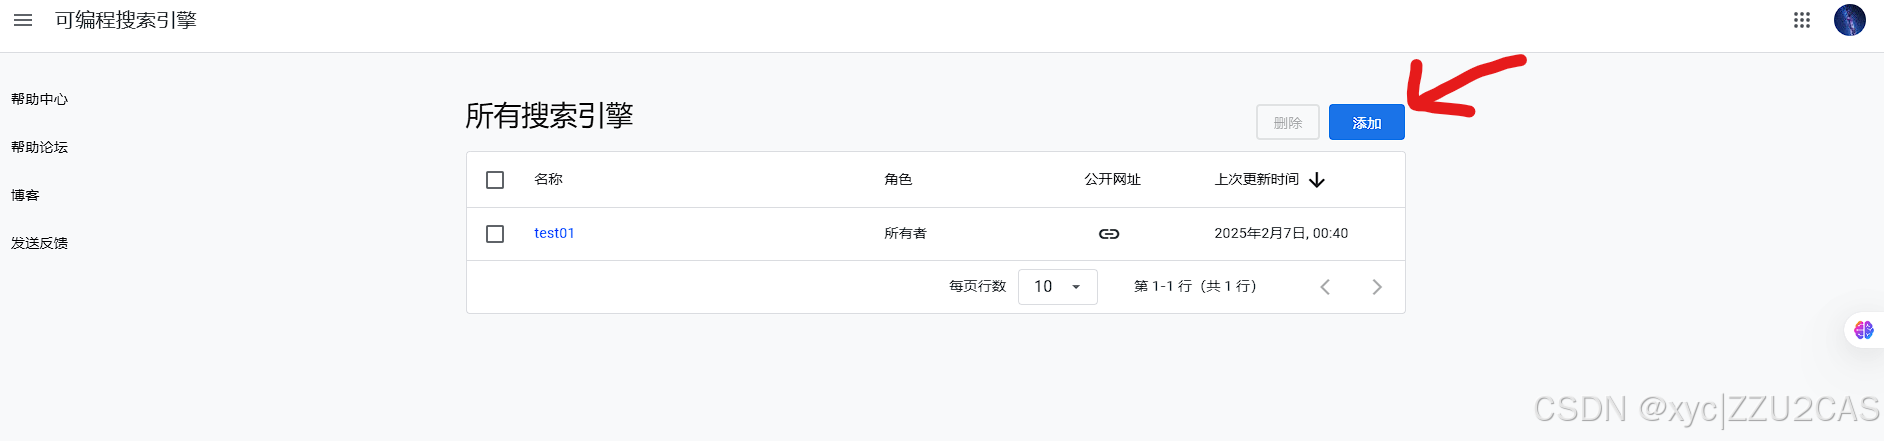
- 去可编程搜索引擎(pse)控制面板里添加一个自定义搜索引擎 https://programmablesearchengine.google.com/controlpanel/all
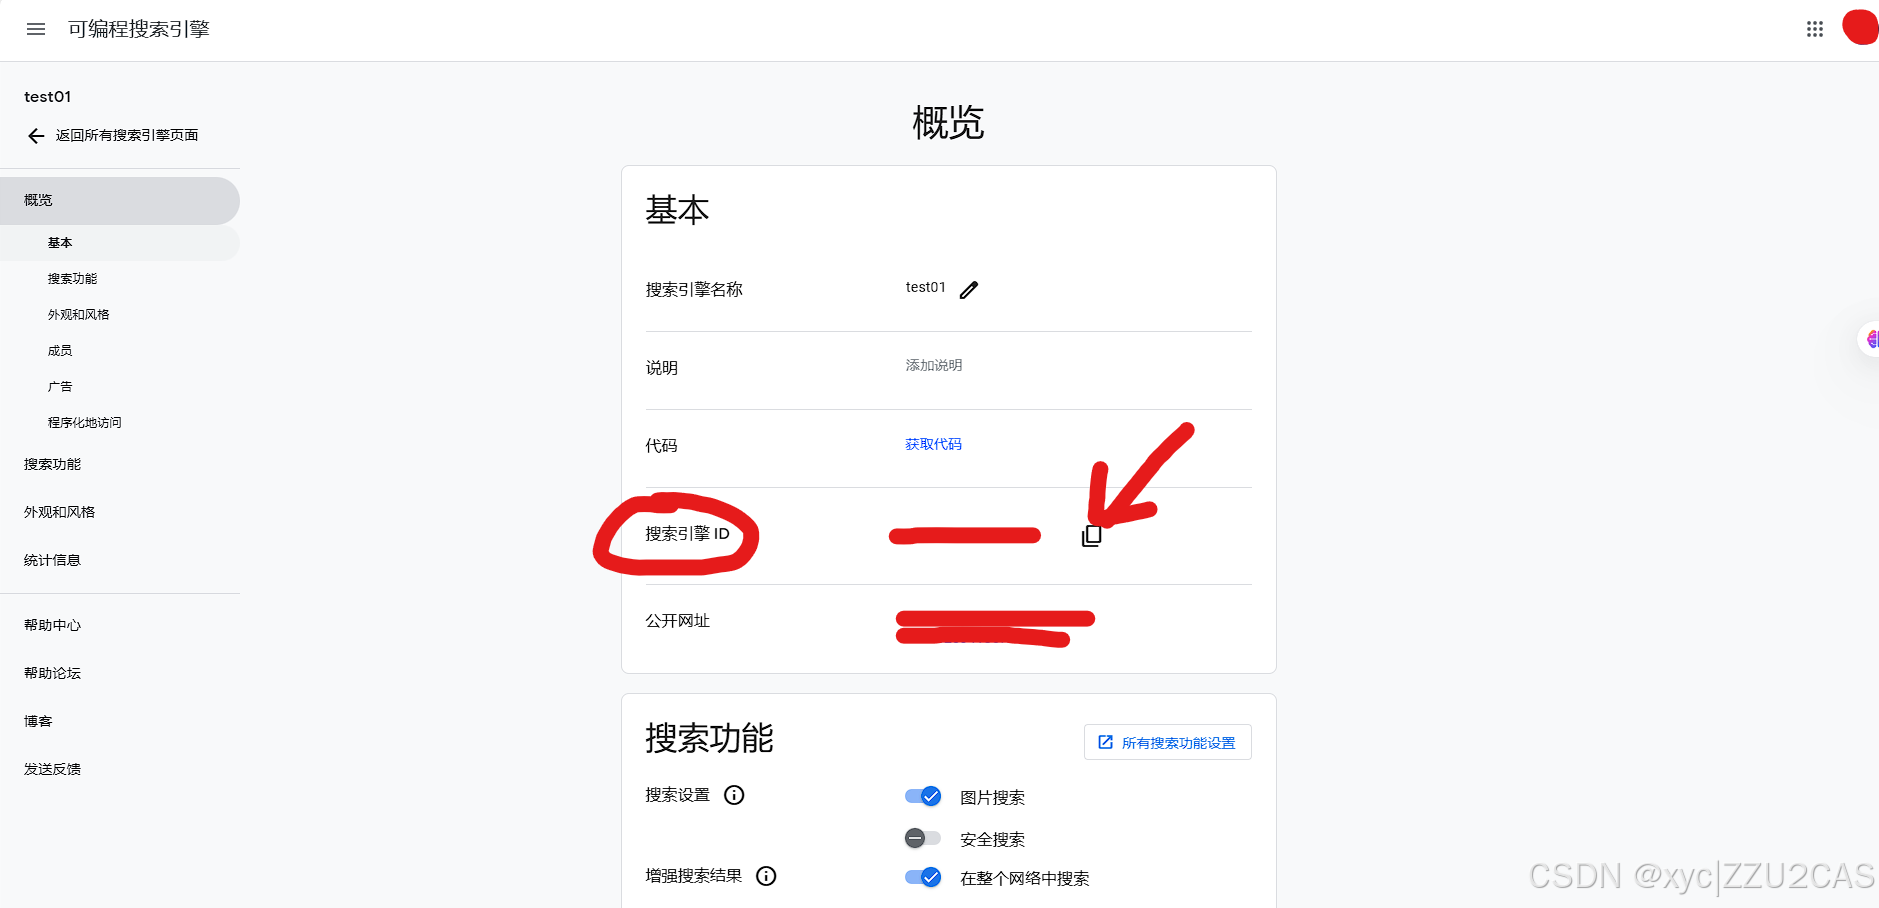
- 点击获取密钥拿到api密钥(记住保存下来!!!) https://developers.google.com/custom-search/v1/introduction
- 回到控制面板点击创建的自定义搜索引擎(复制此页面的搜索引擎id) https://programmablesearchengine.google.com/controlpanel/all

然后在open-webui中按照下述步骤把搜索引擎密钥api和搜索引擎id填入,即可联网搜索
参考文章:
https://blog.csdn.net/u011278722/article/details/137673353
https://www.cnblogs.com/Hollow2333/p/18694512

