Ubuntu22.04安装视觉环境(CUDA CUDNN TensorRT realsense PCL OpenCV) _multiple kernel module types are available for thi
一、安装显卡驱动
先安装编译器
sudo apt install gcc g++ make cmakenvidia驱动官网:Download The Official NVIDIA Drivers | NVIDIA
选择自己显卡和系统版本,并选择合适驱动
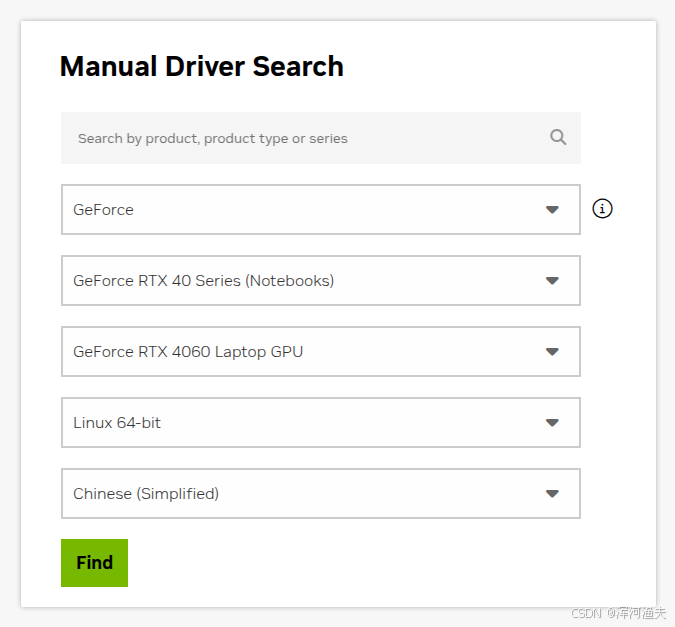
目前最新推荐安装驱动为Linux x64 (AMD64/EM64T) Display Driver 570.124.04 | Linux 64-bit
下载驱动,在终端中运行
sudo sh ./NVIDIA-Linux-x86_64-570.124.04.run之后根据提示进行选择
Multiple kernel module types are available for this system. Which would you like to use?
选择 NVIDIA Proprietary
Install NVIDIA\'s 32-bit compatibility libraries?
选择 No
这两个注意一下,其他要么Continue要么OK
安装完成后,重启电脑
sudo reboot验证安装:
nvidia-smi结果:
Sun Mar 16 20:15:03 2025 +-----------------------------------------------------------------------------------------+| NVIDIA-SMI 570.124.04 Driver Version: 570.124.04 CUDA Version: 12.8 ||-----------------------------------------+------------------------+----------------------+| GPU Name Persistence-M | Bus-Id Disp.A | Volatile Uncorr. ECC || Fan Temp Perf Pwr:Usage/Cap | Memory-Usage | GPU-Util Compute M. || | | MIG M. ||=========================================+========================+======================|| 0 NVIDIA GeForce RTX 4060 ... Off | 00000000:01:00.0 On | N/A || N/A 39C P8 4W / 80W | 547MiB / 8188MiB | 3% Default || | | N/A |+-----------------------------------------+------------------------+----------------------+ +-----------------------------------------------------------------------------------------+| Processes: || GPU GI CI PID Type Process name GPU Memory || ID ID Usage ||=========================================================================================|| 0 N/A N/A 935 G /usr/lib/xorg/Xorg216MiB || 0 N/A N/A 1171 G /usr/bin/gnome-shell 48MiB || 0 N/A N/A 3036 G ...pareRendererForSitePerProcess 90MiB || 0 N/A N/A 10457 G ...144 --variations-seed-version 133MiB || 0 N/A N/A 13721 G ...OTP --variations-seed-version 12MiB |+-----------------------------------------------------------------------------------------+这里的CUDA版本是当前驱动支持的最高版本,不是实际版本,我们根据实际需求选择要安装的CUDA版本
二、CUDA安装
CUDA CUDNN TensorRT版本需要对应上 我选择目前比较常用的CUDA-11.8
官网上一般只有最新的CUDA,老版本在右下角Archive of Previous CUDA Releases里
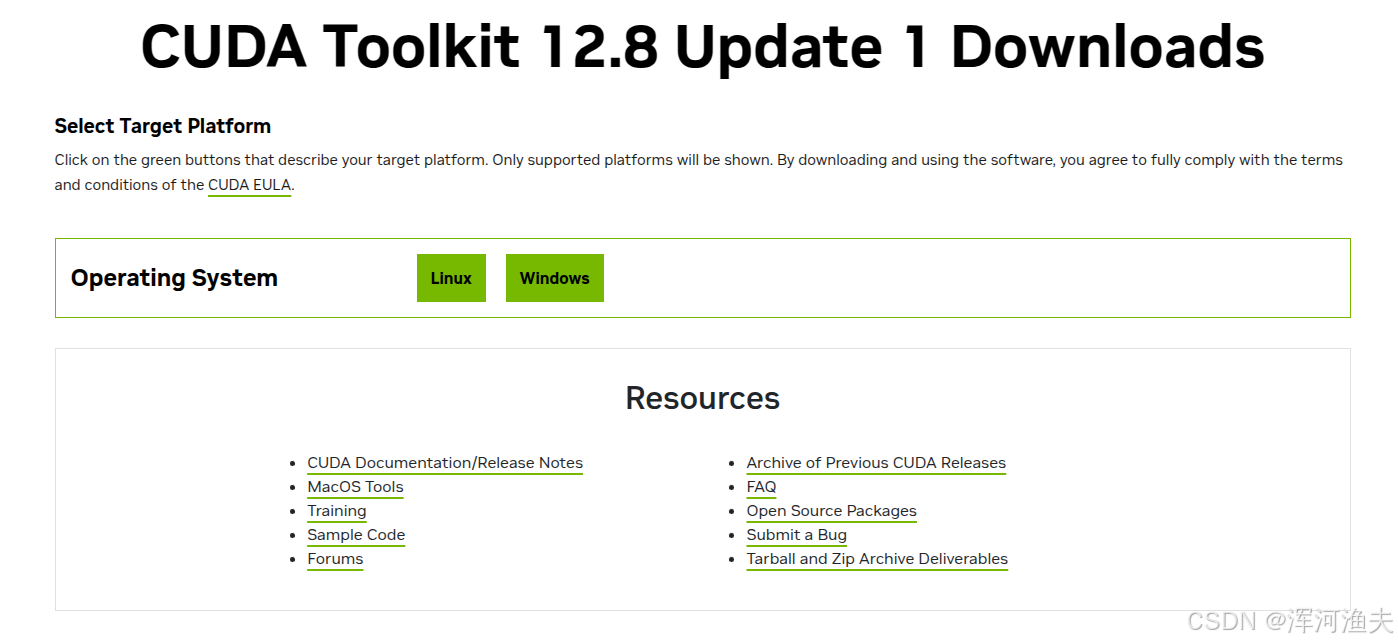
根据系统信息选择合适选项
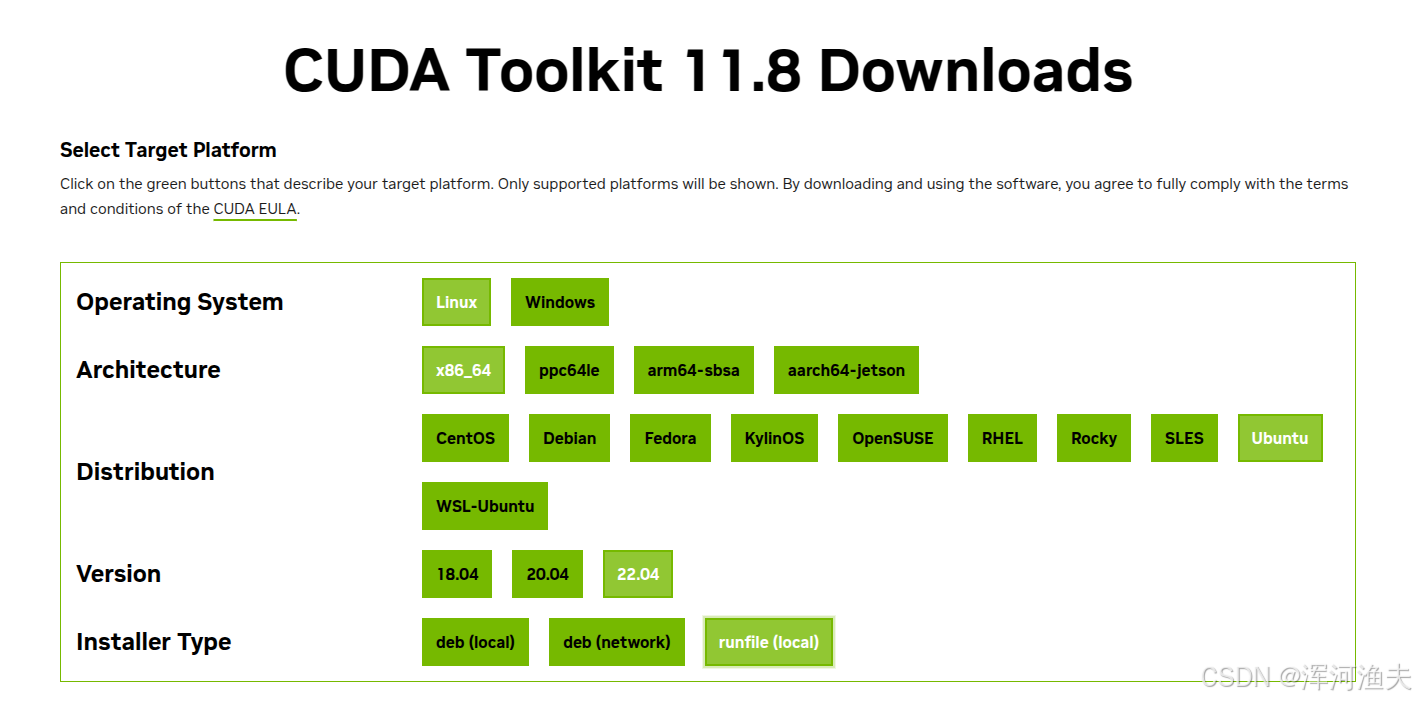
将下面生成的代码在终端中运行:
# 下载.run文件wget https://developer.download.nvidia.com/compute/cuda/11.8.0/local_installers/cuda_11.8.0_520.61.05_linux.run# 运行sudo sh cuda_11.8.0_520.61.05_linux.run出现
┌──────────────────────────────────────────────────────────────────────────────┐│ End User License Agreement ││ -------------------------- ││ ││ NVIDIA Software License Agreement and CUDA Supplement to ││ Software License Agreement. Last updated: October 8, 2021 ││ ││ The CUDA Toolkit End User License Agreement applies to the ││ NVIDIA CUDA Toolkit, the NVIDIA CUDA Samples, the NVIDIA ││ Display Driver, NVIDIA Nsight tools (Visual Studio Edition), ││ and the associated documentation on CUDA APIs, programming ││ model and development tools. If you do not agree with the ││ terms and conditions of the license agreement, then do not ││ download or use the software. ││ ││ Last updated: October 8, 2021. ││ ││ ││ Preface ││ ------- ││ ││──────────────────────────────────────────────────────────────────────────────││ Do you accept the above EULA? (accept/decline/quit): ││ │└──────────────────────────────────────────────────────────────────────────────┘在最下面输入accept(屏幕分辨率太小可能找不到输入的地方,换一块大显示器吧)
用上下箭头和回车键选择安装内容如下(不安装驱动):
┌──────────────────────────────────────────────────────────────────────────────┐│ CUDA Installer ││ - [ ] Driver ││ [ ] 520.61.05 ││ + [X] CUDA Toolkit 11.8 ││ [X] CUDA Demo Suite 11.8 ││ [X] CUDA Documentation 11.8 ││ - [ ] Kernel Objects ││ [ ] nvidia-fs ││ Options ││ Install ││ ││ ││ ││ ││ ││ ││ ││ ││ ││ ││ ││ ││ Up/Down: Move | Left/Right: Expand | \'Enter\': Select | \'A\': Advanced options │└──────────────────────────────────────────────────────────────────────────────┘高光移动到Install上,按回车键,稍等片刻,安装成功
============ Summary ============Driver: Not SelectedToolkit: Installed in /usr/local/cuda-11.8/Please make sure that - PATH includes /usr/local/cuda-11.8/bin - LD_LIBRARY_PATH includes /usr/local/cuda-11.8/lib64, or, add /usr/local/cuda-11.8/lib64 to /etc/ld.so.conf and run ldconfig as rootTo uninstall the CUDA Toolkit, run cuda-uninstaller in /usr/local/cuda-11.8/bin***WARNING: Incomplete installation! This installation did not install the CUDA Driver. A driver of version at least 520.00 is required for CUDA 11.8 functionality to work.To install the driver using this installer, run the following command, replacing with the name of this run file: sudo .run --silent --driverLogfile is /var/log/cuda-installer.log编辑环境变量:
gedit ~/.bashrc在末尾添加:
# cuda-11.8export LD_LIBRARY_PATH=$LD_LIBRARY_PATH:/usr/local/cuda/lib64export PATH=$PATH:/usr/local/cuda/binexport CUDA_HOME=/usr/local/cuda保存并退出,刷新环境变量:
source ~/.bashrc验证安装:
nvcc -V结果:
nvcc: NVIDIA (R) Cuda compiler driverCopyright (c) 2005-2022 NVIDIA CorporationBuilt on Wed_Sep_21_10:33:58_PDT_2022Cuda compilation tools, release 11.8, V11.8.89Build cuda_11.8.r11.8/compiler.31833905_0CUDA 安装成功
三、安装CUDNN
官网:cuDNN Archive | NVIDIA Developer
我选择8.9.7版本
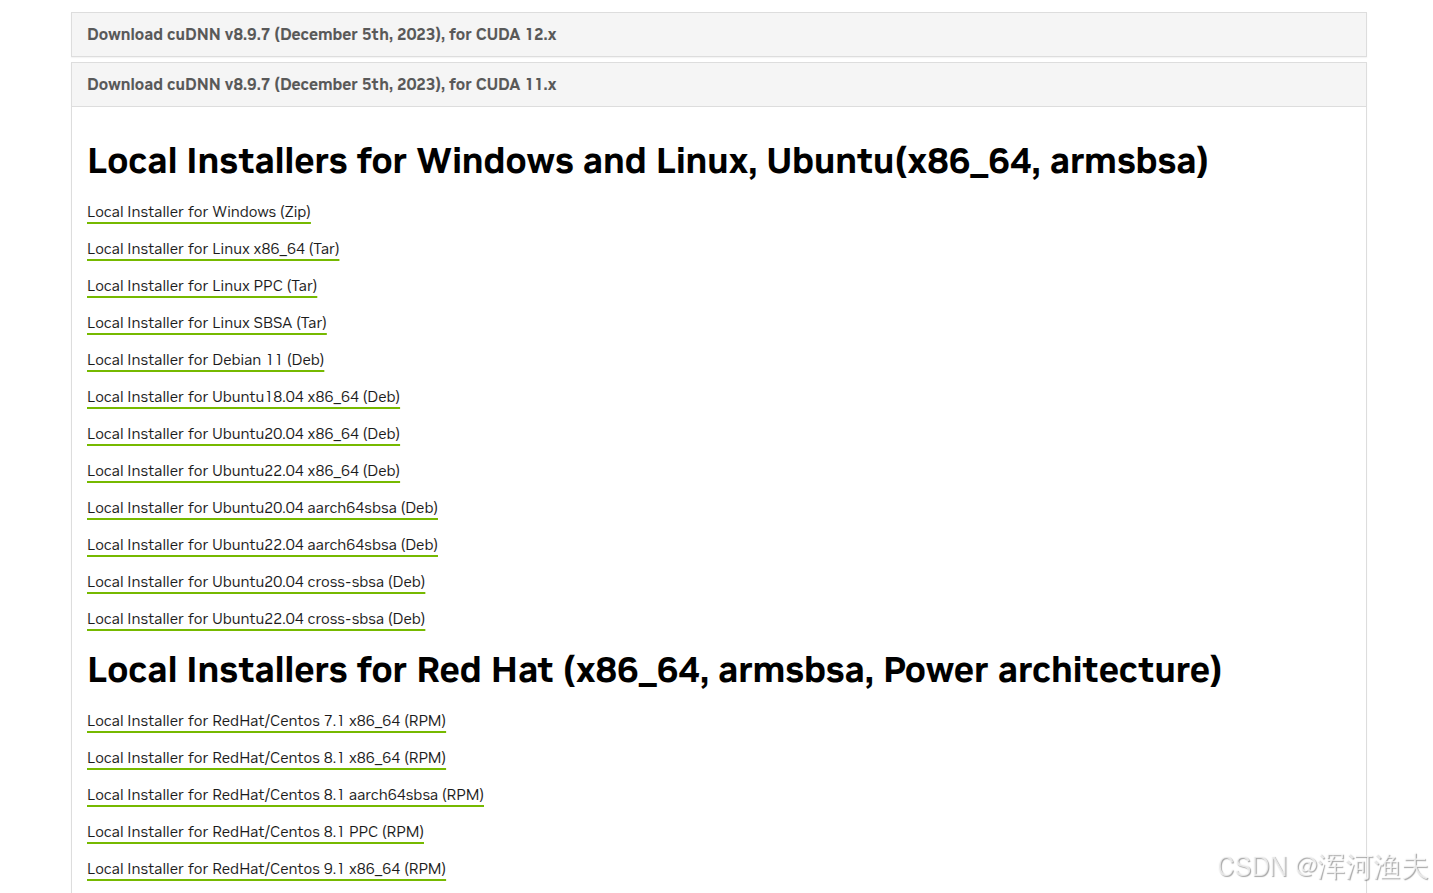
注意:CUDNN每个版本都有对应的CUDA11和CUDA12版本,要和自己CUDA版本对应上
CUDNN8.9.7 Ubuntu22.04 x86-64下载地址:
cudnn-local-repo-ubuntu2204-8.9.7.29_1.0-1_amd64.deb
要先登陆nvidia账号才能下载
安装:
sudo dpkg -i cudnn-local-repo-ubuntu2204-8.9.7.29_1.0-1_amd64.deb根据安装结束后的提示安装key:
sudo cp /var/cudnn-local-repo-ubuntu2204-8.9.7.29/cudnn-local-8AE81B24-keyring.gpg /usr/share/keyrings/再安装以下内容:
sudo apt-get updatesudo apt-get install libcudnn8=8.9.7.29-1+cuda11.8sudo apt-get install libcudnn8-dev=8.9.7.29-1+cuda11.8sudo apt-get install libcudnn8-samples=8.9.7.29-1+cuda11.8将文件复制到cuda目录:
sudo cp /usr/include/cudnn*.h /usr/local/cuda/include/sudo cp /usr/lib/x86_64-linux-gnu/libcudnn* /usr/local/cuda/lib64/验证安装:
sudo apt-get install libfreeimage3 libfreeimage-devcp -r /usr/src/cudnn_samples_v8/ $HOMEcd $HOME/cudnn_samples_v8/mnistCUDNNmake clean && make./mnistCUDNN出现 Test passed! 验证通过
四、TensorRT
官网:TensorRT SDK | NVIDIA Developer
官方教程:Installing TensorRT — NVIDIA TensorRT Documentation
我选择8.5.1.7版本 下载地址:TensorRT-8.x Download
选择 TensorRT 8.5 GA for Linux x86_64 and CUDA 11.0, 11.1, 11.2, 11.3, 11.4, 11.5, 11.6, 11.7 and 11.8 TAR Package
下载完成后解压到主目录,将文件链接到系统中,记得将改成自己用户名
sudo ln -s /home//TensorRT-8.5.1.7.Linux.x86_64-gnu.cuda-11.8.cudnn8.6/TensorRT-8.5.1.7/targets/x86_64-linux-gnu/lib/libnvinfer.so /usr/lib/libnvinfer.sosudo ln -s /home//TensorRT-8.5.1.7.Linux.x86_64-gnu.cuda-11.8.cudnn8.6/TensorRT-8.5.1.7/targets/x86_64-linux-gnu/lib/libnvinfer.so /usr/lib/libnvinfer.so.8sudo ln -s /home//TensorRT-8.5.1.7.Linux.x86_64-gnu.cuda-11.8.cudnn8.6/TensorRT-8.5.1.7/targets/x86_64-linux-gnu/lib/libnvinfer_plugin.so /usr/lib/libnvinfer_plugin.sosudo ln -s /home//TensorRT-8.5.1.7.Linux.x86_64-gnu.cuda-11.8.cudnn8.6/TensorRT-8.5.1.7/targets/x86_64-linux-gnu/lib/libnvinfer_plugin.so /usr/lib/libnvinfer_plugin.so.8编辑环境变量:
gedit ~/.bashrc添加以下内容:
# tensorrtexport LD_LIBRARY_PATH=$LD_LIBRARY_PATH:/home/action/TensorRT-8.5.1.7.Linux.x86_64-gnu.cuda-11.8.cudnn8.6/TensorRT-8.5.1.7/targets/x86_64-linux-gnu/lib刷新环境变量:
source ~/.bashrc五、OpenCV
官网地址:Releases - OpenCV
opencv_contrib 下载对应版本再解压到opencv目录里,注意路径名改成opencv_contrib
下载所需版本,把文件夹复制到主目录然后执行以下命令,根据自己的版本信息修改cuda和cudnn版本以及 cuda_arch_bin(显卡算力)CUDA GPUs - Compute Capability | NVIDIA Developer
cd ~/opencvsudo apt-get install cmake git libgtk2.0-dev pkg-config libavcodec-dev libavformat-dev libswscale-devmkdir build && cd buildcmake -D CMAKE_BUILD_TYPE=RELEASE \\ -D OPENCV_ENABLE_NONFREE=ON \\ -D WITH_CUDA=ON \\ -D WITH_CUDNN=ON \\ -D OPENCV_DNN_CUDA=ON \\ -D WITH_LIBV4L=ON \\ -D ENABLE_FAST_MATH=1 \\ -D CUDA_FAST_MATH=1 \\ -D CUDA_ARCH_BIN=8.9 \\ -D WITH_CUBLAS=1 \\ -D CUDNN_VERSION=8.9.7 \\ -D CUDNN_INCLUDE_DIR=/usr/local/cuda/include \\ -D CUDNN_LIBRARY=/usr/local/cuda-11.8/lib64/libcudnn.so.8.9.7 \\ -D OPENCV_EXTRA_MODULES_PATH=../opencv_contrib/modules ..lscpu # 查看核数量make -j8 # 根据核数量修改 -j8就是8核编译sudo make install安装过程比较长,内存不够就调小核心数
六、librealsense
Github地址:https://github.com/IntelRealSense/librealsense
L515最后支持版本:https://github.com/IntelRealSense/librealsense/releases/tag/v2.54.2
安装教程:librealsense/doc/installation.md at master · IntelRealSense/librealsense · GitHub
下载源码(Source Code)并解压到主目录
安装:
sudo apt-get update && sudo apt-get upgrade && sudo apt-get dist-upgradesudo apt-get install libssl-dev libusb-1.0-0-dev libudev-dev pkg-config libgtk-3-devsudo apt-get install git wget cmake build-essentialsudo apt-get install libglfw3-dev libgl1-mesa-dev libglu1-mesa-dev atcd ~/librealsense-2.54.2/sudo ./scripts/setup_udev_rules.shmkdir build && cd buildcmake ../ -DBUILD_EXAMPLES=truemake -j8sudo make install验证安装:
realsense-viewer七、PCL
Github地址:GitHub - PointCloudLibrary/pcl: Point Cloud Library (PCL)
Ubuntu22.04自带1.12版本,我们要装1.13 Release PCL 1.13.1 · PointCloudLibrary/pcl · GitHub
下载源码并解压到主目录
安装:
cd ~/pcl-1.13.1mkdir build && cd buildcmake ..make -j4sudo make install注意:pcl编译需要相当大的内存空间,16GB内存建议将核心数调整为4或以下,32GB内存可尝试8核心编译
编辑环境变量:
gedit ~/.bashrc在末尾添加:
export LD_LIBRARY_PATH=$LD_LIBRARY_PATH:/usr/local/lib刷新环境变量:
source ~/.bashrc
