【Web】使用Vue3开发鸿蒙的HelloWorld!_vue鸿蒙
文章目录
- 1、简介
- 2、效果
- 3、环境
-
- 3.1、开发环境
- 3.2、运行环境
- 4、实现
-
- 4.1、在VSCode上使用Vue开发HelloWorld
-
- 4.1.1、通过 Vite 快速创建项目
- 4.1.2、修改 src/App.vue
- 4.1.3、模拟Web浏览器运行
- 4.2、使用DevEco完成手机App端移植
-
- 4.2.1、构建Vue 3项目为静态文件
- 4.2.2、创建HarmonyOS JS工程
- 4.2.3、导入Vue静态资源
- 4.2.4、修改主页加载Web资源
- 4.2.5、配置应用签名
- 4.2.6、运行应用到手机
1、简介
随着华为HarmonyOS在移动终端与IoT领域的快速普及,其分布式架构与跨端协同能力正吸引着越来越多的开发者。近期笔者有幸参与华为Mate 60 Pro的鸿蒙原生应用开发,在探索过程中发现:通过Vue3与HarmonyOS ArkUI框架的深度融合,前端开发者可以无缝迁移Web开发经验,快速构建高性能的鸿蒙原生应用。这种技术组合不仅延续了Vue3的响应式编程范式,更通过ArkUI的声明式UI语法,实现了\"一次开发,多端部署\"的跨端开发新范式。
尽管此前对Vue3有碎片化了解,但将其应用于移动端开发尚属首次尝试。在开发实践中,笔者系统梳理了从环境搭建到完整应用落地的全流程。
2、效果

3、环境
3.1、开发环境
操作系统:Windows 11
编辑模拟:VSCode
编译连接:DevEco
Node.js版本:20.9.0
Vue版本:3.6.5
3.2、运行环境
手机:华为Mete60 pro
系统:鸿蒙OS 5.0
连接:USB直连,
连接手机方法检查开发者选项和USB调试设置问题:未正确开启开发者权限或USB调试。解决步骤:在Mate 40E Pro上开启开发者模式:设置 > 关于手机 > 版本号 连续点击7次。返回 设置 > 系统和更新 > 开发人员选项,开启:✅ USB调试✅ 仅充电模式下允许ADB调试重新连接手机,弹出授权提示时勾选 “始终允许”。4、实现
4.1、在VSCode上使用Vue开发HelloWorld
4.1.1、通过 Vite 快速创建项目
npm create vue@latest my-mobile-appcd my-mobile-appnpm installnpm install vant@next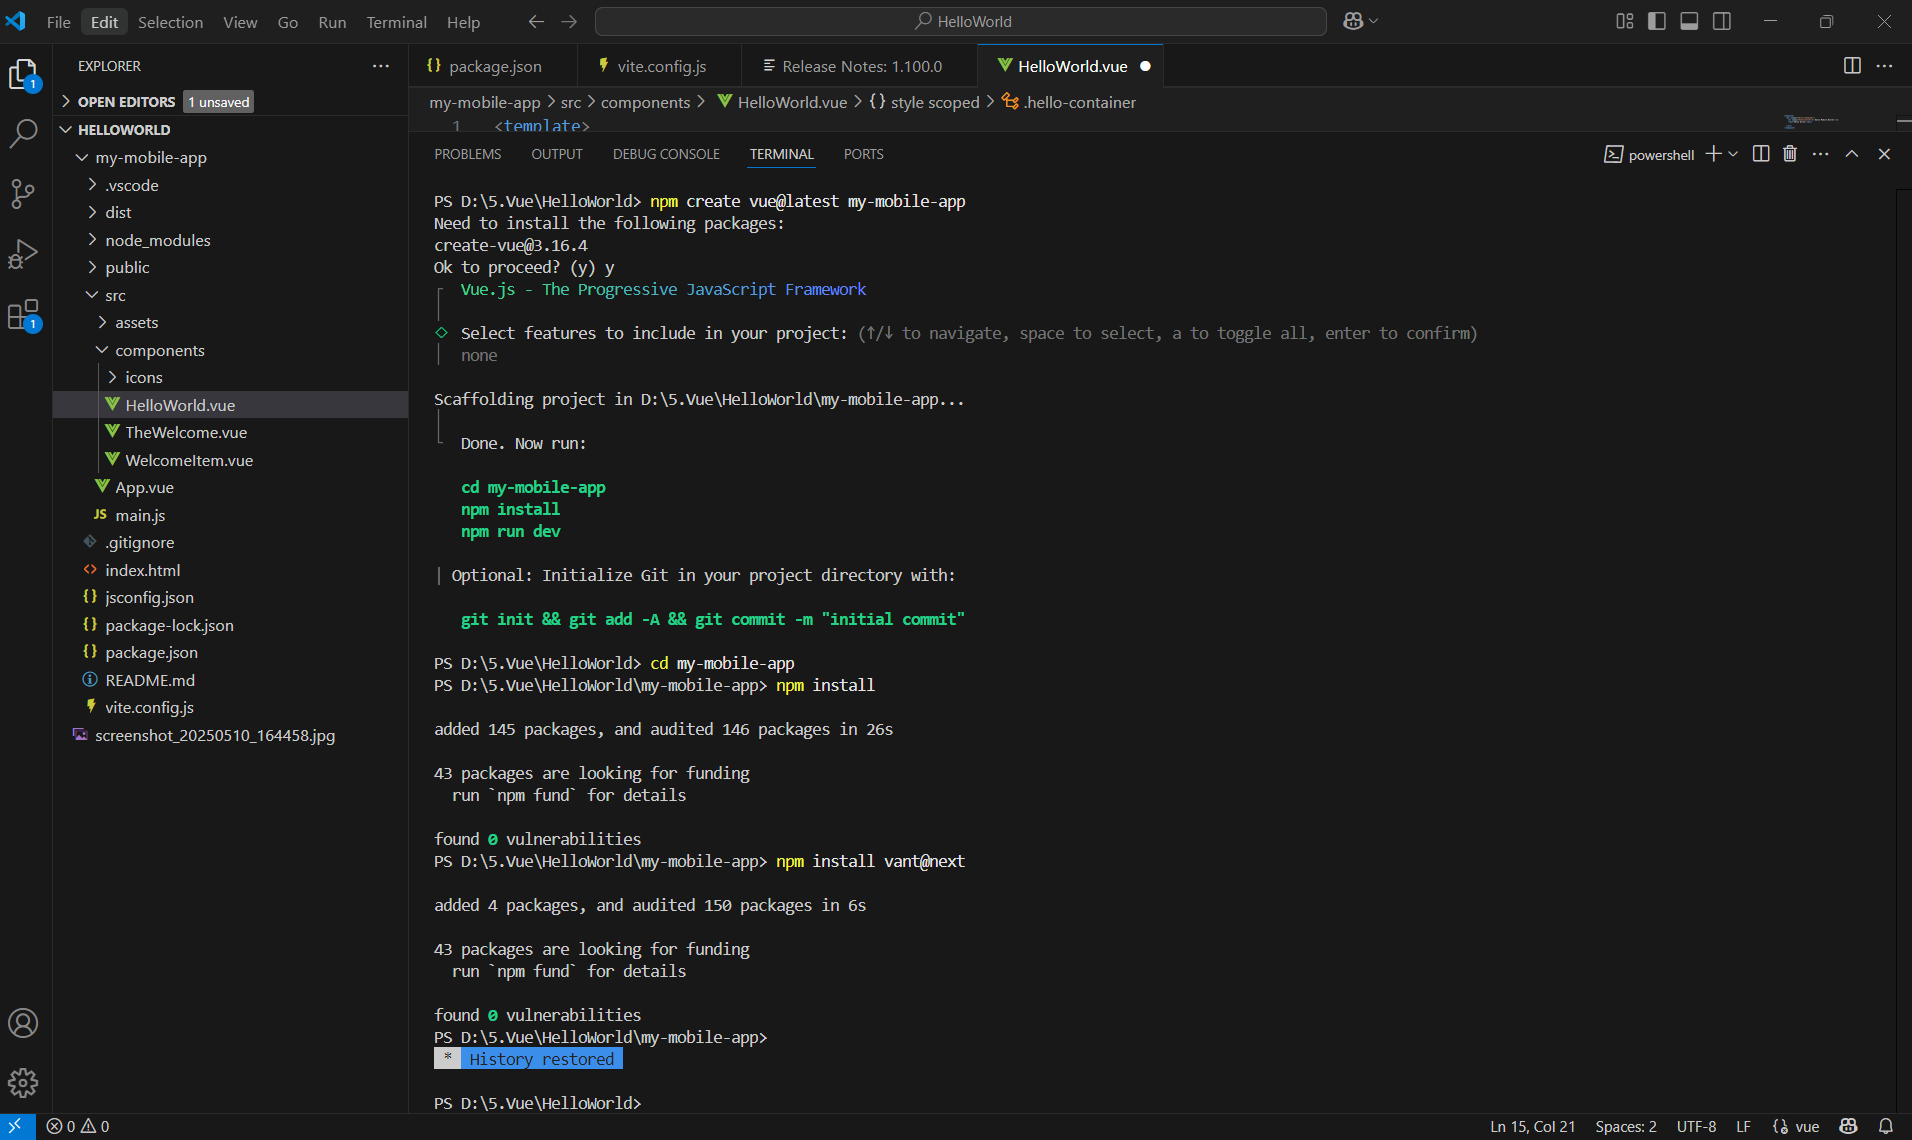
4.1.2、修改 src/App.vue
<template> <div class=\"app-container\"> <HelloWorld></HelloWorld> </div></template> <script setup>import HelloWorld from \'./components/HelloWorld.vue\'</script> <style>/* 全局基础样式 */body { margin: 0; font-family: -apple-system, BlinkMacSystemFont, \'Segoe UI\', Roboto, \'Helvetica Neue\', Arial, sans-serif; -webkit-font-smoothing: antialiased; -moz-osx-font-smoothing: grayscale;} .app-container { max-width: 600px; margin: 0 auto; height: 100vh;}</style>4.1.3、模拟Web浏览器运行
npm run dev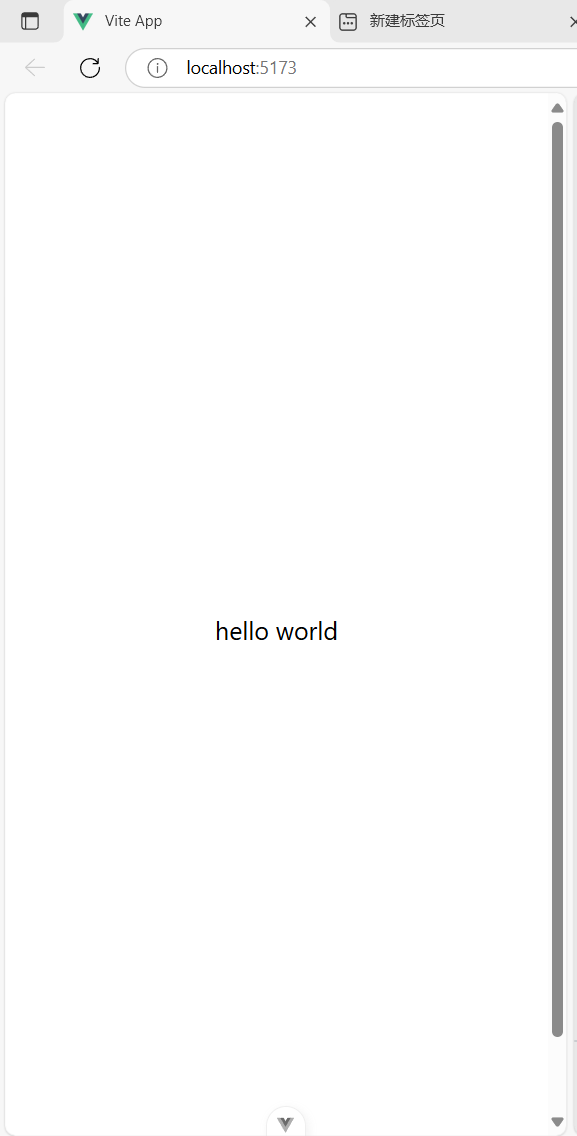
<template> <div class=\"hello-container\"> <span class=\"hello-title\">hello world</span> </div></template> <script setup></script> <style scoped>.hello-container { padding: 20px; min-height: 100vh; /* background: linear-gradient(135deg, #667eea 0%, #764ba2 100%); */ display: flex; flex-direction: column; align-items: center; justify-content: center;} .hello-title { color: black; font-size: 24px; margin-bottom: 40px; text-align: center;} /* 移动端适配 */@media (max-width: 768px) { .hello-title { font-size: 20px; }}</style></style>4.2、使用DevEco完成手机App端移植
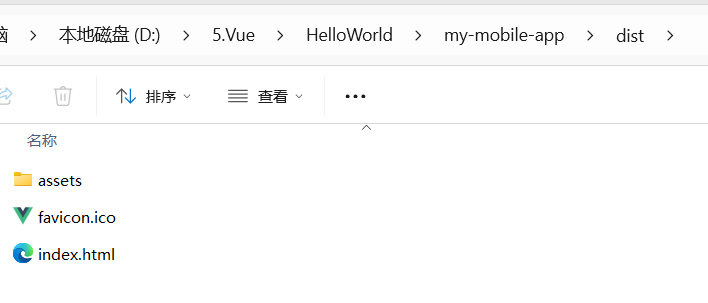
4.2.1、构建Vue 3项目为静态文件
npm run build生成 dist 文件夹,内部包含:
4.2.2、创建HarmonyOS JS工程
打开DevEco Studio,选择 Create Project。
选择模板:Empty Ability(JS语言)。
配置项目名称和存储路径,点击 Finish。
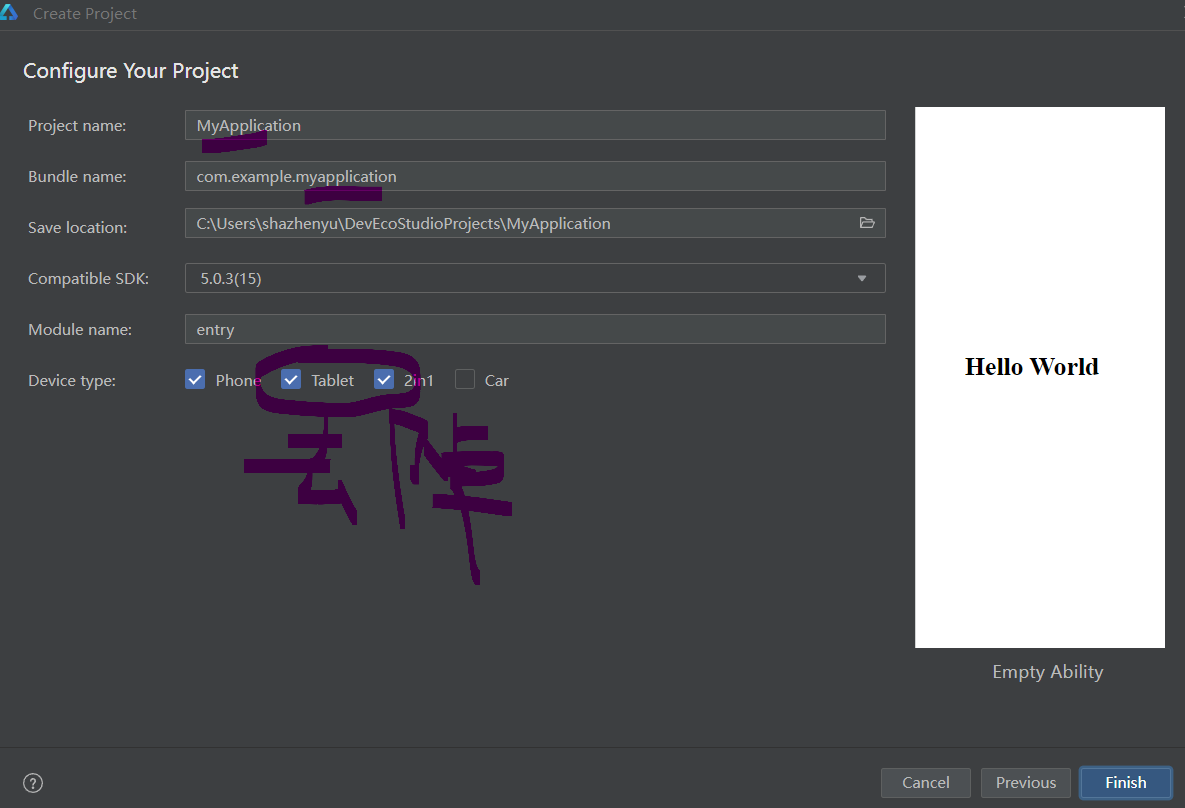
更改下名字和基础配置,选择SDK版本,然后点finish。
4.2.3、导入Vue静态资源
在DevEco项目中,逐级创建资源目录:
entry/src/main/js/default/resources/rawfile/
将Vue的 dist 文件夹内所有内容复制到 rawfile 目录下:
entry/src/main/js/default/resources/rawfile/
4.2.4、修改主页加载Web资源
修改 index.js,打开文件 entry/src/main/js/default/pages/index/index.js,替换为以下代码:
export default { setup() { return { // 指向 rawfile 中的 index.html src: $rawfile(\"index.html\") } }}修改 index.hml,打开文件 entry/src/main/js/default/pages/index/index.hml,替换为以下代码:
<div class=\"container\"> <web src=\"{{src}}\" style=\"width: 100%; height: 100%\"></web></div>4.2.5、配置应用签名
【注意:这里一定要先注册华为的账号】
开启自动签名:
点击菜单栏 File > Project Structure > Project > Signing Configs。
勾选 Automatically generate signing,点击 OK。
等待自动生成签名文件(首次可能需要几分钟)。
4.2.6、运行应用到手机
在DevEco Studio顶部工具栏,点击 Run ‘entry’(绿色三角形图标)。
选择已连接的设备 HUAWEI Mate 60。
等待编译完成,应用会自动安装到手机并启动。

