矩阵魔法:如何通过矩阵乘法实现图像变换(含代码)_图像变换矩阵
各种矩阵乘法对图片进行变换
在图像处理和计算机视觉中,矩阵乘法通常用于对图像进行几何变换,例如旋转、缩放、平移等。以下是一些常见的矩阵变换和如何通过矩阵乘法应用它们的简要说明:
1. 平移变换 (Translation)
平移变换用于将图像的所有像素位置沿着 x 和 y 轴平移指定的距离。
平移矩阵为:
T=[10tx01ty001]T = \\begin{bmatrix}1 & 0 & t_x \\\\0 & 1 & t_y \\\\0 & 0 & 1\\end{bmatrix}T=100010txty1
其中txt_xtx和 tyt_yty 是平移的距离。
应用平移时,原图像坐标 (x,y)(x, y)(x,y) 会变成新坐标 (x′,y′)(x\', y\')(x′,y′):
[x′y′1]=[10tx01ty001][xy1]\\begin{bmatrix} x\' \\\\ y\' \\\\ 1 \\end{bmatrix} = \\begin{bmatrix}1 & 0 & t_x \\\\0 & 1 & t_y \\\\0 & 0 & 1\\end{bmatrix}\\begin{bmatrix} x \\\\ y \\\\ 1 \\end{bmatrix}x′y′1=100010txty1xy1
# 1. 平移变换 (Translation)def translate_image(image, tx, ty): rows, cols = image.shape[:2] M = np.float32([[1, 0, tx], [0, 1, ty]]) # 平移矩阵 translated_image = cv2.warpAffine(image, M, (cols, rows)) # 应用平移 return translated_image# 保存平移变换后的图像image = translate_image(image, tx=100, ty=50)cv2.imwrite(\'translated_image.jpg\', image) # 保存图像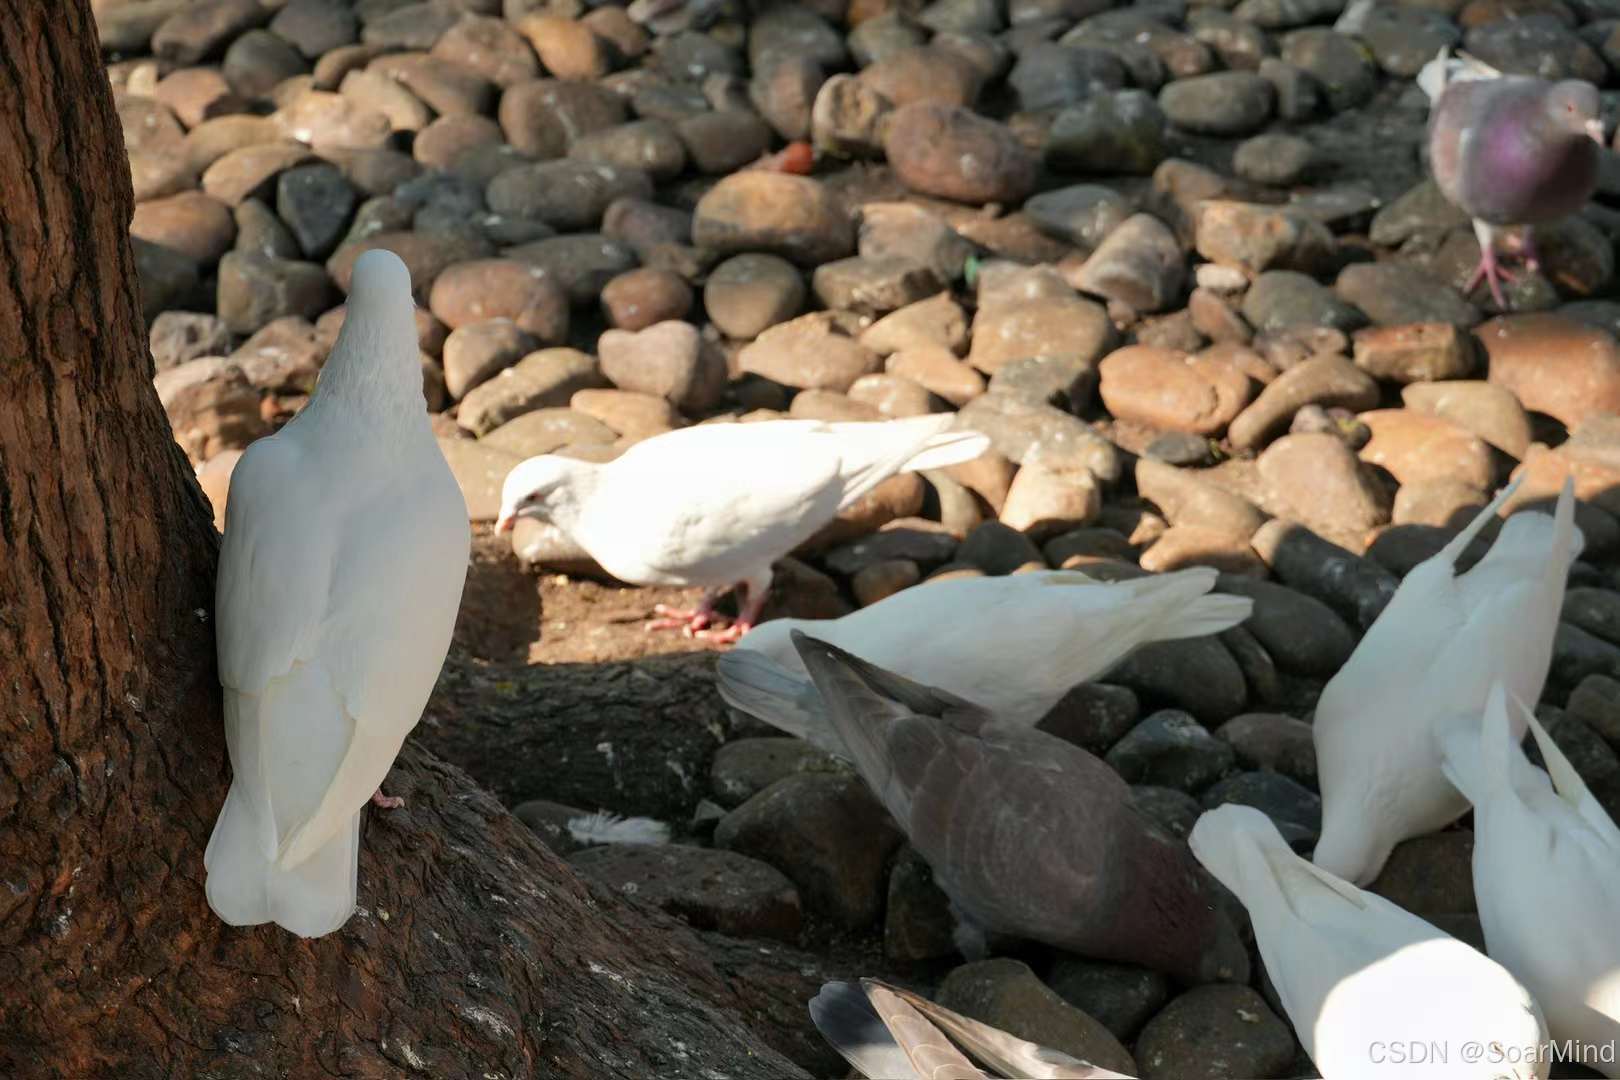
2. 缩放变换 (Scaling)
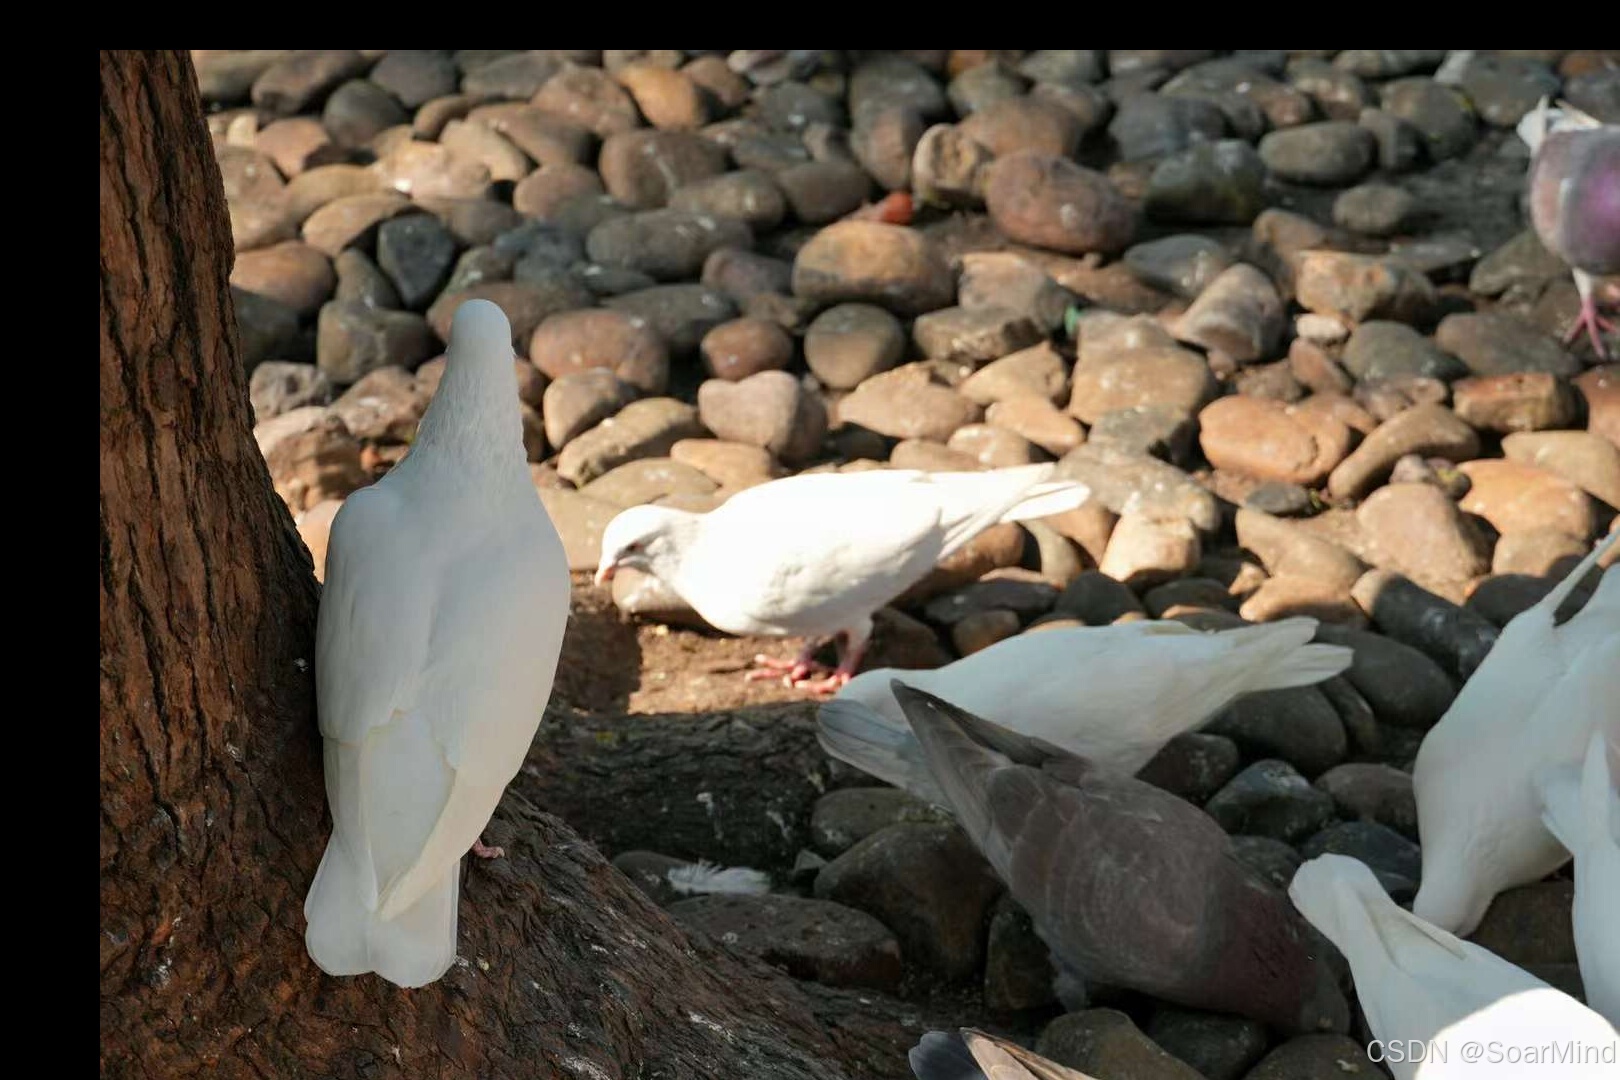
缩放变换可以改变图像的尺寸。缩放矩阵如下:
S=[sx000sy0001]S = \\begin{bmatrix}s_x & 0 & 0 \\\\0 & s_y & 0 \\\\0 & 0 & 1\\end{bmatrix}S=sx000sy0001
其中 sxs_xsx和 sys_ysy 分别是 x 和 y 方向上的缩放因子。
应用缩放时,原图像坐标 (x,y)(x, y)(x,y) 会变成新的坐标 (x′,y′)(x\', y\')(x′,y′):
[x′y′1]=[sx000sy0001][xy1]\\begin{bmatrix} x\' \\\\ y\' \\\\ 1 \\end{bmatrix} = \\begin{bmatrix}s_x & 0 & 0 \\\\0 & s_y & 0 \\\\0 & 0 & 1\\end{bmatrix}\\begin{bmatrix} x \\\\ y \\\\ 1 \\end{bmatrix}x′y′1=sx000sy0001xy1
# 2. 缩放变换 (Scaling)def scale_image(image, sx, sy): rows, cols = image.shape[:2] scaled_image = cv2.resize(image, None, fx=sx, fy=sy) # 缩放图像 return scaled_image# 保存缩放变换后的图像image = scale_image(image, sx=1.5, sy=1.5)cv2.imwrite(\'scaled_image.jpg\', image) # 保存图像
3. 旋转变换 (Rotation)
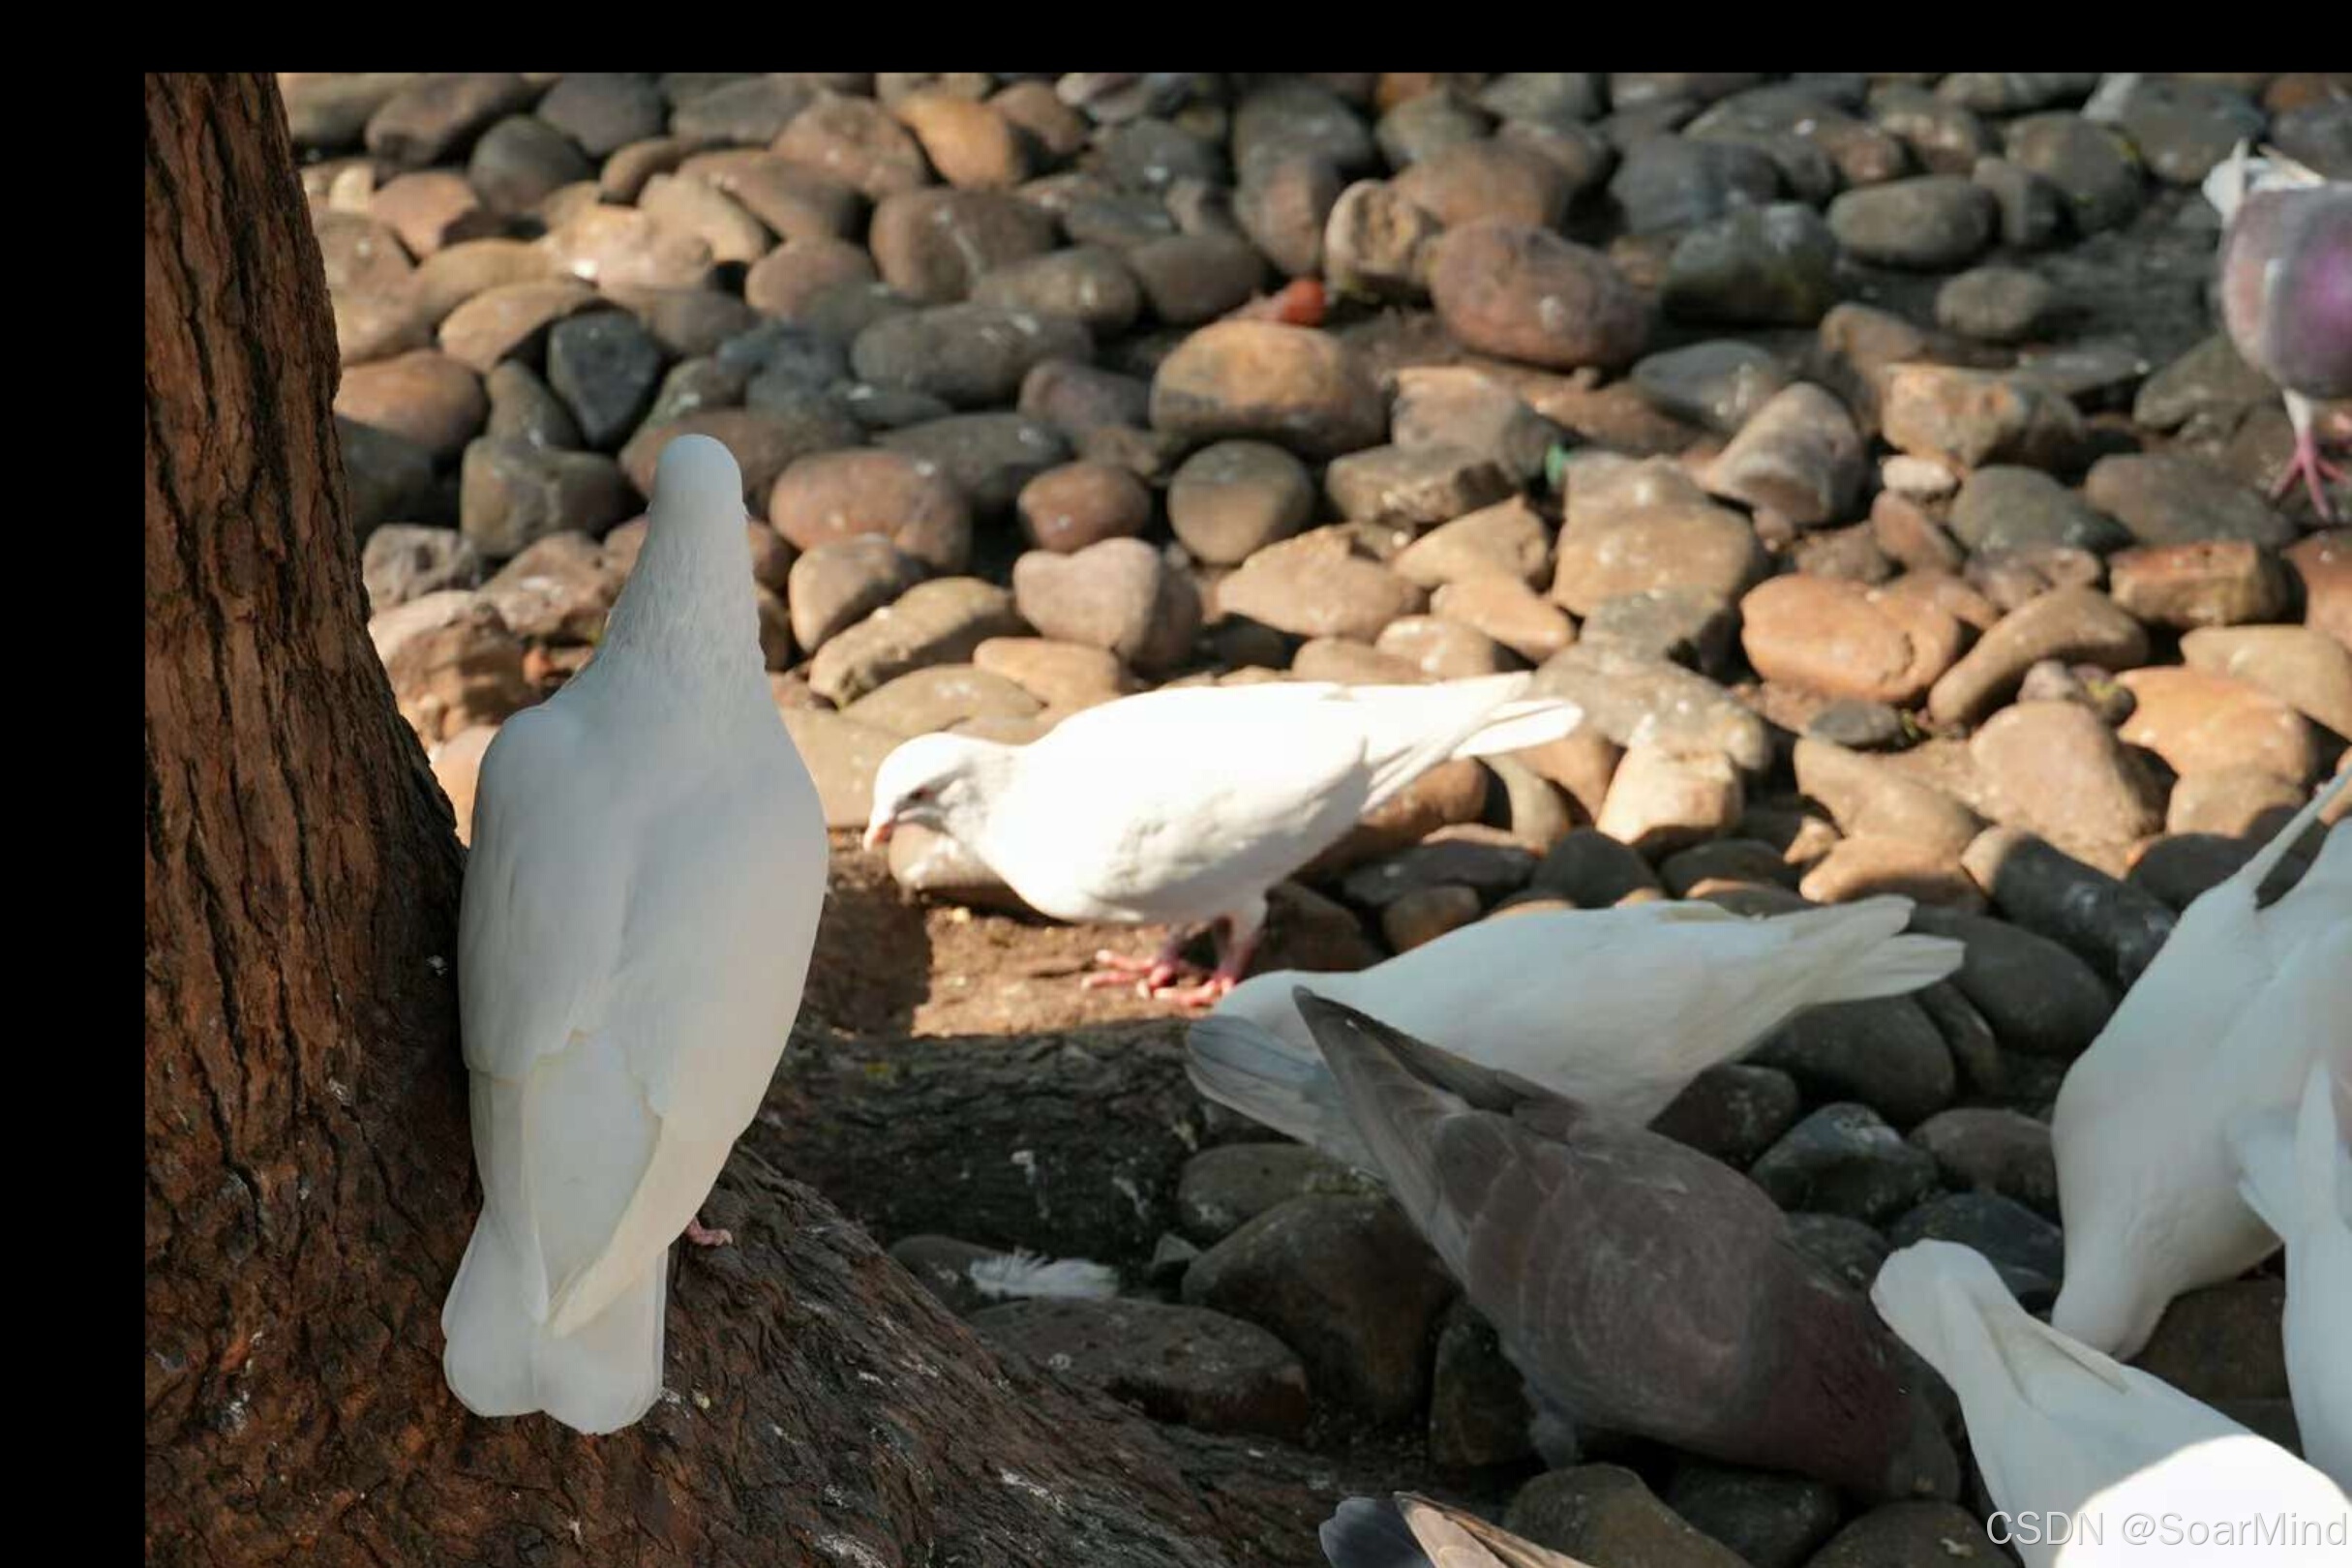
旋转变换用于将图像绕原点或某个点进行旋转。旋转矩阵如下:
R(θ)=[cos(θ)−sin(θ)0sin(θ)cos(θ)0001]R(\\theta) = \\begin{bmatrix}\\cos(\\theta) & -\\sin(\\theta) & 0 \\\\\\sin(\\theta) & \\cos(\\theta) & 0 \\\\0 & 0 & 1\\end{bmatrix}R(θ)=cos(θ)sin(θ)0−sin(θ)cos(θ)0001
其中 θ\\thetaθ是旋转角度(以弧度为单位)。
应用旋转时,原图像坐标(x,y)(x, y)(x,y)会变成新坐标 (x′,y′)(x\', y\')(x′,y′):
[x′y′1]=[cos(θ)−sin(θ)0sin(θ)cos(θ)0001][xy1]\\begin{bmatrix} x\' \\\\ y\' \\\\ 1 \\end{bmatrix} = \\begin{bmatrix}\\cos(\\theta) & -\\sin(\\theta) & 0 \\\\\\sin(\\theta) & \\cos(\\theta) & 0 \\\\0 & 0 & 1\\end{bmatrix}\\begin{bmatrix} x \\\\ y \\\\ 1 \\end{bmatrix}x′y′1=cos(θ)sin(θ)0−sin(θ)cos(θ)0001xy1
# 3. 旋转变换 (Rotation)def rotate_image(image, angle): rows, cols = image.shape[:2] M = cv2.getRotationMatrix2D((cols/2, rows/2), angle, 1) # 旋转矩阵 rotated_image = cv2.warpAffine(image, M, (cols, rows)) # 应用旋转 return rotated_image# 保存旋转变换后的图像image = rotate_image(image, angle=45)cv2.imwrite(\'rotated_image.jpg\', image) # 保存图像
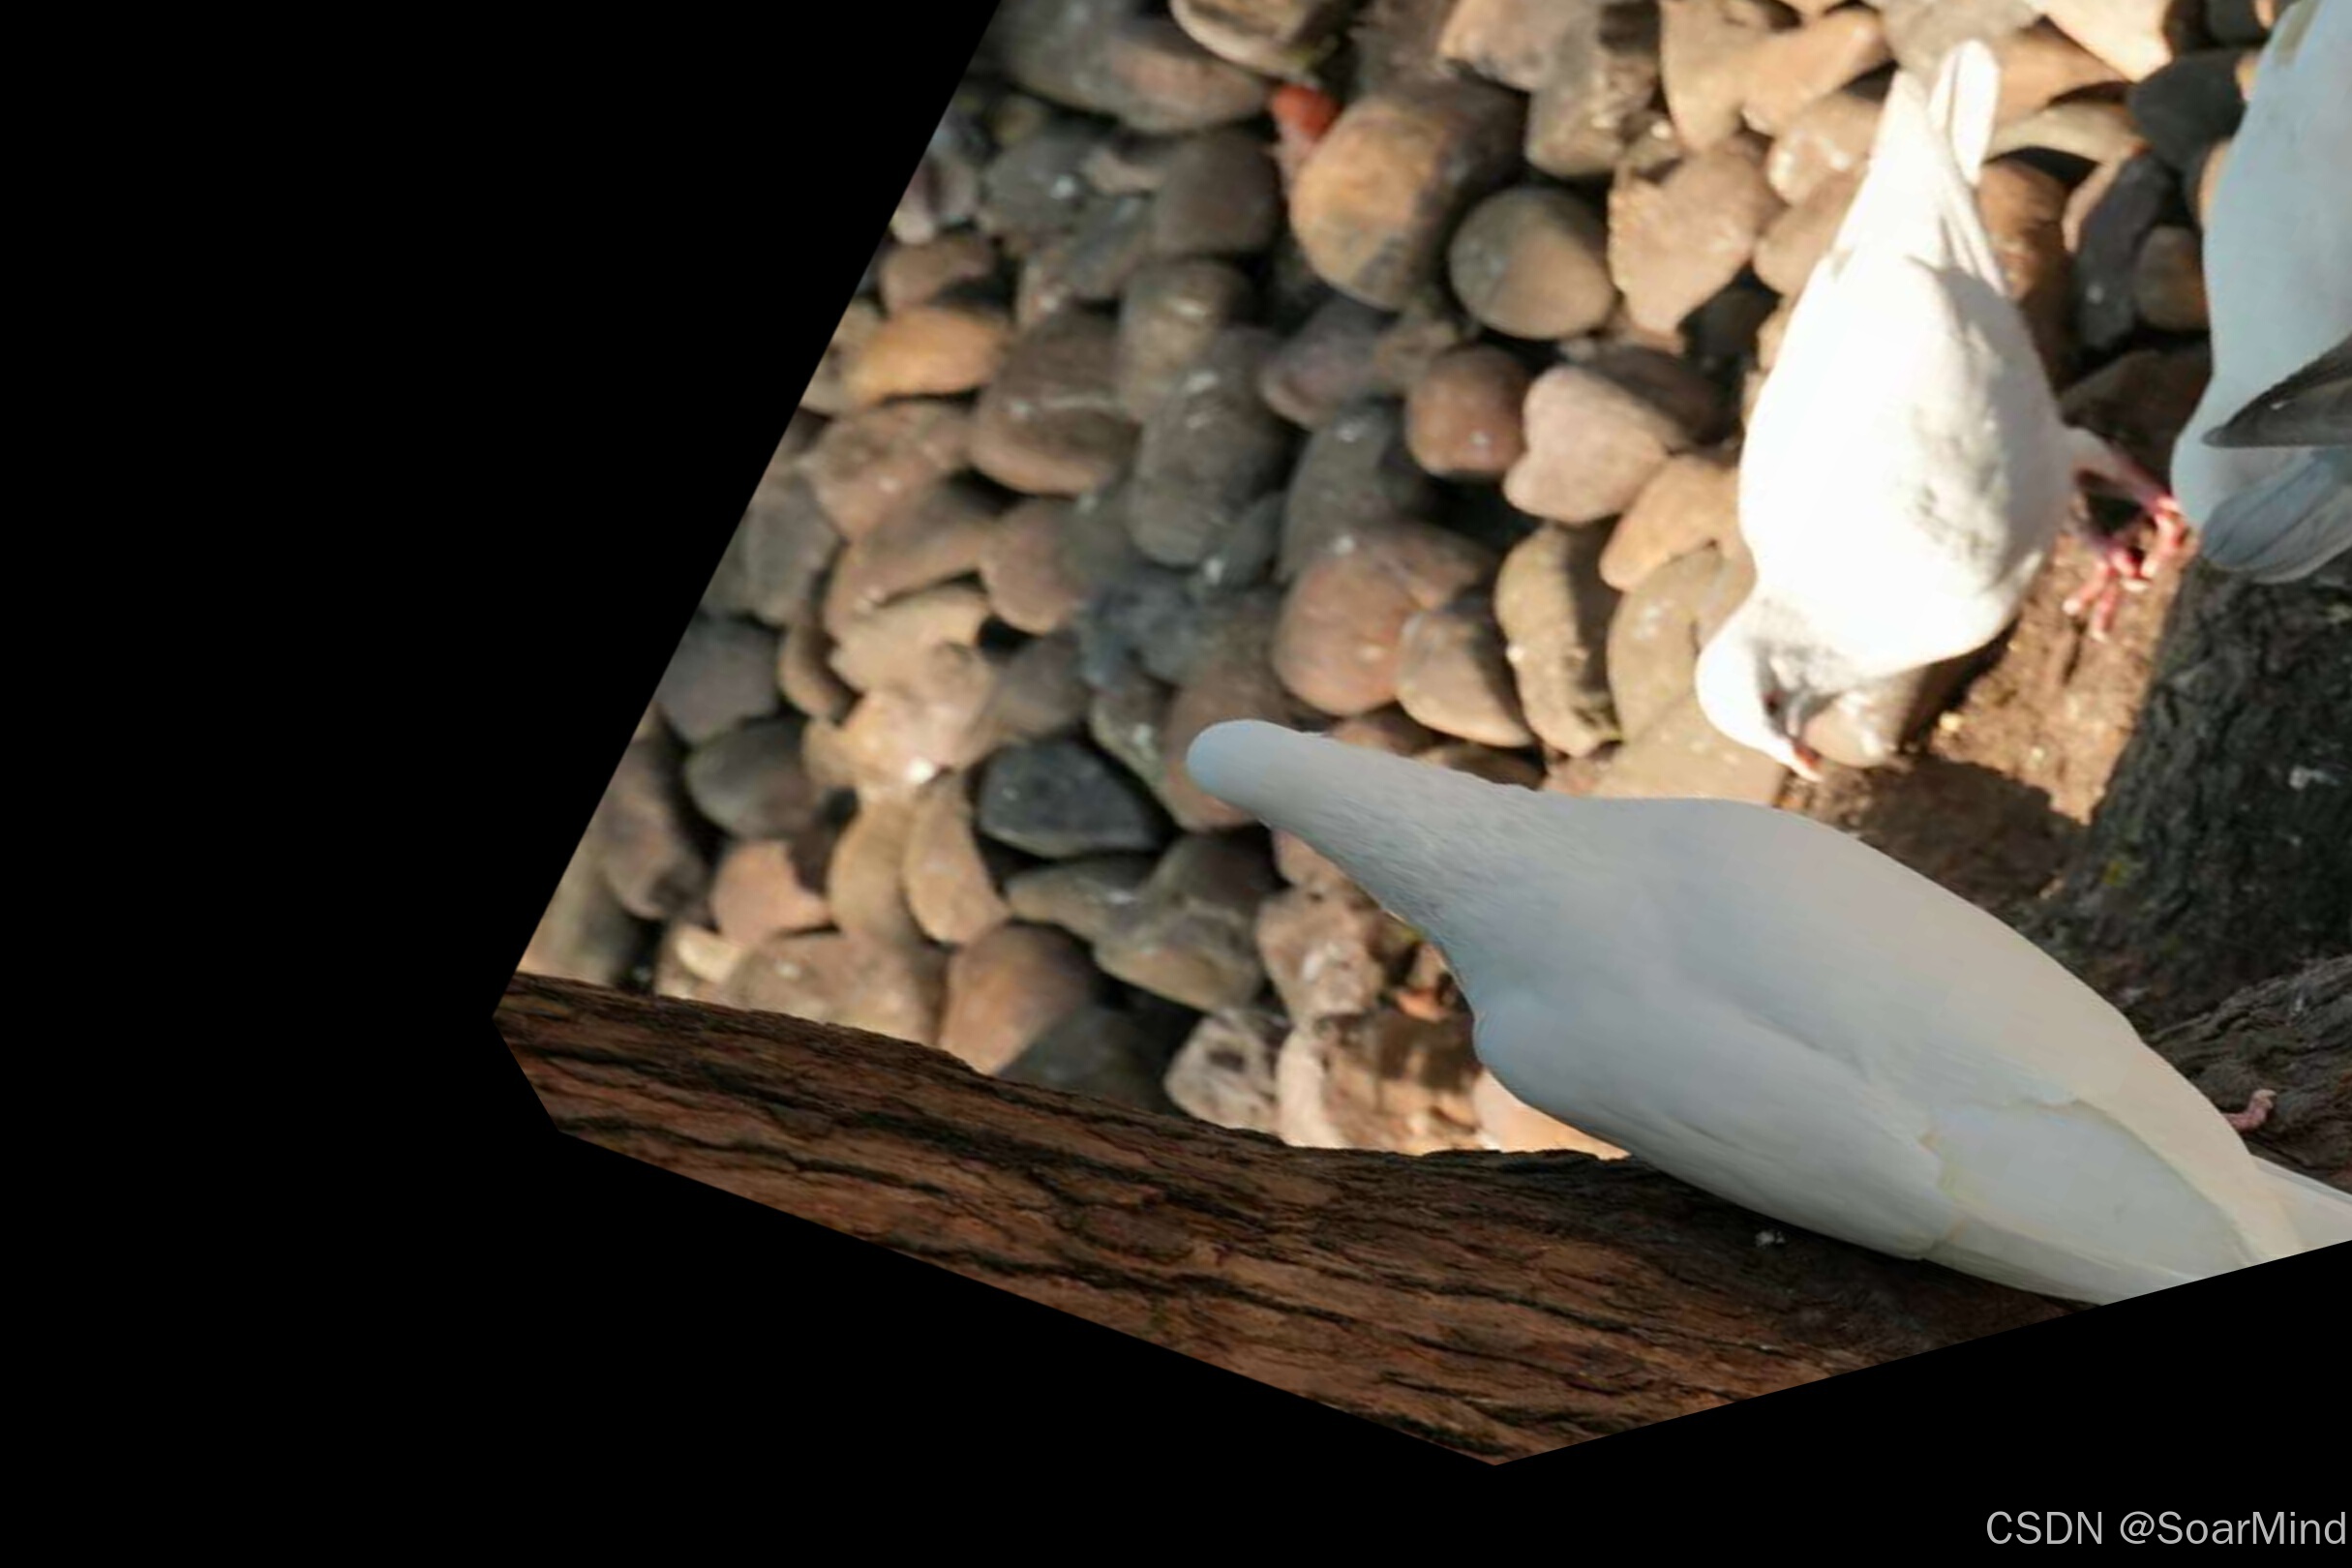
4. 仿射变换 (Affine Transformation)
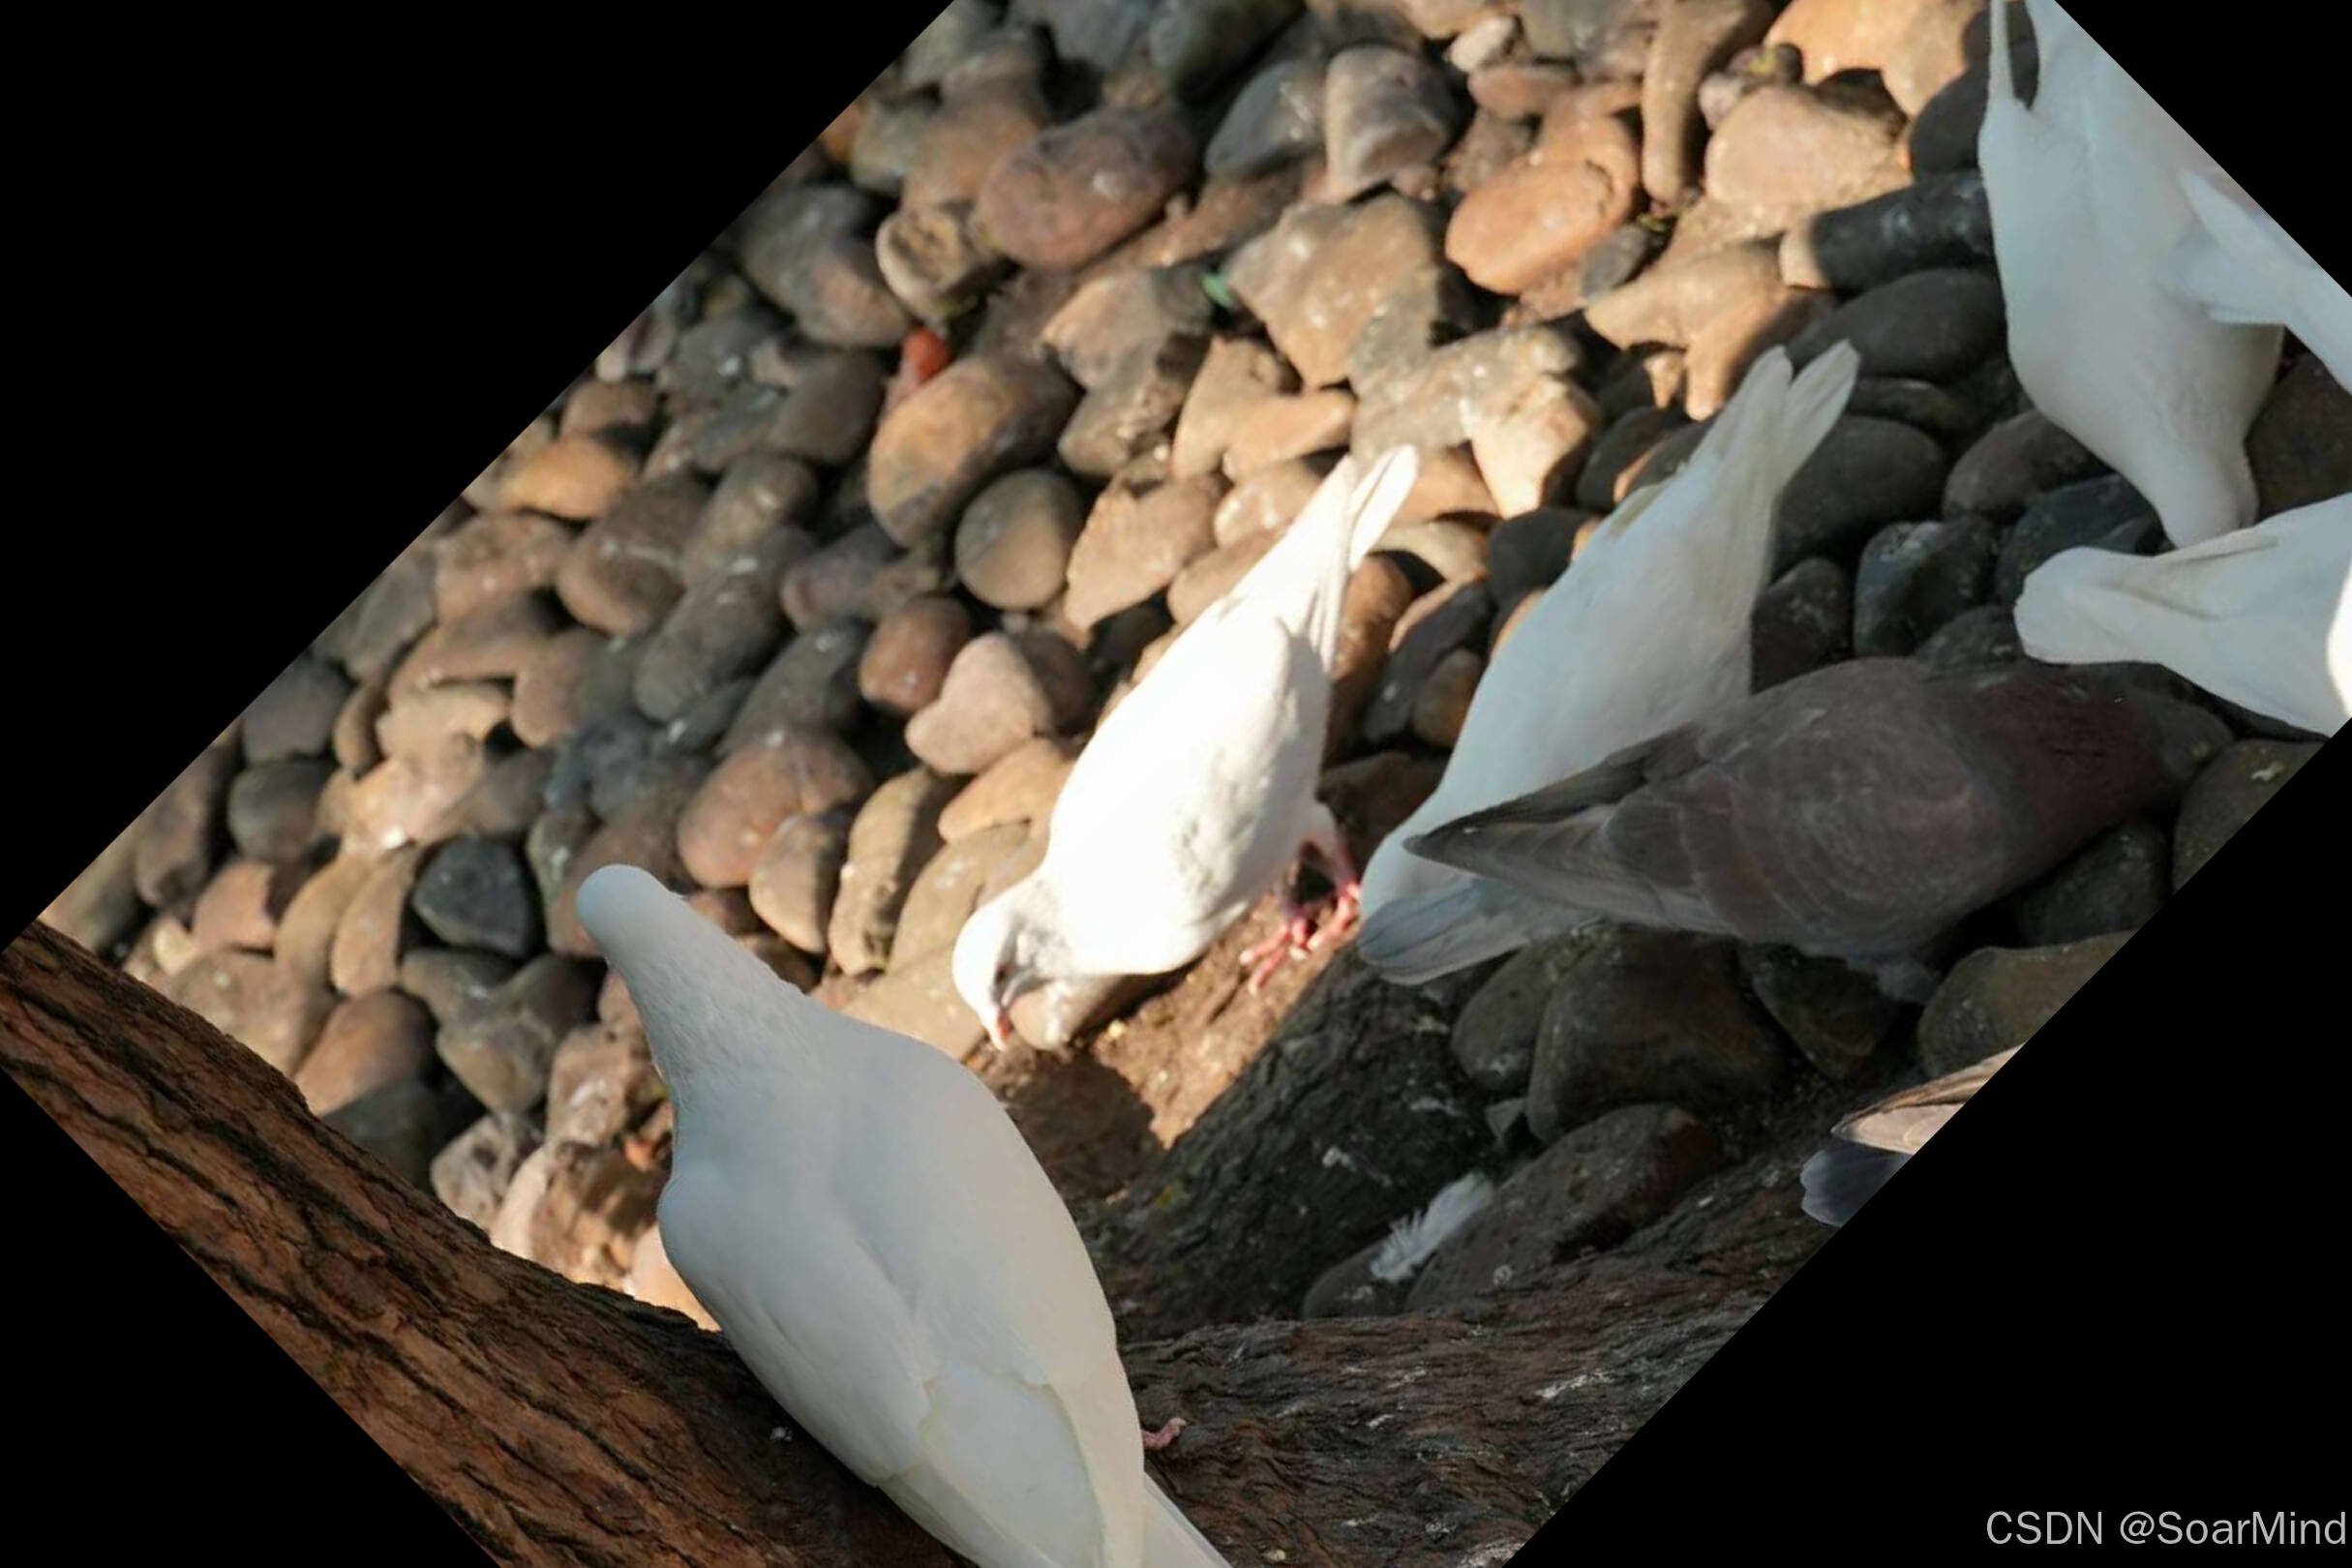
仿射变换是平移、缩放、旋转和剪切的组合,通常使用一个 2×32 \\times 32×3 的矩阵来表示。仿射变换矩阵为:
A=[a11a12txa21a22ty]A = \\begin{bmatrix}a_{11} & a_{12} & t_x \\\\a_{21} & a_{22} & t_y\\end{bmatrix}A=[a11a21a12a22txty]
其中 a11,a12,a21,a22a_{11}, a_{12}, a_{21}, a_{22}a11,a12,a21,a22是仿射变换的系数,txt_xtx和 tyt_yty是平移分量。
应用仿射变换时,原图像坐标 (x,y)(x, y)(x,y) 会变成新坐标 (x′,y′)(x\', y\')(x′,y′):
[x′y′]=[a11a12a21a22][xy]+[txty]\\begin{bmatrix} x\' \\\\ y\' \\end{bmatrix} = \\begin{bmatrix}a_{11} & a_{12} \\\\a_{21} & a_{22}\\end{bmatrix}\\begin{bmatrix} x \\\\ y \\end{bmatrix} +\\begin{bmatrix} t_x \\\\ t_y \\end{bmatrix}[x′y′]=[a11a21a12a22][xy]+[txty]
# 4. 仿射变换 (Affine Transformation)def affine_transform_image(image): rows, cols = image.shape[:2] # 仿射变换矩阵,定义三个点的变换 pts1 = np.float32([[50, 50], [200, 50], [50, 200]]) pts2 = np.float32([[10, 100], [200, 50], [100, 250]]) M = cv2.getAffineTransform(pts1, pts2) # 计算仿射变换矩阵 affine_image = cv2.warpAffine(image, M, (cols, rows)) # 应用仿射变换 return affine_image# 保存仿射变换后的图像image = affine_transform_image(image)cv2.imwrite(\'affine_image.jpg\', image) # 保存图像
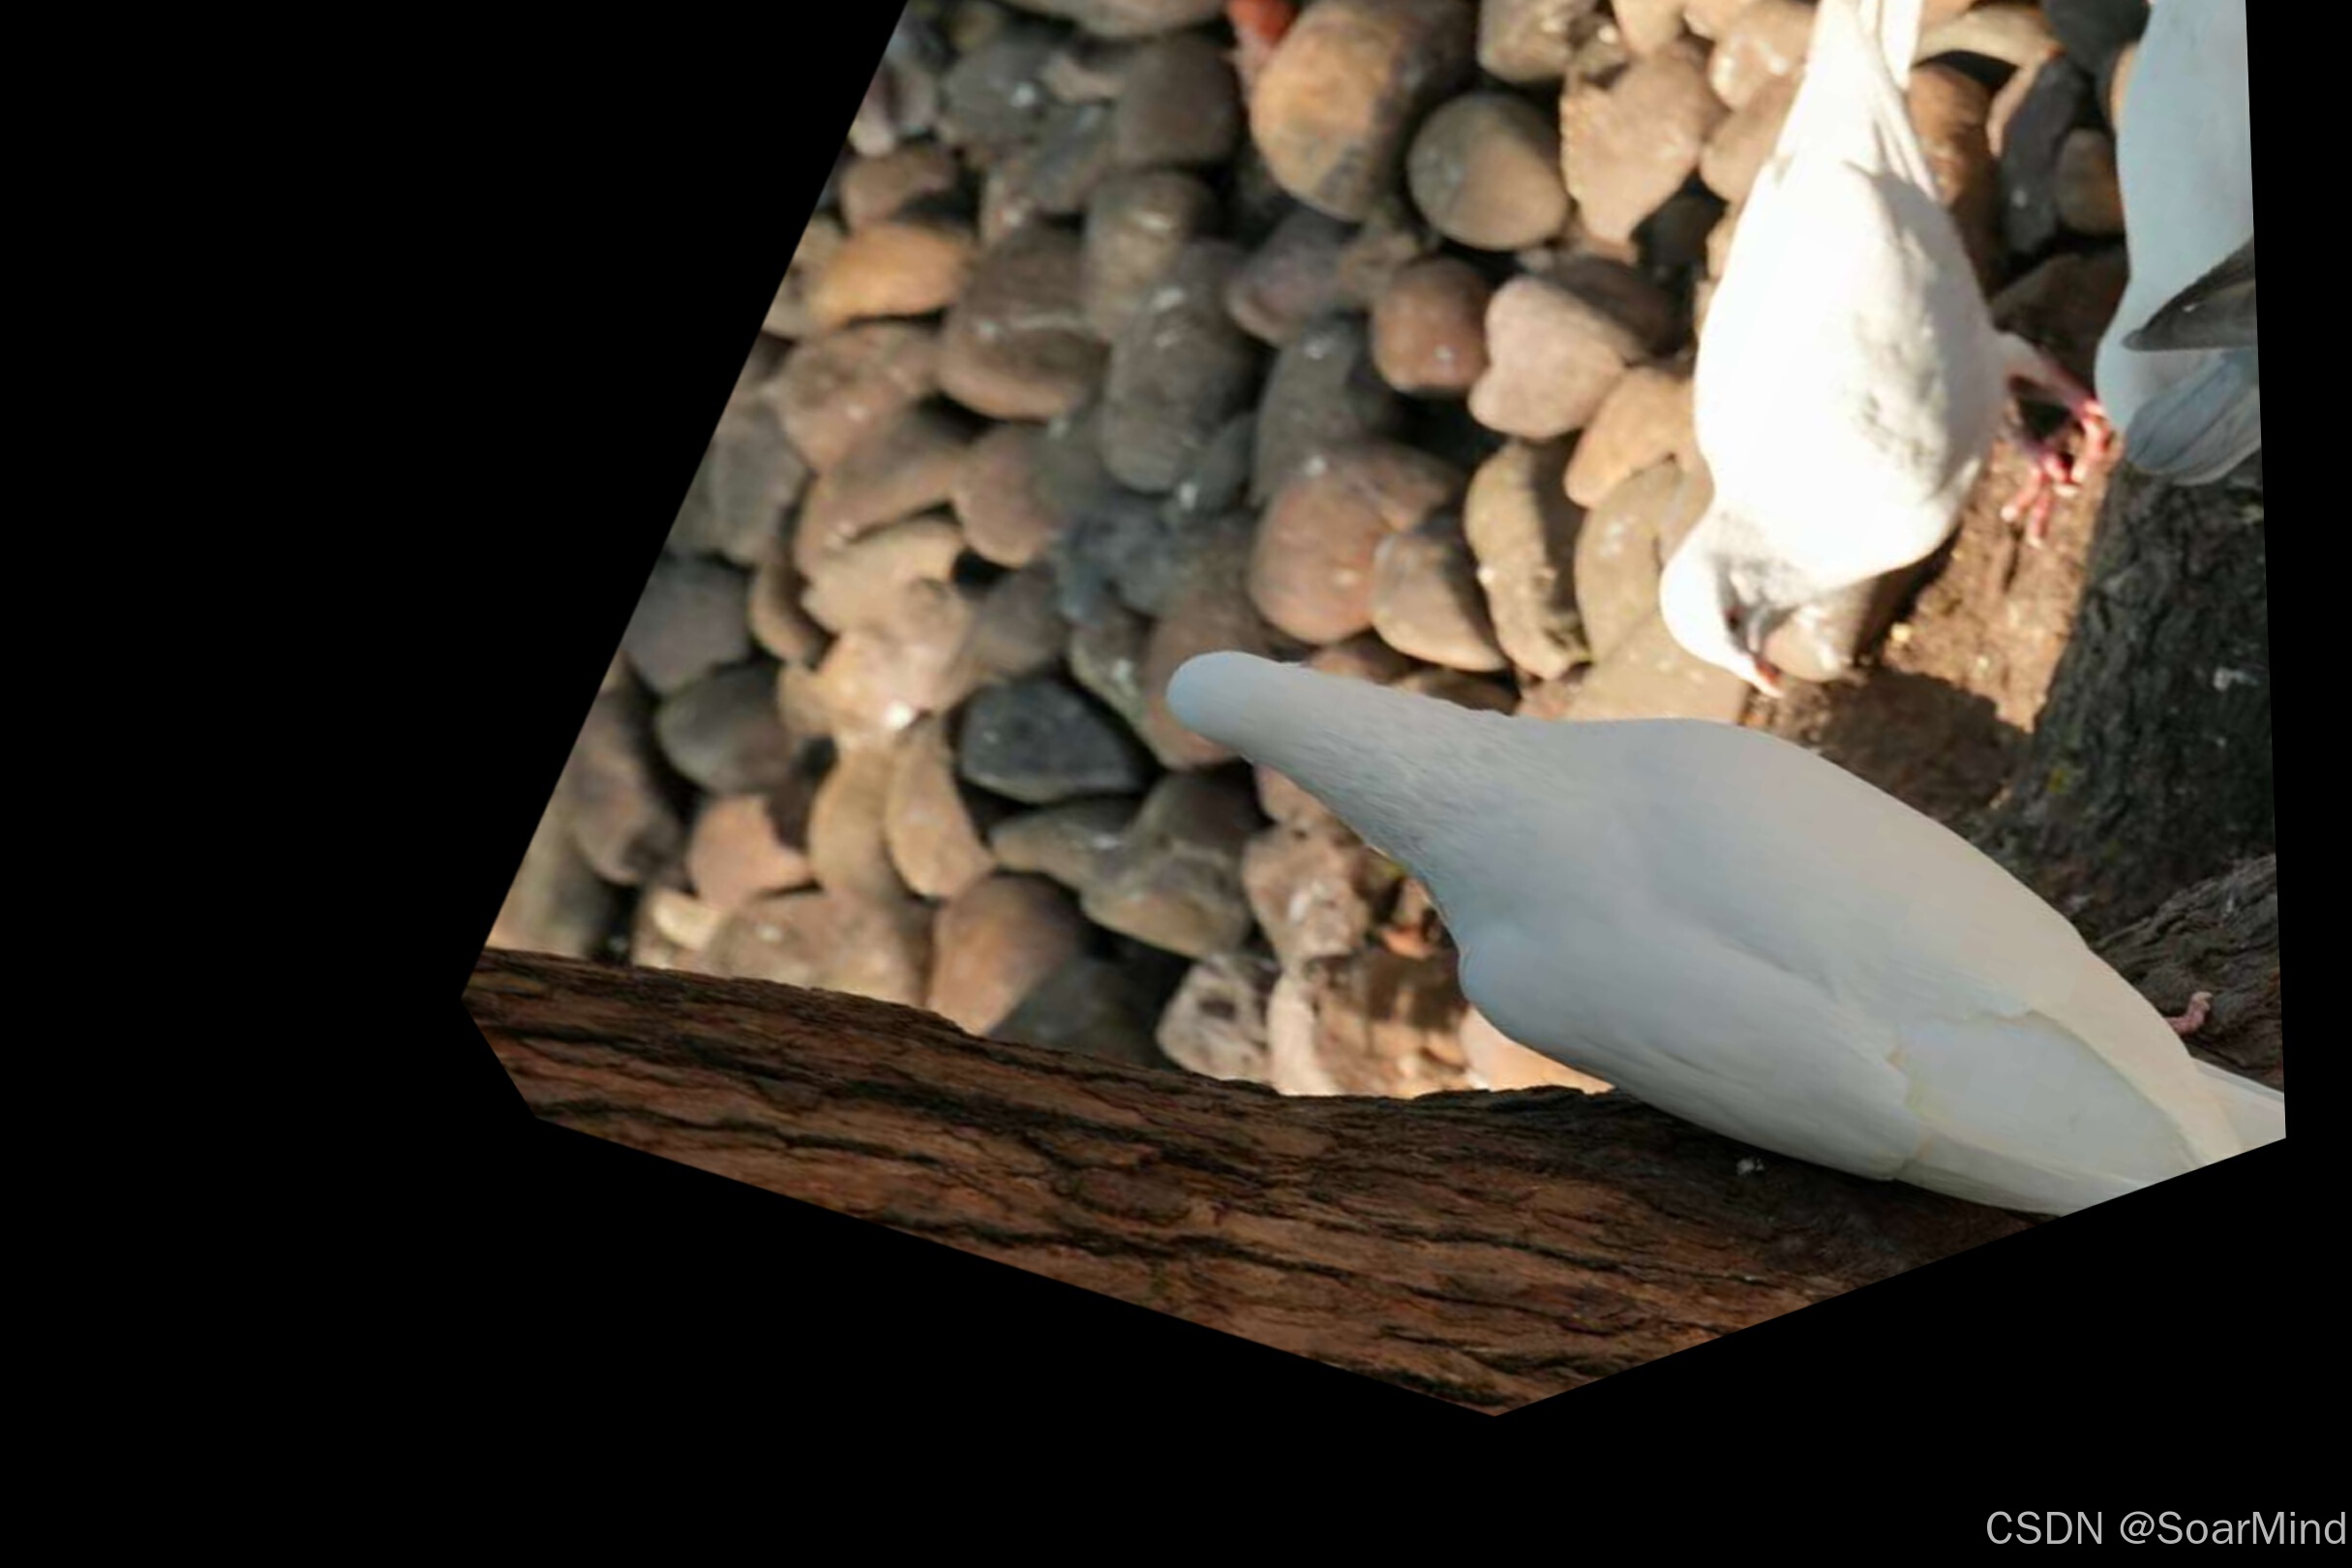
5. 透视变换 (Perspective Transformation)
透视变换用于改变图像的透视效果,通常使用 3×33 \\times 33×3 的矩阵表示:
P=[p11p12p13p21p22p23p31p32p33]P = \\begin{bmatrix}p_{11} & p_{12} & p_{13} \\\\p_{21} & p_{22} & p_{23} \\\\p_{31} & p_{32} & p_{33}\\end{bmatrix}P=p11p21p31p12p22p32p13p23p33
通过透视变换,可以实现图像的透视效果(如在图像中看到不同角度的物体)。
# 5. 透视变换 (Perspective Transformation)def perspective_transform_image(image): rows, cols = image.shape[:2] # 进一步增大源点与目标点之间的差距 pts1 = np.float32([[100, 100], [cols - 100, 100], [100, rows - 100], [cols - 100, rows - 100]]) # 原图四个角 pts2 = np.float32([[0, 0], [cols - 200, 0], [50, rows - 50], [cols - 150, rows - 200]]) # 目标点之间增大差距 M = cv2.getPerspectiveTransform(pts1, pts2) # 计算透视变换矩阵 perspective_image = cv2.warpPerspective(image, M, (cols, rows)) # 应用透视变换 return perspective_image# 保存透视变换后的图像image = perspective_transform_image(image)cv2.imwrite(\'perspective_image.jpg\', image) # 保存图像
组合变换
多个变换可以通过矩阵乘法组合起来,得到一个复合变换矩阵。假设我们有平移矩阵 TTT、缩放矩阵 SSS 和旋转矩阵 RRR,它们的复合变换矩阵为:
M=T×S×RM = T \\times S \\times RM=T×S×R
通过这样的组合,可以一次性对图像进行多重变换。
变换的应用
- 在 OpenCV 中应用这些变换:
- 对于旋转、缩放等变换,OpenCV 提供了函数如
cv2.getRotationMatrix2D()和cv2.warpAffine(),可以直接通过矩阵进行操作。 - 仿射变换可以通过
cv2.getAffineTransform()和cv2.warpAffine()实现。 - 透视变换可以使用
cv2.getPerspectiveTransform()和cv2.warpPerspective()。
- 对于旋转、缩放等变换,OpenCV 提供了函数如
这些矩阵变换能够帮助你在图像处理中实现各种操作,例如图像的旋转、缩放、平移等,广泛应用于图像增强、目标检测、图像对齐等任务。


