服务器部署LLaMAFactory进行LoRA微调_llama factory
一、什么是LLaMAFactory
LlamaFactory 是一个专为 大型语言模型(LLM)微调 设计的开源工具库,旨在简化大模型(如 LLaMA、GPT、Mistral 等)的定制化训练流程,降低技术门槛和硬件成本。以下是它的核心功能和应用场景:
1. 核心功能
① 高效微调技术
-
参数高效微调(PEFT)
支持 LoRA、QLoRA、Adapter 等方法,仅训练少量参数(如原模型的0.1%),显存需求降低50%-80%。-
示例:在24GB显存的RTX 4090上微调7B模型(默认全参数微调需80GB+显存)。
-
-
量化训练
支持4/8-bit量化(结合bitsandbytes),进一步压缩显存占用。 -
梯度检查点
通过牺牲计算时间换取显存,支持更长上下文训练。
② 多模型与多任务支持
-
兼容主流架构:LLaMA、Baichuan、ChatGLM、Qwen、GPT、Mistral等。
-
多任务适配:支持指令微调(Instruction Tuning)、领域适配(如医疗、法律)、对话模型优化等。
③ 分布式训练优化
-
支持多卡并行(数据并行、模型并行)、DeepSpeed ZeRO 加速,适合大模型训练。
④ 用户友好设计
-
可视化Web UI:无需编码即可配置超参数、启动训练。
-
CLI工具:一行命令启动微调,支持自定义数据集格式。
二、部署LLaMAFactroy
首先,让我们尝试使用github的方式克隆仓库:
git config --global http.sslVerify false && git clone --depth 1 https://github.com/hiyouga/LLaMA-Factory.git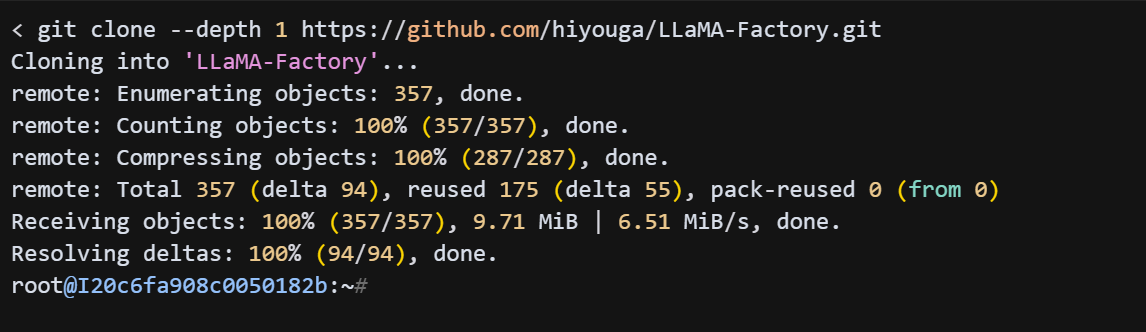
# 创建新环境,指定 Python 版本(以 3.10 为例)conda create -n llamafactory python=3.10 -y# 激活环境conda activate llamafactory仓库已经成功克隆下来了。现在让我们进入项目目录并查看一下环境要求:
cd LLaMA-Factory && cat requirements.txt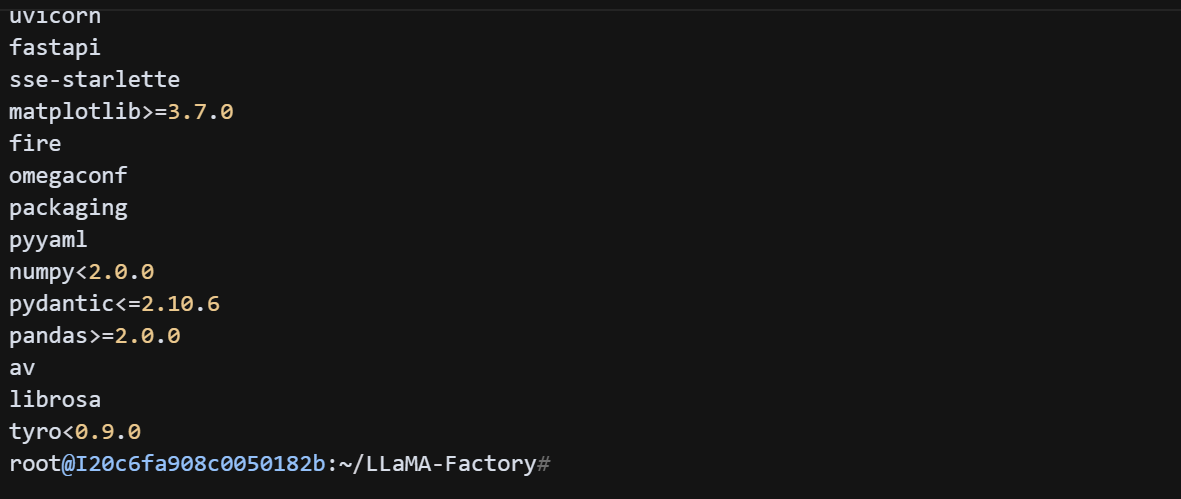
接下来让我们先检查一下 Python 环境:
python3 --version && pip3 --version
现在让我们安装所需的依赖:
pip3 install -r requirements.txt要启动Web UI,可以运行:
cd LLaMA-Factory && python3 src/web_demo.py新建原始数据json文件夹
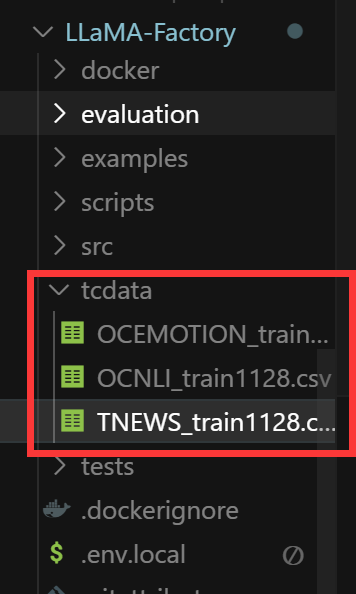
Factory支持的格式。LLaMA-Factory支持多种格式,对于文本分类任务,我们可以使用alpaca格式。创建一个转换脚本:
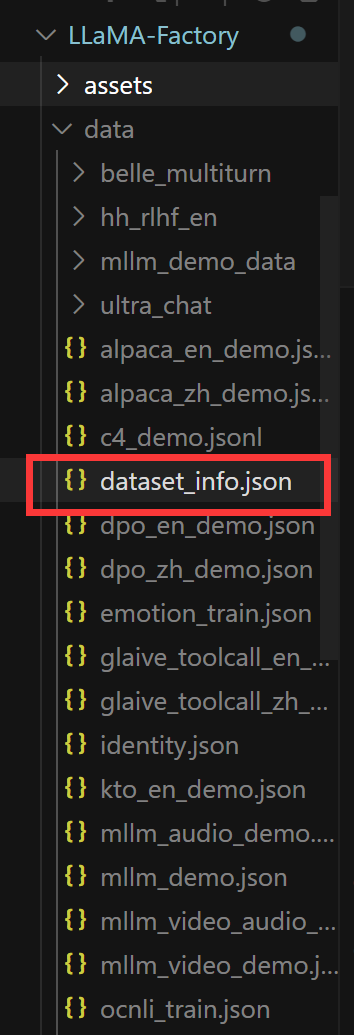
import pandas as pdimport jsonfrom pathlib import Pathdef convert_tnews(input_file): df = pd.read_csv(input_file, sep=\'\\t\', header=None, names=[\'id\', \'text\', \'label\']) # 更新后的标签映射 label_map = { \'100\': \'民生\', \'101\': \'文化\', \'102\': \'娱乐\', \'103\': \'体育\', \'104\': \'财经\', \'106\': \'房产\', \'107\': \'教育\', \'108\': \'科技\', \'109\': \'军事\', \'110\': \'旅游\', \'112\': \'国际\', \'113\': \'证券\', \'114\': \'农业\', \'115\': \'政务\', \'116\': \'电商\' } conversations = [] for _, row in df.iterrows(): label = str(row[\'label\']) if label in label_map: category = label_map[label] else: continue item = { \"instruction\": \"请判断以下新闻属于哪个类别。\", \"input\": row[\'text\'], \"output\": category } conversations.append(item) return conversationsdef convert_ocemotion(input_file): df = pd.read_csv(input_file, sep=\'\\t\', header=None, names=[\'id\', \'text\', \'label\']) # 更新后的标签映射 label_map = { \'sadness\': \'悲伤\', \'happiness\': \'快乐\', \'disgust\': \'厌恶\', \'anger\': \'愤怒\', \'like\': \'喜欢\', \'surprise\': \'惊讶\', \'fear\': \'恐惧\' } conversations = [] for _, row in df.iterrows(): label = str(row[\'label\']).strip() if label in label_map: emotion = label_map[label] else: continue item = { \"instruction\": \"请判断以下文本表达的情感。\", \"input\": row[\'text\'], \"output\": emotion } conversations.append(item) return conversationsdef convert_ocnli(input_file): df = pd.read_csv(input_file, sep=\'\\t\', header=None, names=[\'id\', \'sentence1\', \'sentence2\', \'label\']) label_map = { \'0\': \'蕴含\', \'1\': \'矛盾\', \'2\': \'中立\' } conversations = [] for _, row in df.iterrows(): label = str(row[\'label\']) if label in label_map: relation = label_map[label] else: continue item = { \"instruction\": \"判断两个句子之间的关系。\", \"input\": f\"句子1:{row[\'sentence1\']}\\n句子2:{row[\'sentence2\']}\", \"output\": relation } conversations.append(item) return conversationsdef main(): # 修改为正确的路径 data_dir = Path(\'/root/LLaMA-Factory/tcdata\') output_dir = Path(\'/root/LLaMA-Factory/data\') output_dir.mkdir(parents=True, exist_ok=True) # 转换TNEWS数据 print(\"Converting TNEWS dataset...\") tnews_conversations = convert_tnews(data_dir / \'TNEWS_train1128.csv\') with open(output_dir / \'tnews_train.json\', \'w\', encoding=\'utf-8\') as f: json.dump(tnews_conversations, f, ensure_ascii=False, indent=2) print(f\"Converted {len(tnews_conversations)} TNEWS examples\") # 转换OCEMOTION数据 print(\"\\nConverting OCEMOTION dataset...\") emotion_conversations = convert_ocemotion(data_dir / \'OCEMOTION_train1128.csv\') with open(output_dir / \'emotion_train.json\', \'w\', encoding=\'utf-8\') as f: json.dump(emotion_conversations, f, ensure_ascii=False, indent=2) print(f\"Converted {len(emotion_conversations)} OCEMOTION examples\") # 转换OCNLI数据 print(\"\\nConverting OCNLI dataset...\") ocnli_conversations = convert_ocnli(data_dir / \'OCNLI_train1128.csv\') with open(output_dir / \'ocnli_train.json\', \'w\', encoding=\'utf-8\') as f: json.dump(ocnli_conversations, f, ensure_ascii=False, indent=2) print(f\"Converted {len(ocnli_conversations)} OCNLI examples\")if __name__ == \'__main__\': main() dataset_info.json 包含了所有可用的数据集。使用刚刚自定义三个数据采集数据集,需要在 dataset_info.json 文件中添加数据集描述,并通过修改 dataset: 数据集名称 配置来使用数据集。
现在让我们添加我们的三个自定义数据集。修改 dataset_info.json 文件:
\"tnews_train\": { \"file_name\": \"tnews_train.json\", \"formatting\": \"alpaca\", \"columns\": { \"prompt\": \"instruction\", \"query\": \"input\", \"response\": \"output\" } }, \"emotion_train\": { \"file_name\": \"emotion_train.json\", \"formatting\": \"alpaca\", \"columns\": { \"prompt\": \"instruction\", \"query\": \"input\", \"response\": \"output\" } }, \"ocnli_train\": { \"file_name\": \"ocnli_train.json\", \"formatting\": \"alpaca\", \"columns\": { \"prompt\": \"instruction\", \"query\": \"input\", \"response\": \"output\" } }现在我们已经在 dataset_info.json 中添加了三个新的数据集配置:
tnews_train:新闻分类数据集
emotion_train:情感分类数据集
ocnli_train:自然语言推理数据集
数据已经成功转换并保存到了正确的位置。接下来可以开始使用这些数据进行训练了。以下是后续步骤:
1.下载Qwen基础模型:
- 您可以使用Qwen-7B或Qwen-14B作为基础模型
- 模型可以从Hugging Face下载
pip install -U huggingface_hub
创建一个目录来存放模型:
mkdir -p LLaMA-Factory/models/Qwen-7B-Chat && cd LLaMA-Factory/models/Qwen-7B-Chat 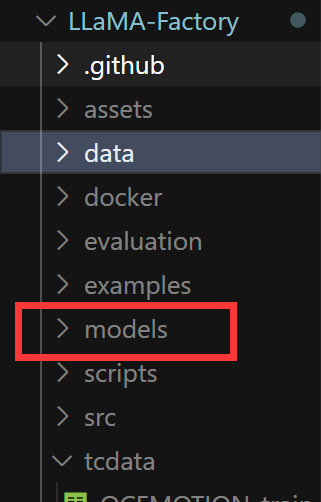
方法一:使用Git LFS克隆Qwen-7B-Chat模型仓库:
cd LLaMA-Factory/models && GIT_LFS_SKIP_SMUDGE=1 git clone https://huggingface.co/Qwen/Qwen-7B-Chat方法二:使用ModelScope镜像来下载模型:
pip install modelscope && cd /root/LLaMA-Factory/models && python3 -c \"from modelscope import snapshot_download; snapshot_download(\'qwen/Qwen-7B-Chat\', cache_dir=\'.\')\" 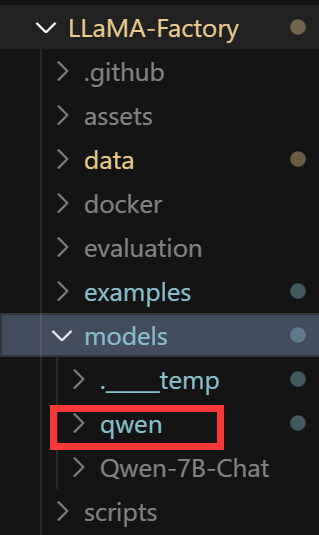
接下来我们将使用LLaMA-Factory进行微调。我们将使用Qwen-7B-Chat作为基础模型,使用我们处理好的三个数据集进行训练。
接下来让我们理解一下,lora微调所涉及到的文件
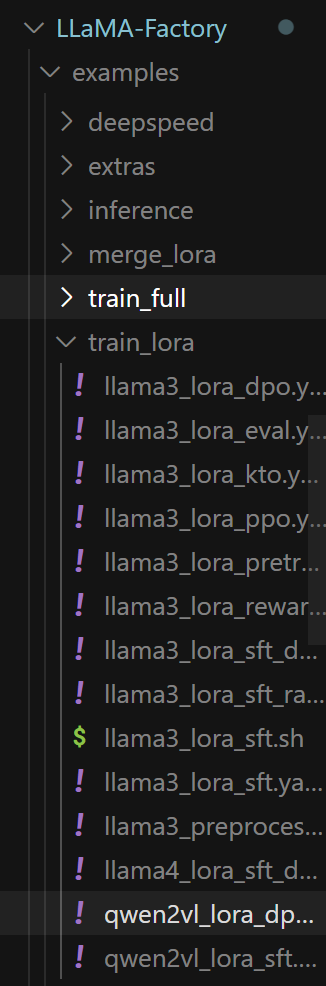
qwen2vl_lora_dpo.yaml qwen2vl_lora_sft.yaml 这两个文件有什么区别?
这两个文件都是LLaMA-Factory的训练配置文件,但它们有几个重要的区别:
训练阶段(stage)不同:
- qwen2vl_lora_sft.yaml: stage: sft (监督微调,Supervised Fine-Tuning)
- qwen2vl_lora_dpo.yaml: stage: dpo (直接偏好优化,Direct Preference Optimization)
学习率(learning_rate)不同:
- sft: learning_rate: 1.0e-4 (较大的学习率)
- dpo: learning_rate: 5.0e-6 (较小的学习率)
特有参数:
- dpo 特有:
pref_beta: 0.1 # DPO的beta参数
pref_loss: sigmoid # 偏好学习的损失函数类型
数据集配置不同:
- sft: dataset: mllm_demo,identity,alpaca_en_demo (普通的指令数据集)
- dpo: dataset: rlhf_v (包含偏好信息的数据集)
主要区别在于它们的用途:
- sft配置用于第一阶段的监督微调,让模型学习基本的指令跟随能力
- dpo配置用于第二阶段的偏好优化,通过人类偏好数据来改进模型输出的质量
这反映了现代大语言模型训练的两个重要阶段:
- SFT(监督微调):让模型学会基本的任务完成能力
- DPO(偏好优化):让模型的输出更符合人类偏好,提高输出质量
如果是第一次训练模型,建议先使用sft配置进行基础训练,然后再考虑使用dpo配置进行优化。
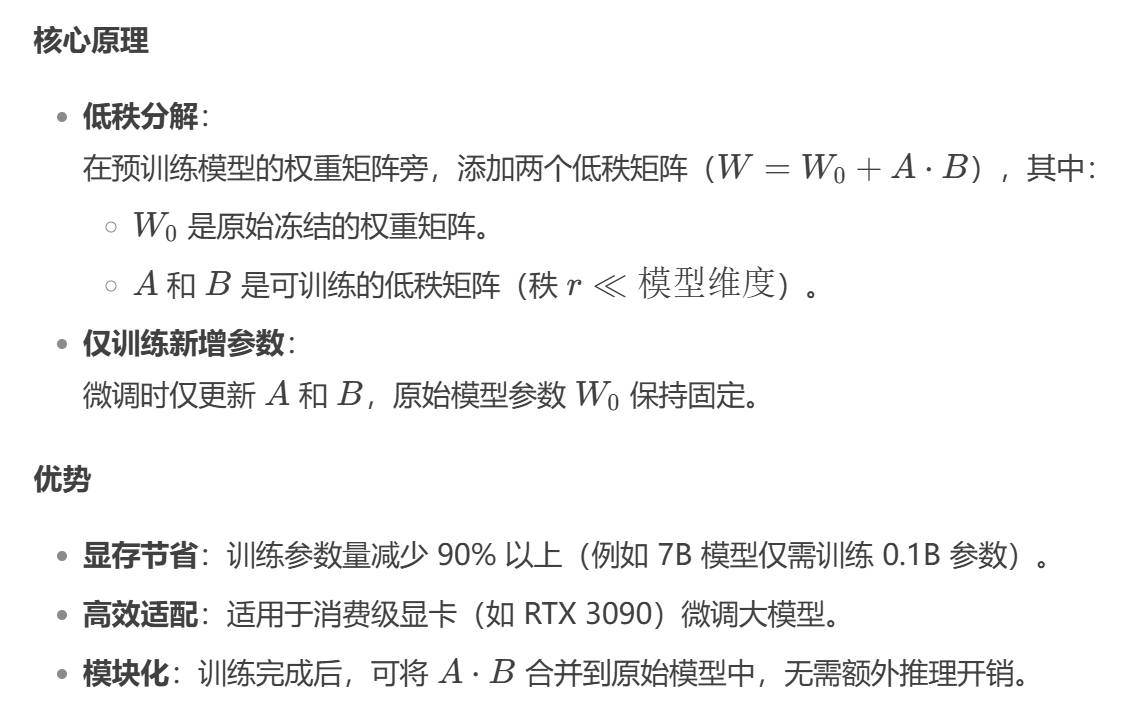
LoRA 是一种 参数高效微调技术(Parameter-Efficient Fine-Tuning, PEFT),专为大型语言模型(如 LLaMA、GPT)设计,旨在显著减少微调所需的计算资源和显存,同时保持模型性能。
三、 详细讲解 qwen2vl_lora_sft.yaml 这个配置文件的主要部分:
### model(模型配置)model_name_or_path: Qwen/Qwen2.5-VL-7B-Instruct # 基础模型路径image_max_pixels: 262144 # 图像最大像素数video_max_pixels: 16384 # 视频最大像素数trust_remote_code: true # 信任远程代码### method(训练方法配置)stage: sft # 训练阶段:监督微调do_train: true # 是否进行训练finetuning_type: lora # 使用LoRA微调方法lora_rank: 8 # LoRA秩,越大效果越好但参数量也越大lora_target: all # 应用LoRA的层,all表示所有层### dataset(数据集配置)dataset: mllm_demo,identity,alpaca_en_demo # 使用的数据集,可以多个template: qwen2_vl # 使用的模板cutoff_len: 2048 # 最大序列长度max_samples: 1000 # 最大样本数preprocessing_num_workers: 16 # 数据预处理的工作进程数### output(输出配置)output_dir: saves/qwen2_vl-7b/lora/sft # 输出目录logging_steps: 10 # 每10步记录一次日志save_steps: 500 # 每500步保存一次模型plot_loss: true # 绘制损失曲线overwrite_output_dir: true # 覆盖已存在的输出目录save_only_model: false # 保存完整检查点report_to: none # 不使用额外的日志记录工具### train(训练配置)per_device_train_batch_size: 1 # 每个设备的批次大小gradient_accumulation_steps: 8 # 梯度累积步数learning_rate: 1.0e-4 # 学习率num_train_epochs: 3.0 # 训练轮数lr_scheduler_type: cosine # 学习率调度器类型warmup_ratio: 0.1 # 预热比例bf16: true # 是否使用bf16精度要快速开始训练,需要主要关注以下几个部分:
模型配置:
- 修改 model_name_or_path 为我们自己的的模型路径
- 例如:model_name_or_path: /root/LLaMA-Factory/models/qwen/Qwen-7B-Chat
数据集配置:
- 修改 dataset 为要使用的数据集
- 例如:dataset: tnews_train,emotion_train,ocnli_train
输出配置:
- 修改 output_dir 为想保存模型的路径
- 例如:output_dir: /root/LLaMA-Factory/outputs/qwen-7b-chat-chinese
训练配置:
- 根据您的GPU显存调整 per_device_train_batch_size 和 gradient_accumulation_steps
查看系统的 GPU 显存信息。在 Linux 系统中,我们可以使用 nvidia-smi 命令来查看:
nvidia-smi使用 df -h 查看文件系统的使用情况:
df -h
- 如果显存不足,可以:
- 降低 per_device_train_batch_size
- 增加 gradient_accumulation_steps
- 减小 cutoff_len
接下来创建一个适合您当前训练任务的配置文件chinese_sft.yaml:
### modelmodel_name_or_path: /root/LLaMA-Factory/models/qwen/Qwen-7B-Chattrust_remote_code: true### methodstage: sftdo_train: truefinetuning_type: loralora_rank: 8lora_alpha: 32lora_dropout: 0.1lora_target: all### datasetdataset: tnews_train,emotion_train,ocnli_traintemplate: qwencutoff_len: 2048max_samples: 100000preprocessing_num_workers: 8dataloader_num_workers: 4### outputoutput_dir: /root/LLaMA-Factory/outputs/qwen-7b-chat-chineselogging_steps: 10save_steps: 100plot_loss: trueoverwrite_output_dir: truesave_only_model: falsedo_eval: true### trainper_device_train_batch_size: 4gradient_accumulation_steps: 4learning_rate: 5.0e-5num_train_epochs: 3.0lr_scheduler_type: cosinewarmup_ratio: 0.1bf16: trueddp_timeout: 180000000### evalval_size: 0.01per_device_eval_batch_size: 4eval_steps: 100需要先安装 LLaMA-Factory 包,使用 CLI 命令来启动训练:
cd /root/LLaMA-Factory && pip install -e .cd /root/LLaMA-Factory && llamafactory-cli train examples/train_lora/chinese_sft.yaml四、 配置文件中哪些设置和显存有关?
在训练配置文件中,以下参数会直接影响显存使用量:
批量大小相关:
- per_device_train_batch_size: 每个 GPU 的训练批量大小,越大显存占用越多
- gradient_accumulation_steps: 梯度累积步数,可以用来变相减小批量大小
- per_device_eval_batch_size: 评估时的批量大小
精度相关:
- bf16: 是否使用 BF16 精度
- fp16: 是否使用 FP16 精度
- 这两个参数会影响模型权重和计算的精度,从而影响显存使用
模型相关:
- lora_rank: LoRA 的秩,越大参数量越多,显存占用越大
- max_samples: 最大样本数,影响数据加载时的显存占用
- cutoff_len: 序列最大长度,越长显存占用越大
优化器相关:
- max_grad_norm: 梯度裁剪阈值
- optim: 优化器类型,不同优化器显存占用不同
要减少显存使用,可以:
- 减小 per_device_train_batch_size(比如从 64 改为 16 或 8)
- 增加 gradient_accumulation_steps(比如从 1 改为 4 或 8)
- 减小 lora_rank(比如从 8 改为 4)
- 减小 cutoff_len(如果可以的话)
- 减小 max_samples(如果可以的话)
五、训练过程中如遇到显存不够可做以下调整:
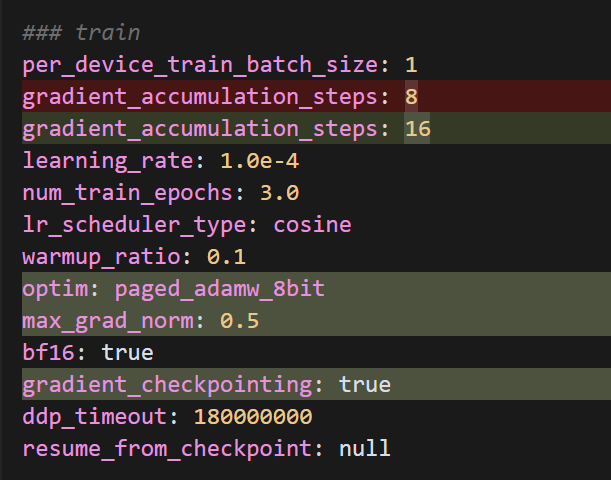
主要更改:
- 增加了 gradient_checkpointing: true 以减少显存使用
- 使用 8-bit 优化器:optim: paged_adamw_8bit
- 增加梯度累积步数:从 8 改为 16
- 添加梯度裁剪:max_grad_norm: 0.5
- 添加 LoRA dropout:lora_dropout: 0.1
即使使用了这些优化方法,显存仍然不够。让我们尝试设置 PYTORCH_CUDA_ALLOC_CONF 环境变量,并进一步优化配置:
### modelmodel_name_or_path: /root/LLaMA-Factory/models/qwen/Qwen-7B-Chatimage_max_pixels: 262144video_max_pixels: 16384trust_remote_code: true### methodstage: sftdo_train: truefinetuning_type: loralora_rank: 4lora_alpha: 32lora_target: q_proj,v_projlora_dropout: 0.1### datasetdataset: ocnli_train,emotion_train,tnews_traintemplate: alpacacutoff_len: 1024max_samples: 1000overwrite_cache: truepreprocessing_num_workers: 16dataloader_num_workers: 4### outputoutput_dir: saves/qwen-7b/lora/sftlogging_steps: 10save_steps: 500plot_loss: trueoverwrite_output_dir: truesave_only_model: truereport_to: none### trainper_device_train_batch_size: 1gradient_accumulation_steps: 32learning_rate: 1.0e-4num_train_epochs: 3.0lr_scheduler_type: cosinewarmup_ratio: 0.1optim: paged_adamw_8bitmax_grad_norm: 0.5bf16: truefp16: falsegradient_checkpointing: truedeepspeed: ds_config.jsonddp_timeout: 180000000resume_from_checkpoint: null### eval# val_size: 0.1# per_device_eval_batch_size: 1# eval_strategy: steps# eval_steps: 500创建 DeepSpeed 配置文件:

{ \"train_batch_size\": 32, \"gradient_accumulation_steps\": 32, \"gradient_clipping\": 0.5, \"zero_optimization\": { \"stage\": 2, \"offload_optimizer\": { \"device\": \"cpu\", \"pin_memory\": true }, \"allgather_partitions\": true, \"allgather_bucket_size\": 5e8, \"contiguous_gradients\": true }, \"bf16\": { \"enabled\": true }, \"optimizer\": { \"type\": \"AdamW\", \"params\": { \"lr\": 1e-4, \"betas\": [0.9, 0.999], \"eps\": 1e-8, \"weight_decay\": 0.01 } }, \"scheduler\": { \"type\": \"WarmupDecayLR\", \"params\": { \"warmup_min_lr\": 0, \"warmup_max_lr\": 1e-4, \"warmup_num_steps\": 100, \"total_num_steps\": 3000 } }}主要优化包括:
减小 LoRA 参数:
- rank 从 8 降到 4
- 只对 q_proj 和 v_proj 进行微调
- 添加 lora_alpha 参数
减小序列长度:
- cutoff_len 从 2048 降到 1024
增加梯度累积:
- gradient_accumulation_steps 从 16 增加到 32
添加 DeepSpeed 支持:
- 使用 ZeRO-2 优化
- 优化器状态卸载到 CPU
- 使用 BF16 混合精度训练
安装Deepspeed
pip install \'deepspeed>=0.9.3\'我来解释一下为什么要添加 DeepSpeed 配置以及它的主要功能:
DeepSpeed 是由微软开发的深度学习优化库,它提供了多项重要功能来提升大规模模型训练的效率:
内存优化
- ZeRO (Zero Redundancy Optimizer) 技术:我们在配置中使用了 \"stage\": 2,这能够将优化器状态和梯度分片到不同设备上
- 优化器状态卸载:通过 \"offload_optimizer\": {\"device\": \"cpu\"} 将优化器状态卸载到 CPU 内存,减少 GPU 内存占用
- 梯度累积:设置 \"gradient_accumulation_steps\": 32 来实现更大的批次大小,同时保持较低的显存使用
训练加速
- 混合精度训练:启用 \"bf16\": {\"enabled\": true} 来使用 BF16 混合精度,在保持训练稳定性的同时提升速度
- 优化的通信:通过 \"allgather_bucket_size\" 等参数优化设备间的数据传输
训练稳定性
- 梯度裁剪:使用 \"gradient_clipping\": 0.5 防止梯度爆炸
- 优化器配置:使用 AdamW 优化器,并配置了合适的学习率调度策略
在我们的场景中添加 DeepSpeed 的主要原因是:
解决显存不足问题:
- 之前遇到了 torch.cuda.OutOfMemoryError 错误
- DeepSpeed 的 ZeRO 优化和 CPU 卸载功能可以显著减少 GPU 显存使用
提升训练效率:
- 允许使用更大的批次大小(通过梯度累积)
- 混合精度训练提升计算速度
- 优化的内存管理减少了 OOM(显存不足)的风险
保证训练稳定性:
- 通过精心配置的优化器参数和学习率调度
- 梯度裁剪防止训练不稳定
这些优化对于训练大型语言模型特别重要,因为像 Qwen-7B 这样的模型本身就需要大量计算资源。通过 DeepSpeed,我们可以在有限的硬件资源下更高效地进行模型训练。
使用 DeepSpeed 时需要通过 torchrun 来启动分布式训练。让我们按照错误提示设置 FORCE_TORCHRUN=1 环境变量并重新运行训练命令:
PYTORCH_CUDA_ALLOC_CONF=expandable_segments:True && cd /root/LLaMA-Factory && llamafactory-cli train examples/train_lora/chinese_sft.yaml 如仍然遇到了显存不足的问题:
我们可以:
- 减小模型加载时的内存使用
- 启用 8 位量化加载模型
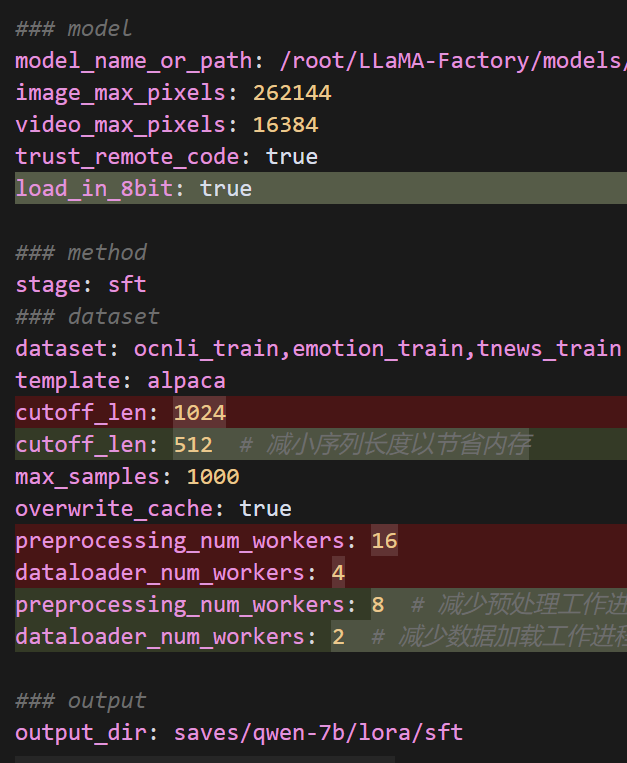
### modelmodel_name_or_path: /root/LLaMA-Factory/models/qwen/Qwen-7B-Chatimage_max_pixels: 262144video_max_pixels: 16384trust_remote_code: trueload_in_8bit: true### methodstage: sftdo_train: truefinetuning_type: loralora_rank: 4lora_alpha: 32lora_target: c_attn,c_projlora_dropout: 0.1### datasetdataset: ocnli_train,emotion_train,tnews_train # video: mllm_video_demotemplate: alpacacutoff_len: 512 # 减小序列长度以节省内存max_samples: 1000overwrite_cache: truepreprocessing_num_workers: 8 # 减少预处理工作进程数dataloader_num_workers: 2 # 减少数据加载工作进程数### outputoutput_dir: saves/qwen-7b/lora/sftlogging_steps: 10save_steps: 500plot_loss: trueoverwrite_output_dir: truesave_only_model: truereport_to: none # choices: [none, wandb, tensorboard, swanlab, mlflow]### trainper_device_train_batch_size: 1gradient_accumulation_steps: 32learning_rate: 1.0e-4num_train_epochs: 3.0lr_scheduler_type: cosinewarmup_ratio: 0.1optim: paged_adamw_8bitmax_grad_norm: 0.5bf16: truefp16: falsegradient_checkpointing: truedeepspeed: ds_config.jsonddp_timeout: 180000000resume_from_checkpoint: null### eval# val_size: 0.1# per_device_eval_batch_size: 1# eval_strategy: steps# eval_steps: 500修改 DeepSpeed 配置以进一步优化内存使用:
{ \"train_batch_size\": 32, \"gradient_accumulation_steps\": 32, \"gradient_clipping\": 0.5, \"zero_optimization\": { \"stage\": 3, \"offload_optimizer\": { \"device\": \"cpu\", \"pin_memory\": true }, \"offload_param\": { \"device\": \"cpu\", \"pin_memory\": true }, \"overlap_comm\": true, \"contiguous_gradients\": true, \"reduce_bucket_size\": 5e7, \"stage3_prefetch_bucket_size\": 5e7, \"stage3_param_persistence_threshold\": 5e5 }, \"bf16\": { \"enabled\": true }, \"optimizer\": { \"type\": \"AdamW\", \"params\": { \"lr\": 1e-4, \"betas\": [0.9, 0.999], \"eps\": 1e-8, \"weight_decay\": 0.01 } }, \"scheduler\": { \"type\": \"WarmupDecayLR\", \"params\": { \"warmup_min_lr\": 0, \"warmup_max_lr\": 1e-4, \"warmup_num_steps\": 100, \"total_num_steps\": 3000 } }}我们尝试另一种方式来解决内存问题。我们可以:
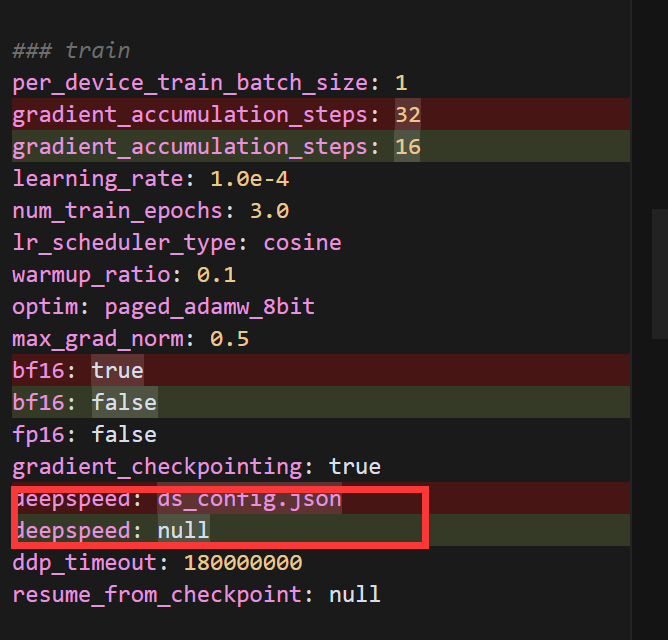
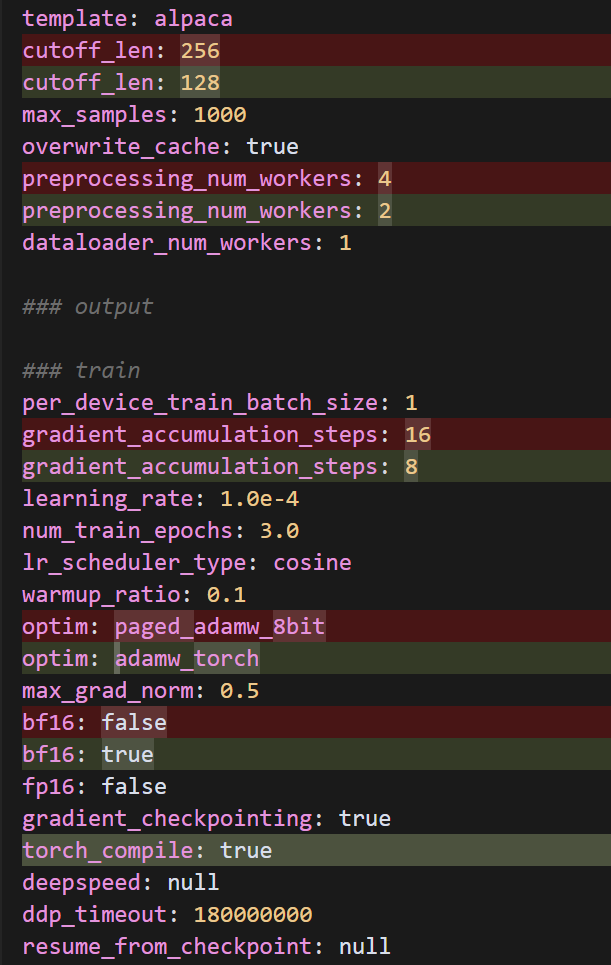
- 禁用 DeepSpeed(因为它可能与 8 位量化加载不完全兼容)
- 使用 bitsandbytes 的 8 位量化
- 进一步减小批次大小和序列长度
### modelmodel_name_or_path: /root/LLaMA-Factory/models/qwen/Qwen-7B-Chatimage_max_pixels: 262144video_max_pixels: 16384trust_remote_code: trueload_in_8bit: true### methodstage: sftdo_train: truefinetuning_type: loralora_rank: 4lora_alpha: 32lora_target: c_attn,c_projlora_dropout: 0.1### datasetdataset: ocnli_train,emotion_train,tnews_train # video: mllm_video_demotemplate: alpacacutoff_len: 256max_samples: 1000overwrite_cache: truepreprocessing_num_workers: 4dataloader_num_workers: 1### outputoutput_dir: saves/qwen-7b/lora/sftlogging_steps: 10save_steps: 500plot_loss: trueoverwrite_output_dir: truesave_only_model: truereport_to: none # choices: [none, wandb, tensorboard, swanlab, mlflow]### trainper_device_train_batch_size: 1gradient_accumulation_steps: 16learning_rate: 1.0e-4num_train_epochs: 3.0lr_scheduler_type: cosinewarmup_ratio: 0.1optim: paged_adamw_8bitmax_grad_norm: 0.5bf16: falsefp16: falsegradient_checkpointing: truedeepspeed: nullddp_timeout: 180000000resume_from_checkpoint: null### eval# val_size: 0.1# per_device_eval_batch_size: 1# eval_strategy: steps# eval_steps: 500看来 load_in_bits 参数也不是有效的配置参数。让我们尝试另一种方式来减少内存使用。我们可以:
- 完全移除量化相关的参数
- 进一步减小模型参数和批次大小
- 启用 torch.compile 来优化内存使用
export FORCE_TORCHRUN=1 && export PYTORCH_CUDA_ALLOC_CONF=expandable_segments:True && cd /root/LLaMA-Factory && llamafactory-cli train examples/train_lora/chinese_sft.yaml六、训练加速
首先我们需要安装DeepSpeed:
pip install deepspeed
如上图所示训练时间过长,我对配置文件做了以下优化,以显著提高训练速度:
数据处理优化:
- 减少了 cutoff_len 从 2048 到 1024,减少处理的序列长度
- 减少了 max_samples 从 100000 到 50000,减少总训练样本数
- 增加了数据处理的并行workers数量
训练参数优化:
- 移除了梯度累积(gradient_accumulation_steps 从 4 改为 1)
- 减少训练轮数(num_train_epochs 从 3.0 改为 1.0)
- 指定了具体的 LoRA 目标层(lora_target),而不是训练所有层
- 启用了 FP16 混合精度训练
- 使用更高效的 adamw_torch 优化器
评估优化:
- 增加了评估的批量大小
- 减少评估频率(eval_steps 从 100 改为 200)
### modelmodel_name_or_path: /root/LLaMA-Factory/models/qwen/Qwen-7B-Chattrust_remote_code: true### methodstage: sftdo_train: truefinetuning_type: loralora_rank: 8lora_alpha: 32lora_dropout: 0.1lora_target: c_attn,c_proj,w1,w2### datasetdataset: tnews_train,emotion_train,ocnli_traintemplate: qwencutoff_len: 1024max_samples: 50000preprocessing_num_workers: 16dataloader_num_workers: 8### outputoutput_dir: /root/LLaMA-Factory/outputs/qwen-7b-chat-chineselogging_steps: 10save_steps: 100plot_loss: trueoverwrite_output_dir: truesave_only_model: falsedo_eval: true### trainper_device_train_batch_size: 32gradient_accumulation_steps: 1learning_rate: 5.0e-5num_train_epochs: 1.0lr_scheduler_type: cosinewarmup_ratio: 0.1bf16: trueddp_timeout: 180000000max_grad_norm: 0.3optim: adamw_torch### evalval_size: 0.01per_device_eval_batch_size: 32eval_steps: 200⭐小知识:
fp16: true 设置和 bf16: true设置:
- BF16(Brain Float 16)通常在现代GPU上性能更好
- 对于大语言模型训练,BF16通常是更好的选择,因为它有更大的动态范围

修改后我们可以看到时间明显缩短
我们继续进行重大优化来显著提升训练速度:
大幅减少训练数据和计算量:
- 将 cutoff_len 从 1024 减少到 512(减少一半的序列长度)
- 将 max_samples 从 50000 减少到 20000(减少训练样本数)
- 将 lora_target 改为只训练关键的注意力层 q_proj,v_proj
提高批处理效率:
- 增加 per_device_train_batch_size 到 64
- 添加 group_by_length: true 来对相似长度的序列进行批处理,提高效率
- 关闭评估 do_eval: false(在训练阶段评估会显著降低速度)
减少存储和日志开销:
- 增加 save_steps 到 500(减少保存检查点的频率)
- 设置 save_only_model: true(只保存模型,不保存优化器状态)
优化学习过程:
- 增加学习率到 1.0e-4 以加快收敛
- 减少预热比例到 0.05
- 保持 bf16 以获得良好的训练效率
### modelmodel_name_or_path: /root/LLaMA-Factory/models/qwen/Qwen-7B-Chattrust_remote_code: true### methodstage: sftdo_train: truefinetuning_type: loralora_rank: 8lora_alpha: 32lora_dropout: 0.1lora_target: c_attn,c_proj### datasetdataset: tnews_train,emotion_train,ocnli_traintemplate: qwencutoff_len: 512max_samples: 6000preprocessing_num_workers: 16dataloader_num_workers: 8### outputoutput_dir: /root/LLaMA-Factory/outputs/qwen-7b-chat-chineselogging_steps: 5save_steps: 500plot_loss: trueoverwrite_output_dir: truesave_only_model: truedo_eval: false### trainper_device_train_batch_size: 64gradient_accumulation_steps: 1learning_rate: 1.0e-4num_train_epochs: 1.0lr_scheduler_type: cosinewarmup_ratio: 0.05bf16: trueddp_timeout: 180000000max_grad_norm: 0.3optim: adamw_torchgroup_by_length: true### evalval_size: 0.01per_device_eval_batch_size: 64eval_steps: 500⭐小知识
对于 lora_target 参数,可以填写的内容取决于具体使用的模型架构。我来为您详细解释不同模型的可用选项:
LLaMA/LLaMA2 模型:
- q_proj,k_proj,v_proj,o_proj: 注意力模块的四个投影层
- gate_proj,up_proj,down_proj: MLP 模块的三个投影层
- 常用组合: q_proj,v_proj 或 q_proj,k_proj,v_proj,o_proj
Qwen/ChatGLM 模型:
- c_attn: 注意力的输入投影层(合并了 q,k,v 投影)
- c_proj: 注意力的输出投影层
- 常用组合: c_attn,c_proj
Baichuan 模型:
- W_pack: 注意力的输入投影层
- o_proj: 注意力的输出投影层
- gate_proj,up_proj,down_proj: MLP 部分
- 常用组合: W_pack,o_proj
InternLM 模型:
- q_proj,k_proj,v_proj,o_proj: 注意力模块
- w1,w2,w3: MLP 模块
- 常用组合: q_proj,v_proj 或 q_proj,k_proj,v_proj,o_proj
选择建议:
- 一般来说,训练注意力模块就足够了,不需要全部模块都使用 LoRA
- 模块越多,可训练参数越多,训练越慢,显存占用越大
- 建议从最基础的注意力相关层开始尝试,如果效果不够好再逐步增加其他层
如果想查看具体模型有哪些层,可以使用以下脚本:
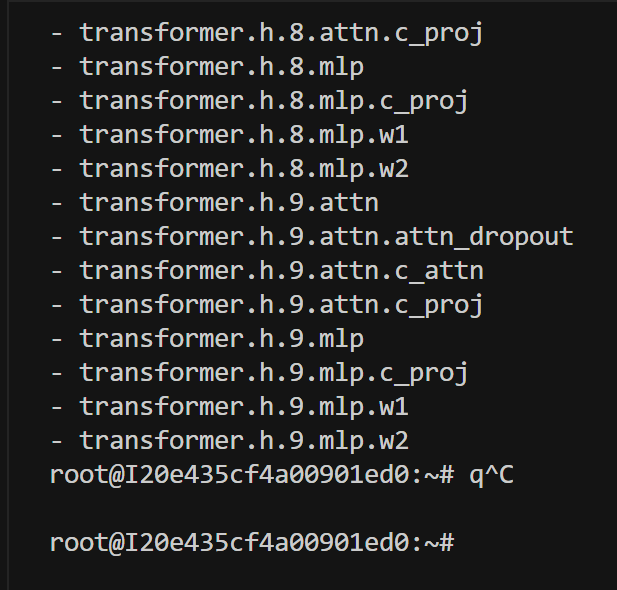
from transformers import AutoModelForCausalLM, AutoTokenizerimport torchdef print_named_modules(model_path): print(f\"Loading model from {model_path}\") model = AutoModelForCausalLM.from_pretrained( model_path, trust_remote_code=True, torch_dtype=torch.float16, device_map=\"auto\" ) # 获取模型的第一个transformer块作为示例 print(\"\\nExample transformer block structure:\") if hasattr(model, \'transformer\'): block = model.transformer.h[0] # 获取第一个transformer块 print(\"\\nTransformer block components:\") for name, _ in block.named_modules(): print(f\"Layer: {name}\") # 打印所有可能的attention相关层 print(\"\\nPotential attention-related layers:\") attention_layers = [] for name, module in model.named_modules(): if any(x in name.lower() for x in [\'attn\', \'attention\', \'proj\', \'mlp\']): attention_layers.append(name) for layer in sorted(attention_layers): print(f\"- {layer}\")if __name__ == \"__main__\": model_path = \"/root/LLaMA-Factory/models/qwen/Qwen-7B-Chat\" print_named_modules(model_path)现在让我们运行修改后的脚本:
python check_model_structure.py
根据输出结果,我来详细说明 Qwen 模型中可用的 lora_target 参数选项:
对于 Qwen 模型,主要的可训练层包括:
注意力层相关:
- c_attn: 注意力的输入投影层(包含 Q、K、V 的组合投影)
- c_proj: 注意力的输出投影层
MLP 层相关:
- w1: MLP 的第一个投影层
- w2: MLP 的第二个投影层
- c_proj: MLP 的输出投影层
常见的 lora_target 组合方式:
只训练注意力层(推荐)lora_target: c_attn,c_proj只训练 MLP 层 lora_target: w1,w2,c_proj
同时训练注意力层和 MLP 层(参数量较大)lora_target: c_attn,c_proj,w1,w2,c_proj